Official Radio Shack Golden Arrow Thread
#276
This thread guided me to fix my golden arrow with hobby grade electronics. Thank you all!! Now with that last post I'm curious if I could fix the old electronics even.
Next topics are how can you get/make/print a new front bumper? Mine broke off like so many others.
Also is there a good method for repairing structural issues? I ordered a parts car but it may be salvageable. It is at least worth testing a repair I think. Is it epoxy, or is frame a type of plastic that takes a different adhesive?
#277

Bumper https://www.stlfinder.com/model/f10-...j4dkh/4437360/
The chassis is made of ABS. You can cut small pieces of ABS obtained from an old casing of an electronic device and dissolve it in acetone: it is a wonderful glue for ABS
https://reparar--cochesrc-blogspot-c..._x_tr_pto=wapp
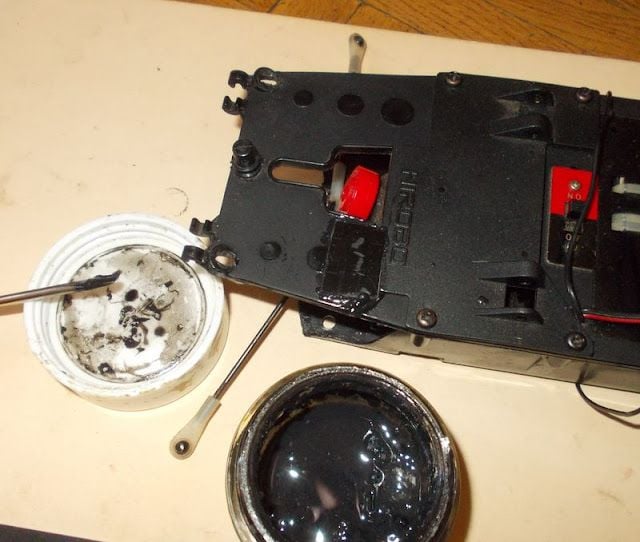
The chassis is made of ABS. You can cut small pieces of ABS obtained from an old casing of an electronic device and dissolve it in acetone: it is a wonderful glue for ABS
https://reparar--cochesrc-blogspot-c..._x_tr_pto=wapp

Last edited by korreka; 12-21-2023 at 05:42 AM.
The following users liked this post:
ImCoKeMaN (12-21-2023)
#278
Was going to share a picture of the success story, but need 10 posts first. It has all new electronics and 3d printed bumper. I'd like to get new bearings I think as well (do i need a hornet kit?), and does the transmission need any service like new silicone lube after so many years? It rips for an old buggy though =)
The parts car I purchased (potentially to get running) has broken transmission mount and the part cracked off the bottom of the chassis right around where that nerf bar attaches in the bottom back area. Unfortunately i wasn't able to find other ABS in bits around the house, seems it's all pp, petg, pvc etc. Should I try a 3d print for that mount, or is it the Hornet that has slotted mounts to allow a little articulation, is that something worth attempting since it will be apart? I'm not even sure how to get that hinge pin and the mounts apart/back together.
Also, once remote is on it only goes full forward but the controller is paired and does the steering so I may try some troubleshooting there too and keep this one on AM true to form. When remote is turned off car stops, my head tells me that could mean the issue is with the remote, but not sure if that's foolproof logic. Maybe the pot is bad on the forward reverse and stuck in full forward mode? Guessing i should be able to test this with ohmmeter and tearing apart remote. The trim knobs on the side don't help either.
Worst case if this becomes a total loss I have backup parts for the main one.
Last edited by ImCoKeMaN; 12-21-2023 at 04:59 PM.
#279

https://es.aliexpress.com/item/1005004777368528.html
To find out if the problem is with the transmitter or the car, you can try a 27Mhz hobby transmitter.
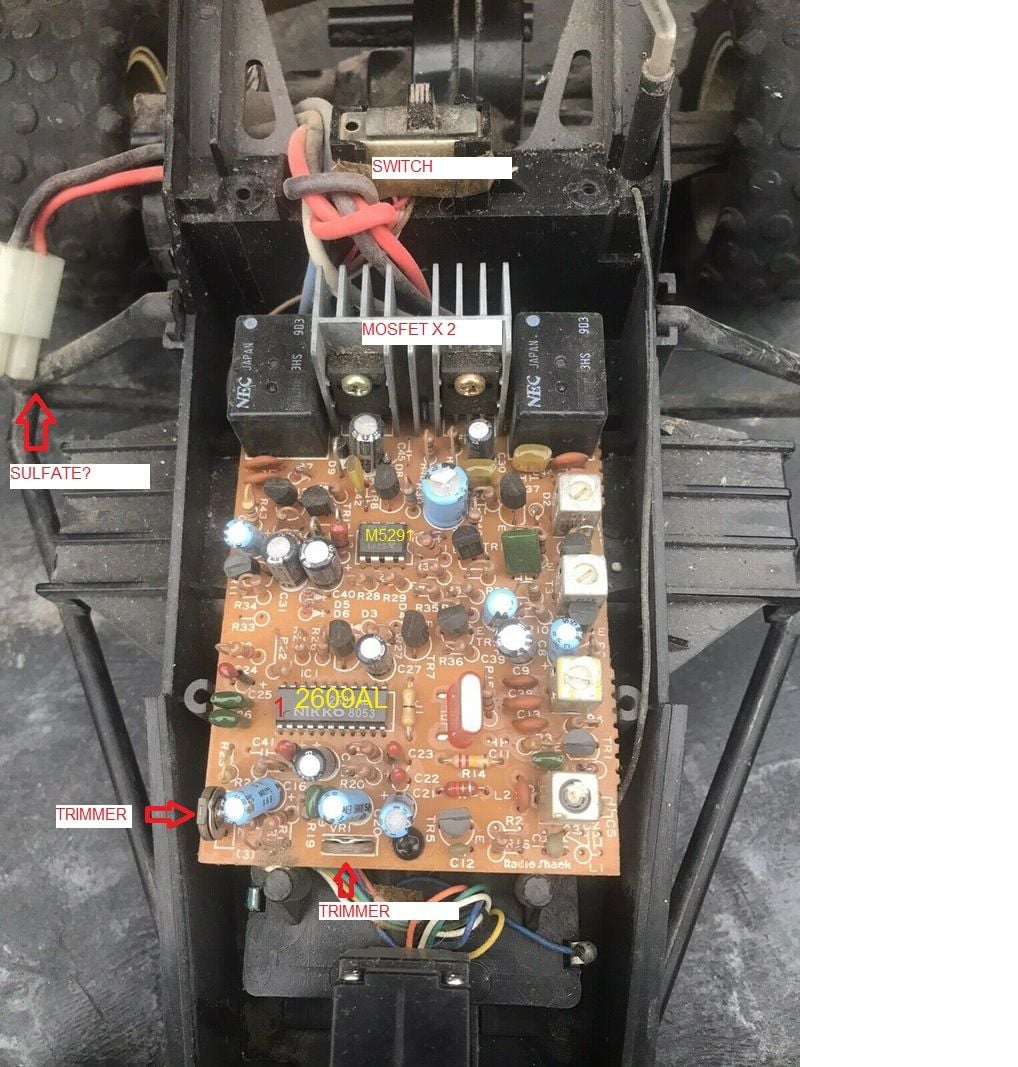
In the car there is a trimmer to adjust the throttle travel and the reverse.. Test it.
Everything said here is valid for you.:
============================
If you have knowledge of electronics and own a multimeter and oscilloscope, my blog-site about the Dictator has diagrams and technical information.
https://reparar-cochesrc.blogspot.co...e-emisora.html
You report the steering works (Ch1) but the throttle (Ch2) does not activate the electric motor, neither in forward or reverse. Sometimes the relay activates in the coil but the contacts are burned.
* Please, try to test the transmitter on another Nikko proportional car or 27Mhz hobby car.
* The batteries must be charged. The old stock 7.2V NiCd battery surely does not have discharge current to activate the motor. Try another battery.
* Clean the contacts of the 7.2V battery box and battery connectors. There is usually sulfate.
* Check the car's ON/Off switch with a multimeter and the solder wires. The sulfate attacks the solders and the copper in the wire breaks inside the insulator.
* Check the neutral trimmers (steering and throttle)
* The relay coil has about 10 or 15 ohms. Check it with the multimeter.
* Pin 4 of 2609AL circuit can see the transmitter signal on the oscilloscope. Pins 19 (forward) or 20 (reverse) are activated with about 4 or 5 volts.
* In addition to a possible relay failure, the problem may be in the power Mosfet transistors or the activation circuit (M5291 i.c.) of the Mosfet transistors.
#280
Thanks I'll give it a go, even with the external trim full reverse and stick full reverse it doesn't stop going forward. I'll check each of the trimmers on the boards and all the other details you posted. I also found some ABS i'll use for repair probably after Christmas at this point though.
Had another go with the working one today and definitely still puts a smile on my face. I ordered bearings, another battery and tires as well now that it's proven worthwhile.
Once I get the 10 posts i'll have to throw some pics here.
Had another go with the working one today and definitely still puts a smile on my face. I ordered bearings, another battery and tires as well now that it's proven worthwhile.
Once I get the 10 posts i'll have to throw some pics here.
#281
Got the old electronics working now! It was able to be fixed by adjusting the trimmer in the car on the left in your picture that controlled forward/reverse it's currently trimmed a little toward the rear of the car for the detent compared to yours. I tweaked it until the controller could stay neutral on trim and not spin the wheels either way. Thanks so much for that picture and description!
I also found some ABS to melt so I'll be doing the body repairs when I have some more dedicated time to allow for it to melt and use before becoming solid again (the glass jar i have is a bit large so not sure how long it would keep it liquid.
I also found some ABS to melt so I'll be doing the body repairs when I have some more dedicated time to allow for it to melt and use before becoming solid again (the glass jar i have is a bit large so not sure how long it would keep it liquid.
#282

#283
Got 2 working now, that ABS acetone trick seems to work really well! Thanks korreka for the personalized help! So glad I found this thread and got these running. Here are some pictures of the 2 builds now that I have my 10 posts:
Original Golden Arrow upgraded with Hobby grade electronics:
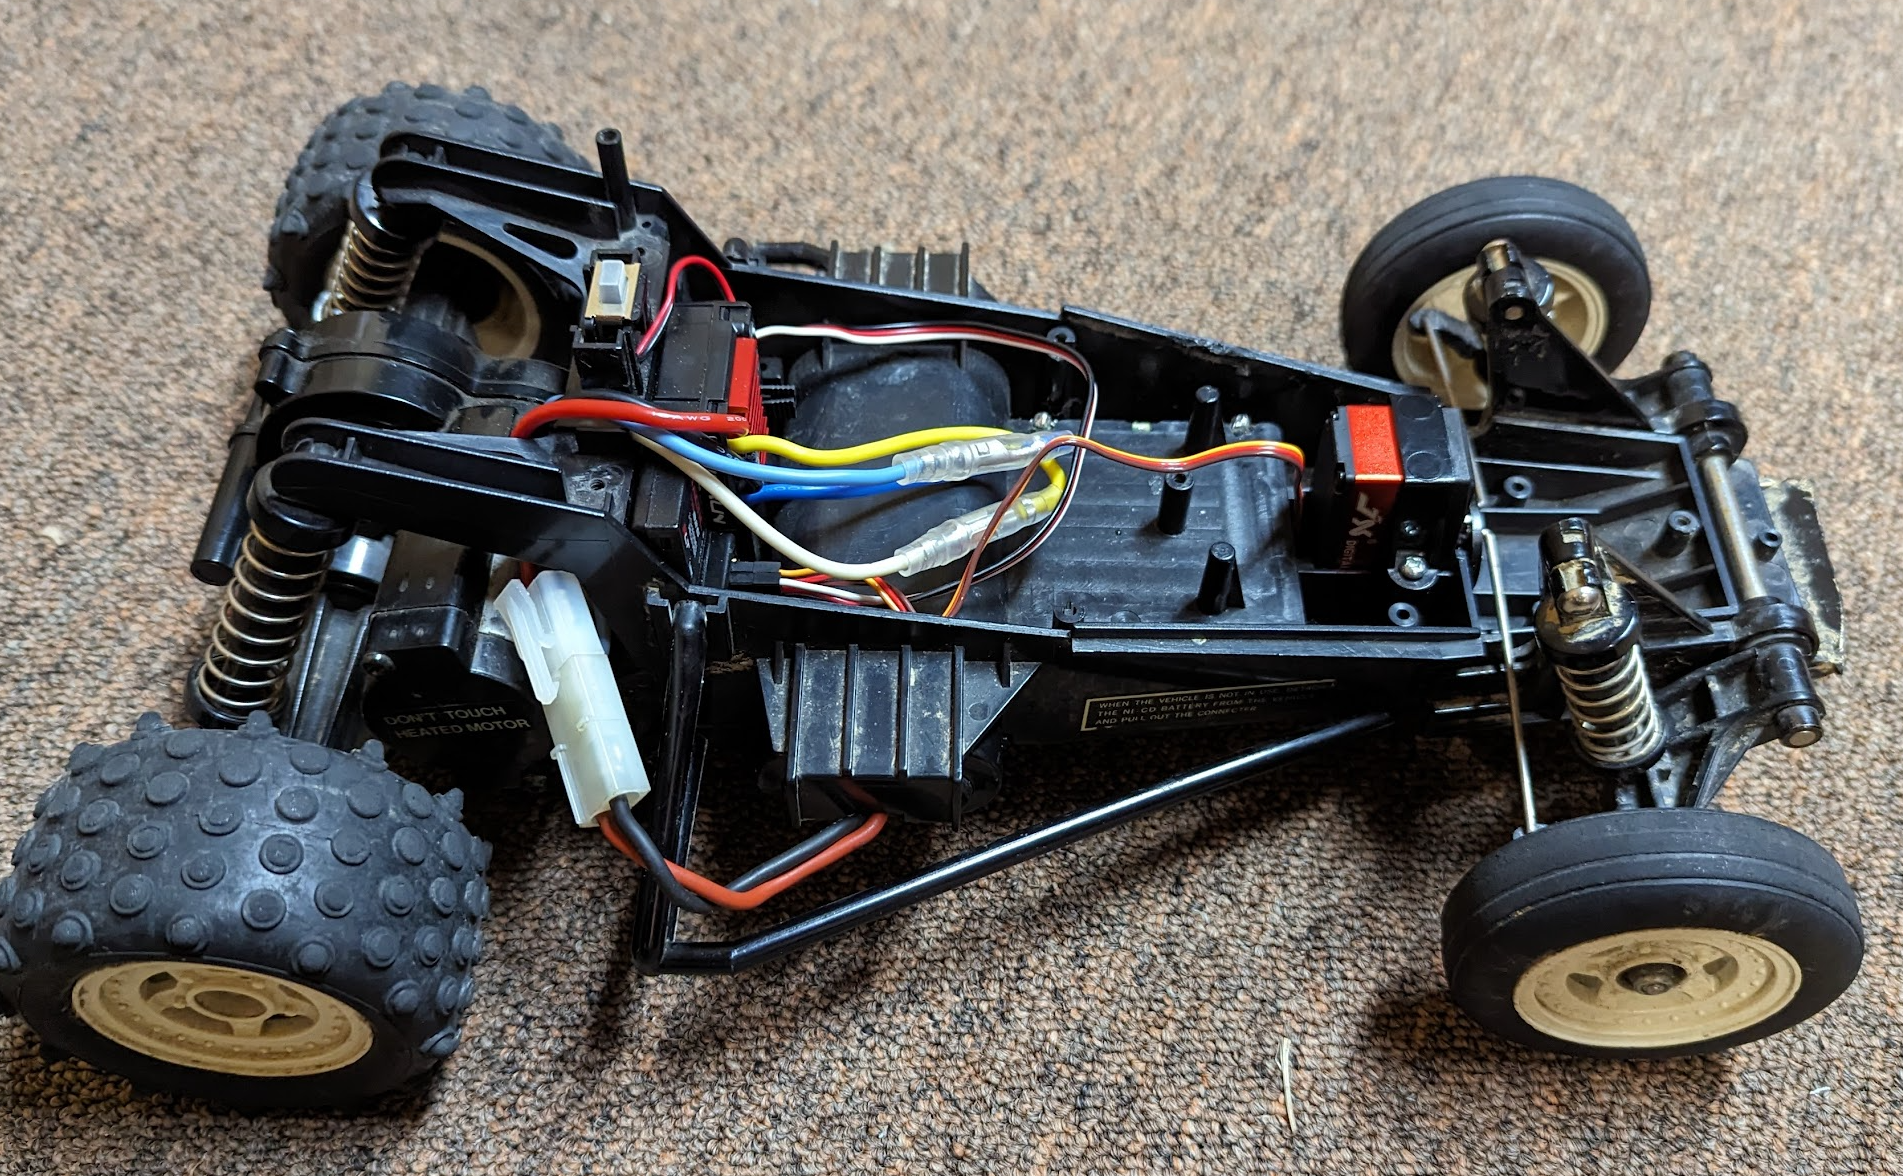
Hobby electronics upgrade, 2.4ghz, digital, and low profile servo to avoid cutting battery box.
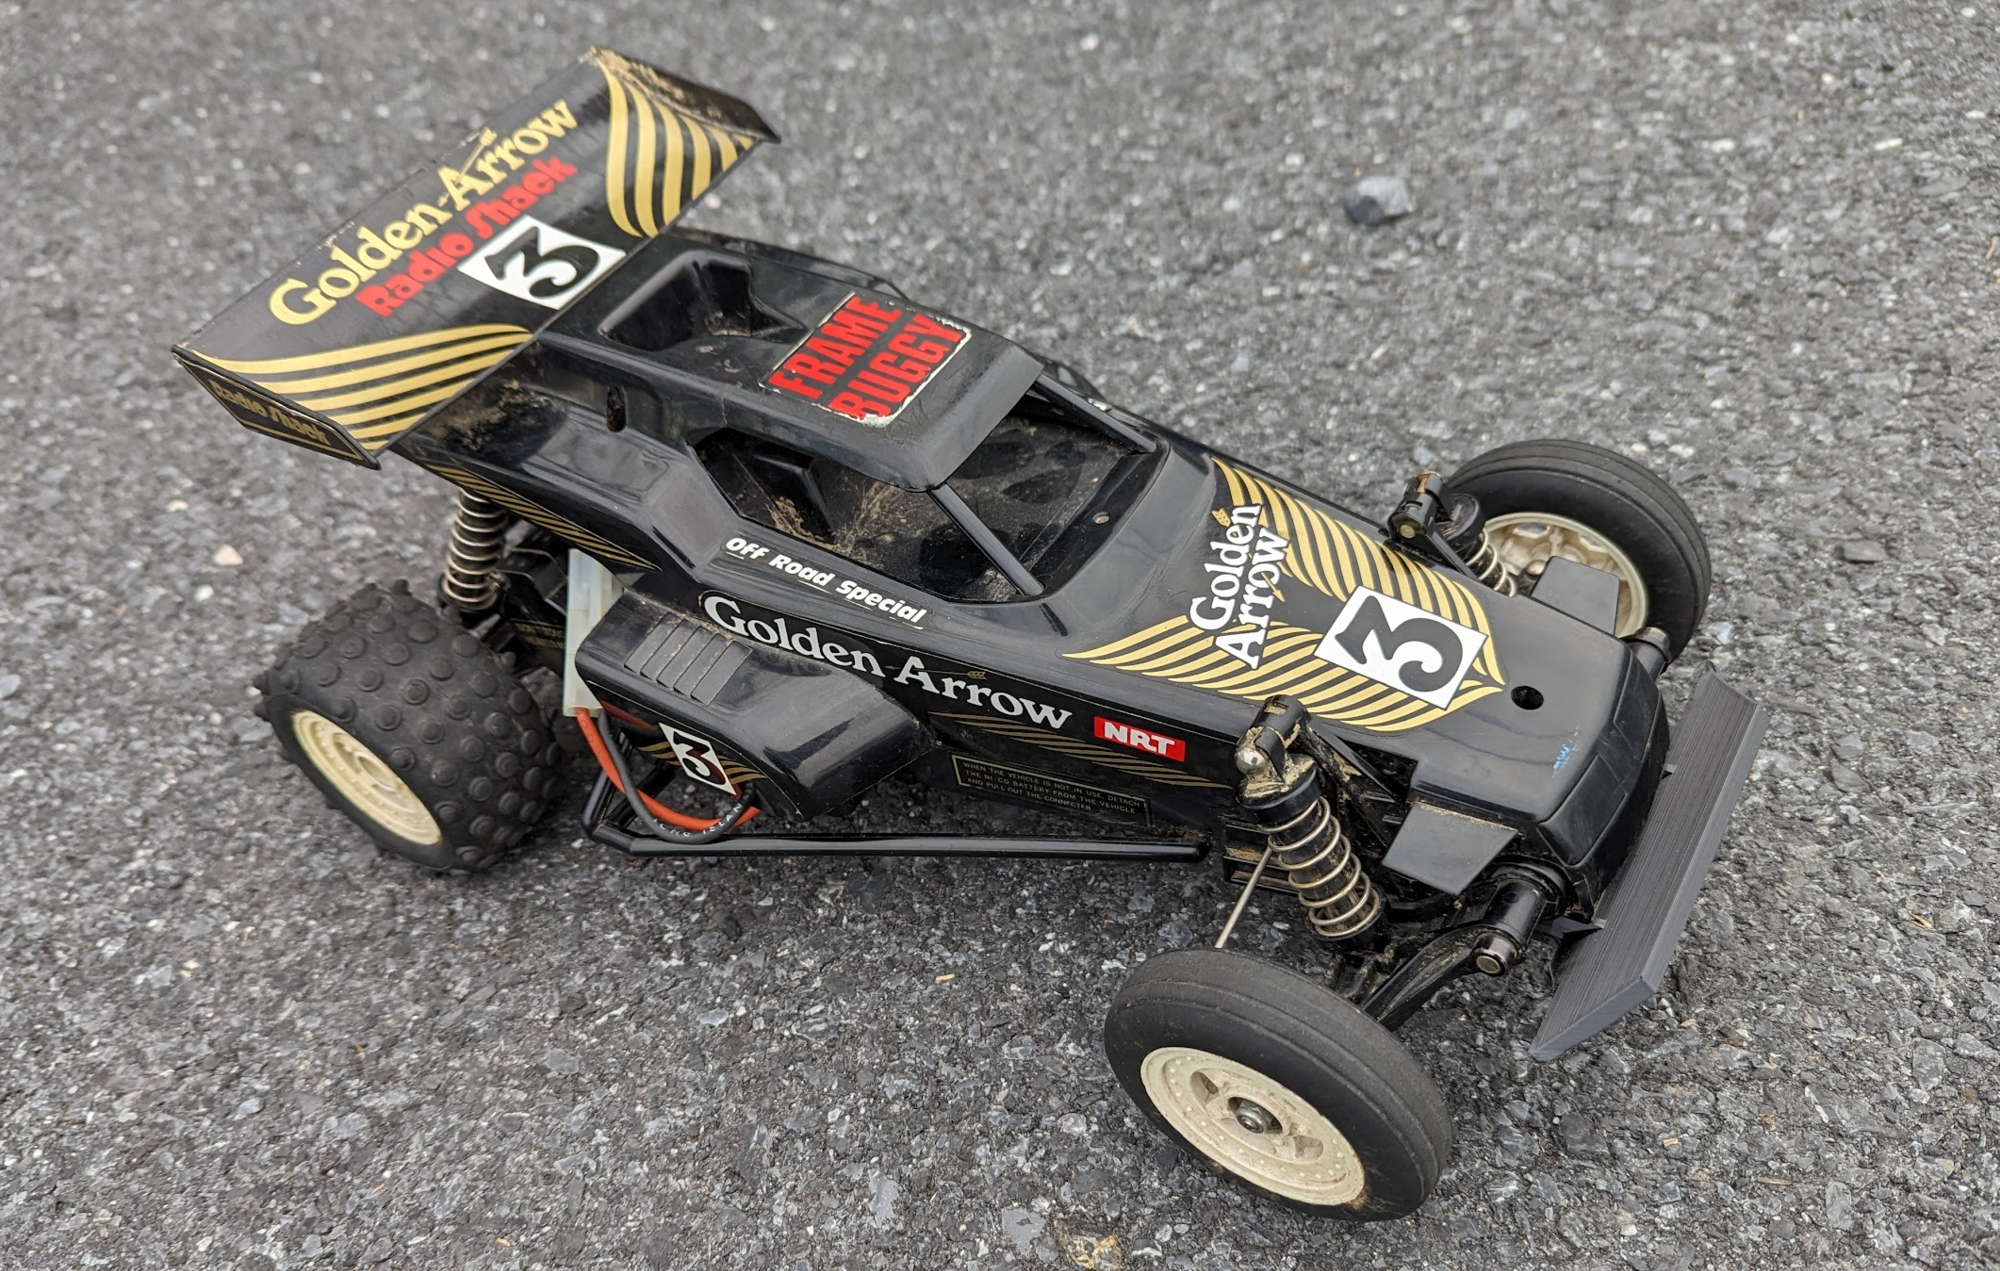
Ready to Run after a 3d printed bumper!
Ebay purchase that started with transmission mount damage, and trim issues (purchased largely for the original bumper):
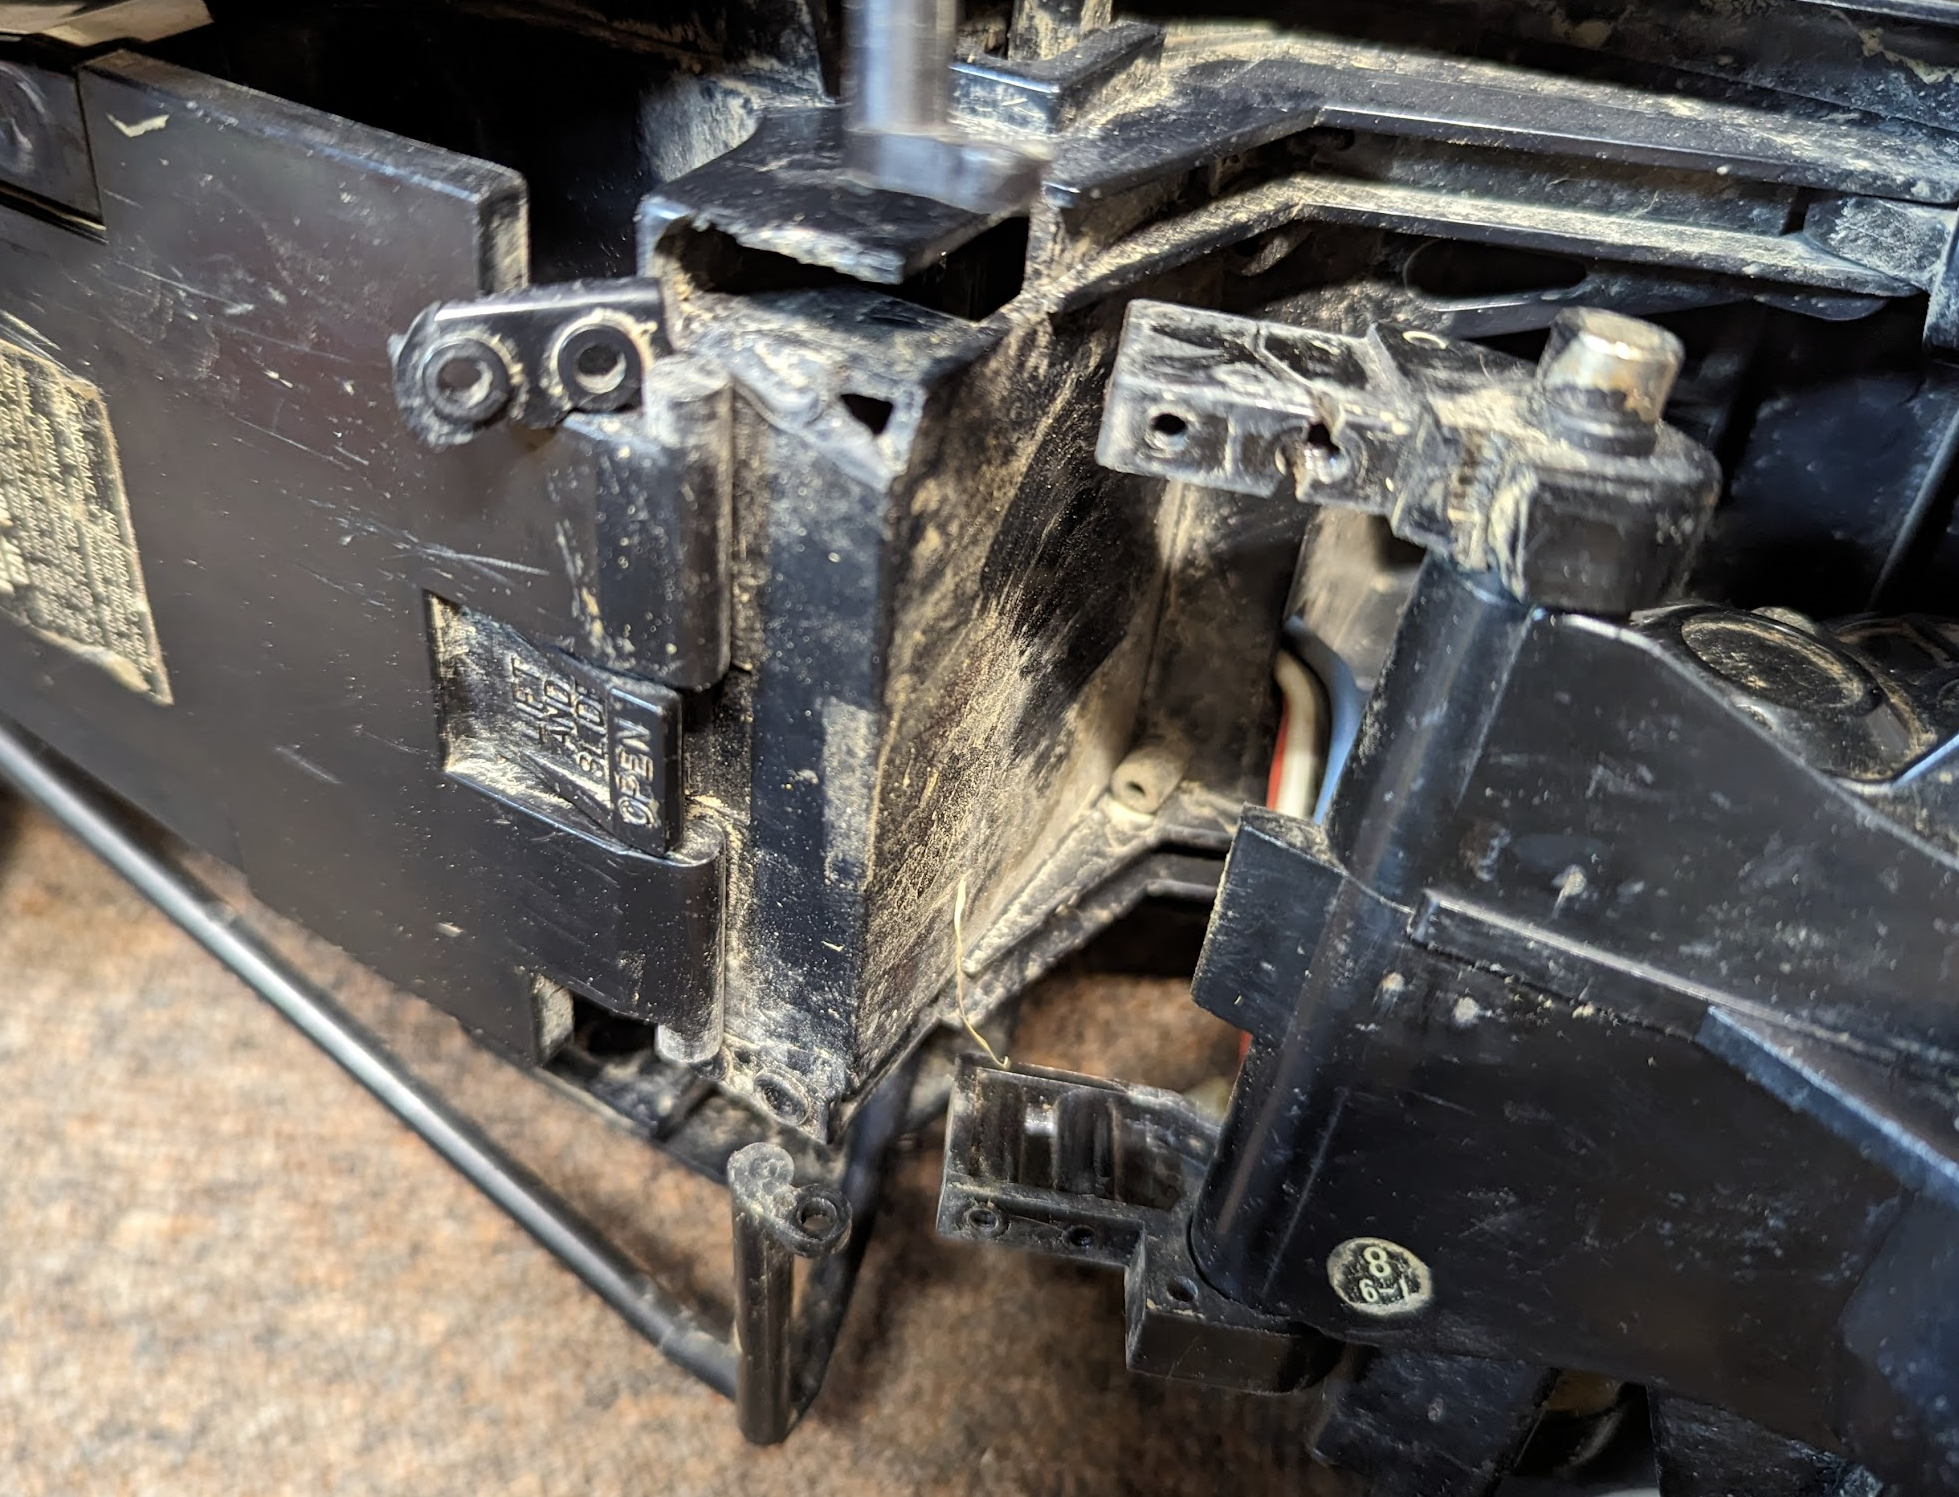
Ebay purchase with cracked chassis and transmission mount
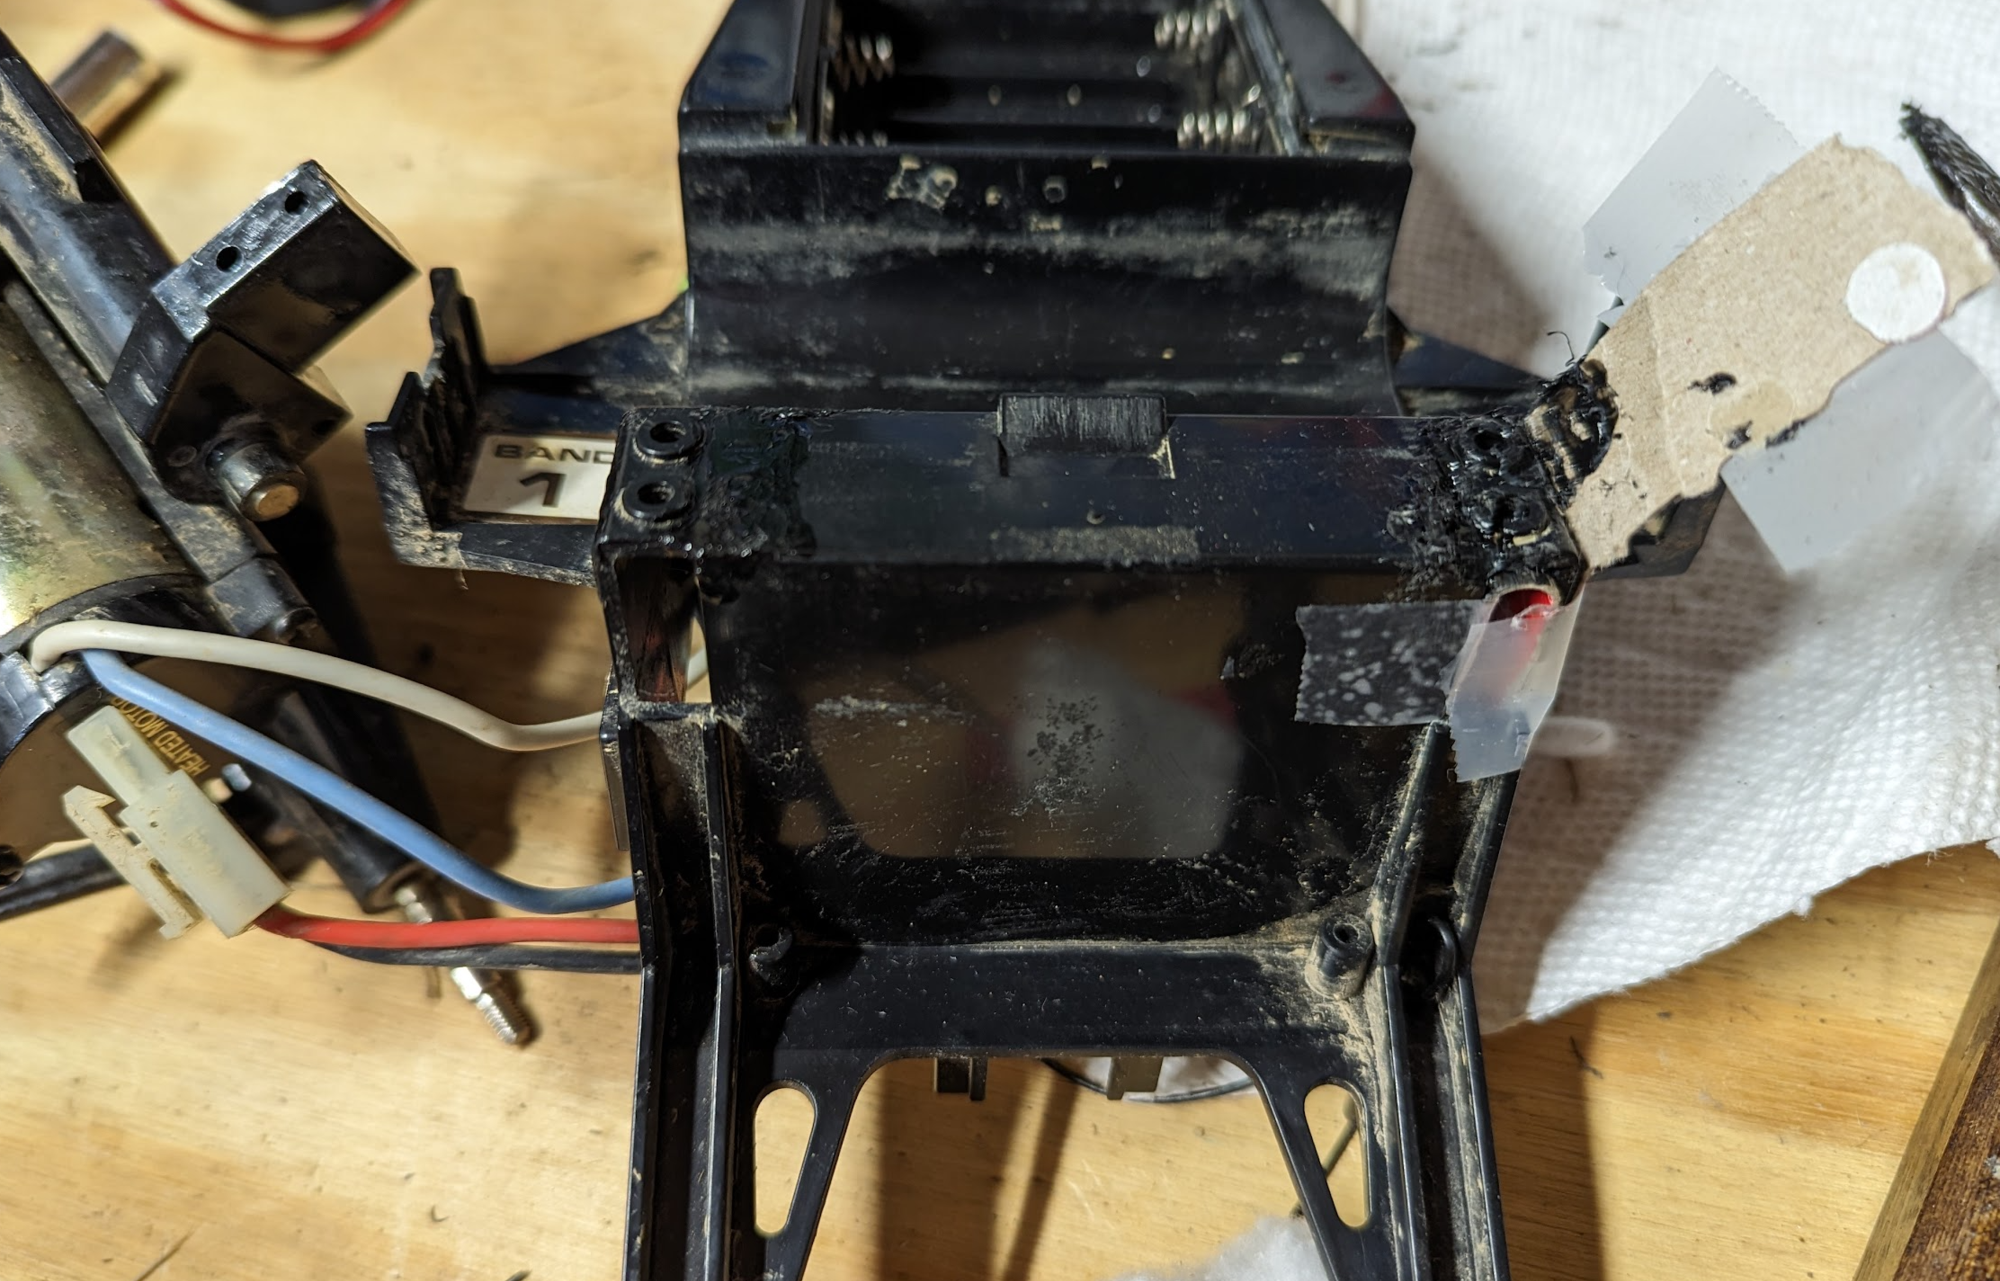
ABS repair time
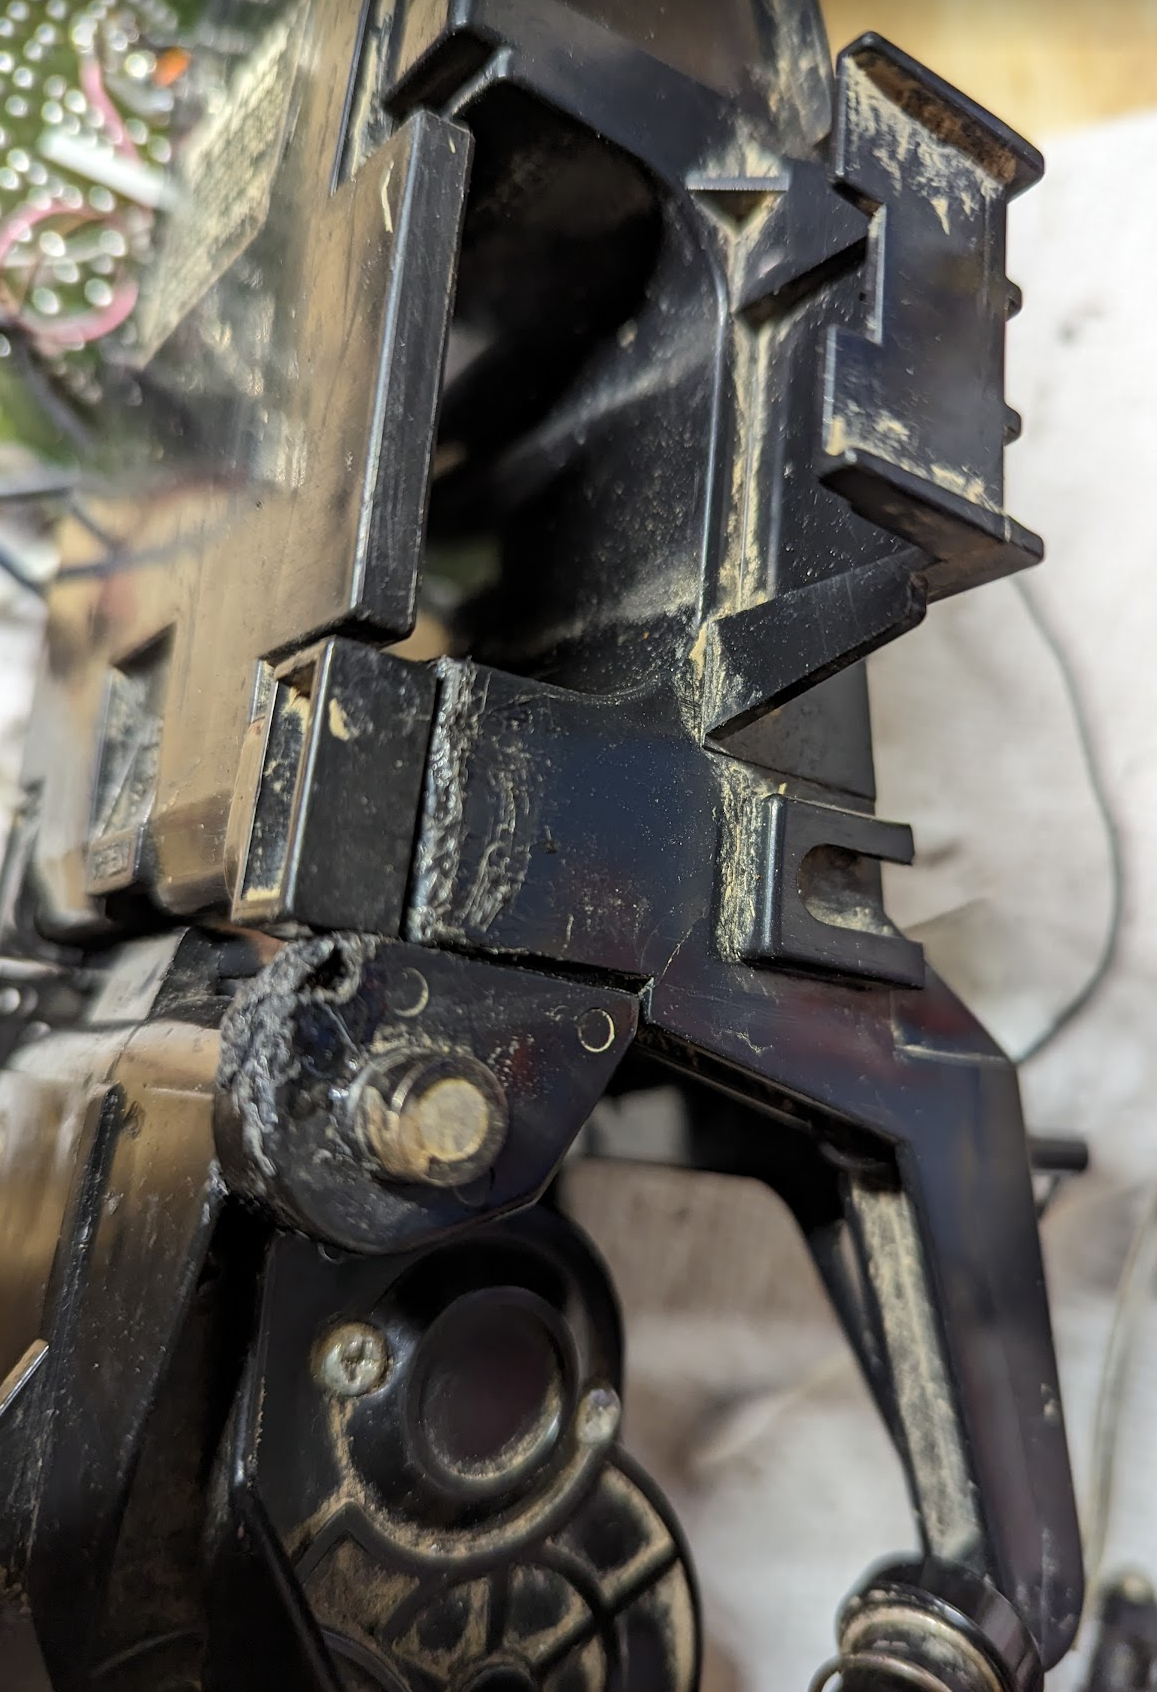
Repair complete, not perfect, but first time and it runs!
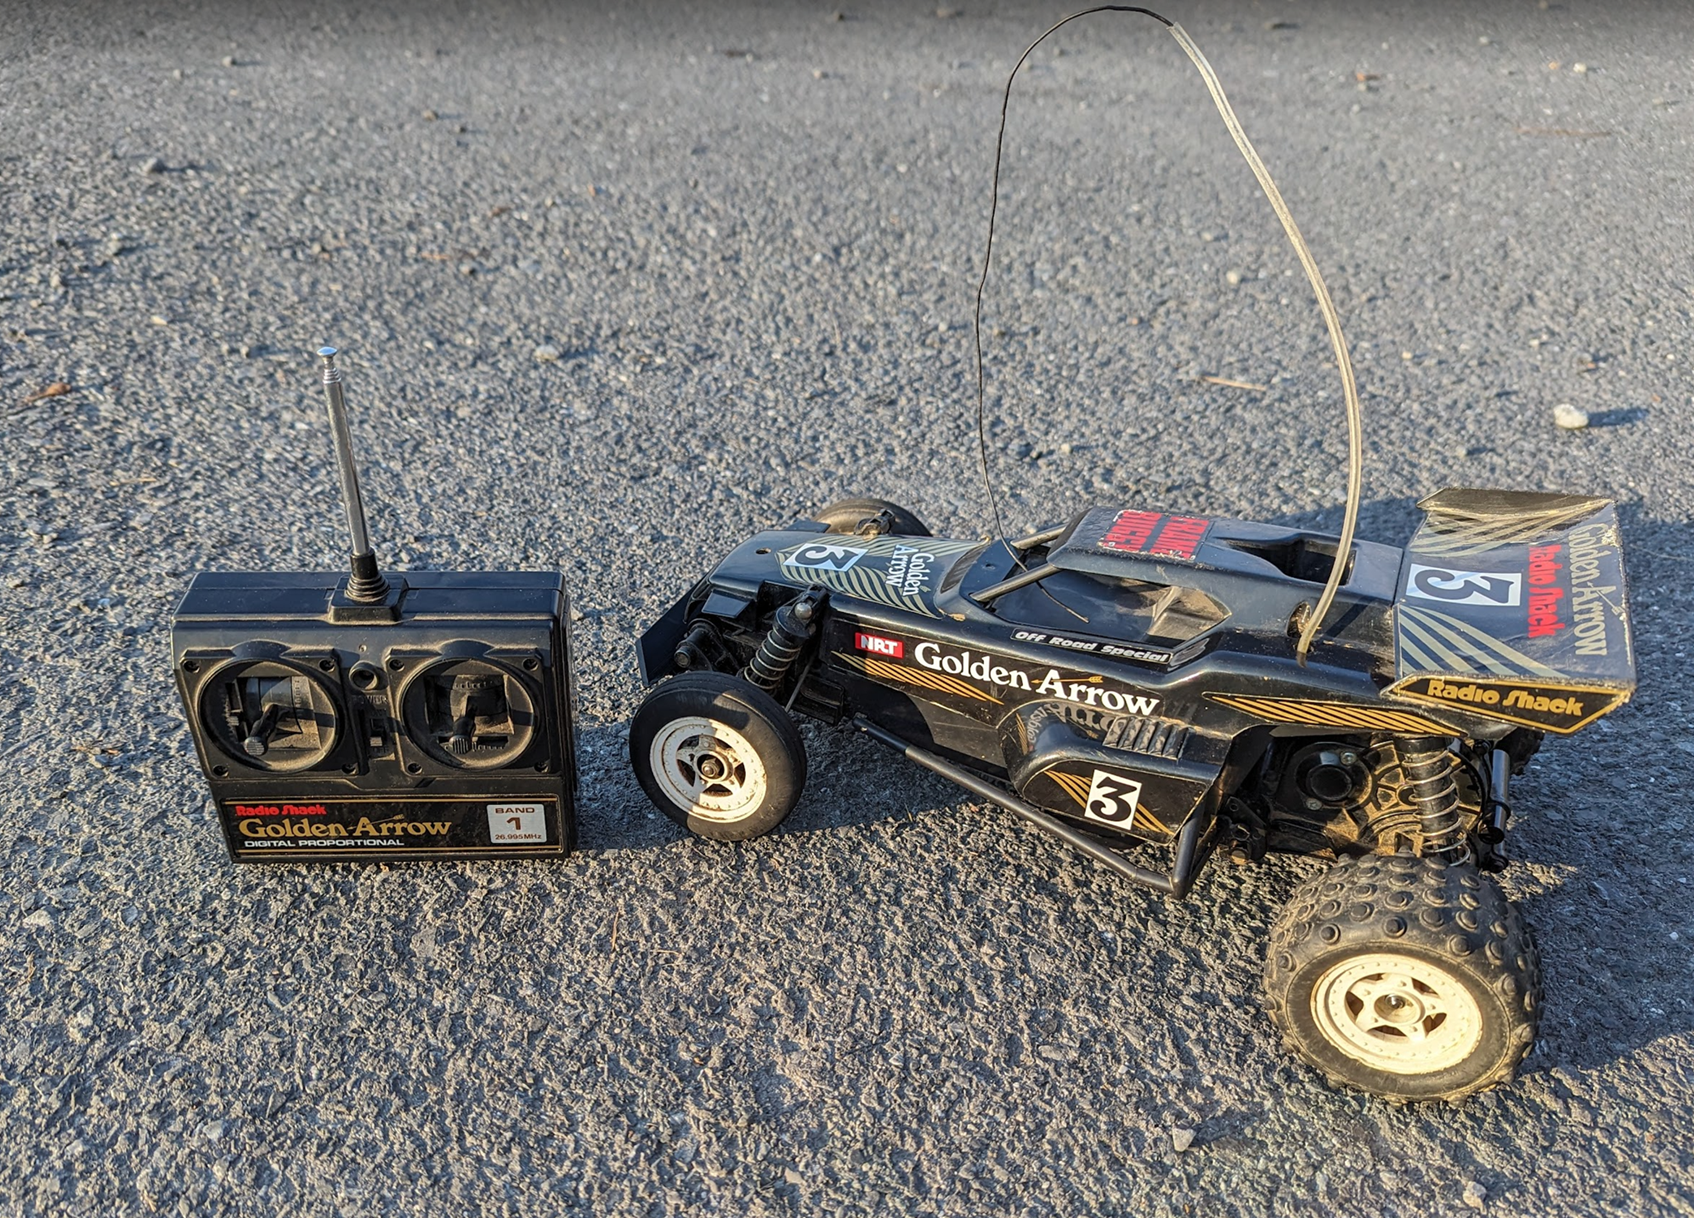
Kicking it old school!
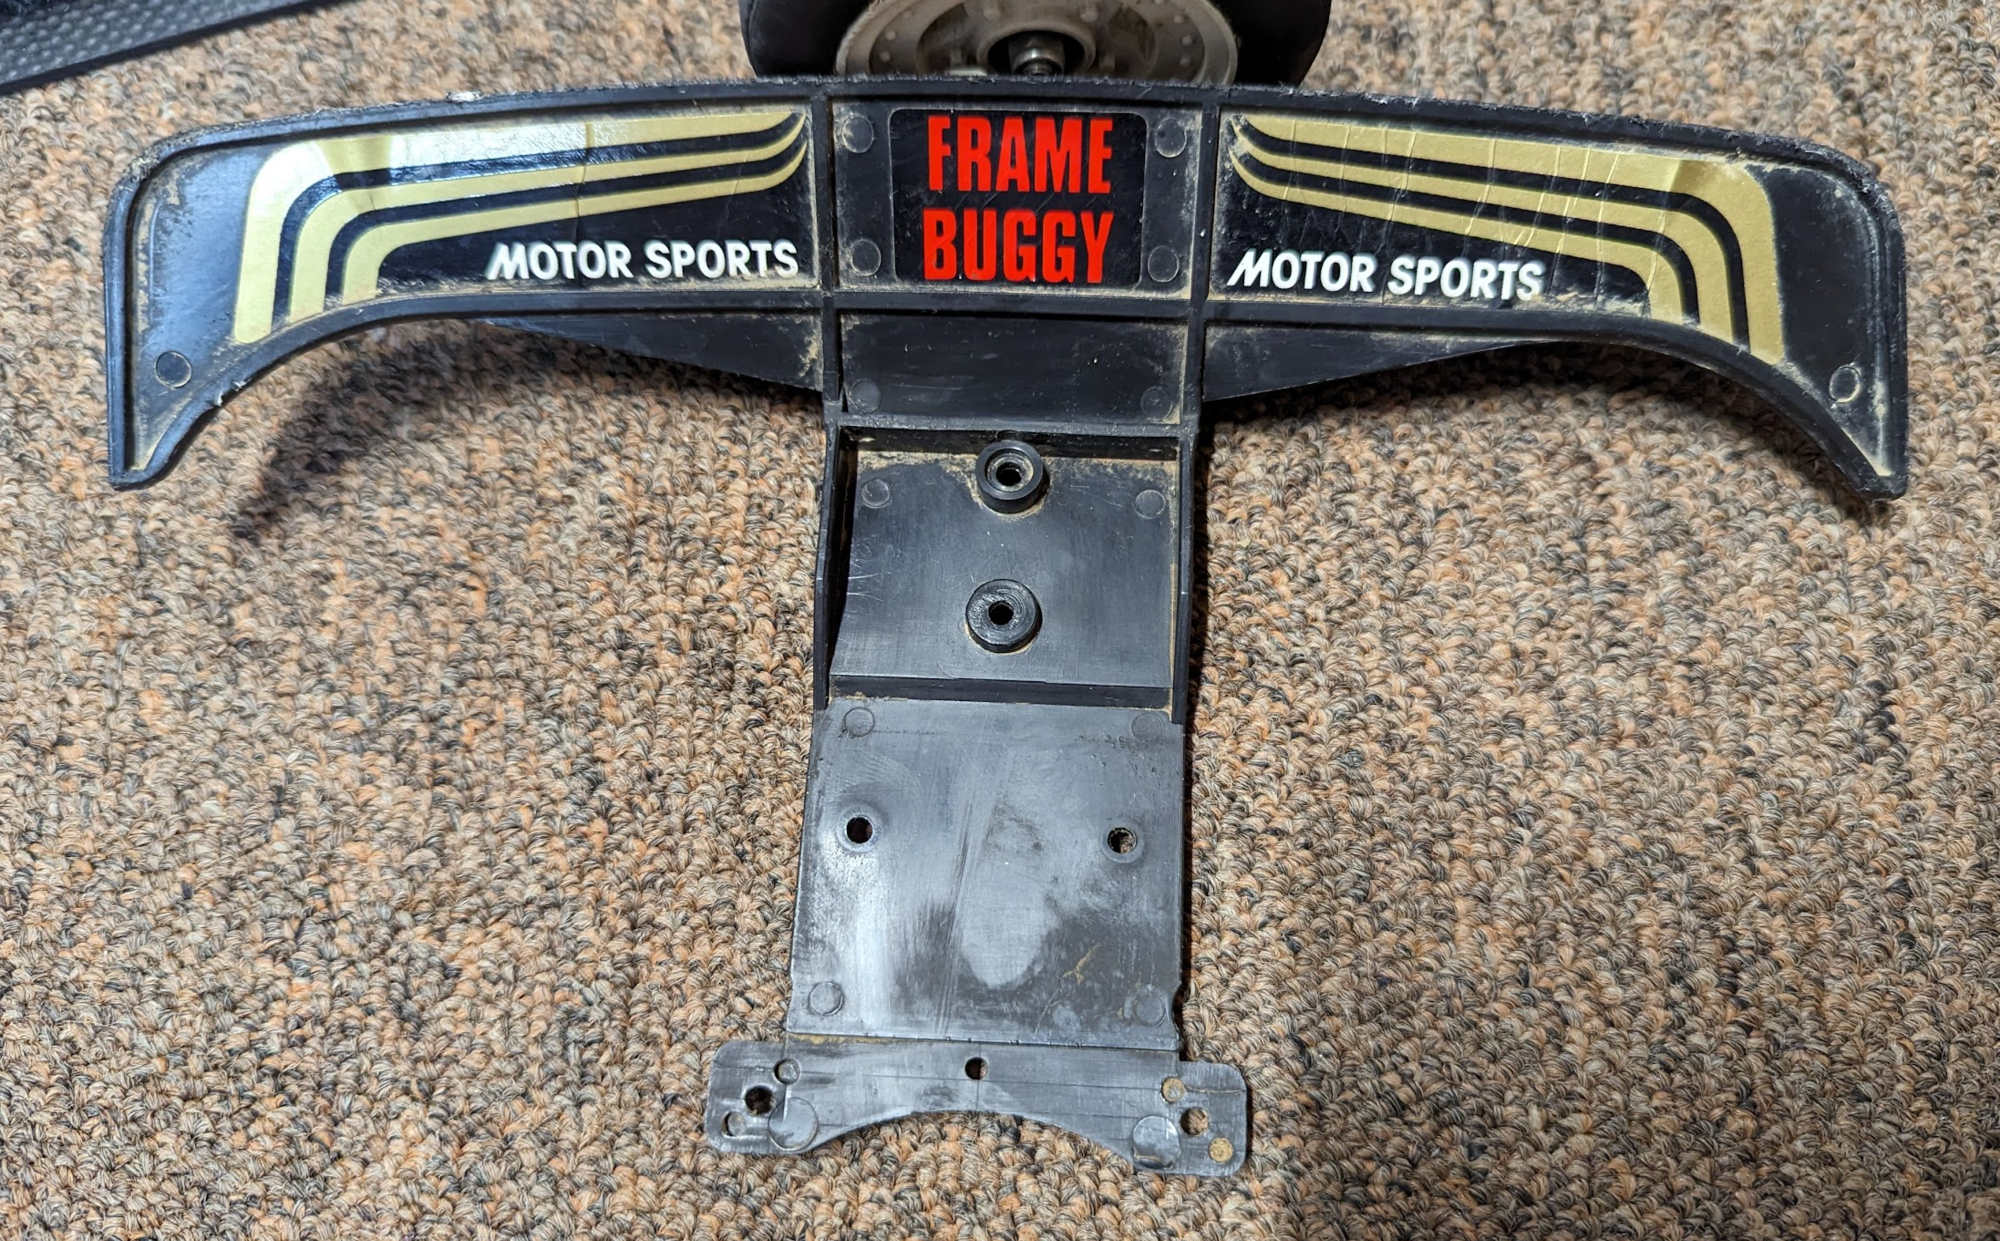
Uncracked front bumper seems to be incredibly rare at this point, hoping to get some better 3d print options from this as a bit of a guide
Original Golden Arrow upgraded with Hobby grade electronics:

Hobby electronics upgrade, 2.4ghz, digital, and low profile servo to avoid cutting battery box.

Ready to Run after a 3d printed bumper!
Ebay purchase that started with transmission mount damage, and trim issues (purchased largely for the original bumper):

Ebay purchase with cracked chassis and transmission mount

ABS repair time

Repair complete, not perfect, but first time and it runs!

Kicking it old school!

Uncracked front bumper seems to be incredibly rare at this point, hoping to get some better 3d print options from this as a bit of a guide
#284
seems I didn't join the transmission mount too well in the repair, not sure if maybe it isn't ABS even though it did seem to rub black on an acetone dampened paper towel. Anyway, here's the discovery and the new 3d printed part. maybe this will hold up better:
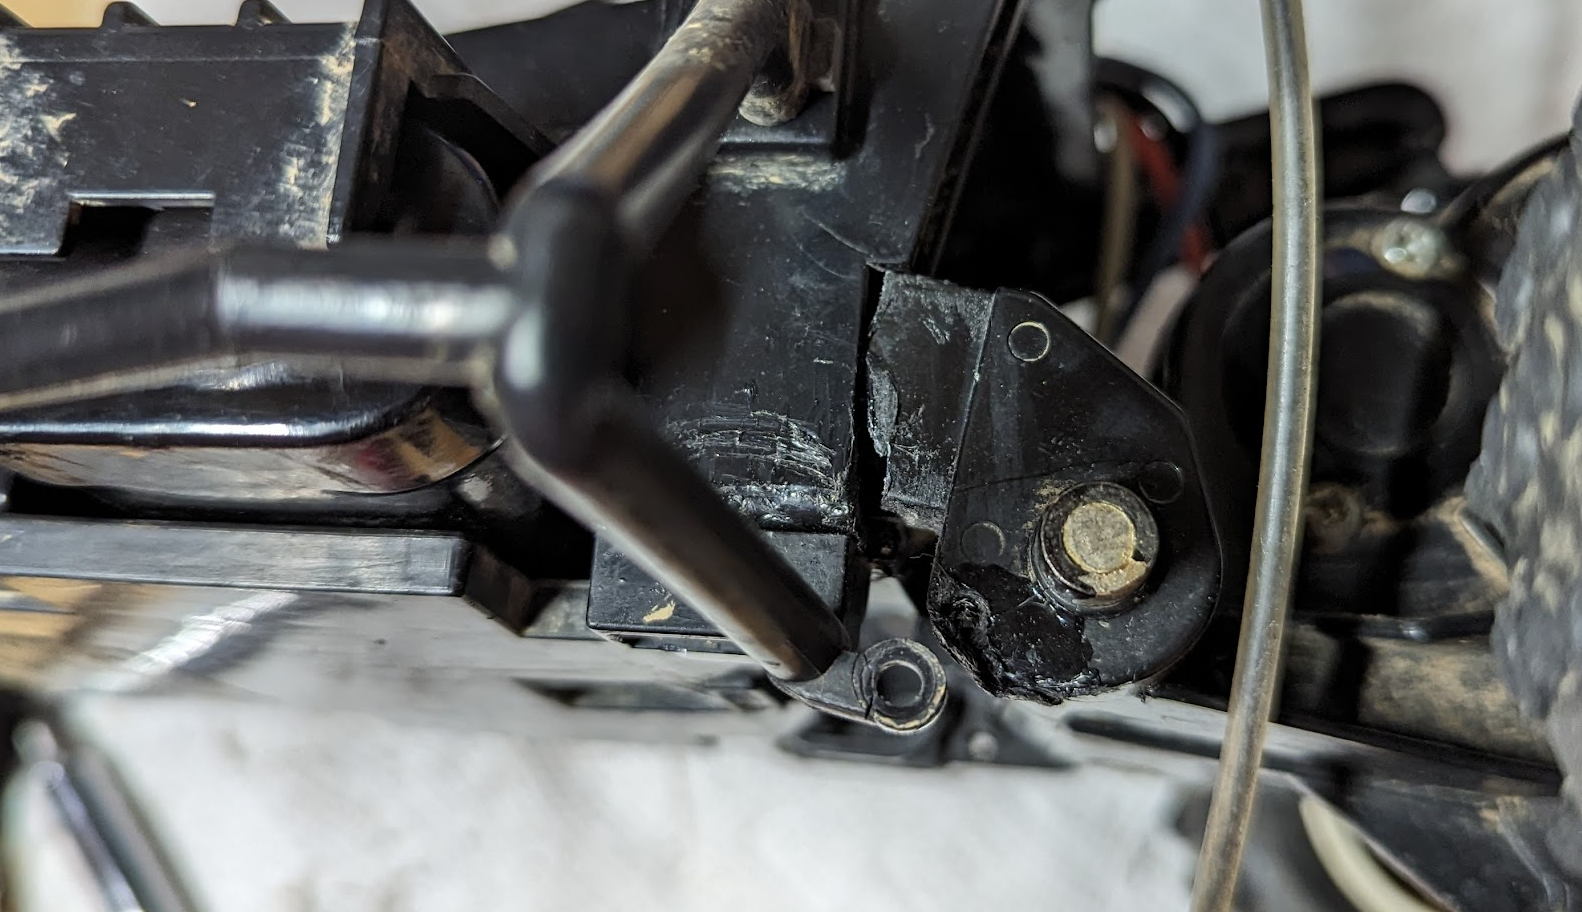
Cracked mount again, didn't notice until next day
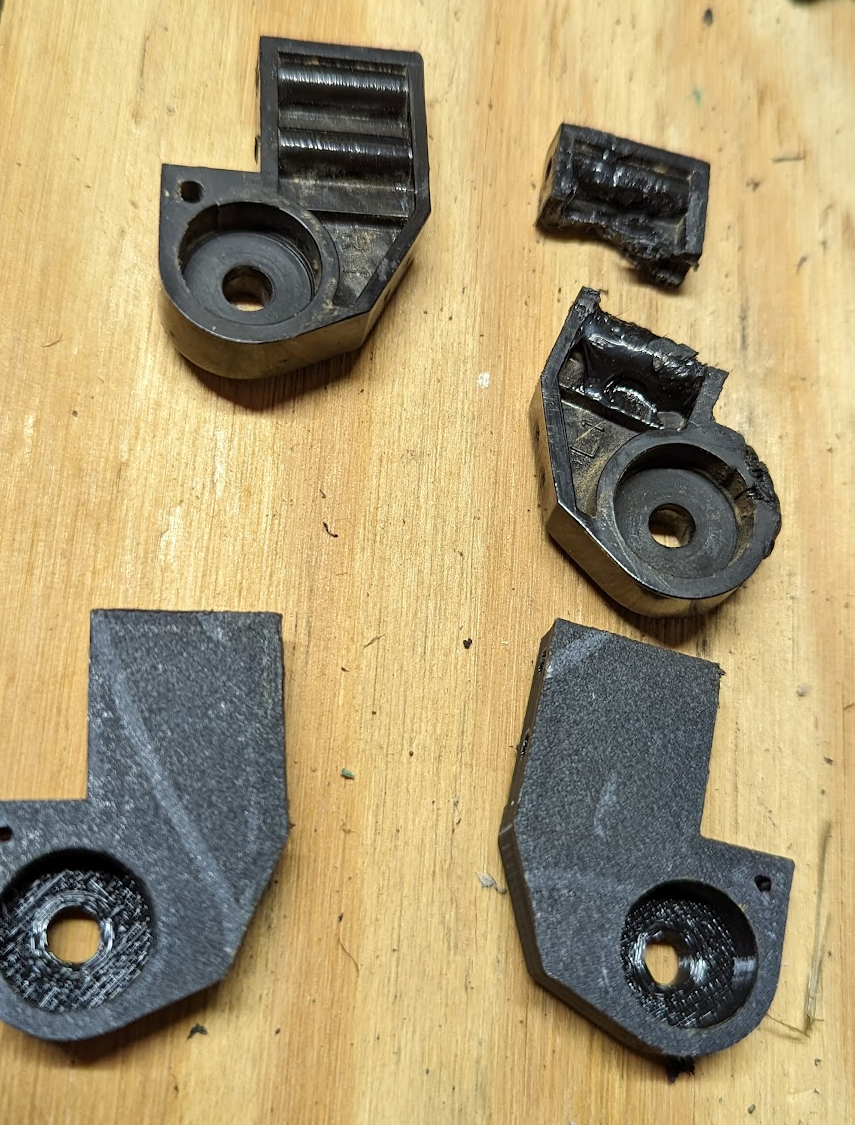
3d parts at bottom, notice lack of gaps around screw threads, hopefully stronger
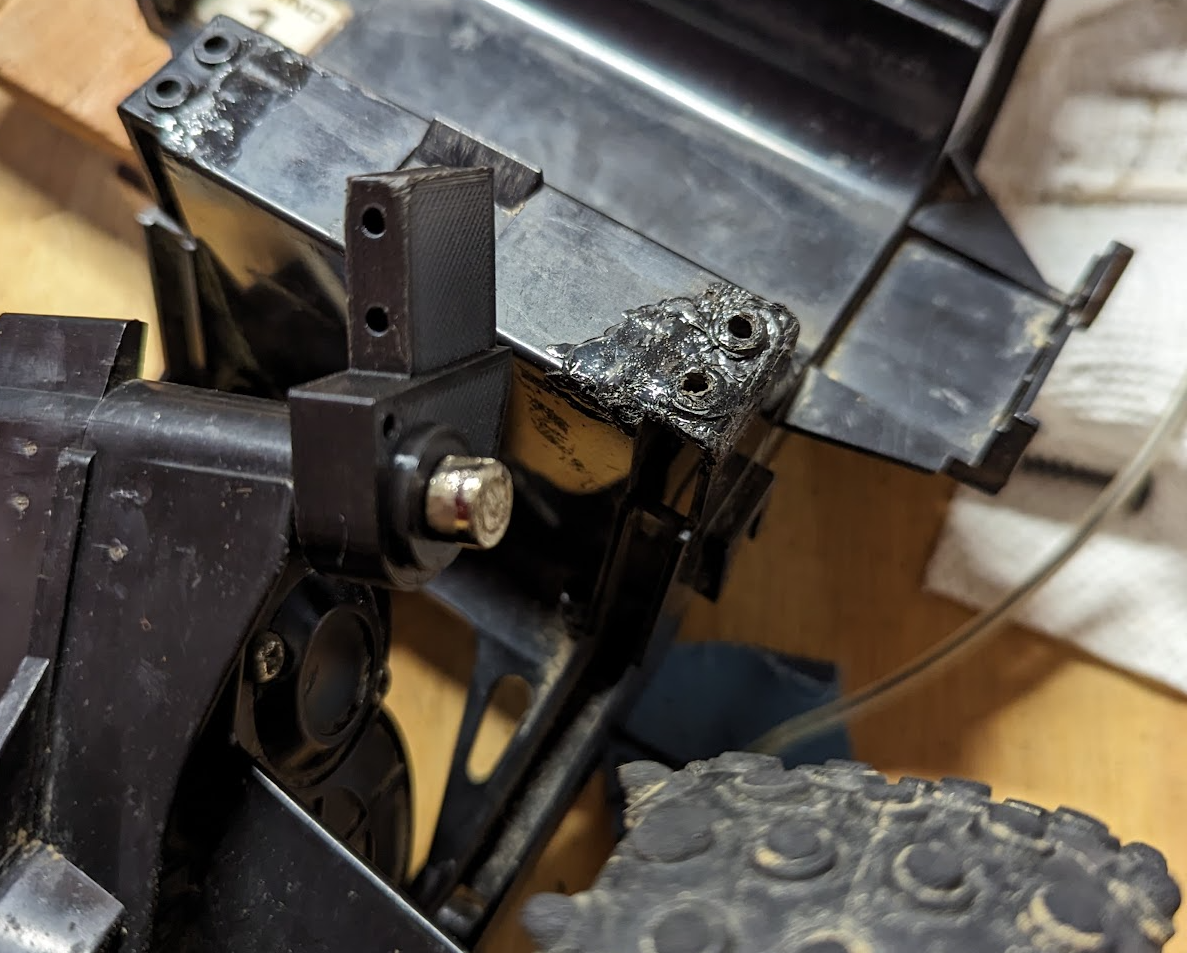
Fitting new part, collar not as pristine as before, but it's on.
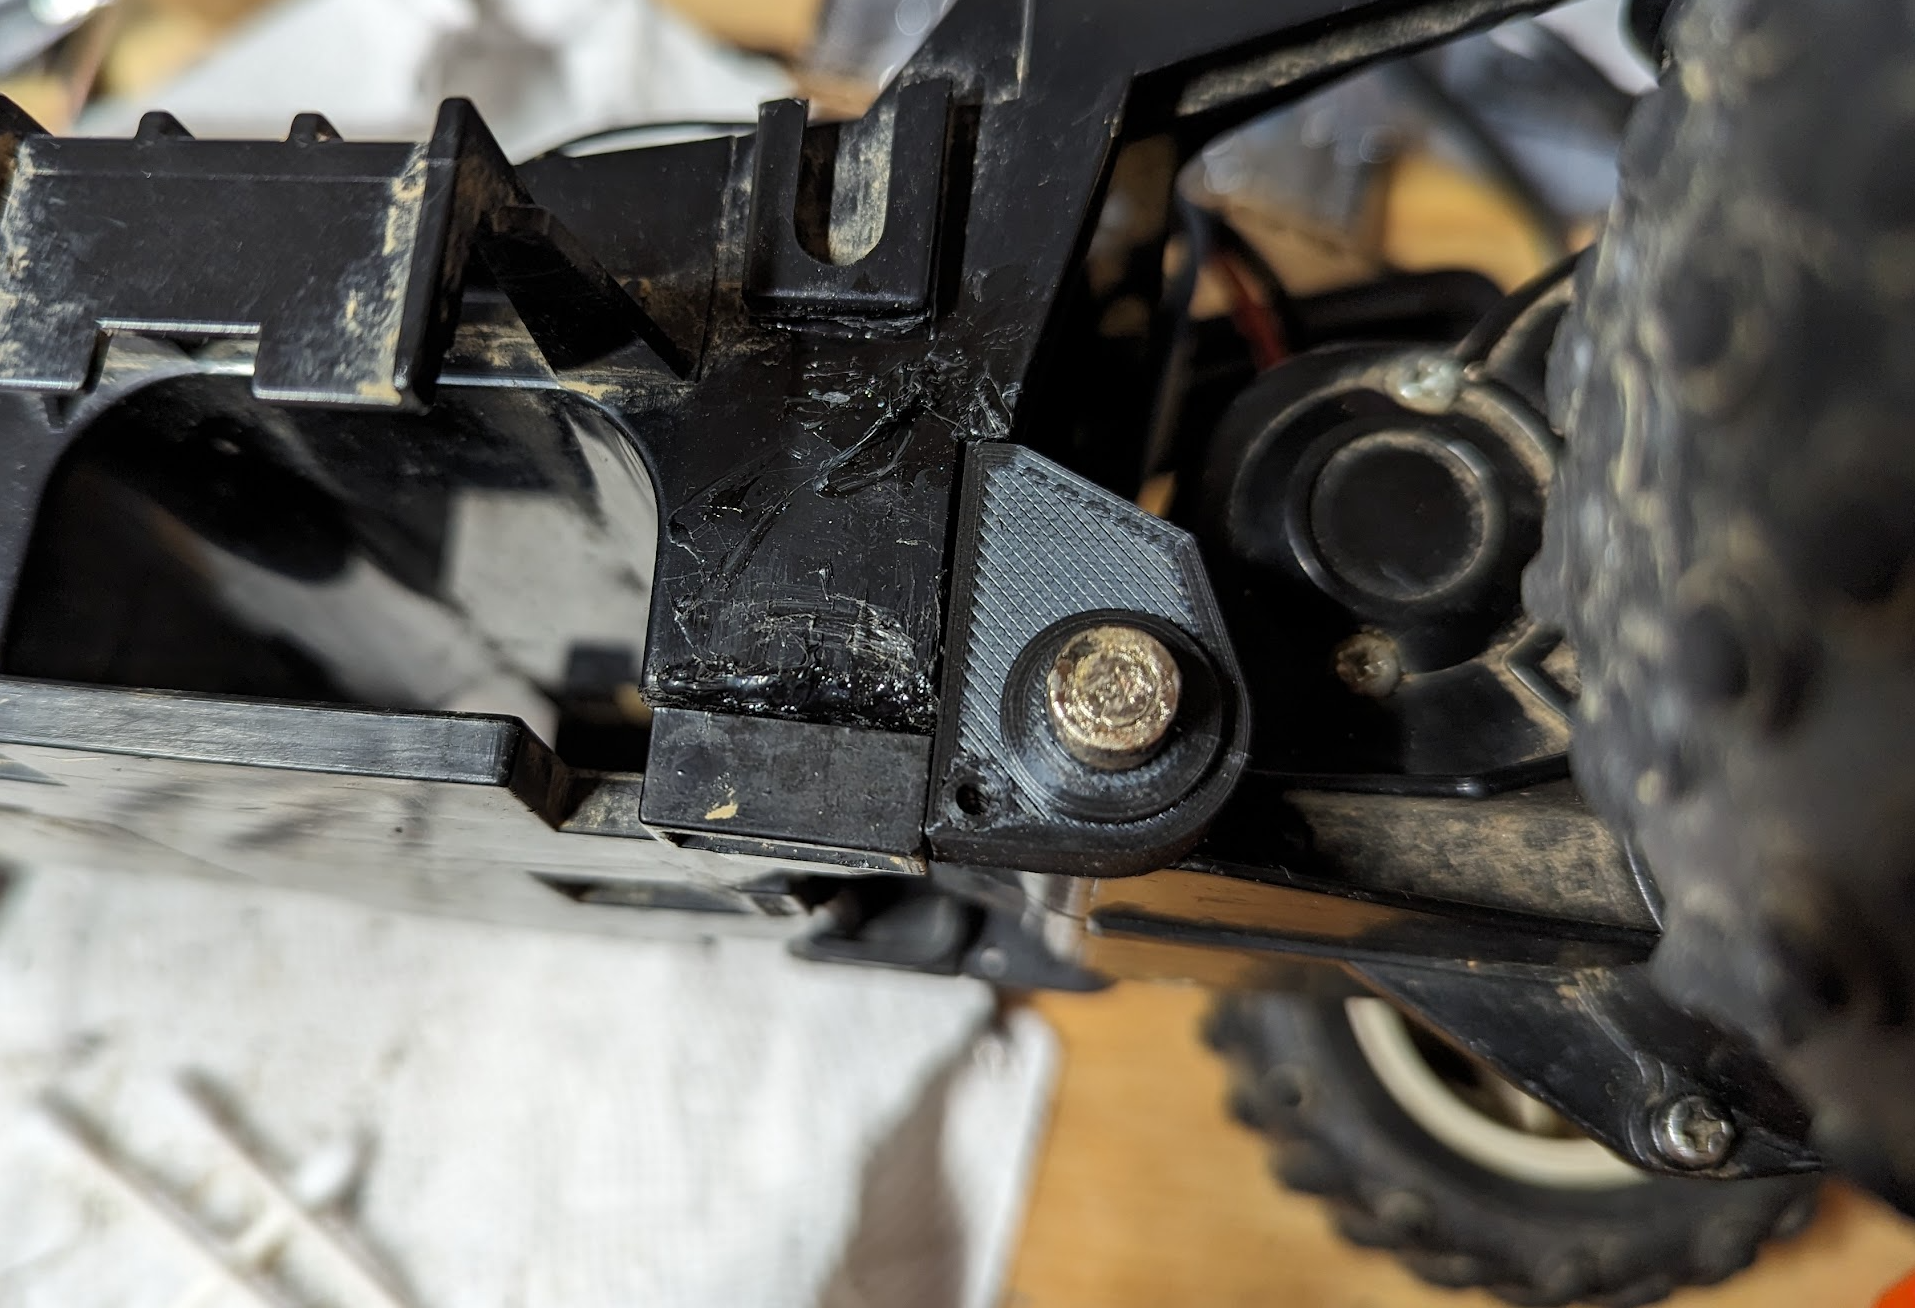
mount looks a little cleaner than last job

Cracked mount again, didn't notice until next day

3d parts at bottom, notice lack of gaps around screw threads, hopefully stronger

Fitting new part, collar not as pristine as before, but it's on.

mount looks a little cleaner than last job
#285
Junior Member
I recently found a vintage Golden Arrow and I've been trying to get it to work. I did get the new upgraded battery but otherwise I'd rather keep the original parts. Everything looks mint but I can't get the vehicle to turn on. The ignition switch is sticky so it might be corroded. How can I find that out? And how can I tell if the remote works besides the red light? I'm not allowed to post pics yet so if you want to see any just ask. Thanks in advance
#286
Yea, that 10 post thing before pictures is a bit rough when trying to get help, but if you have a multimeter you should check for continuity across the switch with no battery in and check for voltage with the battery in. Also make sure you have also replaced the AA batteries as well and that it isn't corroded, and those tiny wires are solid on the switch/board too.
The following users liked this post:
JMac13 (02-03-2024)
#287
Junior Member
My neighbor has this car and is looking for some help repairing it. The transmitter battery contacts were badly corroded and when I took them out they were broken in half.
Unfortunately they were tossed in the garbage before I could measure them and get the proper size. They appear to be 12mm by something, but I just can't be certain now that they have been tossed.
Is anyone able to send measurements or a link to purchase?
Unfortunately they were tossed in the garbage before I could measure them and get the proper size. They appear to be 12mm by something, but I just can't be certain now that they have been tossed.
Is anyone able to send measurements or a link to purchase?
#288

https://www.aliexpress.us/item/3256803186163371.html
You must change the contact wires because the sulfate destroys the copper inside the insulator.
You must change the contact wires because the sulfate destroys the copper inside the insulator.
My neighbor has this car and is looking for some help repairing it. The transmitter battery contacts were badly corroded and when I took them out they were broken in half.
Unfortunately they were tossed in the garbage before I could measure them and get the proper size. They appear to be 12mm by something, but I just can't be certain now that they have been tossed.
Is anyone able to send measurements or a link to purchase?
Unfortunately they were tossed in the garbage before I could measure them and get the proper size. They appear to be 12mm by something, but I just can't be certain now that they have been tossed.
Is anyone able to send measurements or a link to purchase?
#289
Junior Member
Thanks for the tip on the wiring. I had already planned on replacing those since I had taken them off to remove the contact, so glad to know that was the right call

#290
Junior Member
Join Date: May 2024
Posts: 1
Likes: 0
Received 0 Likes
on
0 Posts
It's 2019 and the thread is still going!
I helped my mom clean out her attic and found my sweet Golden Arrow from 30 years ago. Man, the waves of nostalgia.
I bought a new battery and used it's leftover charge to run it... my son got to drive it!
Unfortunately the radio is malfunctioning so I've ordered hobby grade ESC, servo, motor, transmitter, battery charger, servo saver, bearings, tires and some tools I might need and I'm gonna tackle the conversion. All should be here by the weekend so I hope I get her up and running soon!

#291
I used Ebay:
HobbyWing QuicRun 1060
Tactic RC TTX300 3-Channel SLT Radio
JX Servo 9KG Coreless Low Profile Metal Gear Digital Servo
Hardest part was getting the right servo saver:
Tamiya P Parts: servo saver assembly.
Good luck, it's a blast =)
#294
Junior Member
Join Date: Jun 2024
Posts: 1
Likes: 0
Received 0 Likes
on
0 Posts
Hi Everyone. Firstly, so happy to have found this thread.... I found my old GA buggy buried at the bottom of a cupboard recently where it has been laid up since the mid 90's. I got it as a Christmas present back in '88 but both the rear chassis has been broken and the black plastic wheel 'hubs' have also snapped. Whilst I think I can fix the chassis with JB Weld (or perhaps using the acetone trick mentioned above) I'm hoping that one of you might be able to point me to suitable replacements for the hubs?
(These are the black, 5 sided plastic parts which sit on the rear axle to allow the wheel to mount and measure 30mm at the widest point - I'm not even sure of the terminology for them - believe they might be called mounts or dragers?)
Any information welcomed!!
(These are the black, 5 sided plastic parts which sit on the rear axle to allow the wheel to mount and measure 30mm at the widest point - I'm not even sure of the terminology for them - believe they might be called mounts or dragers?)
Any information welcomed!!


