


TopRC giant P-47 Thunderbolt ARF

 06-17-2022, 11:37 AM
#252
 06-17-2022, 11:39 AM
#253
06-17-2022, 11:44 AM
#254
I have not balanced it out yet so dont know how much lead I'll need in the tail.
The following users liked this post:
yeahbaby (06-19-2022)
06-18-2022, 07:50 PM
#256
06-19-2022, 07:12 PM
#258
Join Date: Mar 2011
Location: Wilmington, NC
Posts: 40
Likes: 0
Received 0 Likes
on
0 Posts
The following users liked this post:
yeahbaby (06-20-2022)


 06-20-2022, 09:24 AM
#263

Hey all, I purchased the Snafu version of the Top RC P 47 and experienced the same problem with gear not being secured. Fortunately no real damage. However….while assembling I noticed that the factory has installed the rear former backwards, resulting in the tail wheel mounts and doubler installed on the wrong side. Has anyone else experienced this problem? I am awaiting a response from Ashley at Gator RC to see how they want to handle this…..
06-20-2022, 12:04 PM
#264
Rick if I were you I would Abandon this project while you have a chance to because you need another fuse the former were glued in backwards...I’ve the same plane and a lot more of D&R need to be put into this plane for the price that we paid it’s just my opinion but everybody has one,I am not trying to give the plane a bad rep because it’s a good looking bird and I haven’t put mines in the air yet and don’t know how it will fly..but speaking from a inspection and Assemble or build standpoint THE PLANE NEED MORE R&D! As mention earlier 🤷🏾♂️
06-20-2022, 12:37 PM
#265
Mike, its a DLE 111v3. Unfortunately, the plugs caps will not clear and I will have to cut the cowl (and yes, it's going to kill me to have to do it). I just couldn't justify the 2,700 for the 150 shipped. Maybe at a later date I can replace it with a radial.
The following users liked this post:
cluzeauu (03-10-2023)
06-20-2022, 02:13 PM
#266
Originally Posted by maddog-RCU;[url=tel:12729024
12729024[/url]]Well guys it sure seems I got the lemon when it comes to this P-47.
When my plane arrived, the canopy was all smashed to heck because the landing gear was just tossed into the box; it wasn't even in its own box at all.
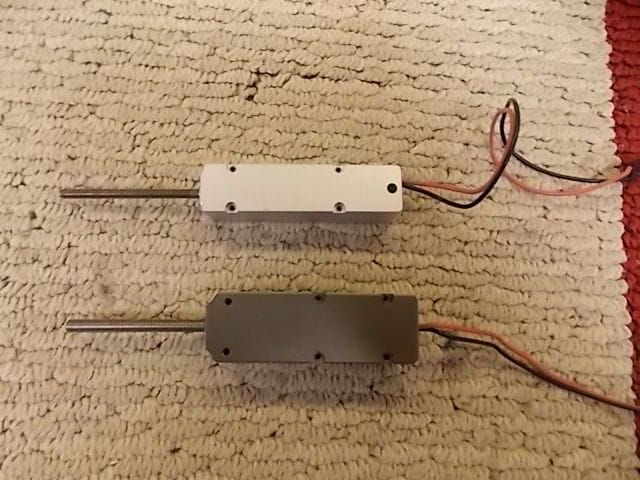
So, during the transport it broke the canopy glass which Gator RC did replace for me; but now I have a tail gear with a jack screw that will not work; I called and told them I needed a replacement they checked, and they had one; GREAT I think.
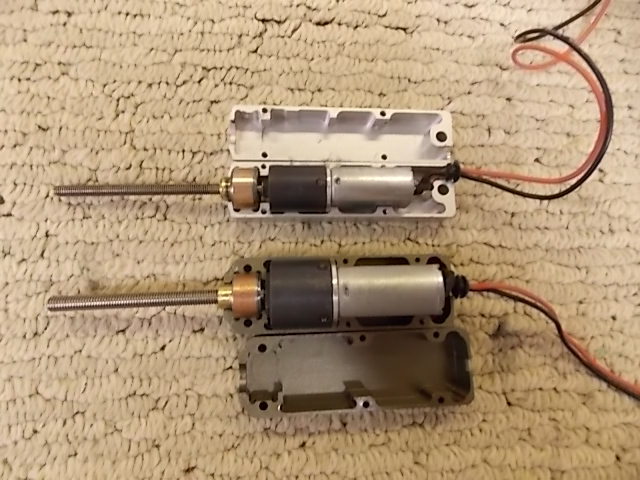
Well it shows up and it is for something else all together; I thought maybe I could swap out the internals but the one they sent is to big to fit into the casing needed for the P-47.
So now I sit here with no retractable tailwheel.
The attached pictures show the unit I got shipped to me as a replacement (copper colored one) and the P-47 unit (silver colored one)
This is my first big warbird that has electric retracts and I can tell you it is leaving a very sour taste in my mouth.
Thanks for letting me vent.
When my plane arrived, the canopy was all smashed to heck because the landing gear was just tossed into the box; it wasn't even in its own box at all.
So, during the transport it broke the canopy glass which Gator RC did replace for me; but now I have a tail gear with a jack screw that will not work; I called and told them I needed a replacement they checked, and they had one; GREAT I think.
Well it shows up and it is for something else all together; I thought maybe I could swap out the internals but the one they sent is to big to fit into the casing needed for the P-47.
So now I sit here with no retractable tailwheel.
The attached pictures show the unit I got shipped to me as a replacement (copper colored one) and the P-47 unit (silver colored one)
This is my first big warbird that has electric retracts and I can tell you it is leaving a very sour taste in my mouth.
Thanks for letting me vent.
The following users liked this post:
John8861 (08-25-2023)
06-21-2022, 07:18 AM
#267
Rick227,
After exchanging e-mails, a number of times with Mike at GatorRC he finally got the correct parts for my tail wheel retract AFTER I sent him the bad jack screw.
I say sit tight Mike has done me right by me and fixed the problems I have run into on my P-47.
It looks to me that the factory screwed up big time on yours and I question how something this wrong made it through any quality control.
The price we pay for these "ARFS" these kind of things shouldn't be happening.
06-21-2022, 08:44 AM
#269
Hope they get the issue fixed for you Rick. It does seem like a few too many things to "fix" on these models.
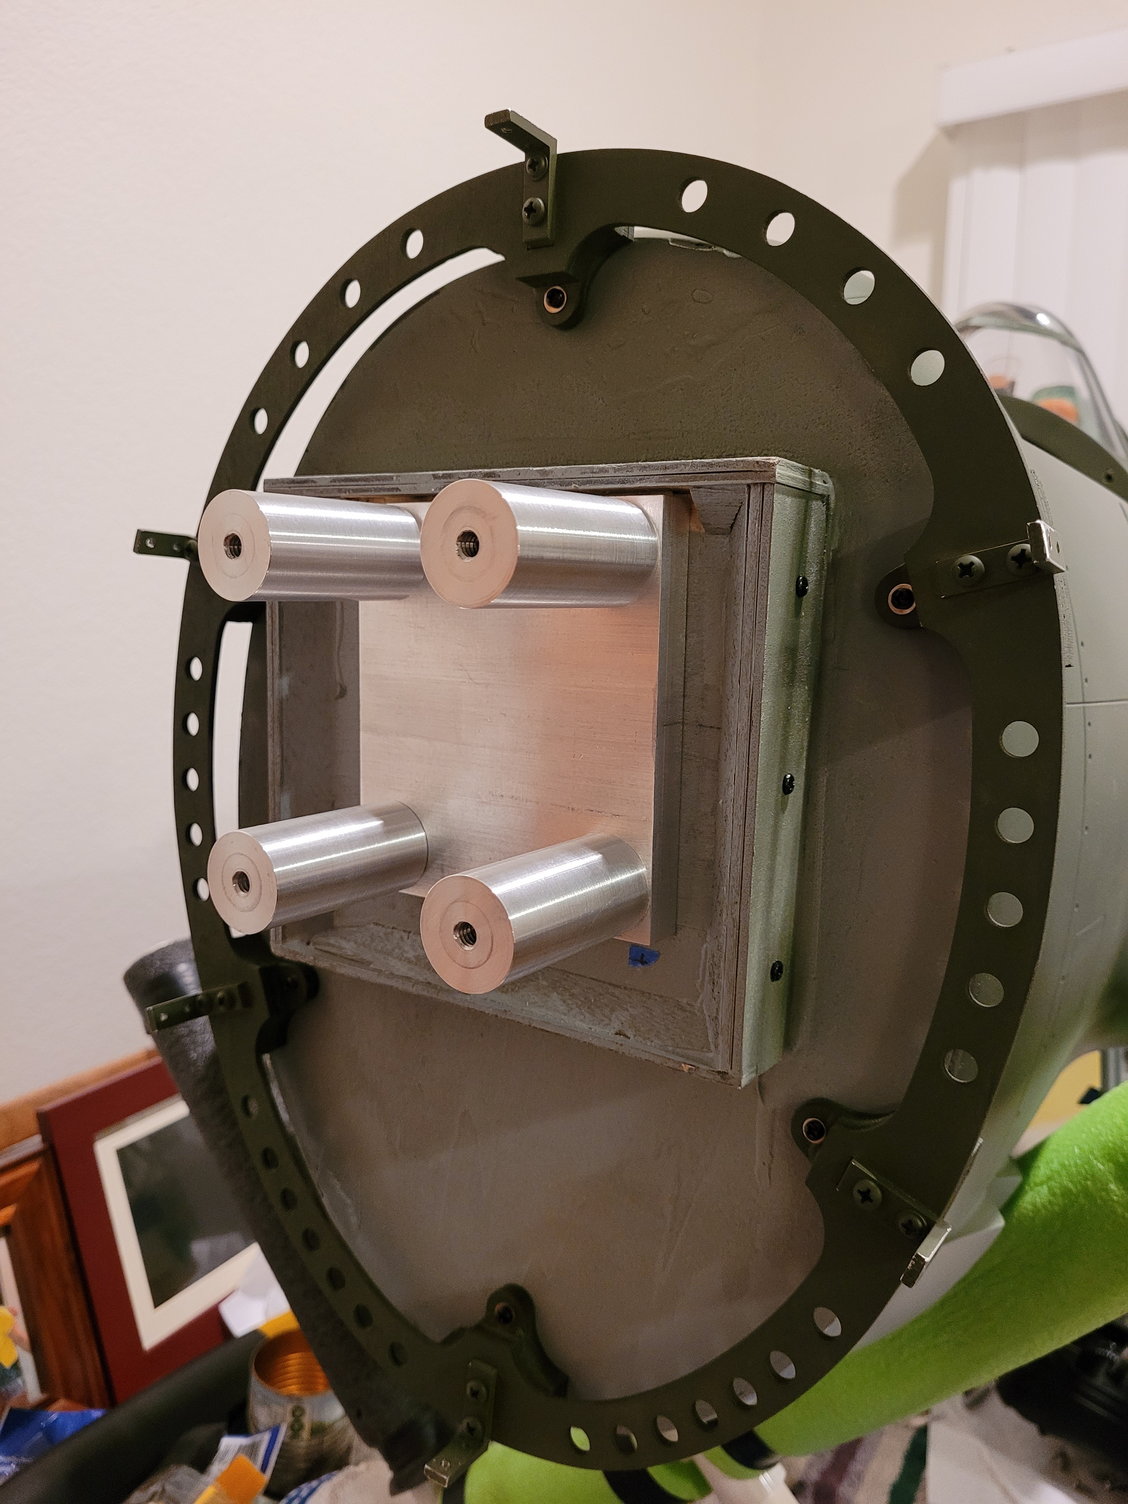
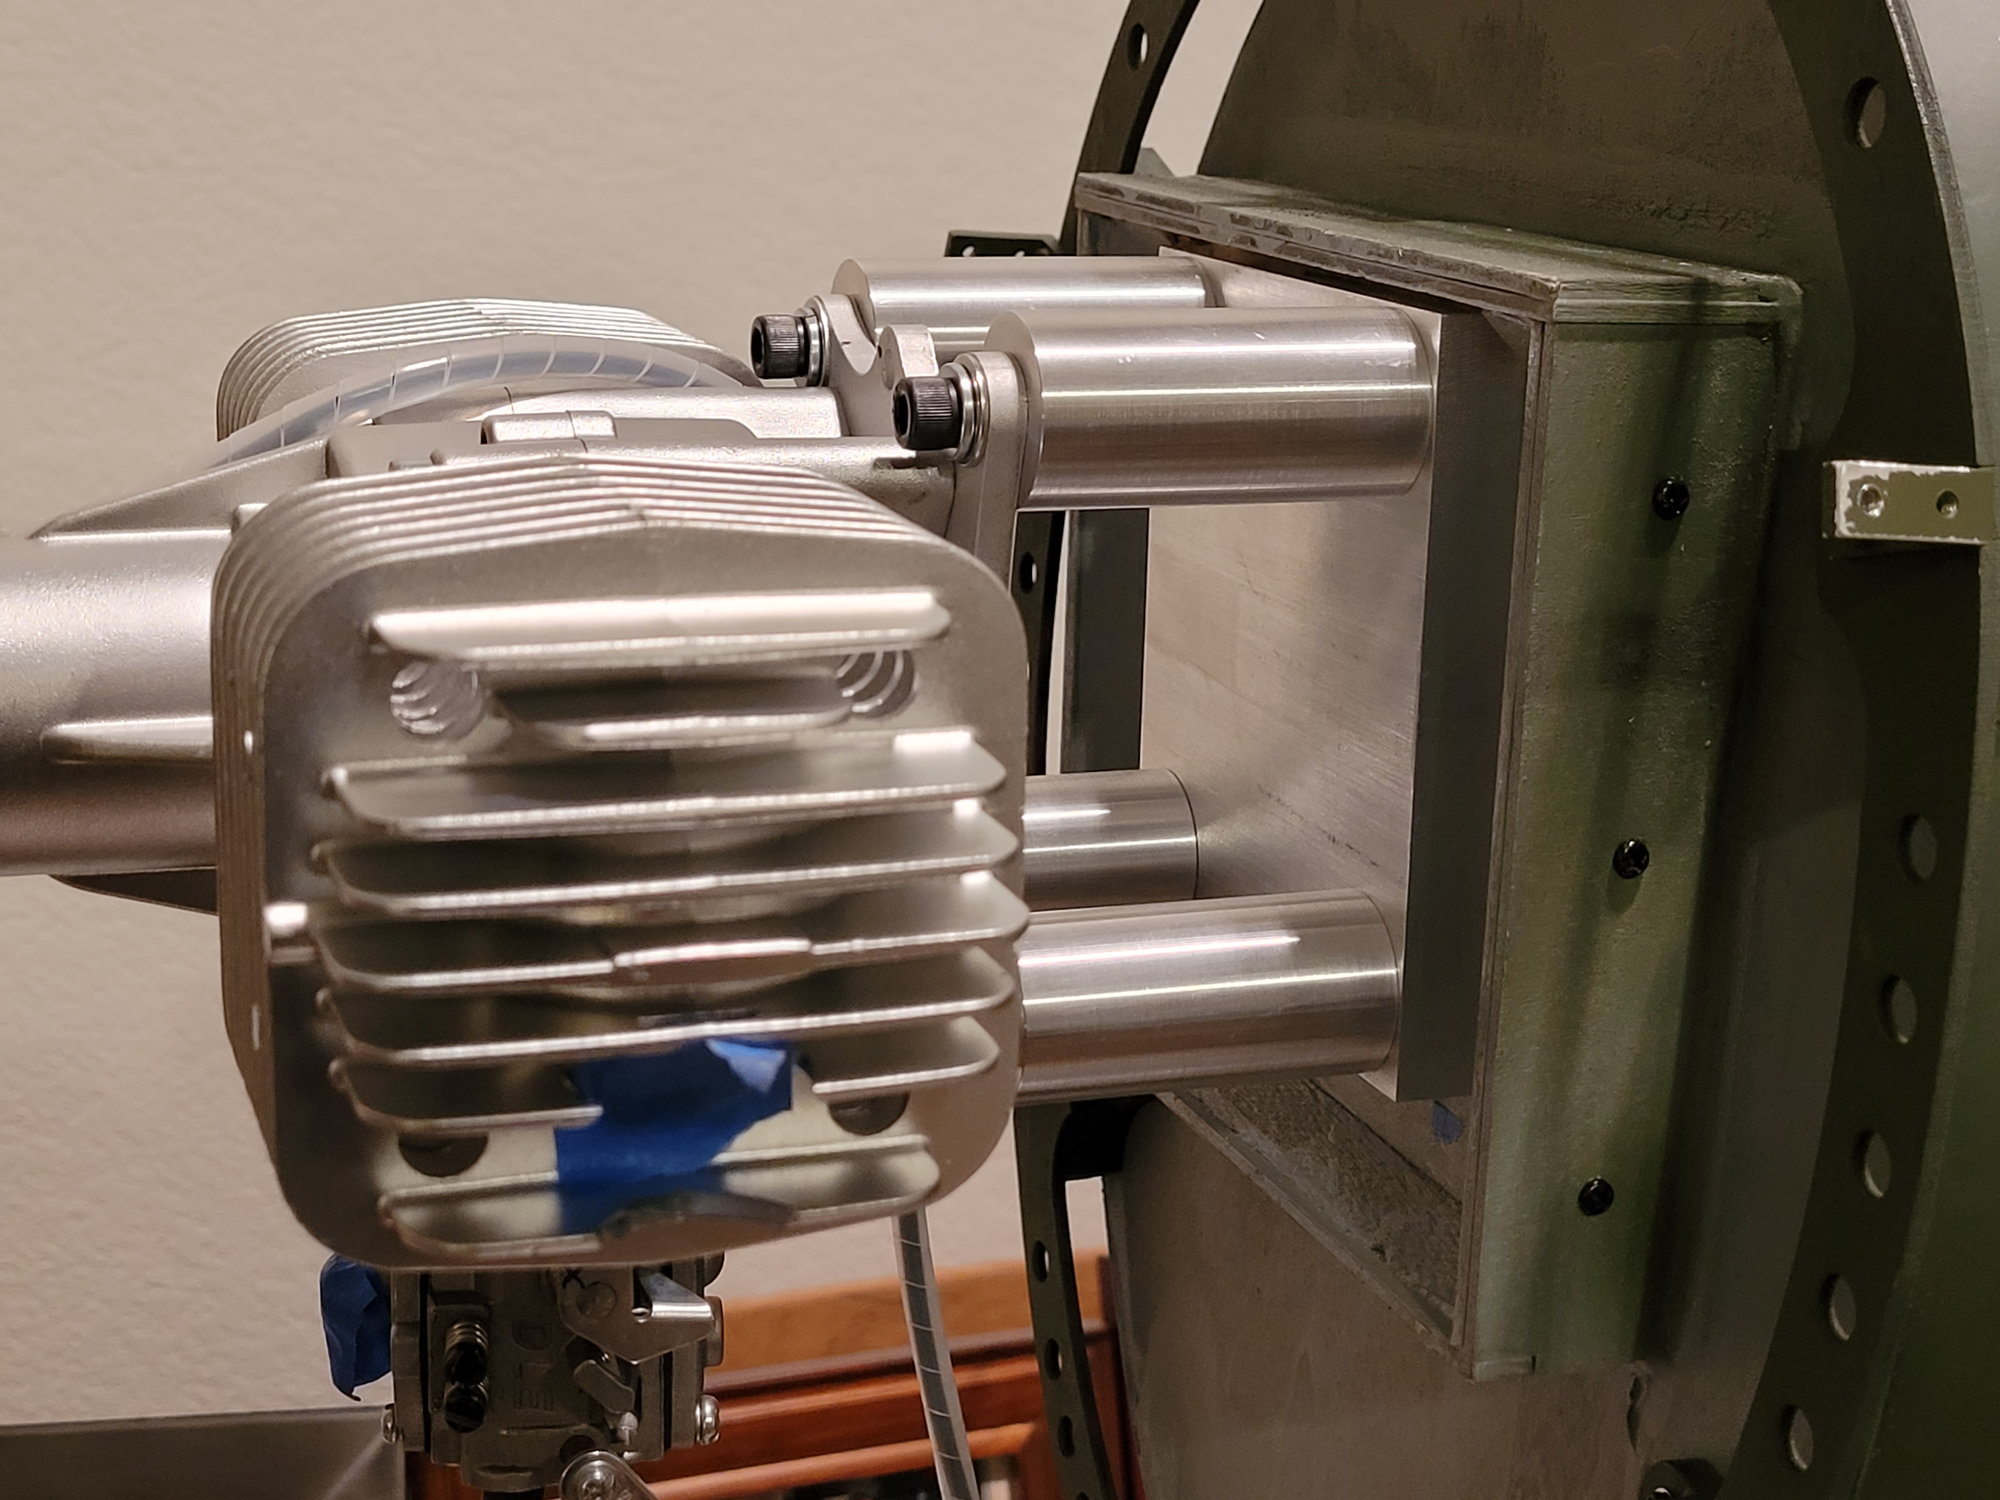
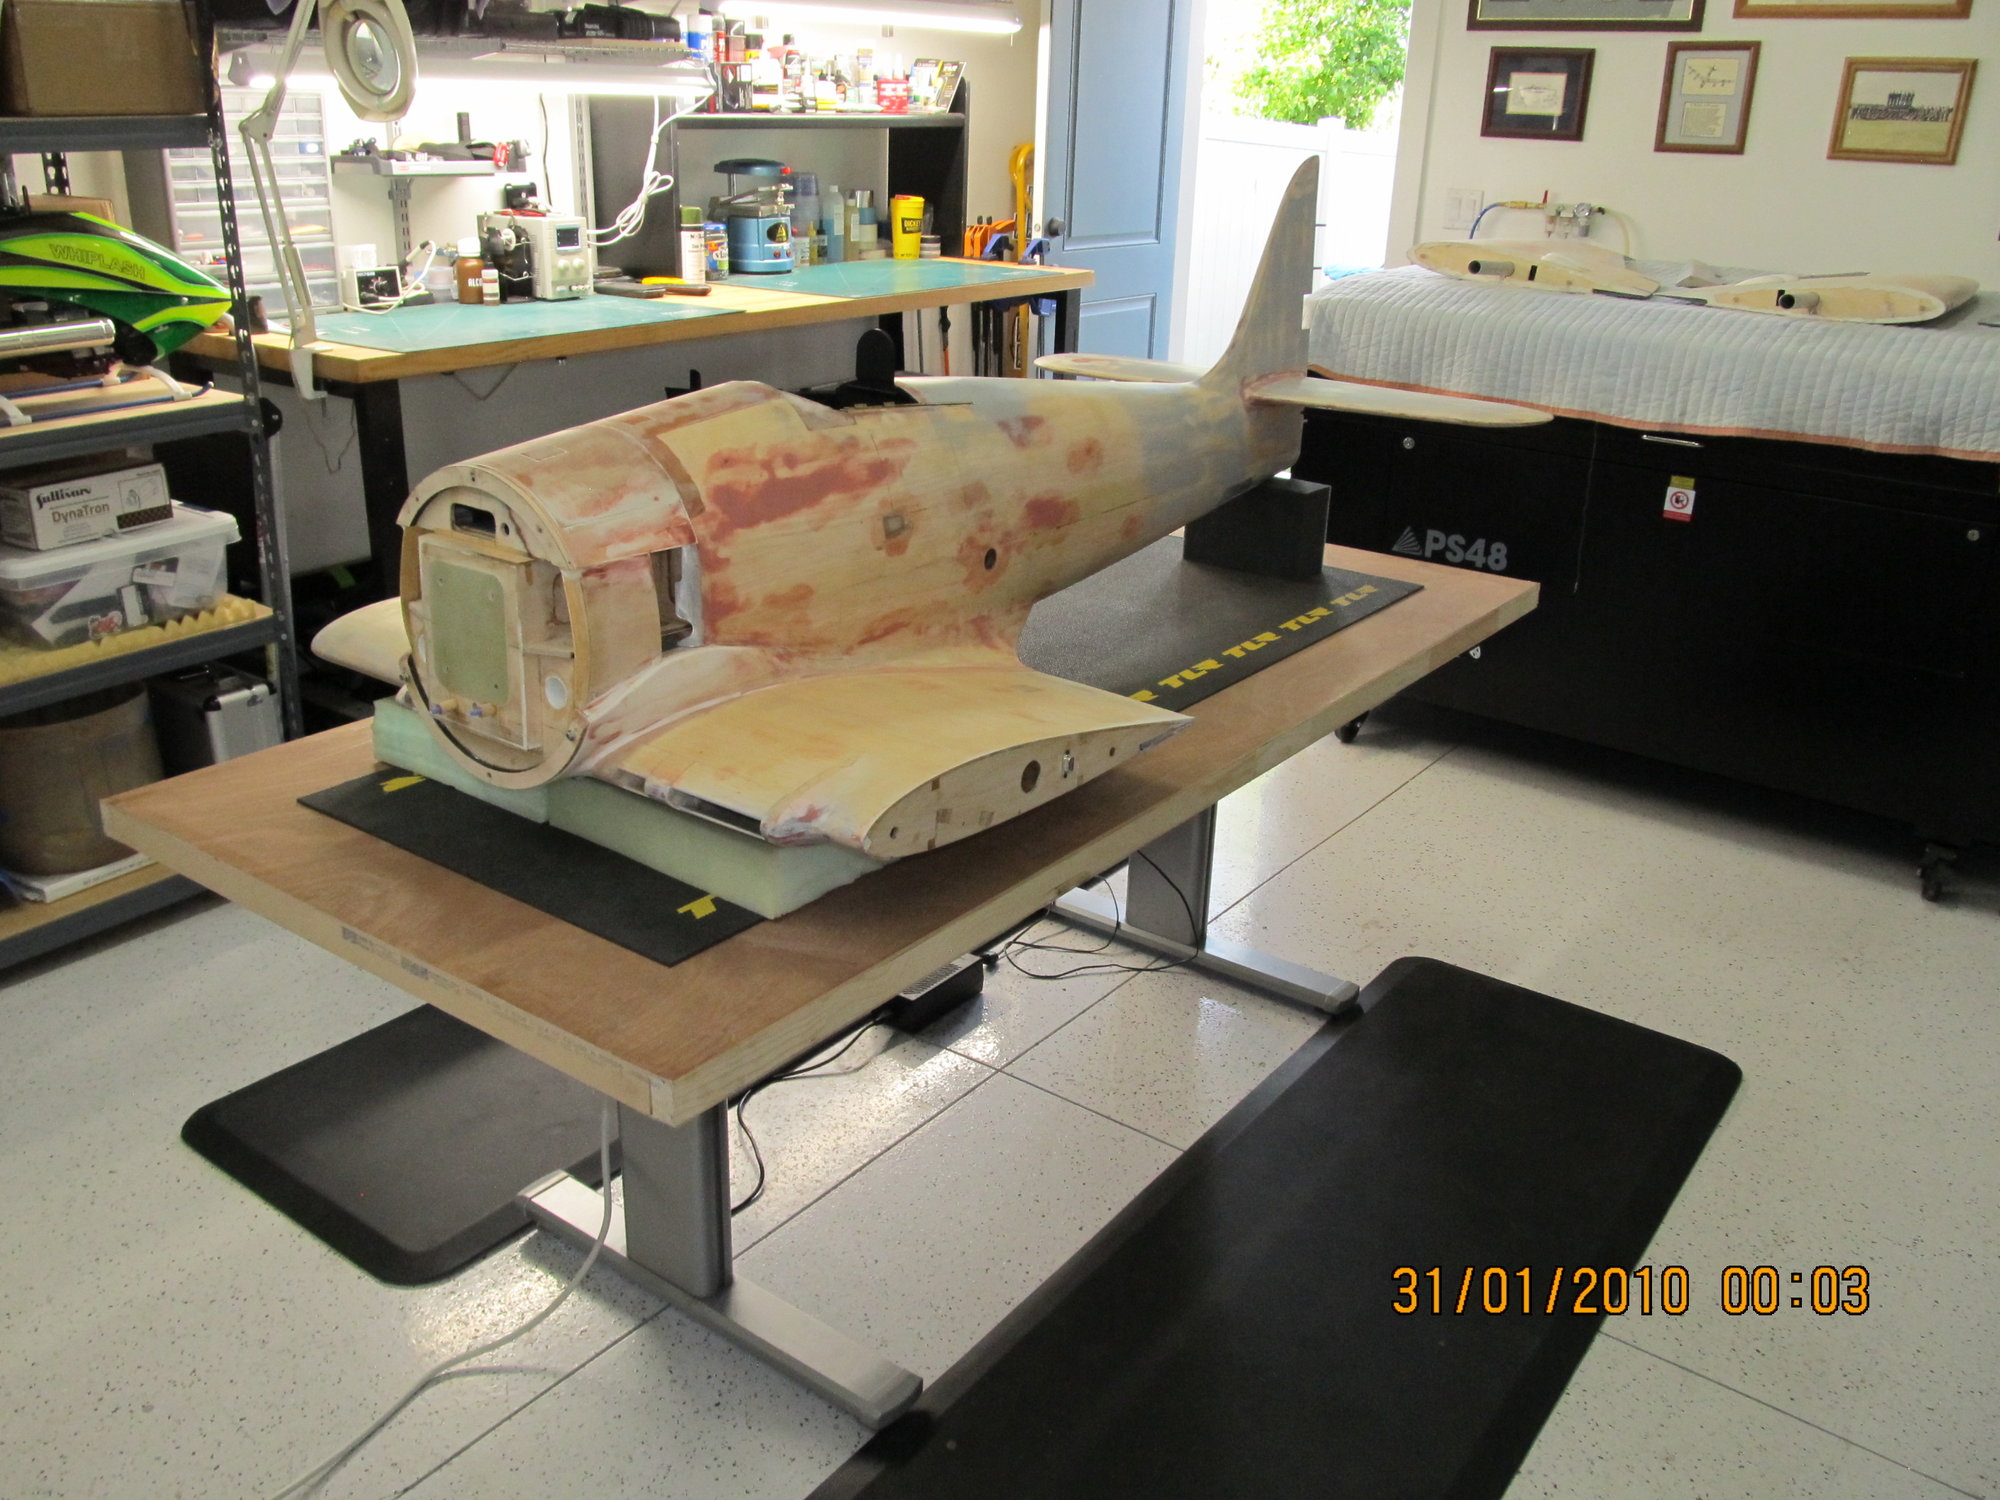
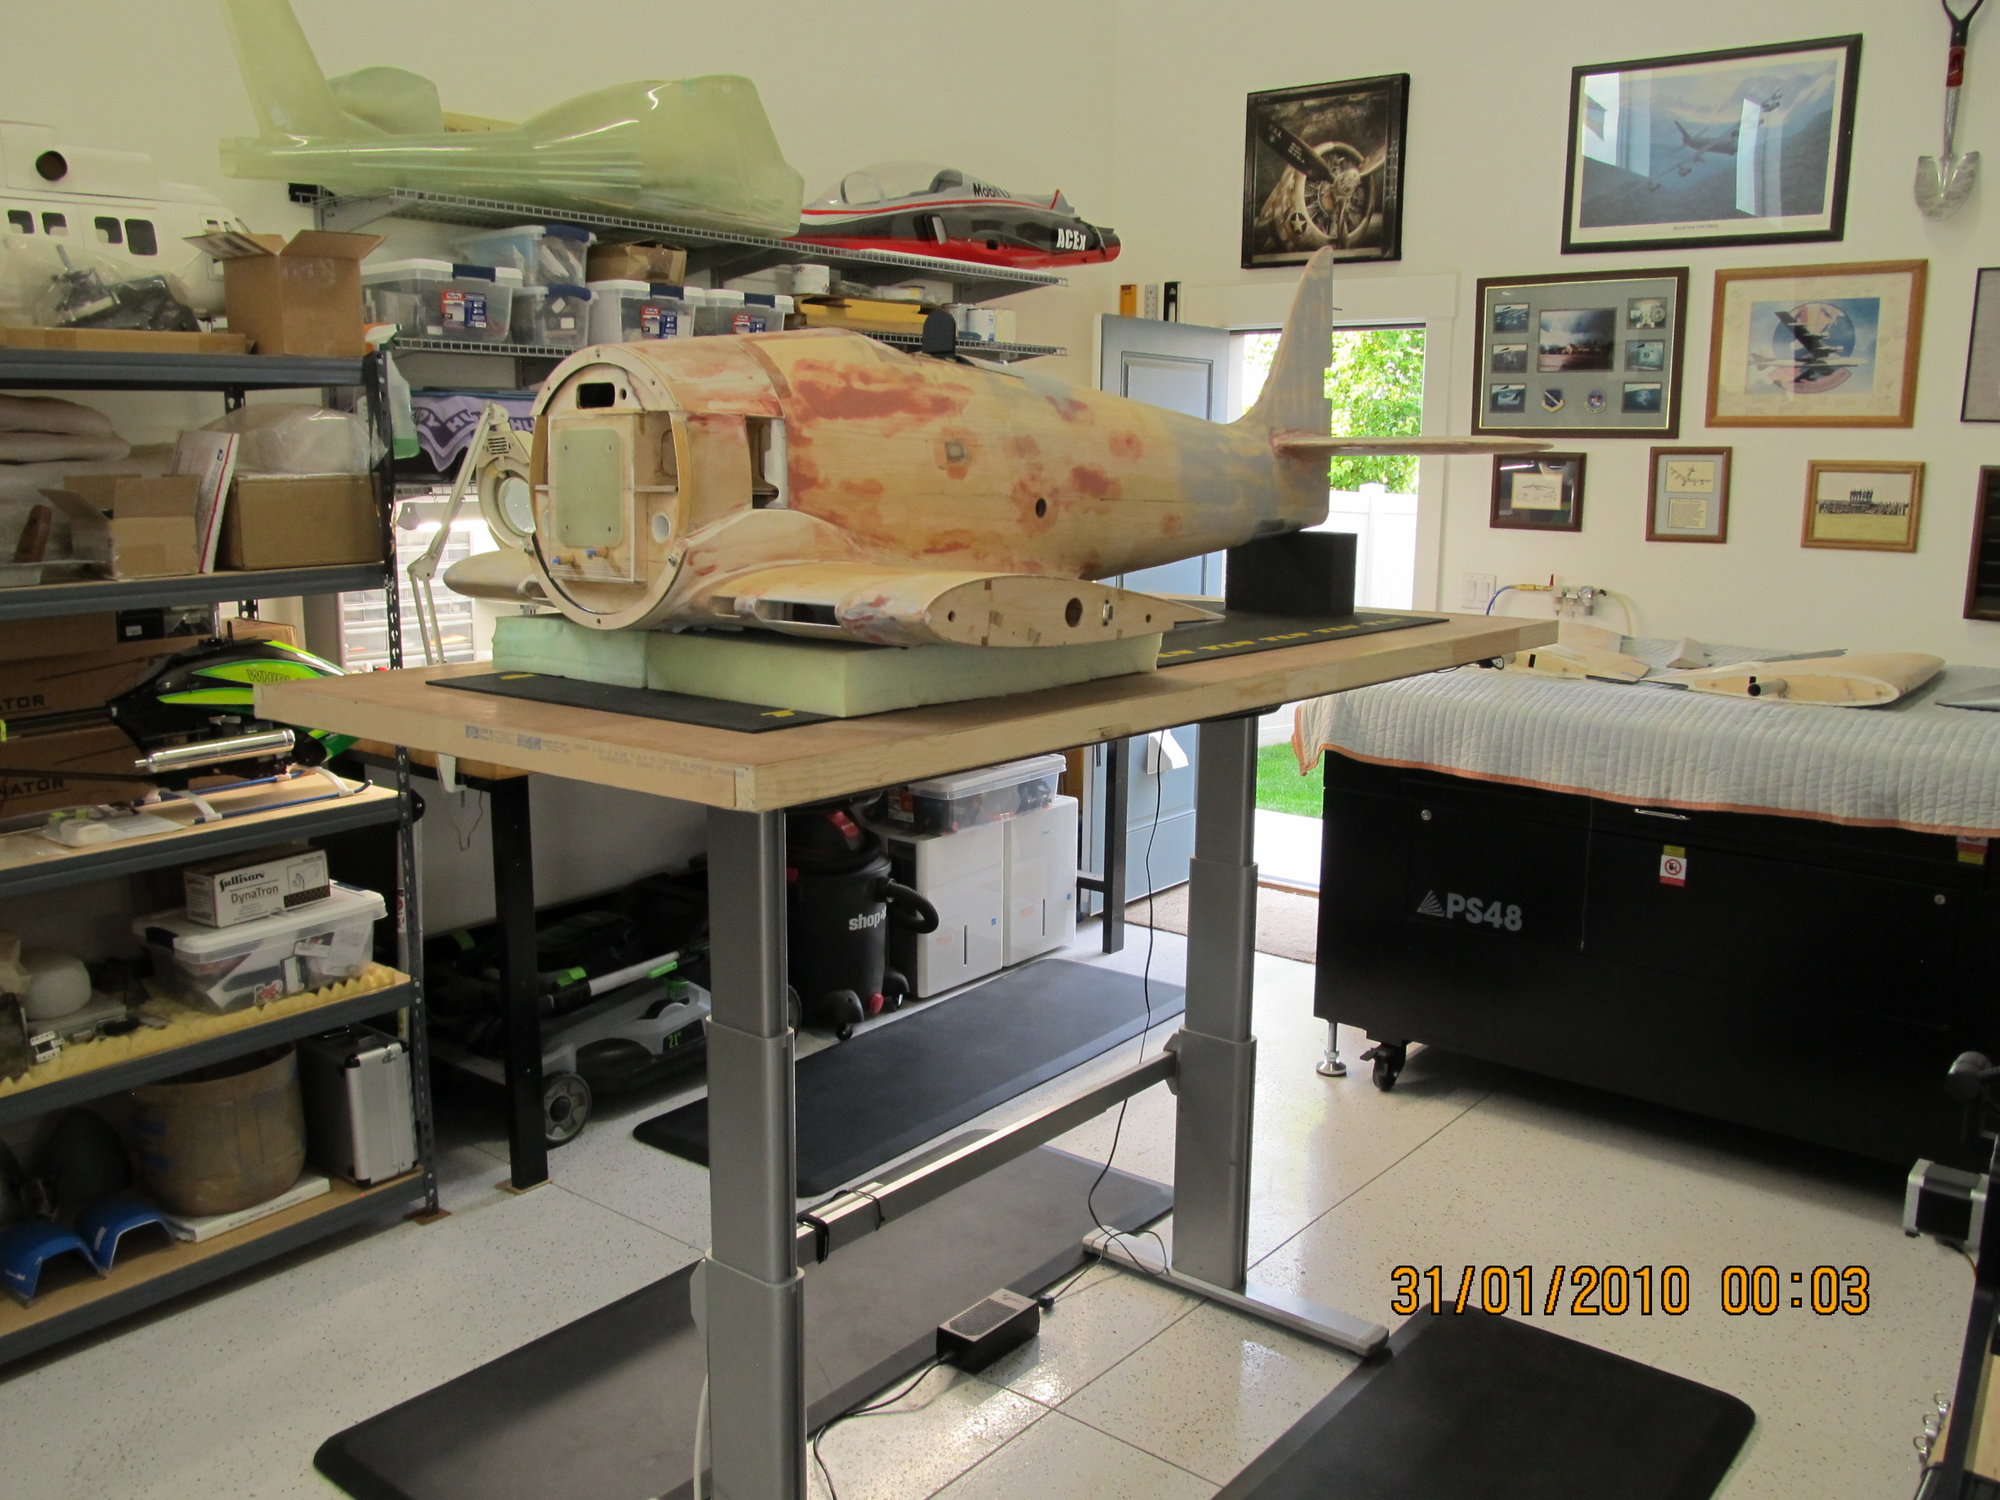
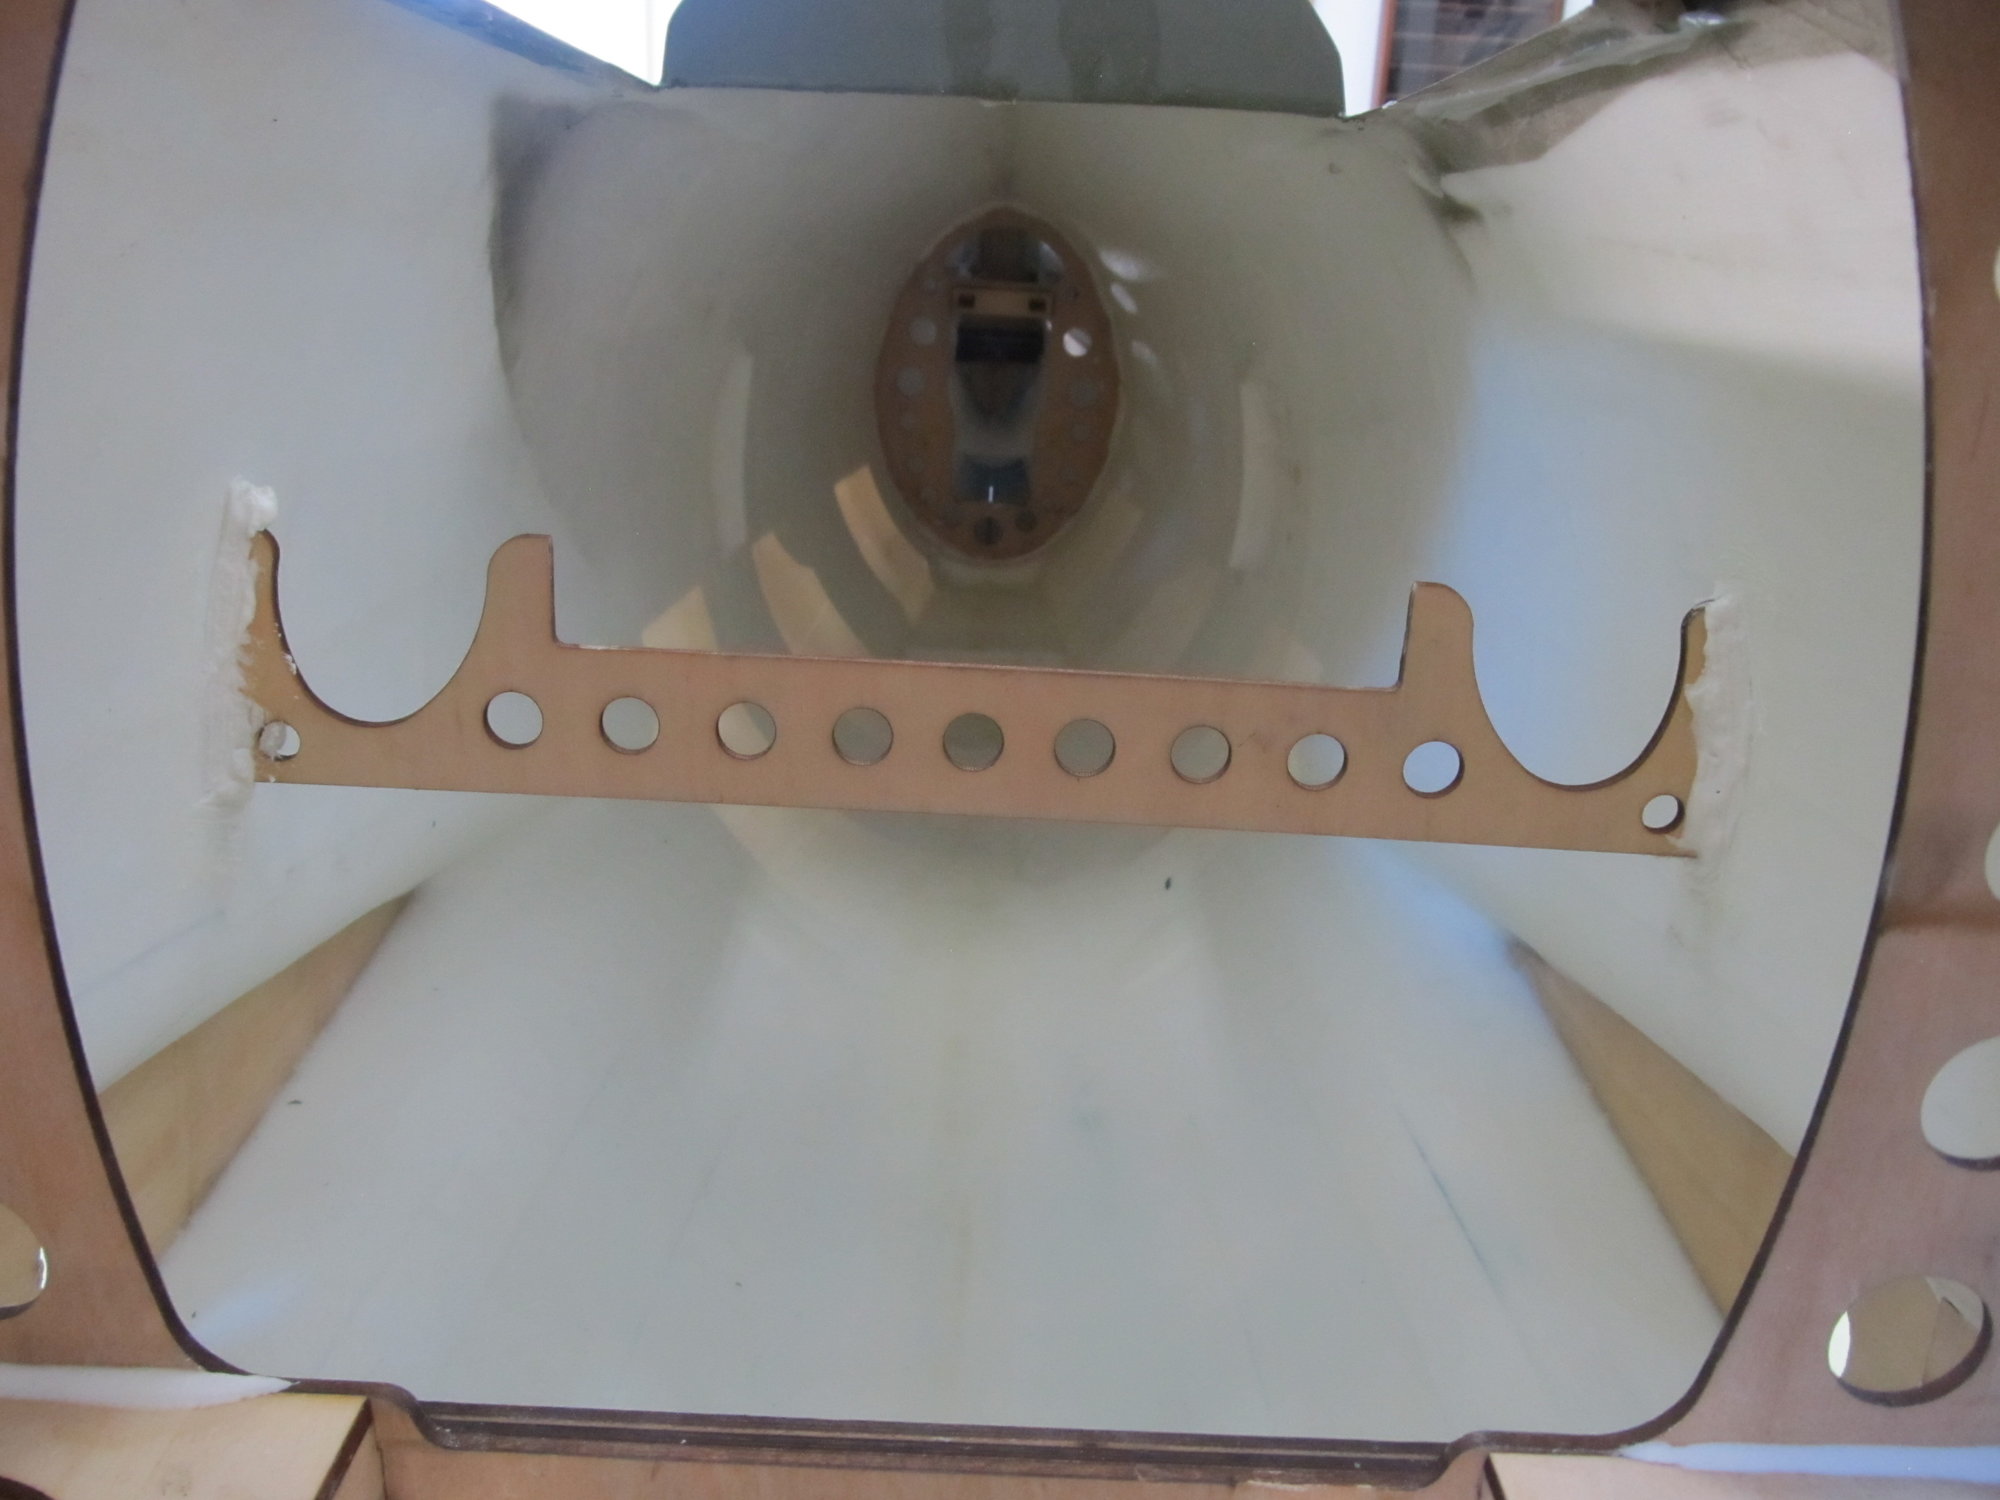
Some thing I couldn't leave be, was the flexible underside. Once the engine is mounted I have to carry the fuse with one hand under the belly behind the wing area and it would oil can sometimes when I picked it up. I was worried about it cracking, so I made 2 half formers and mounted them at 7" and 14" behind the rear wing tube mount.
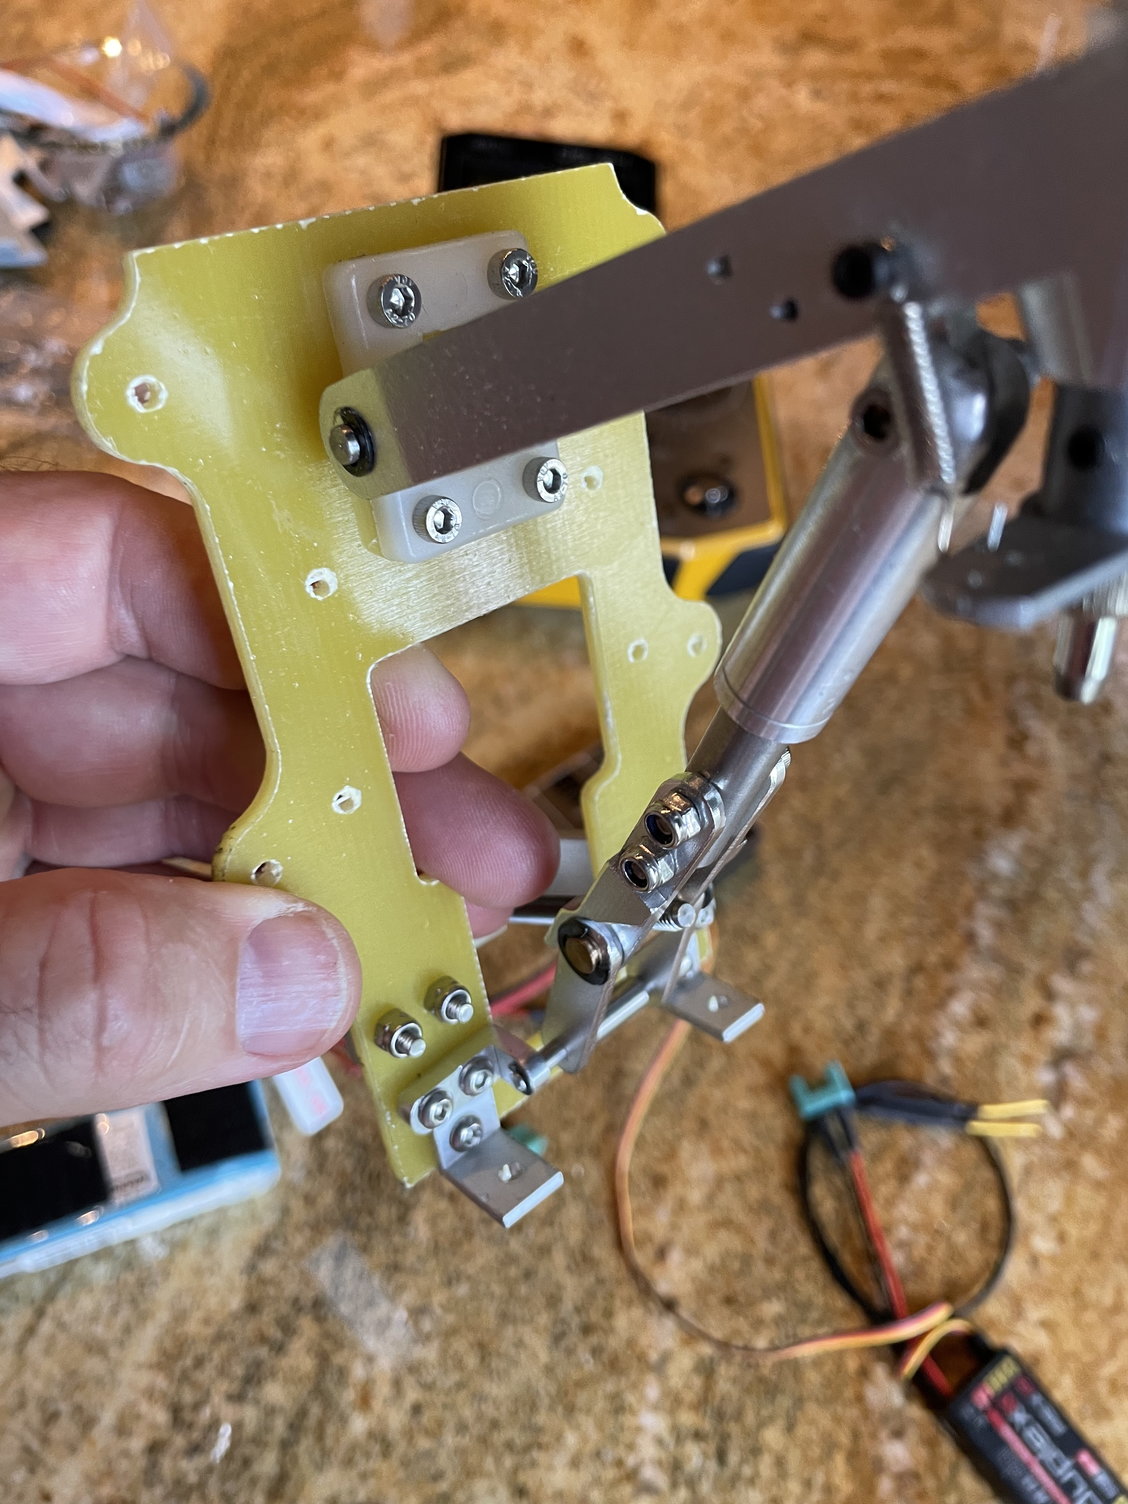
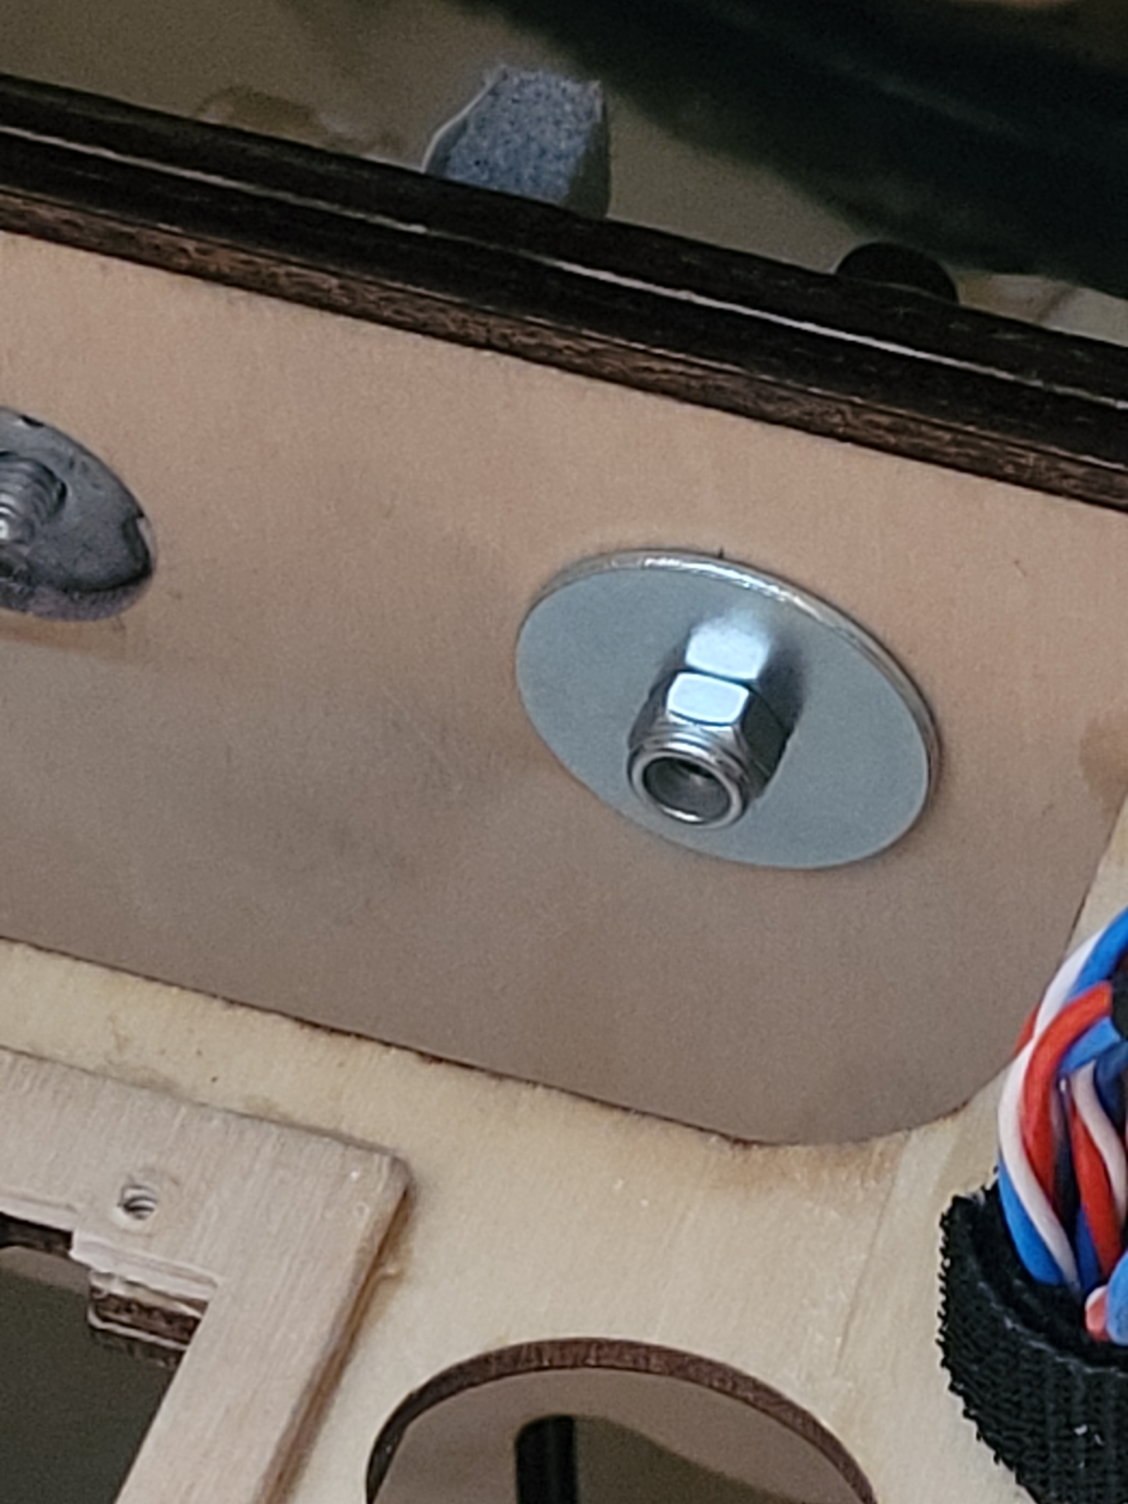
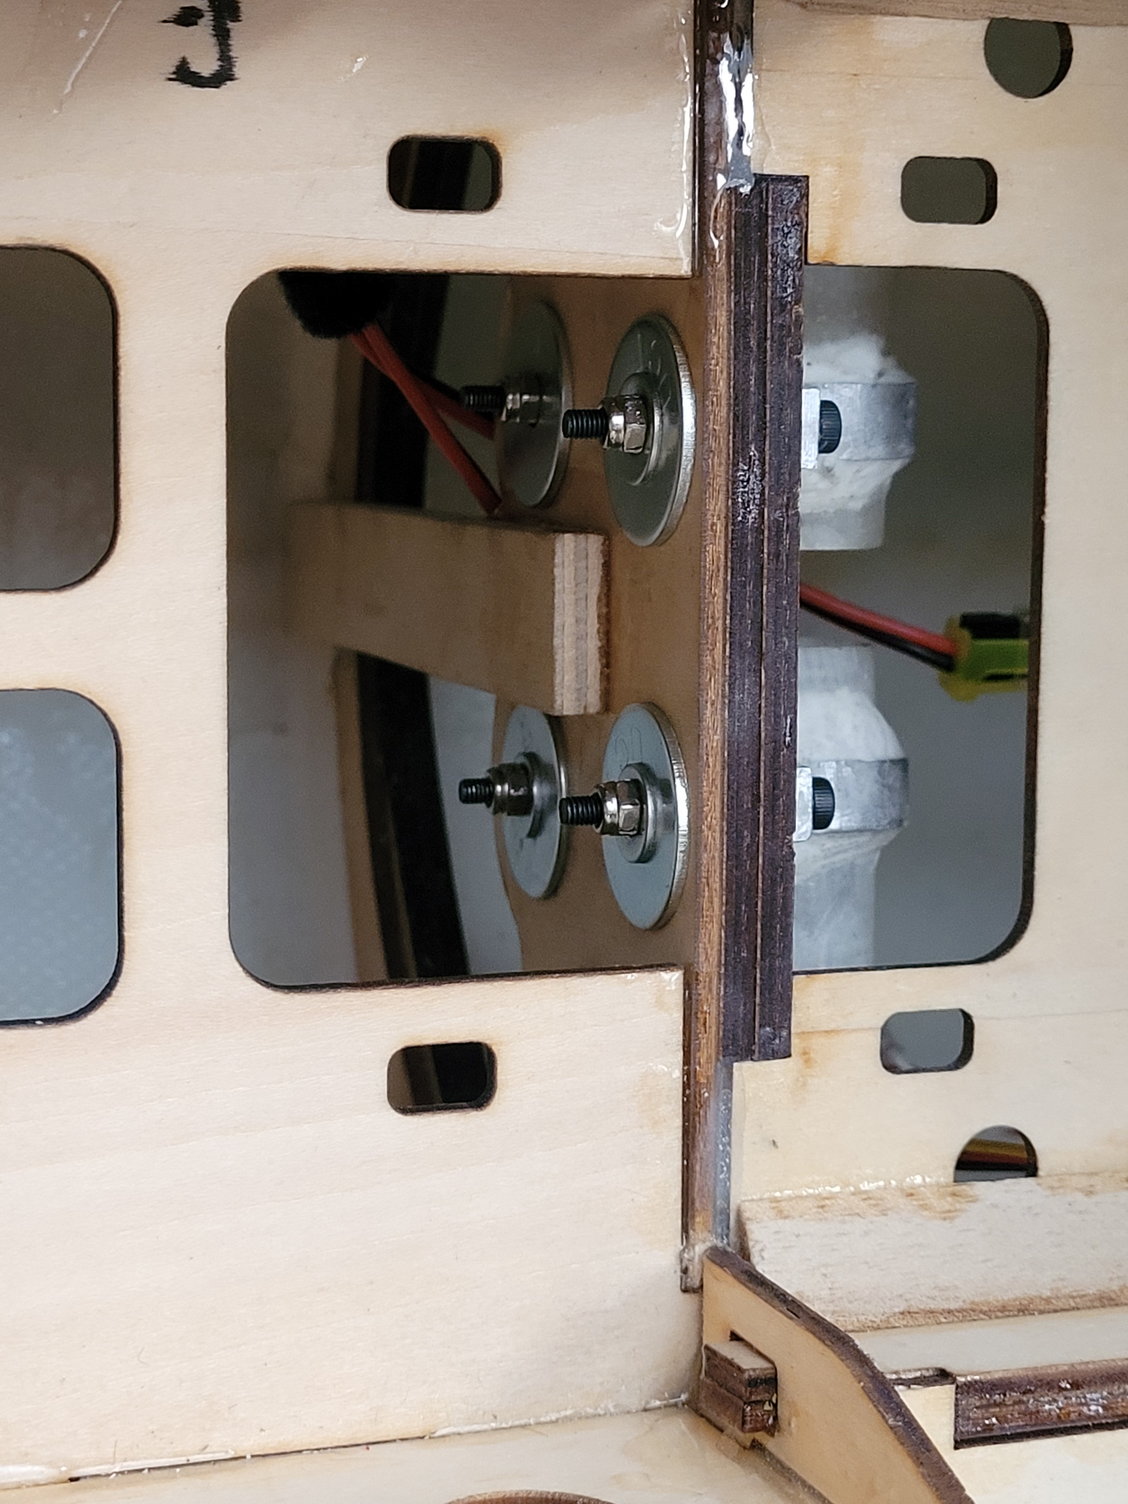
Another issue I found last night, was the wing tube mount screws, front and rear, were loose, which with the questionable plywood on some models, wasn't comforting. I'm replacing the 3mm and 4mm screws with longer ones and putting fender washers and nyloc nuts on them. (I'm probably going to have to remove the fuel tank support in the middle and build it back when I'm done to get at the screws).
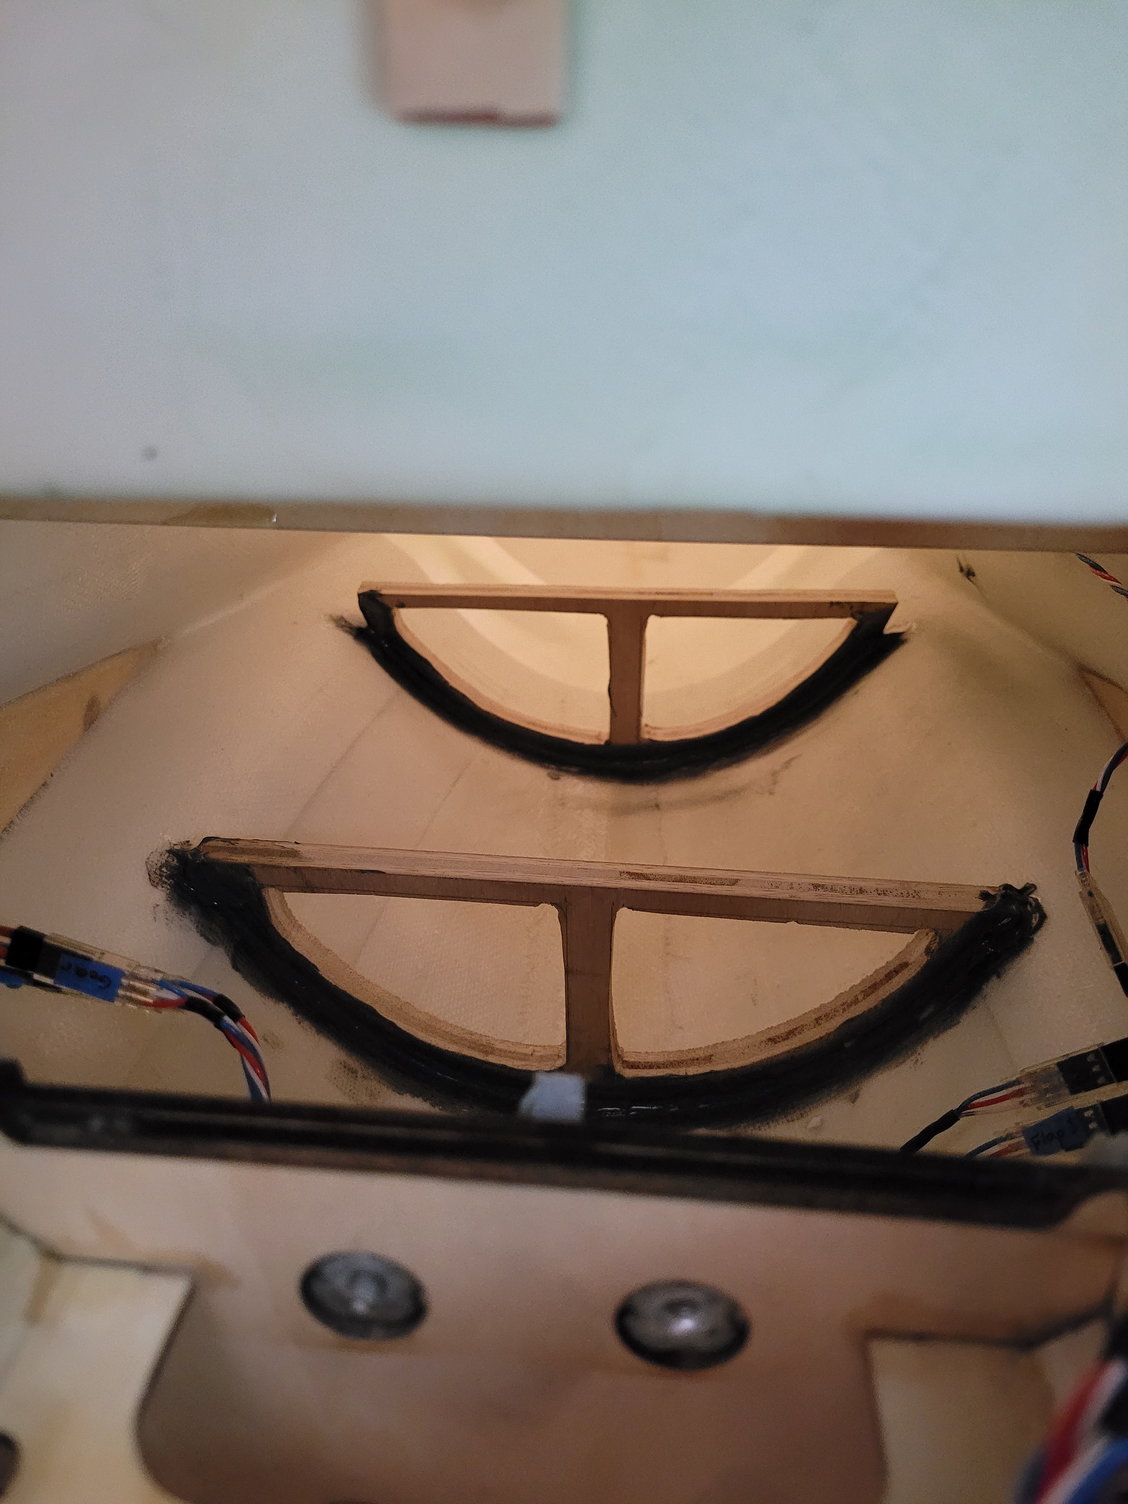
Some thing I couldn't leave be, was the flexible underside. Once the engine is mounted I have to carry the fuse with one hand under the belly behind the wing area and it would oil can sometimes when I picked it up. I was worried about it cracking, so I made 2 half formers and mounted them at 7" and 14" behind the rear wing tube mount.
Another issue I found last night, was the wing tube mount screws, front and rear, were loose, which with the questionable plywood on some models, wasn't comforting. I'm replacing the 3mm and 4mm screws with longer ones and putting fender washers and nyloc nuts on them. (I'm probably going to have to remove the fuel tank support in the middle and build it back when I'm done to get at the screws).
The following users liked this post:
Rick227 (06-21-2022)
06-21-2022, 09:08 AM
#270
Thanx….. I am waiting for a response from them before I proceed any further…..I also noticed the oil canning when moving it around…Anything to help stiffen it would be better…I am using the UMS 150 and now that Tru turn is gone I am trying to find a suitable prop Nut ….I would also like to put a sliding canopy with magnets…but still checking around for rails….
06-21-2022, 12:30 PM
#271
Check with C and H ignition they are making prop hubs for the UMS 150 The guy name is Adrien 561-927-6171 he can also get you another prop Washer. The hole down bolts for my wings I drill a hole through the part that’s coming through and use pin clips after tightening the bolts for extra security...Had I knew this project was going to be like this I would’ve save more money and got a CORF MODEL P47
06-21-2022, 05:50 PM
#272

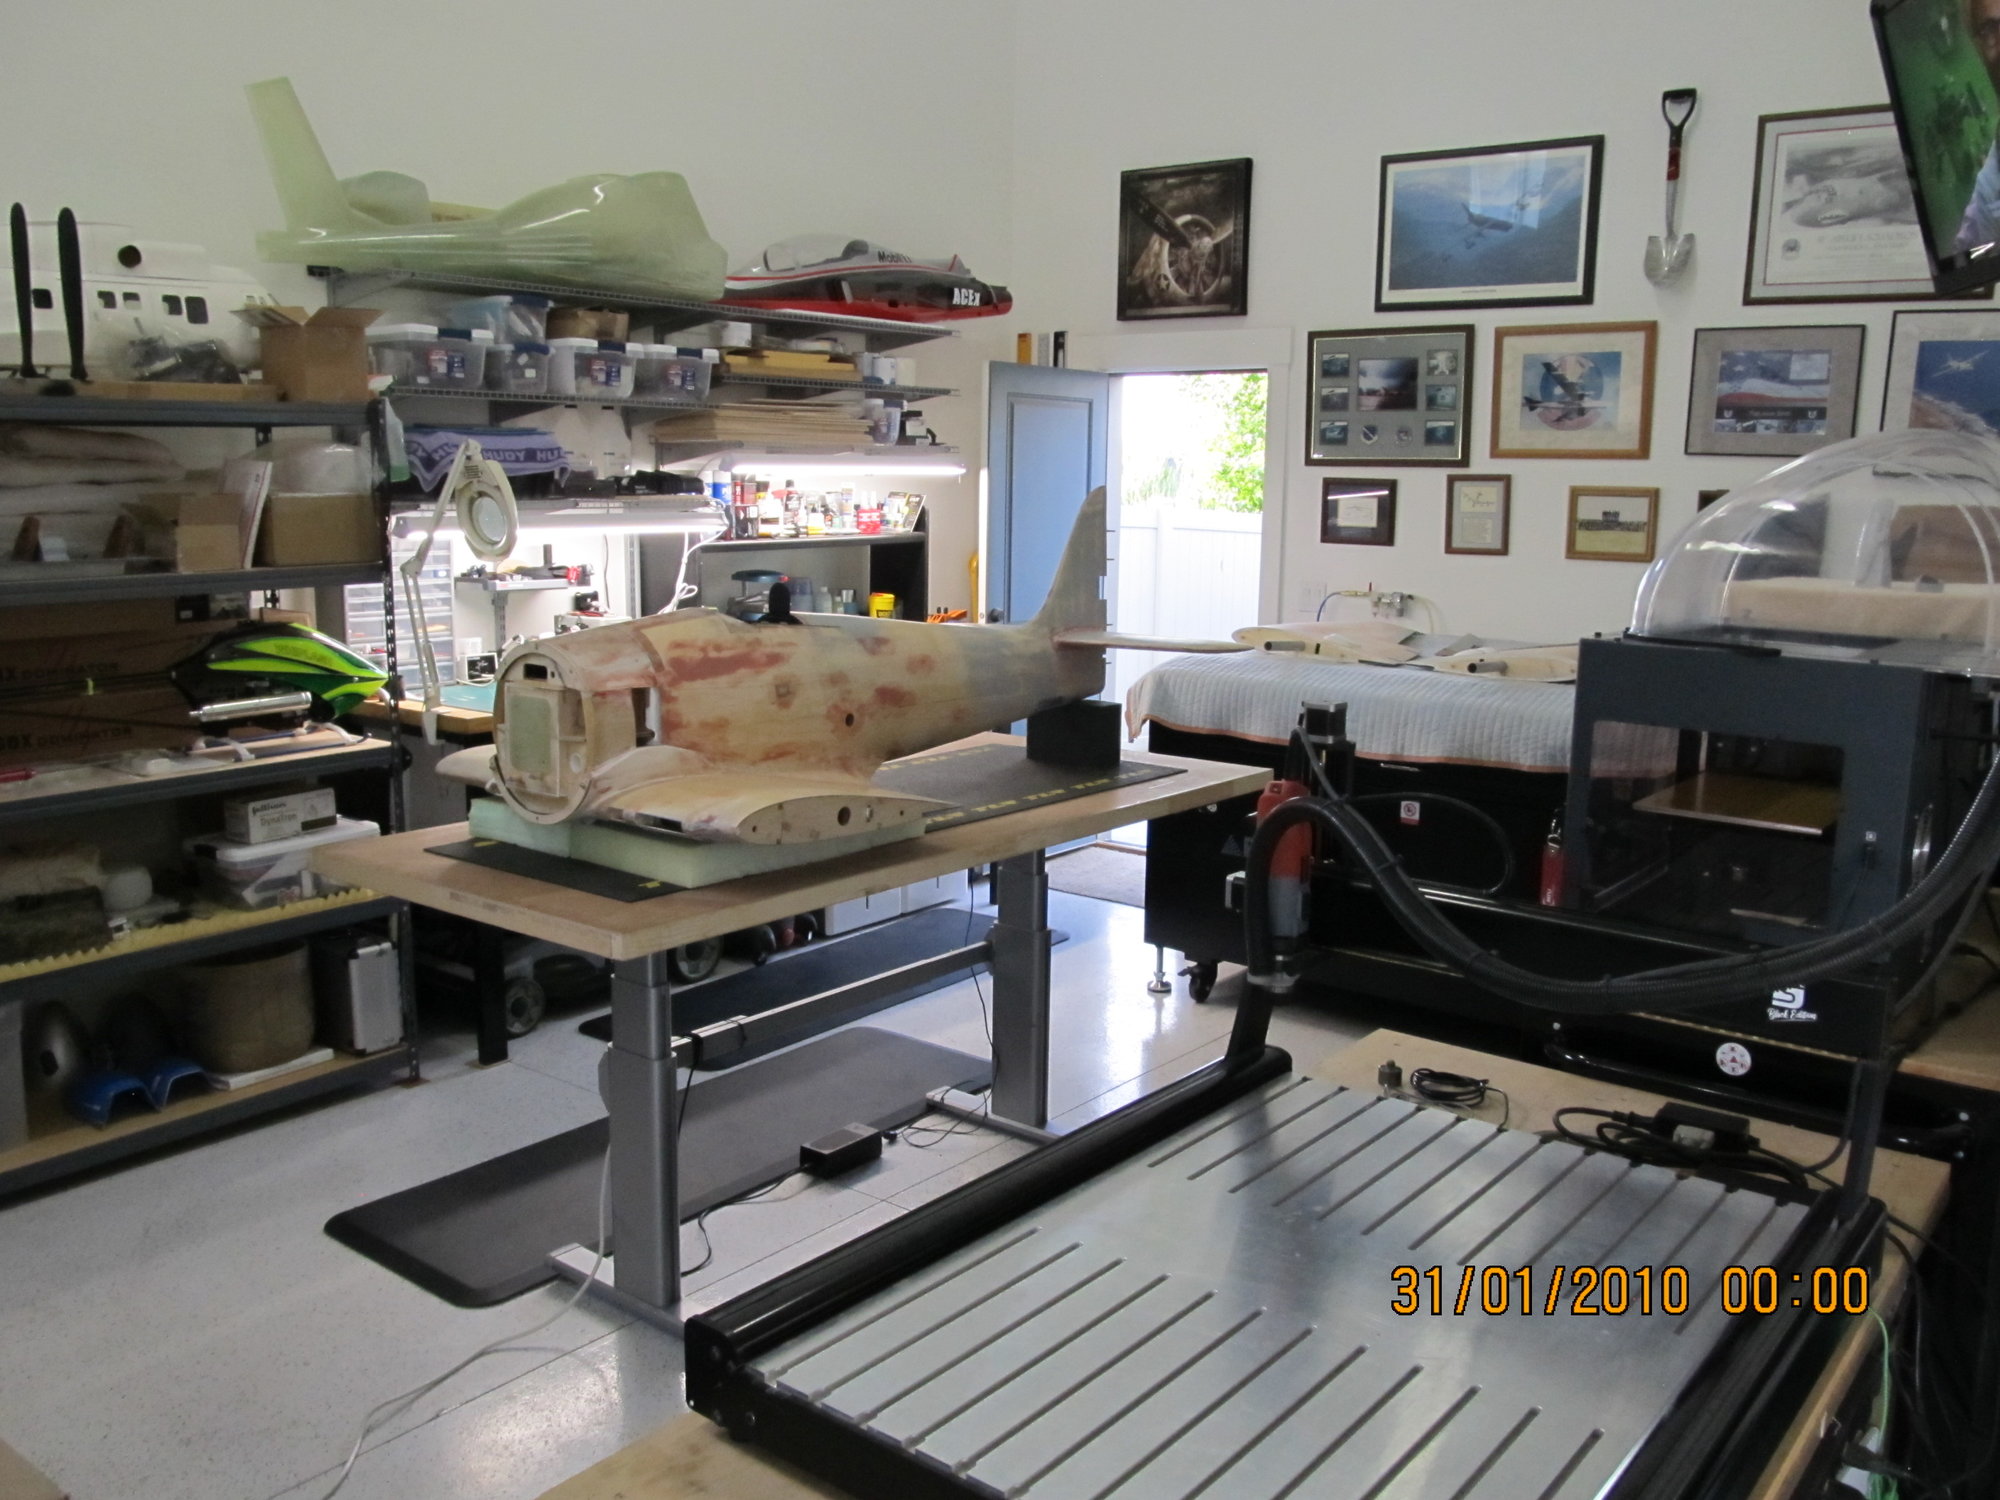
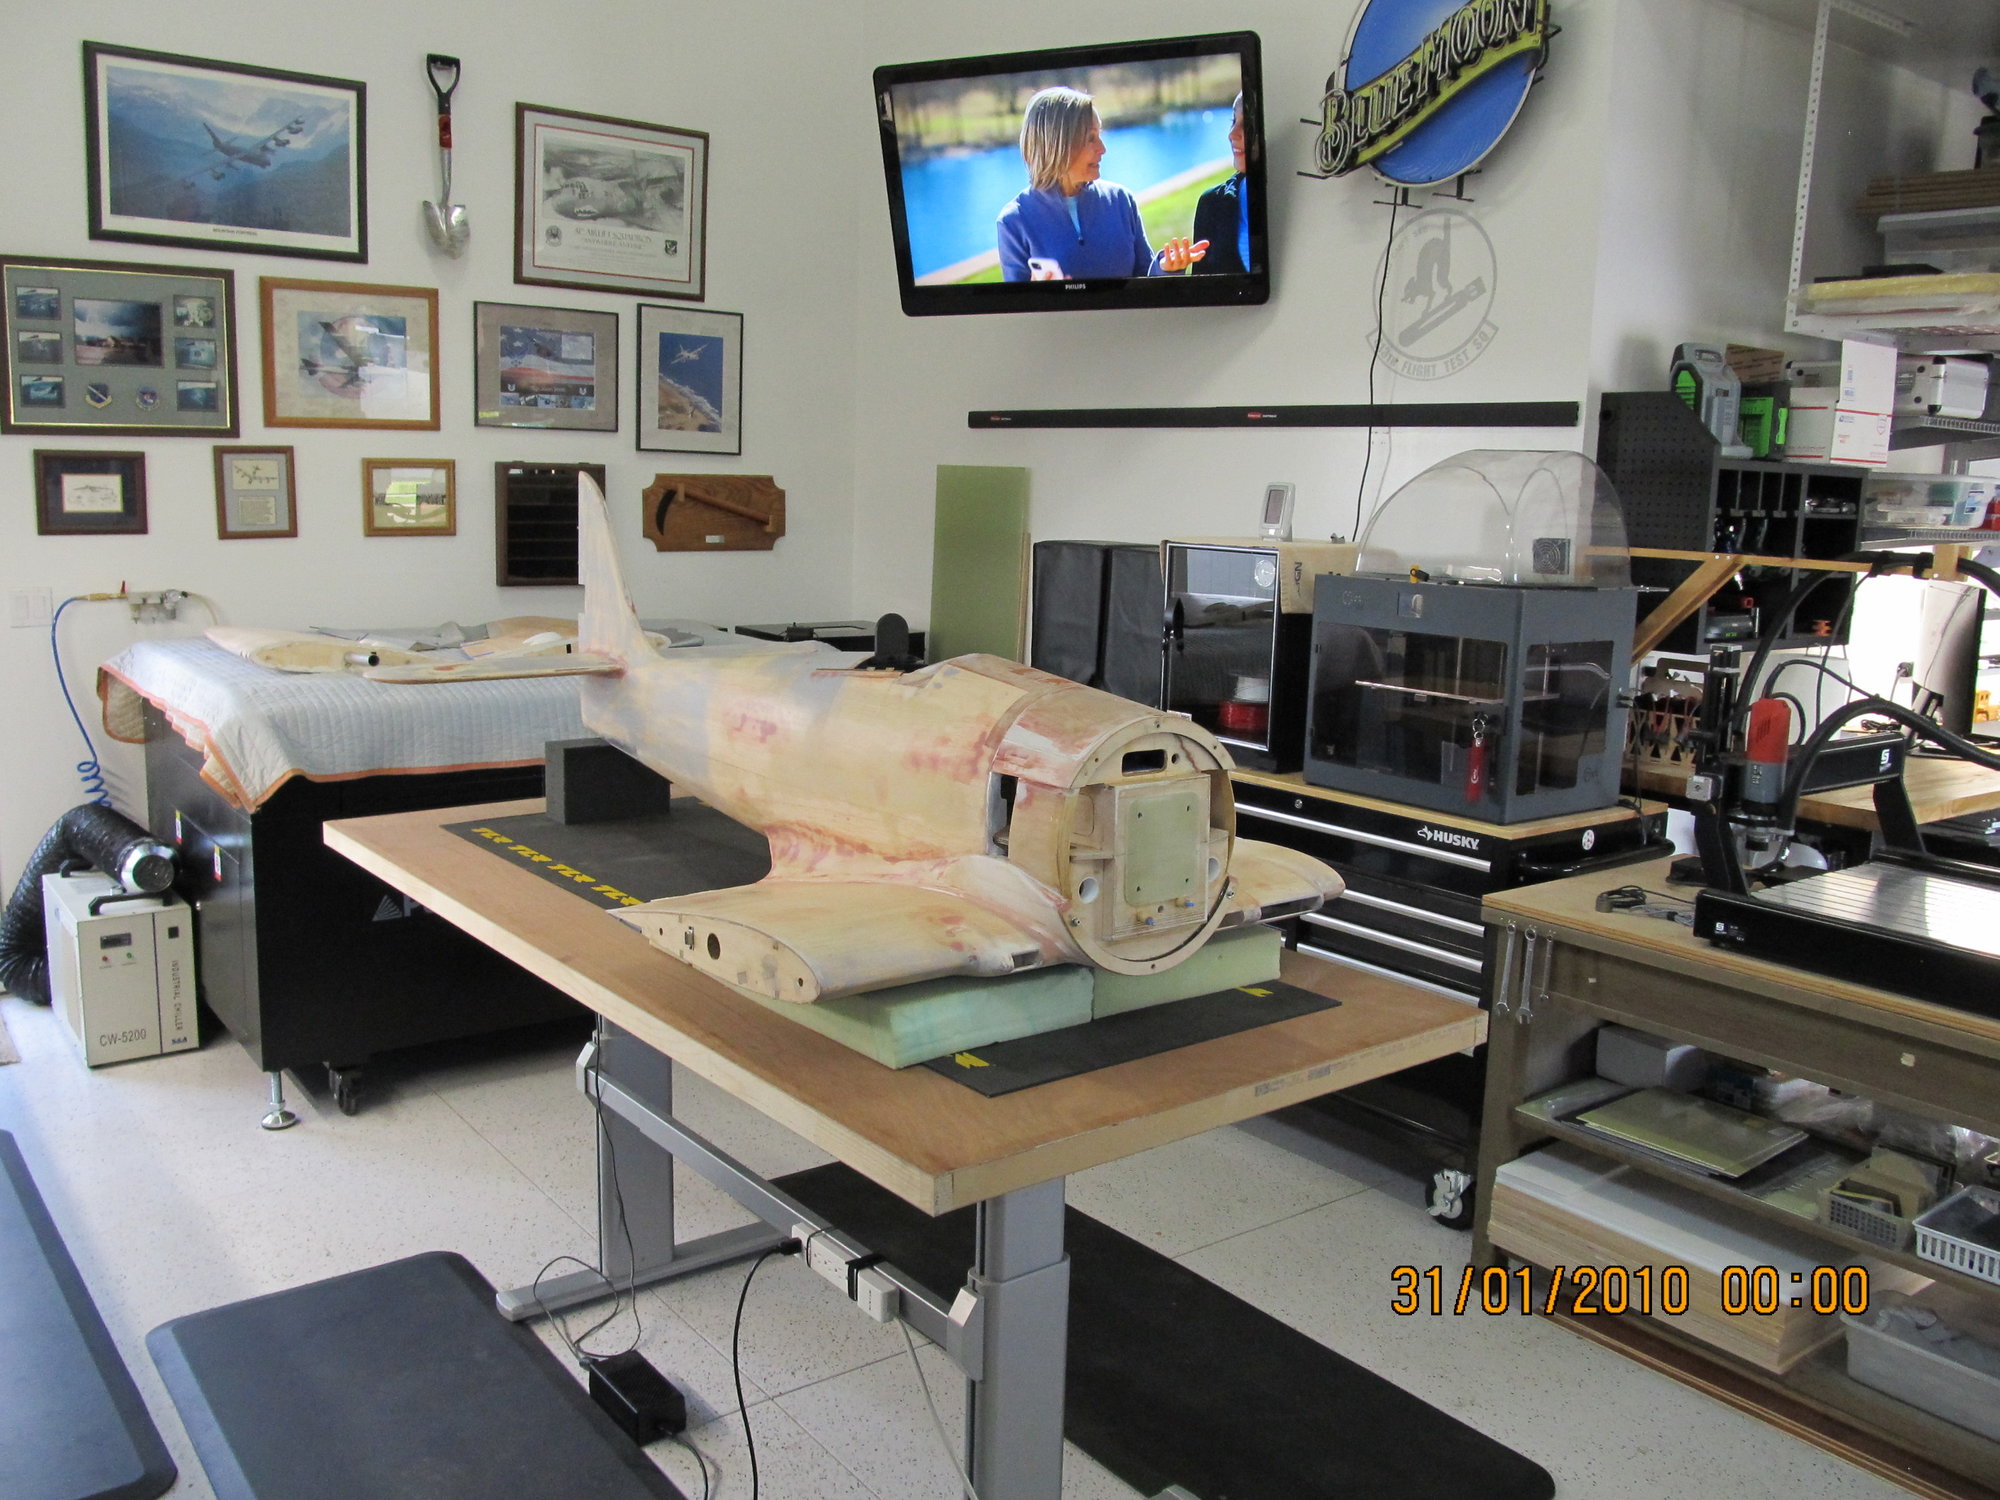
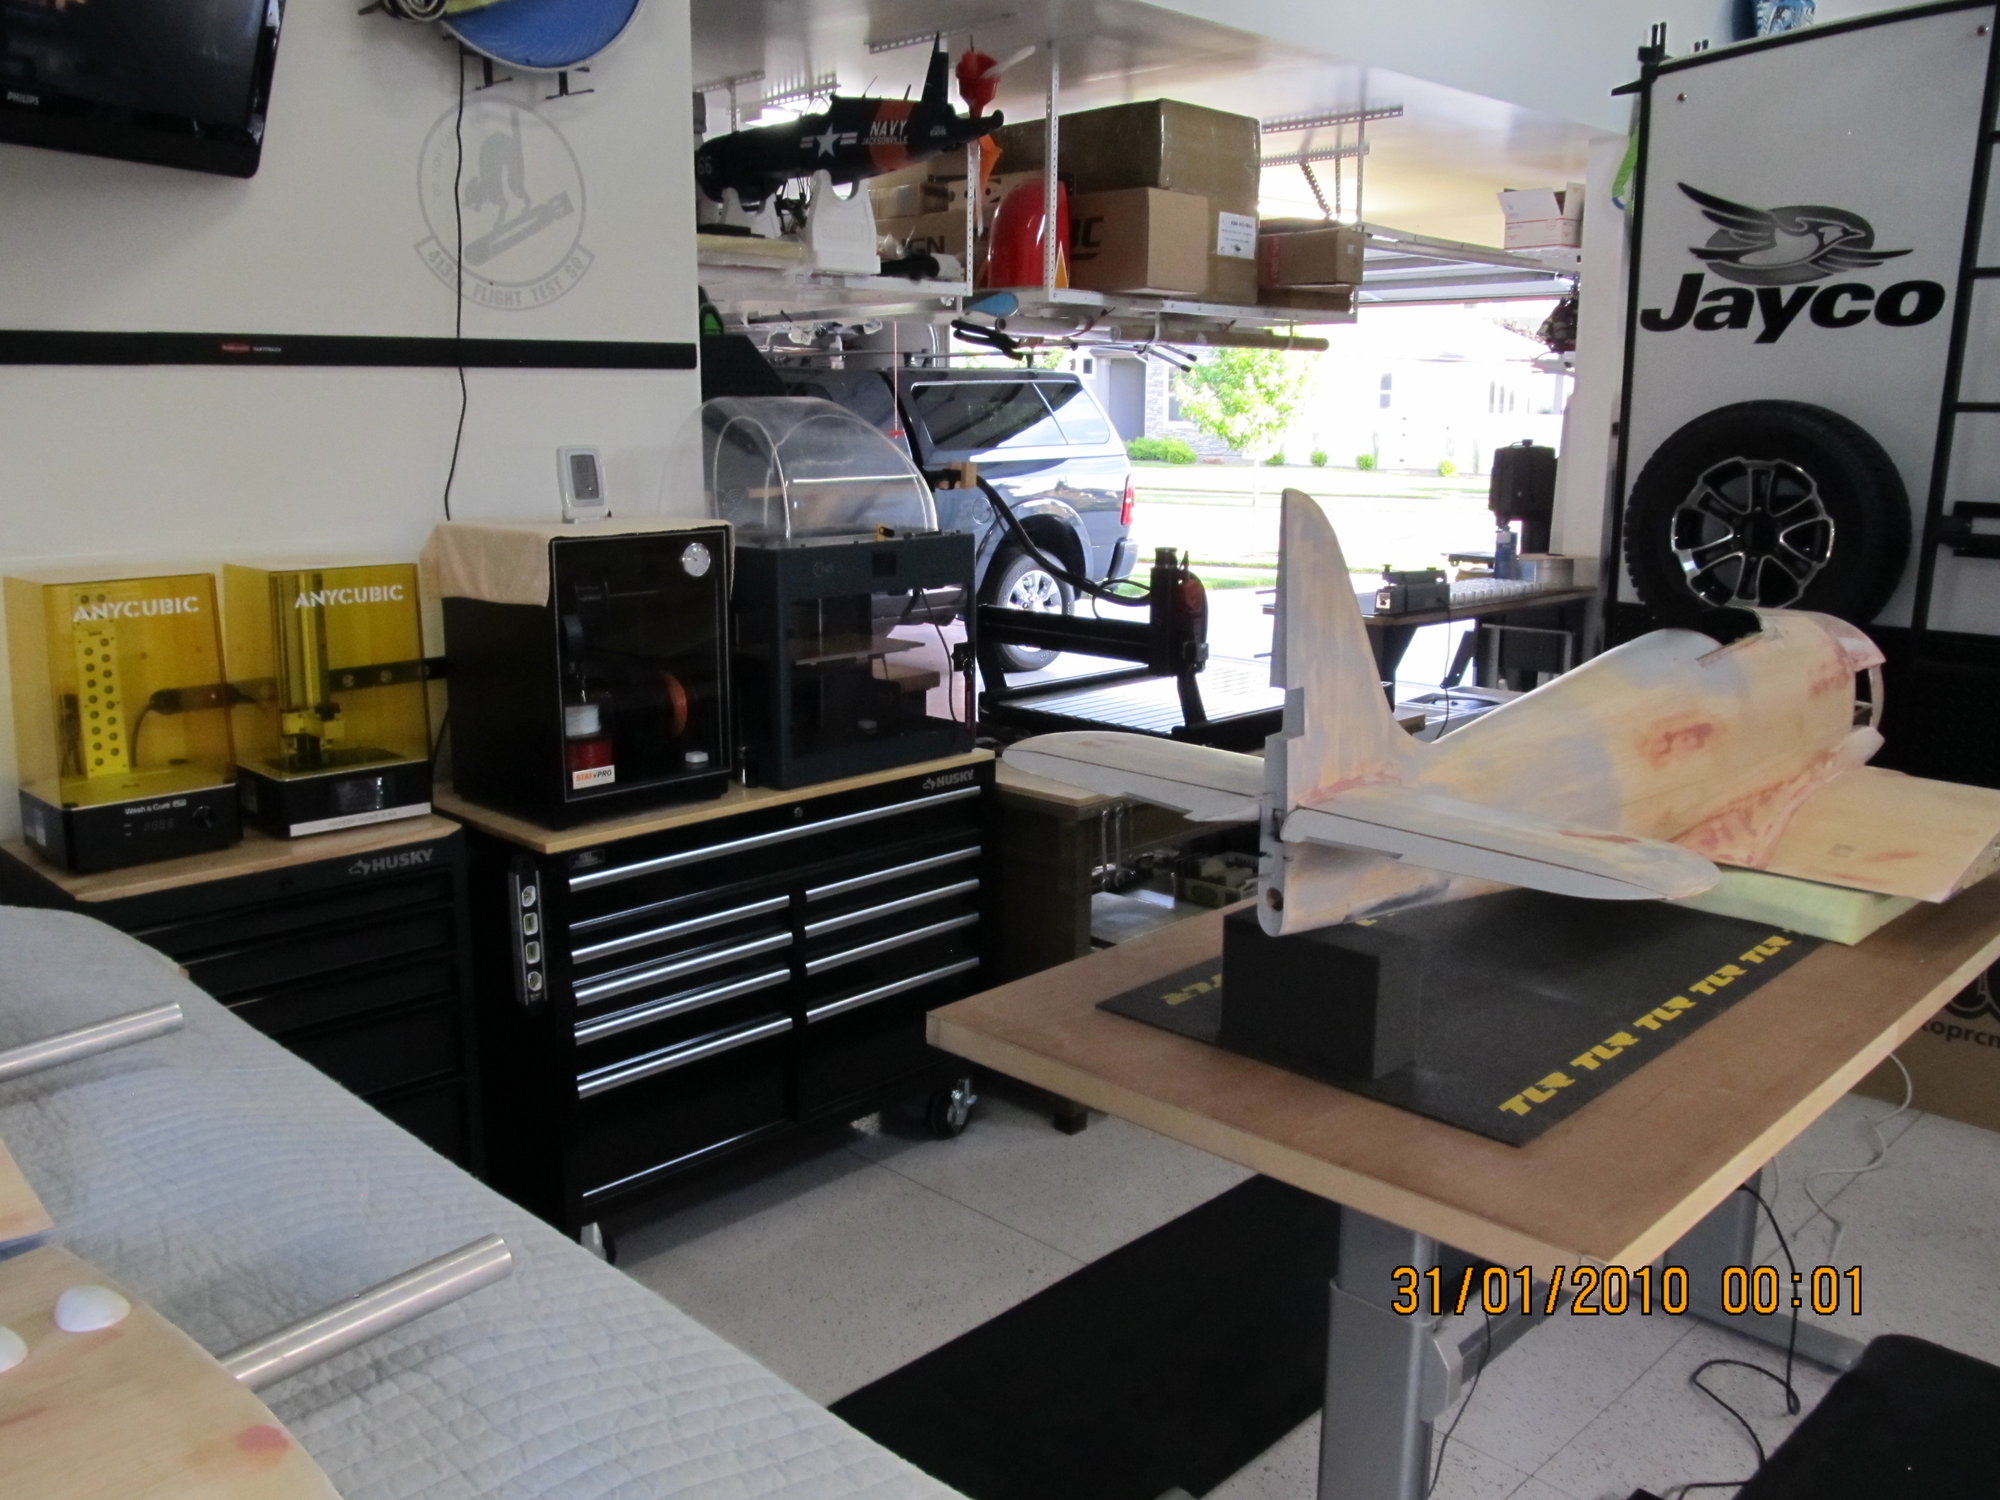
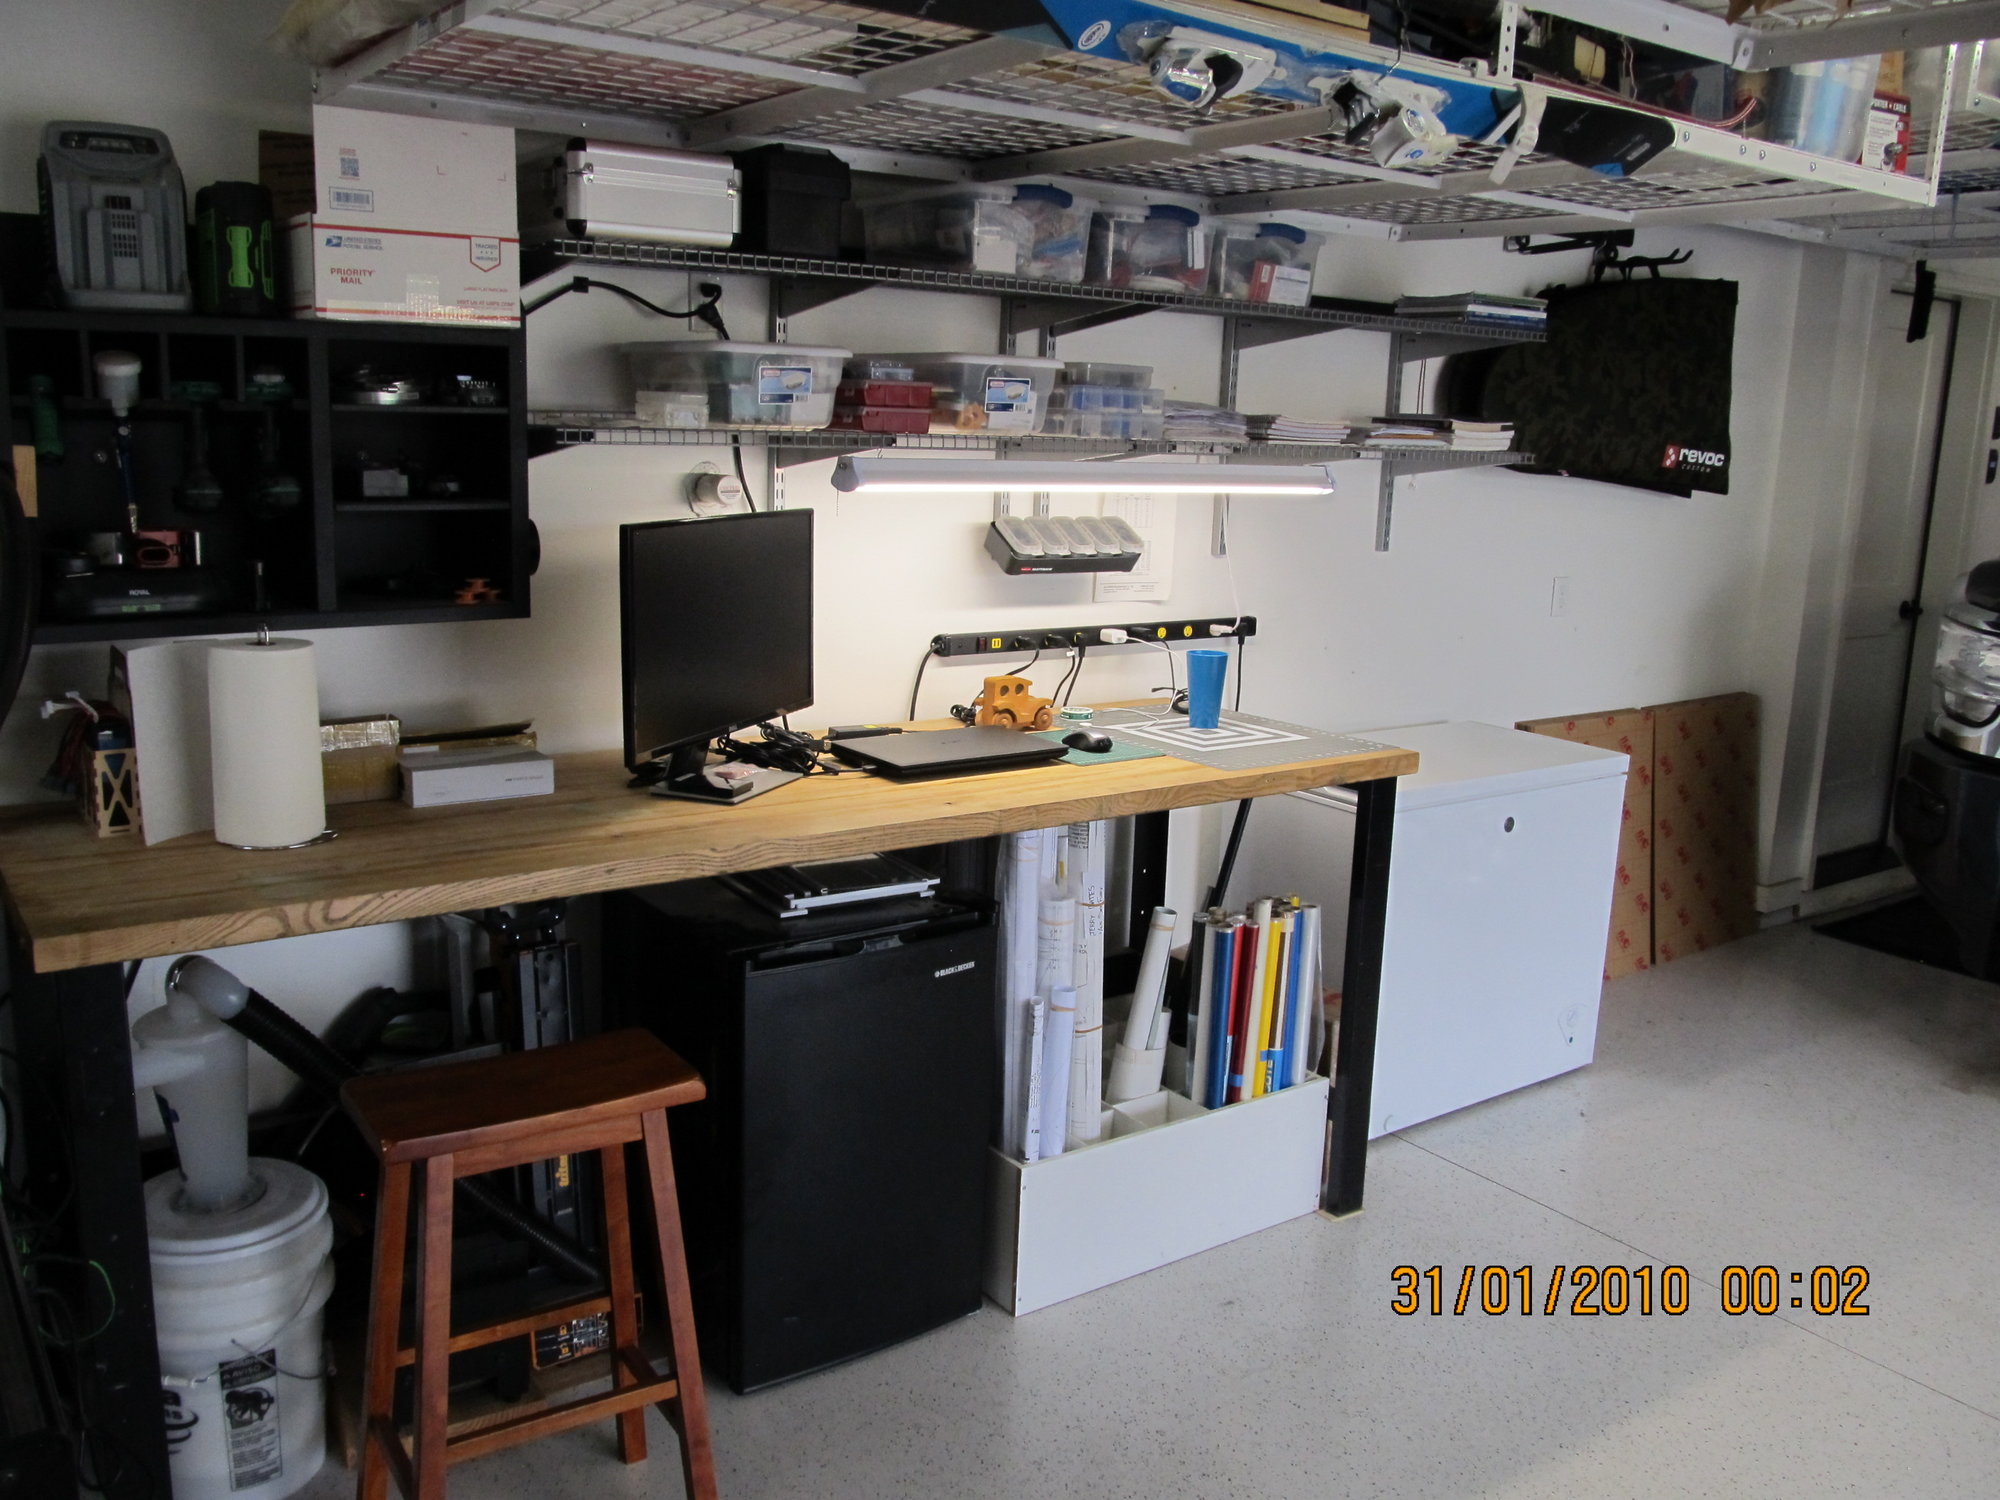
Not sure about the interest, since mine is much father behind all the assemblies here, but time for a small update. I finally got the shop reconfigured and ready to start working on the P-47, a lot more space since I moved the laser cutter to the back wall. Actually, a lot more space since the previous configuration pictured! Here are a couple pictures of the reconfigured shop layout, the JB Sea Fury is not part of this build, just was on the bench when I took the pictures. Please pay no attention to the time and date stamp on the photos, I need to change out the internal battery on the camera, these are current!

The 8025/150 is currently back at Neu Motors while they sort out the reason "why" the prop adapter will not fit when the output shaft screws are tight. We tried a couple different sets of Socket Head Cap Screws and still I could not install the prop adapter when the Screws are fully tight. If they can't figure it out, they will send me a new motor to replace this one. No big deal, I have a lot of other things to work on.
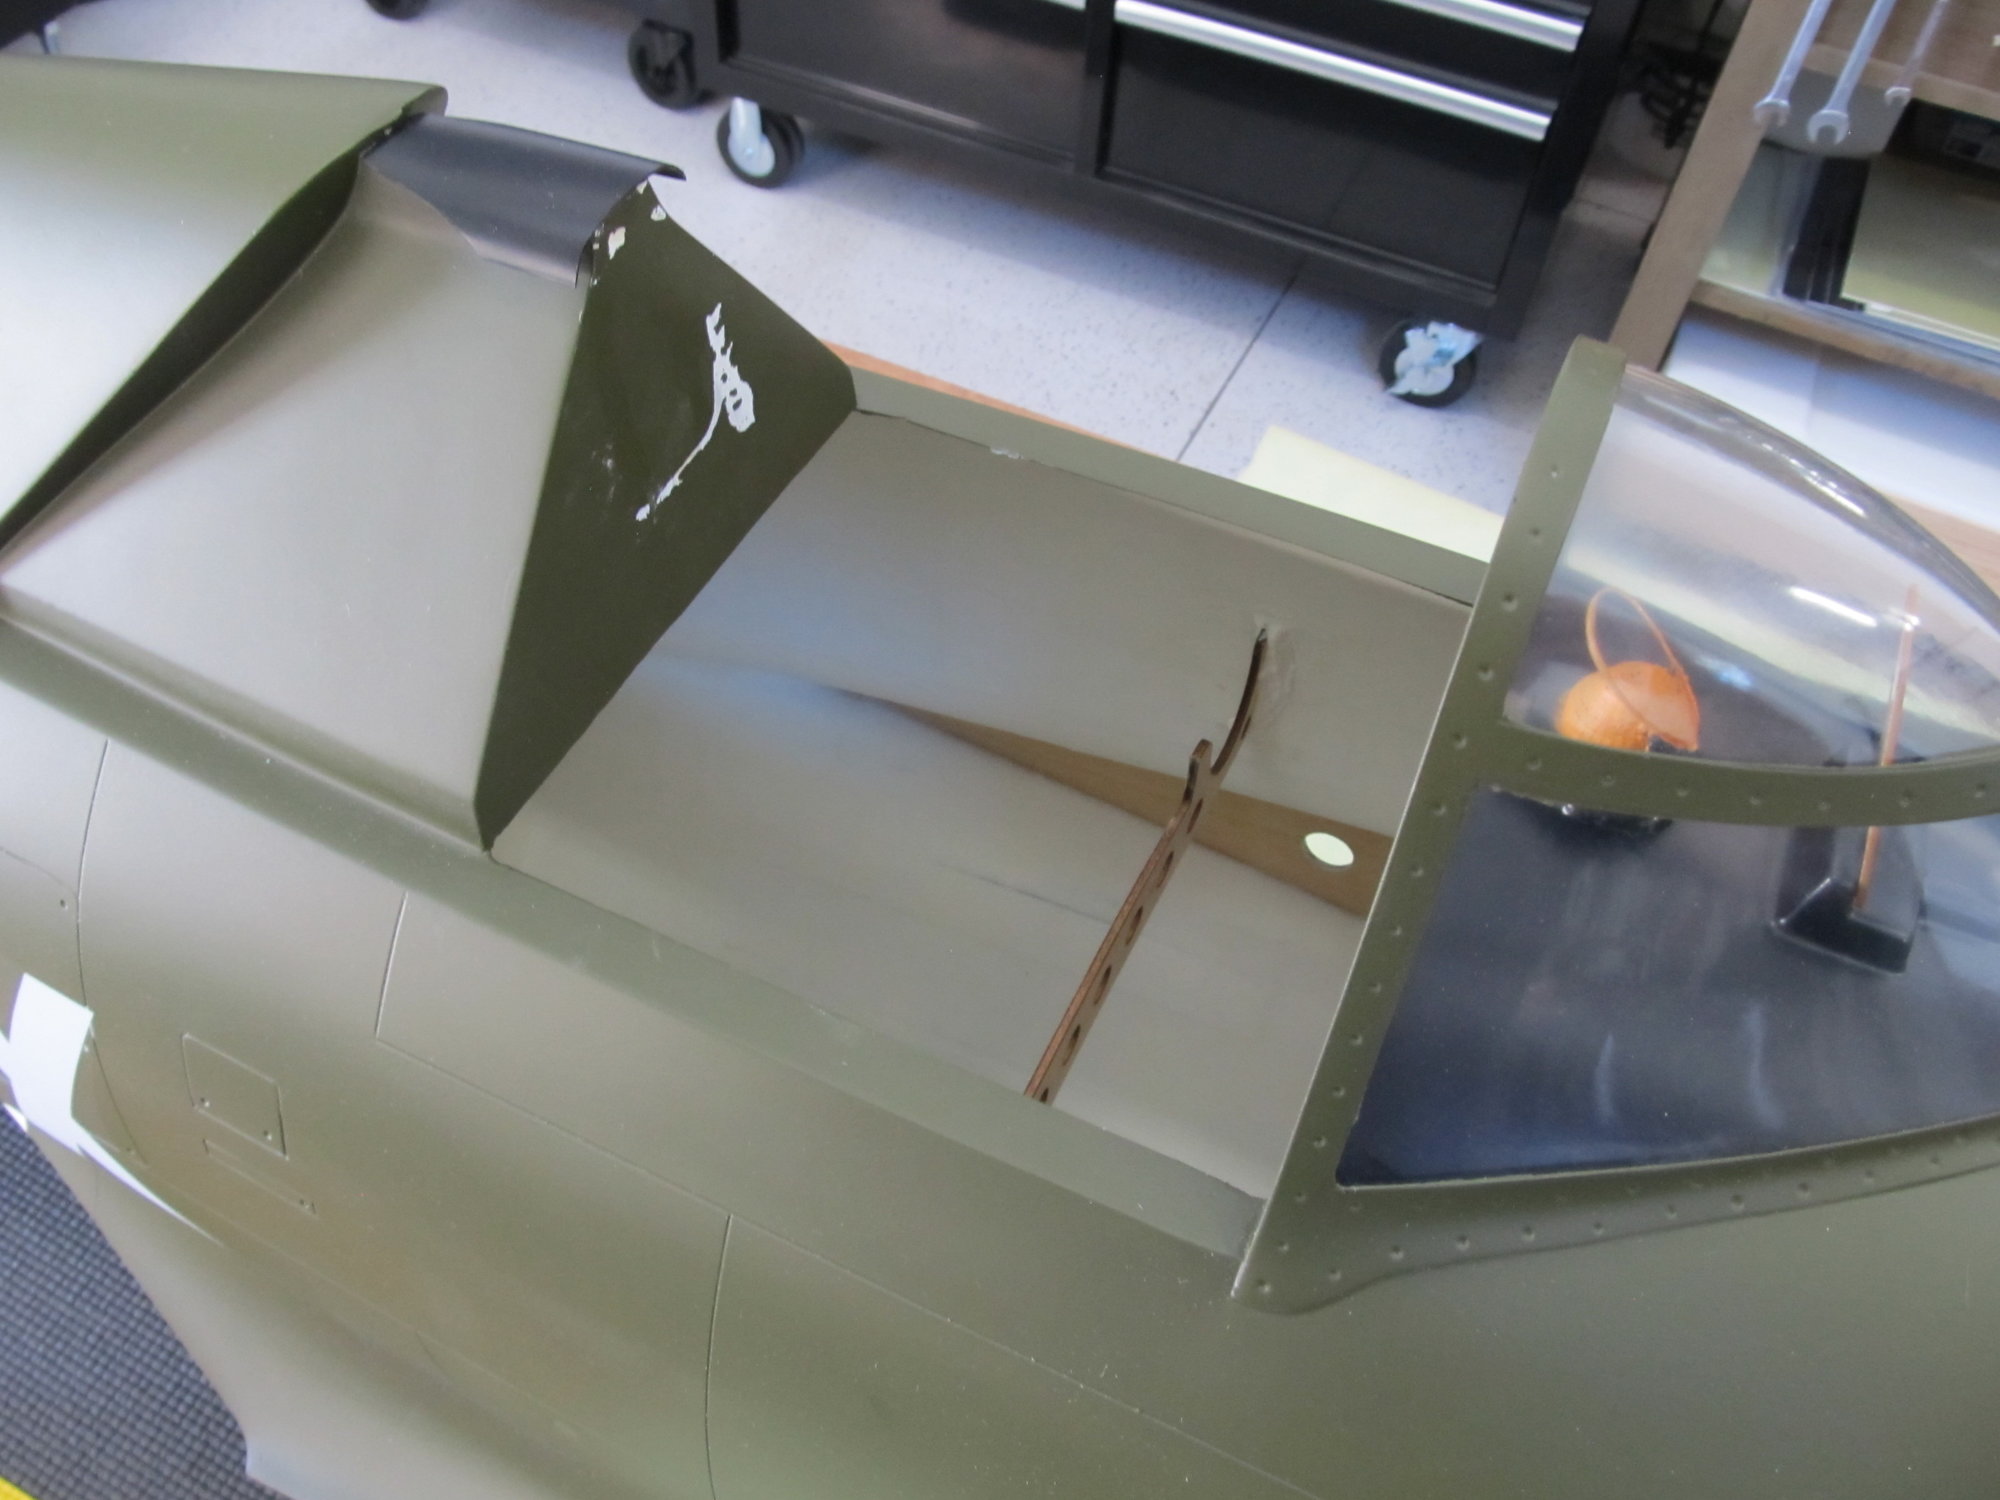
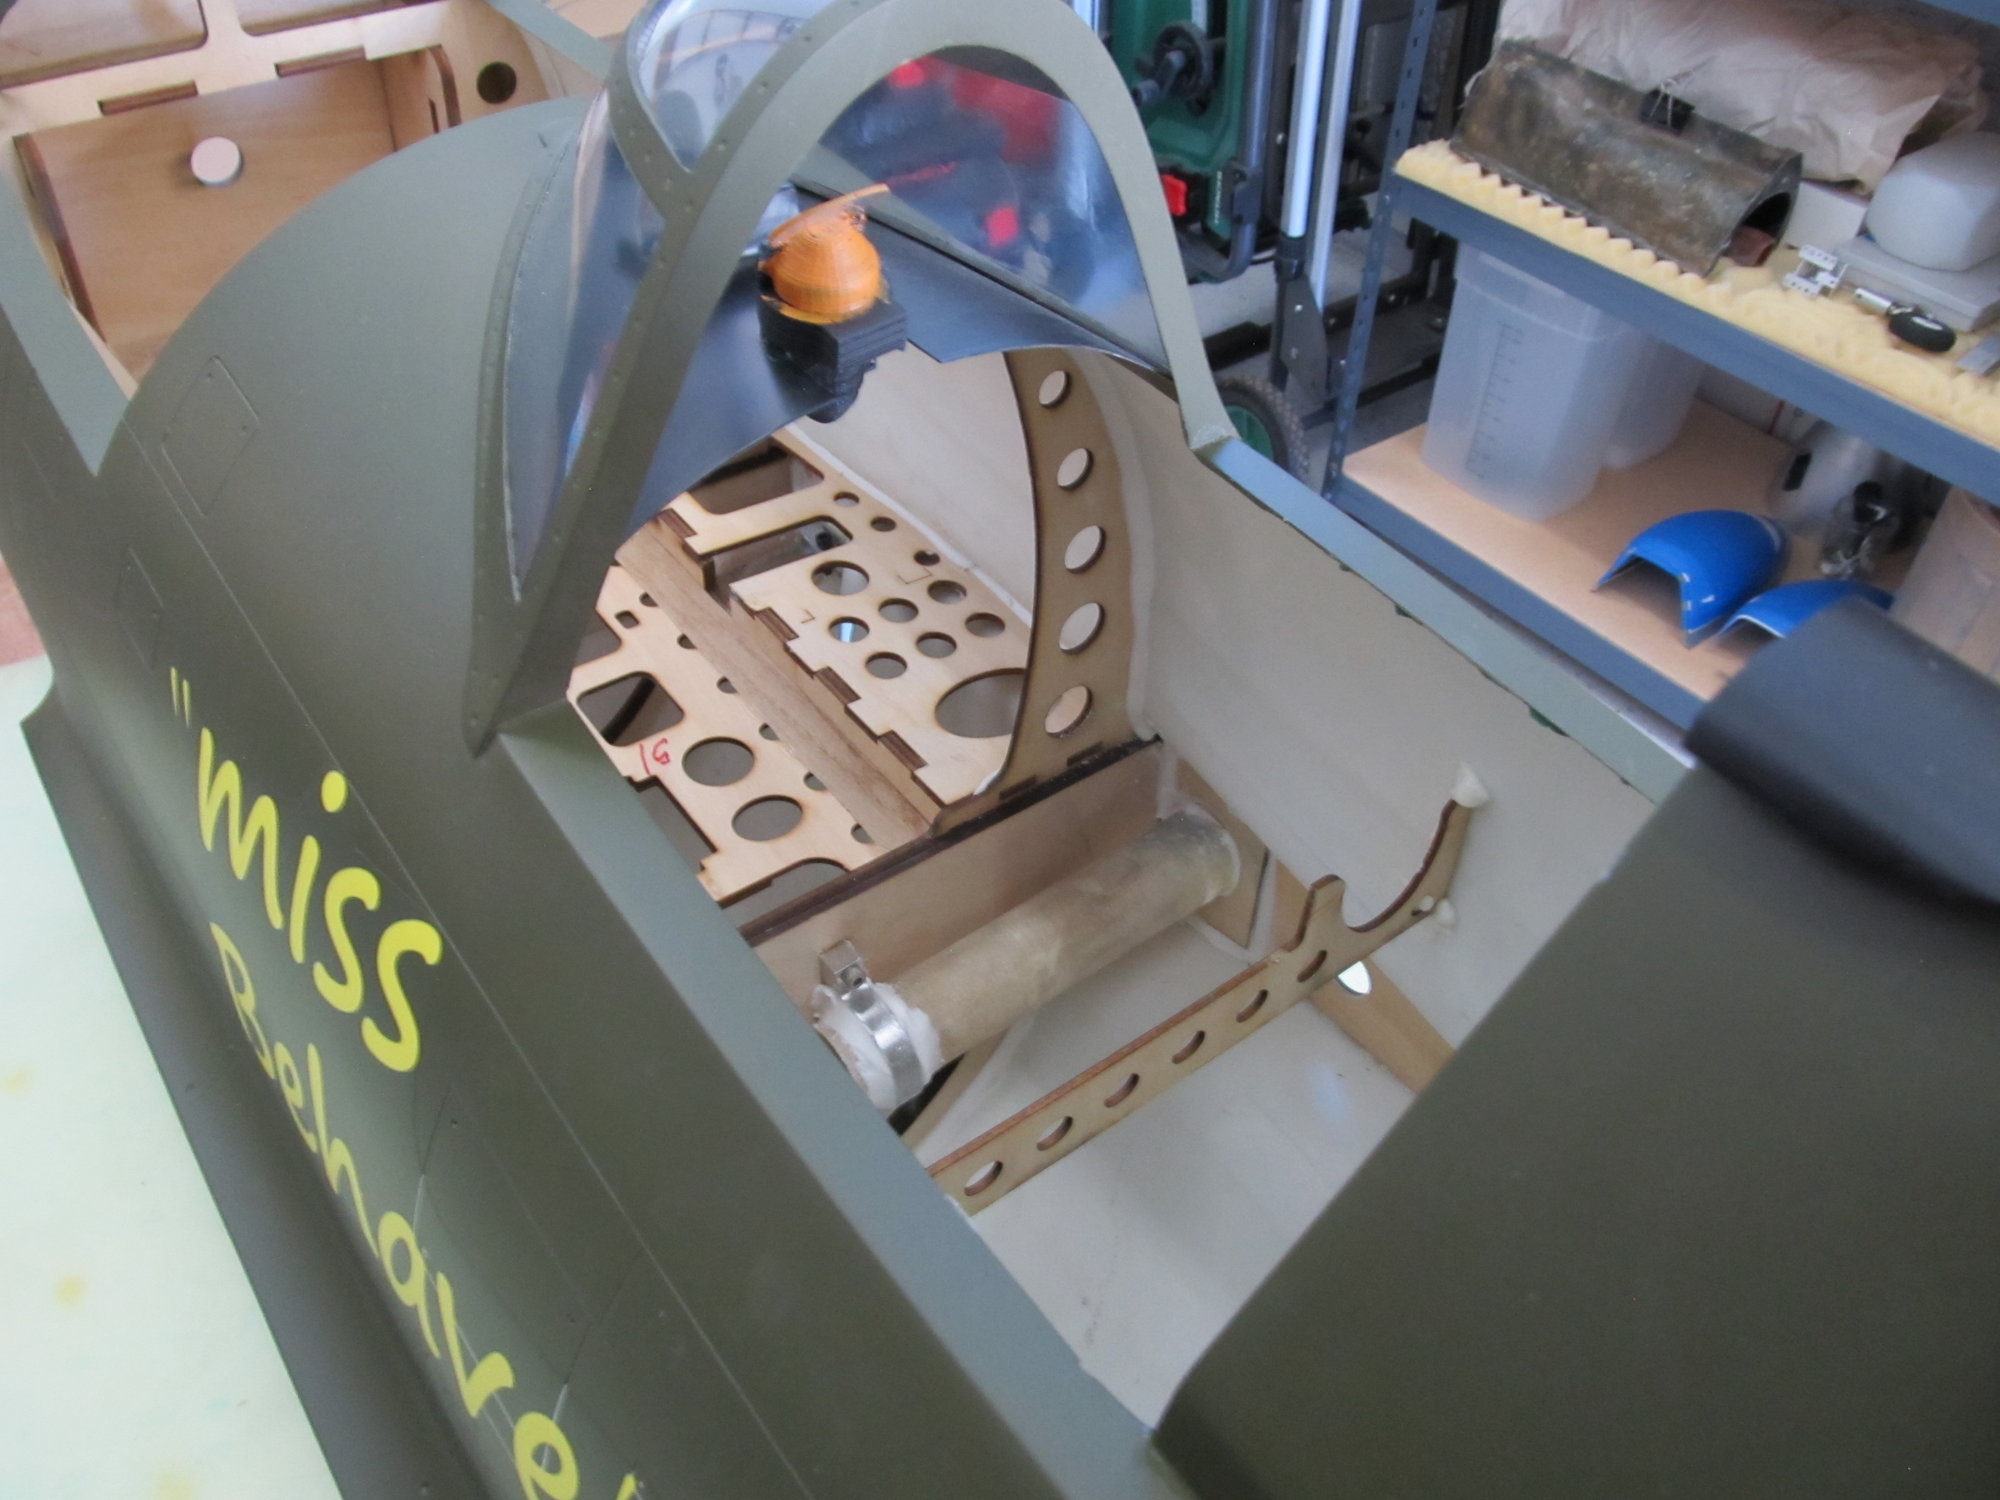
In the meantime, as earlier mentioned, I wanted to make the installed cockpit removable for better access in the fuselage during assembly and design of a few parts. So, it was pretty straight forward and I am able to break down the cockpit into four parts to allow the tub to be removed, the instrument panel, seat, and back plate with headrest, along with the tub. There was not a lot of glue, which was good, so they came apart with a little effort. Actually, only need my fingers and a plastic epoxy stirring stick to gently work each part until the glue joint broke free for all the parts. There will be a little clean up of residual glue under the area where the canopy rails would go, but that should be fairly easy too.
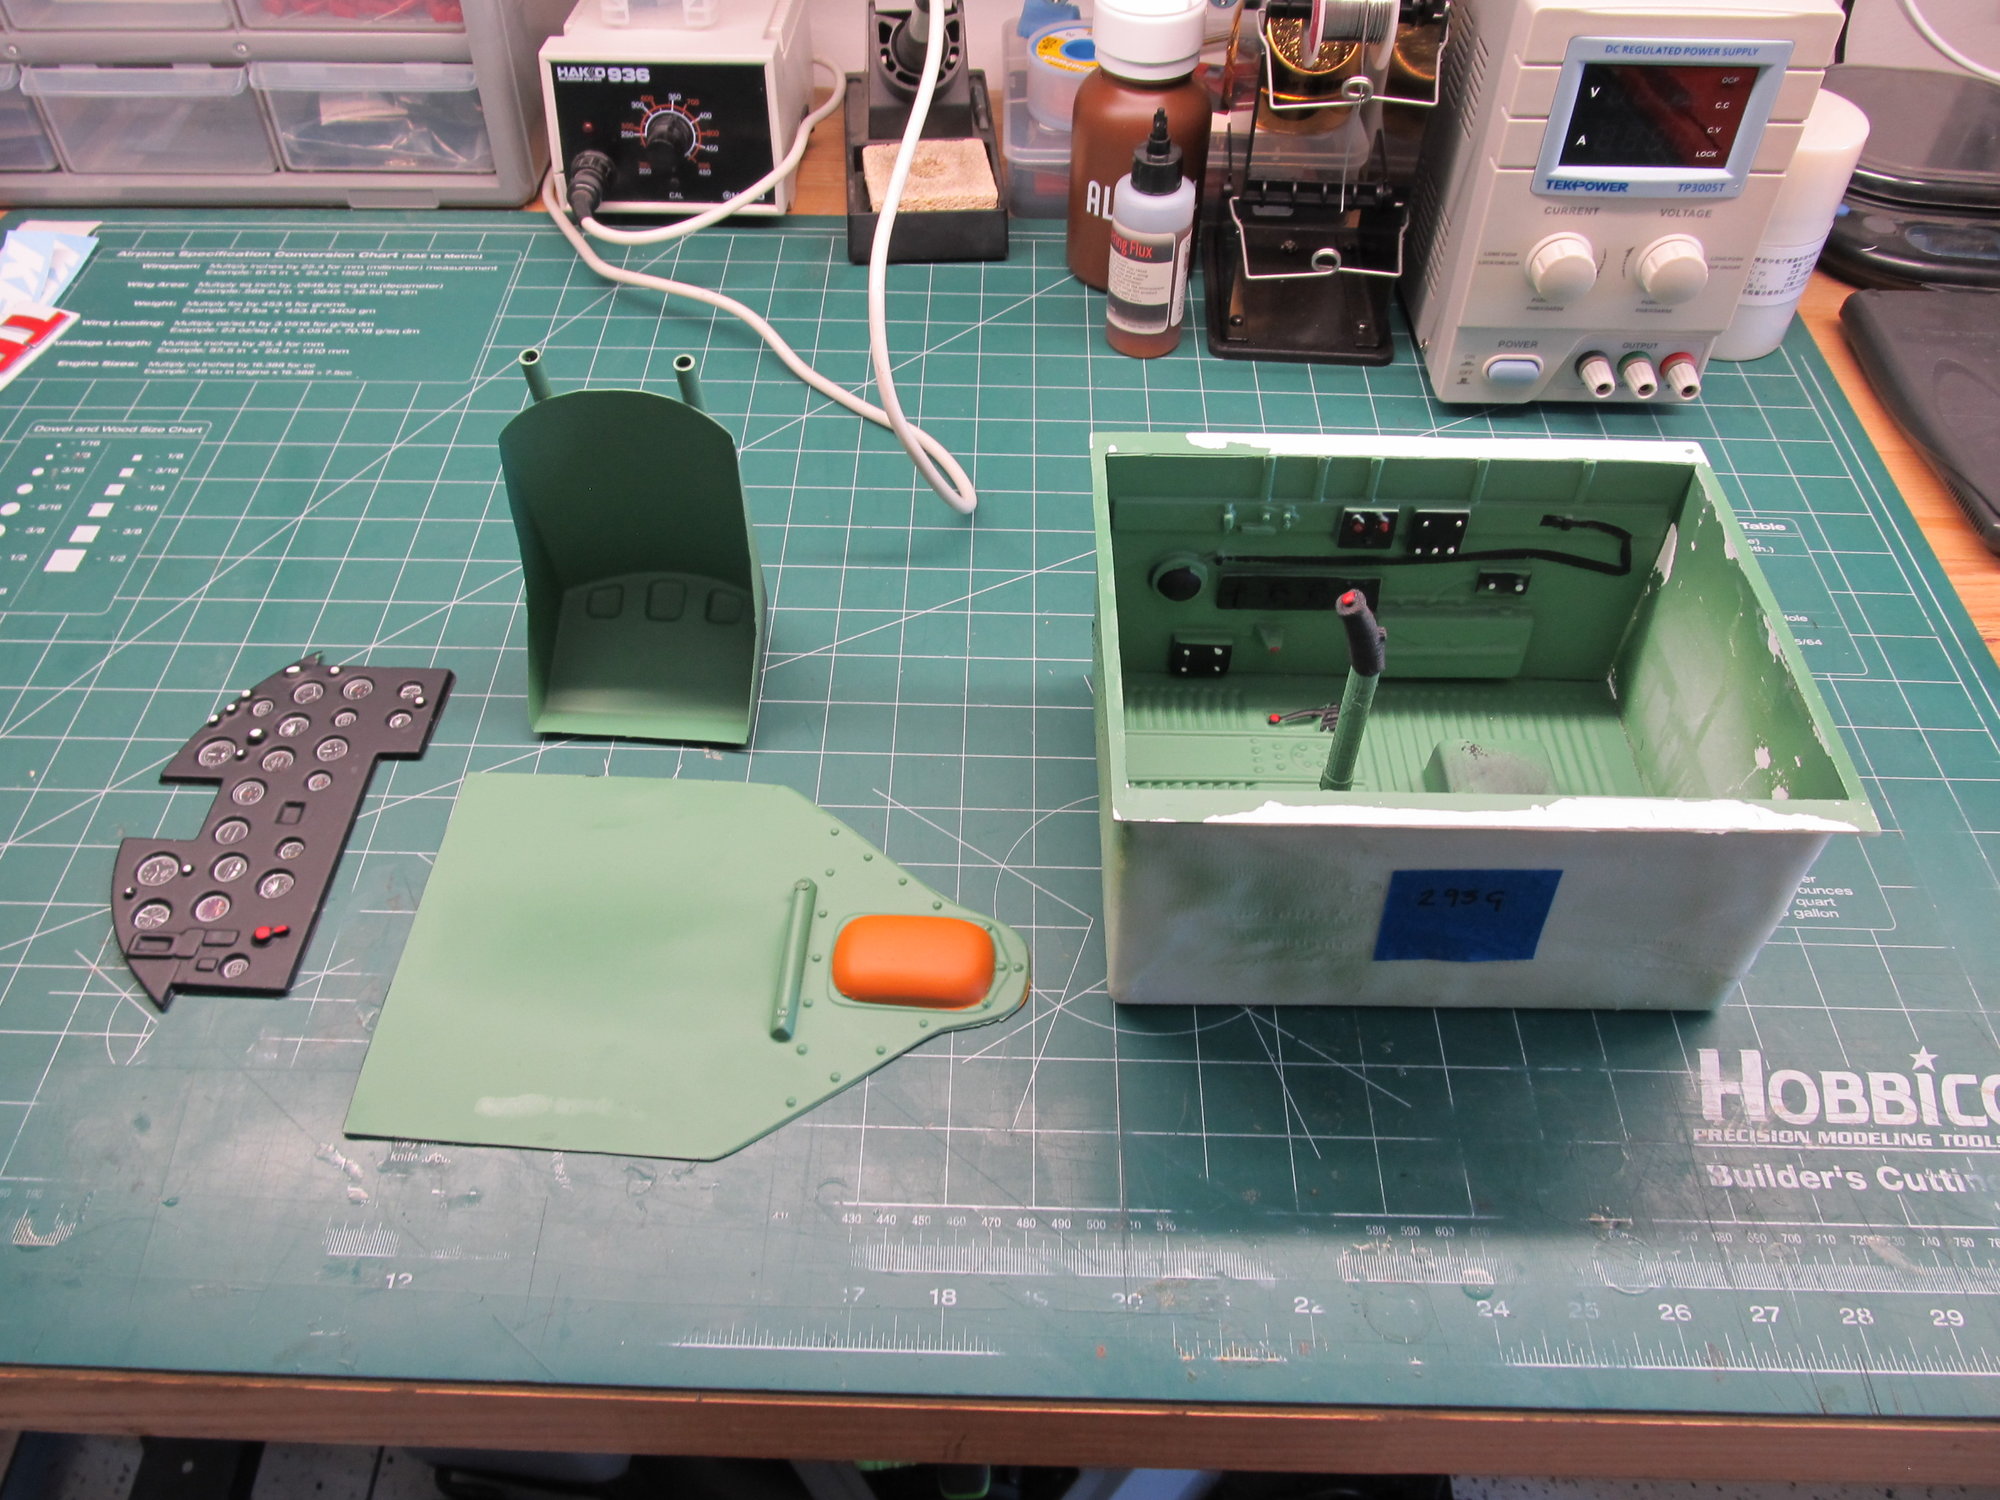

The current weight of the cockpit as pictured is 293 grams, so about .65 pounds. My goal will be to have the cockpit drop in from the top and install the parts with alignment dowels, magnets, and washers. I thought about redesigning some of the parts to be more scale, but I don't want to invest a lot of time in that, since the intent of this airplane is to get my proficiency back on a large Warbirds, time will tell!
Couple of pictures with the canopy out. The access to the rear portion of the fuselage is much better now.
When it comes to spacers and standoffs for your engines, please let me know if I can help, I have full CAD Capability and can cut spacers and adapters as needed. That is all I have for this quick update, talk soon and have a good week.
The 8025/150 is currently back at Neu Motors while they sort out the reason "why" the prop adapter will not fit when the output shaft screws are tight. We tried a couple different sets of Socket Head Cap Screws and still I could not install the prop adapter when the Screws are fully tight. If they can't figure it out, they will send me a new motor to replace this one. No big deal, I have a lot of other things to work on.
In the meantime, as earlier mentioned, I wanted to make the installed cockpit removable for better access in the fuselage during assembly and design of a few parts. So, it was pretty straight forward and I am able to break down the cockpit into four parts to allow the tub to be removed, the instrument panel, seat, and back plate with headrest, along with the tub. There was not a lot of glue, which was good, so they came apart with a little effort. Actually, only need my fingers and a plastic epoxy stirring stick to gently work each part until the glue joint broke free for all the parts. There will be a little clean up of residual glue under the area where the canopy rails would go, but that should be fairly easy too.
The current weight of the cockpit as pictured is 293 grams, so about .65 pounds. My goal will be to have the cockpit drop in from the top and install the parts with alignment dowels, magnets, and washers. I thought about redesigning some of the parts to be more scale, but I don't want to invest a lot of time in that, since the intent of this airplane is to get my proficiency back on a large Warbirds, time will tell!
Couple of pictures with the canopy out. The access to the rear portion of the fuselage is much better now.
When it comes to spacers and standoffs for your engines, please let me know if I can help, I have full CAD Capability and can cut spacers and adapters as needed. That is all I have for this quick update, talk soon and have a good week.
Last edited by JRSmith; 06-21-2022 at 06:11 PM.
The following users liked this post:
PaulD (07-23-2022)
06-22-2022, 05:08 AM
#274
I do plan on adding something as well. However, I may just take some carbon fiber cloth in that area and the turtle deck area, but the formers are a great idea! Looks good.
06-22-2022, 11:57 AM
#275
Thanks Jason!
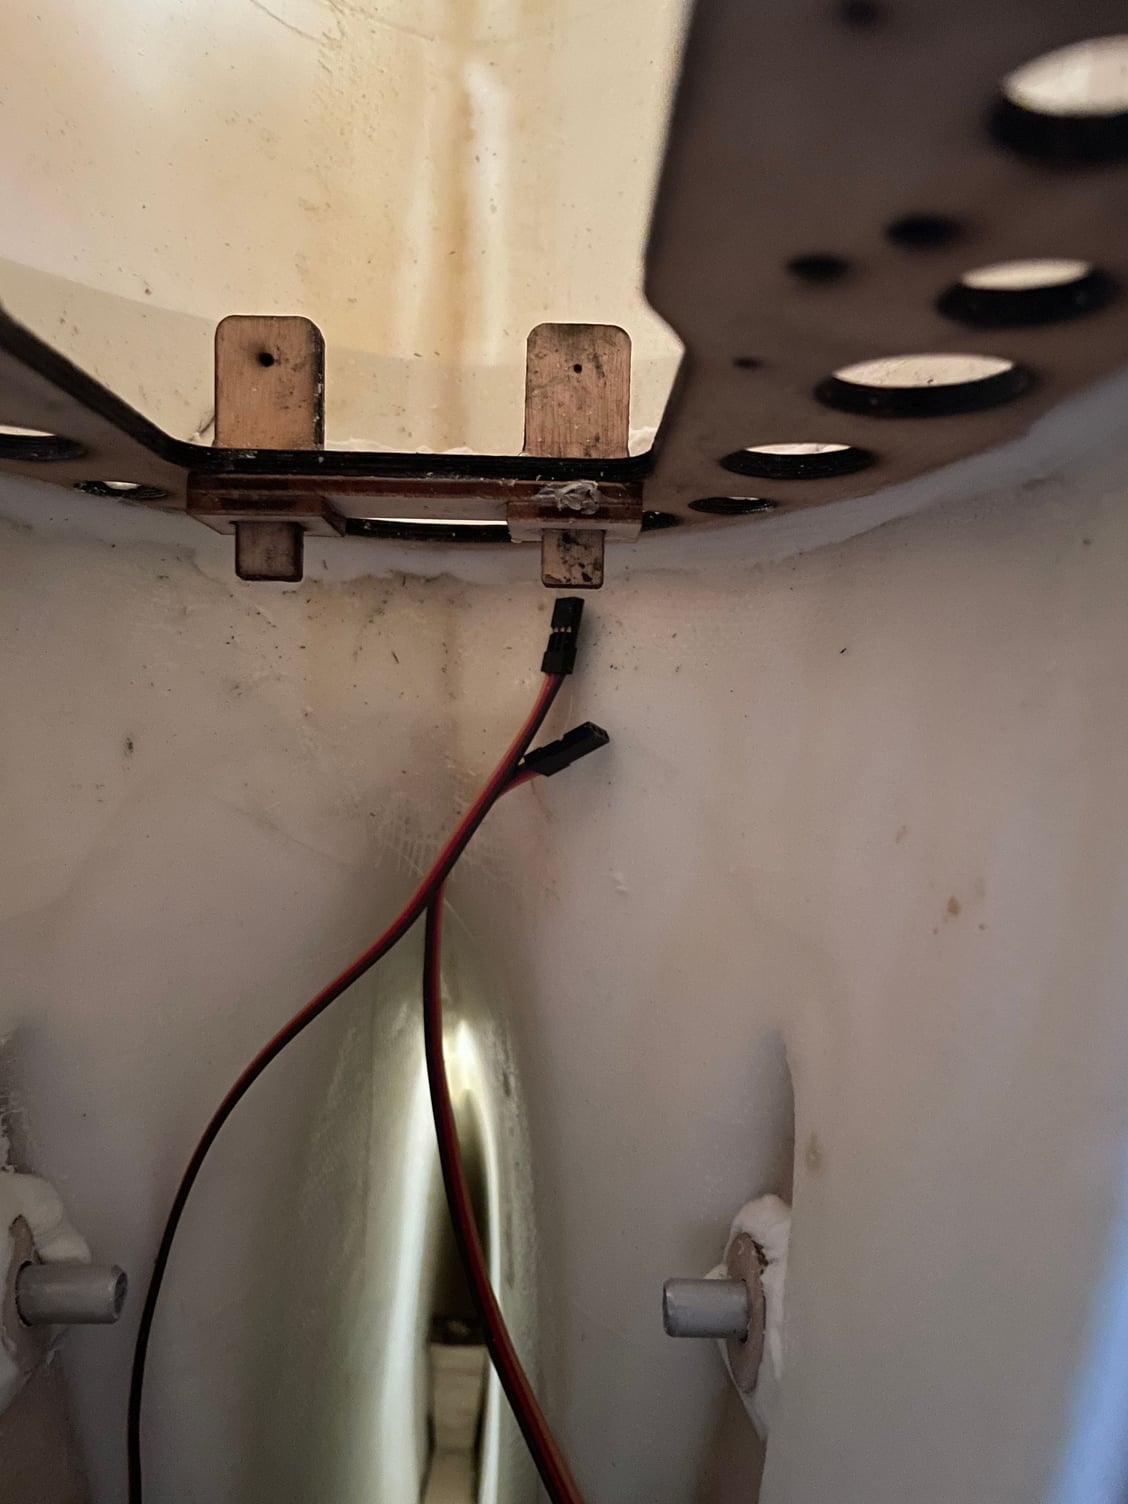
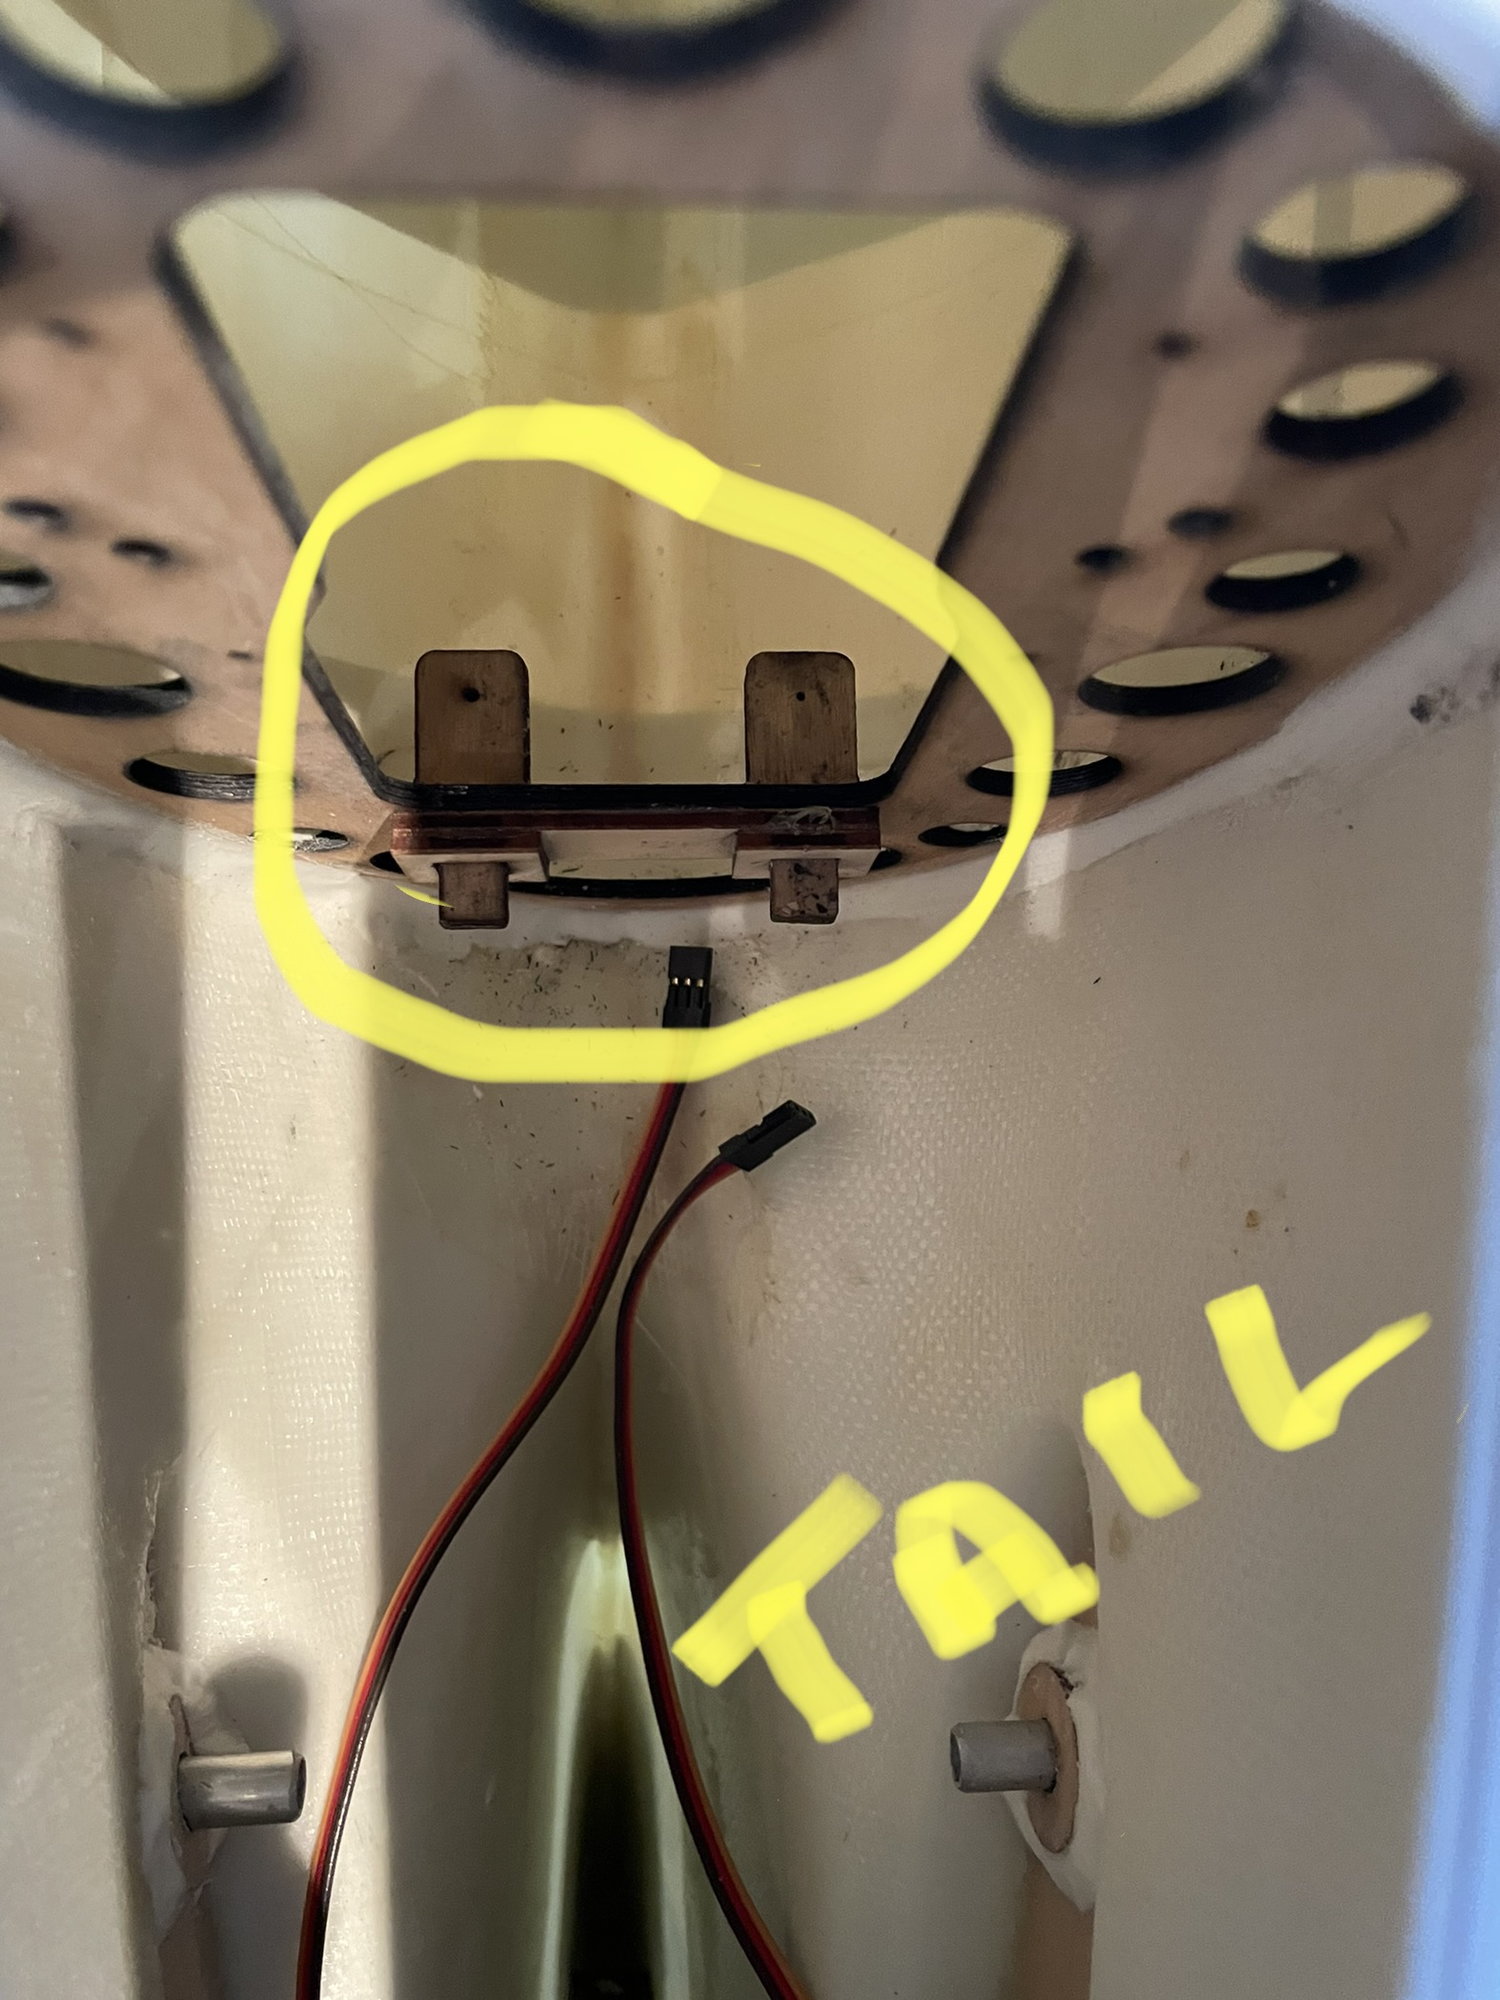
Just want to reiterate to everyone, (Please check the 8 wing tube mount screws in your P-47's). I was able to remove everyone of these screws with finger pressure and the "long end" of an allen wrench. Even if you don't use longer screws with washers and nylocs, at least tighten them with some Loctite. I don't want to see anyone have an issue in the air.
Darrin
This is the fix on the front set of screws.
Last edited by Colt4570; 06-22-2022 at 12:07 PM.

