


Ripmax Xcalibur Sports jet
 08-13-2021, 10:25 AM
#2576
Another thing you can do if the gear gets tuck in the up position, make sure the struts have a bit of a play on the up position, if they don't then the retract is pushing them against the inside of the wheel well, in order for the retract to work properly there has to be a bit if of play on the struts, if there is no play, add two washers under the retract screws facing the center of the fuse to give the wheels a gap between the wheels and bottom of the wheel wells.
Last edited by CARS II; 08-13-2021 at 10:28 AM.

The following 2 users liked this post by CARS II:
BikerDon (08-16-2021),
DenisFerrari (08-13-2021)
09-29-2021, 11:17 PM
#2577
I recently got my hands on a NIB Xcalibur, I've just finished the build with a Swiwin 80 turbine. Fabulous easy build and nice amount of room to lay out everything in an orderly uncluttered fashion.
Just two questions to the experienced Xcalibur team here,
1. I assume the CG in the manual (160mm from LE) is the preferred flying CG (yes/ no) if no, then what is the preferred CG.
2. A few posts above I saw the reference to the turbine needing to be installed with down thrust. This is the first I have heard of this and I didn't encounter anything in the instruction manual other than about using the wooden supports (which were of uniform thickness to centre the turbine in the model.
Thanks & regards,
Phil
09-29-2021, 11:45 PM
#2578

Join Date: Jan 2019
Posts: 3
Likes: 0
Received 0 Likes
on
0 Posts
Hi FF,
I have yet to assemble mine, but from the notes I have collected in preparation, a lot of people start off the COG at 170mm and usually find this to be fine. Adjustment once flying characteristics are seen can be then done. Regarding the thrust angle, I have no plans to adjust mine away from the factory set-up.
Good luck.
The following users liked this post:
DenisFerrari (04-24-2022)
09-30-2021, 12:44 AM
#2580
Fabulous, thanks for the responses guys, I think I will balance at 170 without any extra weight, which will be perfect. Flying field closed down here as Sydney is due to end its long lockdown in a couple of weeks.
This will be my first turbine jet, but in lockdown I've built 3 others, but I think the Xcalibur will be the first one I'll fly to get used to the feeling of turbines on this forgiving airframe.
Cheers,
Phil
This will be my first turbine jet, but in lockdown I've built 3 others, but I think the Xcalibur will be the first one I'll fly to get used to the feeling of turbines on this forgiving airframe.
Cheers,
Phil
09-30-2021, 06:47 AM
#2581

My Feedback: (3)
I recently got my hands on a NIB Xcalibur, I've just finished the build with a Swiwin 80 turbine. Fabulous easy build and nice amount of room to lay out everything in an orderly uncluttered fashion.
Just two questions to the experienced Xcalibur team here,
1. I assume the CG in the manual (160mm from LE) is the preferred flying CG (yes/ no) if no, then what is the preferred CG.
2. A few posts above I saw the reference to the turbine needing to be installed with down thrust. This is the first I have heard of this and I didn't encounter anything in the instruction manual other than about using the wooden supports (which were of uniform thickness to centre the turbine in the model.
Thanks & regards,
Phil
Just two questions to the experienced Xcalibur team here,
1. I assume the CG in the manual (160mm from LE) is the preferred flying CG (yes/ no) if no, then what is the preferred CG.
2. A few posts above I saw the reference to the turbine needing to be installed with down thrust. This is the first I have heard of this and I didn't encounter anything in the instruction manual other than about using the wooden supports (which were of uniform thickness to centre the turbine in the model.
Thanks & regards,
Phil
The following users liked this post:
CARS II (10-02-2021)
02-22-2022, 09:54 PM
#2586
Thread Starter
You don’t have to read the whole thread to find the info required. If someone took the time to summarise a set up it would be that persons view/way. The idea of these threads is to see a range of solutions and set ups. It’s worth the time reading through to learn.
Or ask the questions that are really needing answering and they will be responded to by a range of people.
Or ask the questions that are really needing answering and they will be responded to by a range of people.
The following users liked this post:
DenisFerrari (02-23-2022)
04-17-2022, 09:51 AM
#2587
What about slow flight and landing regarding flaps and elevator settings ?
thanks in advance
The following users liked this post:
DenisFerrari (04-17-2022)
04-17-2022, 10:24 AM
#2589
04-17-2022, 10:57 AM
#2590
Thread Starter
It’s the same as full flap. You should be able to deploy full flap and fly slow circuits. Once the gear is down there is little pitch change on an Xcalibur
The following users liked this post:
DenisFerrari (04-17-2022)
04-17-2022, 12:06 PM
#2591
The following 2 users liked this post by Dave Wilshere:
arjan70 (04-17-2022),
DenisFerrari (04-17-2022)

The following users liked this post:
DenisFerrari (04-24-2022)
05-20-2022, 01:24 PM
#2595
Since my Roo is done with, then I can tackle my next project.
Short story.
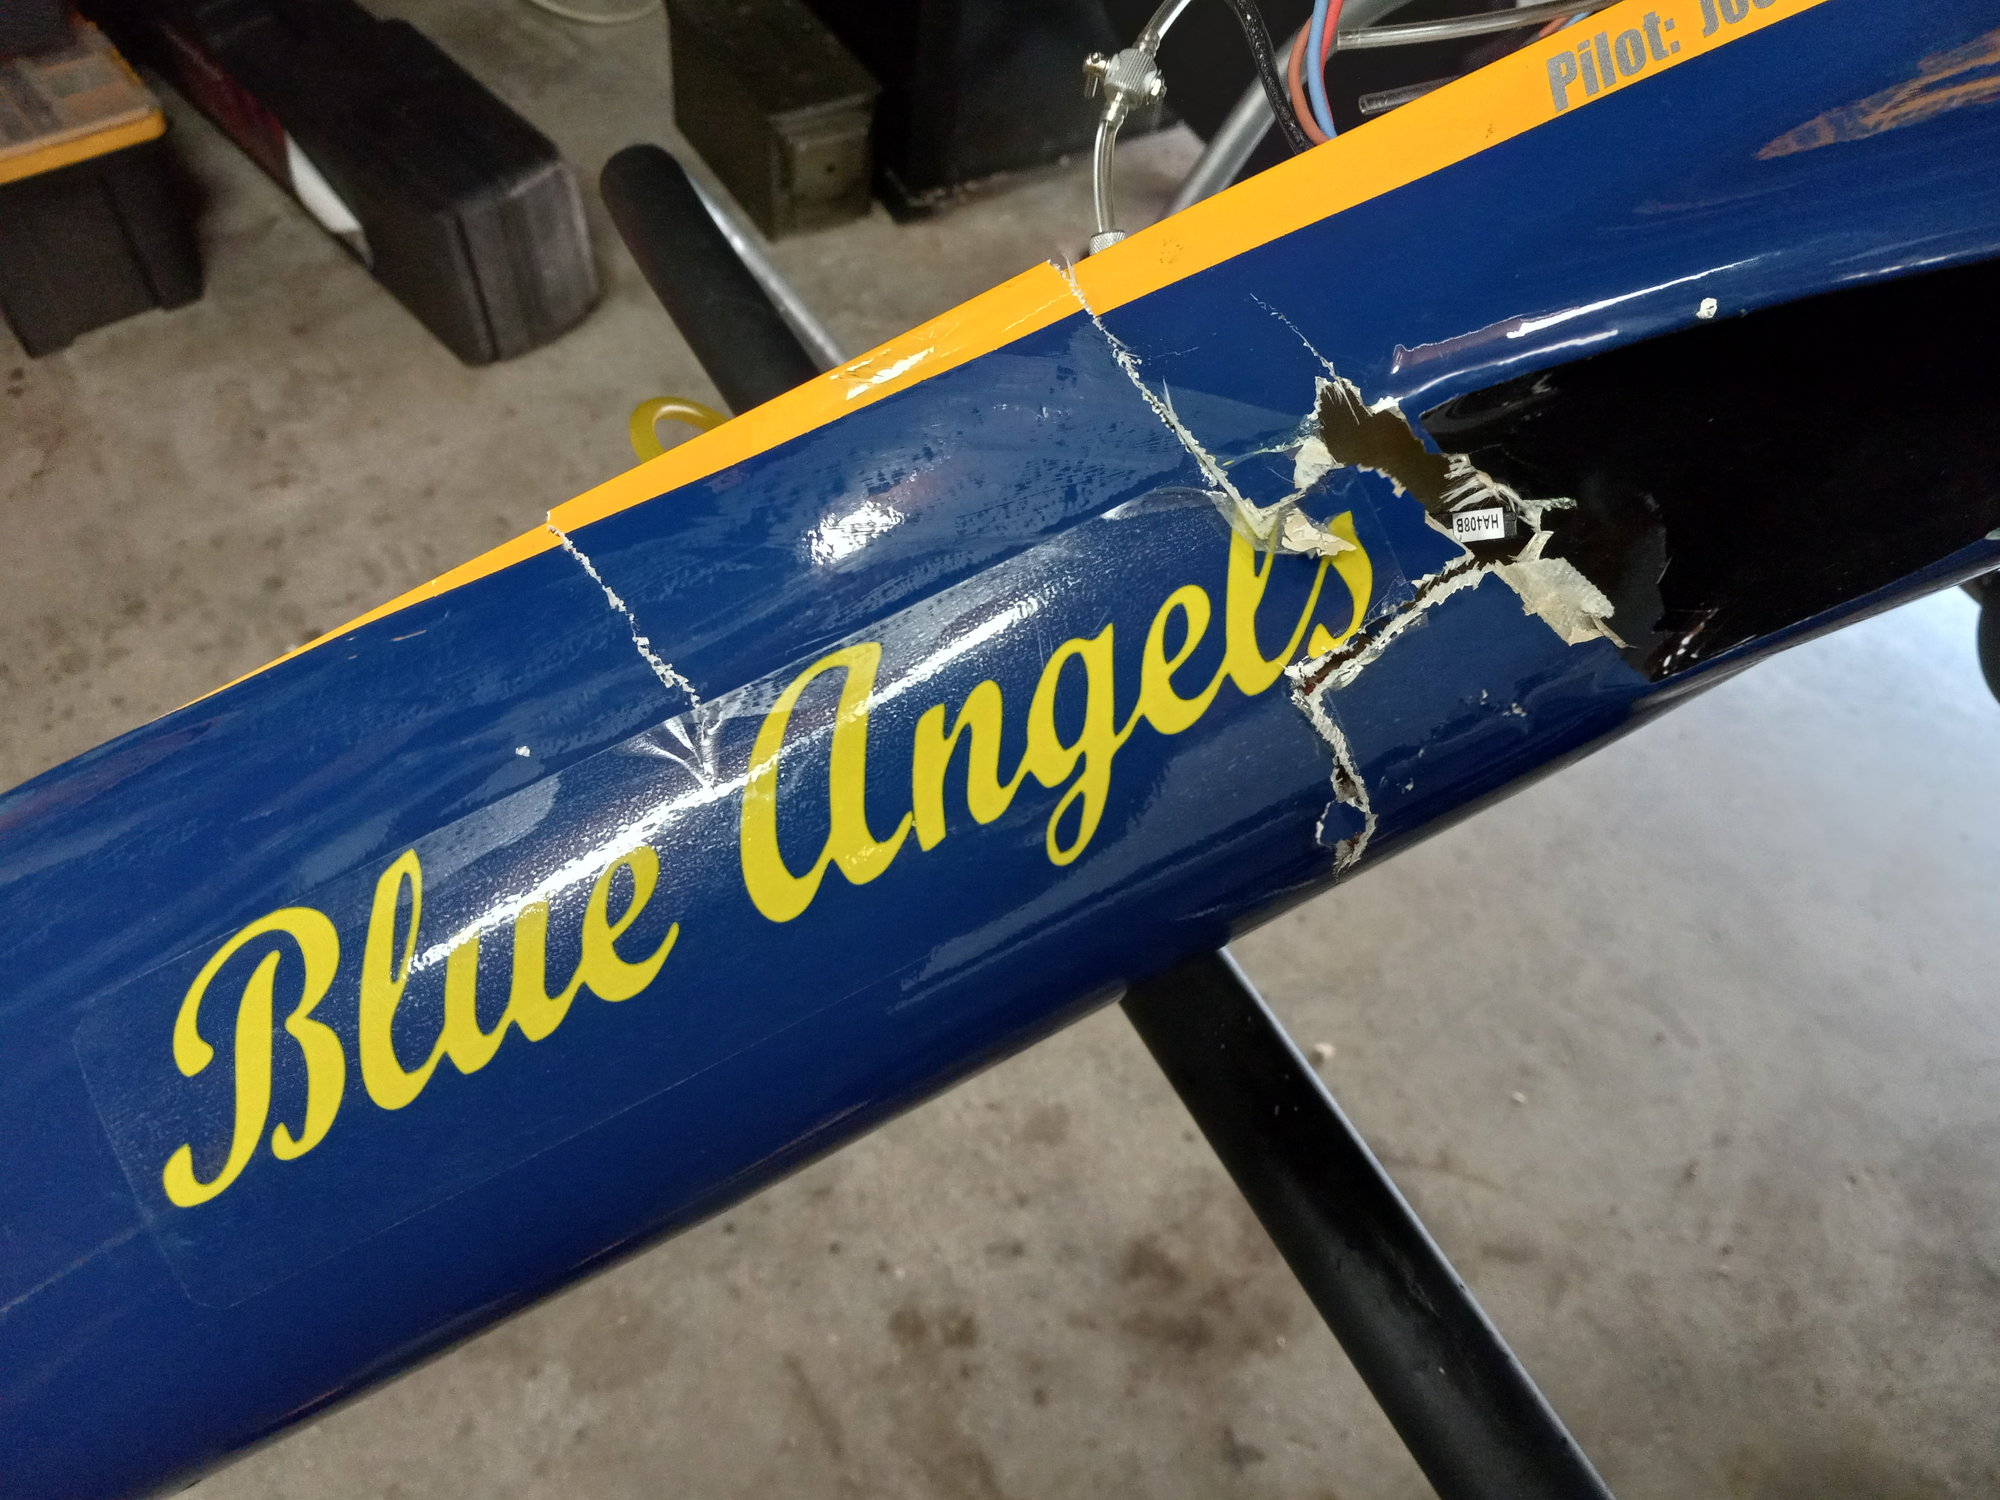
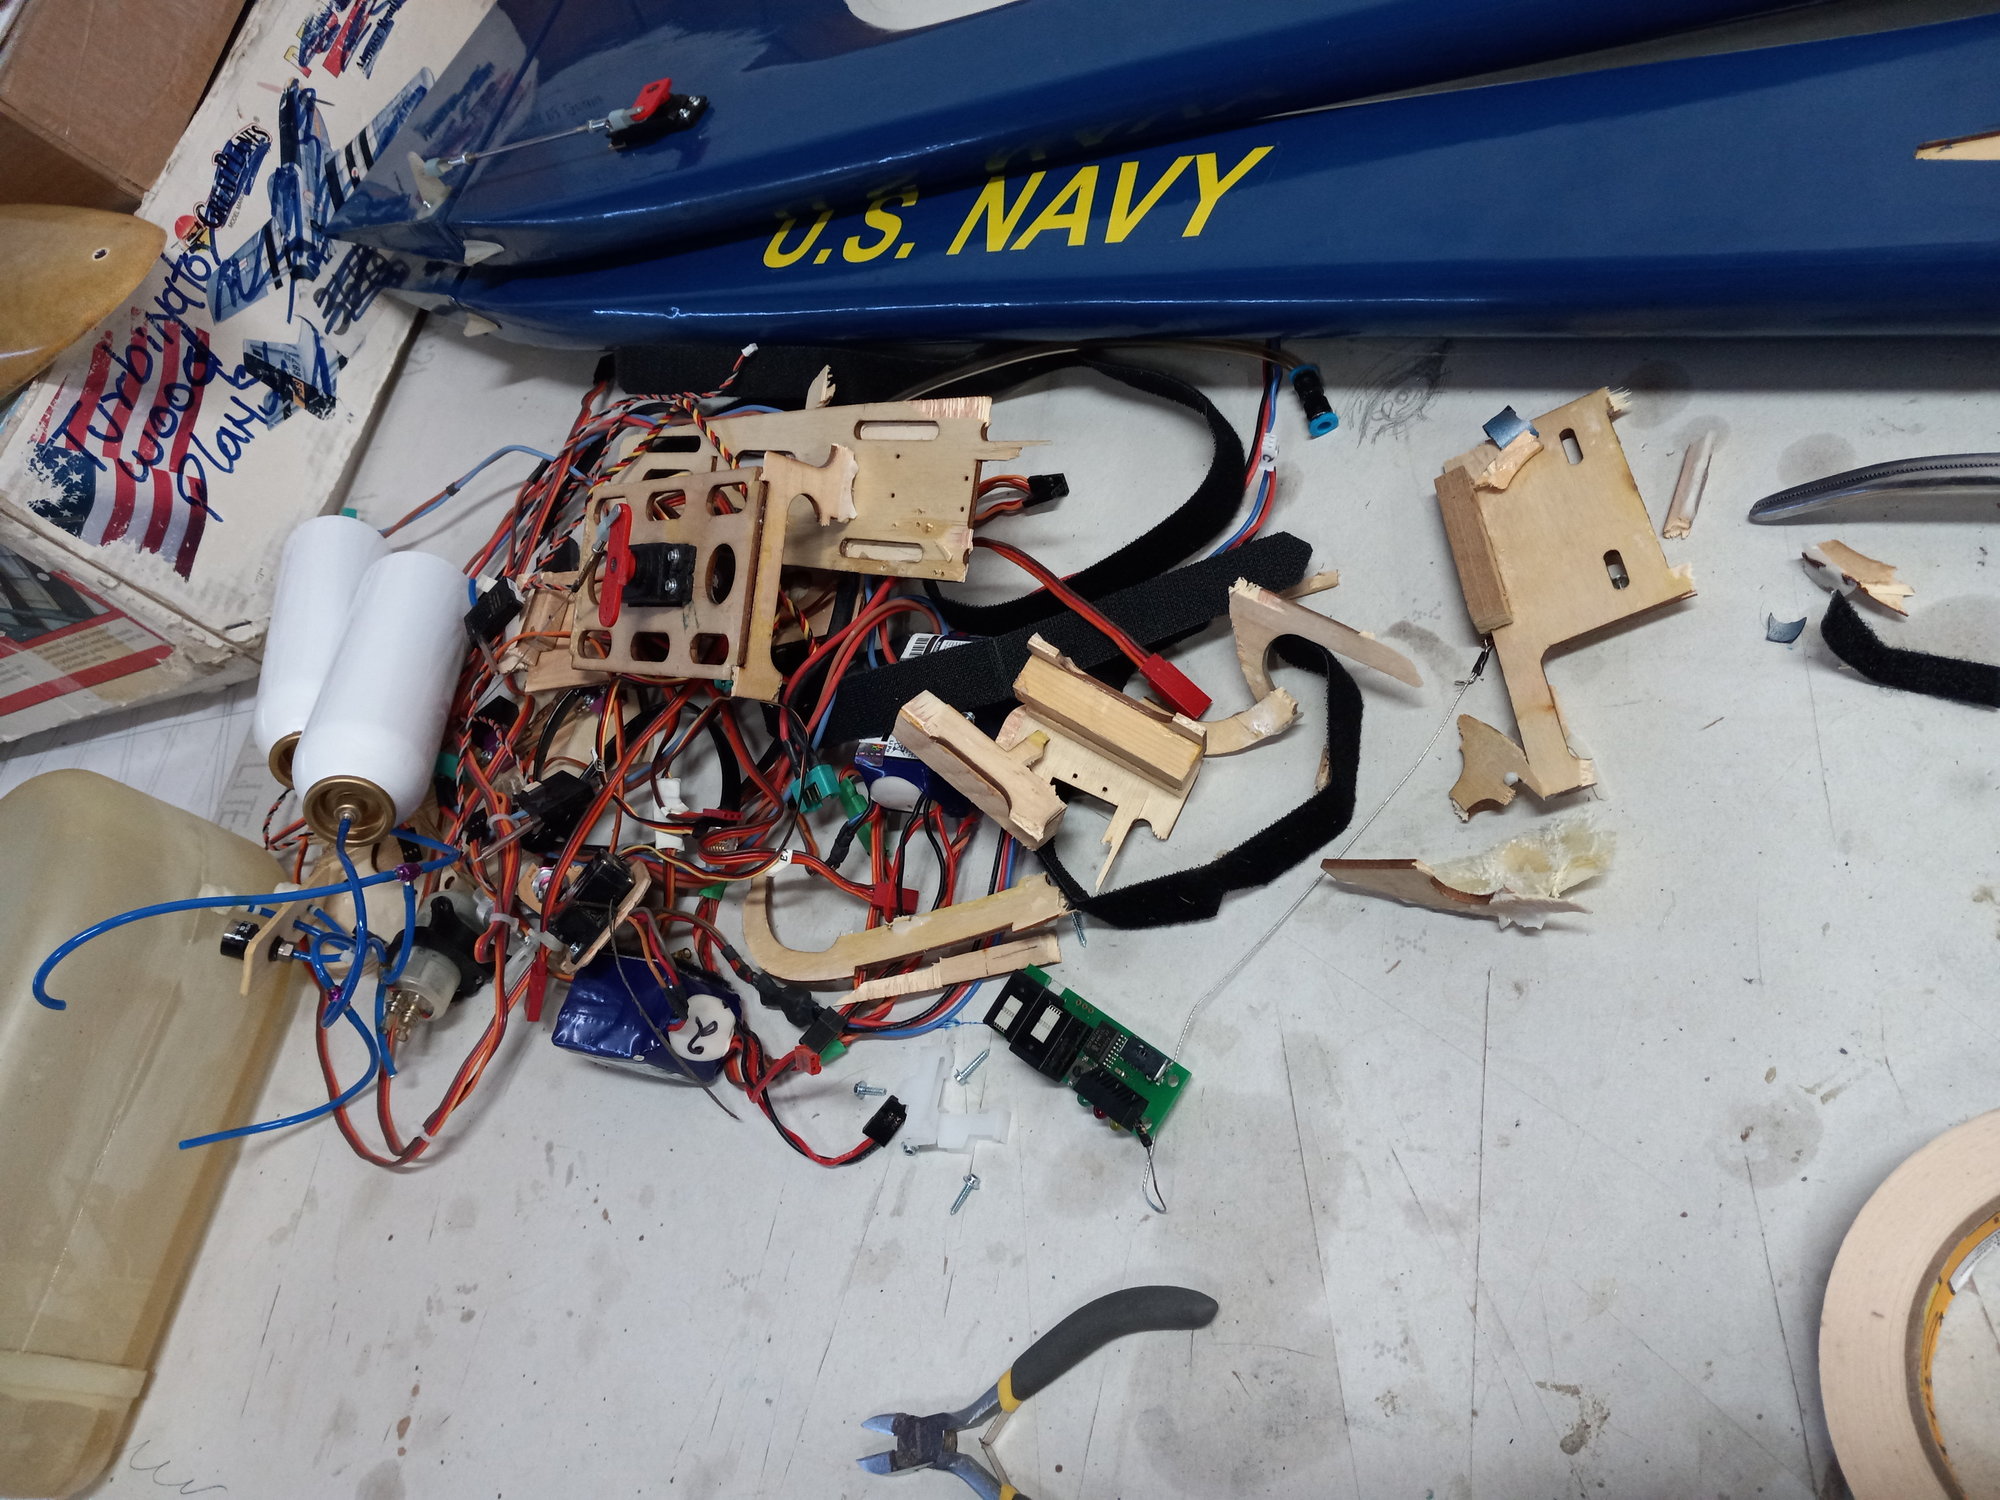
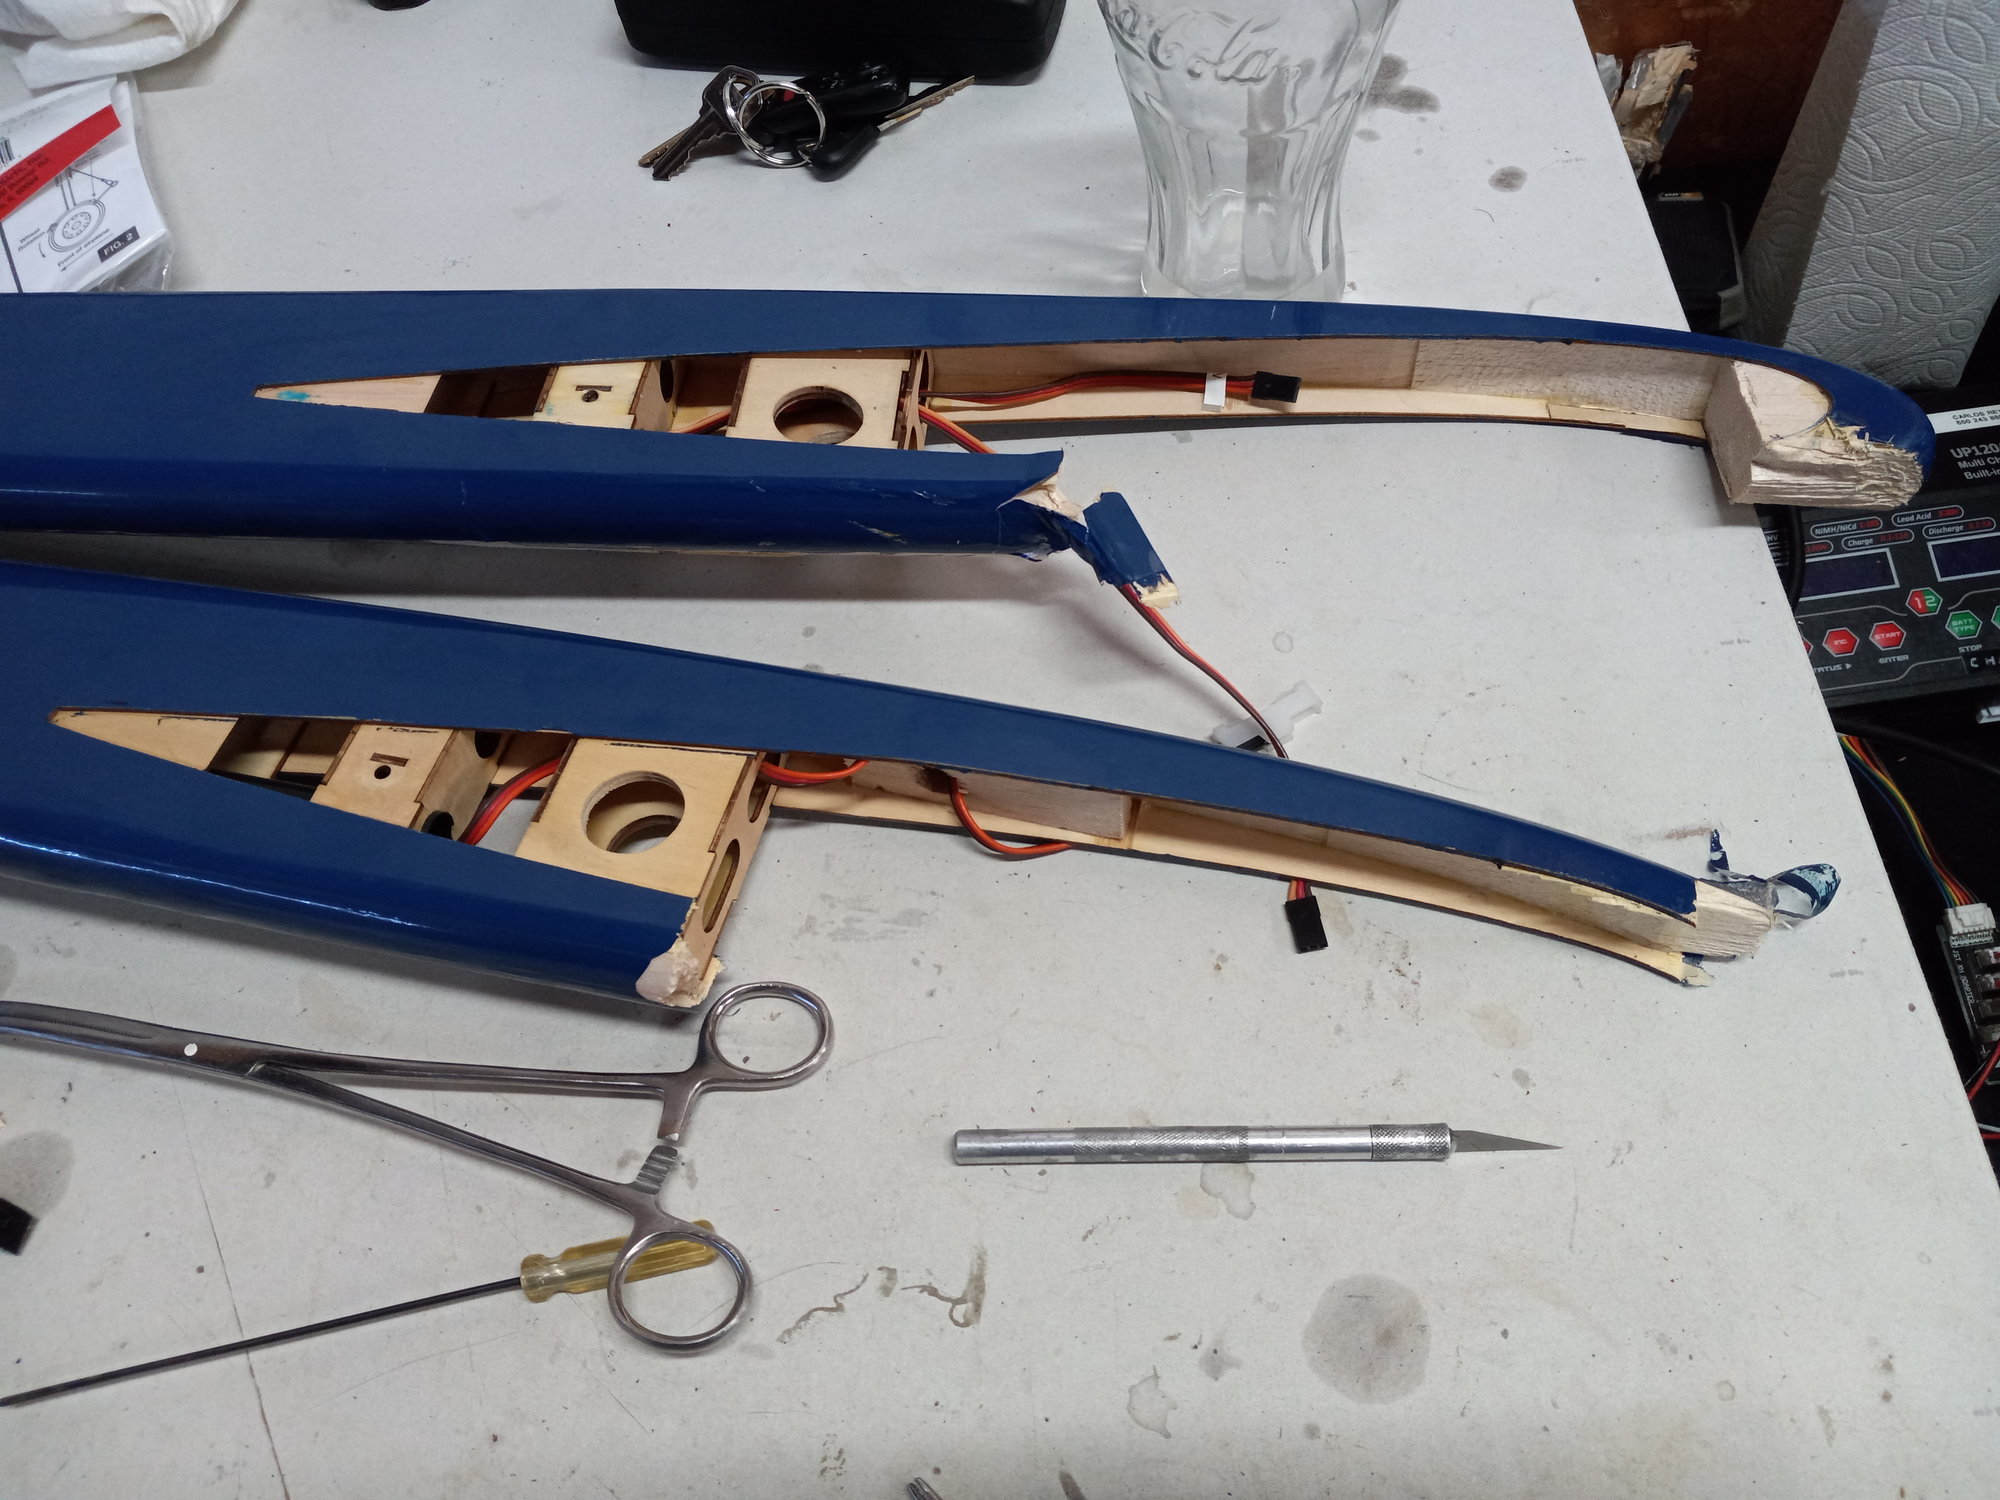
I build this X in two days for my friend, he had it for 44 days, got a few flights on it till a pass in front of the Sun, lost visual with it and it ended up on top of the grape fields up side down, the hatch was total lost, a trunion fork was badly damaged, the fuse got the worst damage, cracked on the left side, the booms lost the bottom front part and the wings also came out with some damage.
I was able to get a hatch from a friend and a trunion fork from a really nice RCU member, without their generous contribution, I wouldn't have been able to find this parts, thank you.
And now, it's time to get busy.
Short story.
I build this X in two days for my friend, he had it for 44 days, got a few flights on it till a pass in front of the Sun, lost visual with it and it ended up on top of the grape fields up side down, the hatch was total lost, a trunion fork was badly damaged, the fuse got the worst damage, cracked on the left side, the booms lost the bottom front part and the wings also came out with some damage.
I was able to get a hatch from a friend and a trunion fork from a really nice RCU member, without their generous contribution, I wouldn't have been able to find this parts, thank you.
And now, it's time to get busy.
Last edited by CARS II; 05-20-2022 at 07:24 PM.
05-20-2022, 05:42 PM
#2597
Carlos
Why air gauges? We fill the air tanks with a pump fitted with a gauge, start the turbine and put the top on...no one on board can see the gauges. When you land if the gear came down and the brakes worked you had enough air...
Each air gauge is 3-4 more joints to leak-I have never got the need to add weight and failure points...
Dave
Reading the thread to see what I can use on the rebuild to simplified the build ( very little space for accessories ) I will give this advice a try since I now have a pump with an air gage and I like the idea of less connections, this rebuild will be my first without air gages ( KISS ) 😀
Last edited by CARS II; 05-20-2022 at 05:48 PM.
05-20-2022, 05:59 PM
#2598
Some people just give up, I have a Boomerang Intro which a friend stripped the covering intending to glass it but gave up. Now on the shelf waiting to be finished.
I have quite a few tiny air gauges from lots of bits I've collected over the years, none have been fitted to models for the same reasons as Dave gives.
Last edited by Boomerang1; 05-20-2022 at 06:03 PM.
05-25-2022, 12:19 PM
#2600
Adjust the linkage so the top of the elevator is level with the top of the tail-plane.
That's what I always do
 never let me down yet
Last edited by BikerDon; 05-25-2022 at 12:25 PM.