


Welcome to Club SAITO !
 05-11-2018, 10:31 AM

My Feedback: (1)
Wow, that P-61 sounds great, too bad that little kid wouldn't shut up. Guess I now know what engines to save up for to put in mine when I get around to building it. FG-84 R3.
wow
Jim
Last edited by the Wasp; 05-11-2018 at 10:38 AM.
 05-11-2018, 09:07 PM
My Feedback: (1)
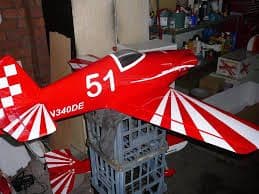
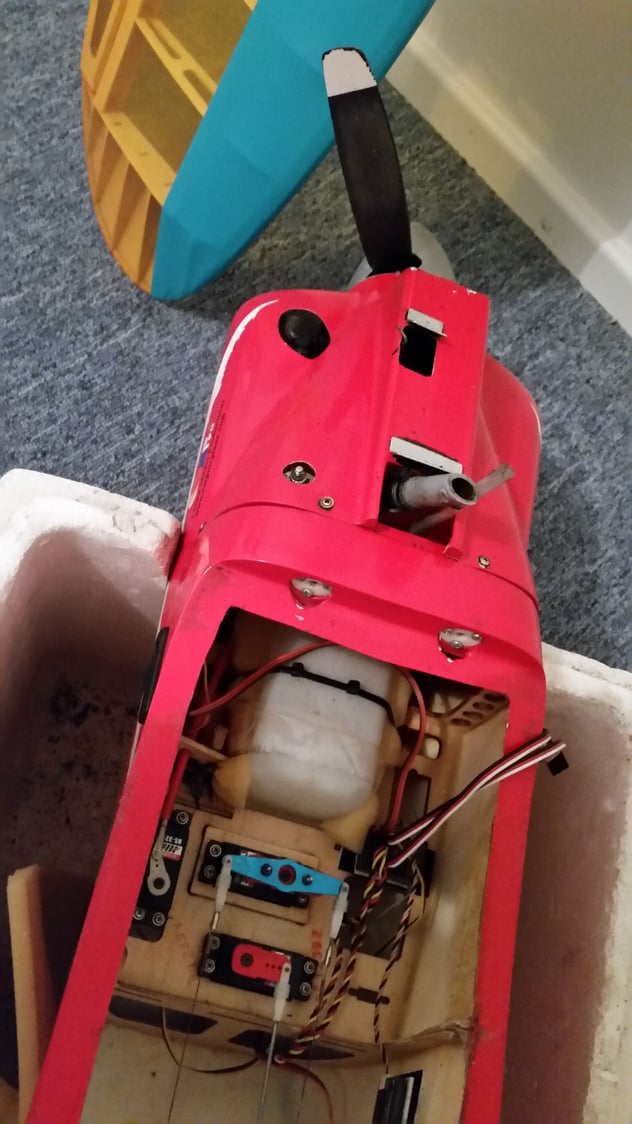
Pete, I check to see how well my Saito 100T would fit in the Mustang's cowl, once in the cowl it's a tight fit, a very nice fit actually, only a tiny bit of glass cutting would be needed, both Intake Pipes hit just a bit, so once you cut out for the Intake Pipes no more cutting would be required, slick,, but getting the engine to go into the cowl is something different, once the engine is mounted to the engine wall I would have to cut out long patches on each side of the cowl to get the engine inside the cowl,
it's just too bad the cowl didn't have removable panels that fit well and looked good too, the 100T would be just the coolest engine for that plane !!
if it fit, the engine would have been mounted by now !!
Jim
it's just too bad the cowl didn't have removable panels that fit well and looked good too, the 100T would be just the coolest engine for that plane !!
if it fit, the engine would have been mounted by now !!
Jim
05-12-2018, 02:19 AM

Jim re your midget mustang there's not many times i'd say yours is bigger than mine.Here's a couple of pics i've posted before re the fa115 engine fit in the smaller cmpro midget.The fa100t would lack the grunt needed to make the mustang shine but should fit in the cowl easier.Look up some you tube vids and you'll see what i mean.
05-12-2018, 07:02 AM
Split the cowl along the sides, glue in a backer strip on the top part, of either plastic or a couple thin layers of plywood, then get a bunch of small screws and screw the bottom part to the top, and to make it look more like a real cowl, put screws in the top too. My 10-300 Ultimate was like that, but since it went in nose first, the cowl shattered. I don't have a picture of my Rascal 168 cowl, but I did the same thing with it too.
05-12-2018, 07:16 AM
Senior Member

Can any of you computer gurus explain to me why thus site converts my BBCode (IMG) pictures to attachments?

They show up as BBCode images in the preview, but return to thumbnail when I post.
They show up as BBCode images in the preview, but return to thumbnail when I post.
05-12-2018, 08:18 AM

Split the cowl along the sides, glue in a backer strip on the top part, of either plastic or a couple thin layers of plywood, then get a bunch of small screws and screw the bottom part to the top, and to make it look more like a real cowl, put screws in the top too. My 10-300 Ultimate was like that, but since it went in nose first, the cowl shattered. I don't have a picture of my Rascal 168 cowl, but I did the same thing with it too.
 05-12-2018, 11:09 AM
The one I had, the builder sliced it in front and under the hub opening too, but it was also to fit around an OS Gemini II 120. I did the same on my Rascal for the DA 100. Sure makes it easier to get on and off and doesn't look bad either. I used servo screws with the allen head.
05-12-2018, 12:05 PM
Senior Member
I'm not sure, but I have not seen another one in the photos I have seen, see my link.
https://www.google.com/search?hl=en&tbm=isch&source=hp&biw=1676&bih=838&e i=0bTiWuqWA6W8ggf-8a74BA&q=Saito+100Ti+glow+engine&oq=Saito+100Ti+gl ow+engine&gs_l=img.12...1629.16918.0.18637.26.10.1 .15.16.0.307.924.7j1j0j1.9.0....0...1ac.1.64.img.. 1.11.934.0..0j35i39k1j0i30k1j0i24k1.0.r-LkyZ7egds
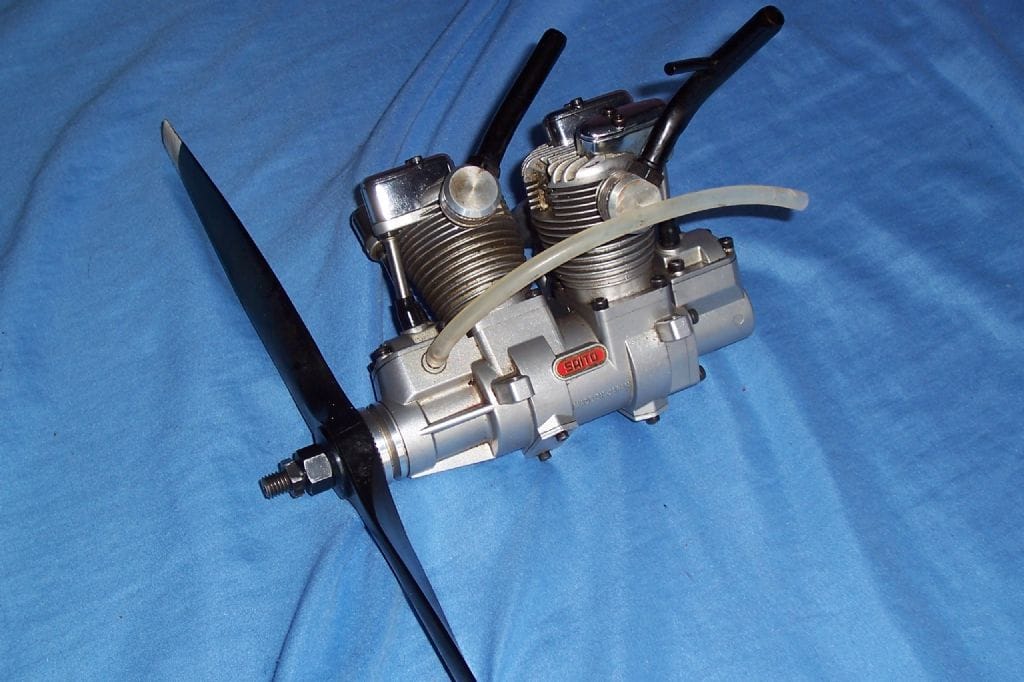
edit> hey Dave, looky here in this link, scroll down, only one breather,,,, love the connecting rods tho
http://www.rcuniverse.com/forum/glow...r-reports.html
I think I am going to put mine in the same place as on the 100Ti
Jim
https://www.google.com/search?hl=en&tbm=isch&source=hp&biw=1676&bih=838&e i=0bTiWuqWA6W8ggf-8a74BA&q=Saito+100Ti+glow+engine&oq=Saito+100Ti+gl ow+engine&gs_l=img.12...1629.16918.0.18637.26.10.1 .15.16.0.307.924.7j1j0j1.9.0....0...1ac.1.64.img.. 1.11.934.0..0j35i39k1j0i30k1j0i24k1.0.r-LkyZ7egds
edit> hey Dave, looky here in this link, scroll down, only one breather,,,, love the connecting rods tho
http://www.rcuniverse.com/forum/glow...r-reports.html
I think I am going to put mine in the same place as on the 100Ti
Jim
05-12-2018, 08:58 PM
My Feedback: (1)
Split the cowl along the sides, glue in a backer strip on the top part, of either plastic or a couple thin layers of plywood, then get a bunch of small screws and screw the bottom part to the top,
RC Specialties "Jim",
that's one slick job on that cowl, the Mustang's cowl sure isn't as flat, so as I said I don't want to mess it up, now if I could trade or sell my OS 70Sz for a good price I would be happy to buy another Saito, there is a lot of room in the Cowl so I'm sure the 125 would fit, and there is always a 125 for sale sooner or later, as I remember the 125's Cylinder is only 1mm longer than a FA100, the width is no problem inside this Cowl !
The FA-100Ti and FA-200Ti are both designed fir inverted mounting. That is why they have remote needle valves.
BTW guys, my FA 100 is/was marked, Center Punched for the drilling and taping, a wood jig has been made to hold the case to the mill/drill, I will be testing drilling and taping on bar of aluminum this week before drilling and tapping on the case,,, with that I don't think I will be able to get the drilling and tapping to a prefect 90% to the case (X&Y), but it will be close, when I drill I will be drilling at a .050" depth at a time and using a tooth brush on the drill and hole to keep the hole as clean as I can, same for taping,,, to add, the Tap will be very easy to align with the hole, because the Tap Wrench has a Center Hole, so after the hole is drilled I will just mount a Pin in the Drill Chuck and that pin will align the Tap,, slick huu
oh, I read years ago, when machining, drilling and taping Aluminum you can use just about any oil to keep the cutter, drill cool, I have tried it before many times with Gear Oil and it worked great
Jim
05-13-2018, 12:27 AM
Nice one jim looks like an apc prop on the front of an fa150?...pssst i know a guy who makes better looking turbo header mufflers if you need his phone number mate cheers
Good to see you back sr,for a while there i thought you must have bought an overrated american made motorcycle cruiser and gone for a ride in the woods where it promptly wobbled off in to the shrubbery or broke down and stranded you.Do you still have that vid of the 200ti being flown in an american warbird?
i know a guy who makes better looking turbo header mufflers if you need his phone number mate cheersGood to see you back sr,for a while there i thought you must have bought an overrated american made motorcycle cruiser and gone for a ride in the woods where it promptly wobbled off in to the shrubbery or broke down and stranded you.Do you still have that vid of the 200ti being flown in an american warbird?
05-13-2018, 03:44 AM

My Feedback: (102)

Join Date: Dec 2001
Location: Colonial Beach, VA
Posts: 20,370
Likes: 0
Received 25 Likes
on
25 Posts
On Tuesday I took my bike to Hector Inspector for the annual Va. State inspection, it was 10 miles to there and 70 miles back home, go figure. After sitting since Nov. it fired on the first compression stroke, Fuel injection is a wonderful thing.
05-13-2018, 04:59 AM
Senior Member
Can any of you computer gurus explain to me why thus site converts my BBCode (IMG) pictures to attachments?
Attachment 2260424
They show up as BBCode images in the preview, but return to thumbnail when I post.
Attachment 2260424
They show up as BBCode images in the preview, but return to thumbnail when I post.
Attachment 2260428
Last edited by SrTelemaster150; 05-13-2018 at 01:08 PM.
05-13-2018, 09:01 AM
Senior Member
My pictures are sized specifically for message boards. (640 X 480)
It seems inane that anyone would rather have to click a thumbnail to view the picture in another window where the text can no longer be viewed. It's like having all of the pictures for a magazine article posted separately at the back of the magazine. Wouldn't it be just peachy to have the flip back & forth between the article and a "picture apenndix" in a magazine?
Again, this is the ONLY board I post one with such asinine picture posting software.
At least before the site "improvement" I could post pictures as I want before the picture nannies might strike. Actually "Club Saito" was the only forum that had picture nannies. In the other RCU forums they would leave my posts alone.
Guess I'll just have to post on RCG and post links to that site here when I do my next how-to thread.
Last edited by SrTelemaster150; 05-13-2018 at 05:35 PM.
05-13-2018, 09:52 AM
05-13-2018, 12:08 PM
Senior Member
The 220 "Big Bore Carburetor" is 13mm bore.
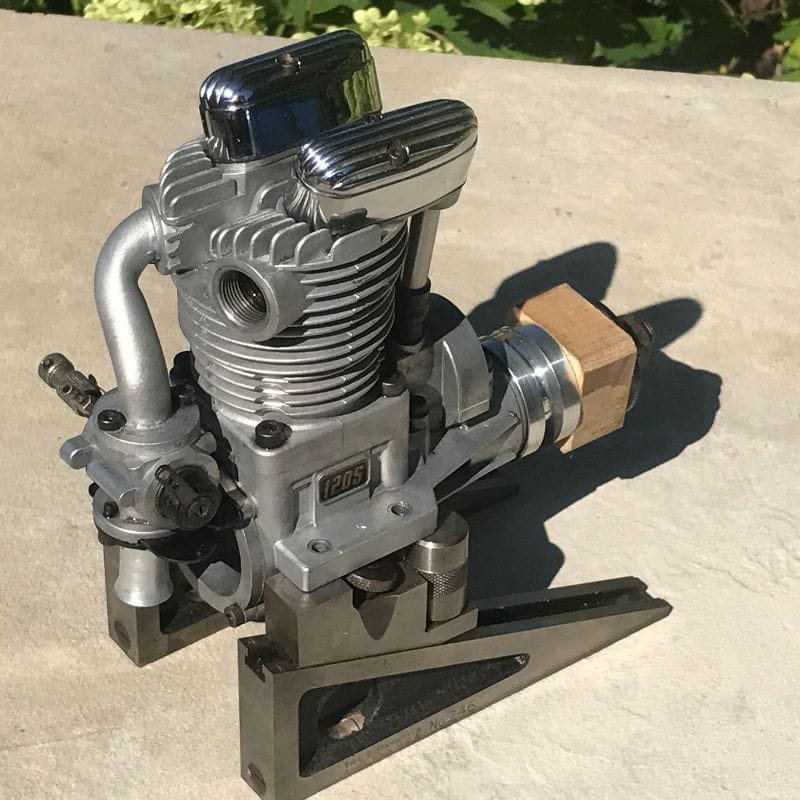
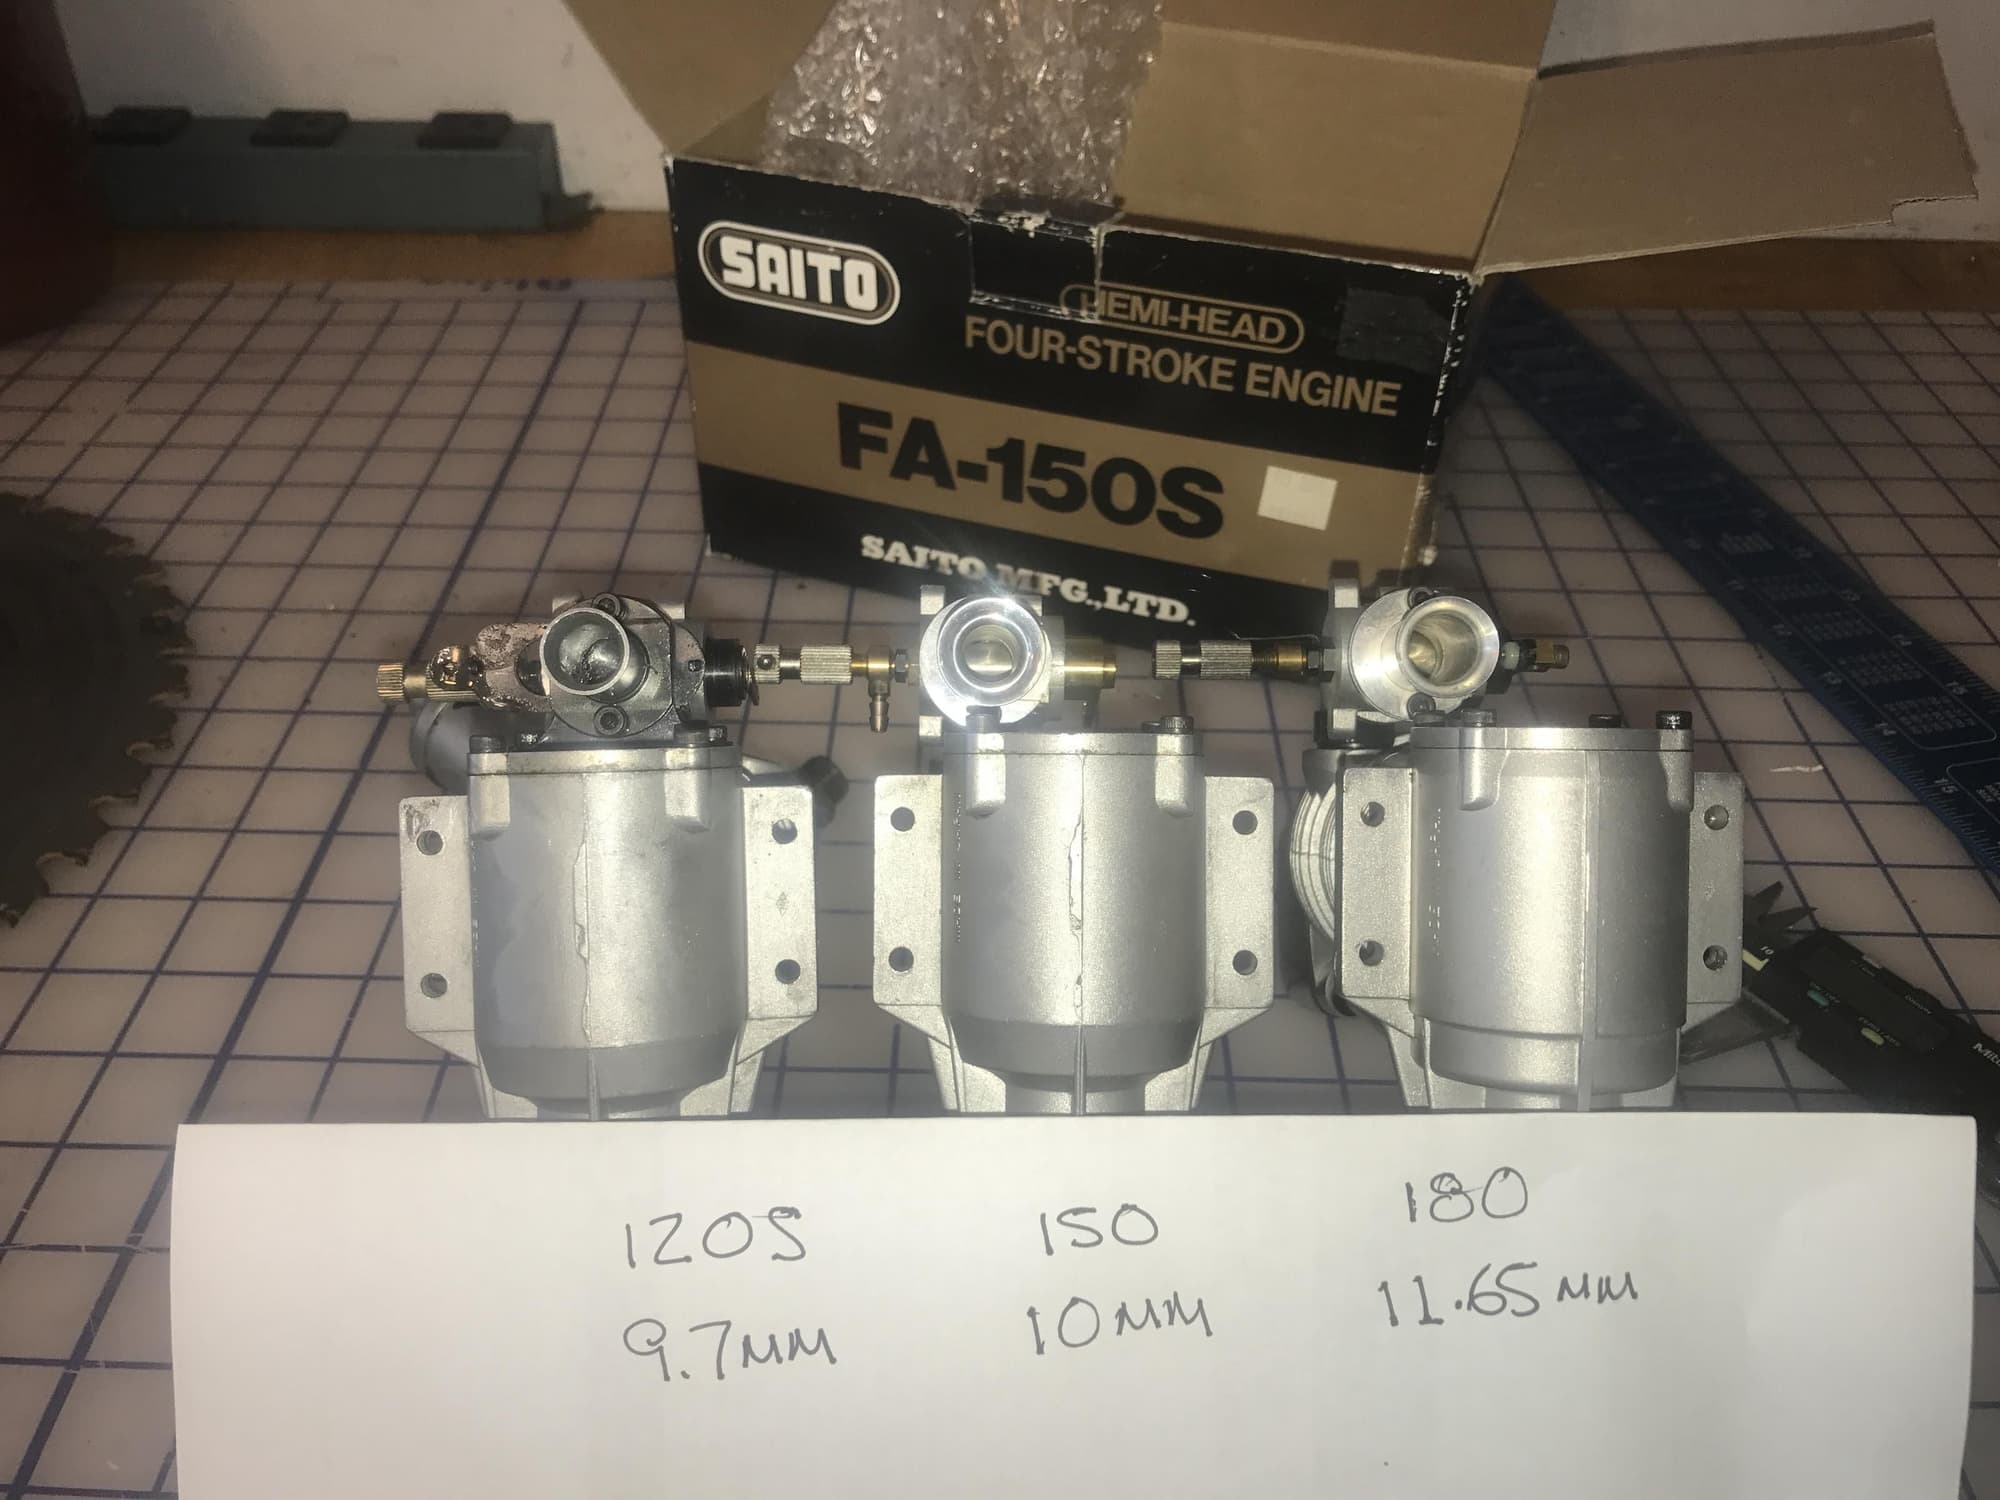 The rebuilt 120 just before installation in the 1/5 scale Pica Waco. The other pic is a comparison of the carb bores on the three Saito big blocks. (150 in the middle sporting a homebrew , longer than stock velocity stack as seen in on the 150 with the brass muffler.
05-13-2018, 12:26 PM
The rebuilt 120 just before installation in the 1/5 scale Pica Waco. The other pic is a comparison of the carb bores on the three Saito big blocks. (150 in the middle sporting a homebrew , longer than stock velocity stack as seen in on the 150 with the brass muffler.
05-13-2018, 12:26 PM
Senior Member
I have right clicked on various full sized images posted here and clicked "copy image address". All have come back as "vbuleton" URL while all of mine come back as attachments.
Here is one of your pix the full url will not post
https://cimg6.ibsrv.net/gimg/www.rcu...3011676972.jpg
Right click the link, right click on the image, "copy the image address, paste in the task bar and see the URL in the task bar.
The "vbuletin url will also show if you hit the quote" button.
Mine will start out as the "imgur" IMG url and even show the 640 X 480 image in the preview, but once I post, the url disappears in the parallel universe and the picture reverts to a thumbnail.'
Like this.

Last edited by SrTelemaster150; 05-13-2018 at 05:35 PM.
05-13-2018, 12:29 PM
Senior Member
BBBCode is what photo hosting sites use for IMG linking. You would not be posting that way if you are using pictures from your computer.
I have right clicked on various full sized images posted here and clicked "copy image address". All have come back as "vbuleton" URL while all of mine come back as attachments.
Here is one of your pix the full url will not post
https://cimg6.ibsrv.net/gimg/www.rcu...3011676972.jpg
Right click the link, right click on the image, "copy the image address, paste in the task bar and see the URL in the task bar.
The "vbuletin url will also show if you hit the quote" button.
Mine will start out as the "imgur" IMG url and even show the 640 X 480 image in the preview, but once I post, the url disappears in the parallel universe and the picture reverts to a thumbnail.'
Like this.
 05-13-2018, 12:39 PM
Senior Member
I tried to post some pix on another thread.
Pictures went back to thumbnails.
Here is a normal piston contact pattern from a 12.7:1 Compression FA-180 running glow fuel with spark ignition. I ran this on a test stand for many hours, at least 10 hours @ WOT doing prototype tests.
Attachment 2260430
Attachment 2260431
Pictures went back to thumbnails.
I'm seeing a normal clean land on the left...not polished, and excessive carbon on the right, which matches the pattern in the cylinder head. I'm seeing your uneven wear pattern on the skirt, but not terribly concerned about it. Air cooled engine, fairly loose tolerance... short skirt... piston is going to rock right to left of crank especially until it gets up to temperature. Consider the piston or bore may be out of round also for all we know, or uneven temps adding to the problem. Consider also if that land was in contact with the bore you'd see aluminum deposits on the ring in short order.
The thing I don't like is the carbon buildup on one side and not the other. I would expect it to be more uniform. Poor swirl pattern? Possible detonation cleaning off one side? I've seen many Briggs and Stratton's look better than that!
I'm aware of the timing. I may have to drill a couple new holes in the crankcase to get it or come up with some other method.
I checked the carb parts, they looking good so far. The valve plate is made out of clear acetate (?). For awhile I couln't find it in the glass jar and thought it disintegrated. Turned out to be just nearly invisible..no damage.
Attachment 2260430
Attachment 2260431
Last edited by SrTelemaster150; 05-13-2018 at 12:43 PM.
05-13-2018, 12:48 PM
 05-13-2018, 12:58 PM
Senior Member
I bought a NIB FA-220 with an extra gasket set, 90 degree exhaust adaptor, aluminum engine mount and the "Big Bore" carburetor with pump. for $549 on e-bay back in December.