


Ziroli 1/6 Hellcat Build
 03-14-2024, 09:34 AM
#351
Junior Member
During the construction process, I utilized the magnetic building method from Airfield Models - Radio Control Flying Aircraft and Display. This method has proven to be exceptionally efficient, and I'm thoroughly impressed with its effectiveness. It's my first time utilizing this system, and I can confidently say that I won't build another plane without it.
With the assistance of the PicsArt editor, I was able to design and visualize the wing structure, ensuring that it meets my specifications and preferences. This tool has been invaluable in creating a visually appealing and structurally sound wing assembly.
With the assistance of the PicsArt editor, I was able to design and visualize the wing structure, ensuring that it meets my specifications and preferences. This tool has been invaluable in creating a visually appealing and structurally sound wing assembly.
 03-15-2024, 08:38 AM
#352

Thread Starter
During the construction process, I utilized the magnetic building method from Airfield Models - Radio Control Flying Aircraft and Display. This method has proven to be exceptionally efficient, and I'm thoroughly impressed with its effectiveness. It's my first time utilizing this system, and I can confidently say that I won't build another plane without it.
With the assistance of the PicsArt editor, I was able to design and visualize the wing structure, ensuring that it meets my specifications and preferences. This tool has been invaluable in creating a visually appealing and structurally sound wing assembly.
With the assistance of the PicsArt editor, I was able to design and visualize the wing structure, ensuring that it meets my specifications and preferences. This tool has been invaluable in creating a visually appealing and structurally sound wing assembly.
I used the same method. Unfortunately, I didn't post any pictures of building the wing this way. I had the wing built before starting this thread. However, on the first page of this thread, there are a few pictures of the h-stab being built with these magnetic fixtures. I agree, these are very useful and I recommend them.
03-27-2024, 06:25 PM
#353
Thread Starter
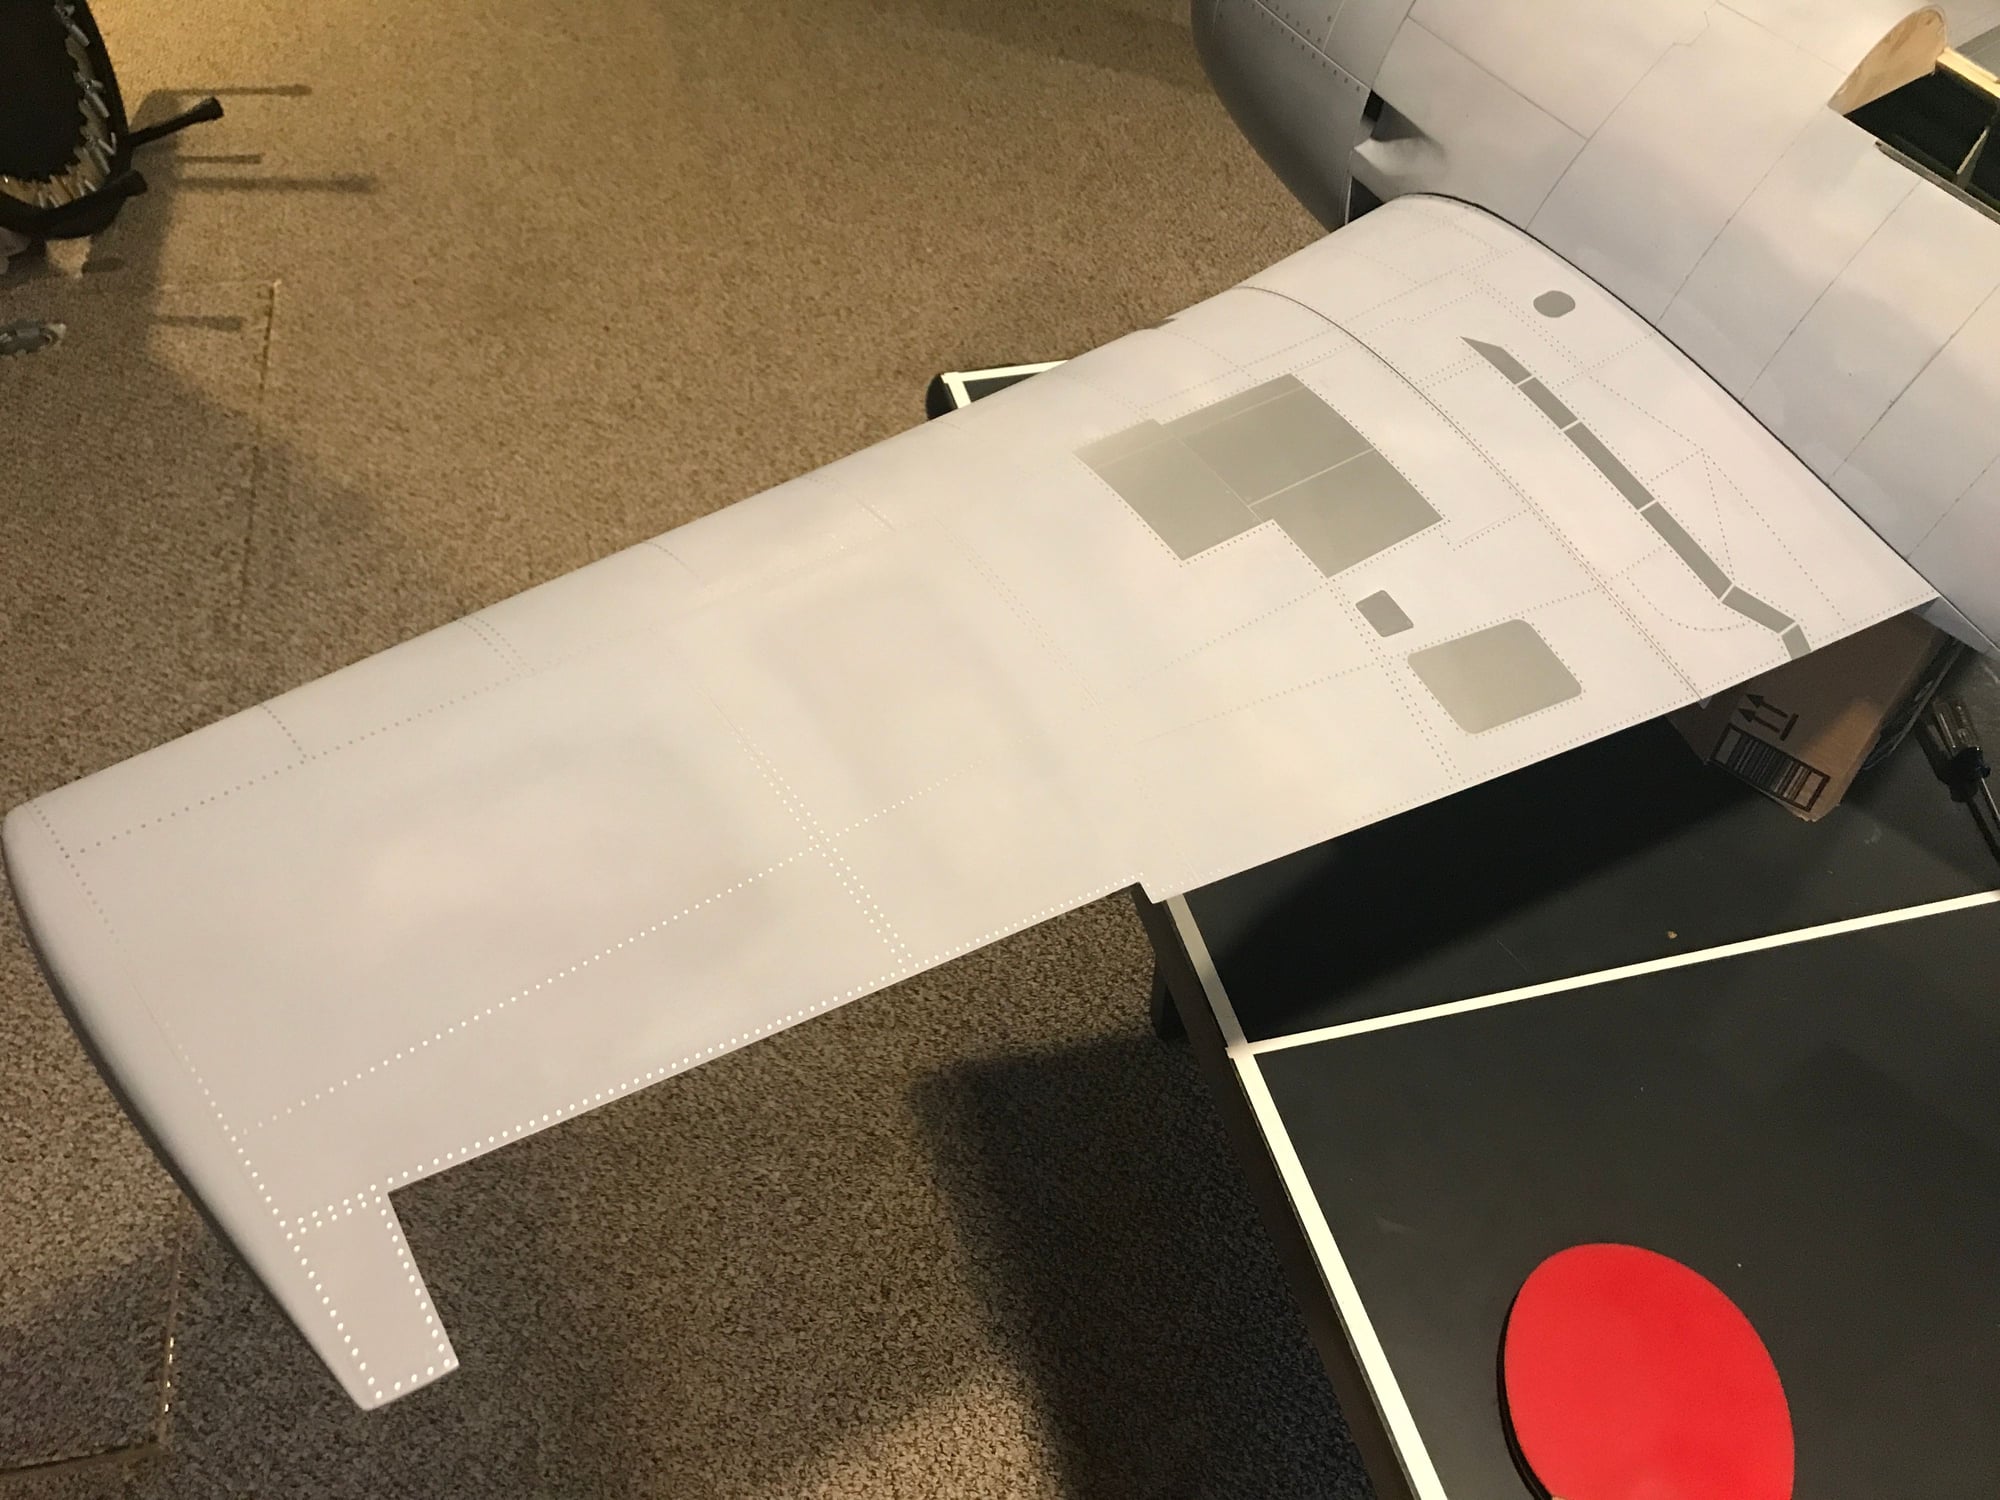
Up to around 8,600 rivets applied, just on the wing and belly-pan. I think I could easily put another 2, 000 into the wing, but I may shoot for 600 more. IFF I can stop at 9,000, I'll have about 6500 left for the fuselage - or I'll need to order some more.
What's is a good number to stop at? When is enough good enough?
I currently have a couple ideas I'm using as guidelines:
- no large expanses without rivets (it should look like something is holding the panel in place to the underlying structure - edges and at least a couple rows down and across the panel)
- outline access panels (the panels have dummy screws or rivets - the surrounding metal should not be left flapping in the wind)
- interesting features (there's a curved line of rivets on each side of the center wing section, and some lines fanned out from where the full scale wing would break for rotating into storage position - things that make the Hellcat unique)
At one point, the wing obviously looked deficient on rivet count. Now, it's looking much better, filled in.
Any thoughts on this? If this were a museum piece, then of course, "Put them all on!"
My Byron Hellcat had zero dummy rivets, zero dummy screws, zero dummy panels, etc. and yet it all got great comments and a purchase offer. And yes, this custom build has been a riveting experience!
03-30-2024, 01:49 PM
#354
Thread Starter
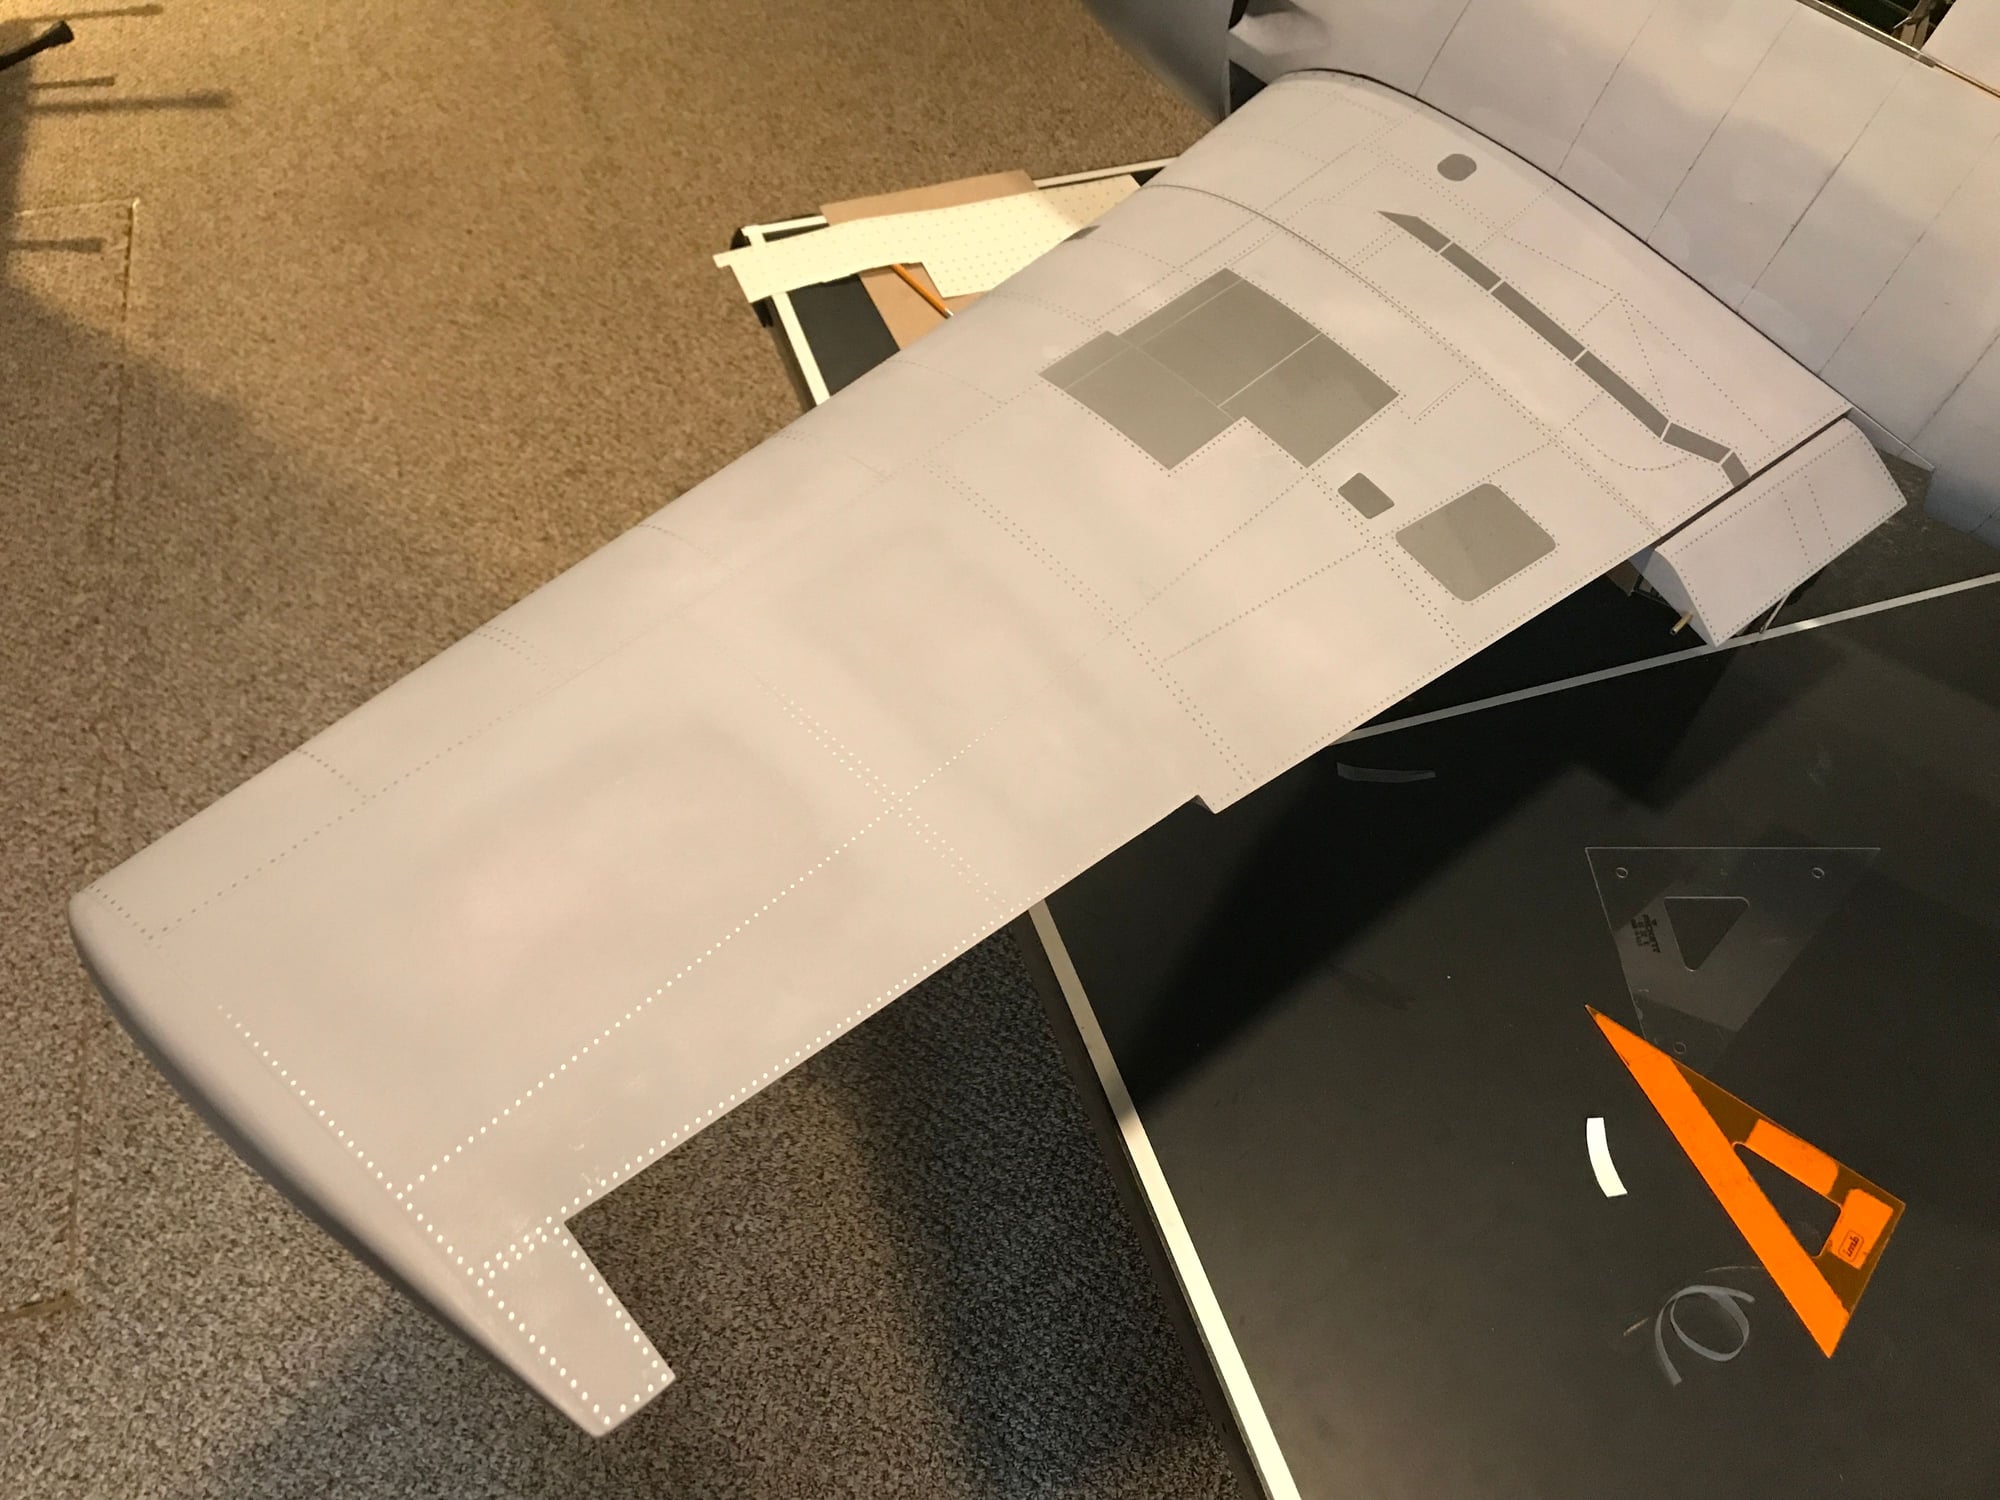
9,000 rivets...
I think the upper wing panels are done. Will flip it, today, as I think I need a couple more lines on the underside. Then the inboard flaps. Maybe a couple short lines on each gun/ammo access cover. Have I done every line of rivets? No. But standing back, there is a fullness that wasn't there before, that feels acceptable. I feel that if I go further than I'm all in - one more line and it won't be balanced - to be balanced I'd have to add 10 lines here, 8 lines there repeat on other side... another 4,0000 on the wing? So, I may have enough, now. Stop. Move on.
Will I need to order more rivets for the fuse, h/v stab? We shall see as I have about 6,000 left. It may be close.
03-31-2024, 08:40 AM
#355
Thread Starter
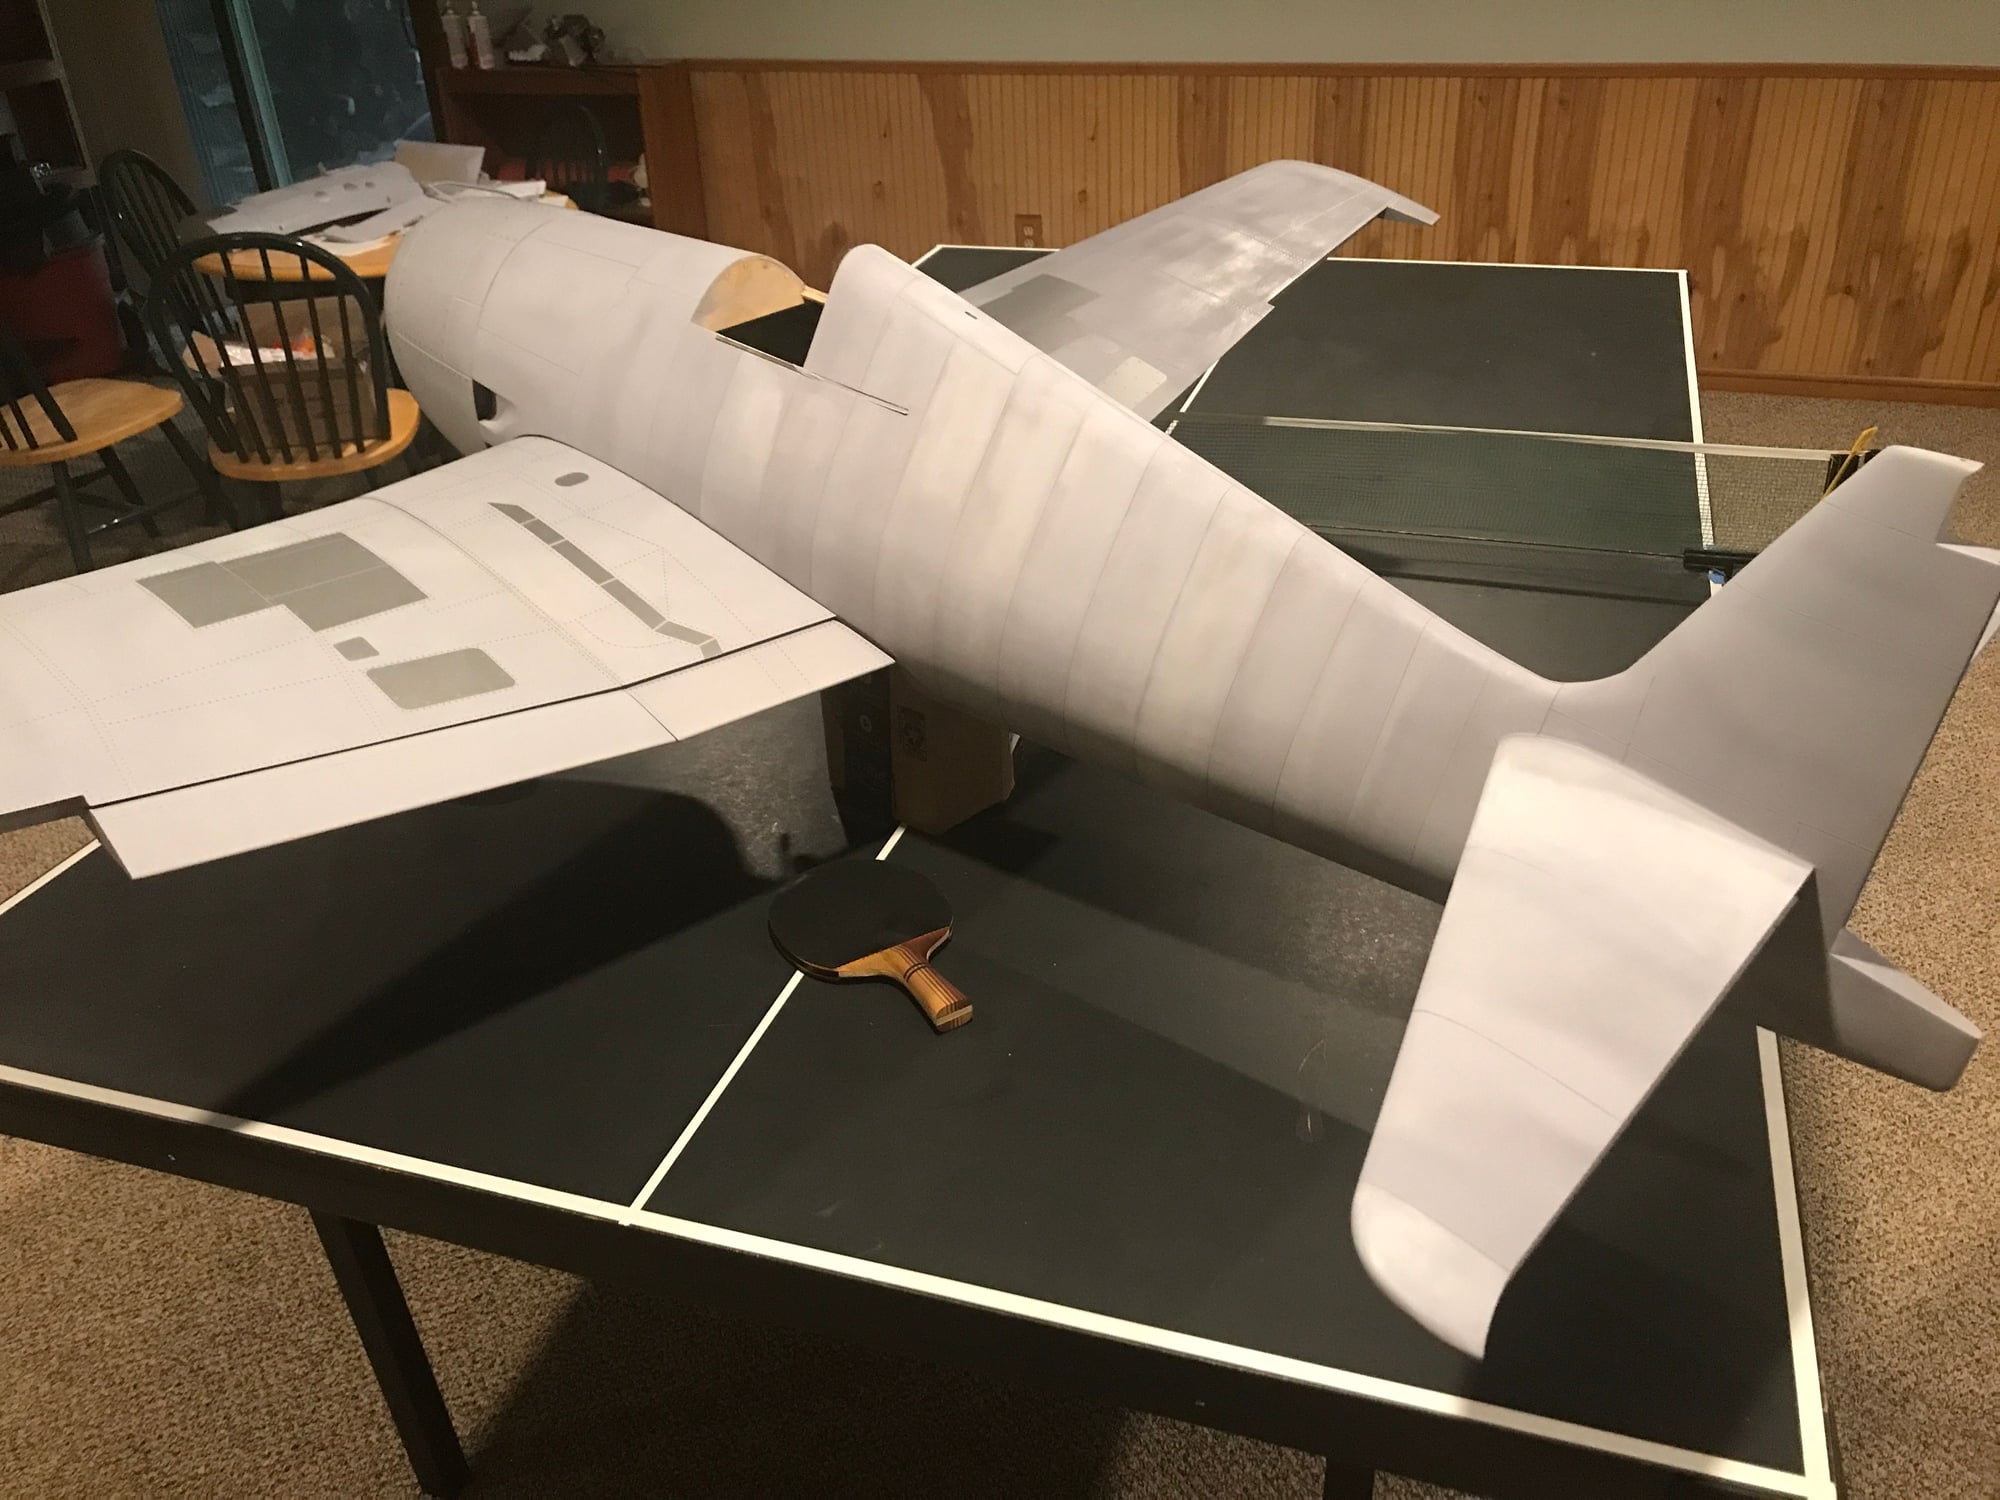
Left wing, inboard flap - rivets completed. One line on the right outboard wing bottom and the right inboard flap to complete and the entire wing will then be done (other than 4 bay covers I need to fabricate and completion of the gear covers).
Yes, I could do more rivets on the wing, but time to move on. I think it's looking good.
Any thoughts?
I'll need to start looking for paint, going back through my bookmarks. I used an air spray gun (not an air brush) and latex paint last time. I have a single stage air brush and have been thinking about an upgrade to a dual stage.
!
04-10-2024, 05:17 PM
#356
Thread Starter
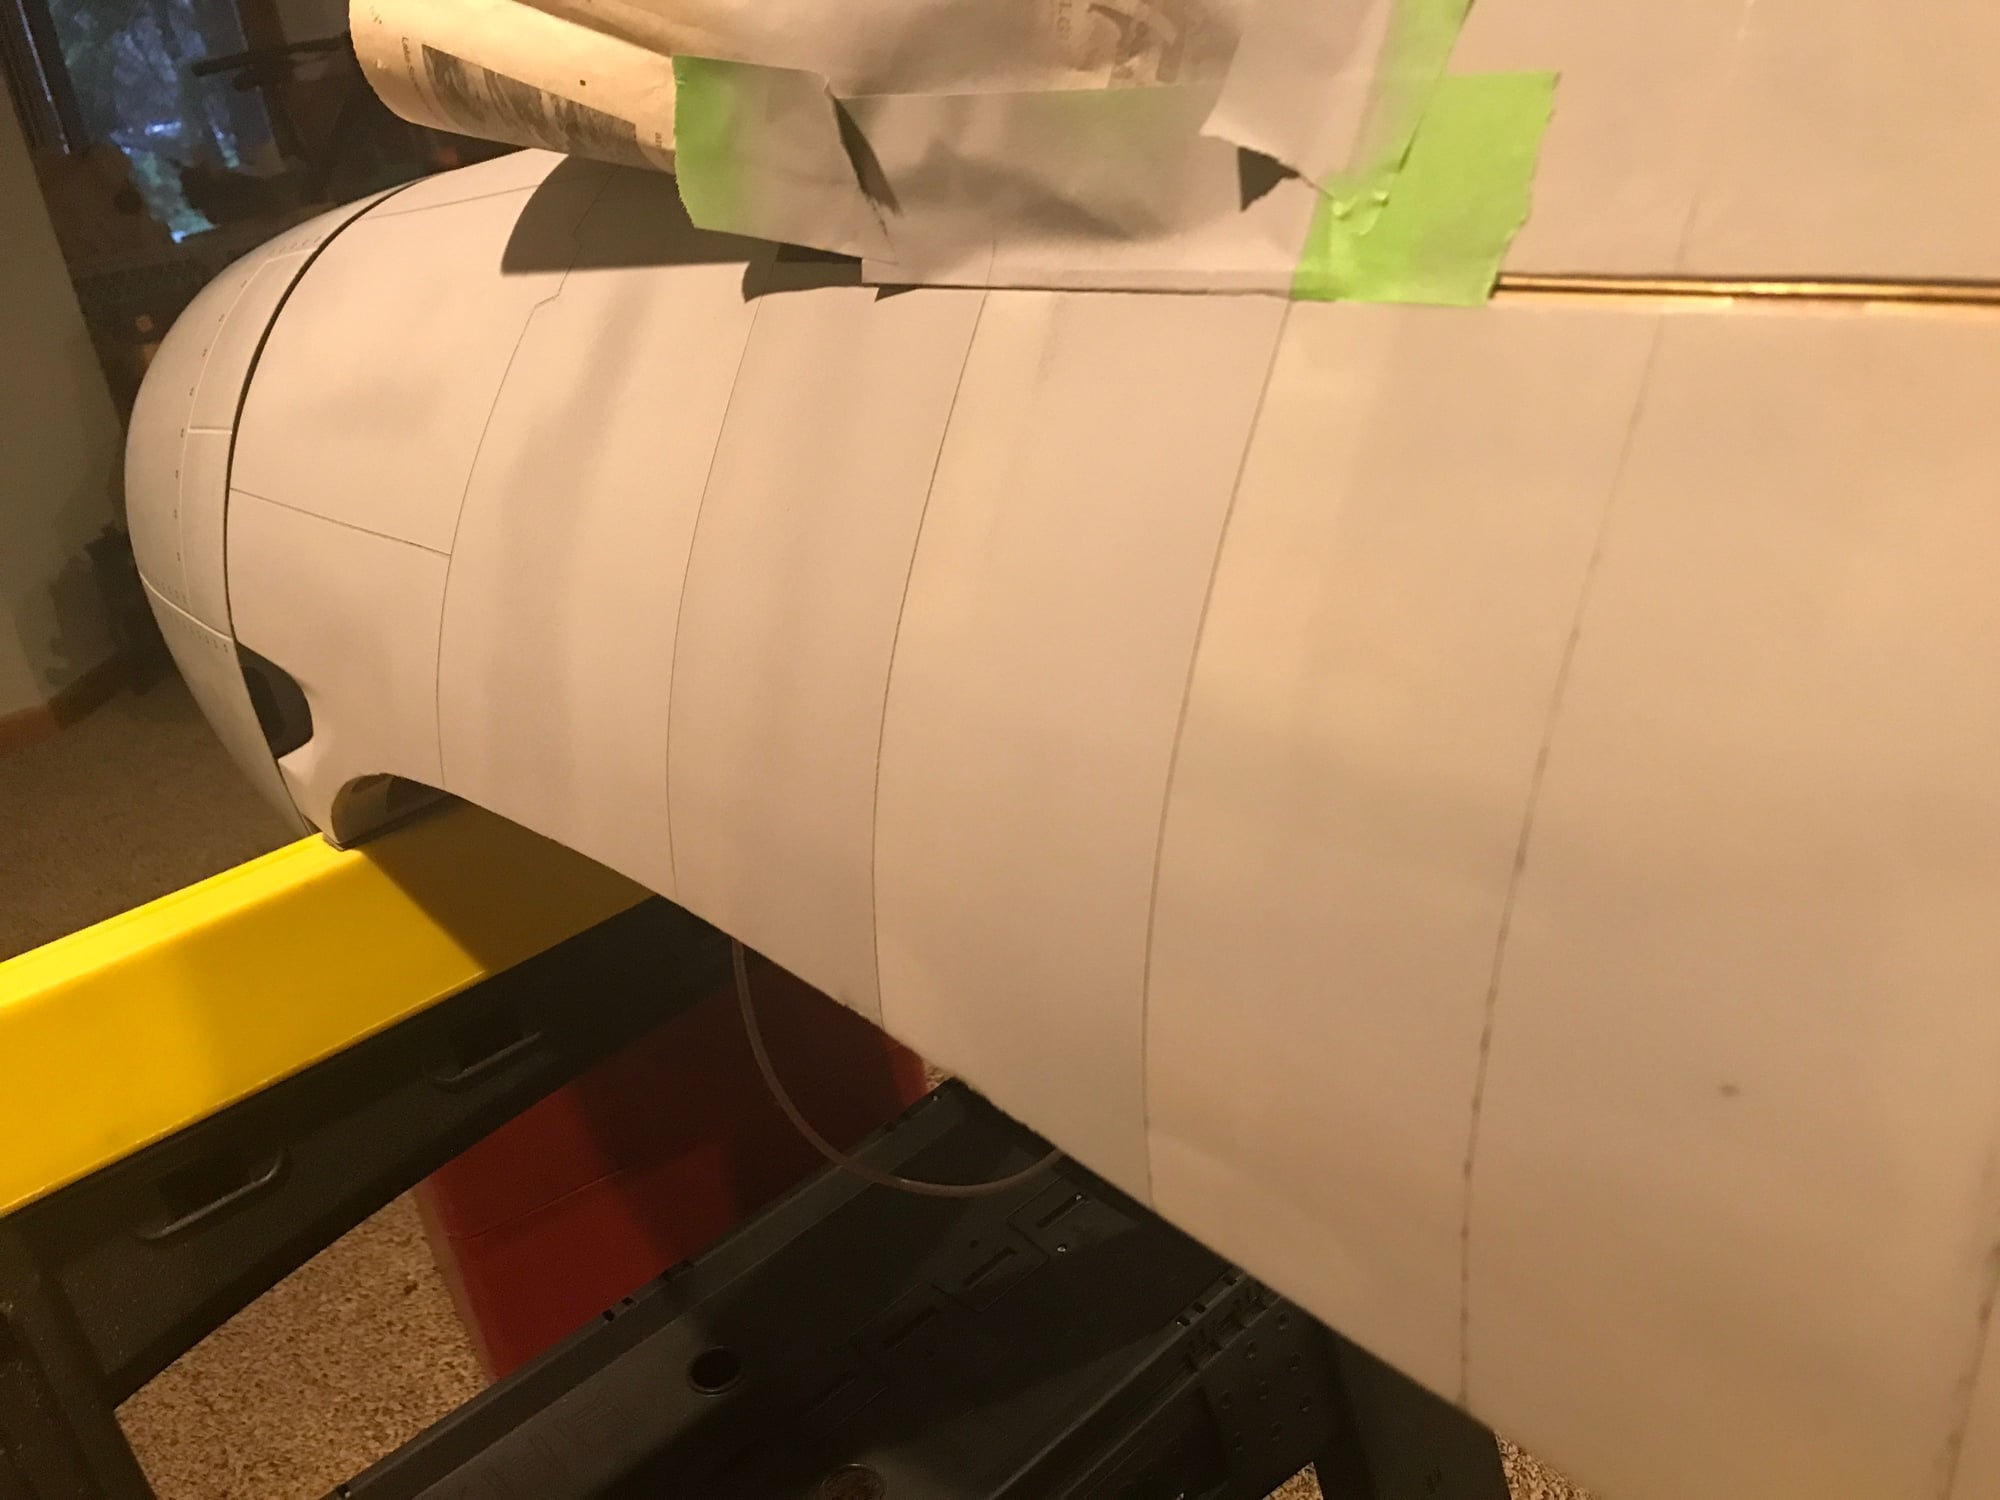
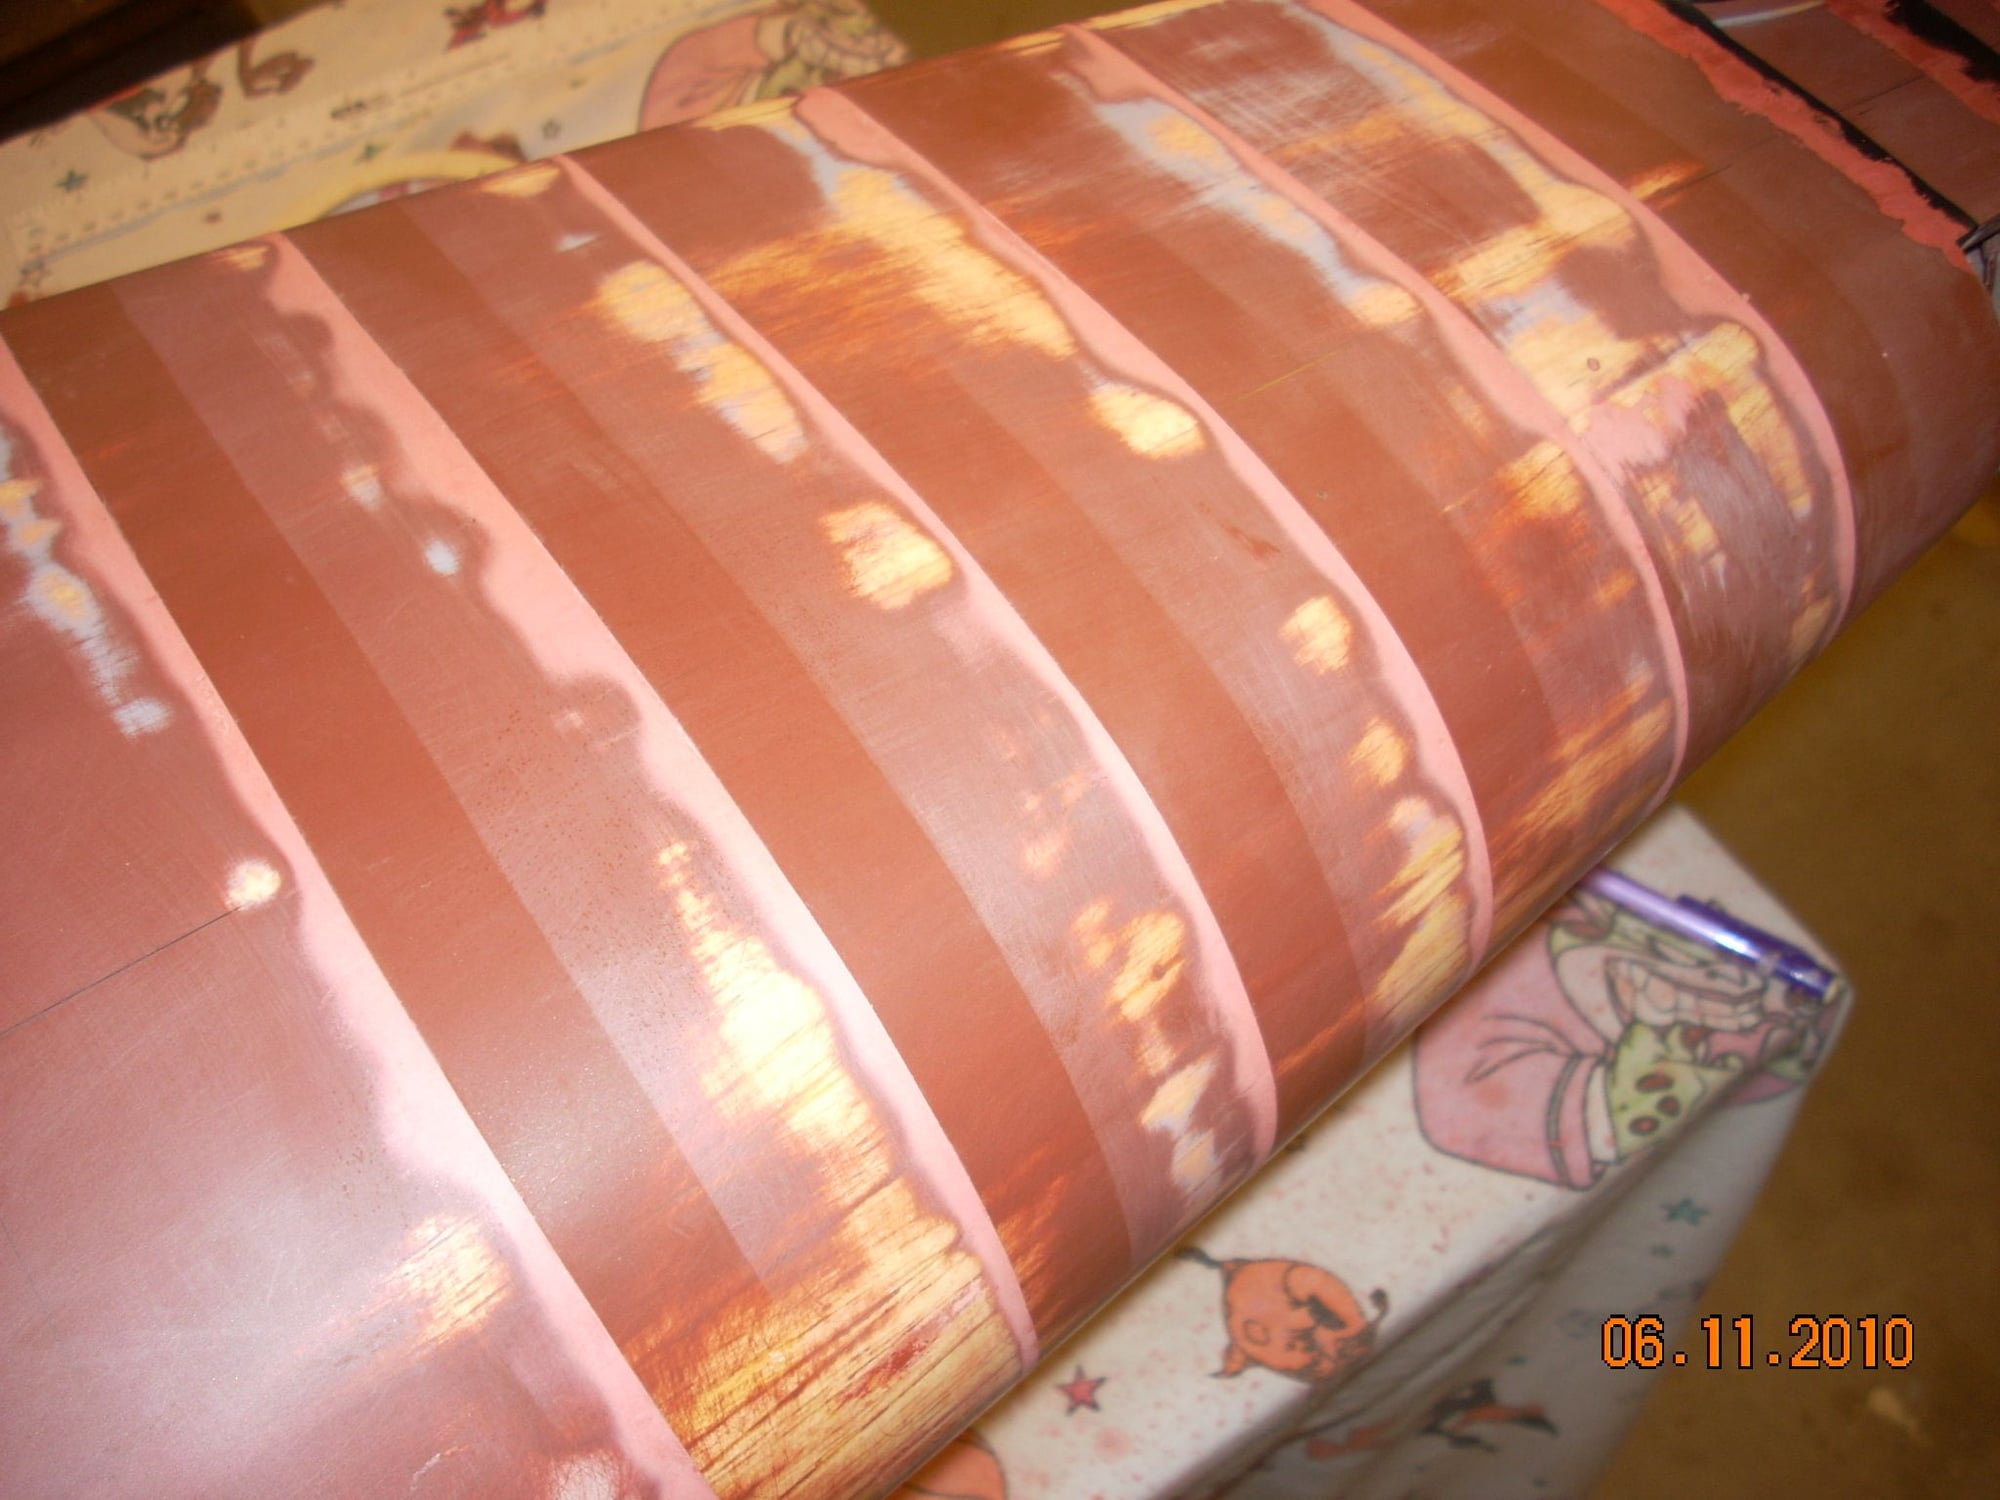
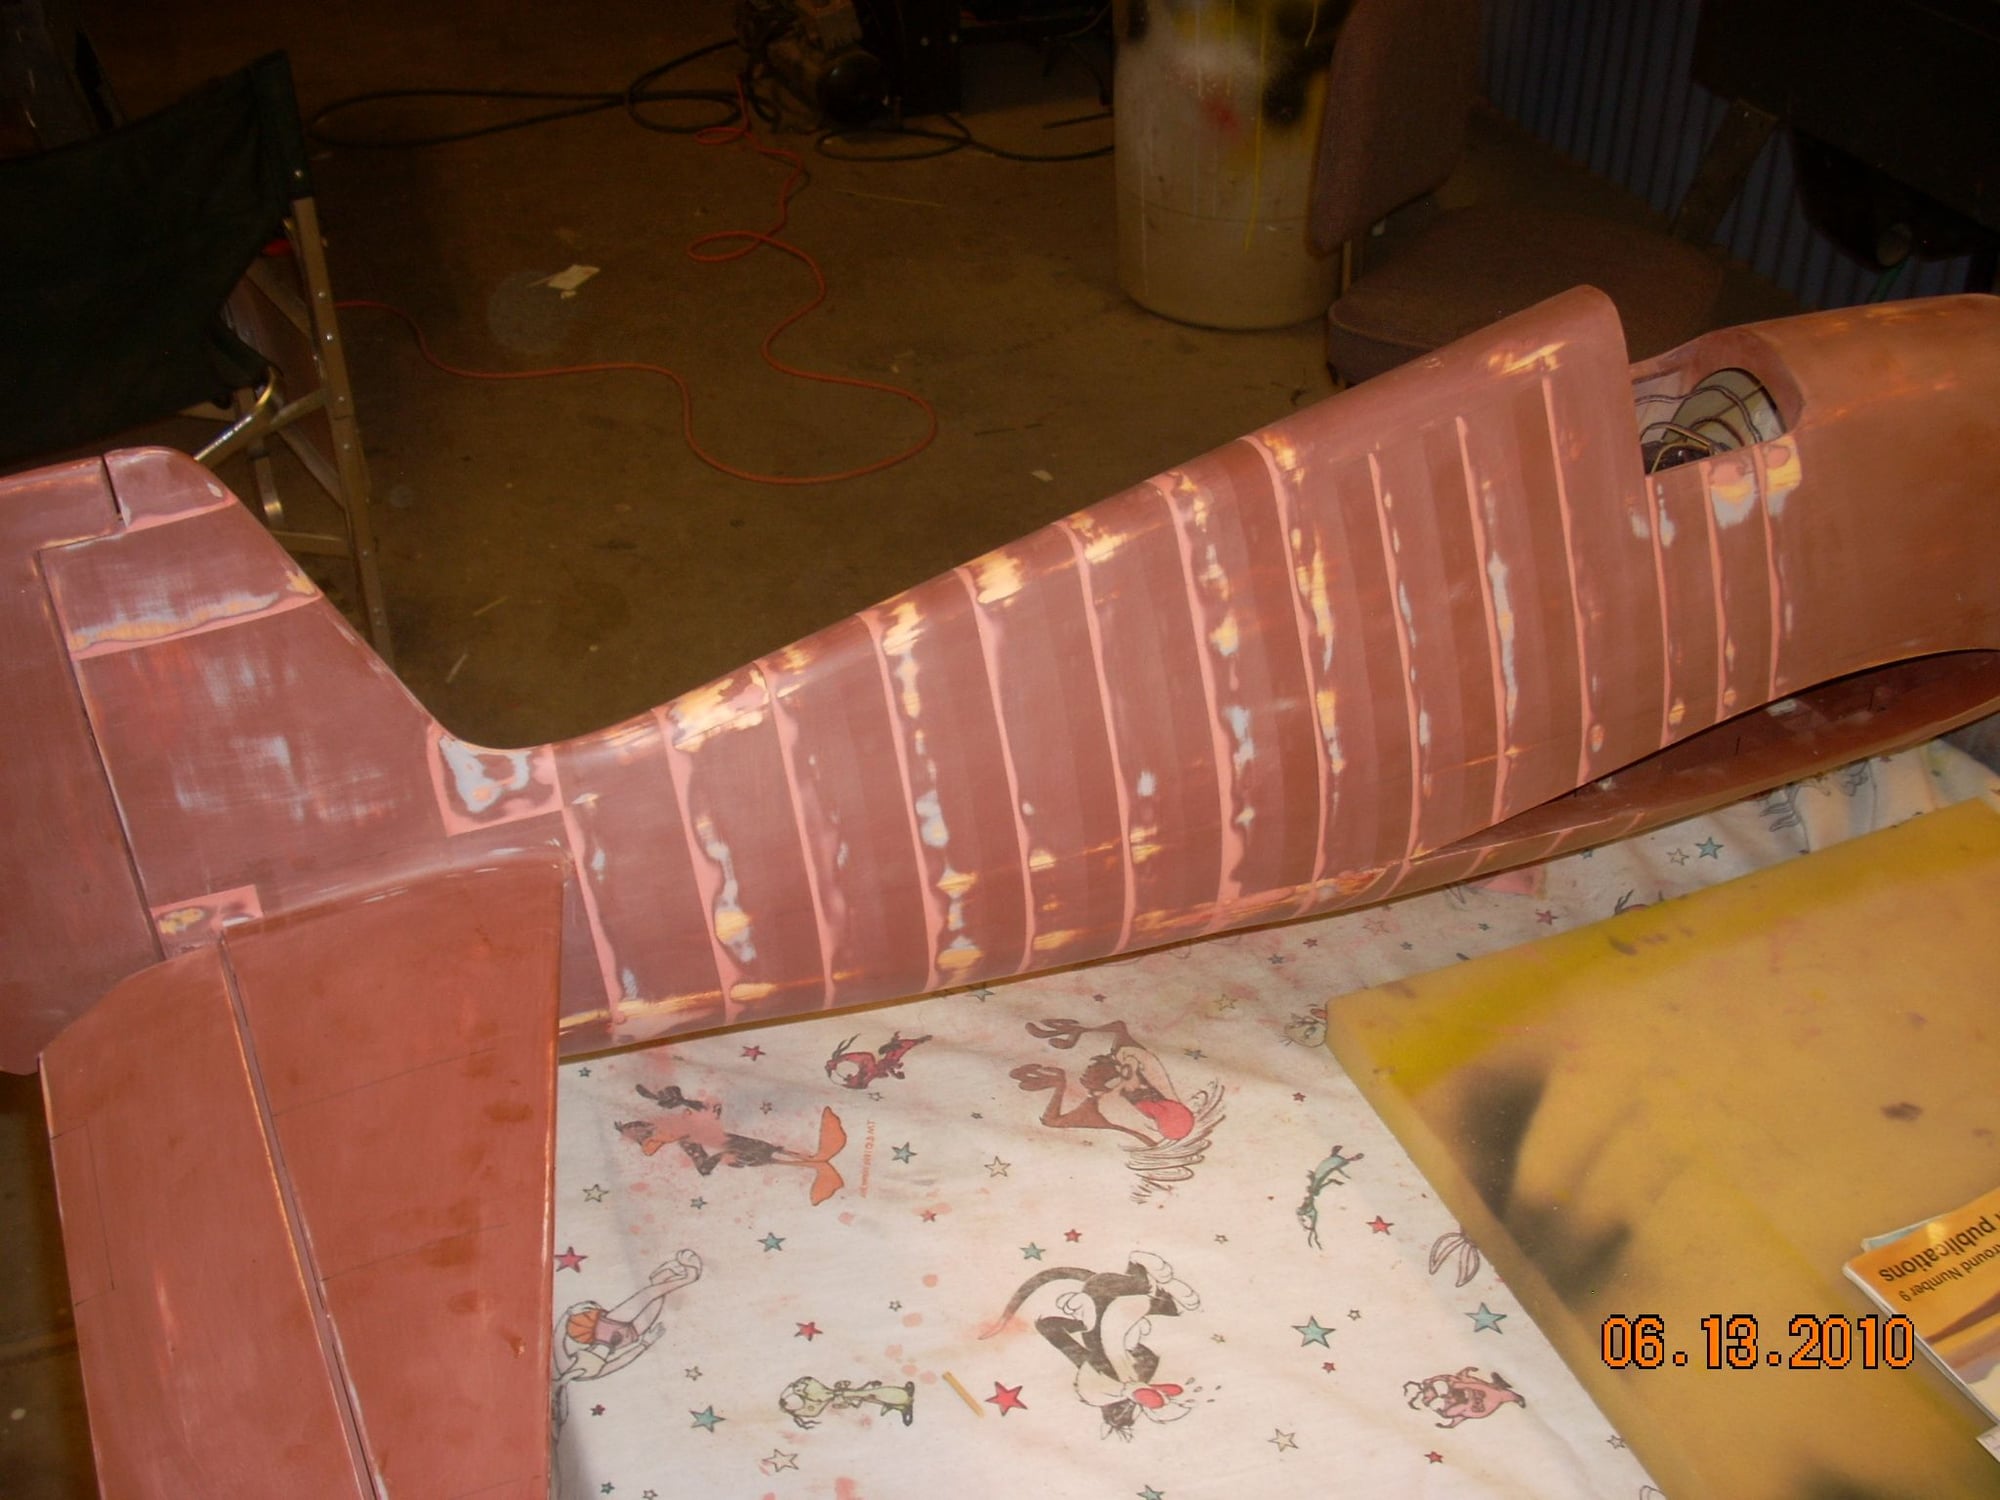
Fuselage progress: Butt panel joints at front of fuse are complete, along with two sets each on the vertical and horizontal stabs. Also, three overlapping panel joints completed at the cockpit area of the fuse.
I tried using electrical tape for the overlapping panel joints, as it is the same thickness (7 mils) as the ChartPak tap used for the butt joints. However, I found the adhesive too aggressive and that the solvent in the paint would slowly curl the tape. Not good. I had decided against using "painter tape" as it was half the thickness of the ChartPak tape - I didn't think I'd get enough paint build-up to make a clearly defined line.
So, time for an idea: Layer two pieces of painter tape and cut it down the middle to get a clean, straight edge. This worked extremely well.
Weather is warming up, so hopefully I can get at least 3 of these lines done per day, as long as it doesn't rain. The overlapping joints take time as I haven't figured out how to paint more than one tape area at a time - finish one area, remove the tap and where the tape is removed, it get's blended into the next area. I might be able to tape the whole thing at once, spray and then remove one tape, spray, and keep repeating until all the tape is removed. But, I might not finish in one day and I don't want to leave the tape on too long - even though the painter tape's adhesion is much less than the electrical tape, it isn't zero and does pull a pit of the primer with it. I prefer to put the tape on, spray, let it set for an hour max, and then remove it.
Better ideas welcomed.
04-11-2024, 08:14 AM
#357

One way I've seen it done is with masking tape and spackle. Place the tape where you want it, apply the spackle against the edge, sand and remove the tape. Sand the edges from front to back and top to bottom. Took it from an an old copy of "Scale R\C Modeler" years ago.
Great job on one of my all time favorite planes by the way!
Great job on one of my all time favorite planes by the way!
04-15-2024, 09:42 AM
#358
Thread Starter
One way I've seen it done is with masking tape and spackle. Place the tape where you want it, apply the spackle against the edge, sand and remove the tape. Sand the edges from front to back and top to bottom. Took it from an an old copy of "Scale R\C Modeler" years ago.
Great job on one of my all time favorite planes by the way!
Great job on one of my all time favorite planes by the way!
04-15-2024, 10:23 AM
#359

My Feedback: (60)
Join Date: Dec 2001
Location: Litchfield Park,
AZ
Posts: 7,677
Likes: 0
Received 26 Likes
on
24 Posts
One way I've seen it done is with masking tape and spackle. Place the tape where you want it, apply the spackle against the edge, sand and remove the tape. Sand the edges from front to back and top to bottom. Took it from an an old copy of "Scale R\C Modeler" years ago.
Great job on one of my all time favorite planes by the way!
Great job on one of my all time favorite planes by the way!
The following users liked this post:
G.F. Reid (06-01-2024)
04-15-2024, 03:39 PM
#361
My Feedback: (60)
Join Date: Dec 2001
Location: Litchfield Park,
AZ
Posts: 7,677
Likes: 0
Received 26 Likes
on
24 Posts
Always good to hear from you Greg! I think I have known you for about as long as I have known anybody on these boards. If I am not mistaken we first started interacting here way back when it was RC Online and the Internet was a fairly new idea! Man, where does the time go? Are you working on anything currently or just back perusing the threads? Either way I hope all is going well for you and yours my friend.
04-15-2024, 03:56 PM
#362
Yes, it has been a long time since those RCO days!
Not working on anything at the time being. Unfortunately I'm battling cancer and it kind of makes you think about all the things you want to do but don't feel like doing and one of them for me was playing with an airplane. So I've got a couple of foamies, some minis and possibly plans to finish that old p-47 one of these days.
Not working on anything at the time being. Unfortunately I'm battling cancer and it kind of makes you think about all the things you want to do but don't feel like doing and one of them for me was playing with an airplane. So I've got a couple of foamies, some minis and possibly plans to finish that old p-47 one of these days.
04-15-2024, 04:15 PM
#363
Thread Starter
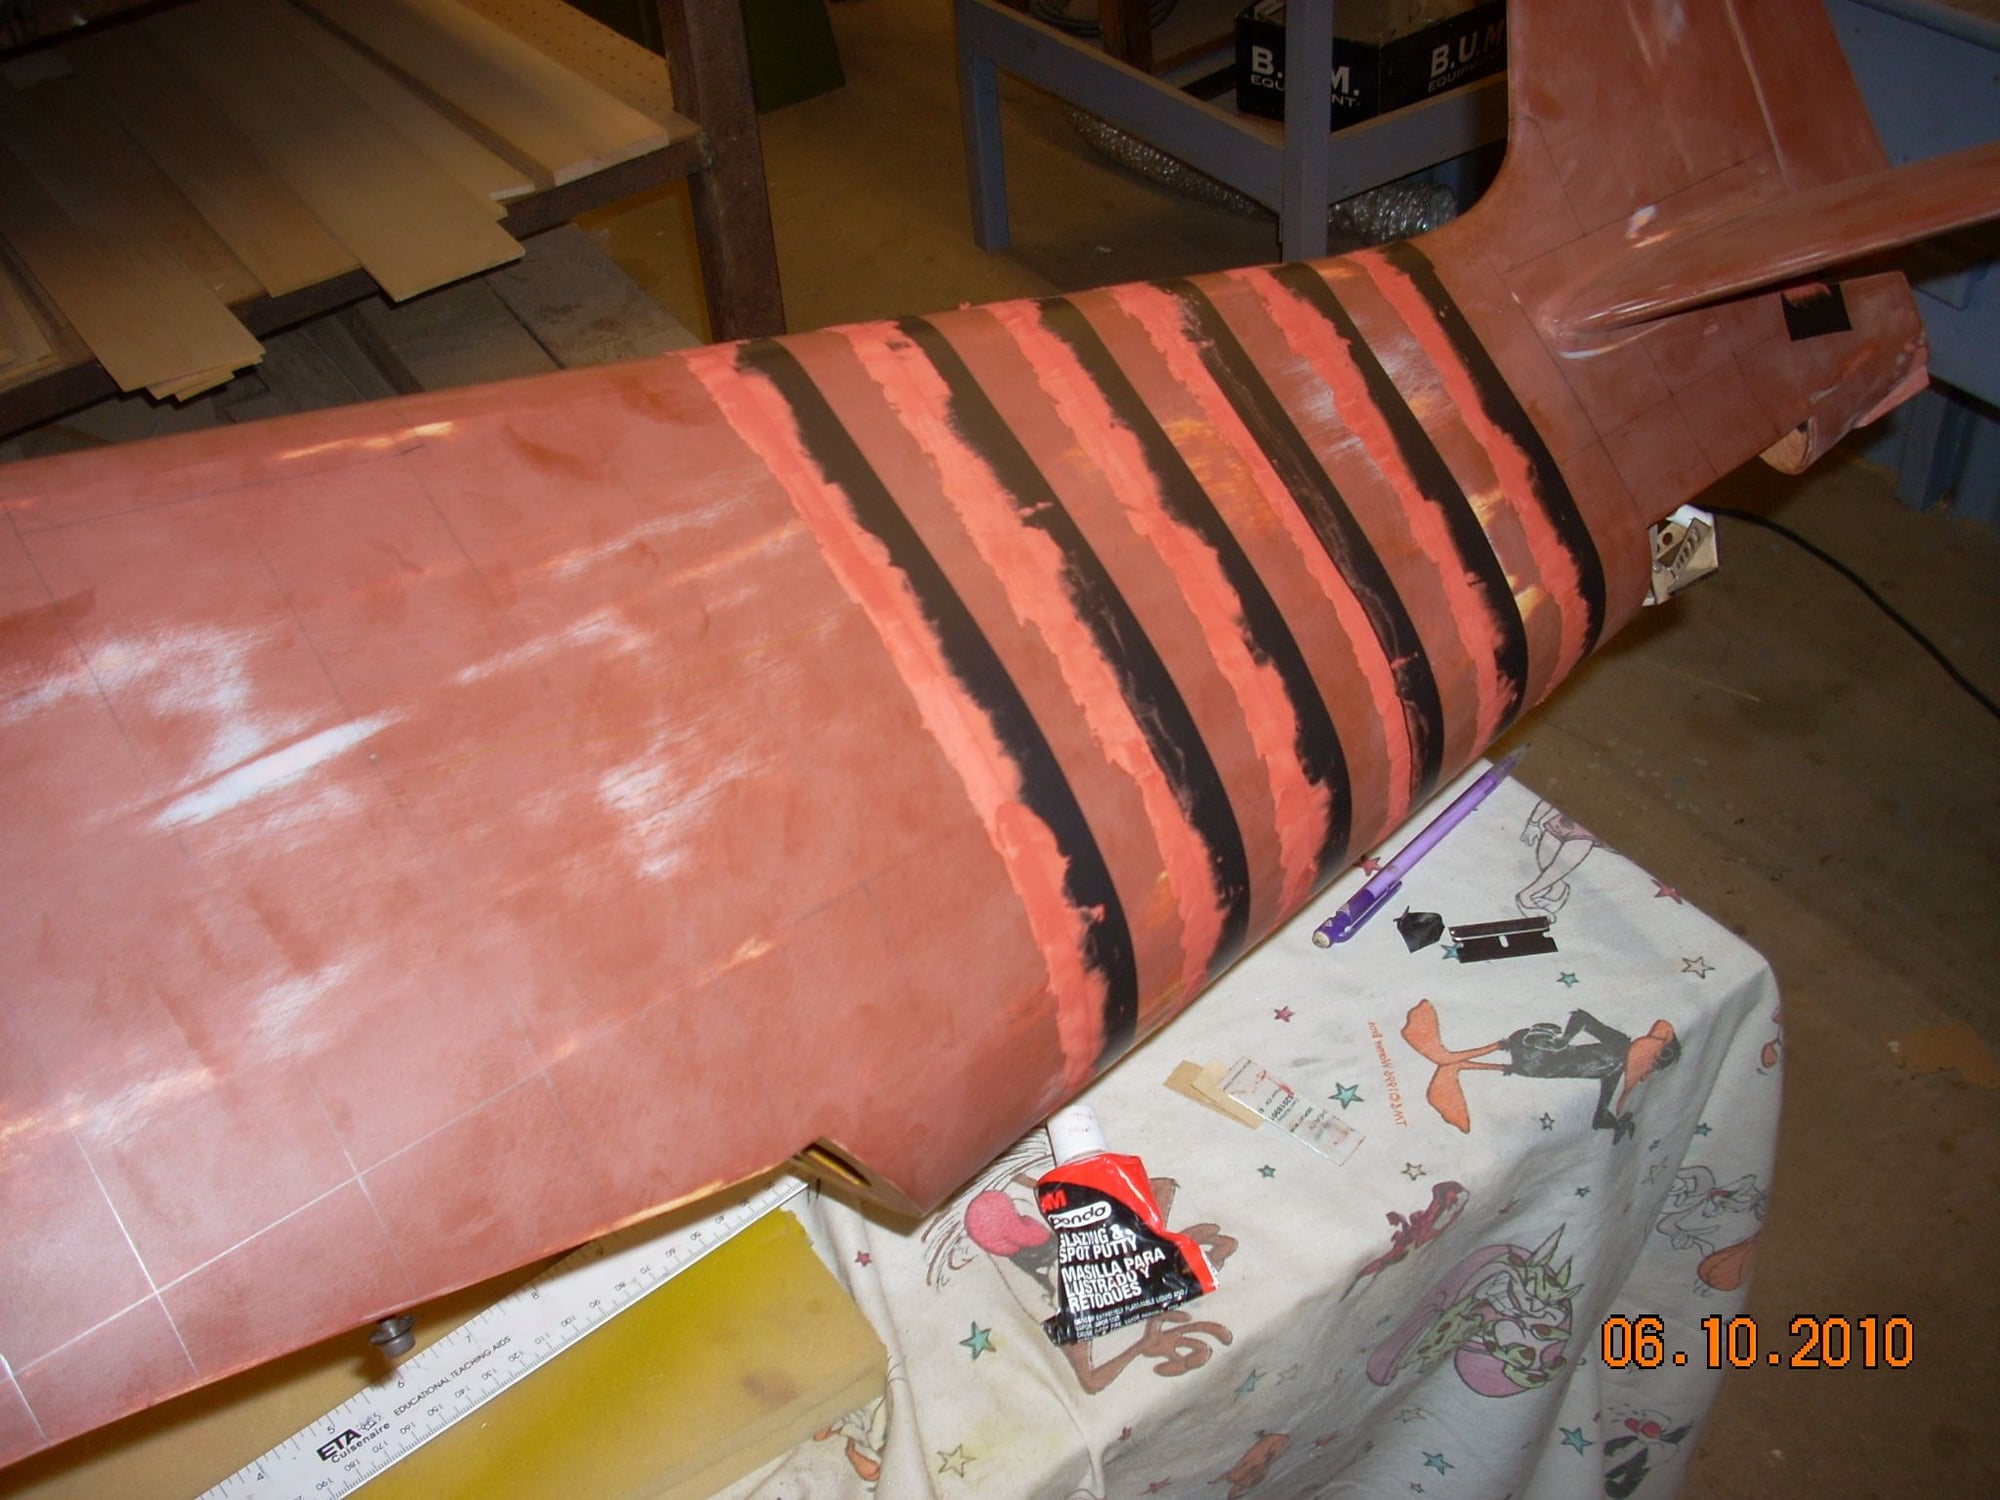
Exactly the way I did it on my Hellcat except that I used electrical tape and spot putty. I like the electrical tape because it can be formed around compound curves and you can wet sand against it without it falling apart. The spot putty works well but next time I will probably use Evercoat body filler as it is a bit tougher. There were a few spots on the spot putty that chipped out and had to be repaired.
I've noticed that you are participating more on this forum. I hope this means you are doing better.
04-15-2024, 04:18 PM
#364
Thread Starter
Yes, it has been a long time since those RCO days!
Not working on anything at the time being. Unfortunately I'm battling cancer and it kind of makes you think about all the things you want to do but don't feel like doing and one of them for me was playing with an airplane. So I've got a couple of foamies, some minis and possibly plans to finish that old p-47 one of these days.
Not working on anything at the time being. Unfortunately I'm battling cancer and it kind of makes you think about all the things you want to do but don't feel like doing and one of them for me was playing with an airplane. So I've got a couple of foamies, some minis and possibly plans to finish that old p-47 one of these days.
The following users liked this post:
G.F. Reid (04-15-2024)
04-16-2024, 11:01 AM
#366
My Feedback: (60)
Join Date: Dec 2001
Location: Litchfield Park,
AZ
Posts: 7,677
Likes: 0
Received 26 Likes
on
24 Posts
Yes, it has been a long time since those RCO days!
Not working on anything at the time being. Unfortunately I'm battling cancer and it kind of makes you think about all the things you want to do but don't feel like doing and one of them for me was playing with an airplane. So I've got a couple of foamies, some minis and possibly plans to finish that old p-47 one of these days.
Not working on anything at the time being. Unfortunately I'm battling cancer and it kind of makes you think about all the things you want to do but don't feel like doing and one of them for me was playing with an airplane. So I've got a couple of foamies, some minis and possibly plans to finish that old p-47 one of these days.
04-27-2024, 08:25 AM
#368
Junior Member
Dale - I have spent the last 3 or 4 days reading your build thread and what a journey! Through the pandemic and beyond! I too have recently retired and after a 35 year hiatus am getting back into RC and working my way through all the changes. Going to cut my teeth on a TF Corsair which I have always been enamored of and move on from there. Your build thread is awesome and your patience and skills are a testimony to what can be created with the right amount of focus and effort. Although your build is significantly more complex that what I am planning I have already learned many things from you and save several links to pages and websites I know I will be using/visiting in the future. Keep up the good work and will follow till the maiden voyage.
05-08-2024, 08:08 AM
#369
Thread Starter
Dale - I have spent the last 3 or 4 days reading your build thread and what a journey! Through the pandemic and beyond! I too have recently retired and after a 35 year hiatus am getting back into RC and working my way through all the changes. Going to cut my teeth on a TF Corsair which I have always been enamored of and move on from there. Your build thread is awesome and your patience and skills are a testimony to what can be created with the right amount of focus and effort. Although your build is significantly more complex that what I am planning I have already learned many things from you and save several links to pages and websites I know I will be using/visiting in the future. Keep up the good work and will follow till the maiden voyage.
Patience, I have much of, true. Skills - I will likely never match those of ChadV, Mirce and many others that have posted here. Thankful for the time you spent reviewing my build. I'm glad you are finding useful content here, much being the summary of what I've learned from others. It has taken way too long, but I've learned much, met some good people with great input, and it has been a refuge at times. Delayed by having too many interests, besides the big life issues.
Due to weather, I'm taking a break from Spring yard work, today, and will get some panel lines done on the fuse, today. Lines for the fin, stab and cockpit forward are done. My method for completing the overlap panel joints on the fuse is slow - slow, but it works: Mask and paint one panel line, feathering into the previous line, repeat. Perhaps I could mask all the lines, paint, remove the tape and feather in with sanding? Will see. I have a process, it's working, and I have other tasks around the house to complete while paint dries! If doing overlapping panel lines on another project, I will seriously consider ChadV's method.
Again, thank you!
05-24-2024, 11:15 AM
#370
Thread Starter
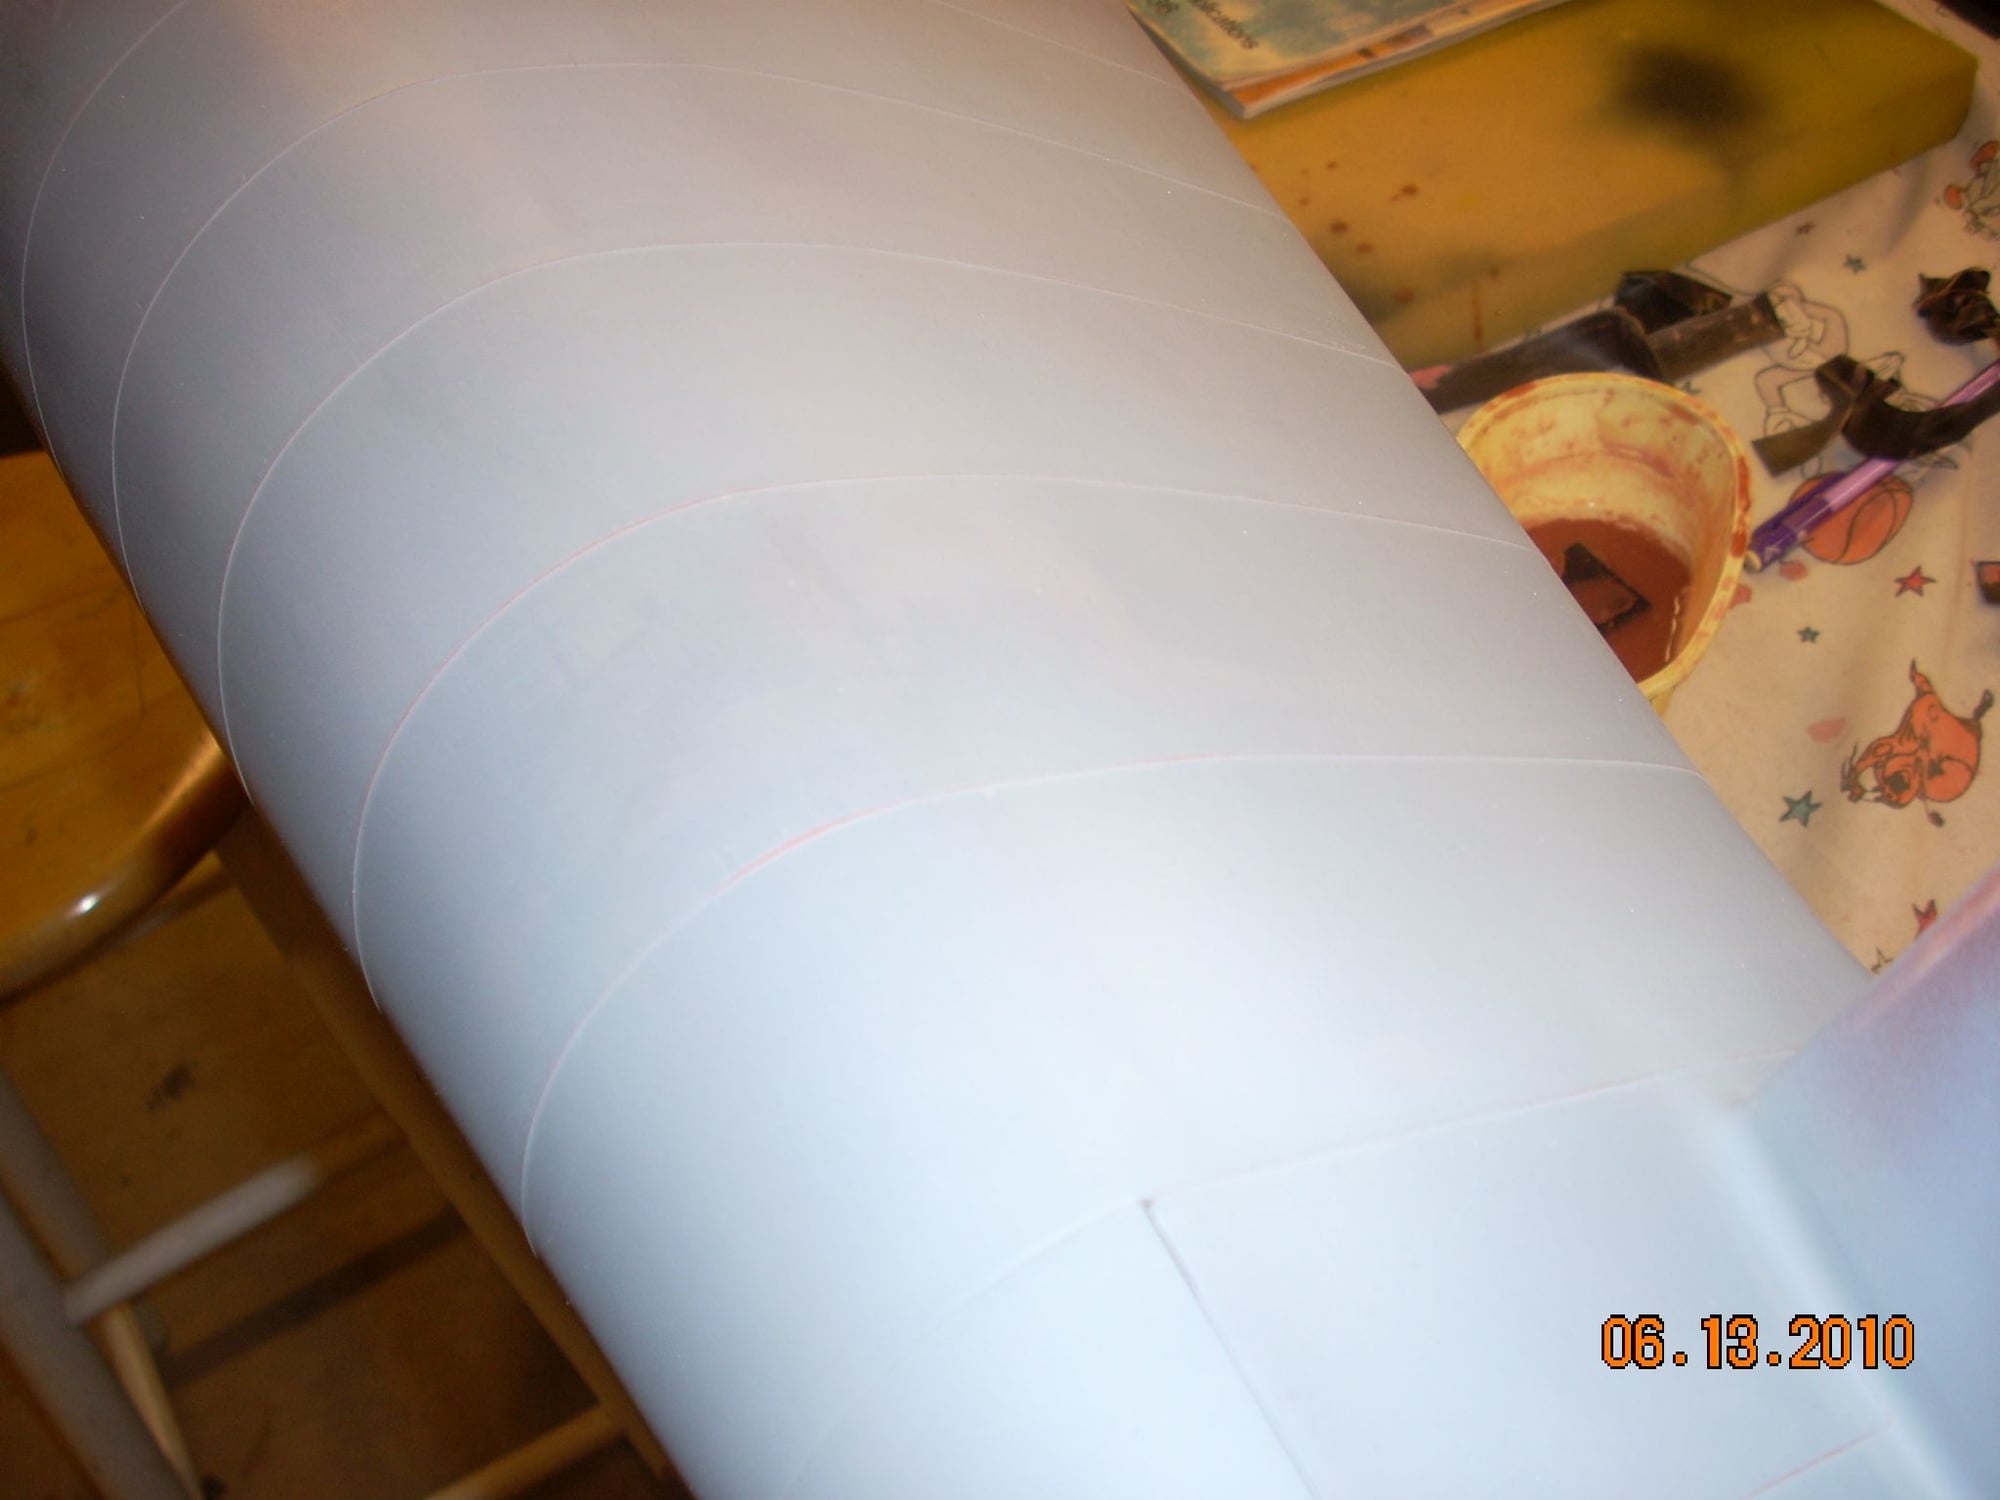
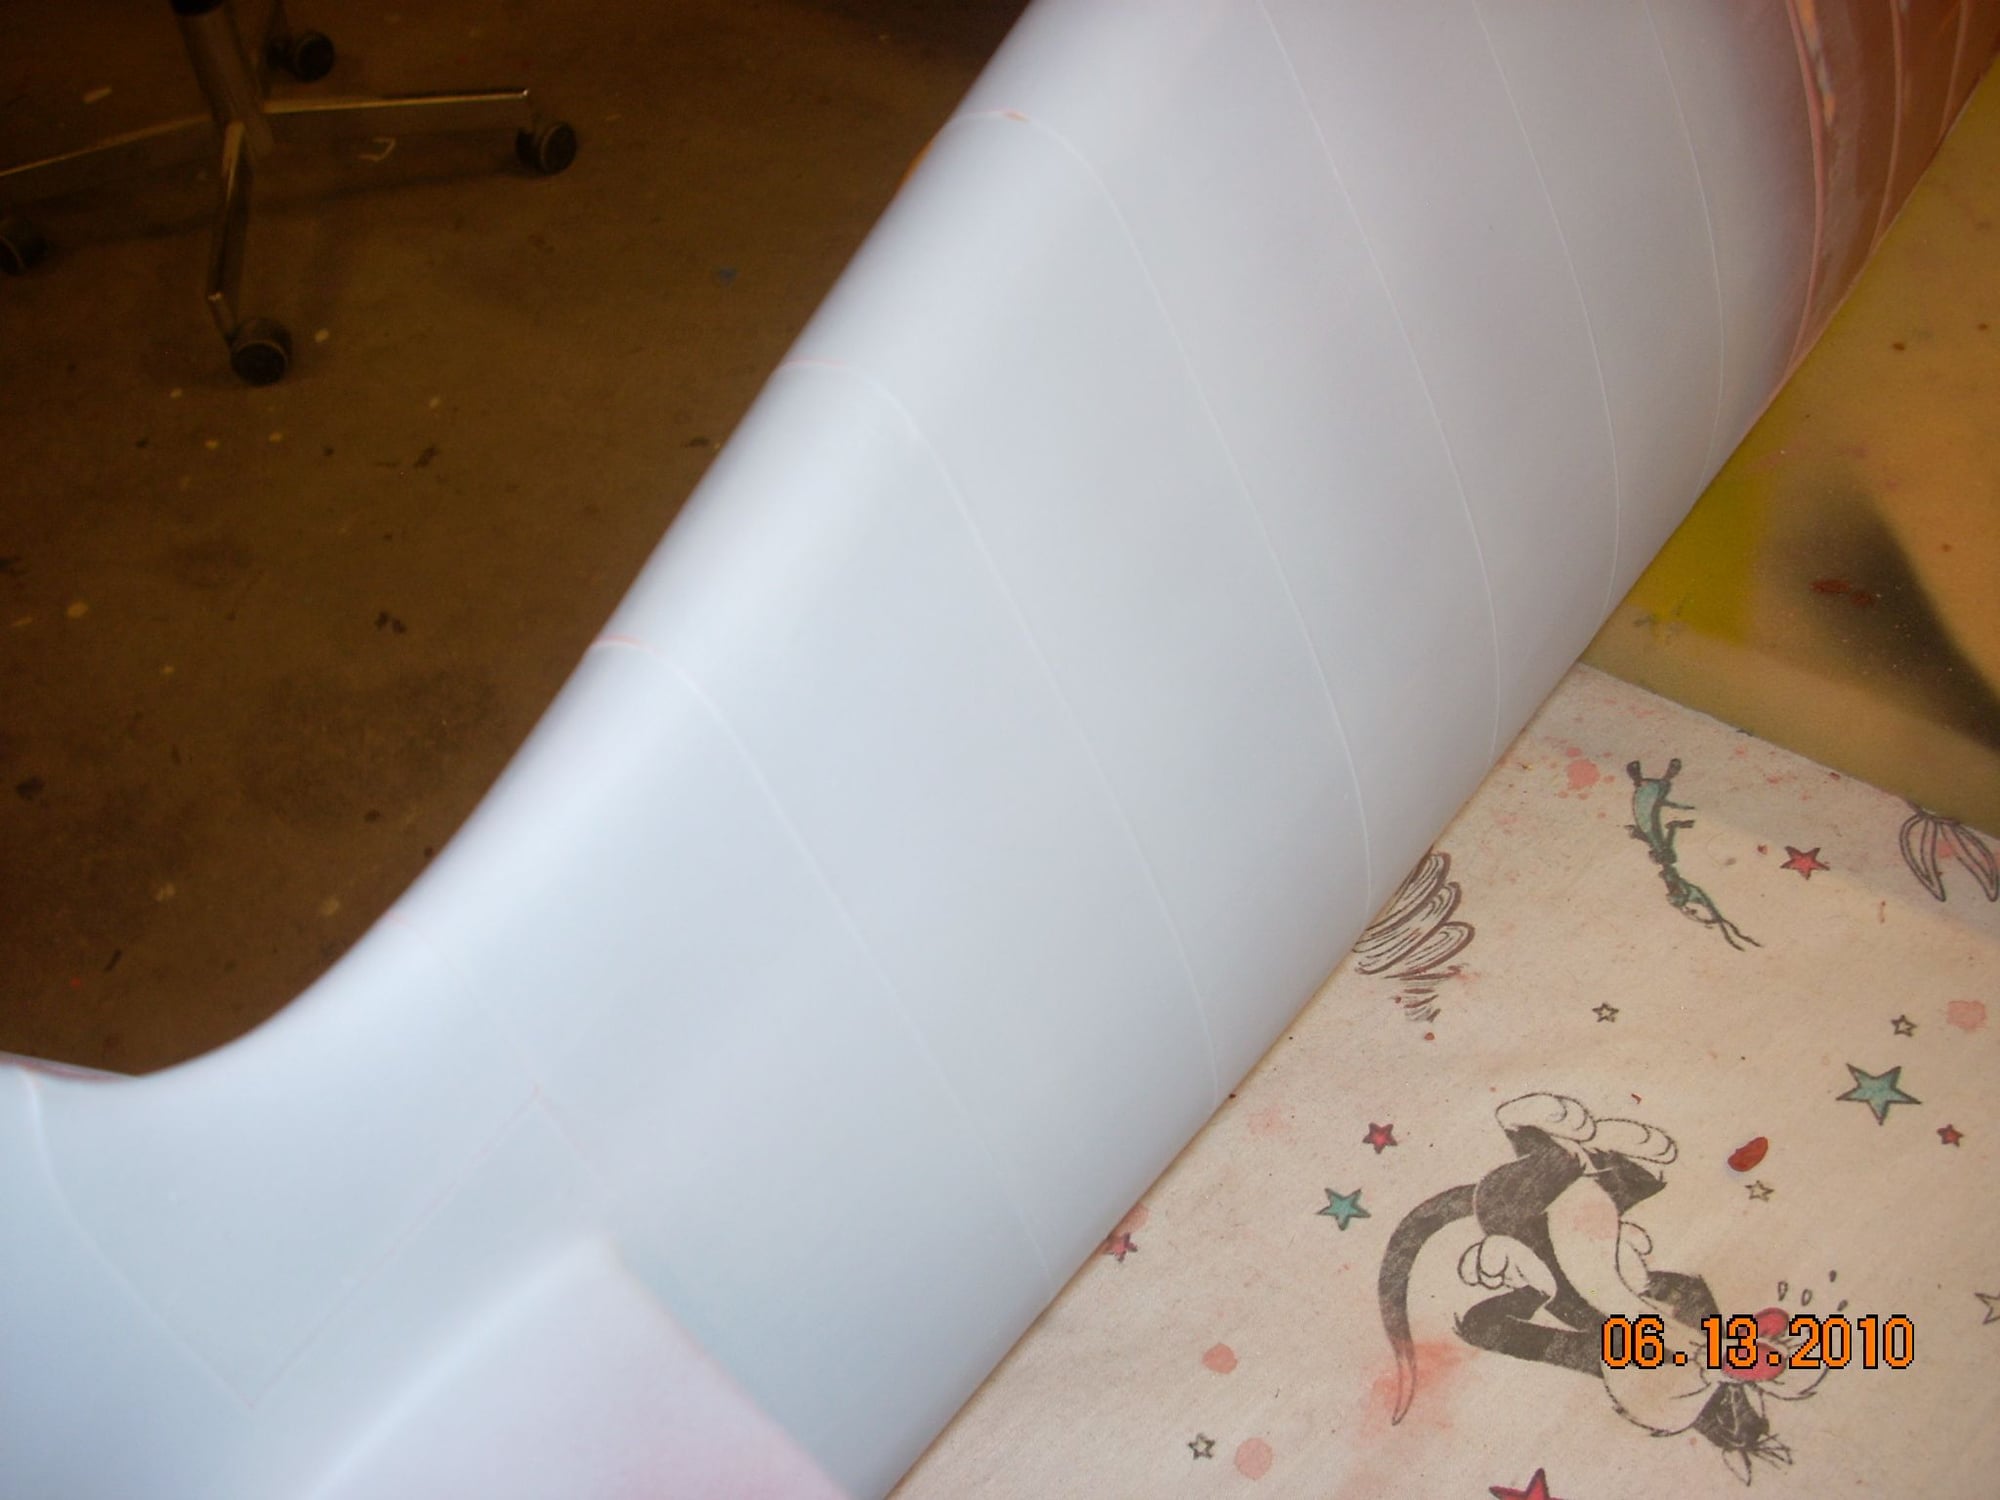
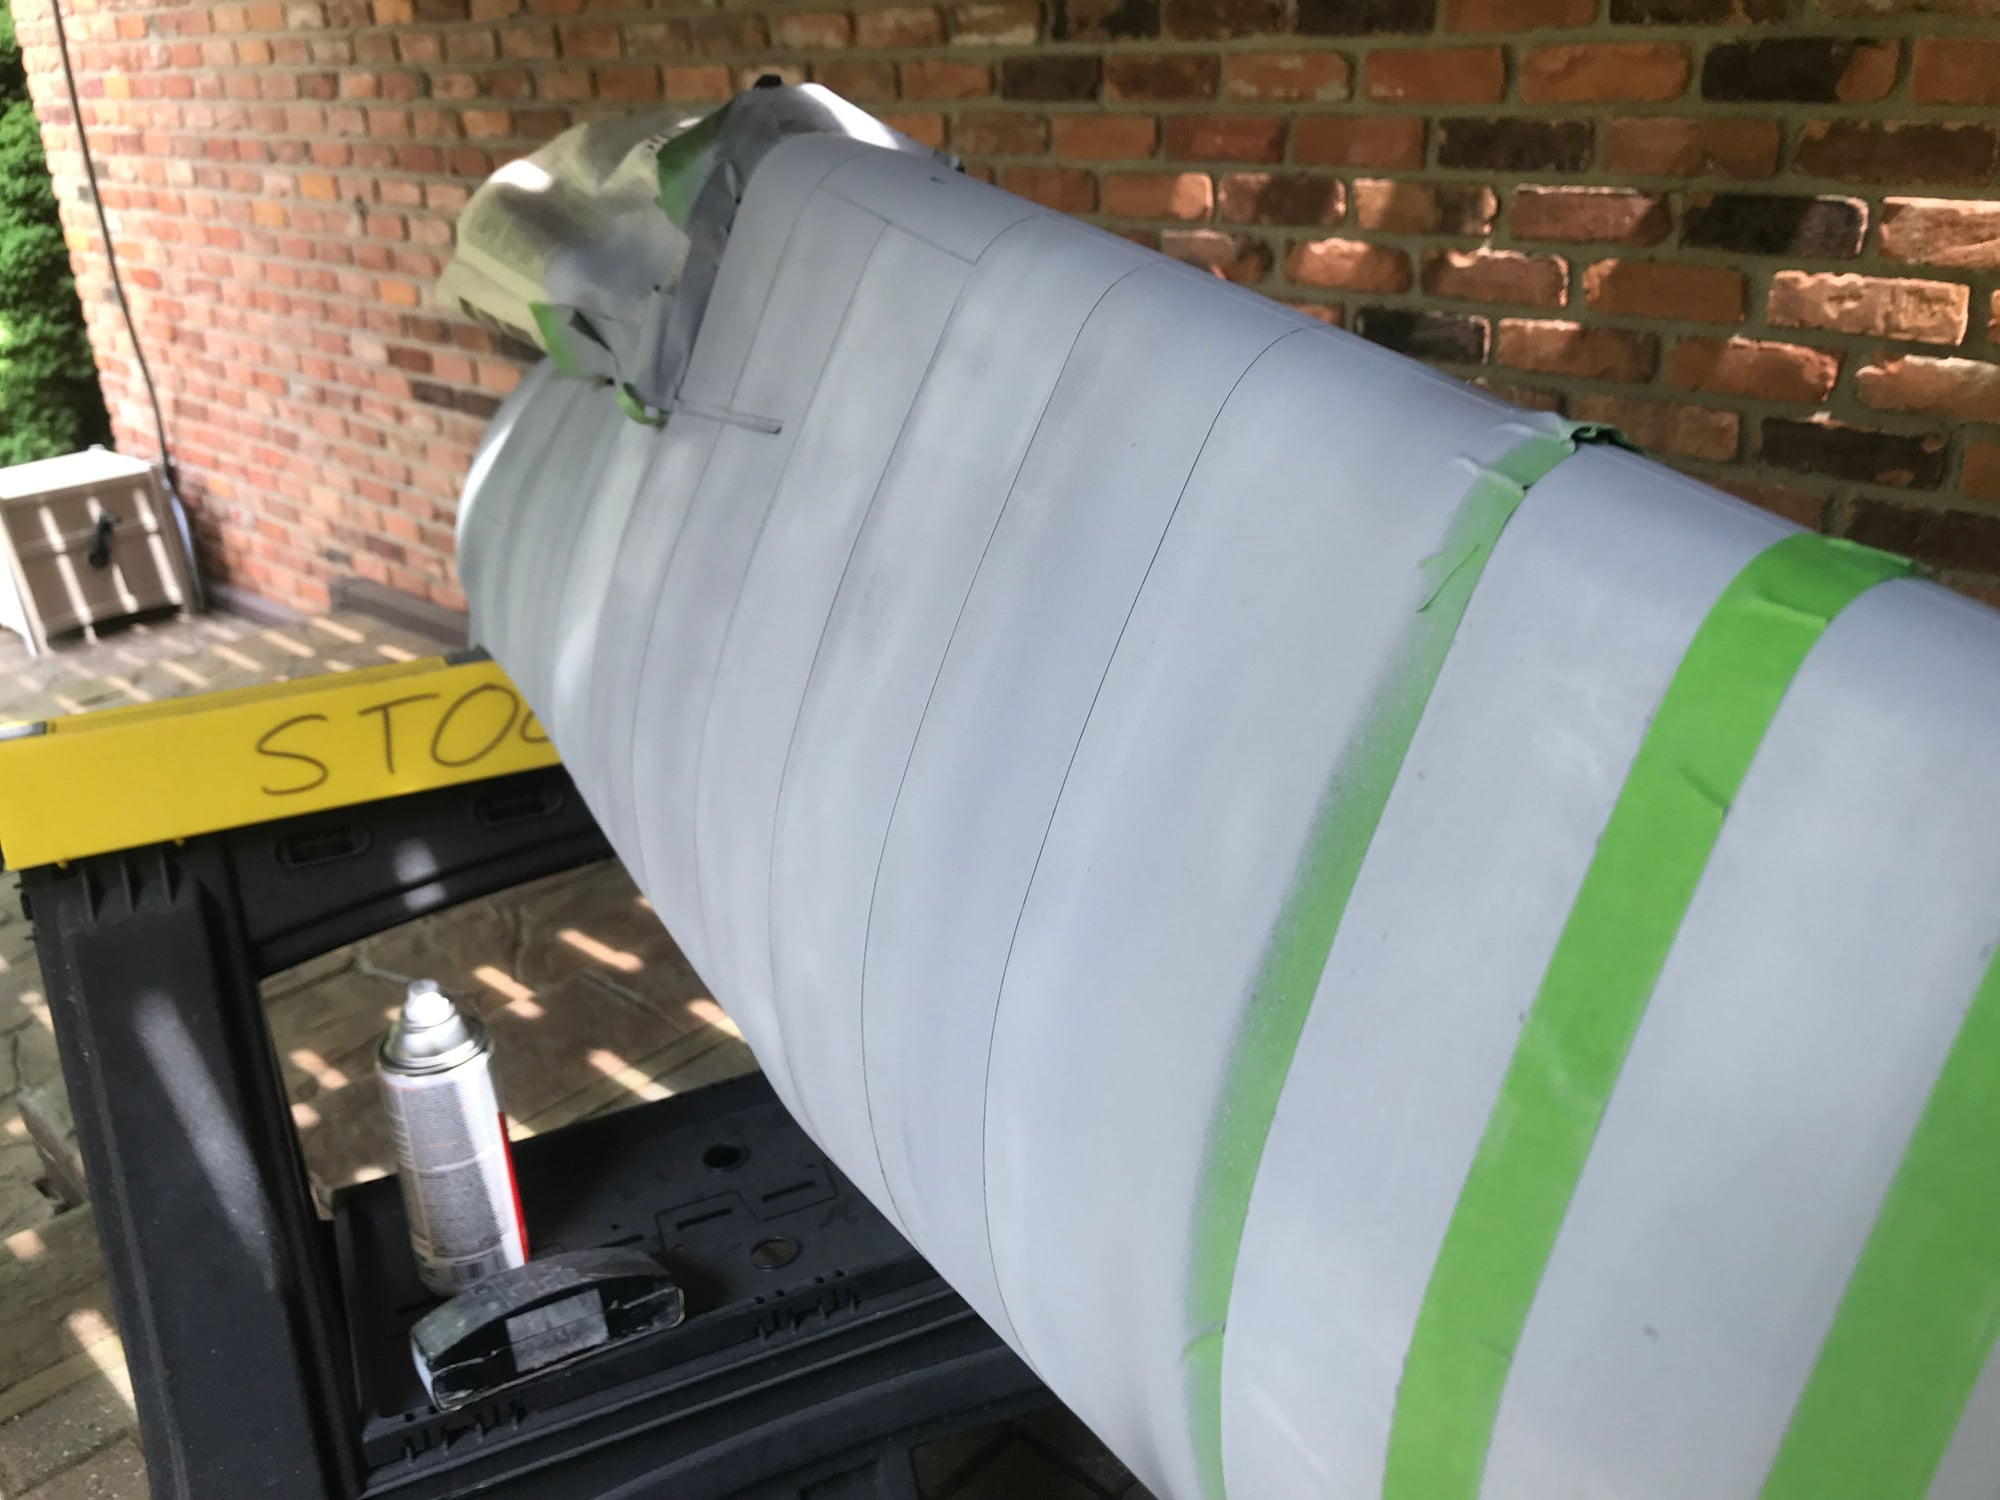
Back to it after taking care of some other stuff around the house. Halfway through creation of the overlapping panel lines on the fuse. Was worried about leaving the tape on too long, so I had been preceding one panel line at a time. After seeing Chad's work, decided to go ahead and tape all the remaining fuse lines. I still spray one line at a time, removing the one piece of tape after drying. This allows me to "back spray" a bit over the bit where the tape was laying. This way, I can do at least 3 panel lines a day, and still attend to other stuff around the house that needs doing! I need one more can of primer to finish. Then a light wet sanding before starting the application of panel and rivet details.
Push will be to complete the final color coats before it gets cold again.
I think the lines are coming up quite well, for a first timer. What do you think?
Push will be to complete the final color coats before it gets cold again.
I think the lines are coming up quite well, for a first timer. What do you think?
05-24-2024, 01:01 PM
#371
Looks good to me!
Funny this should come back up right now. Back in post number 357 I mentioned a method that I like and I just received the material that I use for that last night. Link here: U-POL CASE of 10 714 Dolphin Putty Pourable Finishing Glaze Filler 440 ml UP0714 . Notice, this price is for the case. It's only about 20 bucks.
https://a.co/d/2VA4ERZ
Last edited by G.F. Reid; 05-24-2024 at 01:04 PM.
05-24-2024, 05:59 PM
#372
Thread Starter
Looks good to me!
Funny this should come back up right now. Back in post number 357 I mentioned a method that I like and I just received the material that I use for that last night. Link here: U-POL CASE of 10 714 Dolphin Putty Pourable Finishing Glaze Filler 440 ml UP0714 . Notice, this price is for the case. It's only about 20 bucks.
https://a.co/d/2VA4ERZ
Funny this should come back up right now. Back in post number 357 I mentioned a method that I like and I just received the material that I use for that last night. Link here: U-POL CASE of 10 714 Dolphin Putty Pourable Finishing Glaze Filler 440 ml UP0714 . Notice, this price is for the case. It's only about 20 bucks.
https://a.co/d/2VA4ERZ
05-27-2024, 02:49 PM
#373
Thread Starter
Fuselage panel lines all but done. There's one more panel line I want to add at the tail, which I highlighted in the drawing under the picture of the plane. From my AirZoo pictures, this panel doesn't appear to be an overlap type, nor a butt type, either....looks like the tail cone edges are stamped inwards such that they slide under the forward sheet (see additional picture, below). I think I'll do this using the Chartpak tape and then try to lightly round one edge by sanding to in order to get that stamped look.
Tomorrow!
Then wet sanding and panel details, rivets, screws.... I think I need to place an order for more rivets...
I'm also getting closer to having to make a decision on paint. I'm open to suggestions!
I have a 919-15002 Craftsman detail spray gun (single stage, siphon fed), and a single stage Badger 350 airbrush. I used the Craftsman with latex to finish my first Hellcat, years ago. Considering latex, again. Also found this company, My Perfect Color This intrigues me as their site indicates that they can mix to the original ANA color specs that were in use through most of WWII. Also, they can supply in spray cans - so I could just avoid the whole spray gun/airbrush question.
I'm thinking to go with satin or semi-gloss on which I can add any weathering I choose to do, and then follow with a clear coat (gloss for a newer look, semi-gloss for weathered look?).
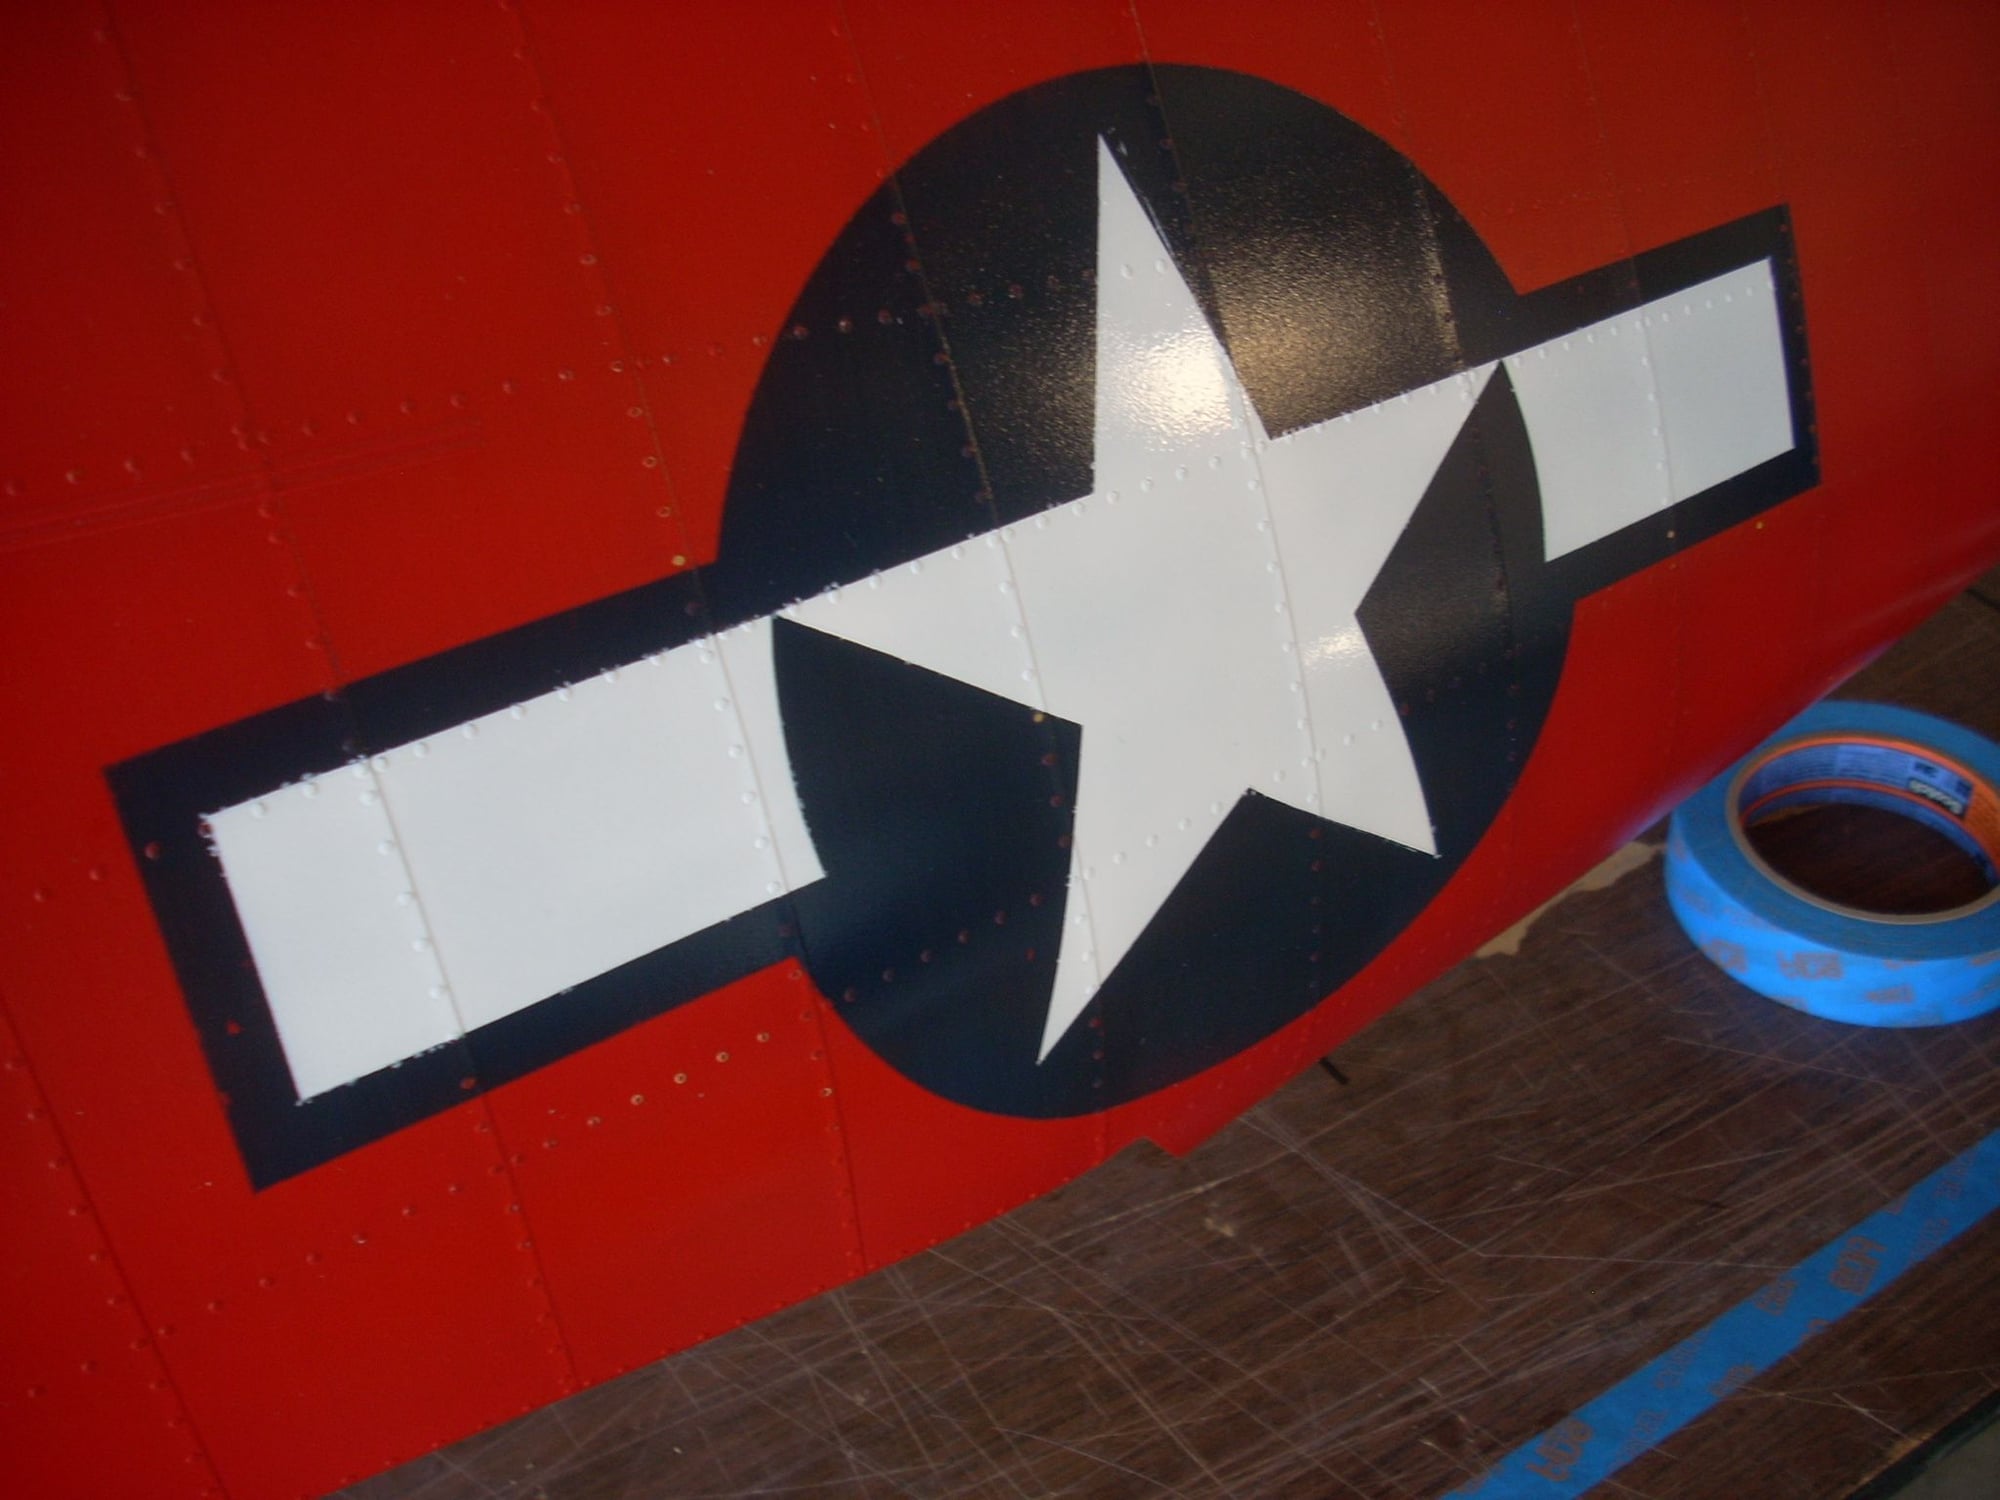
Red5Design indicated they could make make paint masks for the insignias. I'd still like to find someone that can make up the placards for the various lettering (or maybe my sister-in-law can do this on her Cricut machine?).
What do you think?
Still amazed, though perhaps I should not be by this time, at how the details bring things to life.
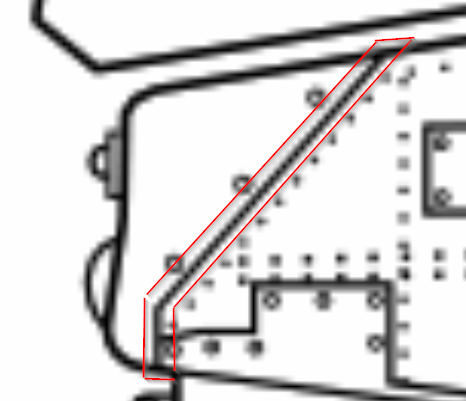
Last panel line detail to add - I've not added every single panel line, but darn close to it.
Tail cone of AirZoo Hellcat.
Tomorrow!
Then wet sanding and panel details, rivets, screws.... I think I need to place an order for more rivets...
I'm also getting closer to having to make a decision on paint. I'm open to suggestions!
I have a 919-15002 Craftsman detail spray gun (single stage, siphon fed), and a single stage Badger 350 airbrush. I used the Craftsman with latex to finish my first Hellcat, years ago. Considering latex, again. Also found this company, My Perfect Color This intrigues me as their site indicates that they can mix to the original ANA color specs that were in use through most of WWII. Also, they can supply in spray cans - so I could just avoid the whole spray gun/airbrush question.
I'm thinking to go with satin or semi-gloss on which I can add any weathering I choose to do, and then follow with a clear coat (gloss for a newer look, semi-gloss for weathered look?).
Red5Design indicated they could make make paint masks for the insignias. I'd still like to find someone that can make up the placards for the various lettering (or maybe my sister-in-law can do this on her Cricut machine?).
What do you think?
Still amazed, though perhaps I should not be by this time, at how the details bring things to life.
Last panel line detail to add - I've not added every single panel line, but darn close to it.
Tail cone of AirZoo Hellcat.
05-27-2024, 05:50 PM
#374
My Feedback: (23)
Dale, I used PPG base coat paints because that�s what I am used to. I have a government fan deck with all the paint colors. I always took them to the paint supplier and he would match as close as possible. What I did last time was purchased the Tamiya military color spray cans of my choice. I sprayed out a couple cards and off I went to my paint supplier. For the final clear, I used PPG flex and flat. That just about seals anything. In your case, that�s a win win scenario if you could get it all mixed up! Plus it�s probably much more economical! Good luck, you already know what mine looks like!
05-28-2024, 11:43 AM
#375
Thread Starter
Dale, I used PPG base coat paints because that�s what I am used to. I have a government fan deck with all the paint colors. I always took them to the paint supplier and he would match as close as possible. What I did last time was purchased the Tamiya military color spray cans of my choice. I sprayed out a couple cards and off I went to my paint supplier. For the final clear, I used PPG flex and flat. That just about seals anything. In your case, that�s a win win scenario if you could get it all mixed up! Plus it�s probably much more economical! Good luck, you already know what mine looks like!
My Perfect Color is about $19/11oz spray can plus a batch processing fee of $29.99. Or $83/half-pint, no batch fee. A quart of dark sea blue and half-pint of insignia white would be more than enough, I'm sure. I will contact them with an estimate of surface area to cover, to see if they have a recommendation on number of spray cans needed. Spray cans sounds easier, but they have a warning indicating that color variation is more likely in small batches - so if I don't order enough the first time, the second order is likely to be a bit different.
I found a better picture, IMO, of the rear tail cone. This view, which I brightened, clearly shows that the rear tail cone slides in/under the sheet metal in front of it. Also, the sheet metal in front of the rear tail cone appears to be quite a bit thicker than used for the other panels. This view also picks up some rivet details between the fuse and the underside of the rudder. Off to tape and paint the last overlap joint!
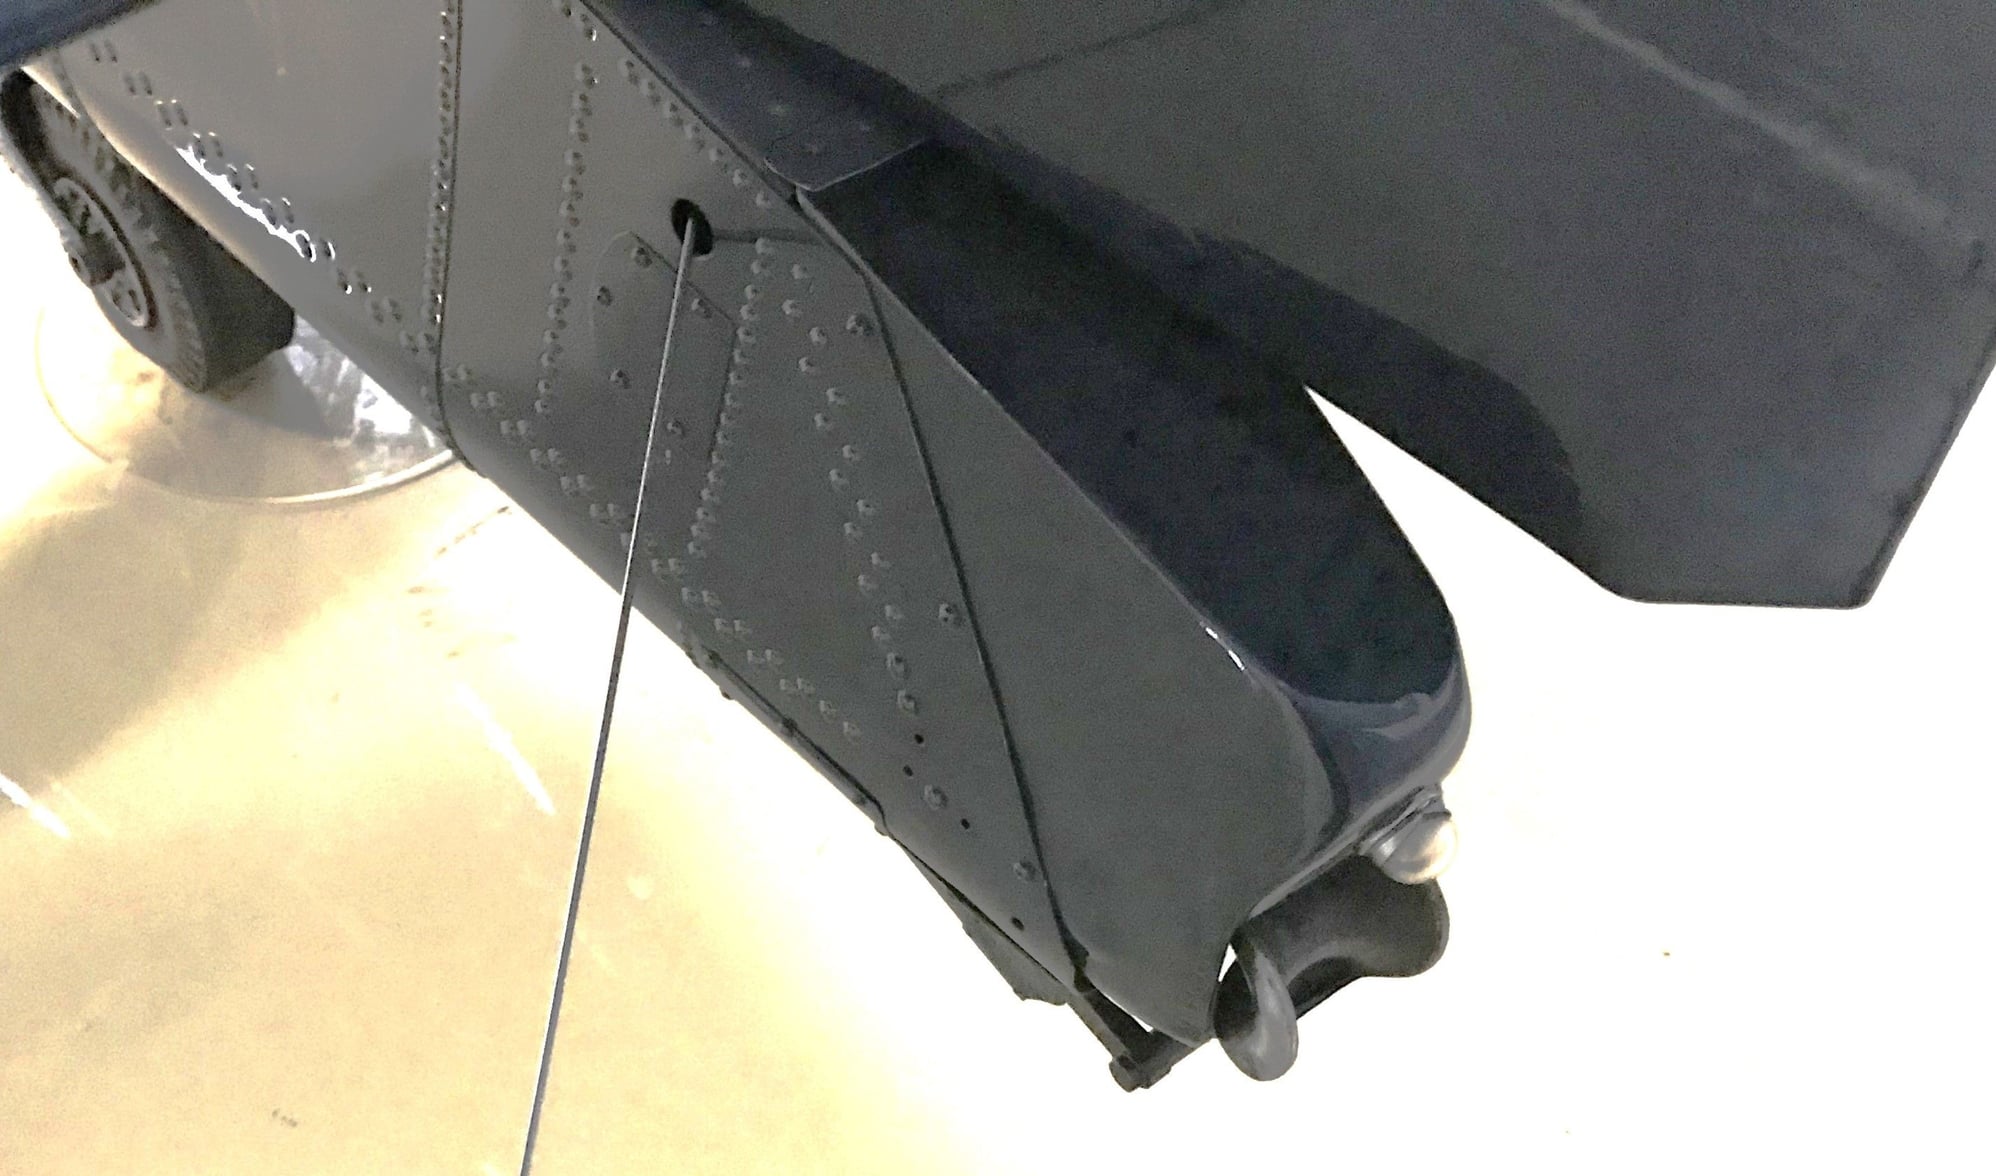
I think this shows the tail cone slid into the rear fuse forming an overlap joint. Comparing the 45 degree panel line with vertical lines further up the fuse, this panel appears to be quite a bit thicker.