


SIG Komander
 09-10-2019, 05:27 PM
#351

Join Date: May 2013
Location: Moncton, NB, CANADA
Posts: 62
Likes: 0
Received 0 Likes
on
0 Posts
I have a SIG Komander kit and one of our club members, an experienced builder, is going to assemble it for me. Has anyone reduced or removed the dihedral on the main wing during assembly. If yes how did it fly. I do not need it as a trainer as such and wishing to know of modifications that have worked to make it more aerobatic as well. In addition to removing some or all of the dihedral, I was also was also thinking of increasing the control surface areas, such as a wider elevator and wider ailerons. Your comments would be appreciated. Power will be electric. Thank you.
Last edited by Creative RC; 09-10-2019 at 10:17 PM.
 09-10-2019, 06:07 PM
#352
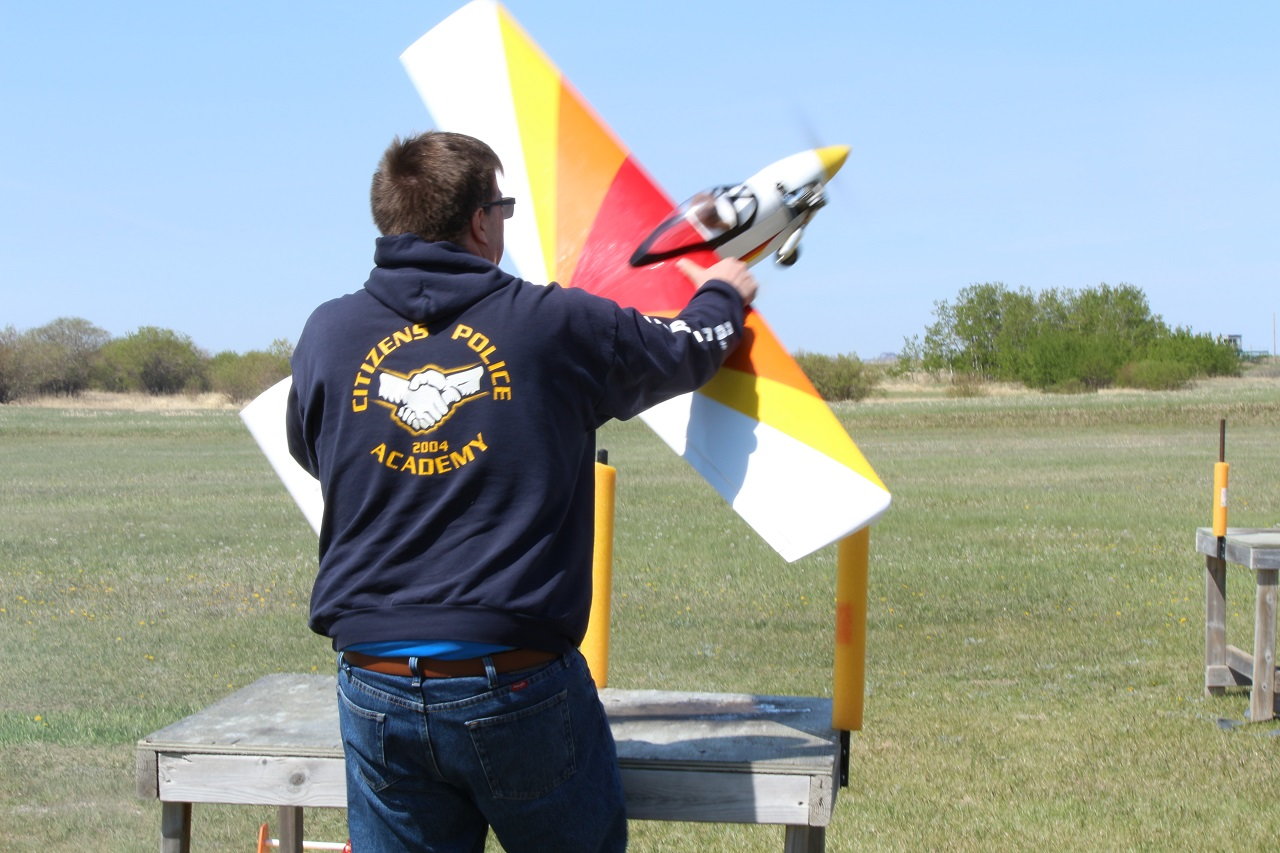
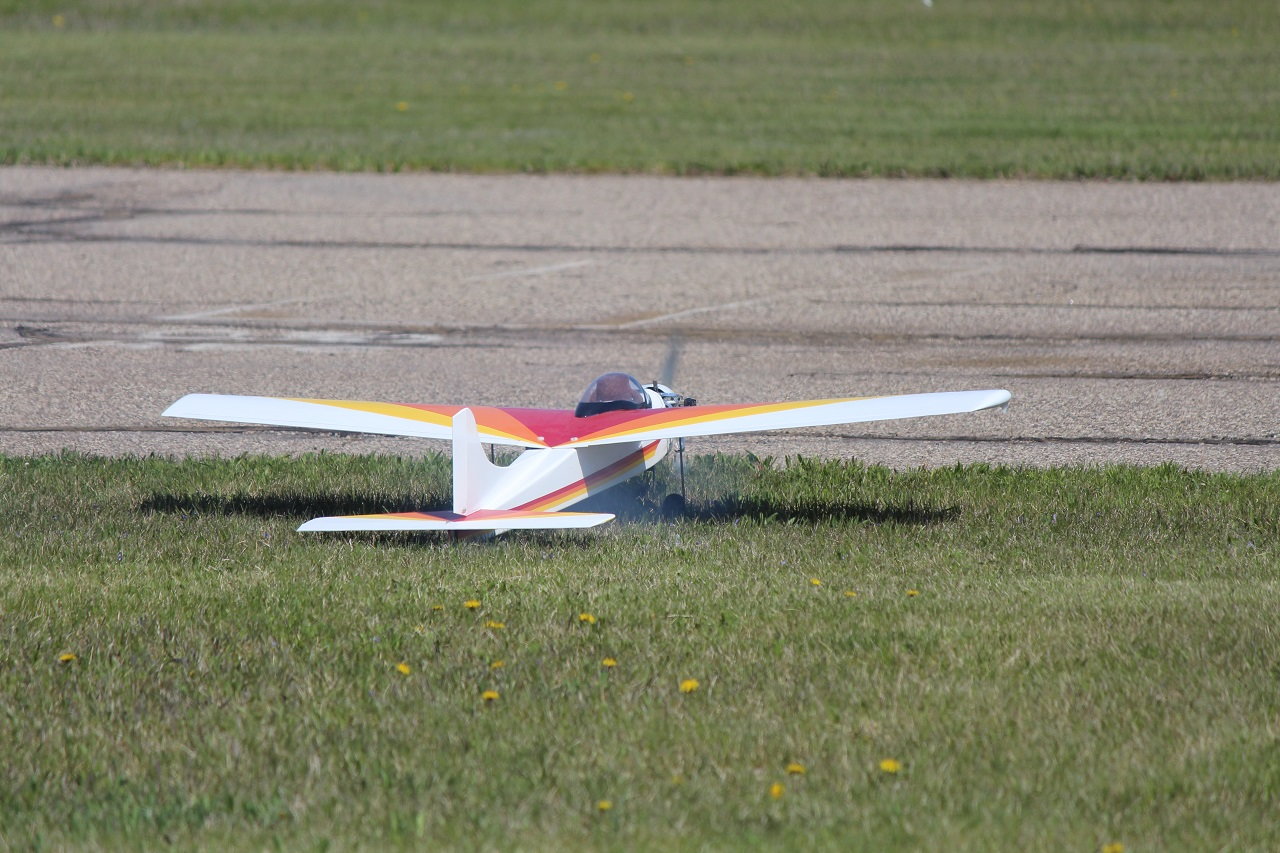
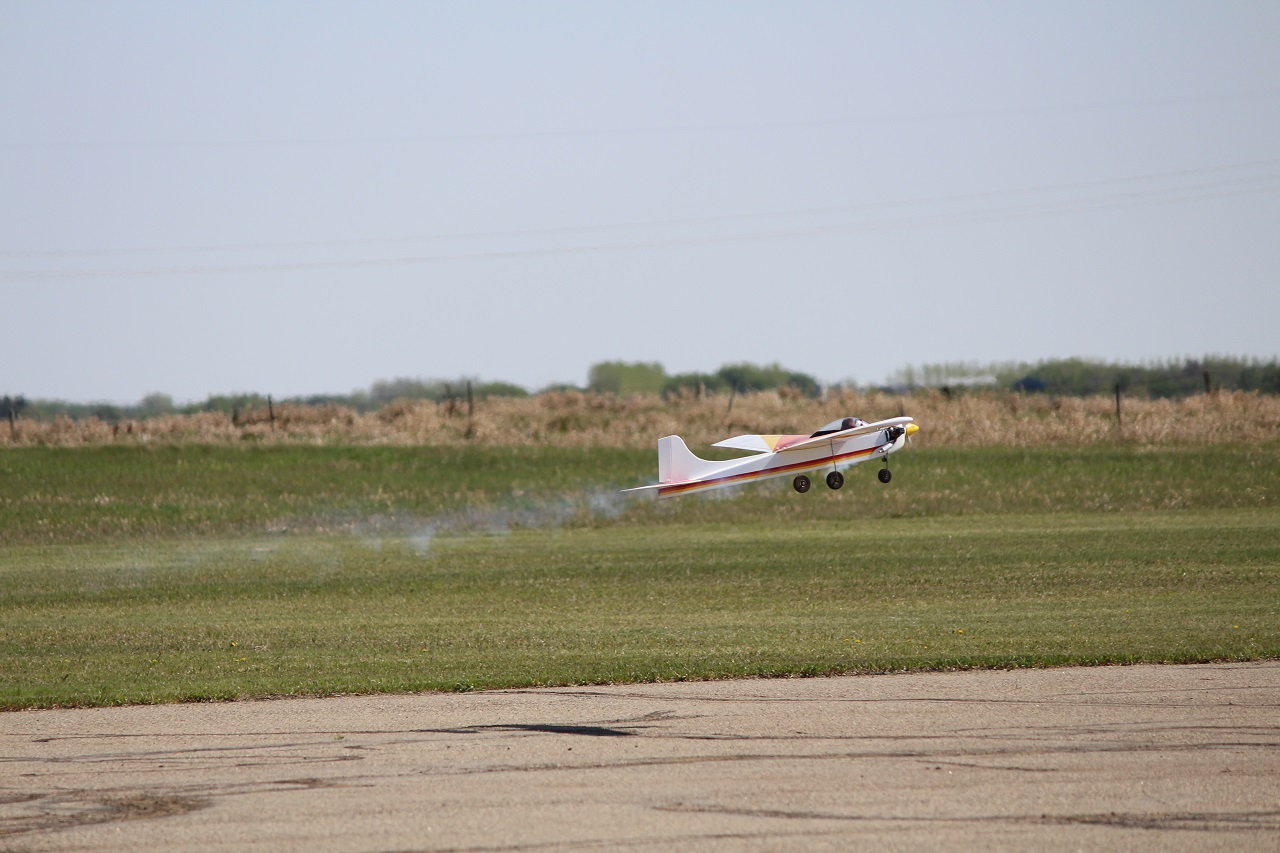
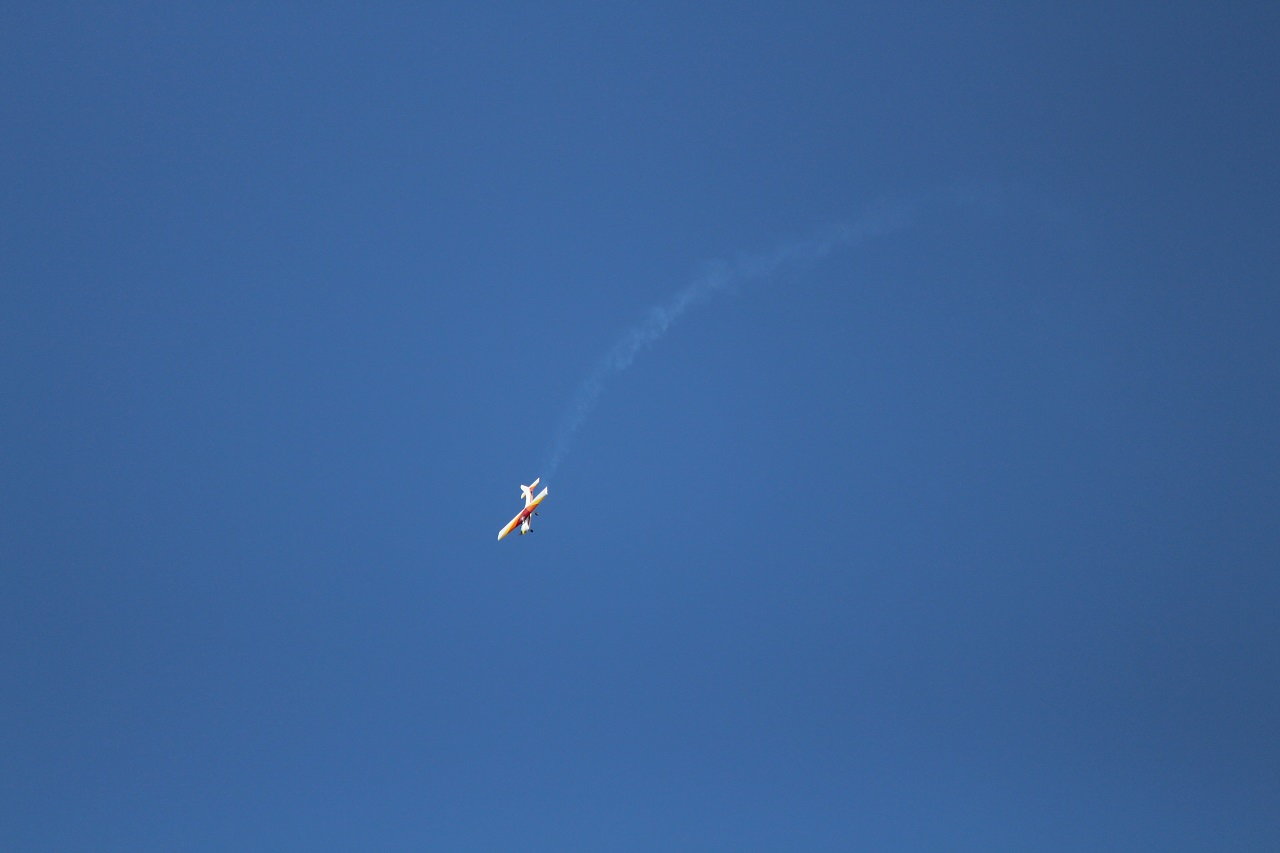
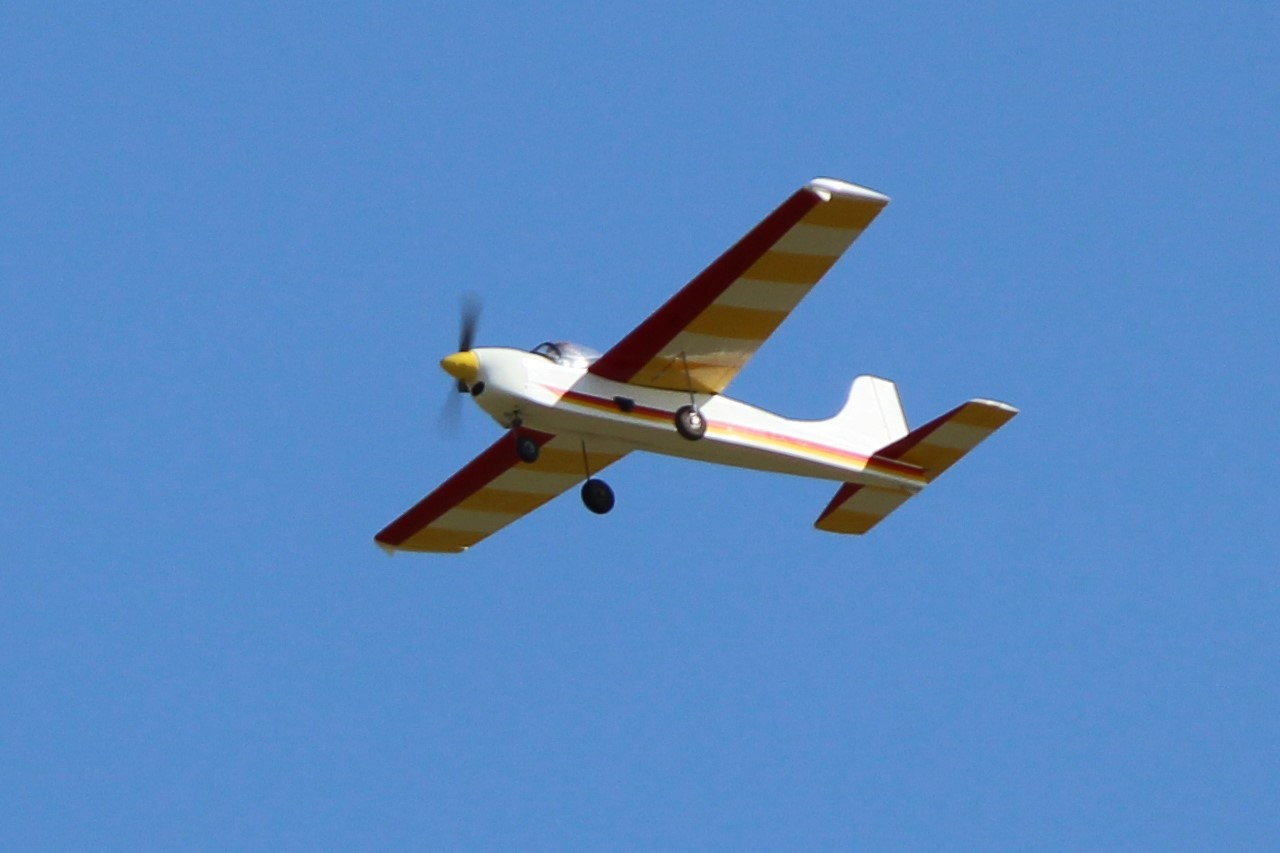
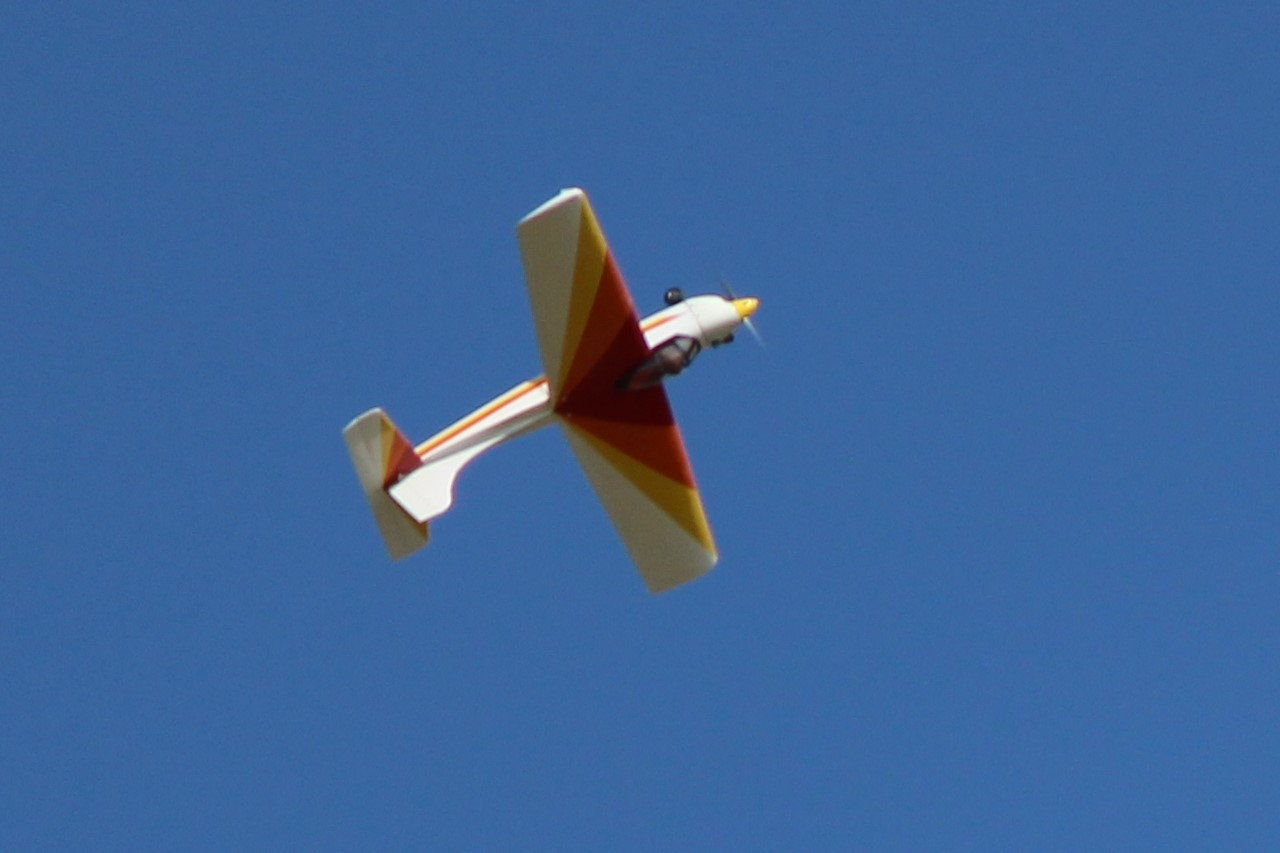
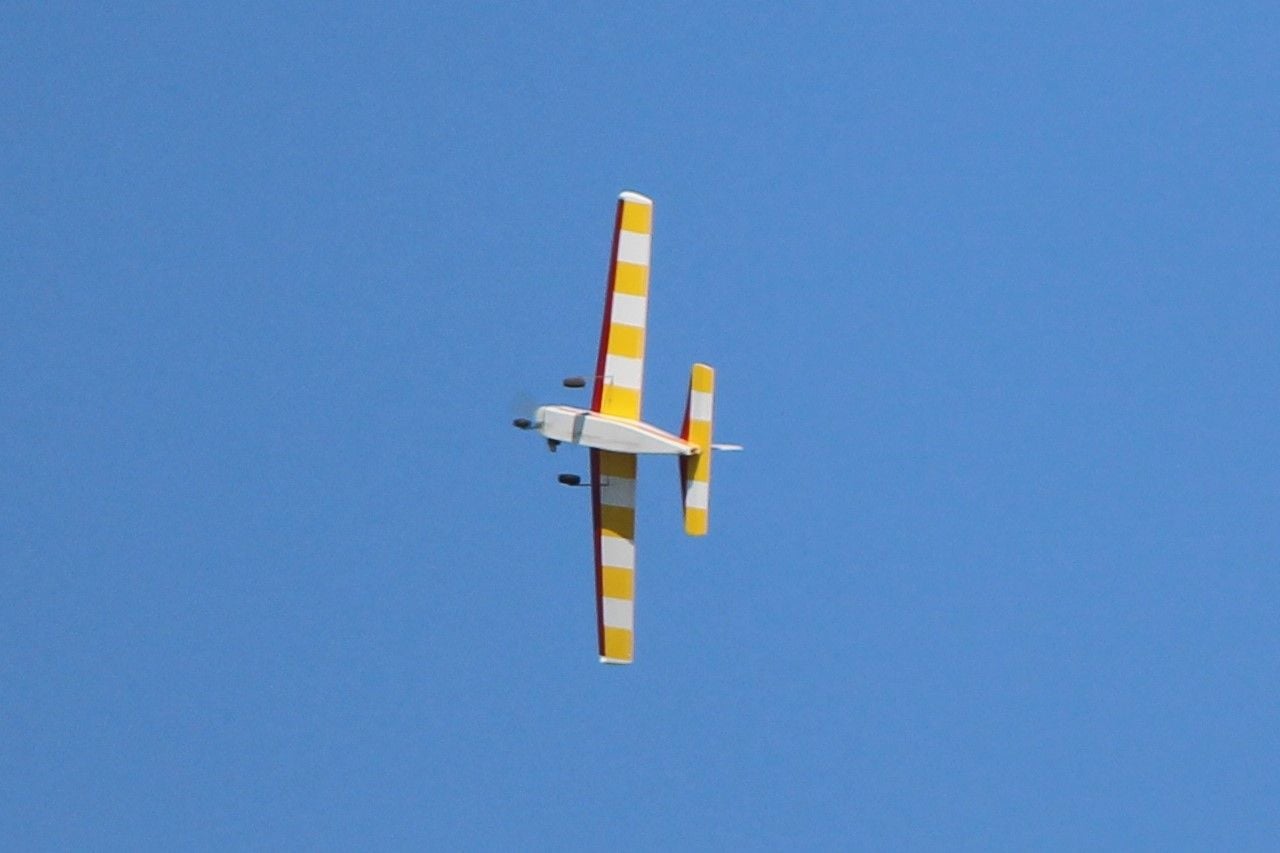
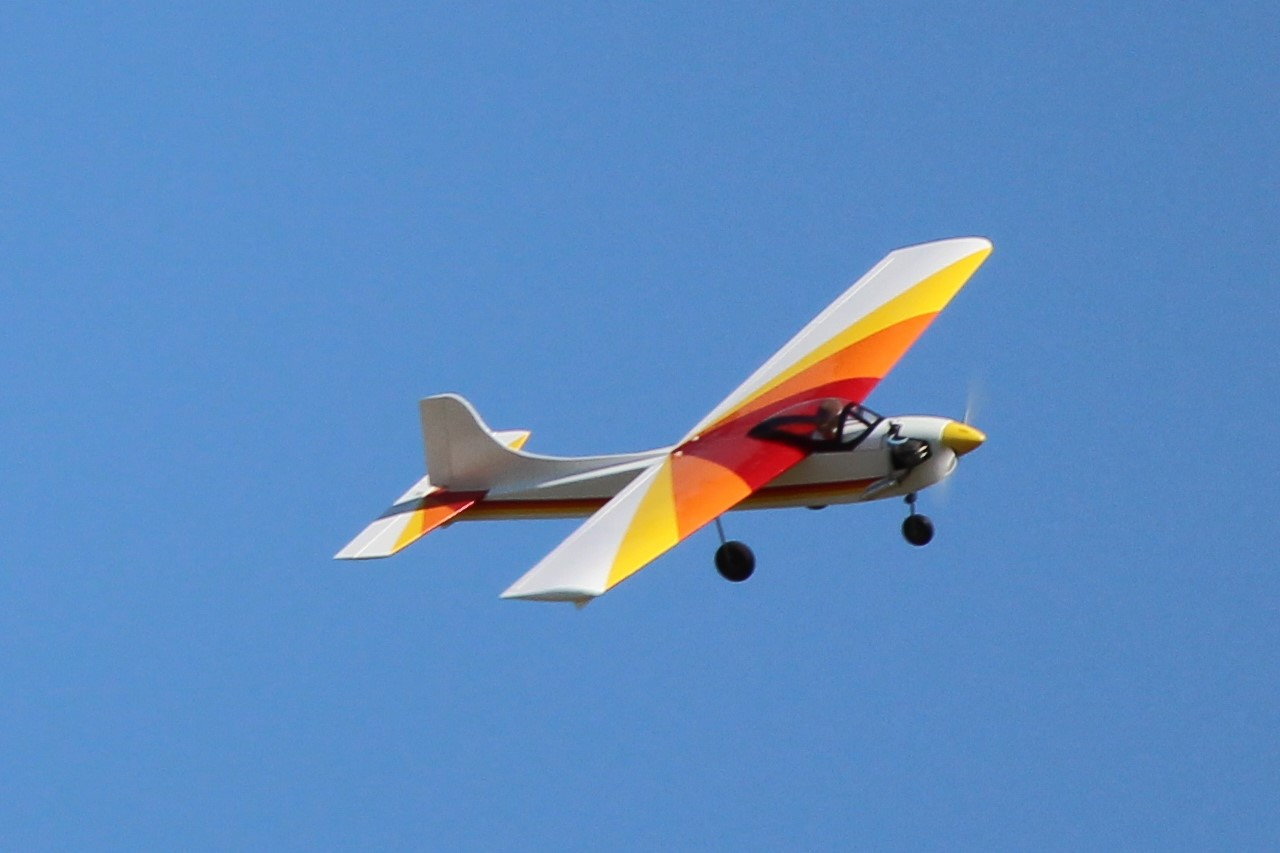
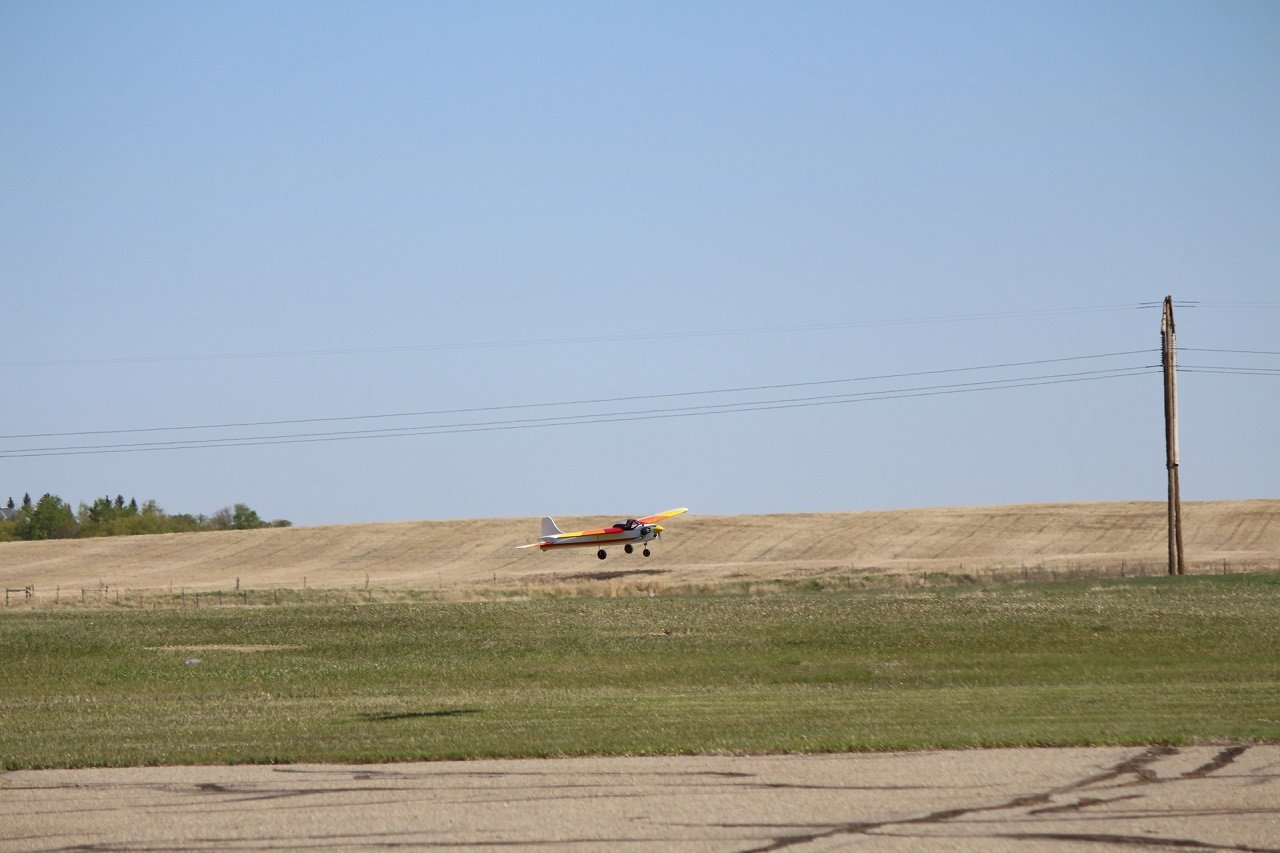
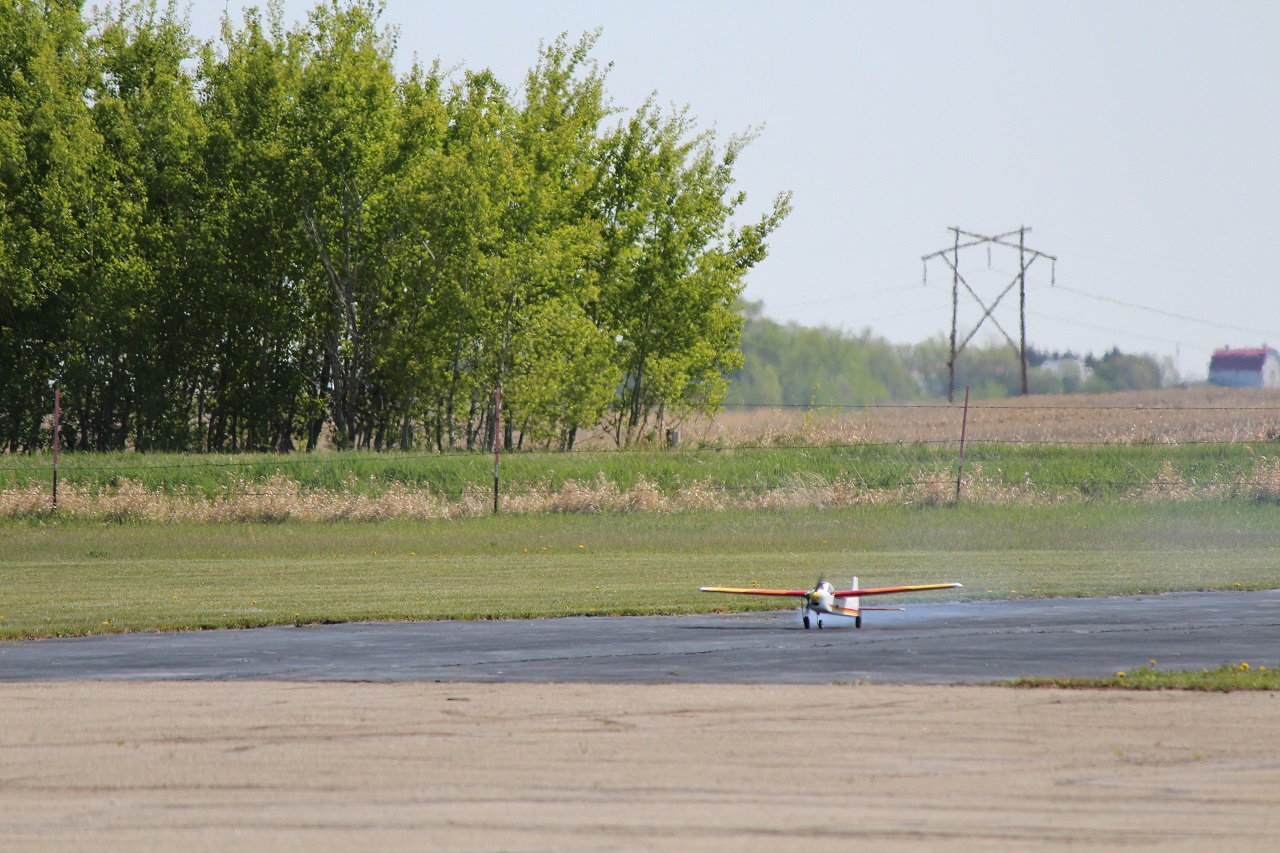
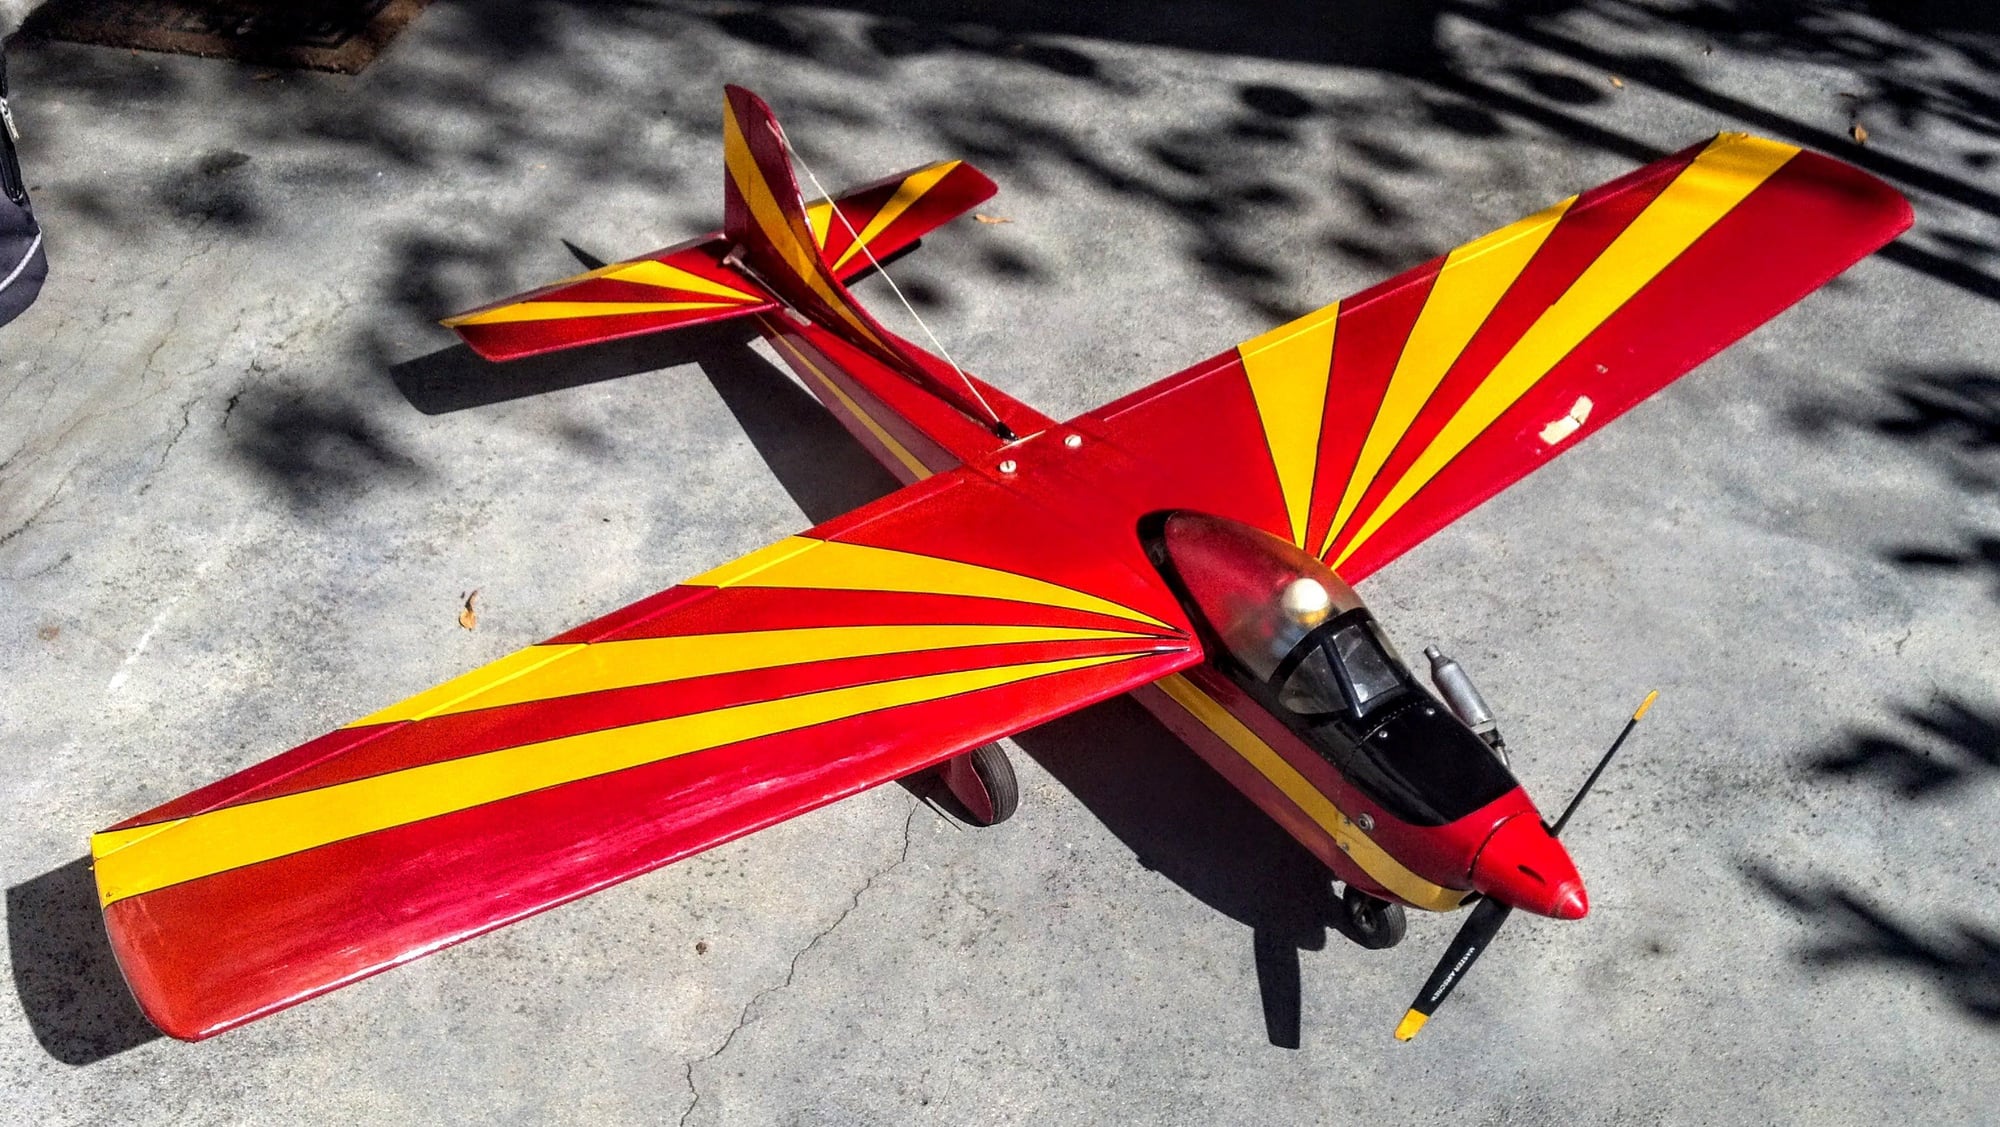
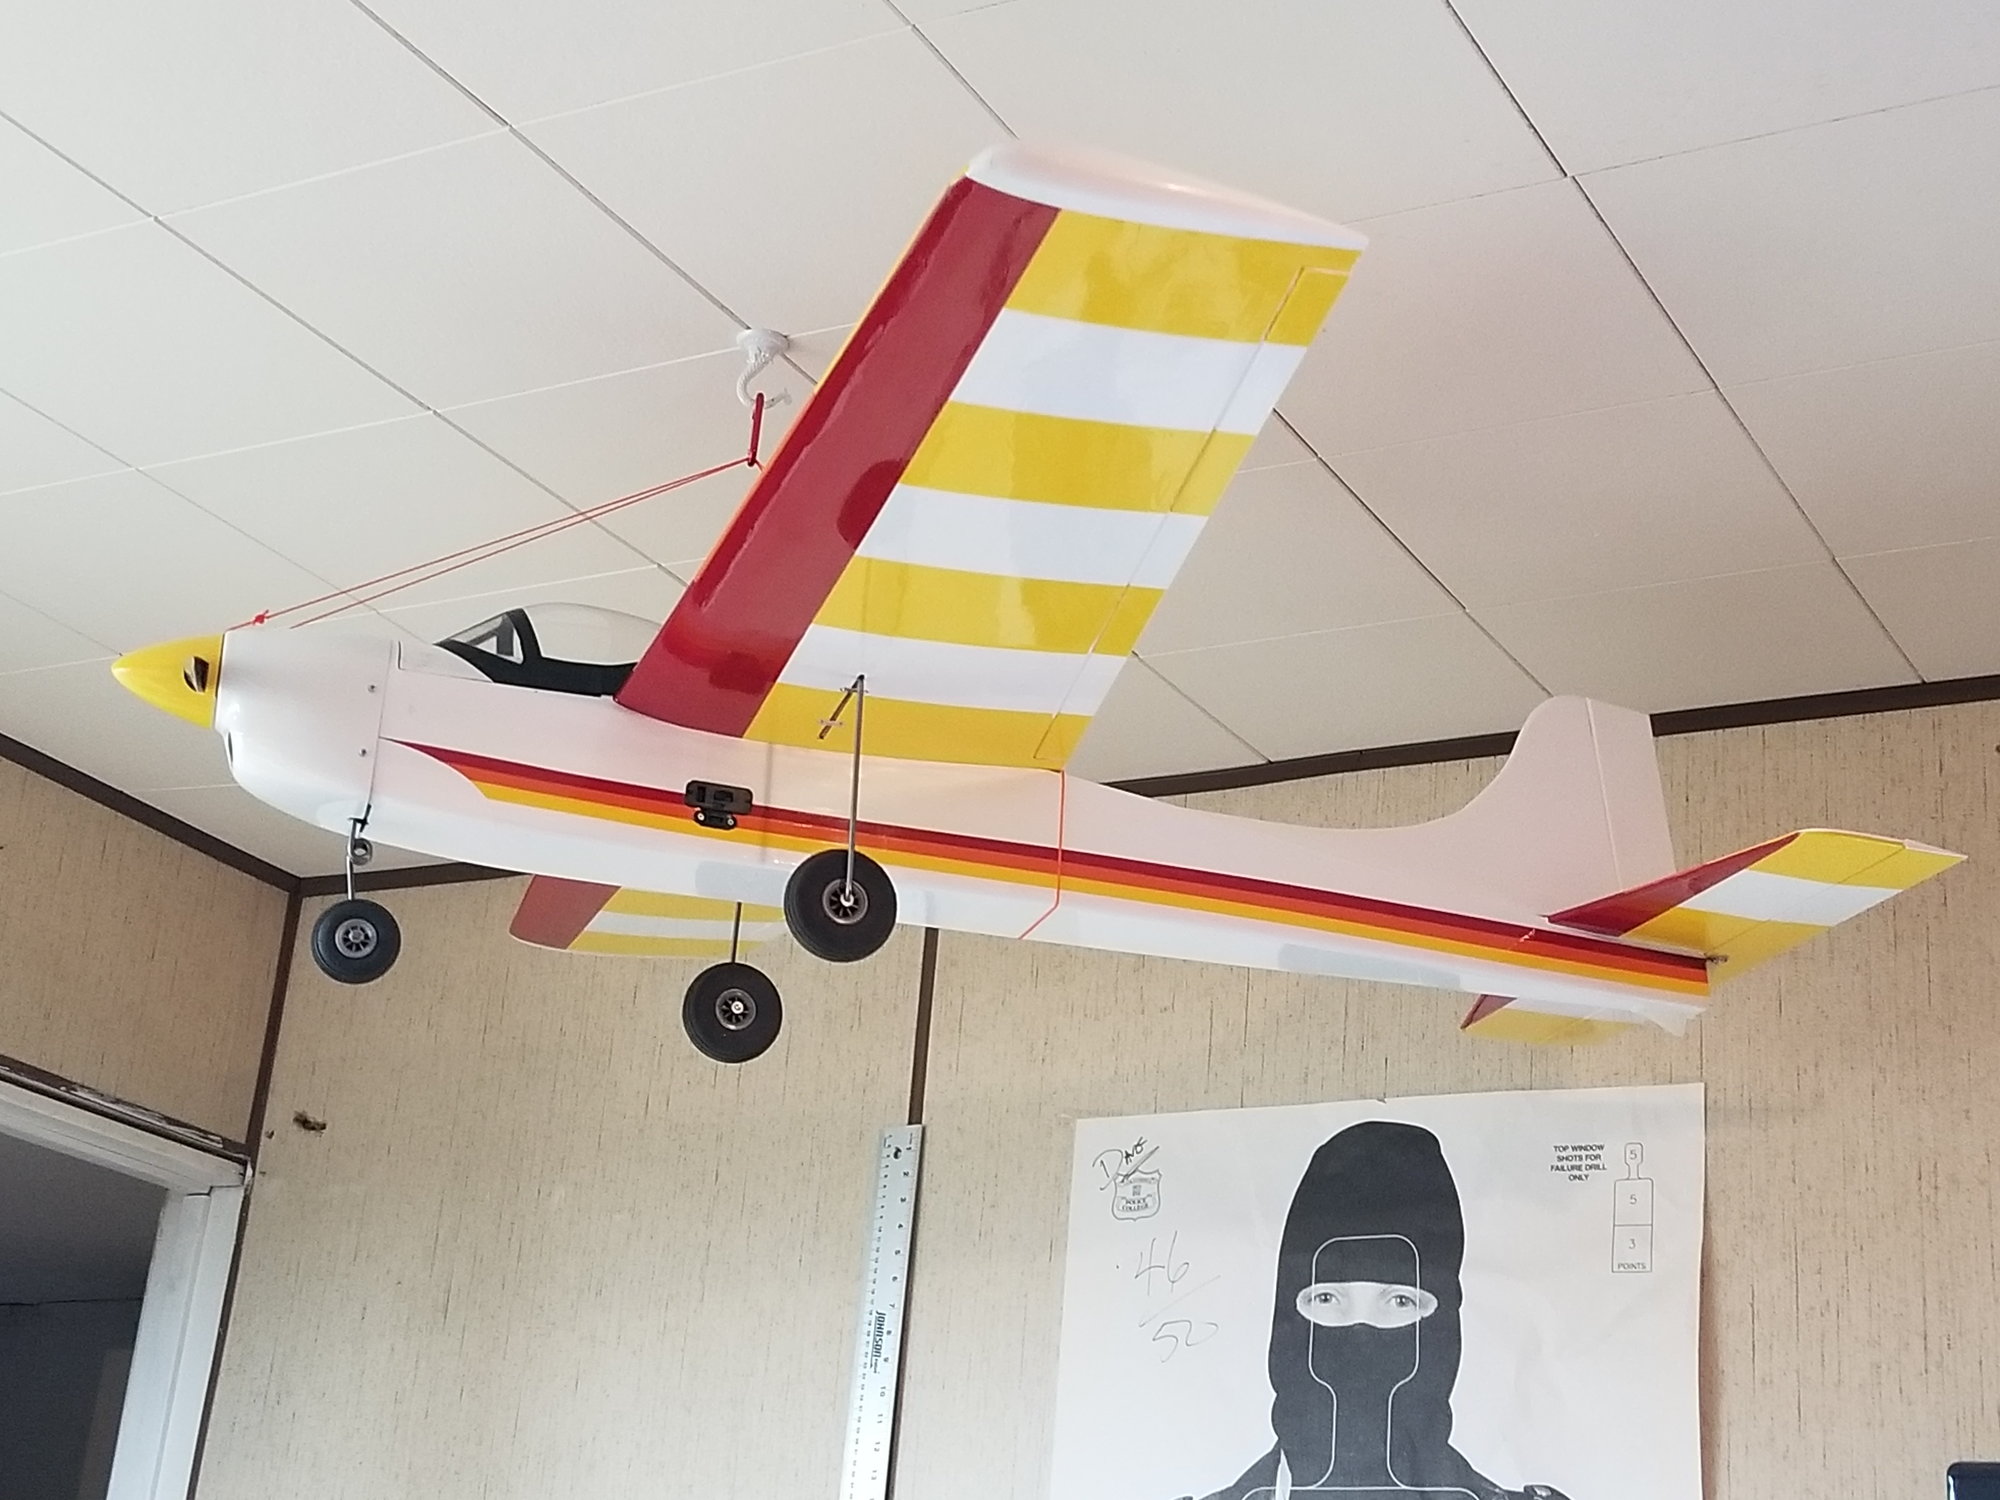
The only real change I made from my first one to my second one was 90' mounting of the motor and removing the slight positive incidence. Flies great. Since the thread has revived, I guess I will take this chance to post a few pictures that my daughter took on my first day out this spring..

09-10-2019, 06:22 PM
#353
Great pics! Interesting starburst color pattern that wing looks reversible. I completely inverted my OS FS .70 engine, installed retracts and reconfigured the tail feathers. 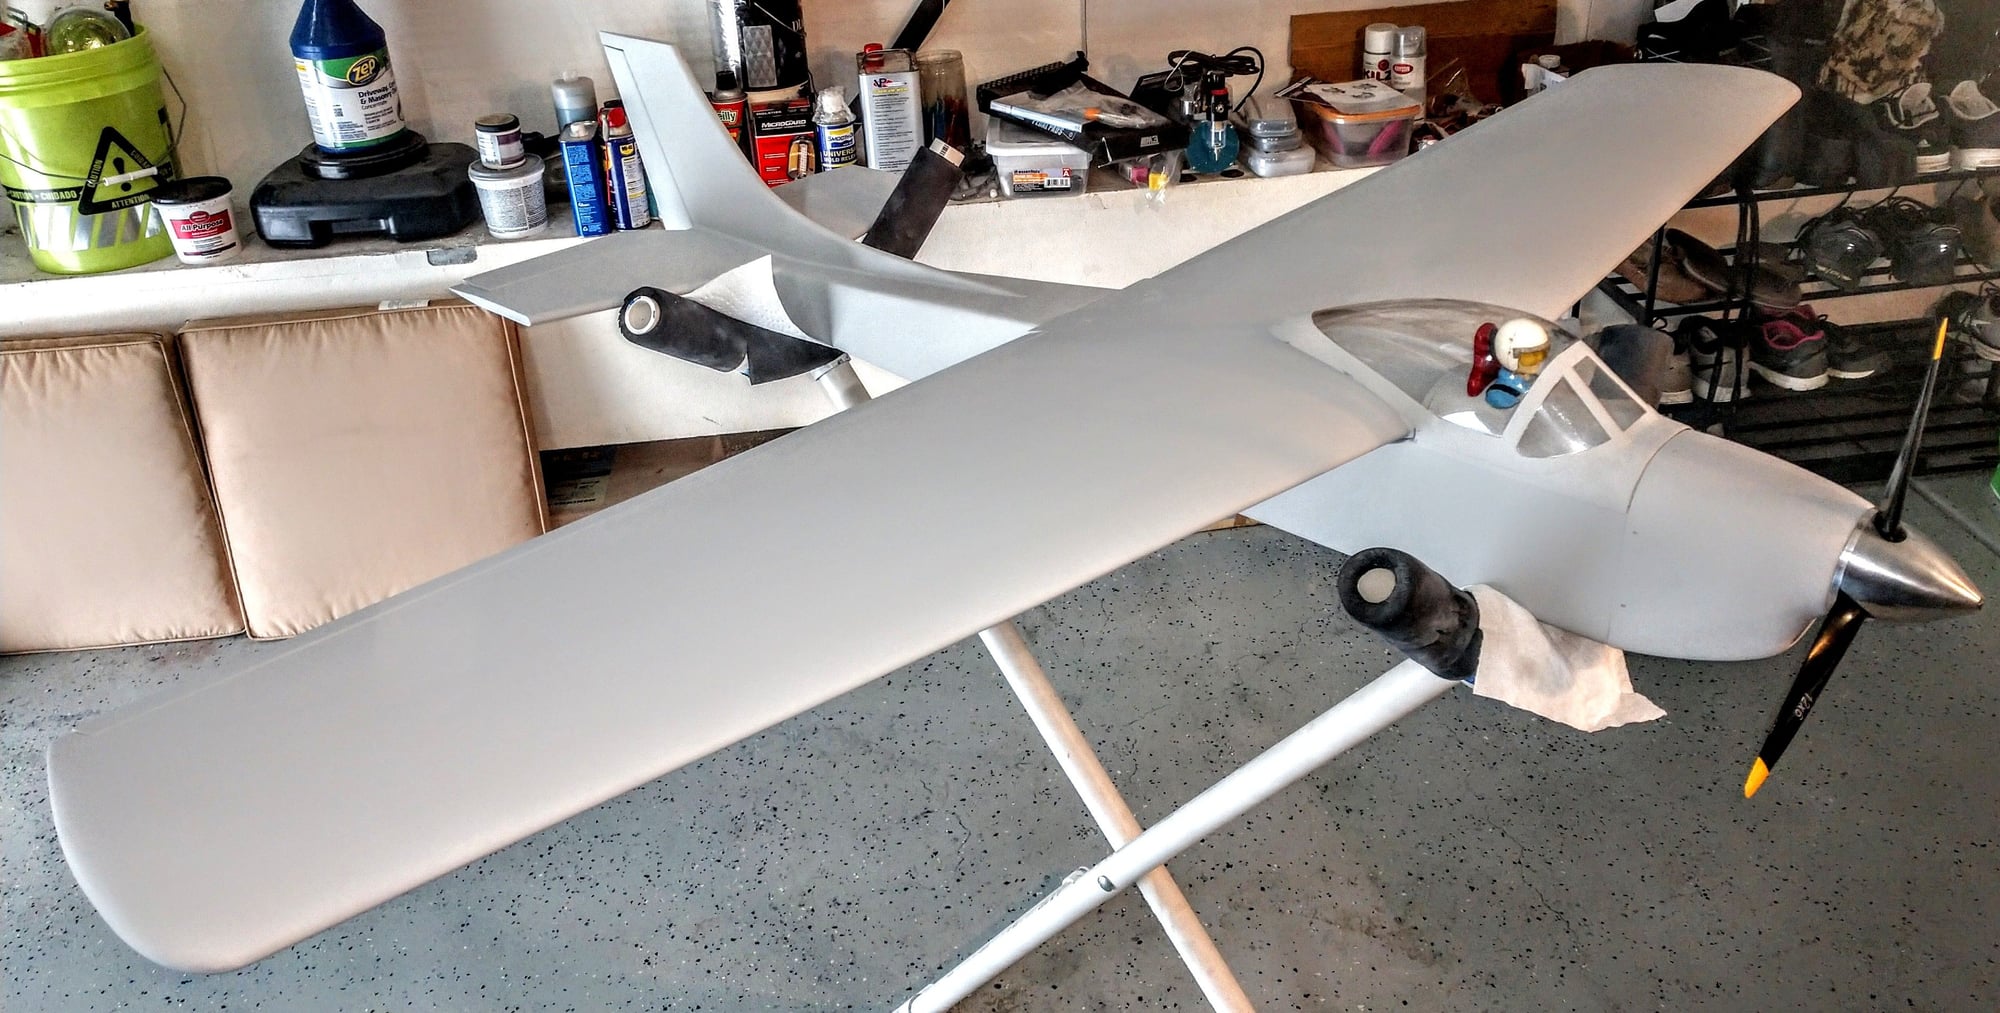
Last edited by robbtennis; 09-10-2019 at 11:00 PM.
09-14-2019, 01:42 AM
#357
Join Date: May 2013
Location: Moncton, NB, CANADA
Posts: 62
Likes: 0
Received 0 Likes
on
0 Posts
[QUOTE=Grumpy Monkey;12129665]Here is mine. Built last year. I was missing the canopy as well and used one from an old U-Can-Do. It has been converted to electric.
Hi, I am in process of starting a build and will power electric as well. Which motor did you install and what size battery and number of cells you are using. Would you have photos of how you installed the battery which you could post? Do you have a bottom battery access hatch or do you install the battery from the top hatch. Did you make any reinforcement modifications? Did you change the main wing dihedral?
How does it fly. What changes would you make if you had to build it again.
I was thinking of installing the battery as high as possible so that its weight is not too low and reducing the amount of dihedral. Appreciate any advice you may have.
Thanks for your reply.
12-17-2019, 05:20 AM
#358
Join Date: May 2013
Location: Moncton, NB, CANADA
Posts: 62
Likes: 0
Received 0 Likes
on
0 Posts
A club member, a very experienced builder, has constructed a Komander MkII for me from a kit to essentially ARF state with servos, control rods and horns and motor installed. Received it yesterday. Remaining to be completed is the fine sanding, the battery hatch, battery tray, ESC compartment, holes for air circulation, fine tuning and the film application.
We modified the wing to have less dihedral, 1 inch instead of 2-1/4 inch at the tips, modified the ailerons to be 2-1/8 inches wide, installed a plywood wing spar which was also glued up against the landing gear blocks to make gear support even stronger, fiber glassed wider in middle area of wing top and bottom, wing tips not carved. A servo wire channel has been cored in the wing to allow for a future installation of aileron and flaps. No longer a basic trainer.
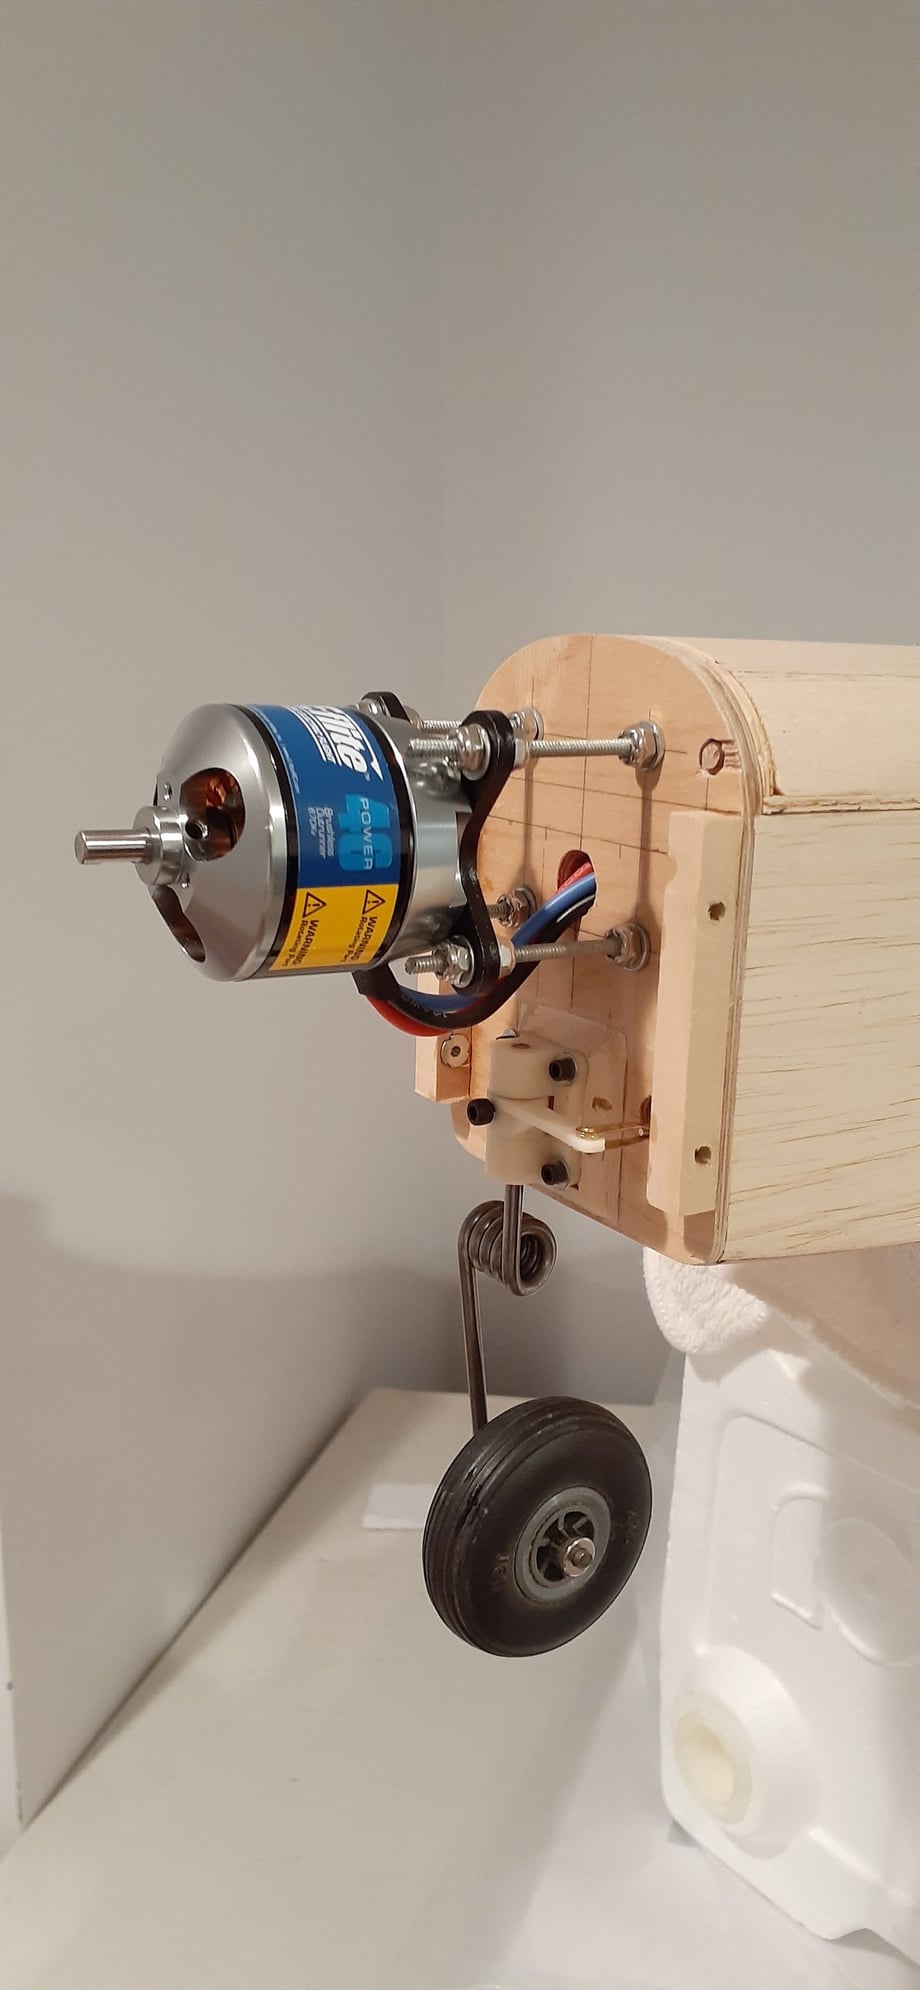
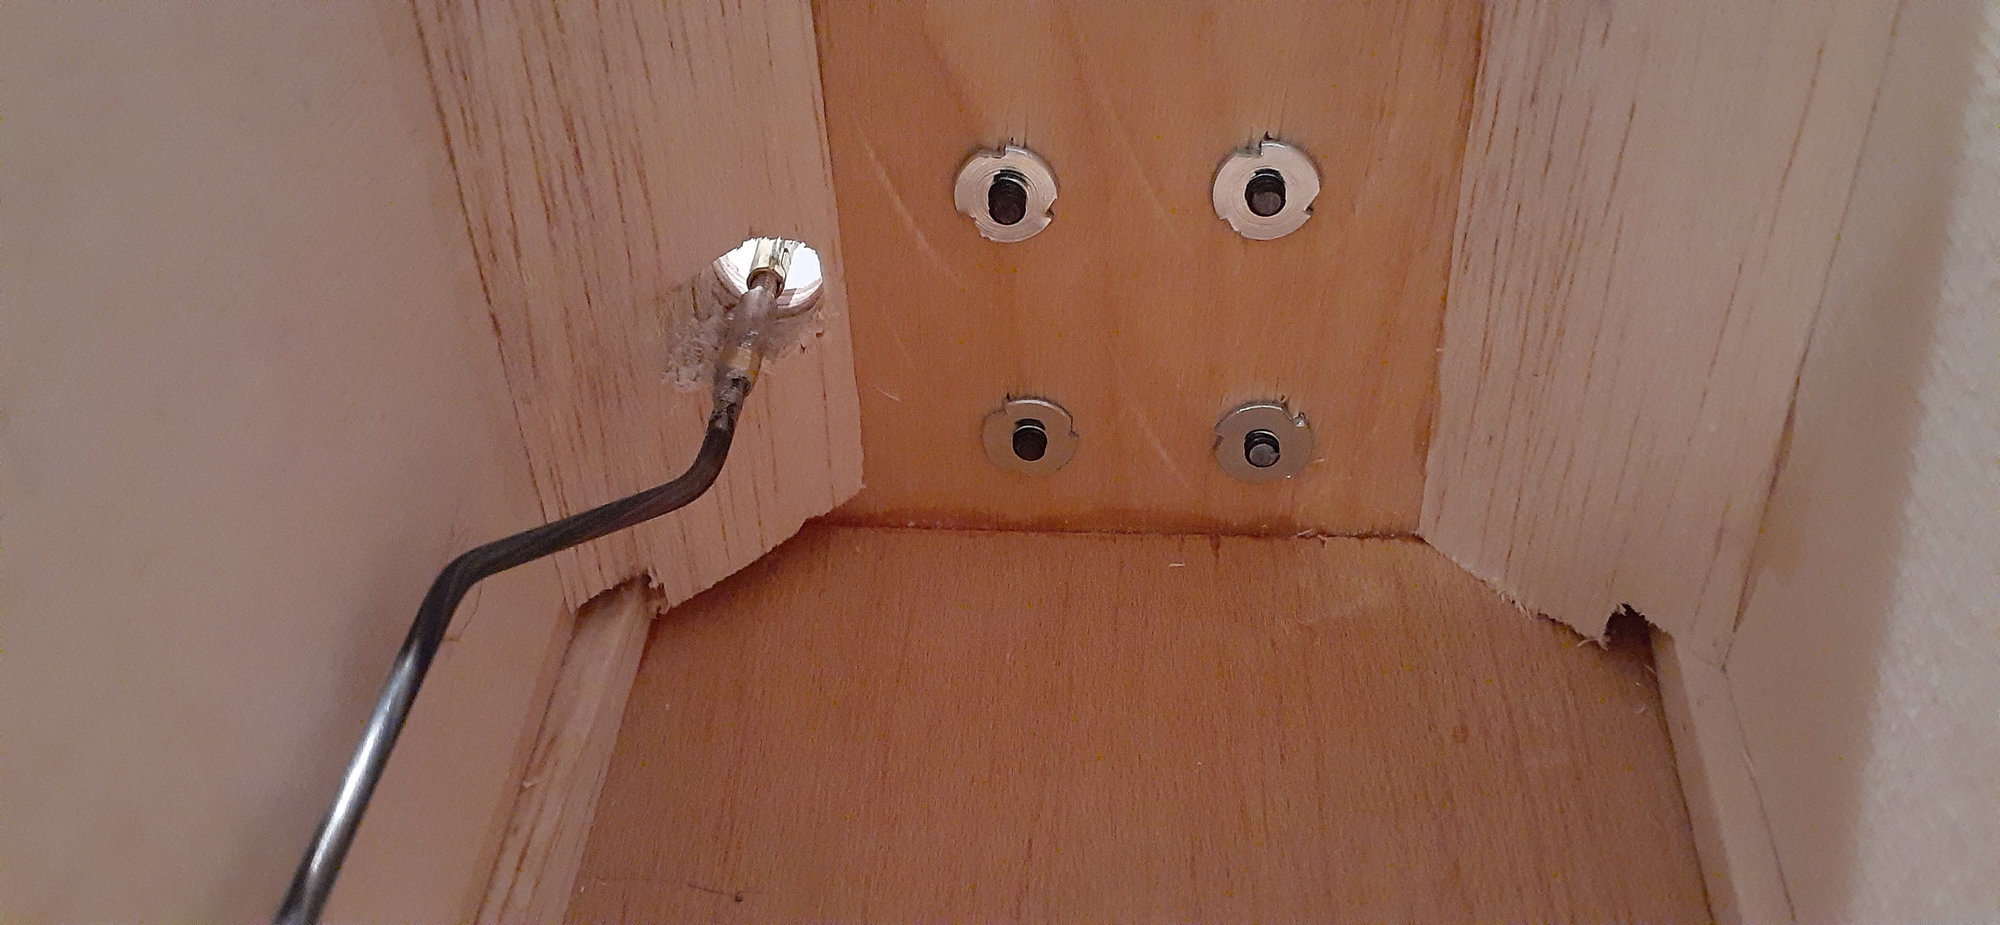
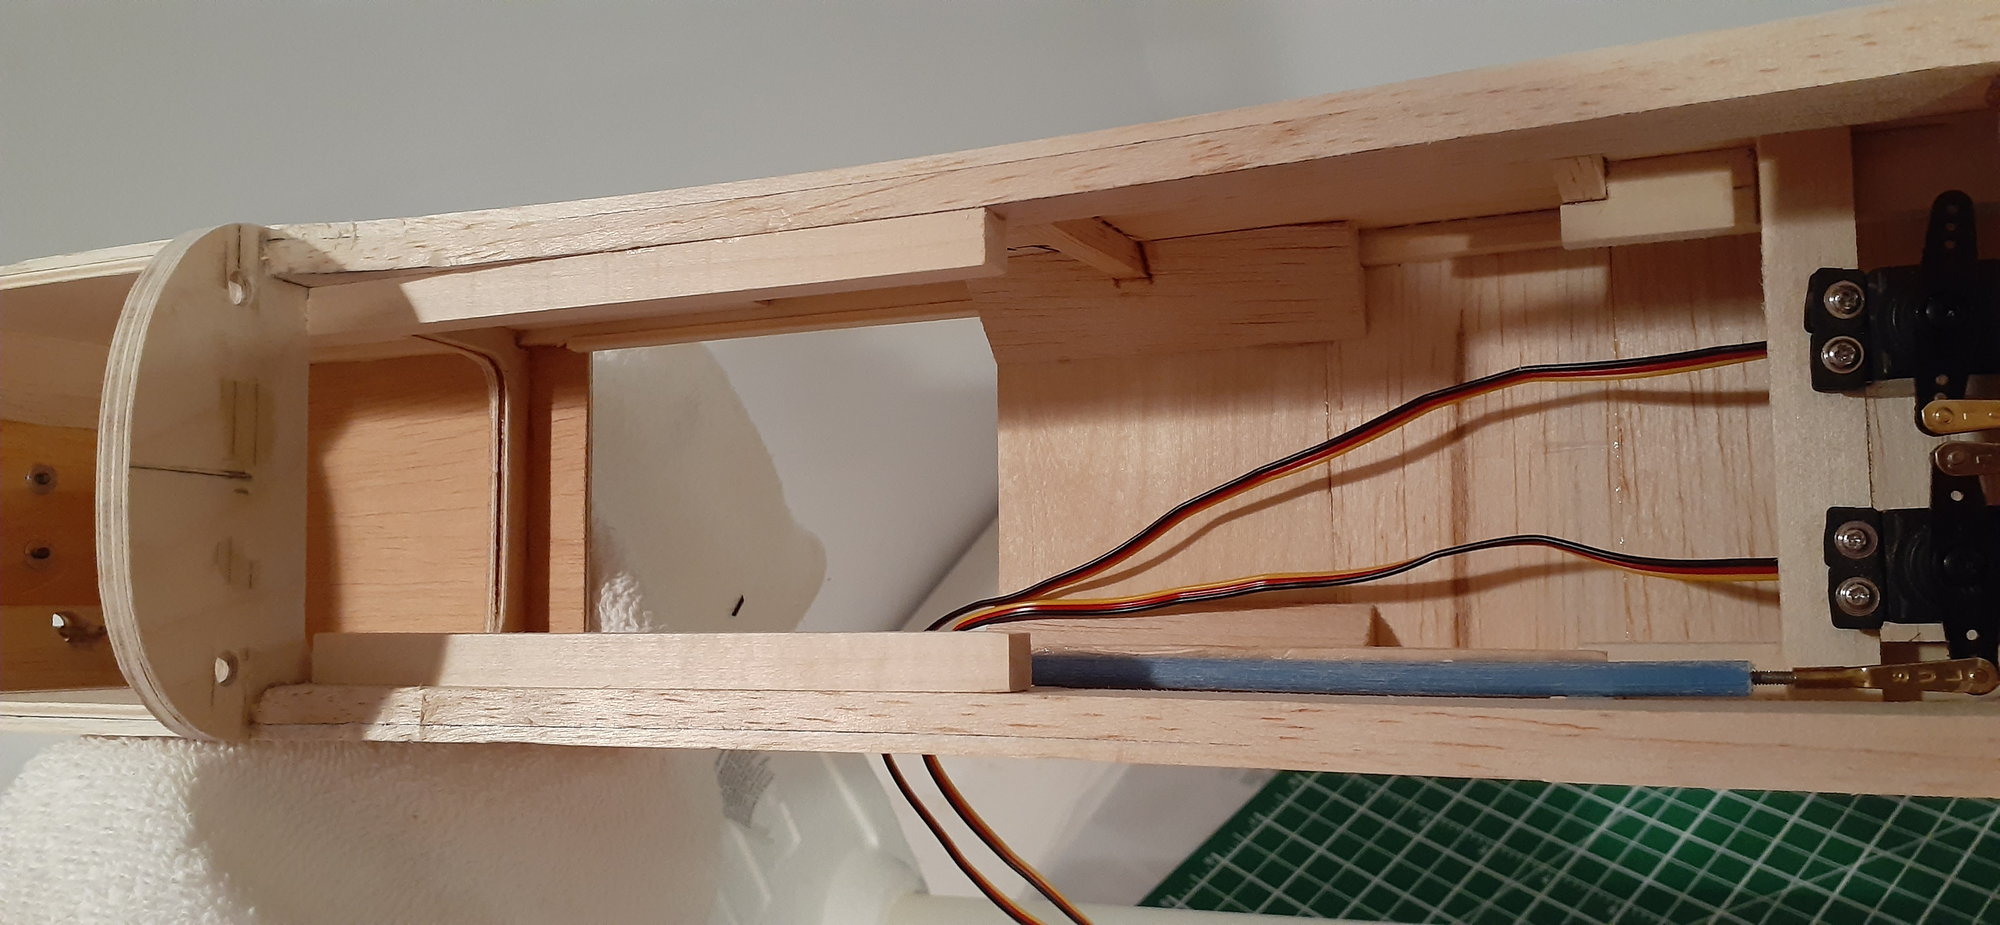
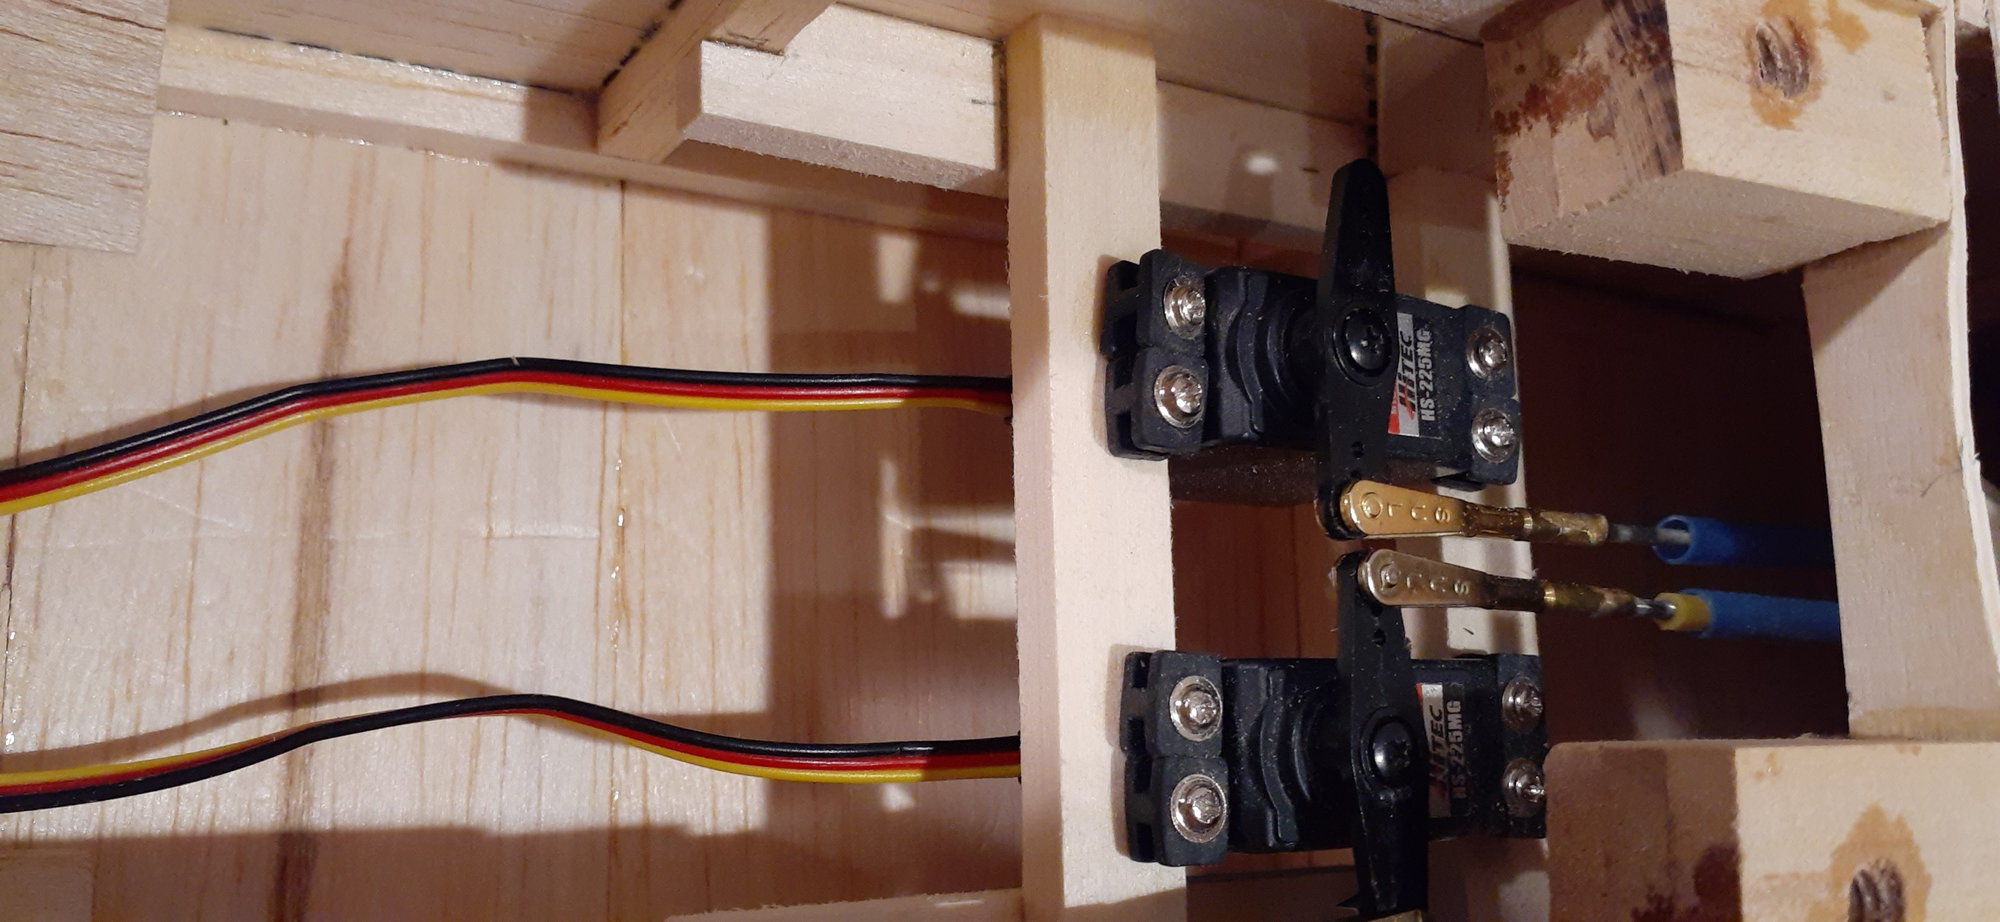
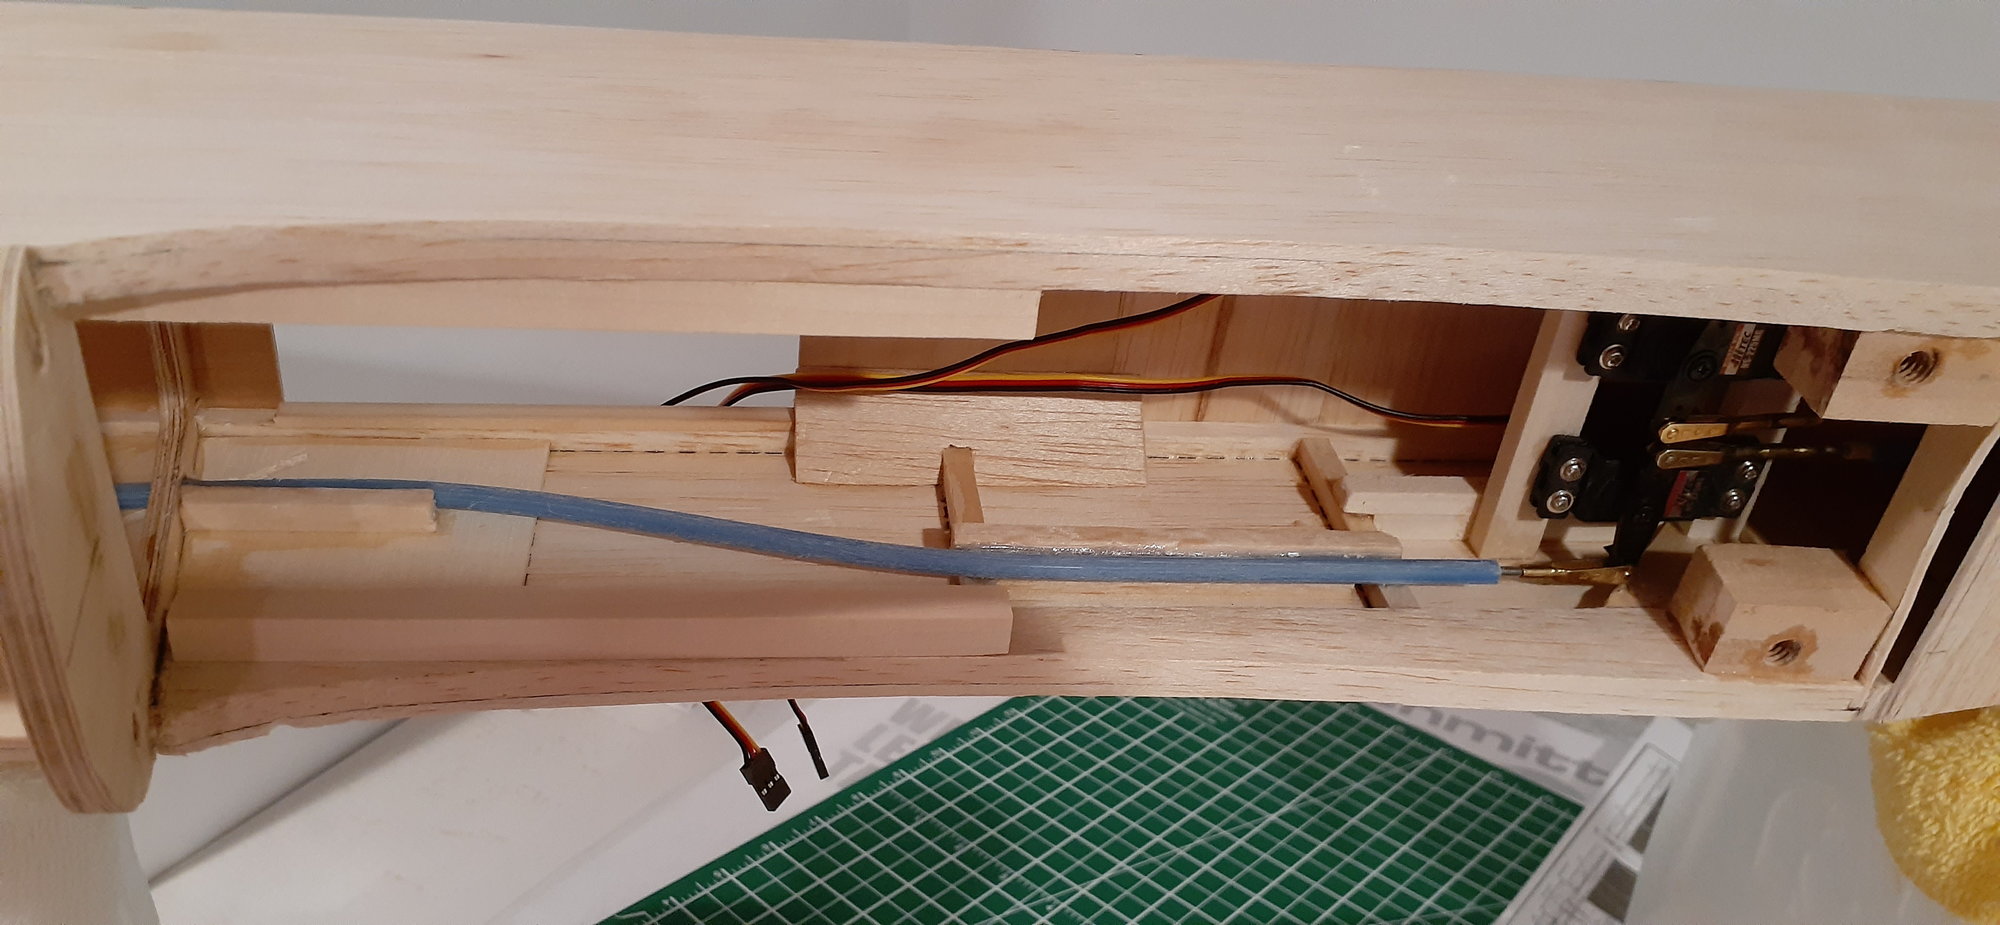
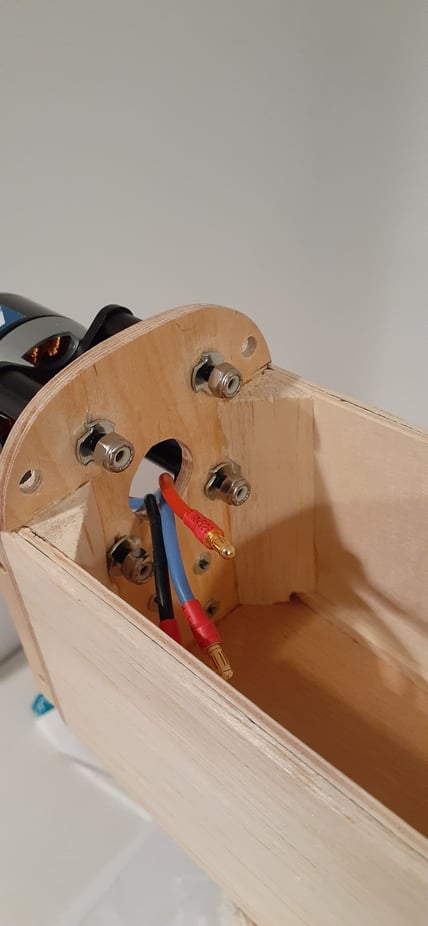
Fuselage includes conversion of the fuel tank area to an ESC compartment, construction of bottom battery hatch, a battery support tray located close to the underside of wing, elevator and rudder, servos mounted further rearward allowing ample room for battery. Motor mounted on threaded rods.
Power Setup: Power 46 motor, 5s 5000 mah battery, 12 x 8 prop, ESC to be determined (likely 65 to 80 amp). Looks like it will come out at about 6.2 lbs, quite good for an electric conversion with a good size battery. Will program it for a flaperons setup for landings as I did with a modified Freshman Trainer.
If I fly it with a 3300 4s battery it will come in at about 5 lbs per the box label. There is lots of room for making the battery tray adjustable for batteries within that range and still get the plane balanced.
I will post photos of the construction without film in a day or two by amending this post.
We modified the wing to have less dihedral, 1 inch instead of 2-1/4 inch at the tips, modified the ailerons to be 2-1/8 inches wide, installed a plywood wing spar which was also glued up against the landing gear blocks to make gear support even stronger, fiber glassed wider in middle area of wing top and bottom, wing tips not carved. A servo wire channel has been cored in the wing to allow for a future installation of aileron and flaps. No longer a basic trainer.
Fuselage includes conversion of the fuel tank area to an ESC compartment, construction of bottom battery hatch, a battery support tray located close to the underside of wing, elevator and rudder, servos mounted further rearward allowing ample room for battery. Motor mounted on threaded rods.
Power Setup: Power 46 motor, 5s 5000 mah battery, 12 x 8 prop, ESC to be determined (likely 65 to 80 amp). Looks like it will come out at about 6.2 lbs, quite good for an electric conversion with a good size battery. Will program it for a flaperons setup for landings as I did with a modified Freshman Trainer.
If I fly it with a 3300 4s battery it will come in at about 5 lbs per the box label. There is lots of room for making the battery tray adjustable for batteries within that range and still get the plane balanced.
I will post photos of the construction without film in a day or two by amending this post.
Last edited by Creative RC; 12-17-2019 at 08:06 AM.
12-22-2019, 05:50 PM
#359
Join Date: May 2013
Location: Moncton, NB, CANADA
Posts: 62
Likes: 0
Received 0 Likes
on
0 Posts
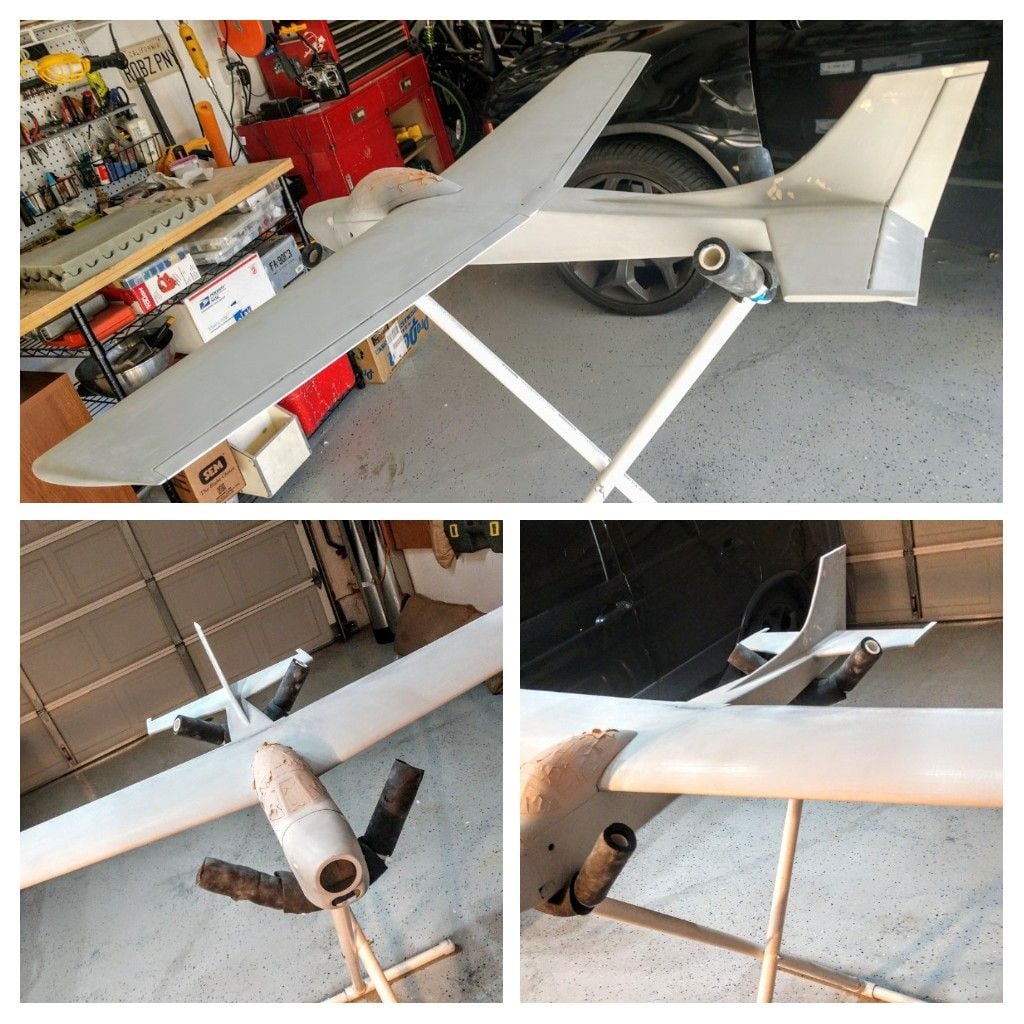
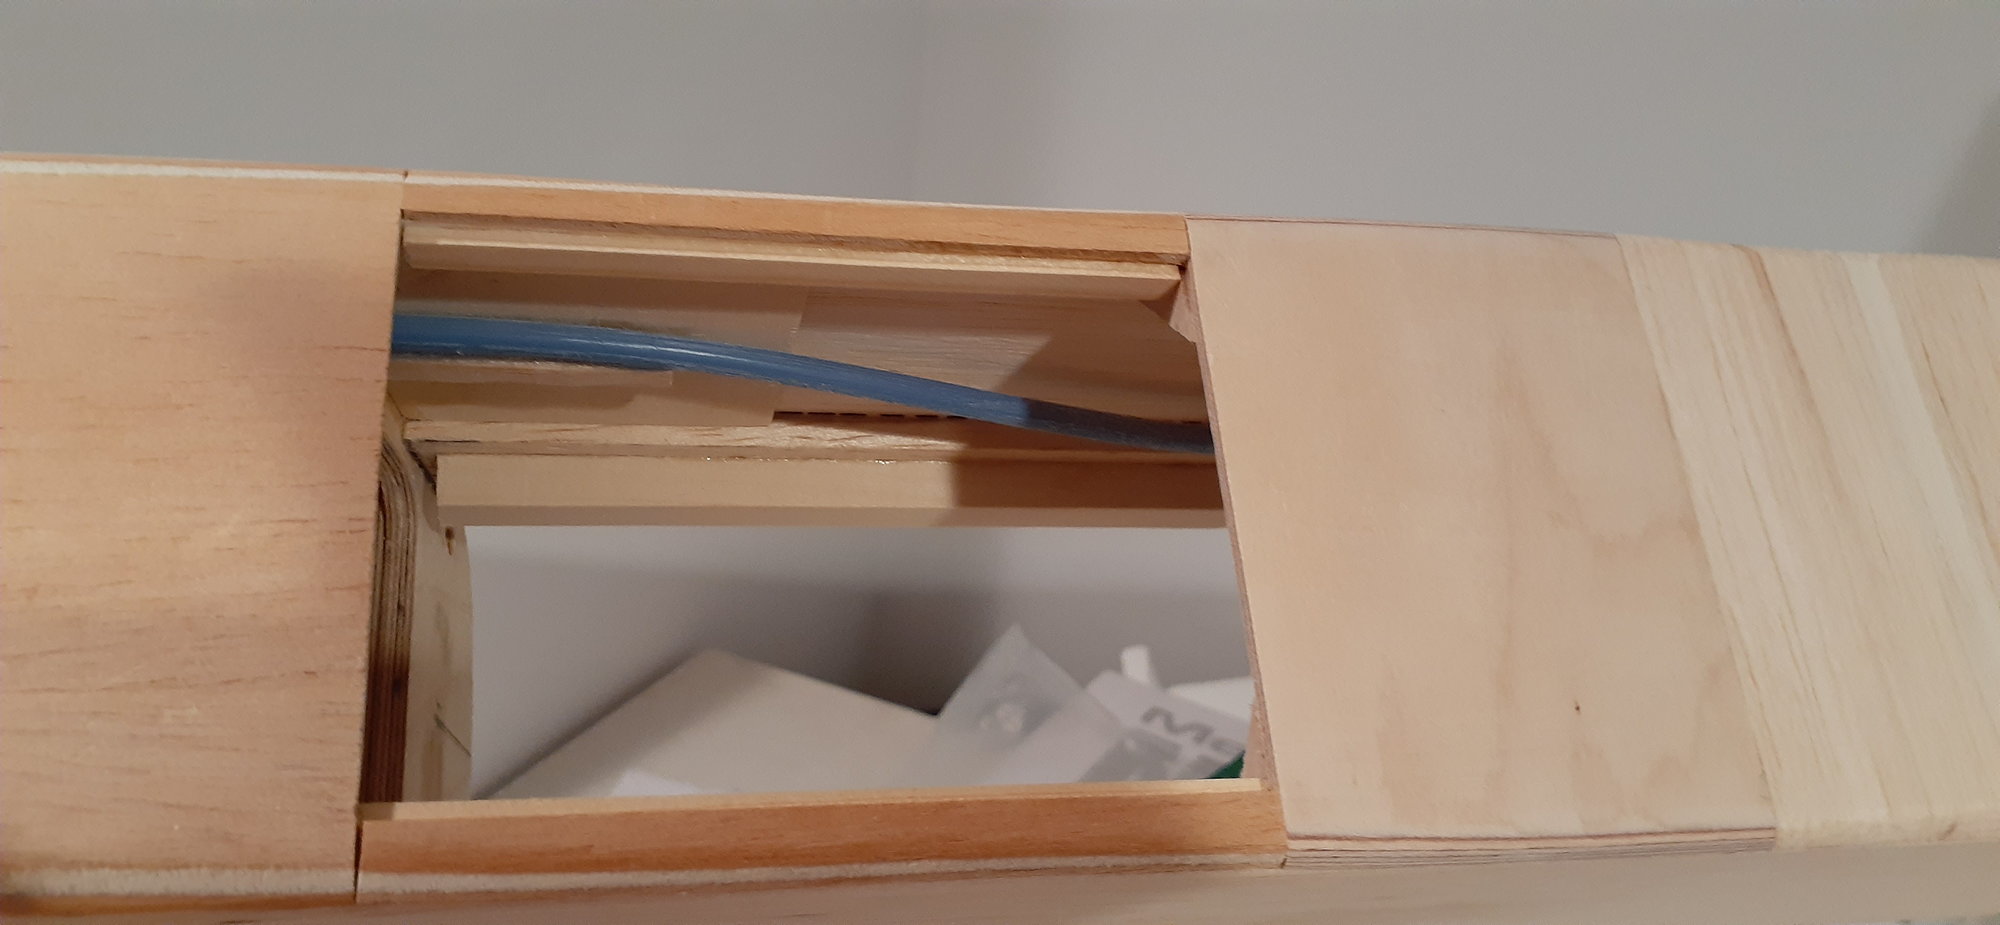
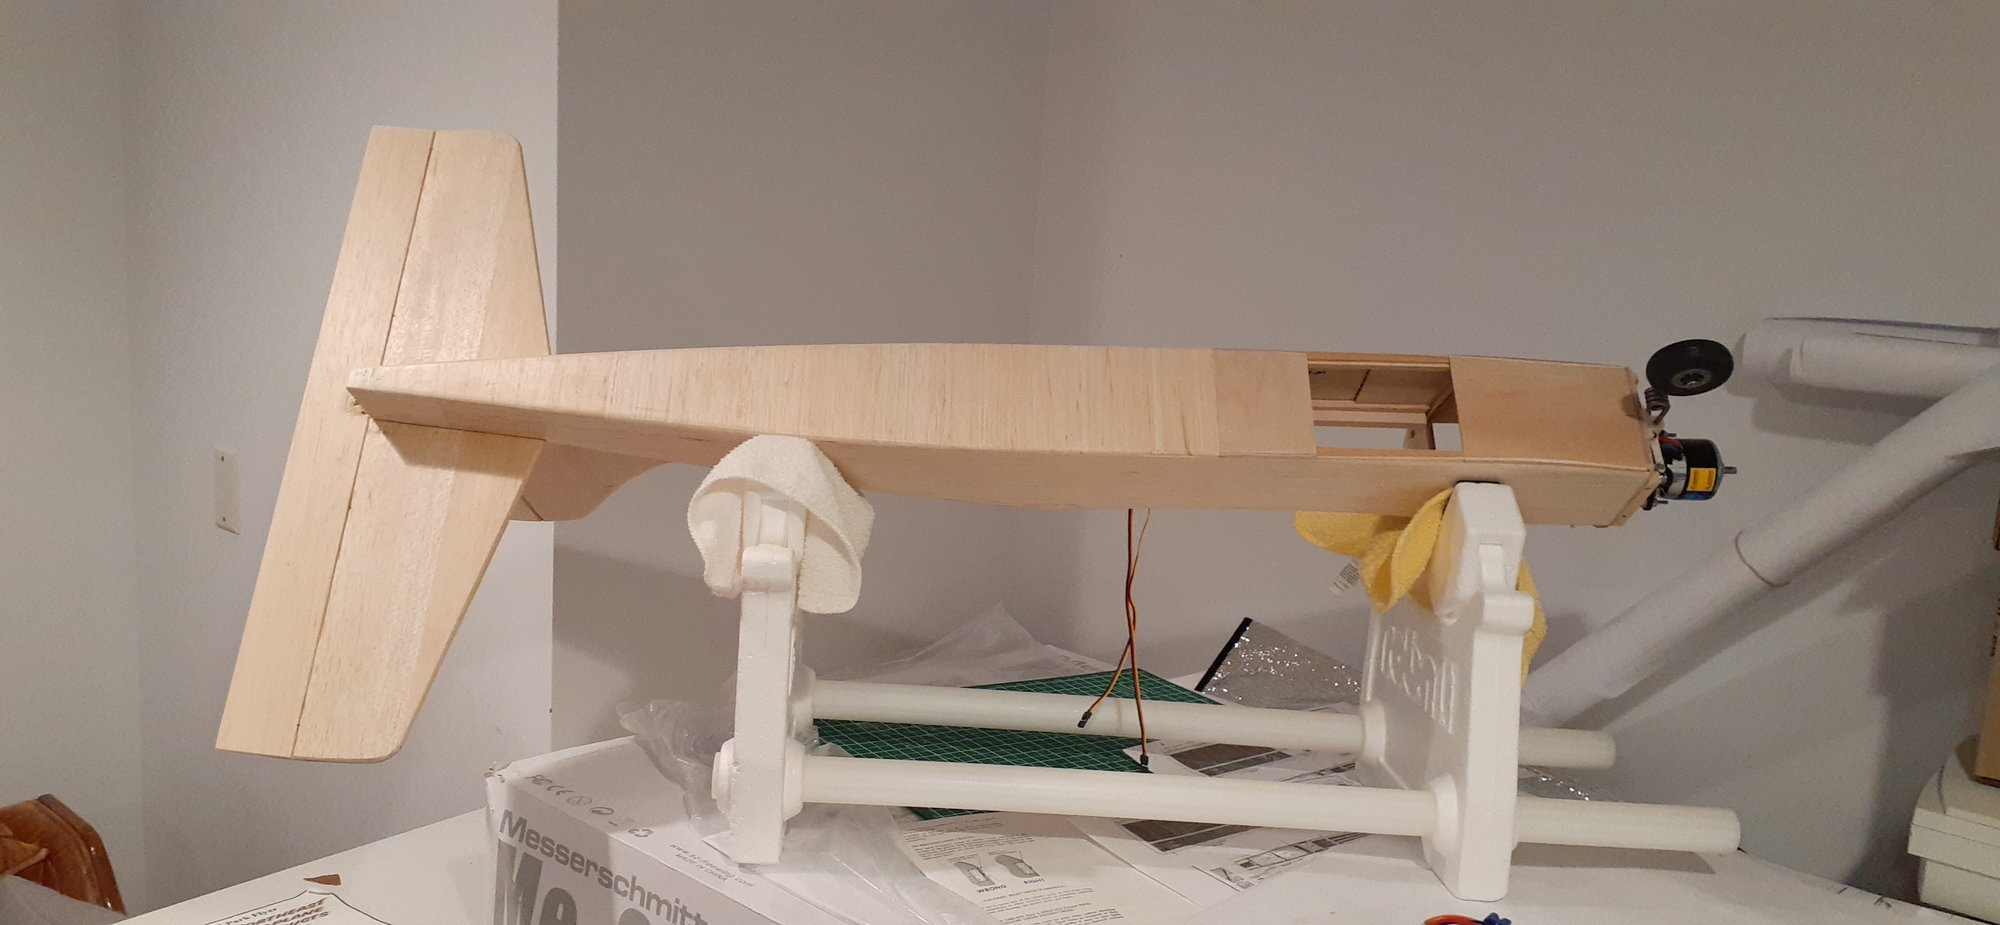
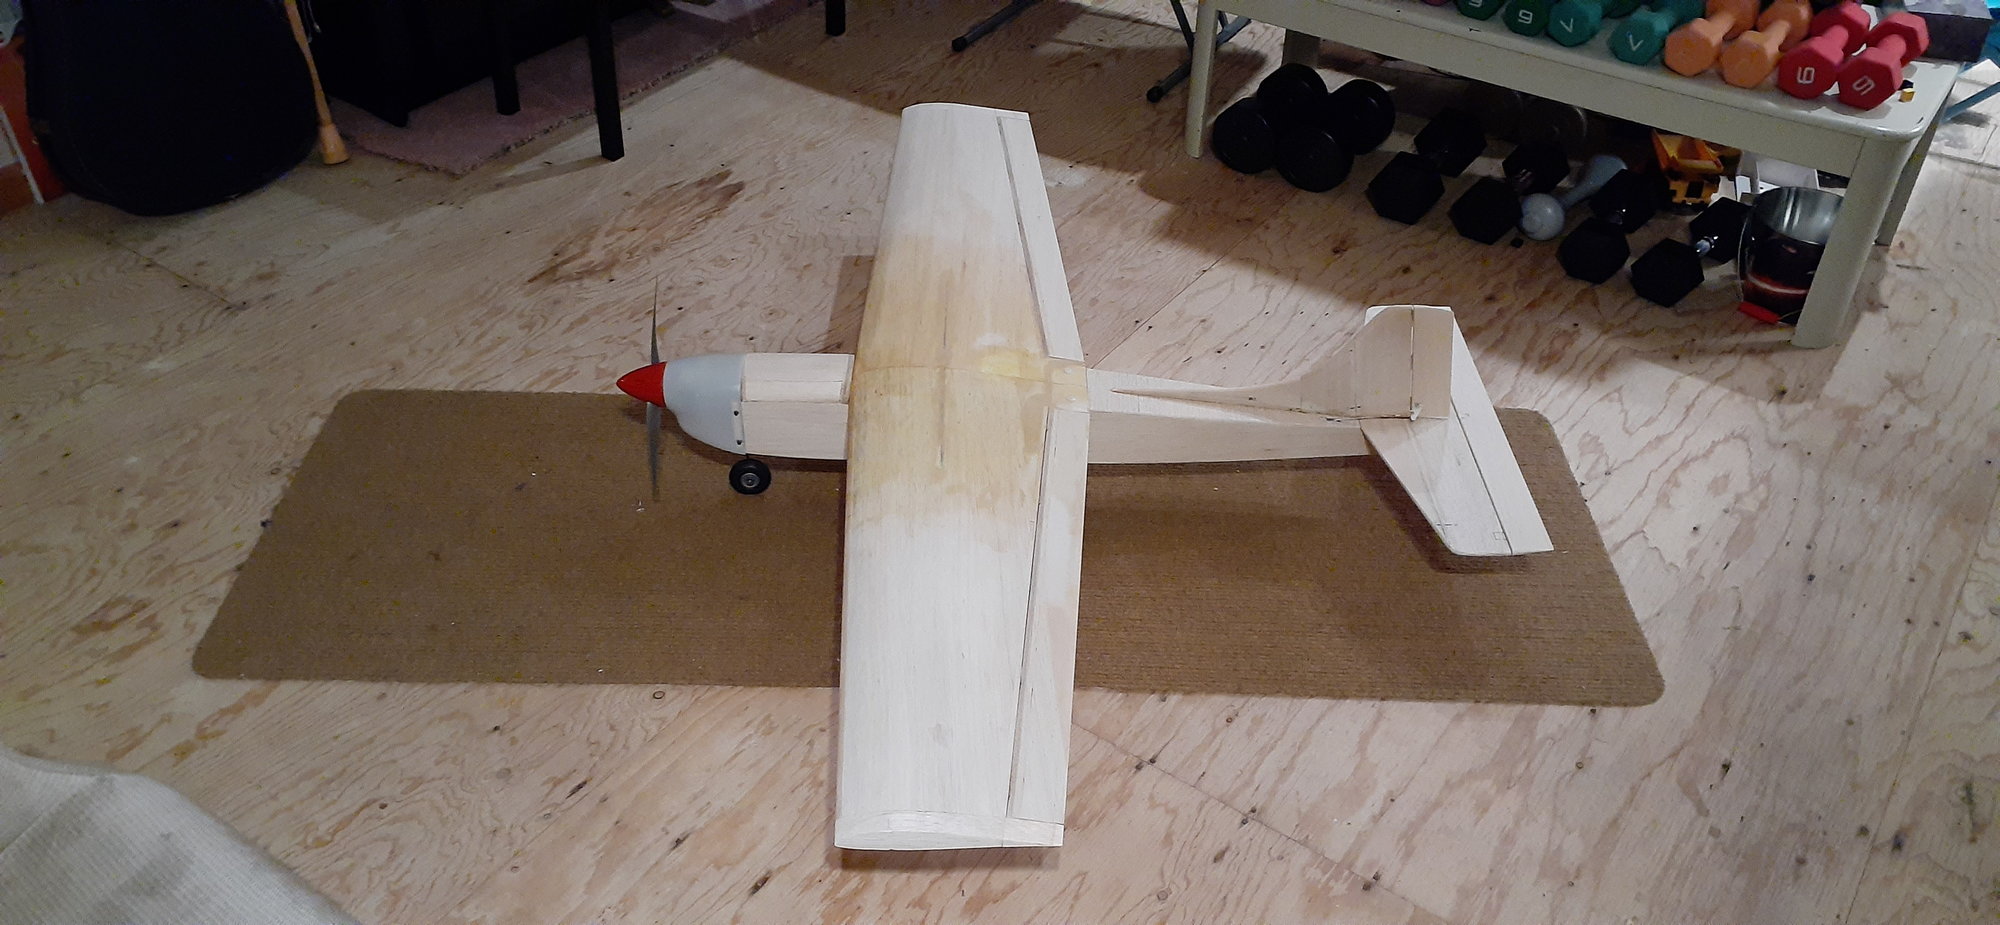
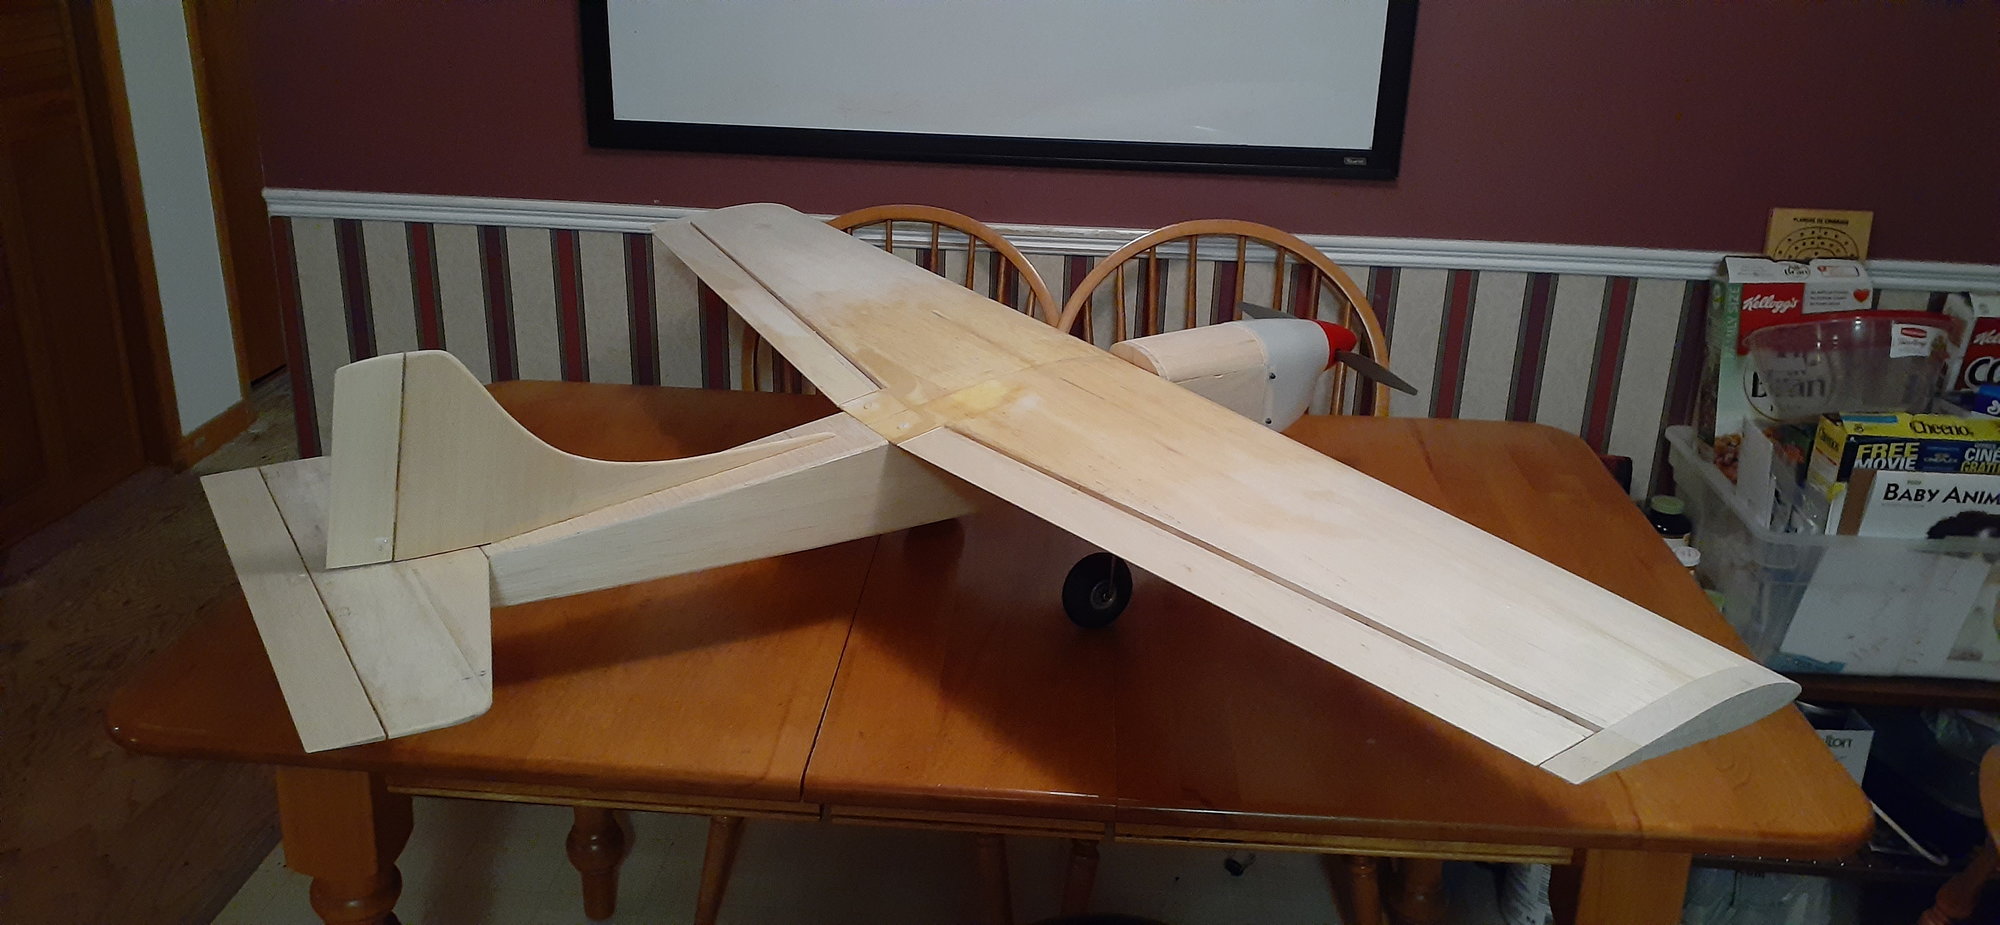
Here are photos of the build prior to finishing. Hope these can useful to anyone planing to build one. Once the covering and all final adjustments are done, I am thinking of doing the maiden without the canopy. Looking forward to it.
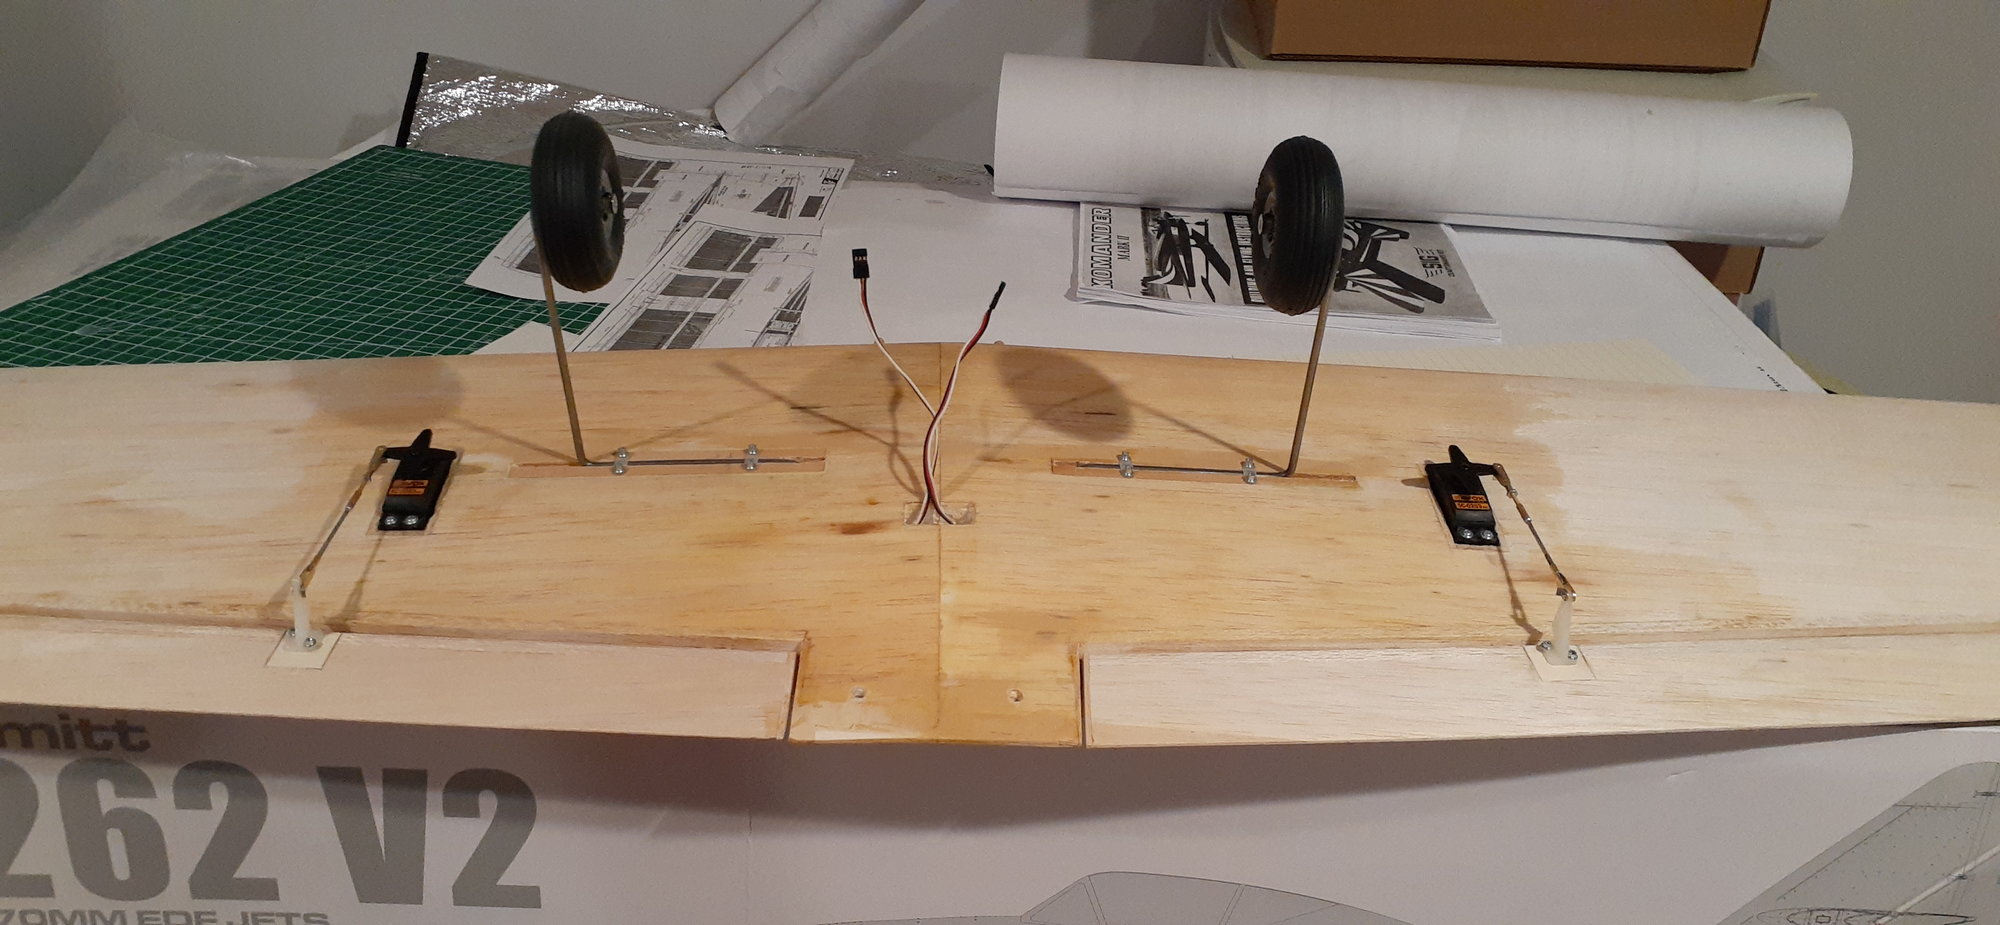
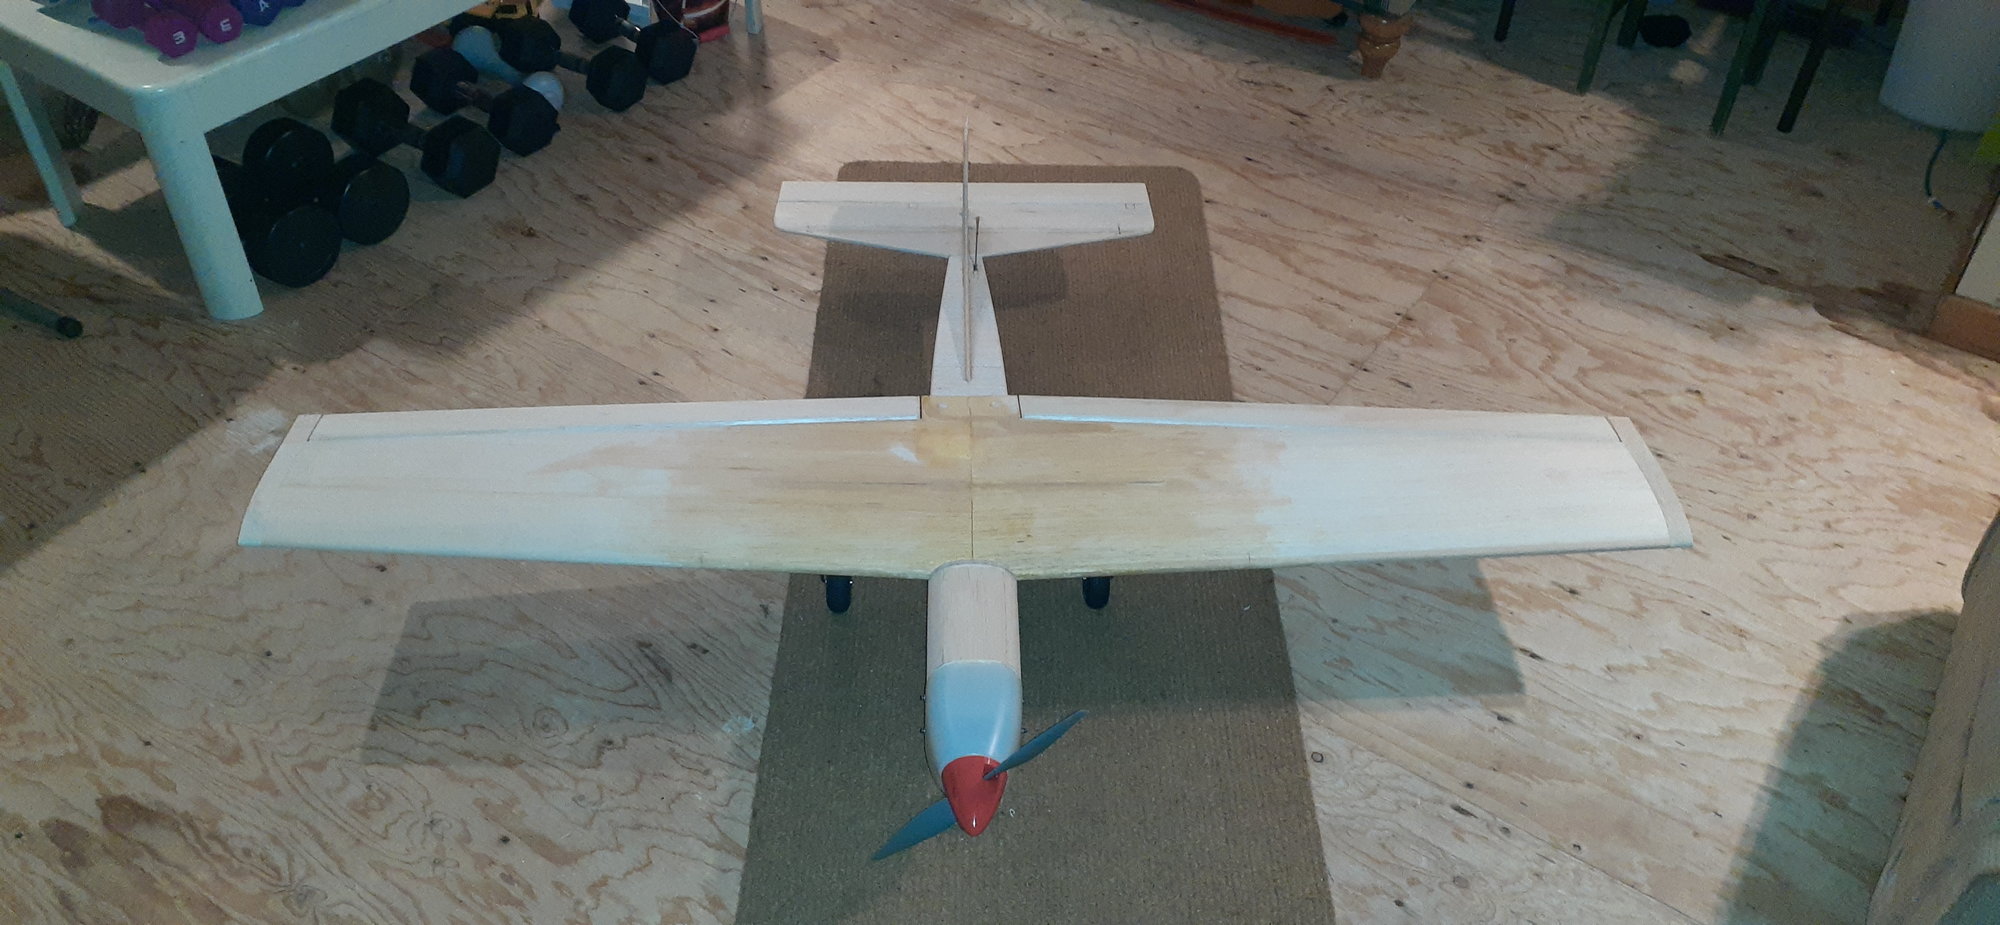
Plywood spar added thickness of wing. Landing gear blocks are also glued against the spar for added resistance.
Ailerons are 2-1/8 inch wide.
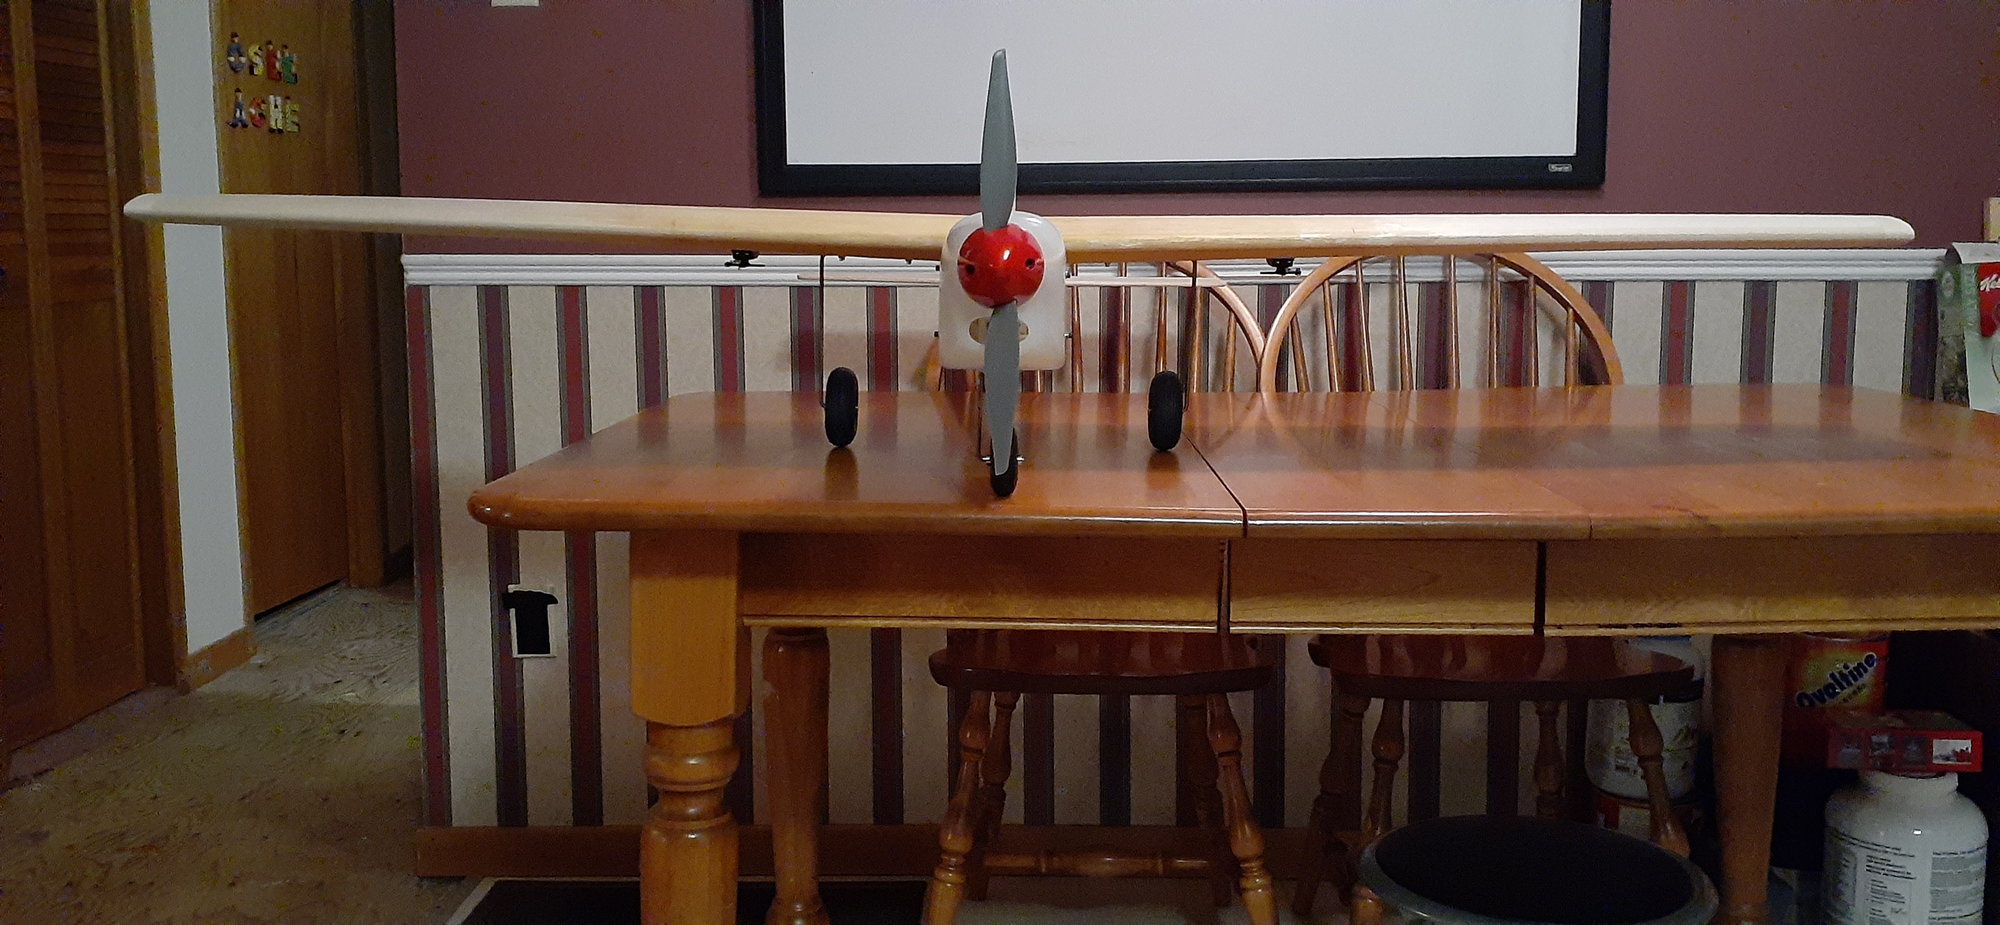
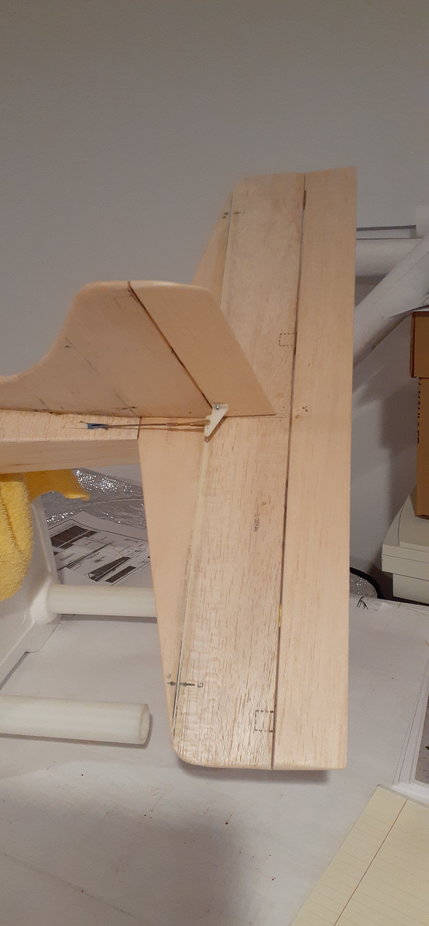
Reduced dihedral. Tips raised only 1 inch.
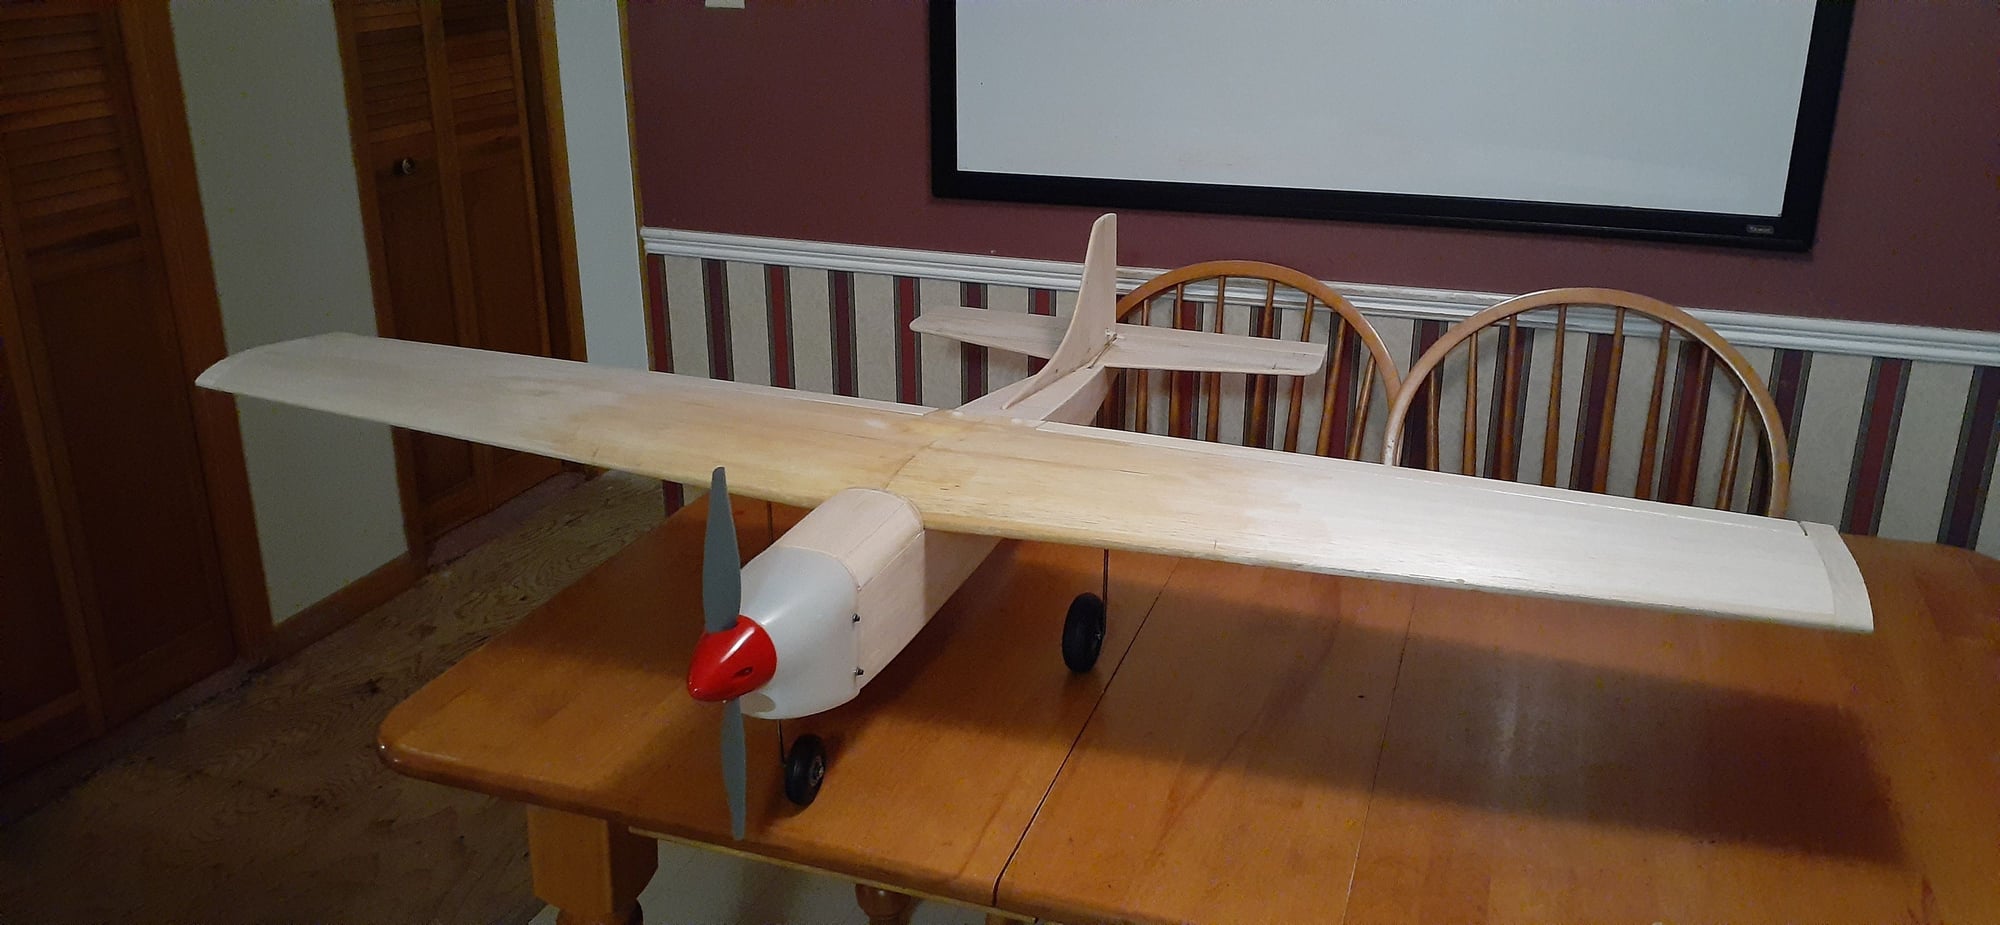
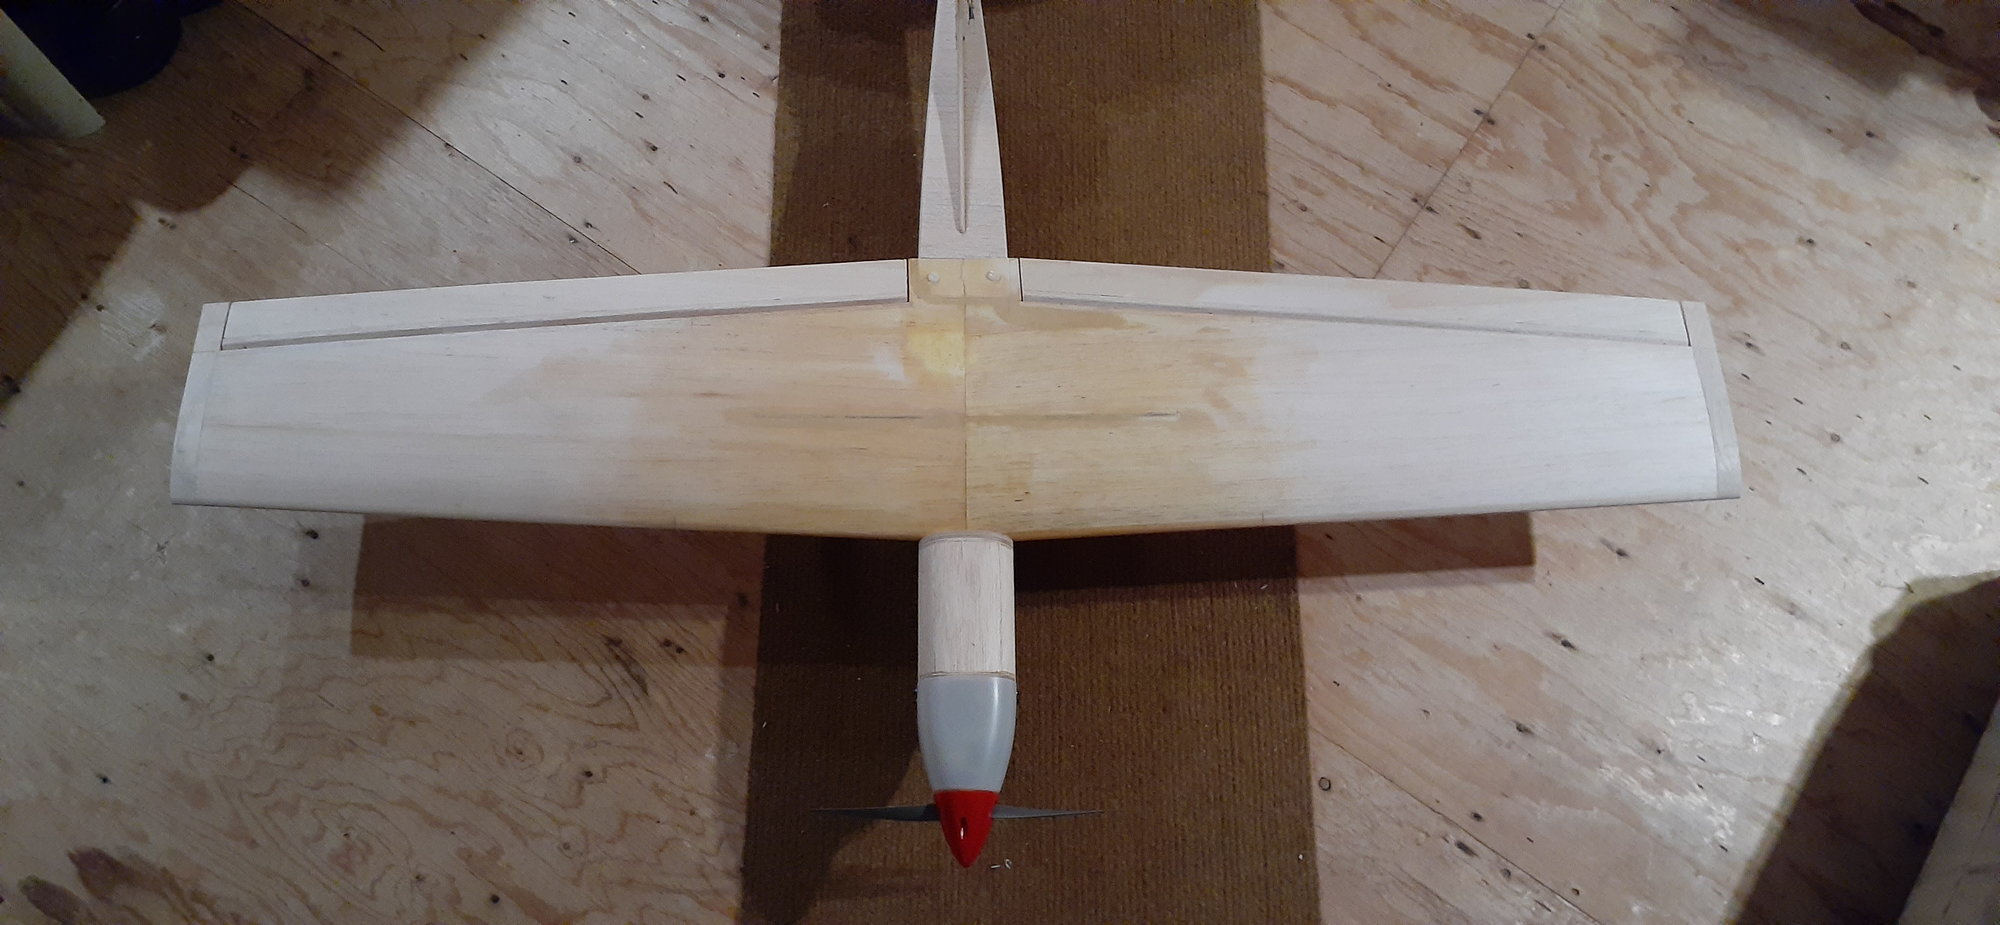
Battery hatch location. Also did not reinforced the cowl with fiberglass as it is sturdy enough for an electric powered plane.
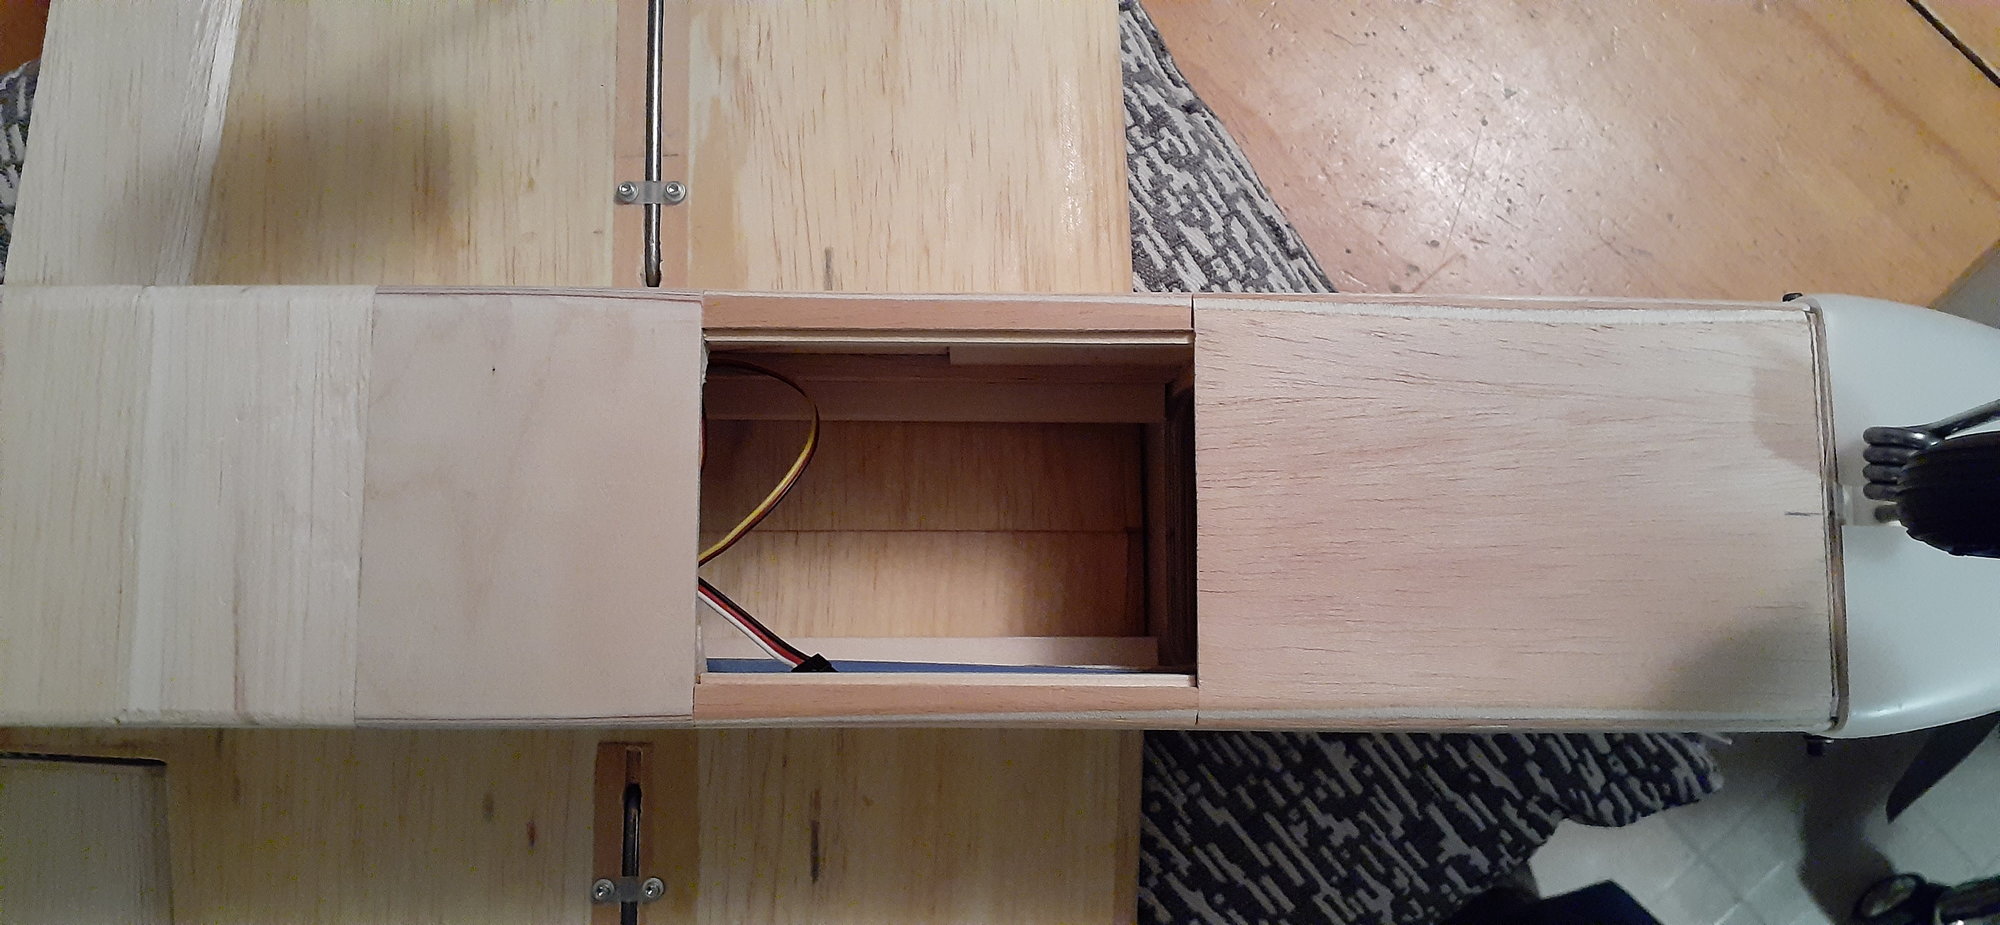
Battery tray rails are close to underside of wing to raise 5s 5000 mah battery as high as possible.
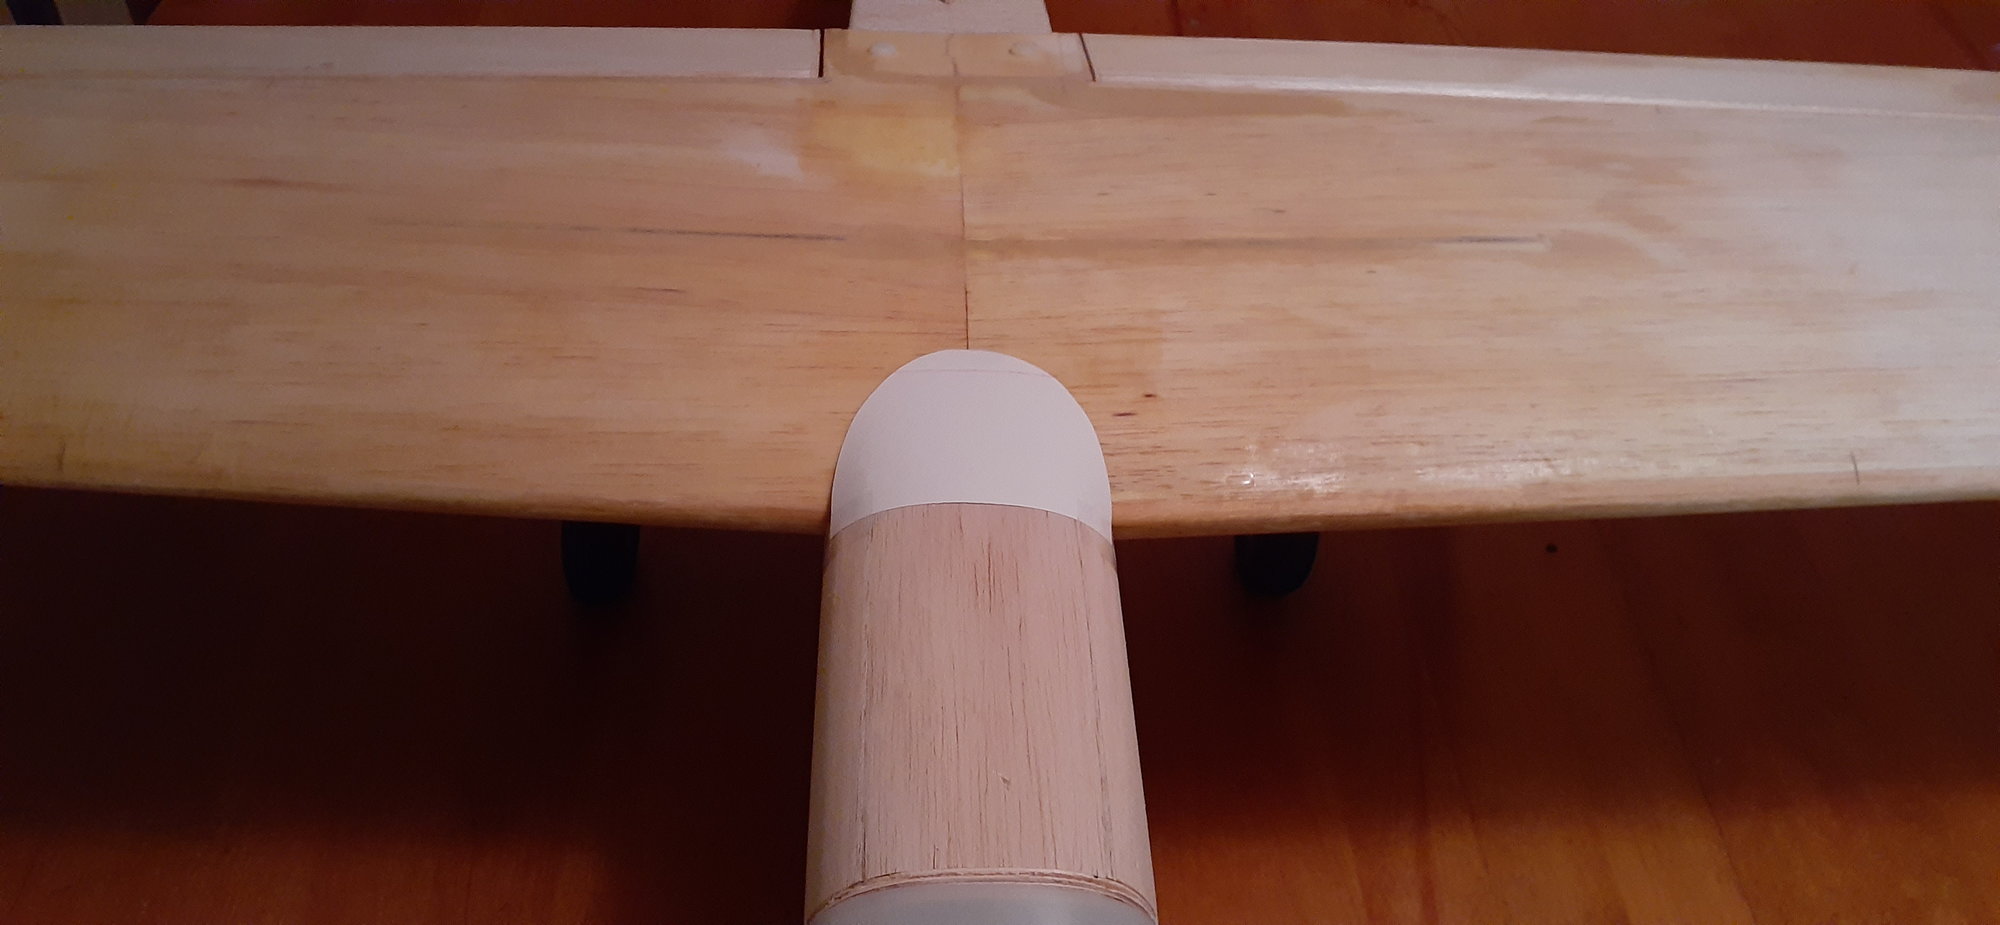
Fairing mock up for maiden flight. Canopy will be installed later.
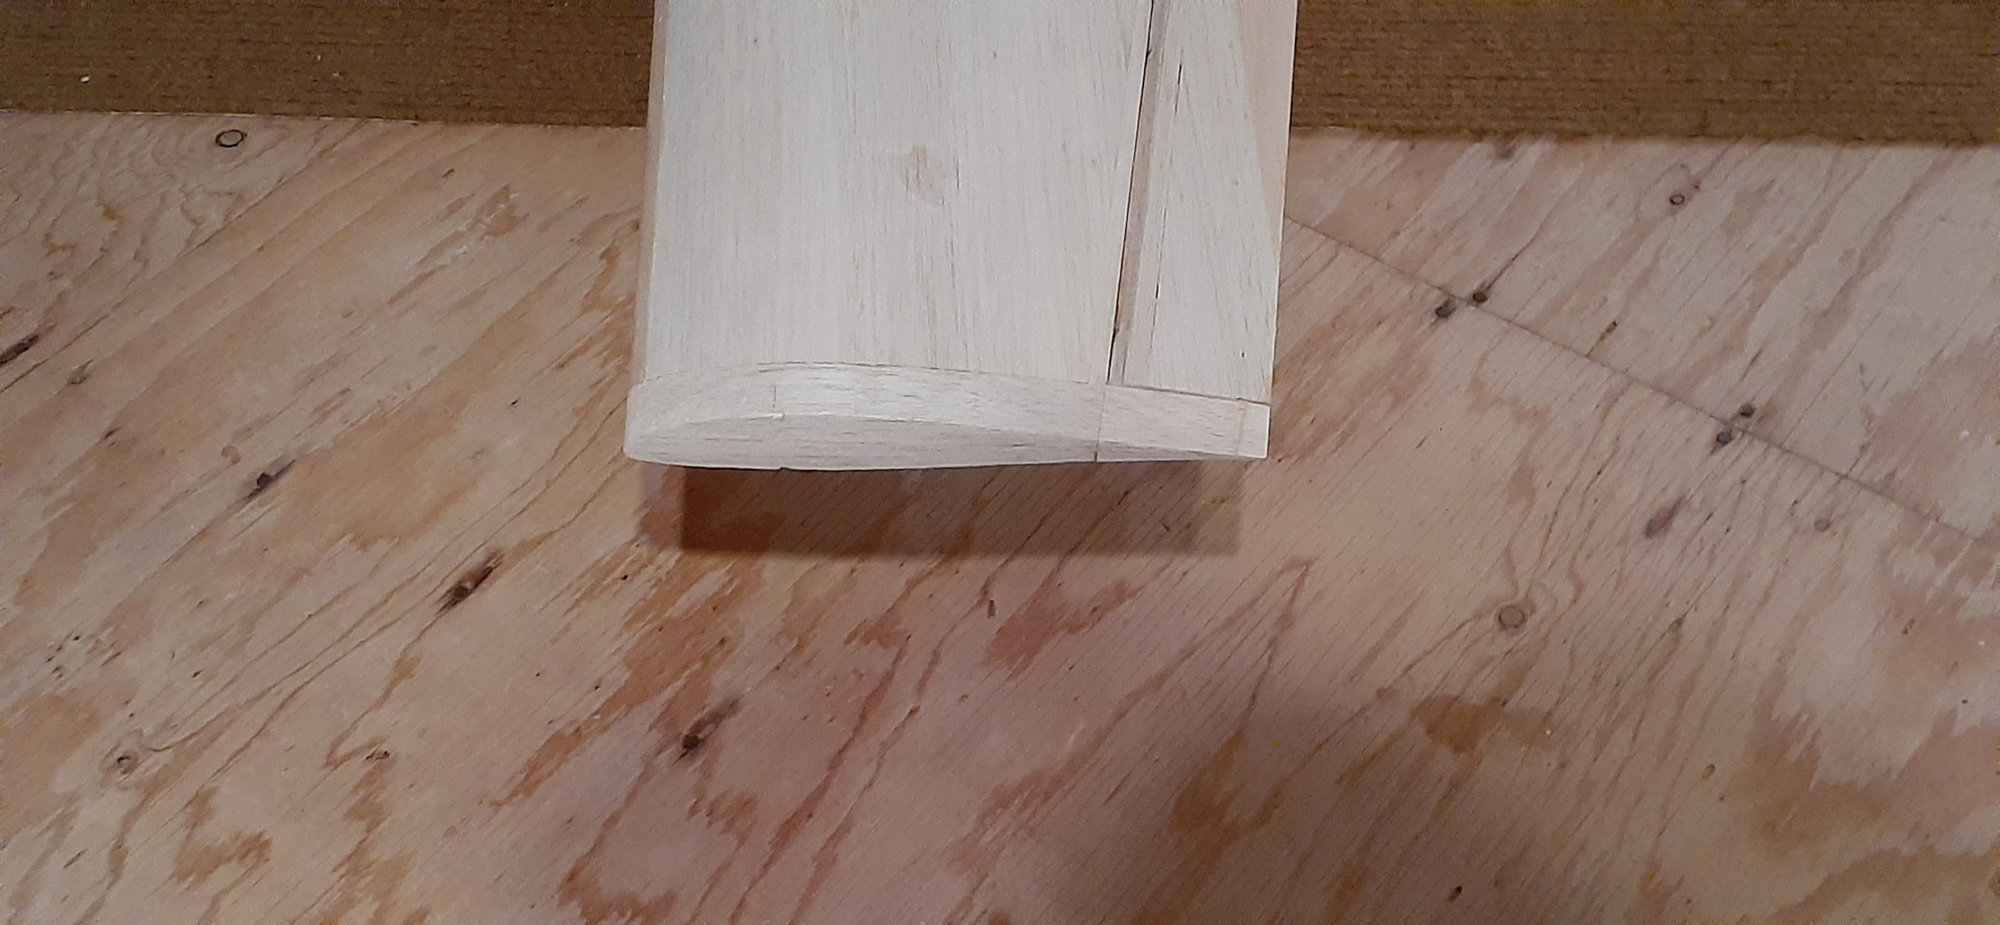
Squared tips.
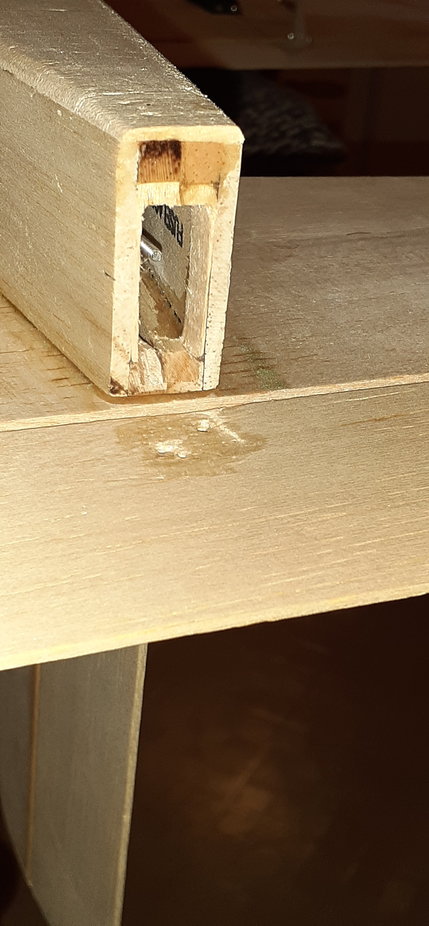
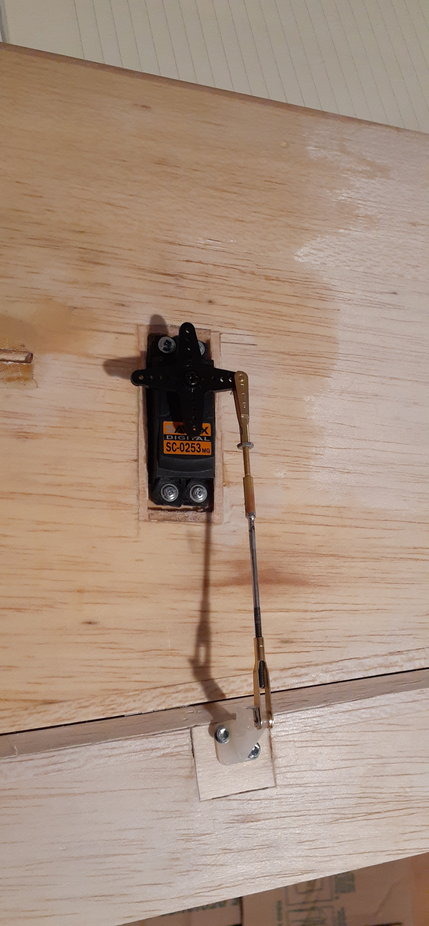
Note beveled wood to allow movement of control horn.
Plywood spar added thickness of wing. Landing gear blocks are also glued against the spar for added resistance.
Ailerons are 2-1/8 inch wide.
Reduced dihedral. Tips raised only 1 inch.
Battery hatch location. Also did not reinforced the cowl with fiberglass as it is sturdy enough for an electric powered plane.
Battery tray rails are close to underside of wing to raise 5s 5000 mah battery as high as possible.
Fairing mock up for maiden flight. Canopy will be installed later.
Squared tips.
Note beveled wood to allow movement of control horn.
12-22-2019, 06:01 PM
#360
Join Date: May 2013
Location: Moncton, NB, CANADA
Posts: 62
Likes: 0
Received 0 Likes
on
0 Posts
I just finished tinkering with the engine to hopefully do the maiden tomorrow (was hoping today, but way too windy) and I think this Komander came out lighter. On the first one, full throttle, hold the nose up, it just felt really light in the hands, not enough power to pull straight up. Flying it, it still did large loops from level flight. The new one, same engine (OS FS-52), same prop (APC 12x5), I held the nose up full throttle, it wants to climb! Not a huge power climb, but I held the back of the fuse steady and the leading edge of the wing raised my hands, it goes up. 5lbs, 8oz without fuel.
I enjoyed the photos of your plane. Would you be able to post how much your plane weighs ready to fly including its fuel (estimated). My electric powered conversion per the photos I posted will weigh around 6.3 lbs. Also, did you sand the cowl before painting it and what type of paint did you use. Thank you.
Francois
12-23-2019, 07:28 PM
#361

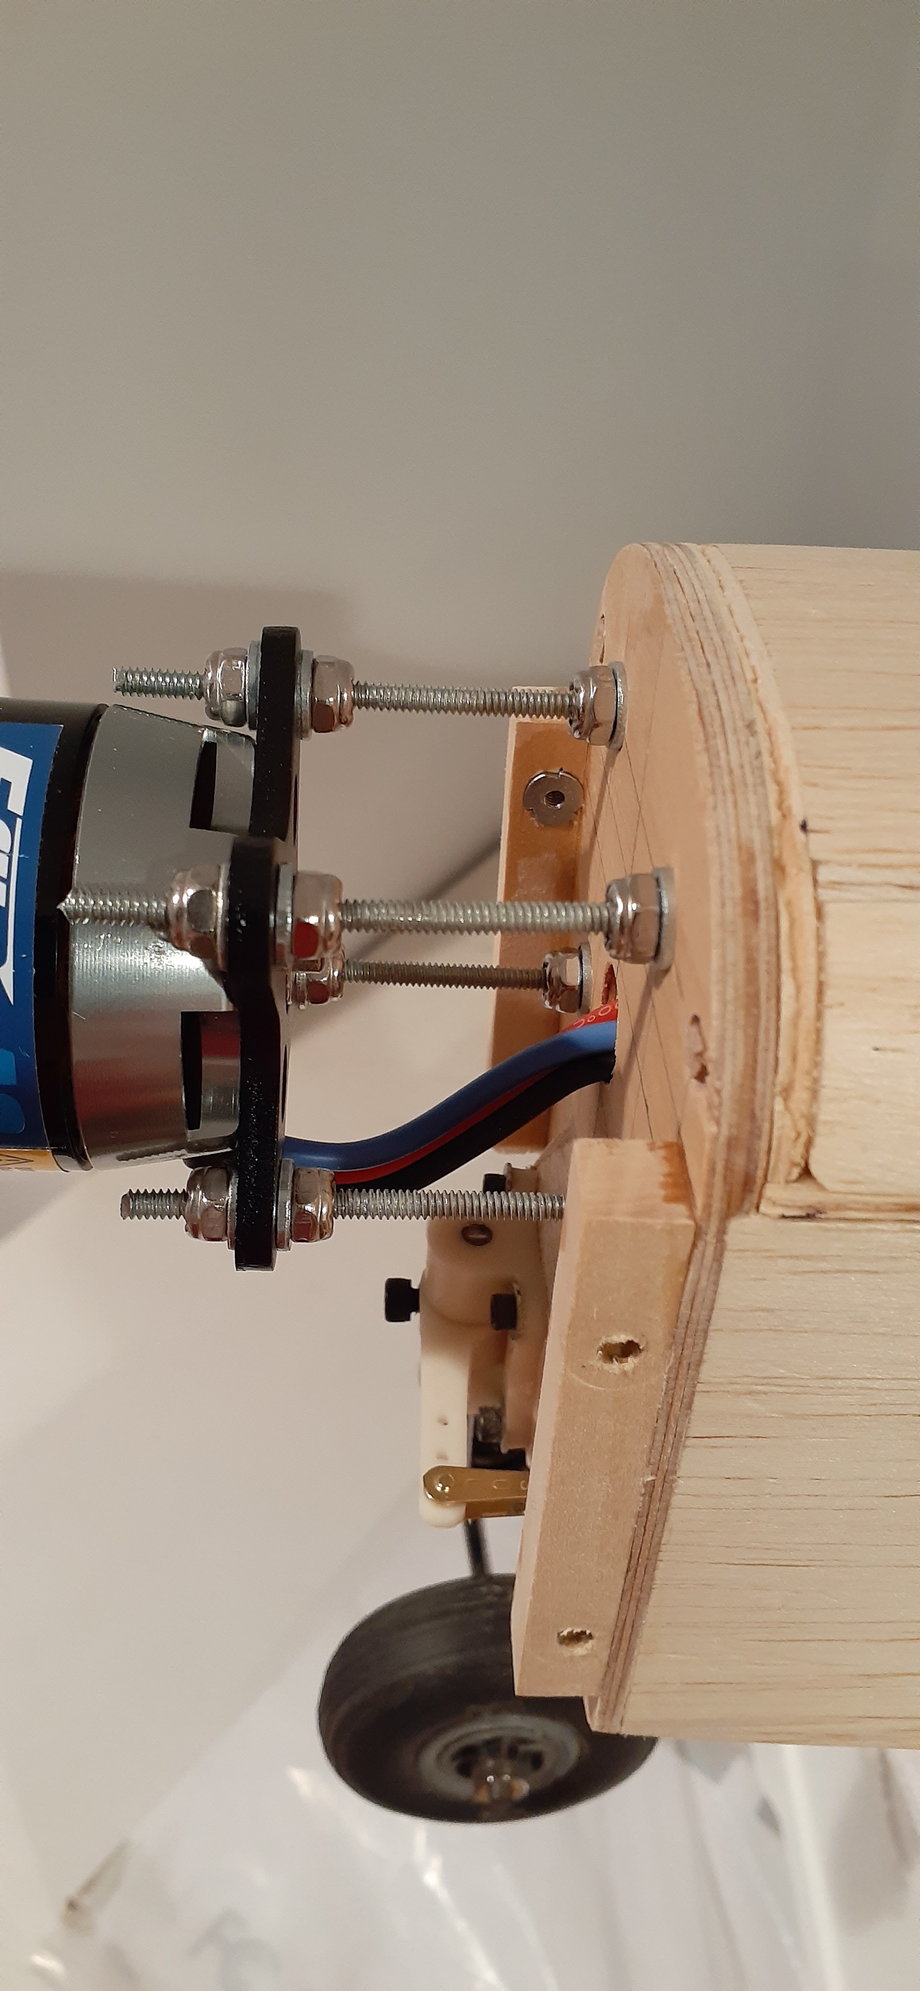
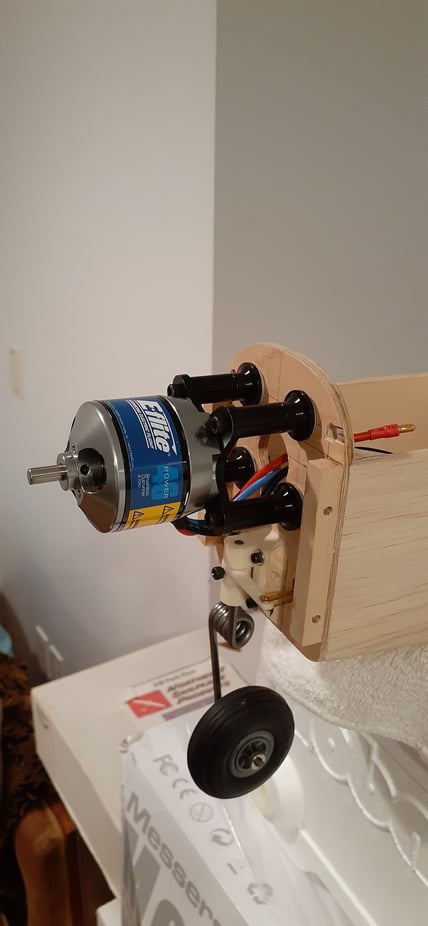
Hello Creative RC... You're work looks pretty clean. I must warn you though, the way that motor is attached to that firewall, the torque will just twist that thing right off. If it doesn't break any screws, it will simply get torn off with the screws and washers pulling out of the firewall... If it's not immediate, it won't take long. I just see several issues in how you have that thing mounted.
I'm honestly not trying to bash your work, as again your woodwork looks Ok, but these larger electric motors have mad torque. The screws aren't sufficient either, and with that motor standing off that far, and that much thread there, those screws will buckle and fail. This is a reason also you never use all-thread, the threads weaken the rod drastically. Sorry to say.
If you do decide to go through with it... please just stand clear... It will probably run fine without that prop, but once you put that prop on and hammer that throttle, you better watch out, if it lets loose it will probably damage that whole cowling. I'd bet alot of money it would. So just be careful.
12-26-2019, 04:33 PM
#362
Join Date: May 2013
Location: Moncton, NB, CANADA
Posts: 62
Likes: 0
Received 0 Likes
on
0 Posts
Hello Creative RC... You're work looks pretty clean. I must warn you though, the way that motor is attached to that firewall, the torque will just twist that thing right off. If it doesn't break any screws, it will simply get torn off with the screws and washers pulling out of the firewall... If it's not immediate, it won't take long. I just see several issues in how you have that thing mounted.
I'm honestly not trying to bash your work, as again your woodwork looks Ok, but these larger electric motors have mad torque. The screws aren't sufficient either, and with that motor standing off that far, and that much thread there, those screws will buckle and fail. This is a reason also you never use all-thread, the threads weaken the rod drastically. Sorry to say.
If you do decide to go through with it... please just stand clear... It will probably run fine without that prop, but once you put that prop on and hammer that throttle, you better watch out, if it lets loose it will probably damage that whole cowling. I'd bet alot of money it would. So just be careful.
I'm honestly not trying to bash your work, as again your woodwork looks Ok, but these larger electric motors have mad torque. The screws aren't sufficient either, and with that motor standing off that far, and that much thread there, those screws will buckle and fail. This is a reason also you never use all-thread, the threads weaken the rod drastically. Sorry to say.
If you do decide to go through with it... please just stand clear... It will probably run fine without that prop, but once you put that prop on and hammer that throttle, you better watch out, if it lets loose it will probably damage that whole cowling. I'd bet alot of money it would. So just be careful.
Last edited by Creative RC; 12-26-2019 at 05:24 PM.
12-26-2019, 05:09 PM
#363
Hi,
I enjoyed the photos of your plane. Would you be able to post how much your plane weighs ready to fly including its fuel (estimated). My electric powered conversion per the photos I posted will weigh around 6.3 lbs. Also, did you sand the cowl before painting it and what type of paint did you use. Thank you.
Francois
As for mounting your motor, I would make a simple box, weight would be marginal.
12-26-2019, 05:43 PM
#364
Join Date: May 2013
Location: Moncton, NB, CANADA
Posts: 62
Likes: 0
Received 0 Likes
on
0 Posts
Thanks. I've only ever weighed it dry which was 5lbs, 8oz. I've actually re-balanced it for this spring as it was quite nose heavy, so 5lbs, 9oz now without fuel. It's an 8oz tank, alcohol weighs slighly less than 1oz per fluid oz, so I would imagine fueled I'm right around the 6lb mark.
As for mounting your motor, I would make a simple box, weight would be marginal.
As for mounting your motor, I would make a simple box, weight would be marginal.
Last edited by Creative RC; 12-26-2019 at 05:46 PM.
12-26-2019, 06:09 PM
#365
Ya, that was my plane, I set the thrust line, wing, and elevator at 0-0-0.
Forgot to mention, if you sized the electric motor correctly, I don't see a problem with it at 6.5lbs. My plane is a floater at half throttle..
Forgot to mention, if you sized the electric motor correctly, I don't see a problem with it at 6.5lbs. My plane is a floater at half throttle..
Last edited by HAL9KPCM; 12-26-2019 at 10:12 PM.
12-26-2019, 11:02 PM
#366
Very good. I'm glad you'll look into it. I don't usually intervene on a build/project like this, but I'm just seeing a great potential for disaster in those pics. Another reason is, my friend had a sport/pattern plane(about same size as the Kommander) and he'd set up the motor(about same size as your motor), nearly identical to yours. All was fine until he had the prop on, and tried to take off for the first time, and the motor torqued around and took everything with it.. including the cowling.. just destroyed the front end... and I don't want to see that happen again to anyone. He ended up building a small box(as I would too) to mount the motor on, and the box gave it the triangulation and bracing it needed.
I wish you well with your classic Kommander, I too have a Kommander I've been working on periodically for a few years... when I'm in between other projects. Mine will be completed at some point I'm sure... just not sure when exactly. I got a new wing core, canopy, and cowling for it, and that Sig wood they used in these is the best balsa on the planet, which was the whole reason I'm restoring it, as well it's one of the coolest sport planes of it's kind in that size range. I think you'll do fine with yours once you get it figured out. Good luck with it.
I wish you well with your classic Kommander, I too have a Kommander I've been working on periodically for a few years... when I'm in between other projects. Mine will be completed at some point I'm sure... just not sure when exactly. I got a new wing core, canopy, and cowling for it, and that Sig wood they used in these is the best balsa on the planet, which was the whole reason I'm restoring it, as well it's one of the coolest sport planes of it's kind in that size range. I think you'll do fine with yours once you get it figured out. Good luck with it.
01-15-2020, 11:10 AM
#367
Join Date: May 2013
Location: Moncton, NB, CANADA
Posts: 62
Likes: 0
Received 0 Likes
on
0 Posts
Very good. I'm glad you'll look into it. I don't usually intervene on a build/project like this, but I'm just seeing a great potential for disaster in those pics. Another reason is, my friend had a sport/pattern plane(about same size as the Kommander) and he'd set up the motor(about same size as your motor), nearly identical to yours. All was fine until he had the prop on, and tried to take off for the first time, and the motor torqued around and took everything with it.. including the cowling.. just destroyed the front end... and I don't want to see that happen again to anyone. He ended up building a small box(as I would too) to mount the motor on, and the box gave it the triangulation and bracing it needed.
I wish you well with your classic Kommander, I too have a Kommander I've been working on periodically for a few years... when I'm in between other projects. Mine will be completed at some point I'm sure... just not sure when exactly. I got a new wing core, canopy, and cowling for it, and that Sig wood they used in these is the best balsa on the planet, which was the whole reason I'm restoring it, as well it's one of the coolest sport planes of it's kind in that size range. I think you'll do fine with yours once you get it figured out. Good luck with it.
I wish you well with your classic Kommander, I too have a Kommander I've been working on periodically for a few years... when I'm in between other projects. Mine will be completed at some point I'm sure... just not sure when exactly. I got a new wing core, canopy, and cowling for it, and that Sig wood they used in these is the best balsa on the planet, which was the whole reason I'm restoring it, as well it's one of the coolest sport planes of it's kind in that size range. I think you'll do fine with yours once you get it figured out. Good luck with it.
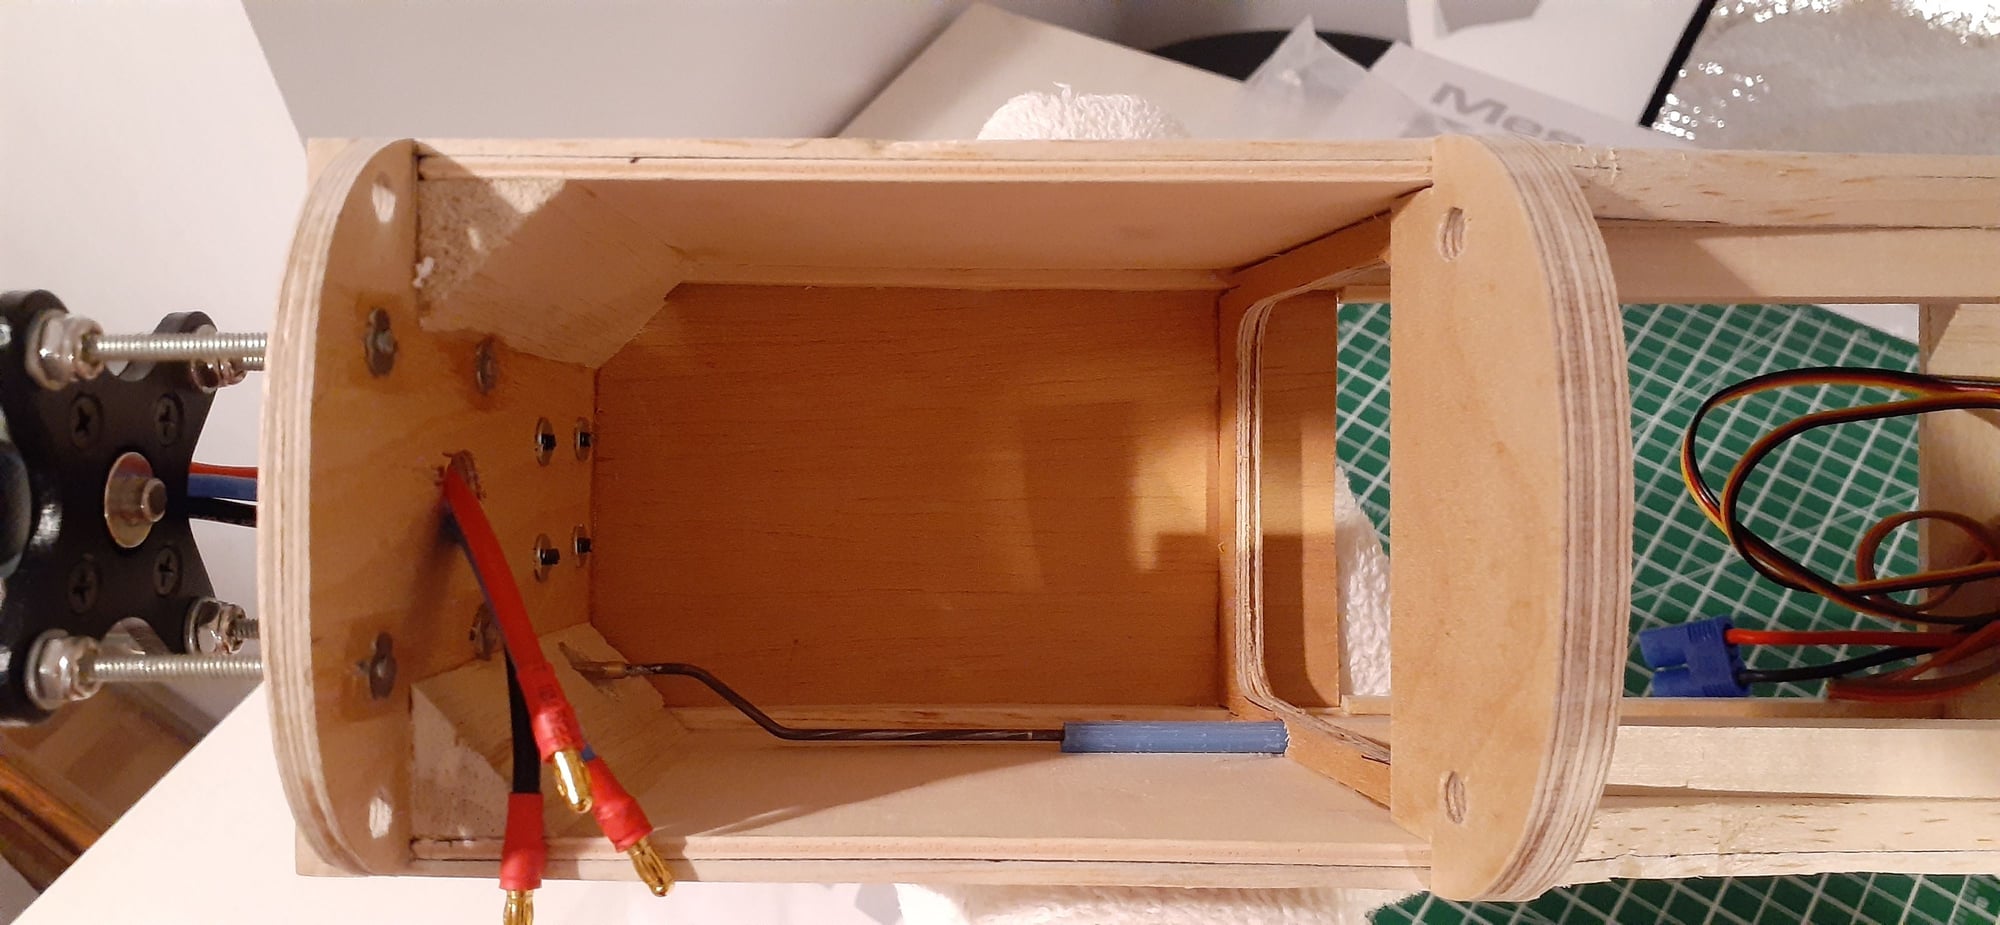
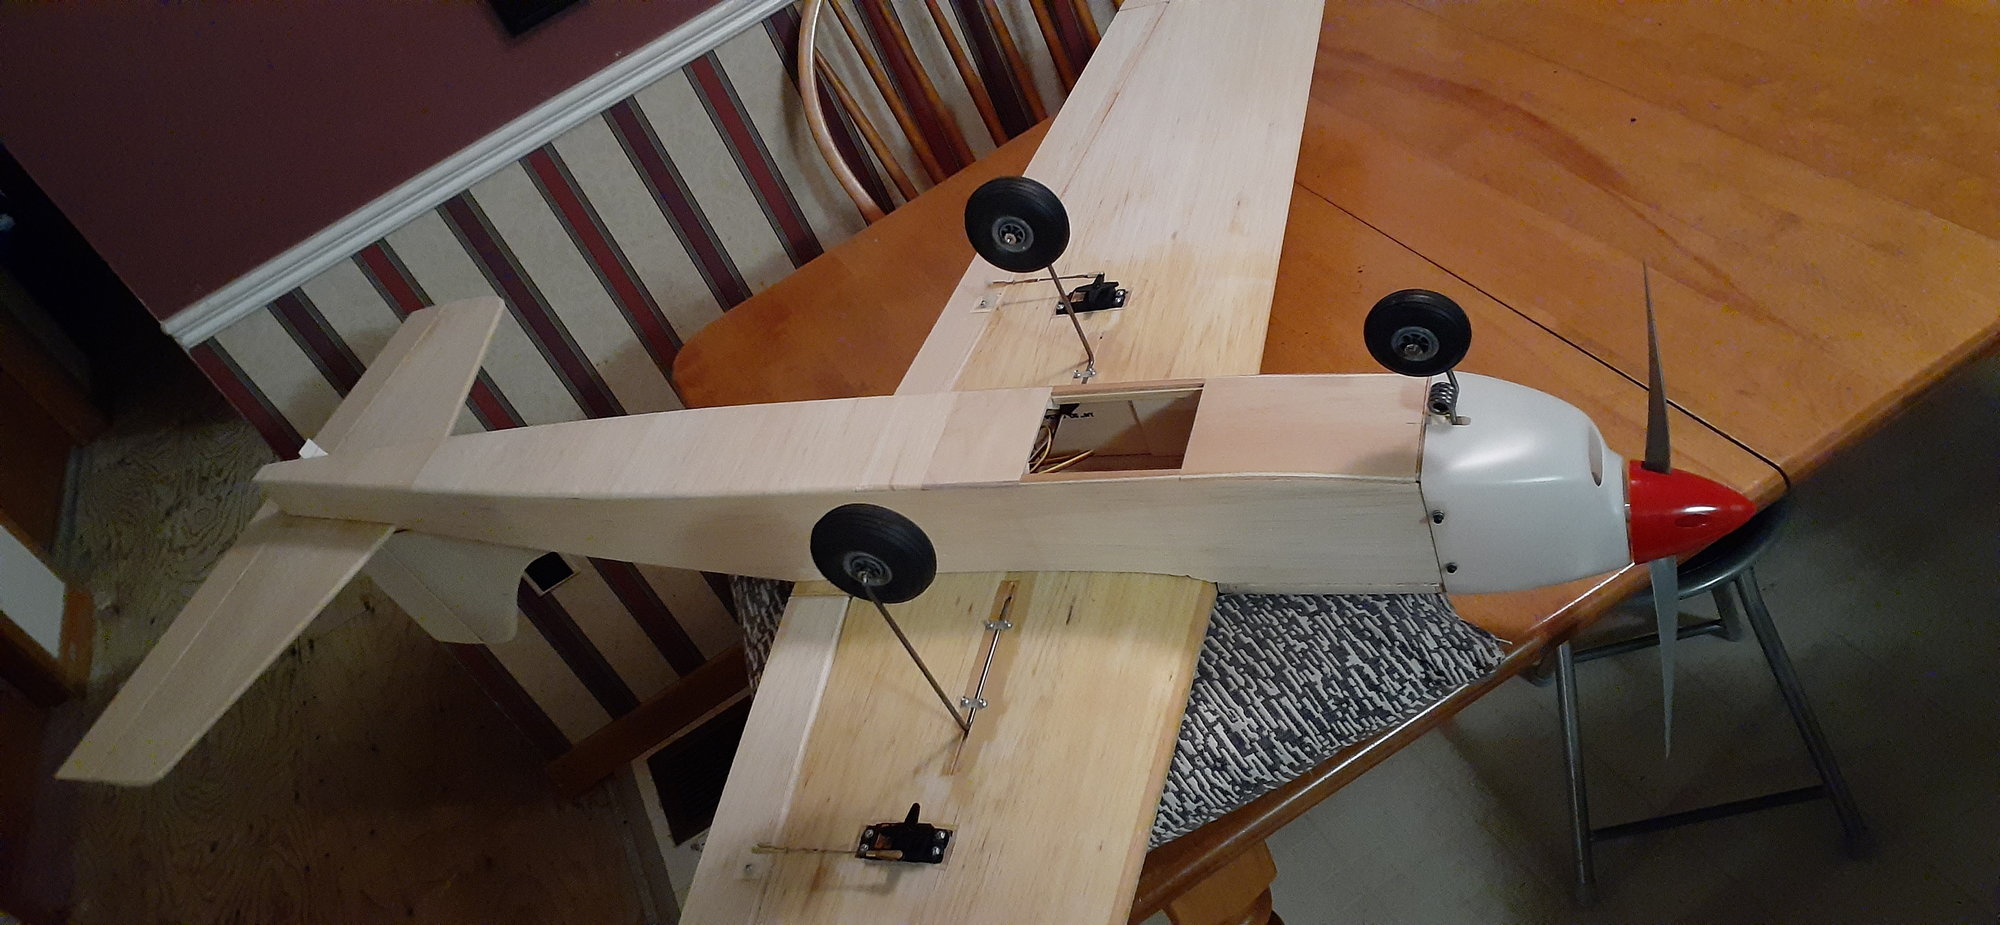
Thank you. Here is a test mounting of an alternative motor installation. I used the kit available from Great Planes. Very sturdy, maybe even overkill. Since the machine screws are long enough, I may use lock nuts instead of thread lock. I will likely be able to use the left over spacers from the kit on another plane. I used a number 19 drill bit to drill larger the holes in the E-Flite motor mount, perfect tight fit for the machine screws. Made the middle hole in the firewall larger, about the size of a quarter to allow air flow to ESC and Battery.
Overall this plane is relatively easy to convert to electric power. There is room for everything and the plane can easily be balanced without adding lead. Will post again as I get nearer to completion.
Last edited by Creative RC; 01-15-2020 at 06:21 PM.
01-15-2020, 09:35 PM
#369
I agree, much better. Very good. That will help considerably, and most likely will never twist. Use the locknuts too.. I mean you have them right there.. LOL.. Even though I'm always weight concious, I I always use locknuts on my engines/motors where I can. With locknuts they won't ever come loose until you want them too. Of course check them occasionally, along with everything else.
Keep it up and you're going to have very nice Kommander soon.
Keep it up and you're going to have very nice Kommander soon.
03-28-2020, 09:21 AM
#370
Join Date: May 2013
Location: Moncton, NB, CANADA
Posts: 62
Likes: 0
Received 0 Likes
on
0 Posts
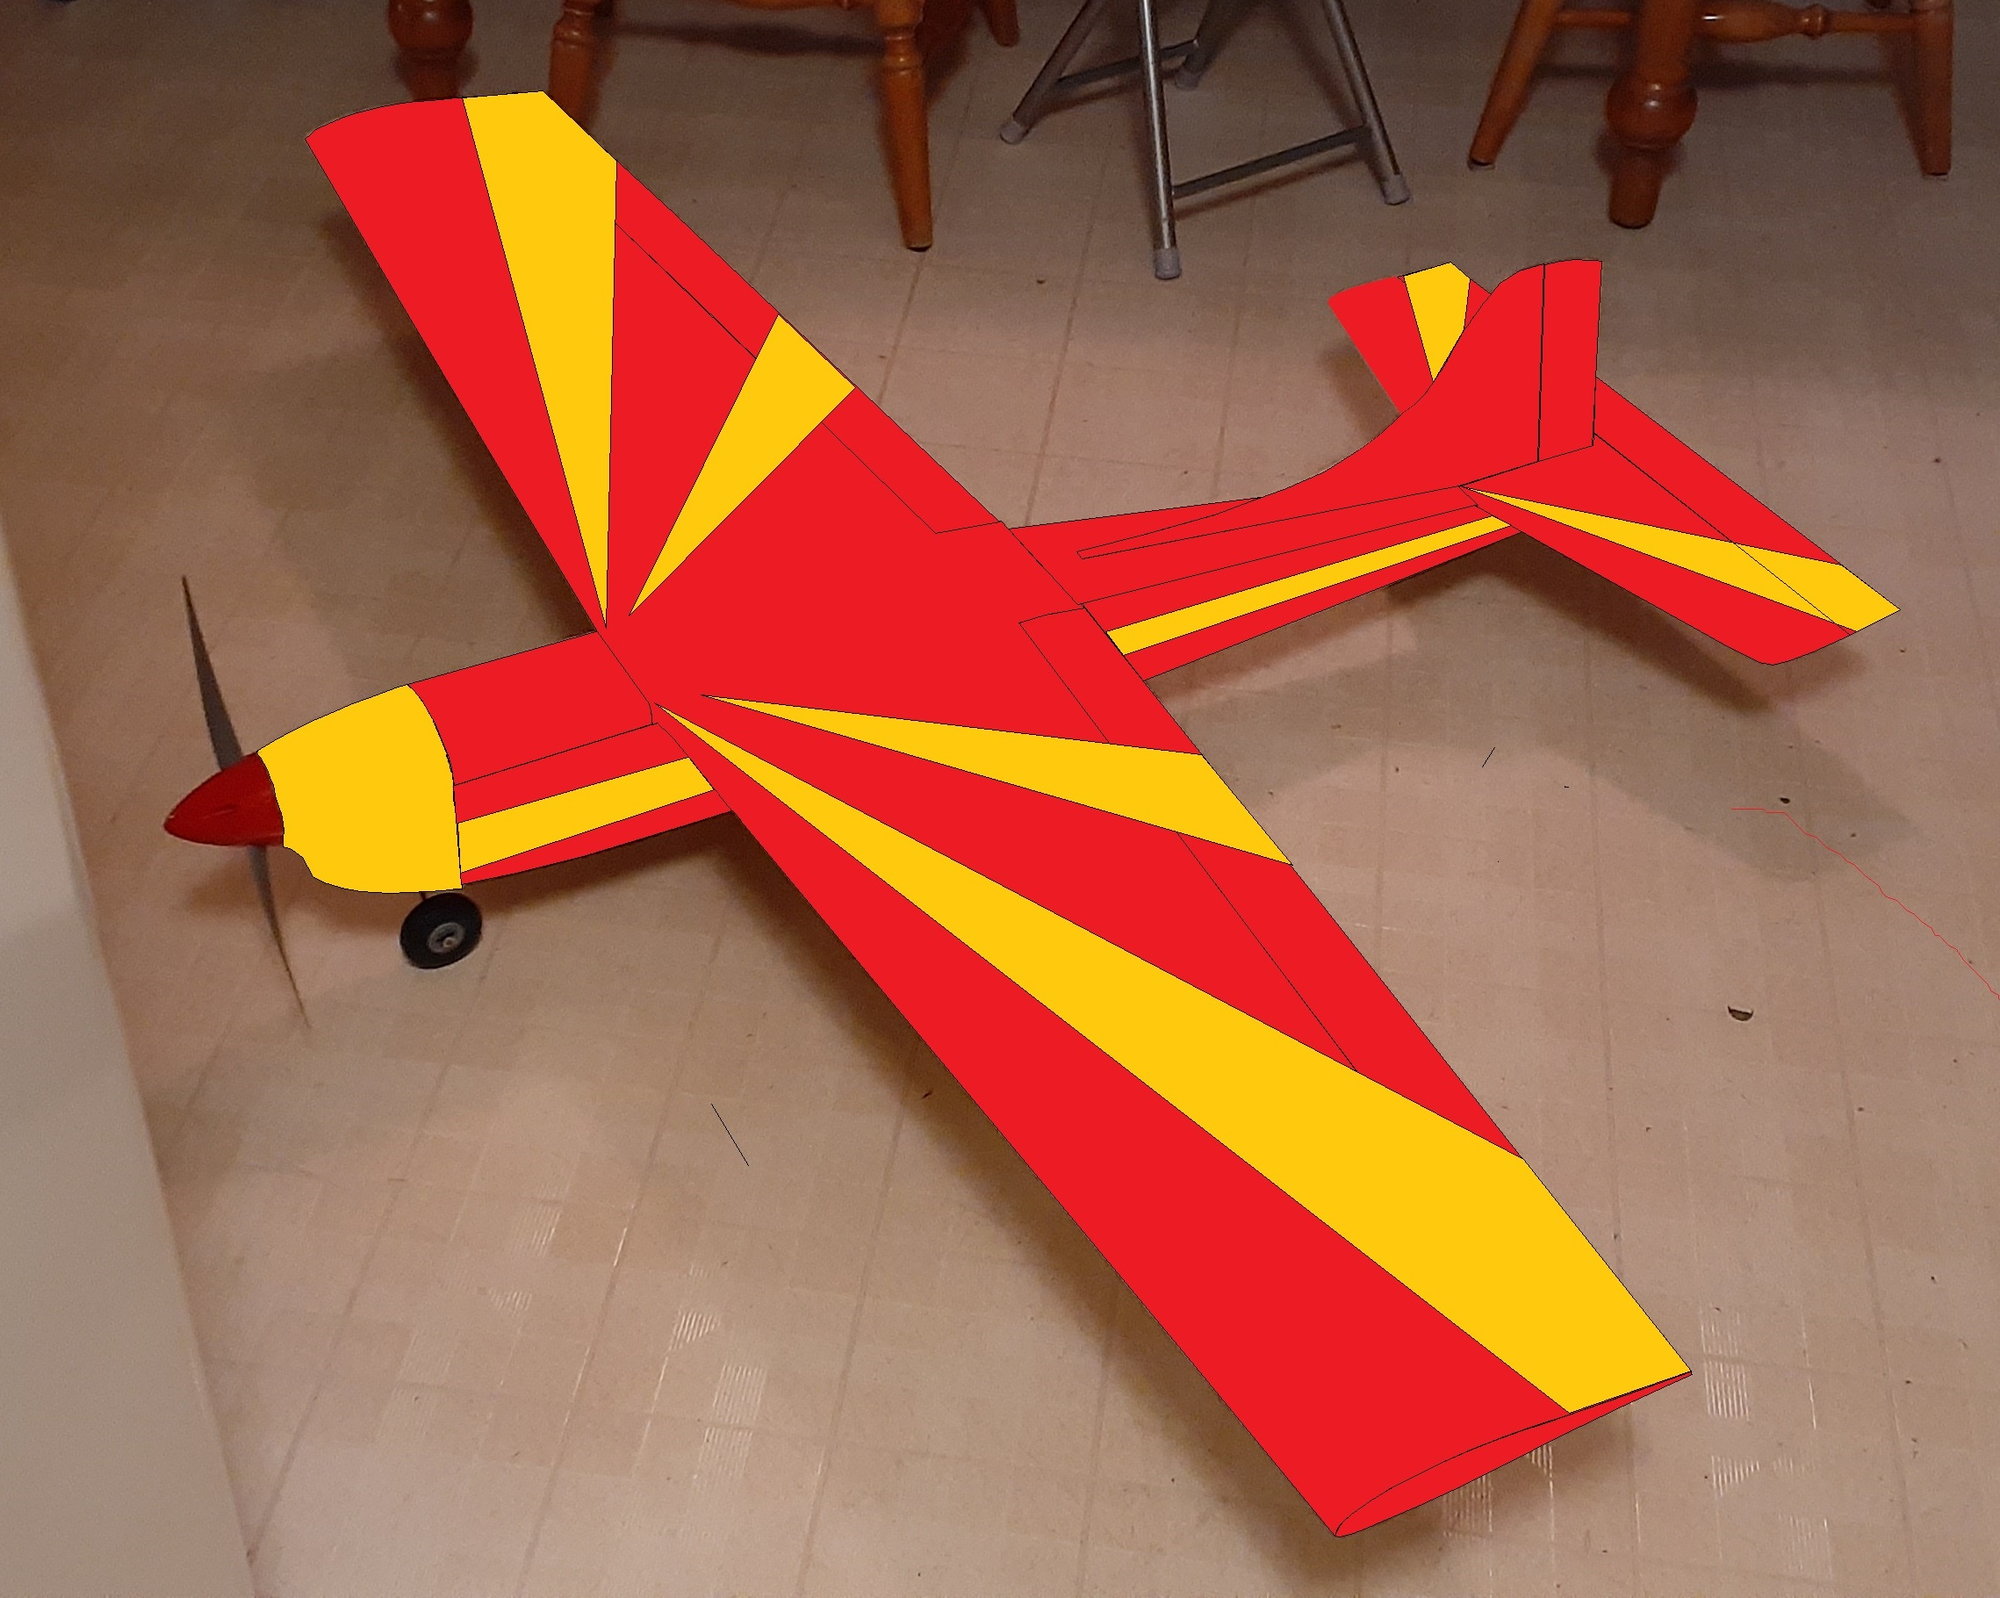
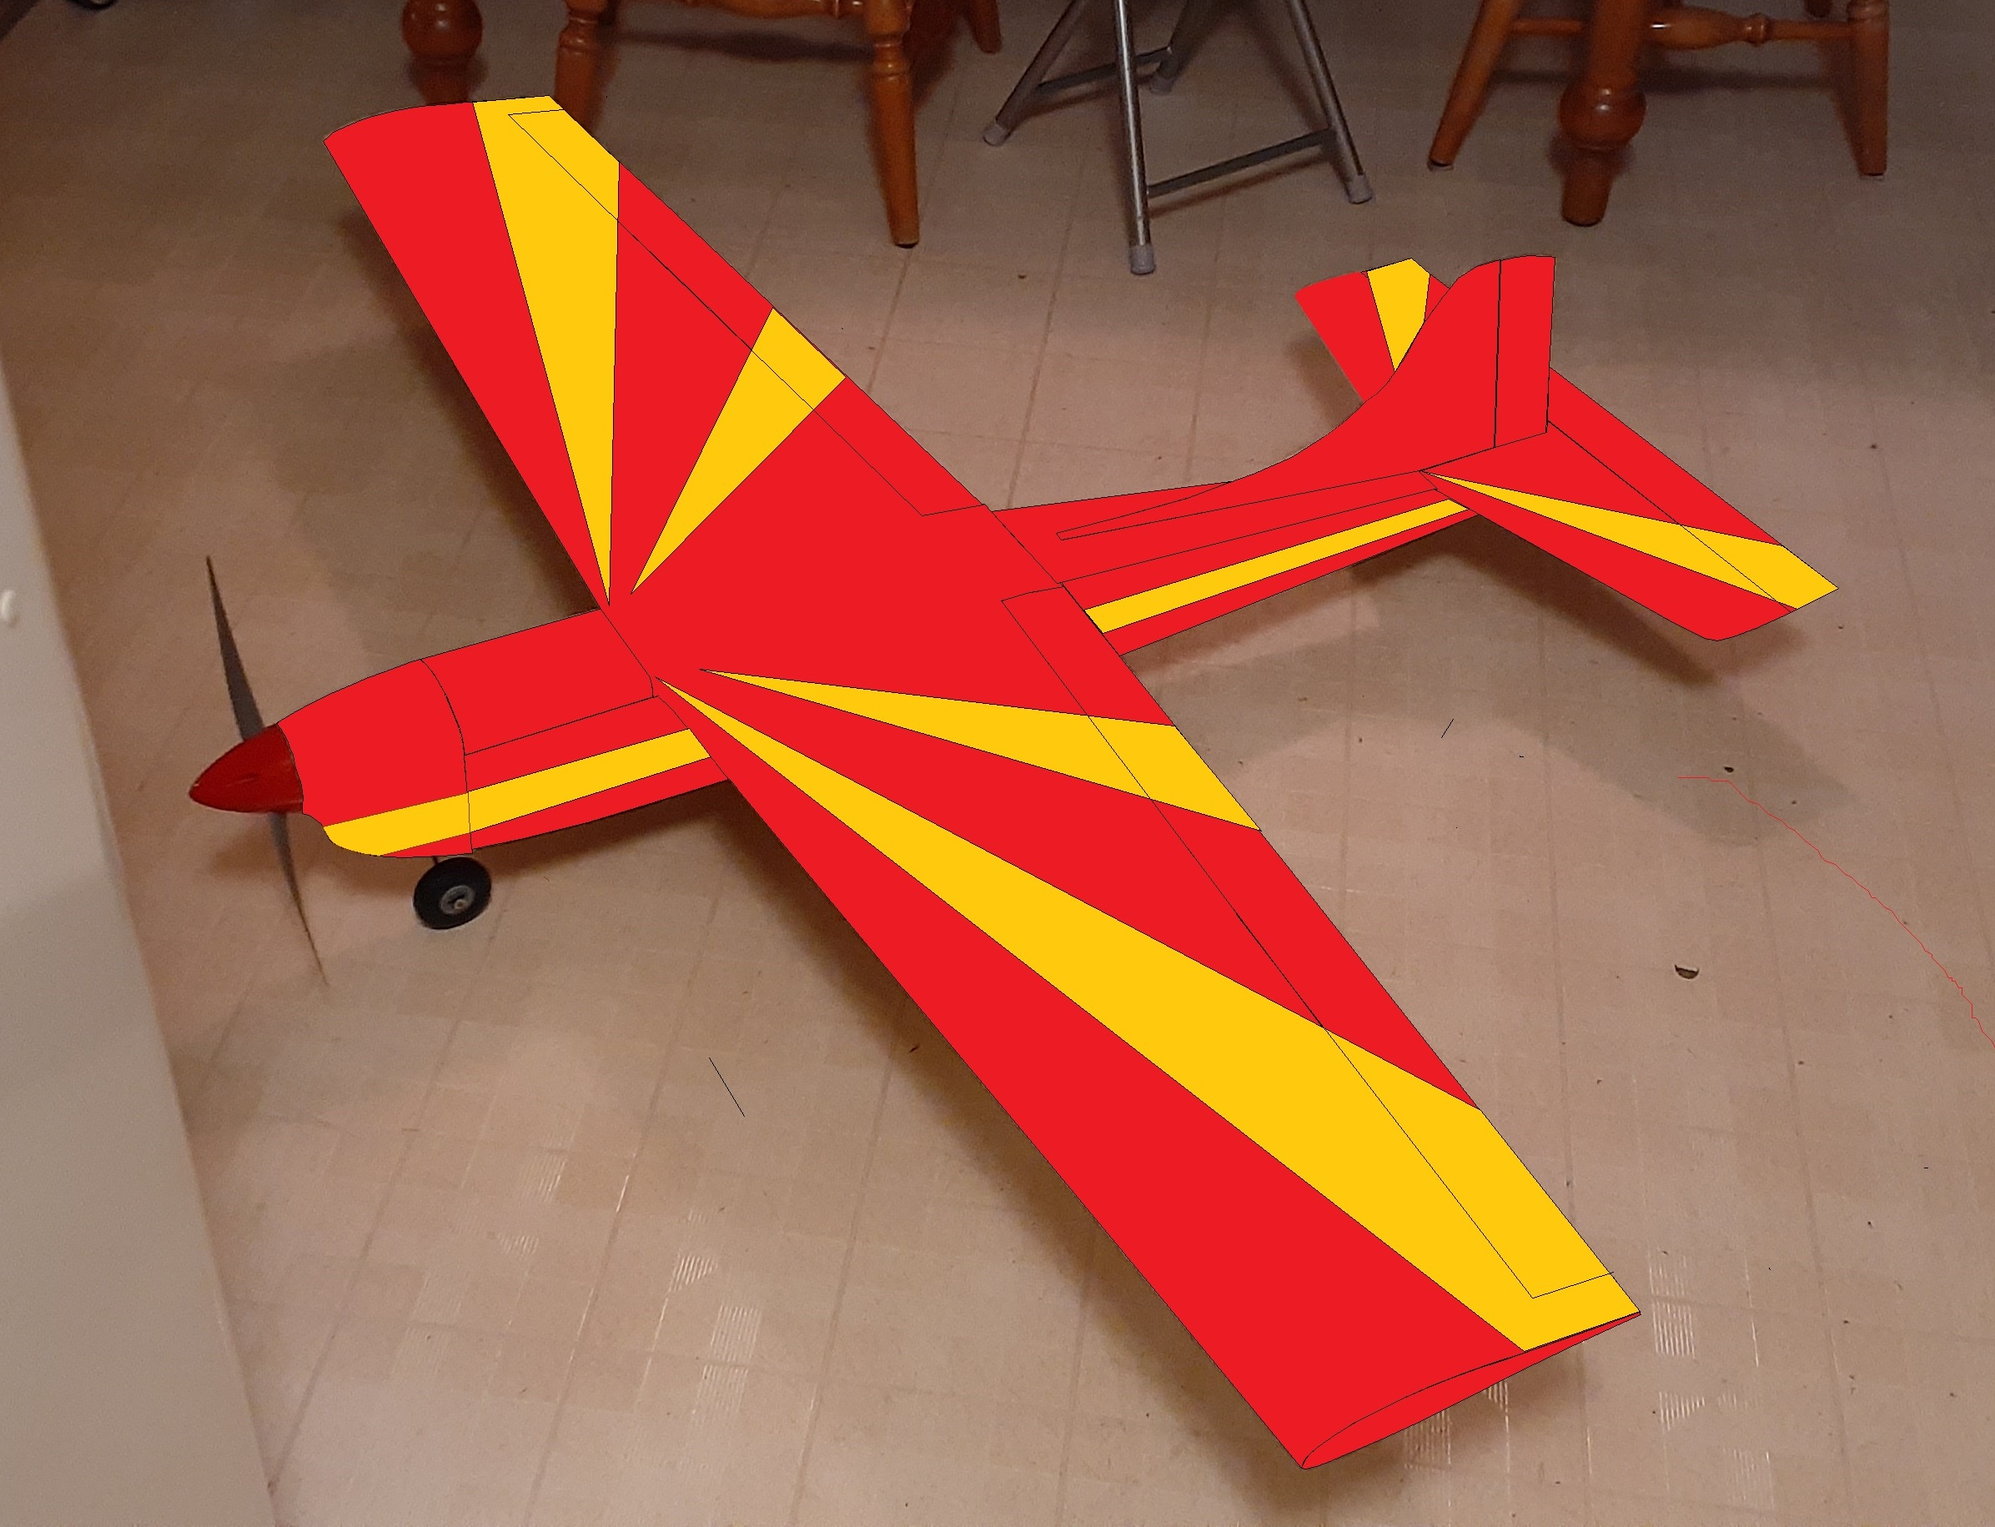
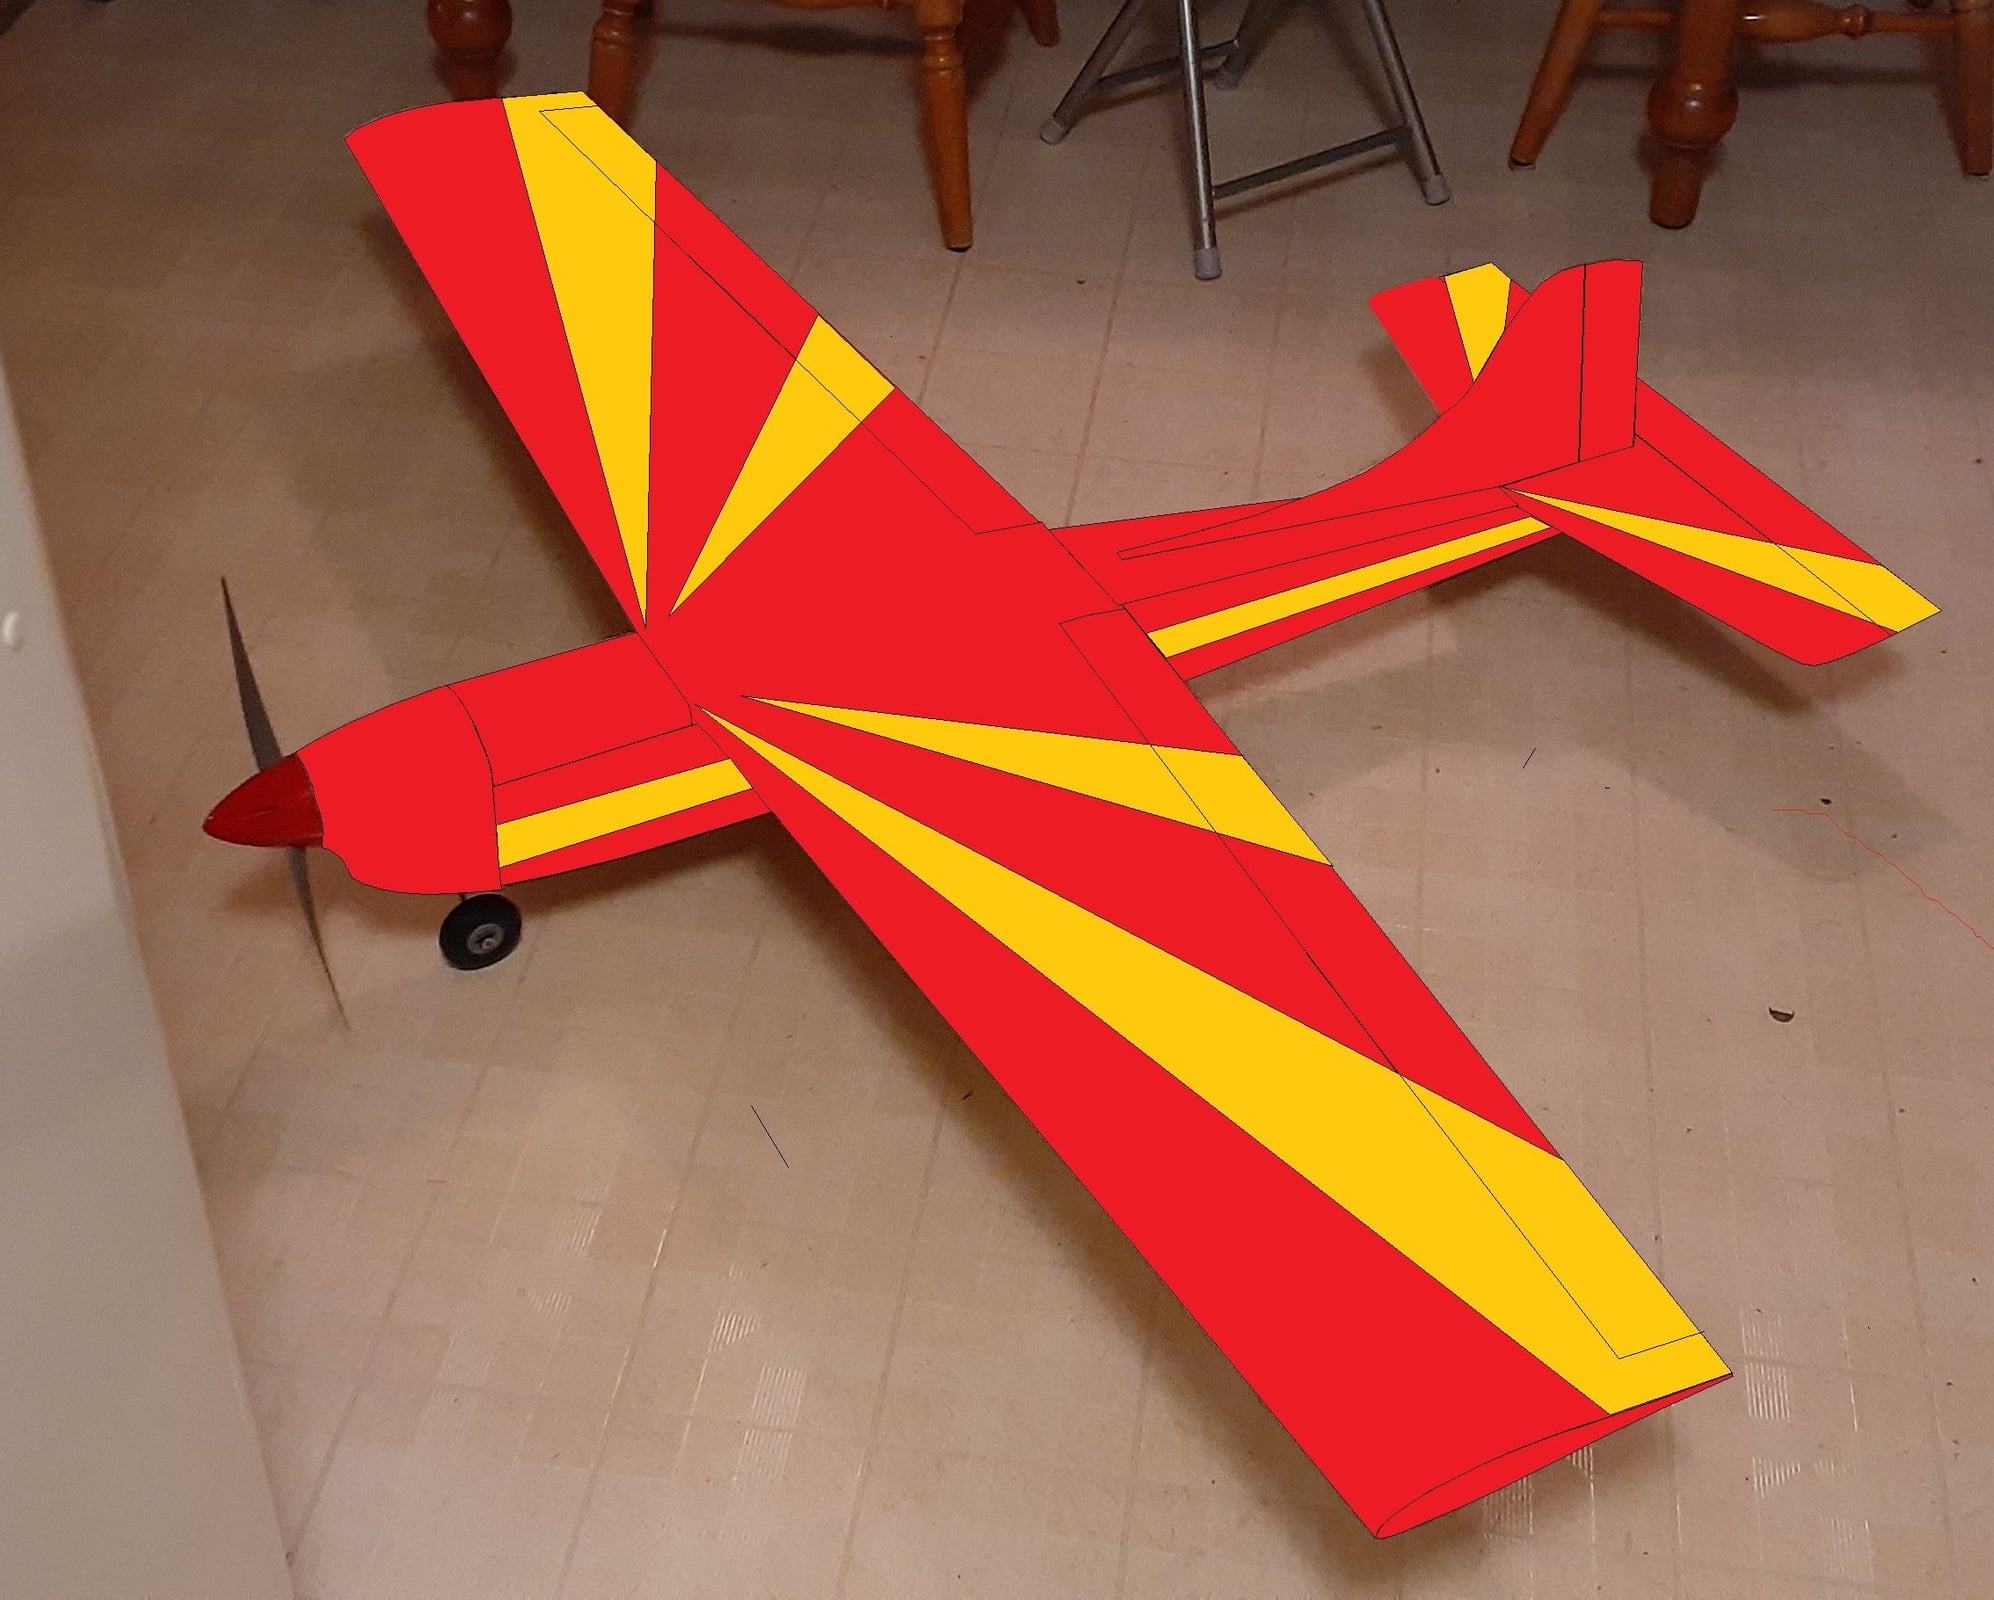
Three options to modify the classic color scheme. One less stripe on the main wing and horizontal stabilizer and none on the vertical stabilizer with variations for the nose. I hope I can find this shade of red and yellow.
Last edited by Creative RC; 03-28-2020 at 10:35 AM.
03-28-2020, 10:14 AM
#371
No clue. What kind of file are you trying to load? The site should take a simple JPeg I would think. If it's something other than that, therein might be the problem.... especially if you're going through a third party host. Your previous pics look to be just that for some reason. A simple JPeg right out of your computer, camera, or phone should load though.
03-28-2020, 10:17 AM
#372
03-28-2020, 10:32 AM
#373
Join Date: May 2013
Location: Moncton, NB, CANADA
Posts: 62
Likes: 0
Received 0 Likes
on
0 Posts
No clue. What kind of file are you trying to load? The site should take a simple JPeg I would think. If it's something other than that, therein might be the problem.... especially if you're going through a third party host. Your previous pics look to be just that for some reason. A simple JPeg right out of your computer, camera, or phone should load though.
08-16-2021, 04:06 PM
#374
Join Date: Mar 2010
Location: , NC
Posts: 1
Likes: 0
Received 0 Likes
on
0 Posts
11-06-2022, 06:25 PM
#375
Join Date: May 2013
Location: Moncton, NB, CANADA
Posts: 62
Likes: 0
Received 0 Likes
on
0 Posts
Here is a link of a you tube video I posted
It is yet to be covered but could not wait any longer to get it air born as winter is rapidly approaching. A gem to fly and very agile in my case. Mind you mine has a reduced dihedral and wider ailerons so it is very agile and has some pattern plane flight characteristics.
I do have a question. With the horizontal stabilizer which is considered to be at 0.0 degrees, what is the angle of incidence at the of the main wing next to the fuselage on your plane. I am getting +1.8 degrees and I read that it was designed to be + 0.5 degrees. It was zooming up when I increased throttle. There is no down thrust or up thrust on it nor right thrust for that matter. Afterwards, did raise the trailing edge 4mm with a rubber spacer which reduced the main wing incidence to approximately +1.0 degree and the zooming stopped, seemed to need bit less throttle to fly level and it seemed to even land more gently, all good signs.
Also, measured with the incidence meter that it has 1 degree of washout at the wing tip which is as per the design.
Oh, at what is the weight of your plane ready to fly. Mine is at so far at 6.75 lbs, uncovered.
I am happily getting 7 minutes with 5000 mah 5s and 4s batteries and APC 12x 8 electric prop. Power 46 motor.
Thank you for your replies.
Last edited by Creative RC; 11-07-2022 at 05:26 AM.