


Welcome to Club SAITO !
 03-14-2019, 03:49 AM
Yep, and there it is Dave, a dip in the torque curve right where apc 14x6 props run on my 82s. That said, it looks like there is room for some unloading of the 14x6 in the air with a draggy airframe.
Last edited by Glowgeek; 03-14-2019 at 03:51 AM.
 03-14-2019, 04:17 AM


Pb batteries, especially AGM tend to be more tolerant of an occasional light overcharge than a maintained "trickle" charge over an extended period.
The battery maintainers that were run through a timer that came on once/week, 1 hour at a time did well with the conditions we were under. The auto charger would terminate the high rate charge very quickly, yet the trickle could not remain on long enough to do any real damage. Even less than once/week would probably work well but I no longer simply hook them up, turn them on and walk away. Yep, timers can fail too but the reliability factor remains well improved overall. Haven't dried out a battery yet with the timed charge.
Saito content:
That Saito control line info was dandy.
Dave, can you post a link to the complete 82 test?
Last edited by Jesse Open; 03-14-2019 at 04:24 AM.
03-14-2019, 07:20 AM
The reason I got the Stanley is because it is supposed to turn off, and it puts a very slight load on the battery by keeping the display lit. My previous one did not turn off, which is what killed a cell.
03-14-2019, 08:10 AM
Zero current, positive or negative between top offs is the best bet.
Even the type that are supposed to turn off do not always do that.
There is a very inexpensive board on eBay that will disconnect the charger from line voltage via a mechanical relay when the battery voltage comes to full charge. This is ok MOST of the time. In the event of a shorted or weak cell, the battery will never make it to full voltage. When this happens, a standard charger will just keep on charging and begin to boil off electrolyte. Bad deal. A timer as back up will terminate the charge regardless.
I never leave a battery on charge without a time out limit of some type. YRMV ,just relating what I prefer.
This board :
https://www.ebay.com/itm/XH-M601-Bat...item25eb7240cb
Is made to turn off the AC current to the charger when the battery comes up to voltage. The part I prefer to eliminate is that it automatically re-connects when the battery voltage drops. It is easy to make a latching relay initial turn on that allows for a single charge cycle without the automatic turn on feature. I can supply a schematic if there is any interest. By adding a switch you can have the one-shot or automatic feature if desired.
Last edited by Jesse Open; 03-14-2019 at 08:47 AM.
03-14-2019, 08:56 AM

My Feedback: (102)

Join Date: Dec 2001
Location: Colonial Beach, VA
Posts: 20,370
Likes: 0
Received 25 Likes
on
25 Posts
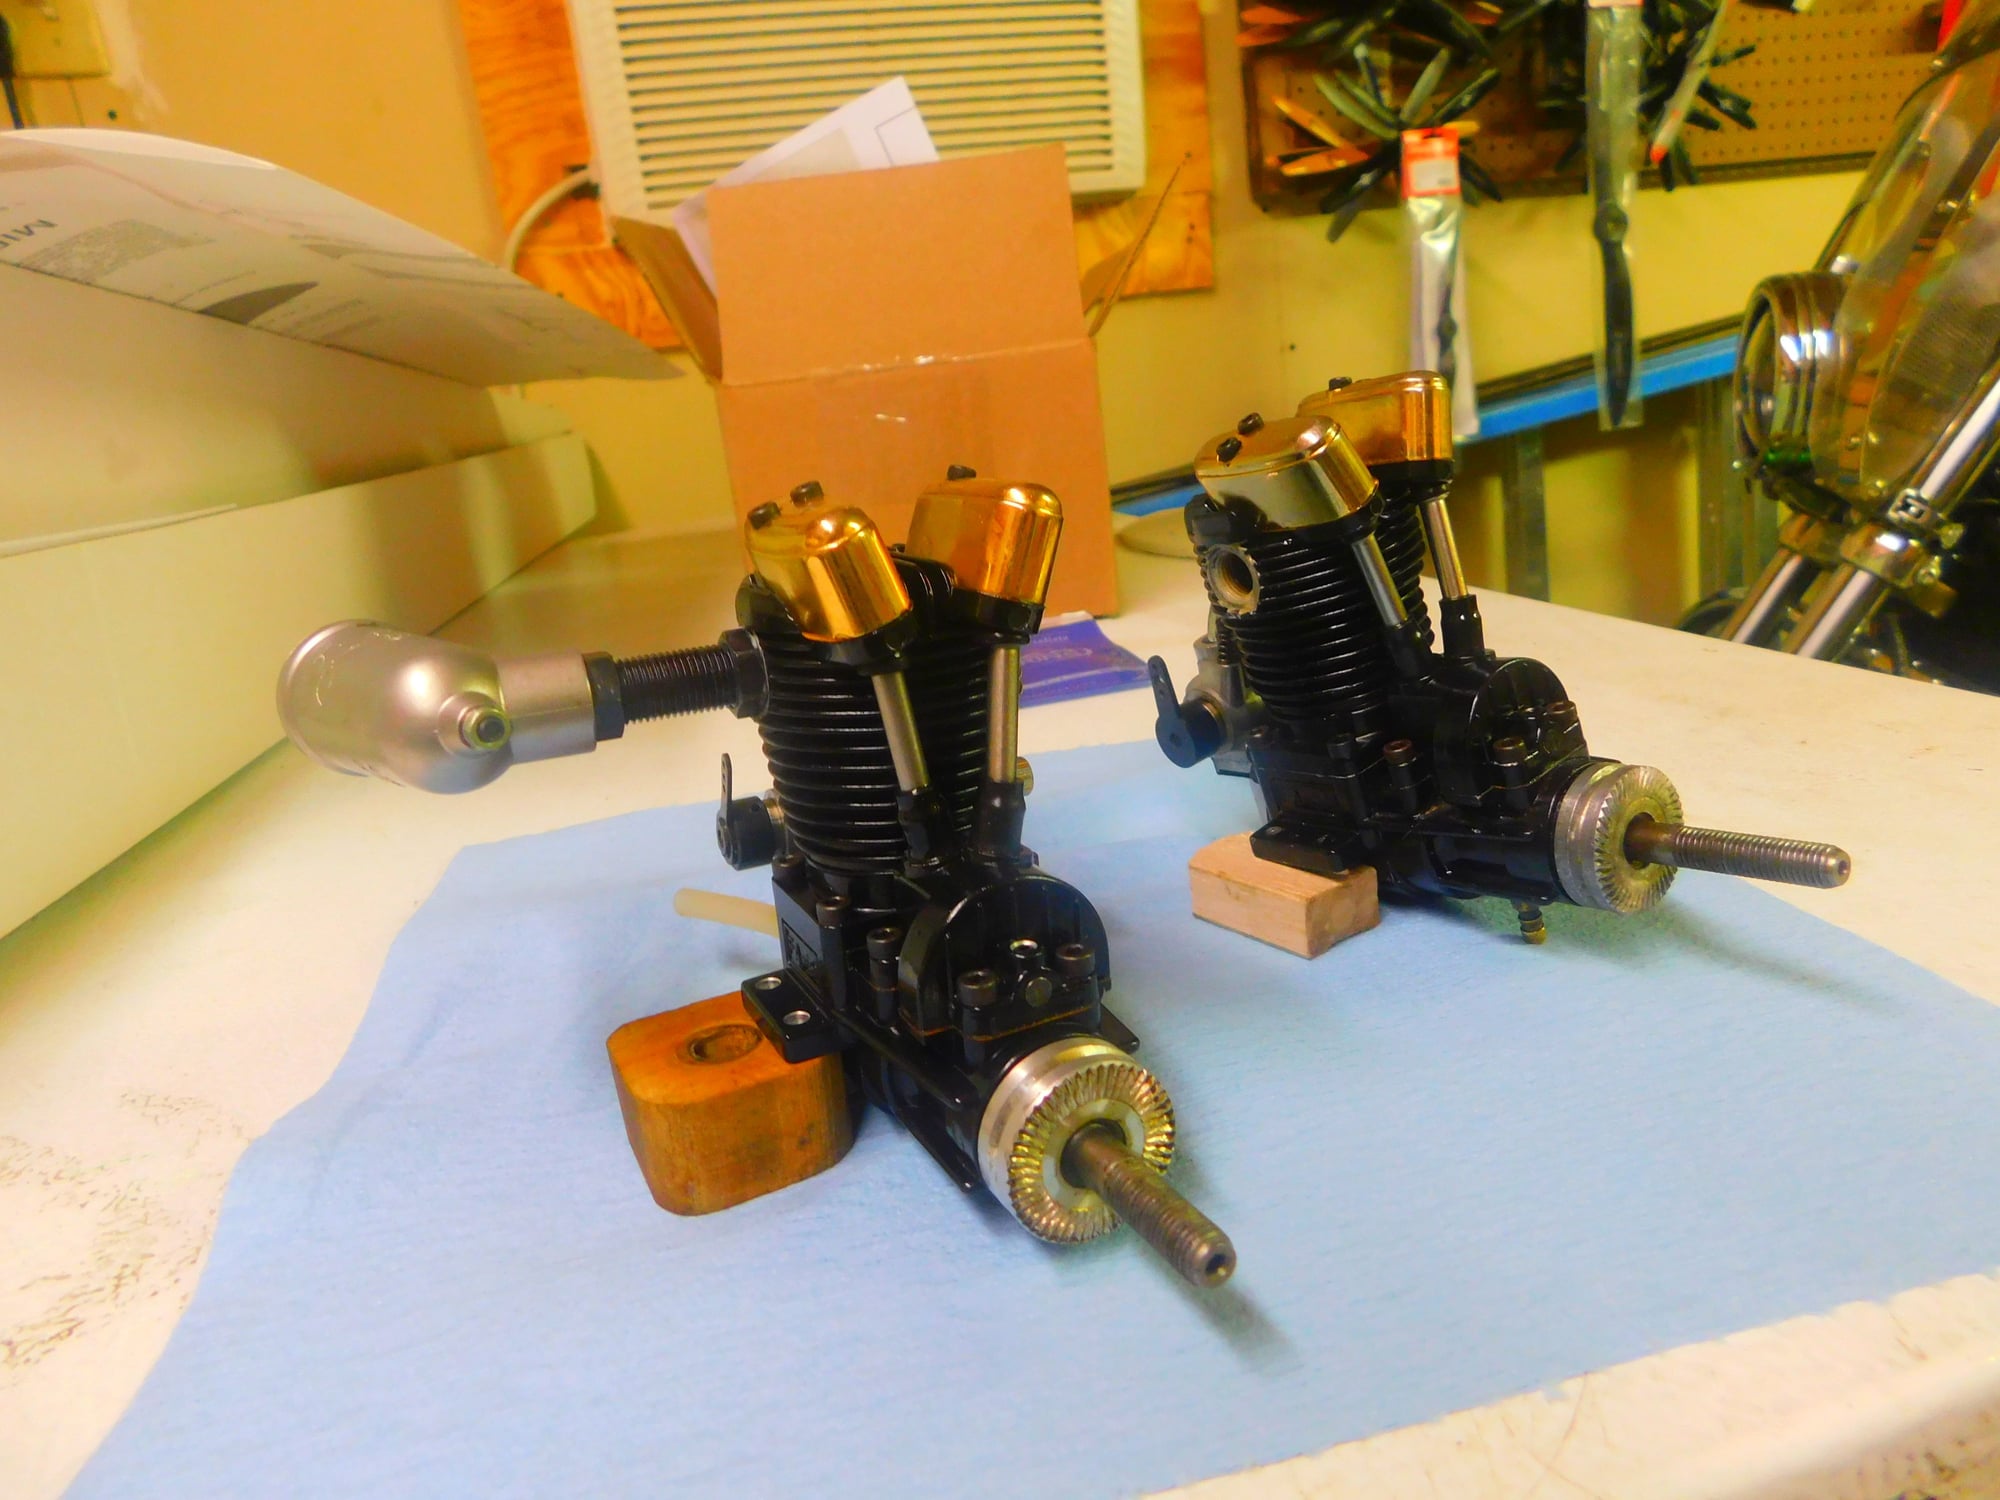
Almost twins, 50 on the left, 56 on the right, they're looking good now.. The muffler on the 50 actually belongs to the 56.
My 310 amp NAPA garden tractor battery is on it's fifth year with a Battery tender plus on it 24 and 7 when not in use, my unmentionable's original 200 amp battery went 7 years with the last 5 having a Battery Tender Plus on it 24 and 7 when sitting in my shop. The new 4.5 years ago, 310 AGM in my unmentionable is on it's 4.5th year of Battery Tender Plus 24 and 7 care.
Last edited by Hobbsy; 03-14-2019 at 09:00 AM. Reason: Add content
03-14-2019, 09:08 AM
When in the car, there is always a draw on the battery for all the keep alive components. Next battery is getting a disconnect switch installed with it, charge one and done.
03-14-2019, 09:34 AM

Almost twins, 50 on the left, 56 on the right, they're looking good now.. The muffler on the 50 actually belongs to the 56.
My 310 amp NAPA garden tractor battery is on it's fifth year with a Battery tender plus on it 24 and 7 when not in use, my unmentionable's original 200 amp battery went 7 years with the last 5 having a Battery Tender Plus on it 24 and 7 when sitting in my shop. The new 4.5 years ago, 310 AGM in my unmentionable is on it's 4.5th year of Battery Tender Plus 24 and 7 care.
 03-14-2019, 09:53 AM
That is the main problem with modern vehicles. The AGM batteries work very well in long term cold storage without need for maintenance charge up to about 6 months, but only when there is no outside current being drawn.
BTW, I don't recall implying or inferring ALL batteries using battery tenders fail. Just relating that I have seen quite a few that have. The AGMs I ran in my Moto Guzzi and several other mo********s as well as garden tractors etc, never saw a Battery Tender and lasted at least 10 years...
Last edited by Jesse Open; 03-14-2019 at 10:02 AM.
03-14-2019, 10:19 AM
My Feedback: (1)
Dave, I have a question about that prop/RPM list, why is it that the 11X11 turns more RPM than the 11X10,, could those numbers be mixed up, or is it that the props profiles are so different ??
Jim
Jim
03-14-2019, 12:17 PM
I had a friend who passed awy some time ago that had a boat docked at one of the larger recreation lakes in the state. I remember he had the bilge pump hooked up to a small lawn tractor battery with a trickle charge attached. He would be back home in the off season and never go near it for months and would come back to find the pump doing its job. The battery lasted for a good 5 to 7 years that I knew of. Poor guy had plans to retire but before he could he suffered a massive heart attack and dropped to floor dead. He use to joke he looked forward to alzheimers in his advance years because then there were no old jokes. I guess the grim reaper got the last laugh on that one.
03-14-2019, 02:34 PM
My Feedback: (102)
Join Date: Dec 2001
Location: Colonial Beach, VA
Posts: 20,370
Likes: 0
Received 25 Likes
on
25 Posts
My guess would be that the prop shown is a Grey Graupner, and they came in an 11 x 11, not all do, if true the Graupner would turn a hundred or so less than an APC or other. A Pro Zinger would turn a 100 or so faster. That' all guess work though, sorry.
03-14-2019, 05:52 PM
My Feedback: (1)
Something to note when looking at Torque & HP graphs above is that the 62 and 72 share the same cam gear. That cam appears to be much better suited for the 62, having a much flatter torque curve, allowing it to run a much wider range of props and achieve hp at higher rpms. Now here's the scary thing, the fa82 uses the same cam! This may explain why both of my 82s are so prop sensitive
but I guess then people would be putting that upgraded Cam in their 82s, 72s, and 62s Haahaa
Jim
Last edited by the Wasp; 03-14-2019 at 06:05 PM.
03-14-2019, 08:45 PM
Join Date: Aug 2017
Posts: 5
Likes: 0
Received 0 Likes
on
0 Posts
I have my share too..From 56 to 150 size..
multiple 82s and 100s and 3 72,s..Best nitro 4 stroke made..I have a few OS 4 strokes yet no comparison..Saitos are easy to rebuild and parts are available even for the old ones.
GLOW NATION!!
multiple 82s and 100s and 3 72,s..Best nitro 4 stroke made..I have a few OS 4 strokes yet no comparison..Saitos are easy to rebuild and parts are available even for the old ones.
GLOW NATION!!
03-14-2019, 10:11 PM
Crunchy, in case you haven't visited the spectreflight site here's a review for a 150s with prop/rpm data.
Saito FA-150S (2)
Saito FA-150S (2)
great info
03-15-2019, 12:23 AM

Thanks for posting the hp and torque graphs guys,didn't realise that there was that much difference in the small blocks,interesting reading for the weekend.Will save me watching concrete dry while the australian formula one round dominates tv here this weekend,boring as bat poo
03-15-2019, 02:36 AM
Dave i promise to almost never say a bad word about the unmentionable if you refrain from posting a pic of the green Lt 40,unless it has a pretty gk in it maybe.Since the weather should be starting to improve over your way maybe you could re charge the battery by riding it.
Thanks for posting the hp and torque graphs guys,didn't realise that there was that much difference in the small blocks,interesting reading for the weekend.Will save me watching concrete dry while the australian formula one round dominates tv here this weekend,boring as bat poo
Thanks for posting the hp and torque graphs guys,didn't realise that there was that much difference in the small blocks,interesting reading for the weekend.Will save me watching concrete dry while the australian formula one round dominates tv here this weekend,boring as bat poo
03-15-2019, 03:18 AM
My Feedback: (102)
Join Date: Dec 2001
Location: Colonial Beach, VA
Posts: 20,370
Likes: 0
Received 25 Likes
on
25 Posts
that FA62/82 Cam (SAI6535A), is also used in the 100, no-wonder it works so good in the 62. it looks like a Cam upgrade would be vary easily done if Saito cared to do for the 100..
but I guess then people would be putting that upgraded Cam in their 82s, 72s, and 62s Haahaa
Jim
but I guess then people would be putting that upgraded Cam in their 82s, 72s, and 62s Haahaa
Jim
Saito Engines Cam Gear, Right: G-K,DD,EE,AS,BM,BN,BV,BS,CA SAI6535A is compatible with SAIE056B, SAIE062A, SAIE062ACL, SAIE062AGK, SAIE065, SAIE072B, SAIE072BGK, SAIE072CL, SAIE072GK, SAIE082A, SAIE082B, SAIE082BGK, SAIE091S, SAIE091SGK, SAIE100, SAIE100GK, SAIE115, SAIE115GK, SAIE125A, SAIE125AGK, SAIE170R3, SAIE182TD, SAIE200R3, SAIEG11, SAIEG14B, SAIEG14C, SAIEG17, SAIEG20, SAIEG21, SAIEG33R3, SAIEG60R3
I put one of them in the 50 I reassembled yesterday and when I snugged the cam cover down the crank was difficult to turn. I added a second gasket, no more problem. I need to think this through. As my grandson would say, sumpings wong.
03-15-2019, 03:34 AM
Interesting Jim, that part # fits all these engines:
Saito Engines Cam Gear, Right: G-K,DD,EE,AS,BM,BN,BV,BS,CA SAI6535A is compatible with SAIE056B, SAIE062A, SAIE062ACL, SAIE062AGK, SAIE065, SAIE072B, SAIE072BGK, SAIE072CL, SAIE072GK, SAIE082A, SAIE082B, SAIE082BGK, SAIE091S, SAIE091SGK, SAIE100, SAIE100GK, SAIE115, SAIE115GK, SAIE125A, SAIE125AGK, SAIE170R3, SAIE182TD, SAIE200R3, SAIEG11, SAIEG14B, SAIEG14C, SAIEG17, SAIEG20, SAIEG21, SAIEG33R3, SAIEG60R3
I put one of them in the 50 I reassembled yesterday and when I snugged the cam cover down the crank was difficult to turn. I added a second gasket, no more problem. I need to think this through. As my grandson would say, sumpings wong.
The 50 uses the same crankshaft pinion, cam gear housing and case size as the 56 so yeah, it should have worked fine. Strange.
Last edited by Hobbsy; 03-15-2019 at 03:49 AM.
03-15-2019, 03:44 AM
My Feedback: (102)
Join Date: Dec 2001
Location: Colonial Beach, VA
Posts: 20,370
Likes: 0
Received 25 Likes
on
25 Posts
Some info says that Sai5035 is the correct cam for the 50. I dunno.
Also, it appears that the big block engines have about 20 degrees less overlap than the 56 sized blocks, as in 70 degrees overlap for the 150 and 90 degrees for the 56. Not very many of the testers measured it.
This cam will fit the old 40: https://www.horizonhobby.com/cam-gea...iijjkk-sai5035 Jim's part number will not.
Last edited by Hobbsy; 03-15-2019 at 03:48 AM.
03-15-2019, 03:56 AM
Some info says that Sai5035 is the correct cam for the 50. I dunno.
Also, it appears that the big block engines have about 20 degrees less overlap than the 56 sized blocks, as in 70 degrees overlap for the 150 and 90 degrees for the 56. Not very many of the testers measured it.
This cam will fit the old 40: https://www.horizonhobby.com/cam-gea...iijjkk-sai5035 Jim's part number will not.
Also, it appears that the big block engines have about 20 degrees less overlap than the 56 sized blocks, as in 70 degrees overlap for the 150 and 90 degrees for the 56. Not very many of the testers measured it.
This cam will fit the old 40: https://www.horizonhobby.com/cam-gea...iijjkk-sai5035 Jim's part number will not.
03-15-2019, 04:30 AM
Dave, I recall seeing a pic of a twin you rebuilt about a year or less ago. The numbers on the cams you used were the wrong parts as well. I do forget which engine but I asked and few times about the discrepency and got no response. IIRC you may not have run that one yet.
The "maybe" question could be answered by measurements, The crank centerline to cam housing face measurements between engines compared. The gear measurements are better made by measuring over gaging wires placed between the gear teeth . This is called "DOP for "Dimension Over Pins" Simple outside diameter measurements can be misleading.
You probably have it solved, just some tips regarding info gathering to verify the real differences.