


Welcome to Club SAITO !
 01-13-2021, 05:21 AM

I have one question for all you experts, did the open rocker Saitos shed their pushrods on hard landings like the open rocker OS engines did?
 01-13-2021, 04:25 PM
Well, I�m impressed. All components in place other than a tray and fuel line. I dropped the damned thing putting it on the rig and have a couple cracks in the wing to repair now😤
01-13-2021, 06:51 PM
Whoops, I hate when I do that! I let my TF 60 size P51 slide off my balancer and it crushed the width of the hood between F2 and F3. I know how you feel Todd, a real sinking feeling.
The plane looks great. I like how you used torque rods for the flaps. What retracts and struts are those?
The plane looks great. I like how you used torque rods for the flaps. What retracts and struts are those?
01-13-2021, 07:18 PM

My Feedback: (1)
Jim i never thought i'd say this but your black and gold two stroke sounds better than that electric powered dart by a long shot...and speaking of shots! i reckon listening to that electric noise would inspire me to take my semi auto remington 1100 12ga chock full of 00buck and give that pilot a scale demo of real ack ack fire.
ps i've seen youtube vids of an american desert shoot where anything goes and at one point they were shooting at flying rc model two stroke aeroplanes...loved it
ps i've seen youtube vids of an american desert shoot where anything goes and at one point they were shooting at flying rc model two stroke aeroplanes...loved it
Pete, LOL yes I saw one of those video's a long time a go. I didn't like it much. there was like 4 people shooting off at an RC plane while standing at the edge of a small pond.
thanks Pete for the nice comments about my Gold Head HP, she's a looker. and built too.
Jim
01-14-2021, 02:19 AM

Howdy jim, the desert shoot i saw had a bikini model firing an assault weapon ( who cares what two strokes sound like then ) gosh dang it awesome. Not to forget the restored real and also replica hand cranked machine guns even black powder cannons. It was optical and aural heaven. NOW! if they'd been all shooting at saito's i'd prolly be shootin at them
 01-14-2021, 04:29 AM
I'm no expert, never owned an open rocker engine, but I just received an open rocker OS60 to overhaul for someone. Once I get it running I'll pick up the test bench and slam it on the ground a few times while the engine is idling. We'll see if it ejects the pushrods with the valve lash adjusted correctly.
01-14-2021, 07:08 AM
Whoops, I hate when I do that! I let my TF 60 size P51 slide off my balancer and it crushed the width of the hood between F2 and F3. I know how you feel Todd, a real sinking feeling.
The plane looks great. I like how you used torque rods for the flaps. What retracts and struts are those?
The plane looks great. I like how you used torque rods for the flaps. What retracts and struts are those?
Those are Century Jets.
01-14-2021, 10:17 AM
Senior Member

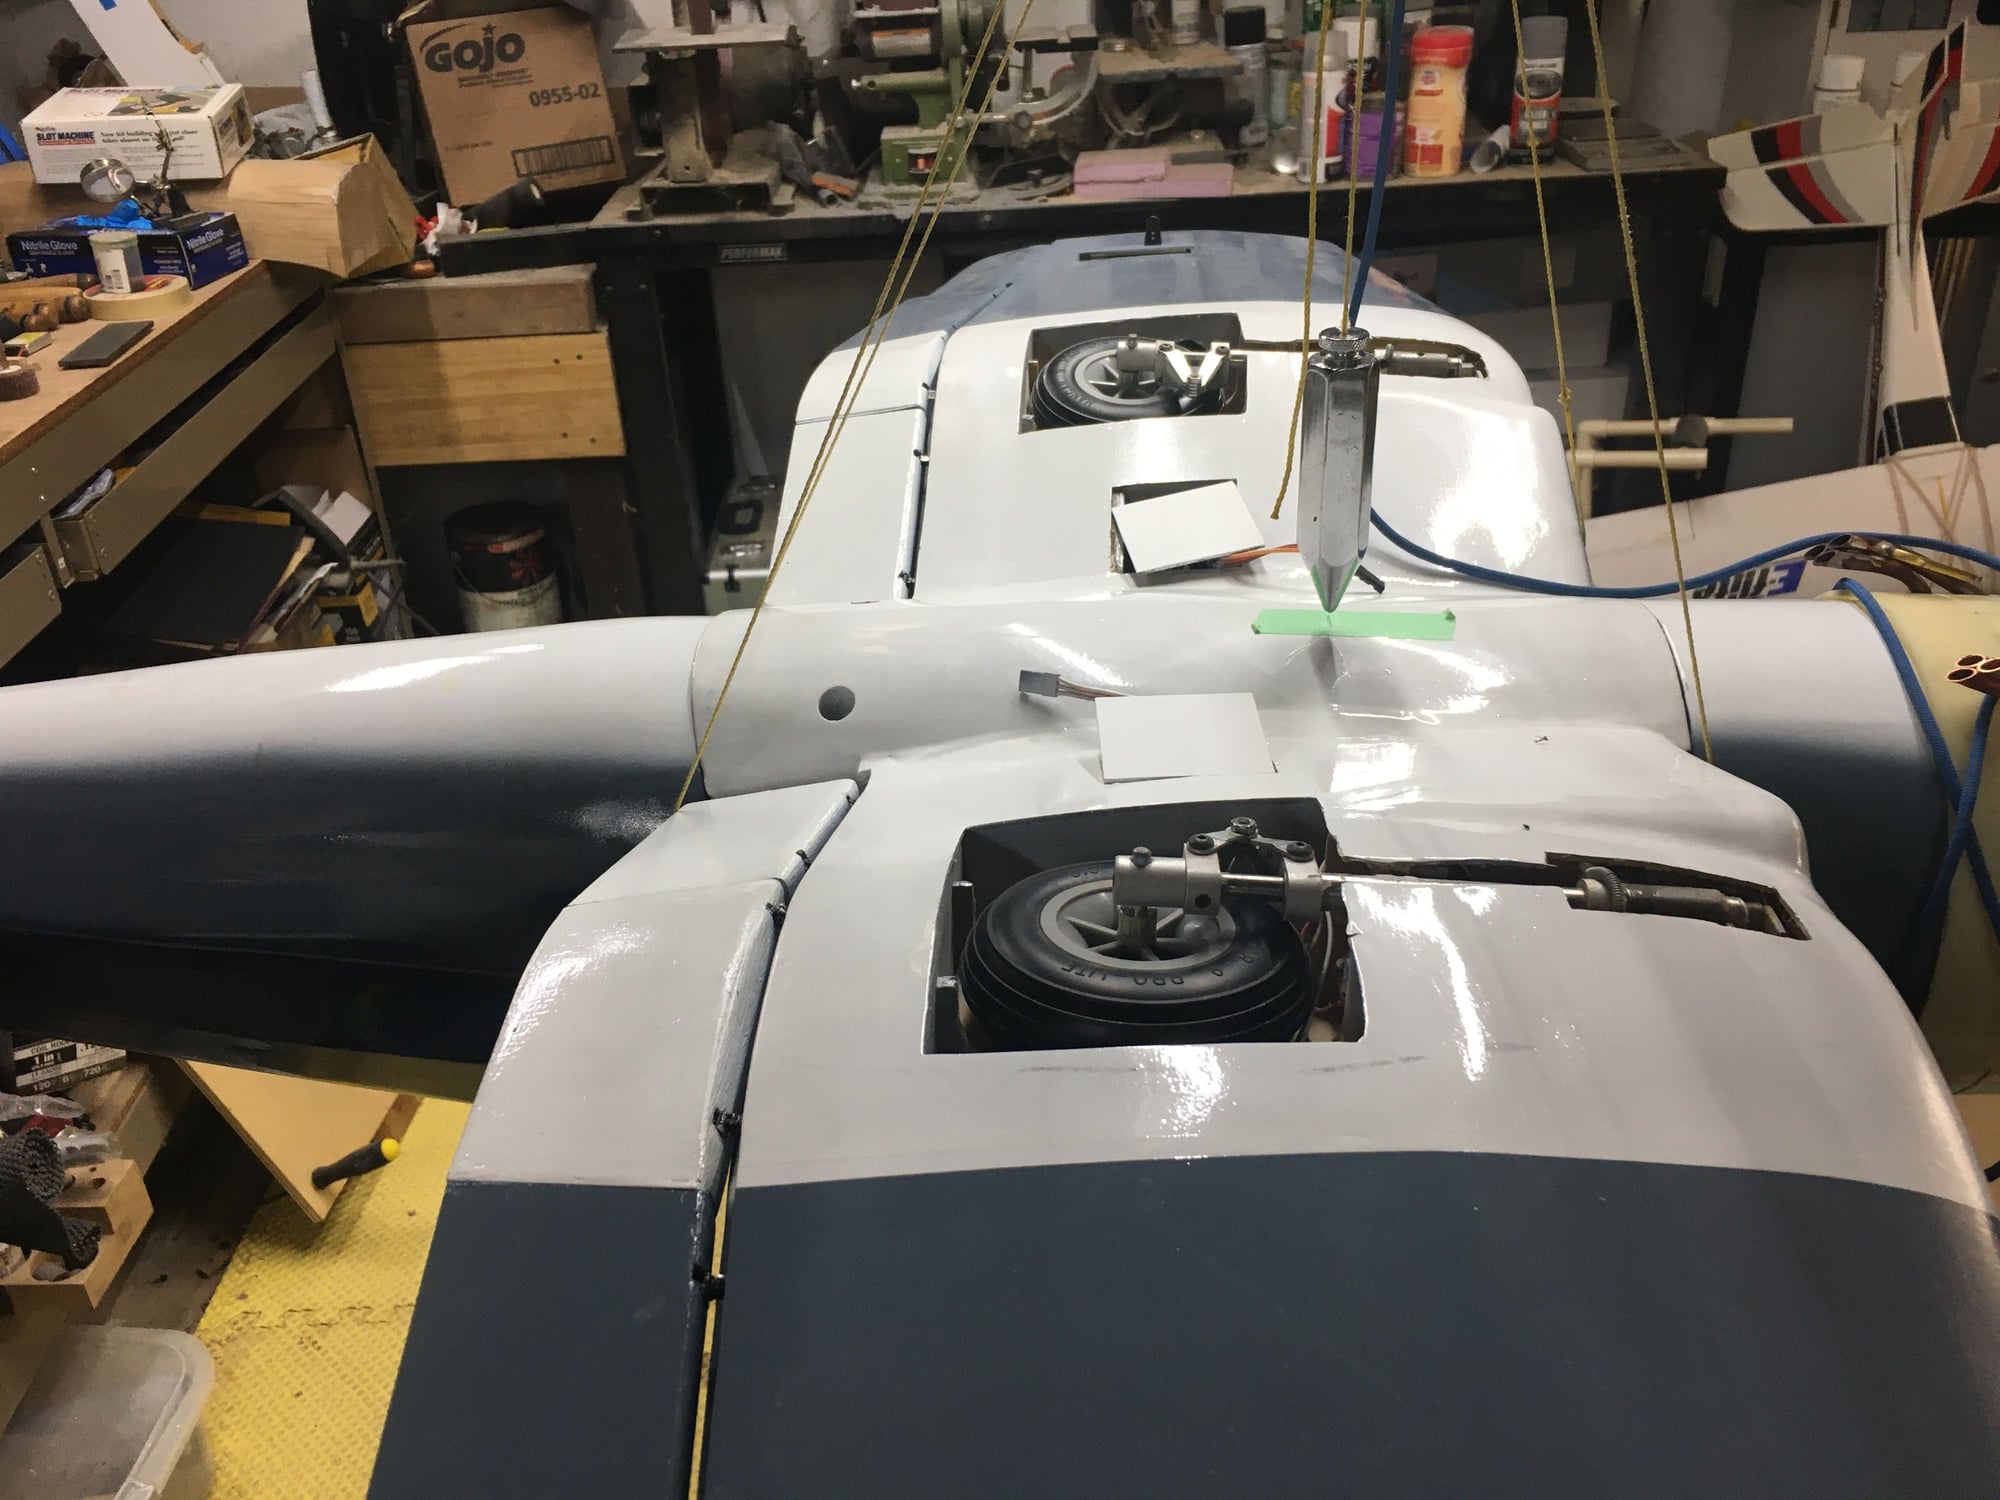
I just mounted the Saito 125-a onto the Sig 110 Rascal, not much of it sticks out, it sits at the very end of the mount. I used PSP Cowl mounts for the cowl, like all PSP products, they are quality items.

15 x 7 three blade prop.
15 x 7 three blade prop.
01-14-2021, 11:51 AM
Reminds me a bit of the .80 I have in a 1/5 scale SIG Cub. Asyou can see there isn't much showing.
Oh I found a picture of a new stamp commemorating the USPS new delivery vehicle, enjoy!


Oh I found a picture of a new stamp commemorating the USPS new delivery vehicle, enjoy!
01-14-2021, 12:09 PM
Ours isn't the only one, two co workers i talked to daily are also waiting on theirs.
I inspected the damage, and found it chipped the paint/ GRRRRR, not at all happy about that.
I inspected the damage, and found it chipped the paint/ GRRRRR, not at all happy about that.
01-14-2021, 12:58 PM
01-14-2021, 02:07 PM

Join Date: Feb 2006
Location: Norwalk,
OH
Posts: 313
Likes: 0
Received 0 Likes
on
0 Posts
Mine made it Tuesday. Said part of all this is they raise minimum wage to $15.00 an hour it might get me and the wife 2 meals at Mc Donald�s or Burger King. They should have raise ss to $15.00 and hour for the older people also.
 01-14-2021, 02:32 PM
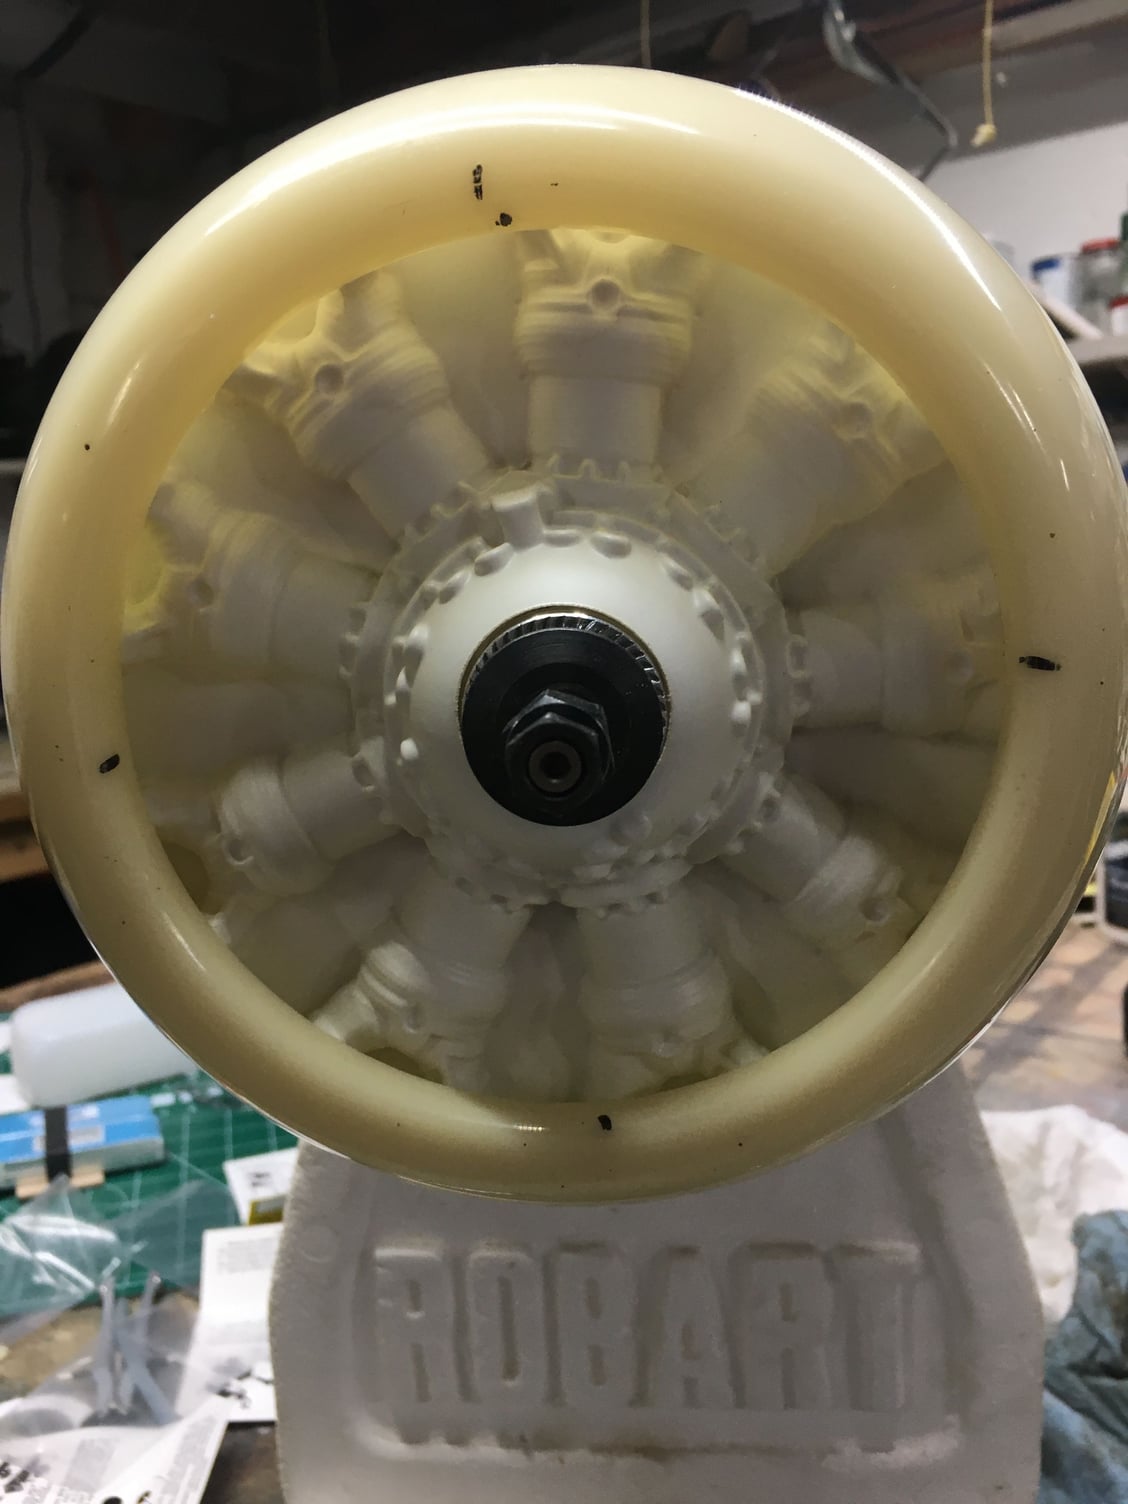
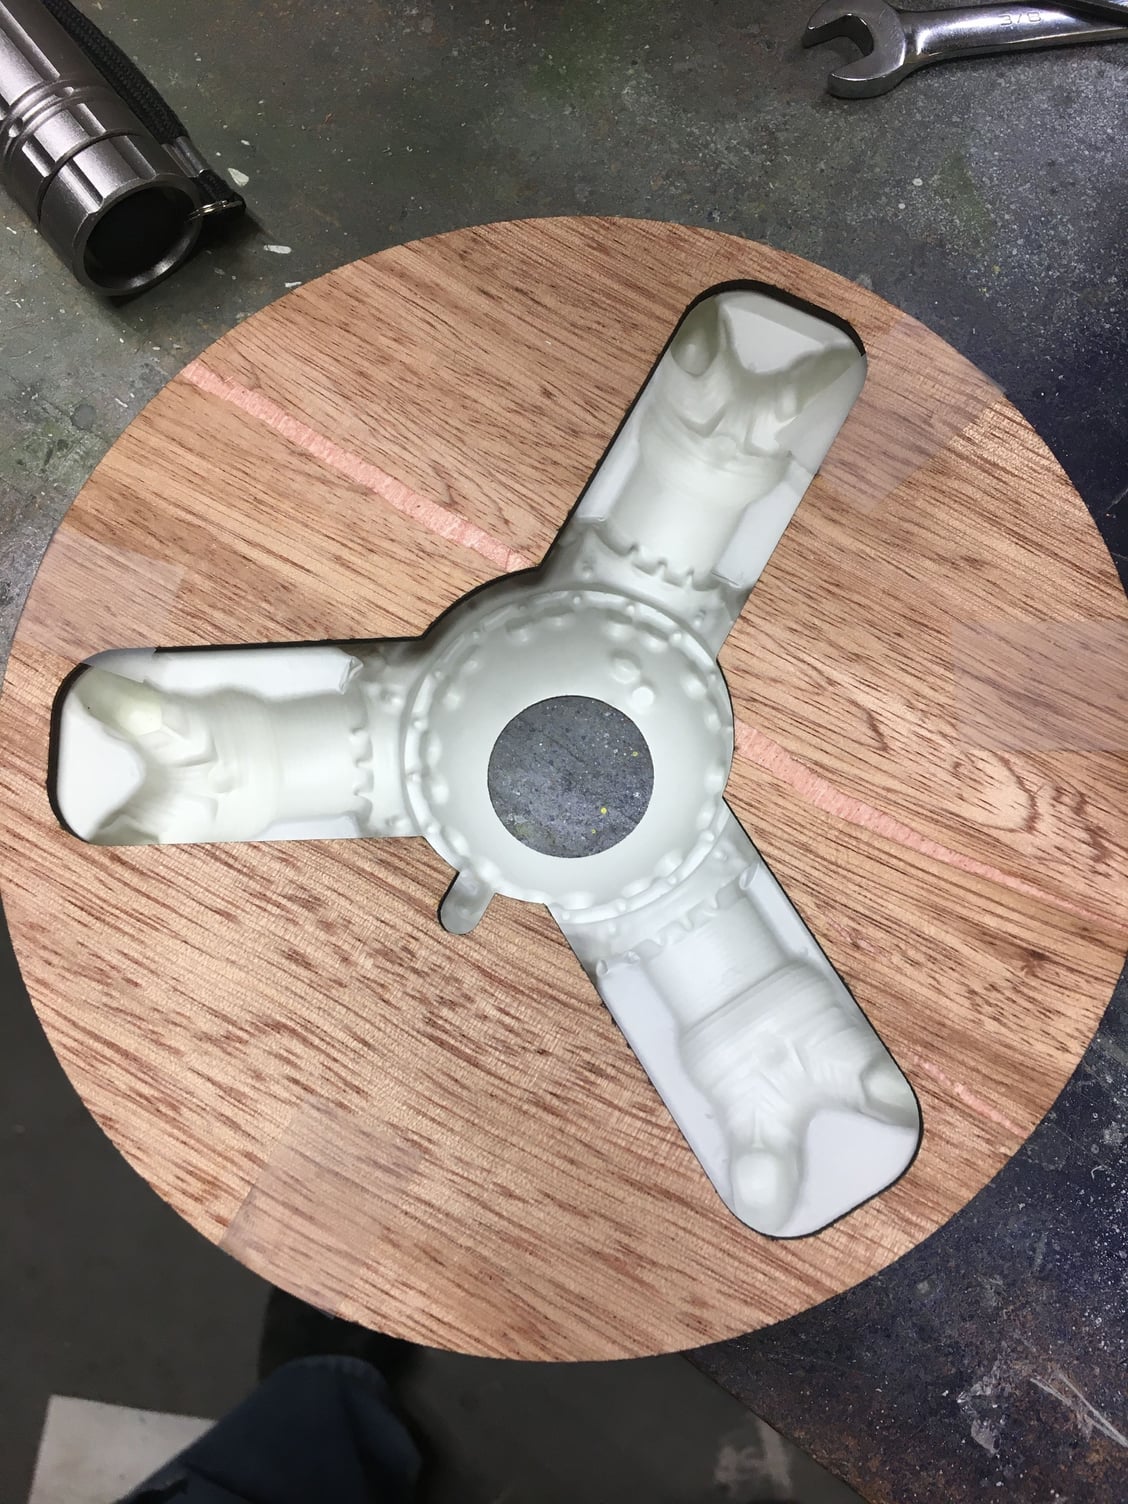
I am LOVING my laser!! I got the engine baffle cut and got the dummy engine cut. All that is left now is to cut the the cylinder openings in the dummy, and glue it to the baffle. That will take a bit of time since I have to first see if I can have the head traverse at the correct depth without striking the dome.
01-14-2021, 02:52 PM
I finally came up with a decent clamp that works with the honeycomb. Held the plywood nice and tight and took out the warps. I was able to put the parts back in the same exact spot for trimming and now have a 1/16" ring that is 6.7/8" in diameter. I then lined the baffle up with the dummy engine, marked a ring around it with sharpie and lined it up on the plywood to cut out the outer part, dropped it into the hole from the baffle with the ring I cut earlier and reset the focus and then cut the center out. Now trying to decide how best to cut the cylinders out without touching or marring the dome. I will take a file to the notch I made for the crank case breather so I can attach a line to it. Once I got that all set, a couple coats of silver dope and glue the dummy to it and get that one done.
I bought a new exhaust extractor this week, and WOW what a difference it made. I can have the entire setup running and have a normal conversation and not need hearing protection. It is about 200CFM less extraction, but I notice it does a better job clearing smoke. I always smelled smoke with the other one, so I'm guessing the 200 extra CFM may have been blowing smoke out the duct run behind it even though it is fully sealed.
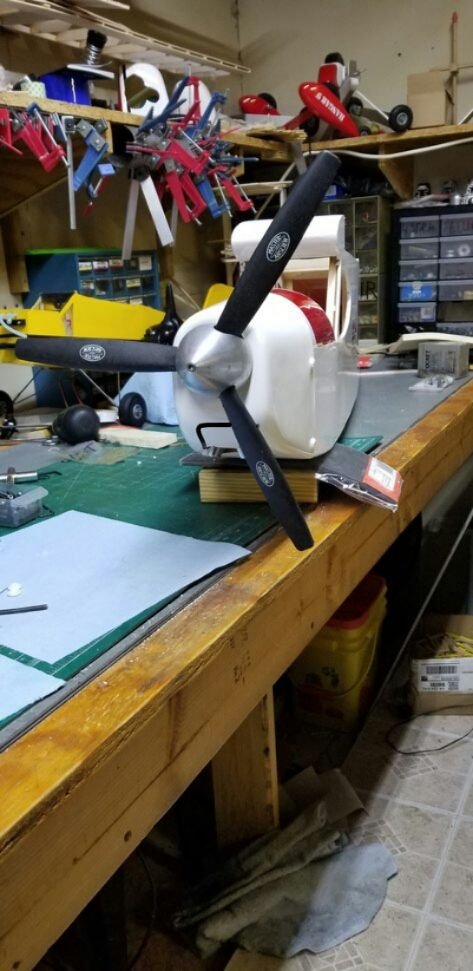
Anyway, this Saito Radial is going to look SO good in this Corsair.
I bought a new exhaust extractor this week, and WOW what a difference it made. I can have the entire setup running and have a normal conversation and not need hearing protection. It is about 200CFM less extraction, but I notice it does a better job clearing smoke. I always smelled smoke with the other one, so I'm guessing the 200 extra CFM may have been blowing smoke out the duct run behind it even though it is fully sealed.
Anyway, this Saito Radial is going to look SO good in this Corsair.
01-14-2021, 09:13 PM
01-15-2021, 03:41 AM
Senior Member
I need a suggestion on a cooling air inlet on this cowl, do I open the existing hole up higher, or make a new "smiley" like hole under the spinner? I think a round hole would look odd.

01-15-2021, 04:08 AM
 01-15-2021, 05:17 AM
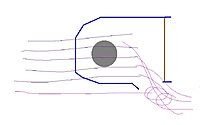
What's equally important is how to get the hot air out of the cowl. A 1/2" wide slot cut across the rear underside of the cowl with a 1/4-5/16" tall airdam in front of it works very well. You may be able to heat and bend the air dam from the cowl material itself. Otherwise I would extend the cutout to the rear leaving only the amount of cowl needed for mounting. Both options aren't particularly pretty but both work.
Last edited by Glowgeek; 01-15-2021 at 05:33 AM.
01-15-2021, 06:03 AM
On the 168 cowl I put a smiley face cut out under the prop and flaps at the back of the cowl. It was much larger so it worked out, but on the smaller one, I would do the above too.