


Welcome to Club SAITO !
 01-21-2021, 09:00 PM

I don't know I'll bet those stubs will come out right easy I would be surprise you could do it with your teeth. 
I would point out the compression will be considerably better if your run it with the cylinder installed. I'm here all week too!
I would point out the compression will be considerably better if your run it with the cylinder installed.
I'm here all week too!
 01-22-2021, 03:28 AM
Senior Member


That would have me looking for a new airframe to remount the still usuable motor on. After the crash Gary lol
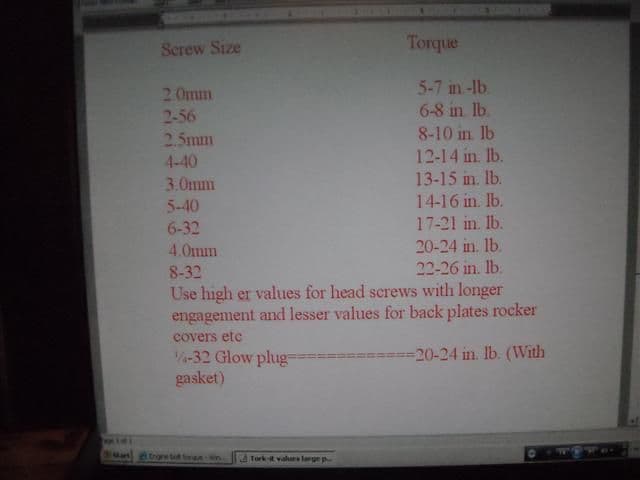
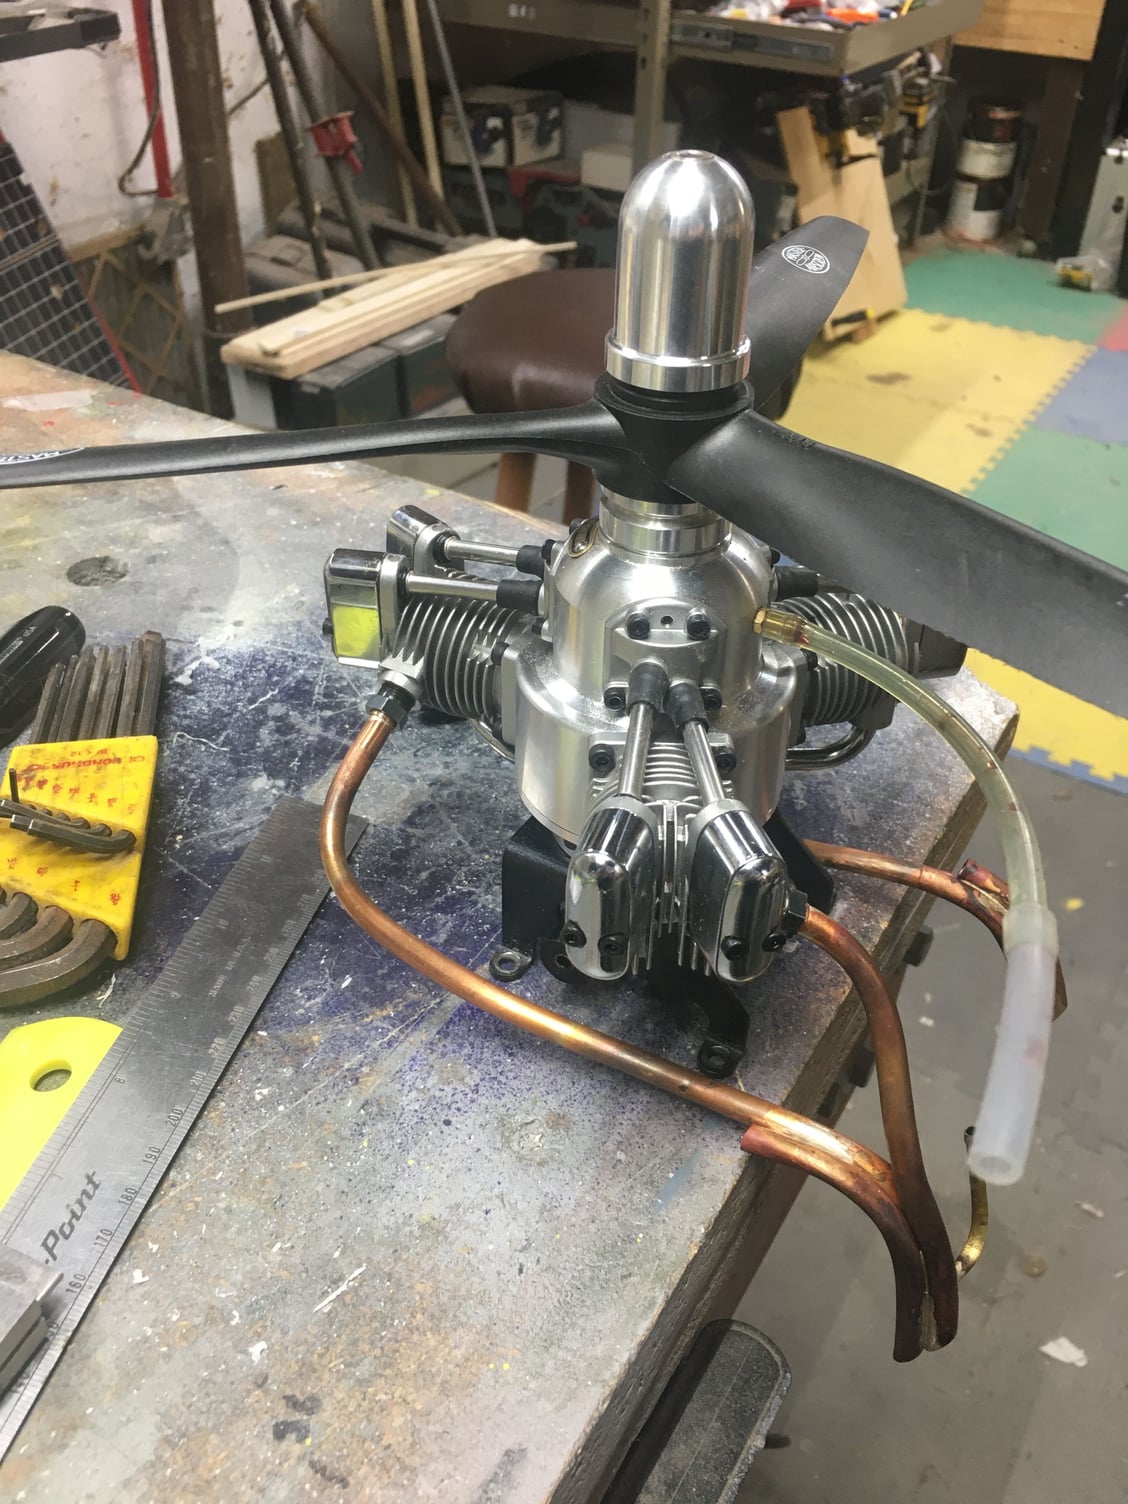
OK fellas. Upon closer inspection. Ever see two cyl base screws snap clean on the same side?
Anybody ever run across a torque requirement/spec for these base screws in addition to patterned securement?
My v twin motors are really happy to fail the casting boss flange at these points. Improper torque will kill them early if the castings are imported from Hell anyway (aka china.)
Just wondering. I Have never disassembled this 72 before. (Yet anyway)
Hmmm
I reassemble them using copper based anti seize. The back plate screws and cam housing screws take 10 oz inch and the carbs take 12.
Last edited by 1200SportsterRider; 01-22-2021 at 03:50 AM. Reason: Add content.
 01-22-2021, 06:23 AM
You're 3.5 m, they might be 4 m) would be about 18 oz inch, Saito really torques the base screws down, they almost always come loose with an audible crack.
I reassemble them using copper based anti seize. The back plate screws and cam housing screws take 10 oz inch and the carbs take 12.
I reassemble them using copper based anti seize. The back plate screws and cam housing screws take 10 oz inch and the carbs take 12.
01-22-2021, 11:07 AM


Seems the stuff I have ordered from Great Britain has been arriving faster than domestic stuff. Order my rings fron Gaviscool in GB and they have been arriving in about 1 week. I also prefer properly heat treated rings so, even if it took longer, I would wait.
Dave,
For what it takes nowdays to get the differential, a fee button pushes on the TX, well worth at least trying.
Last edited by Jesse Open; 01-22-2021 at 11:10 AM.

 01-23-2021, 09:25 AM
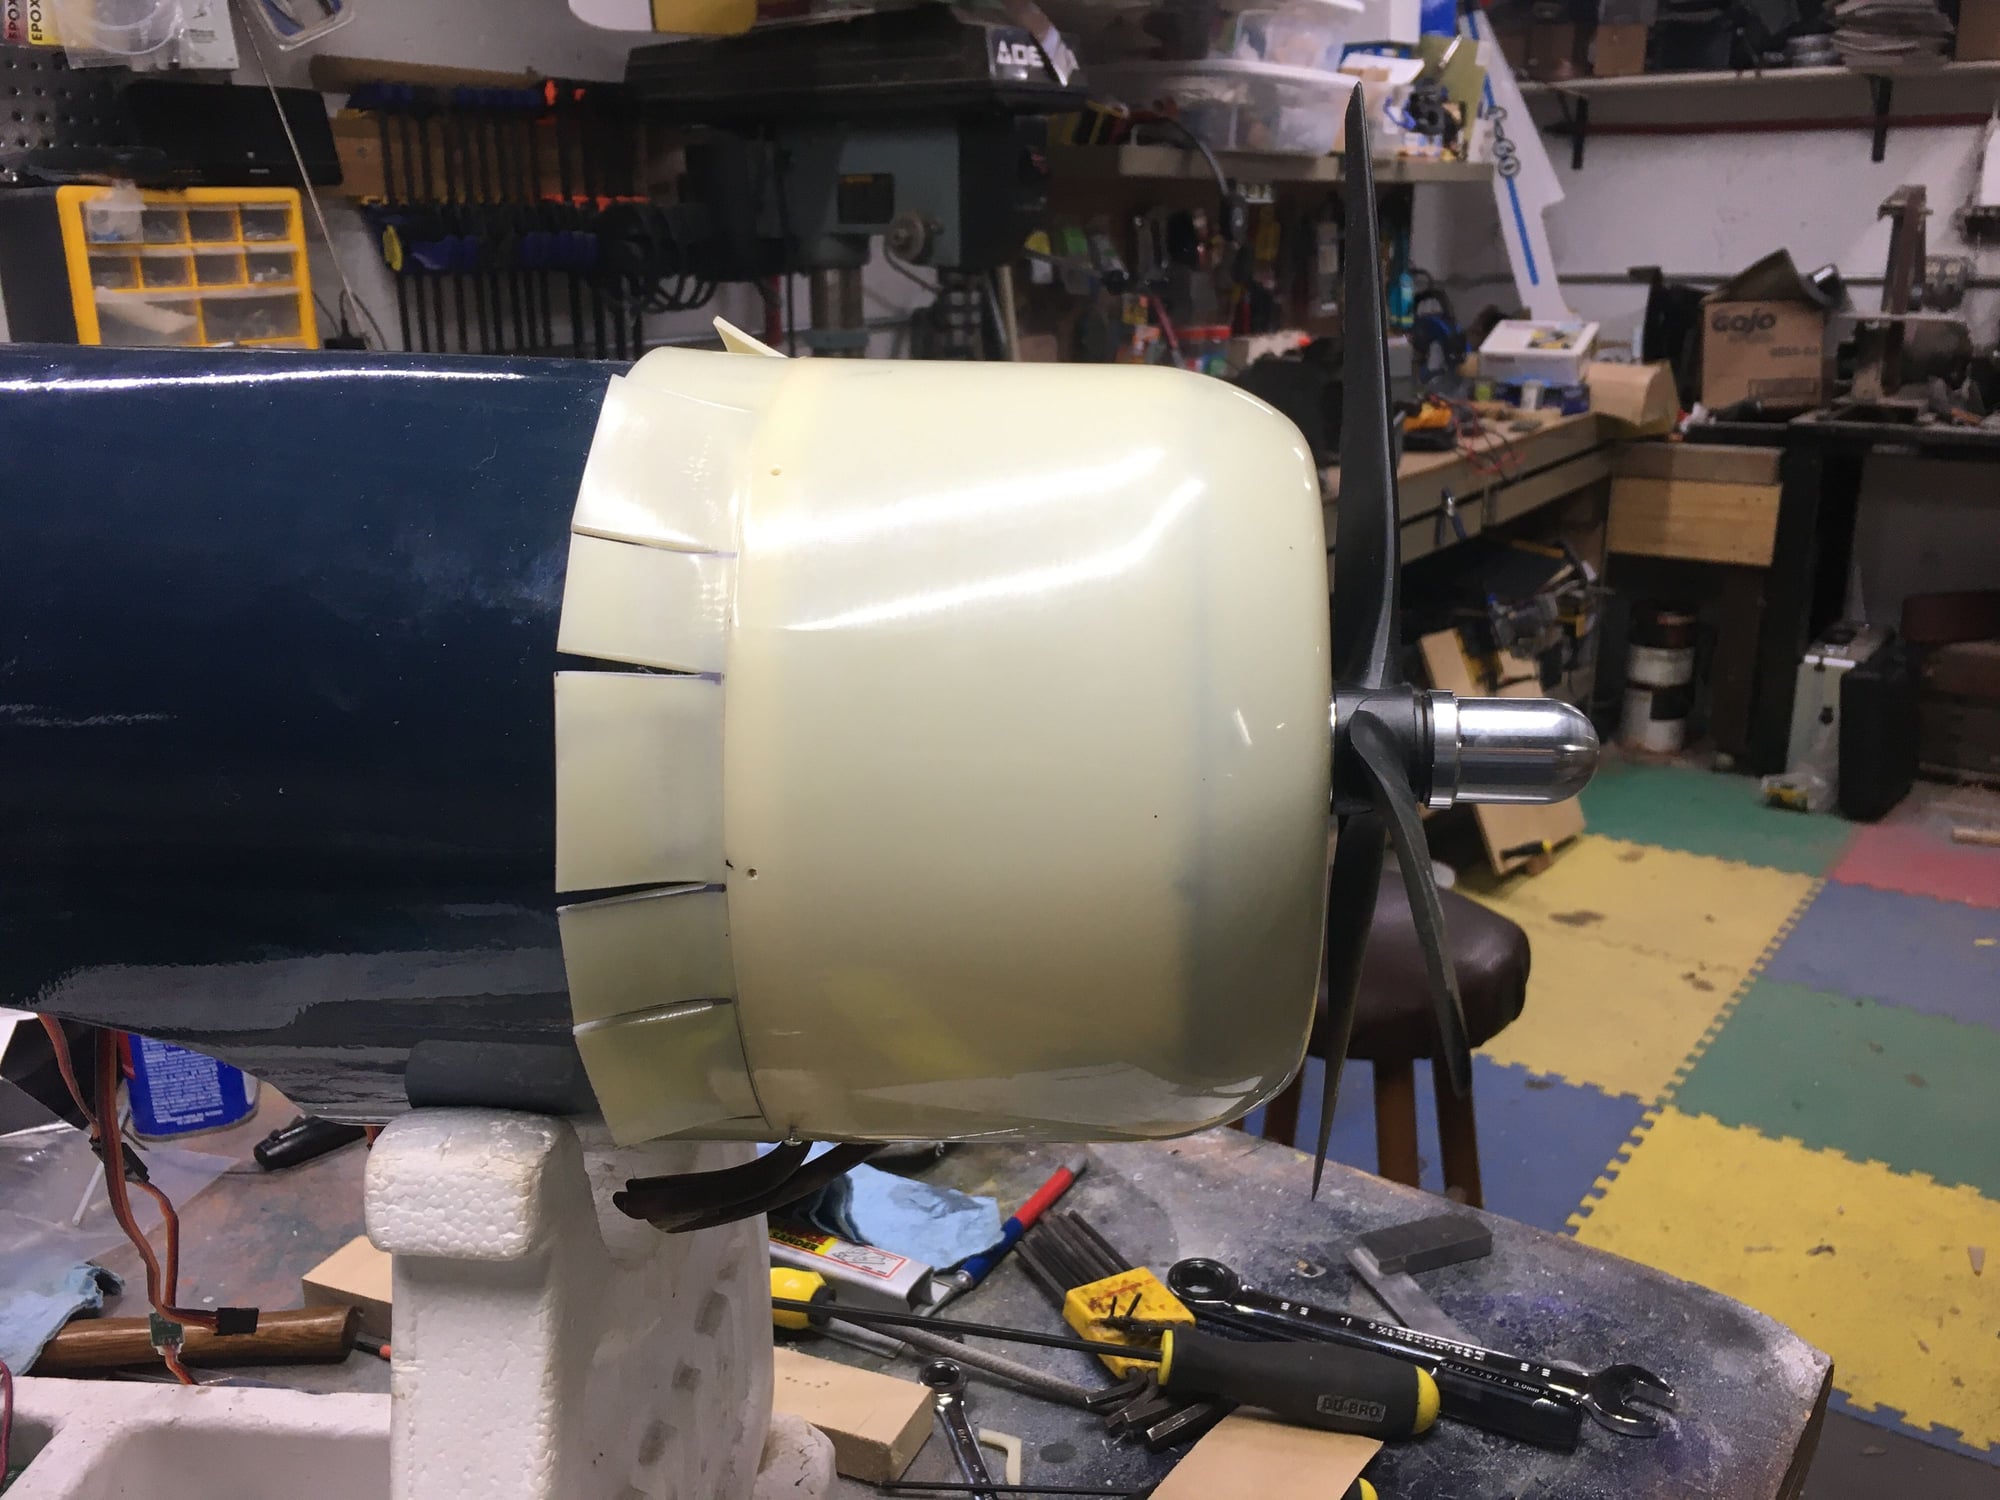
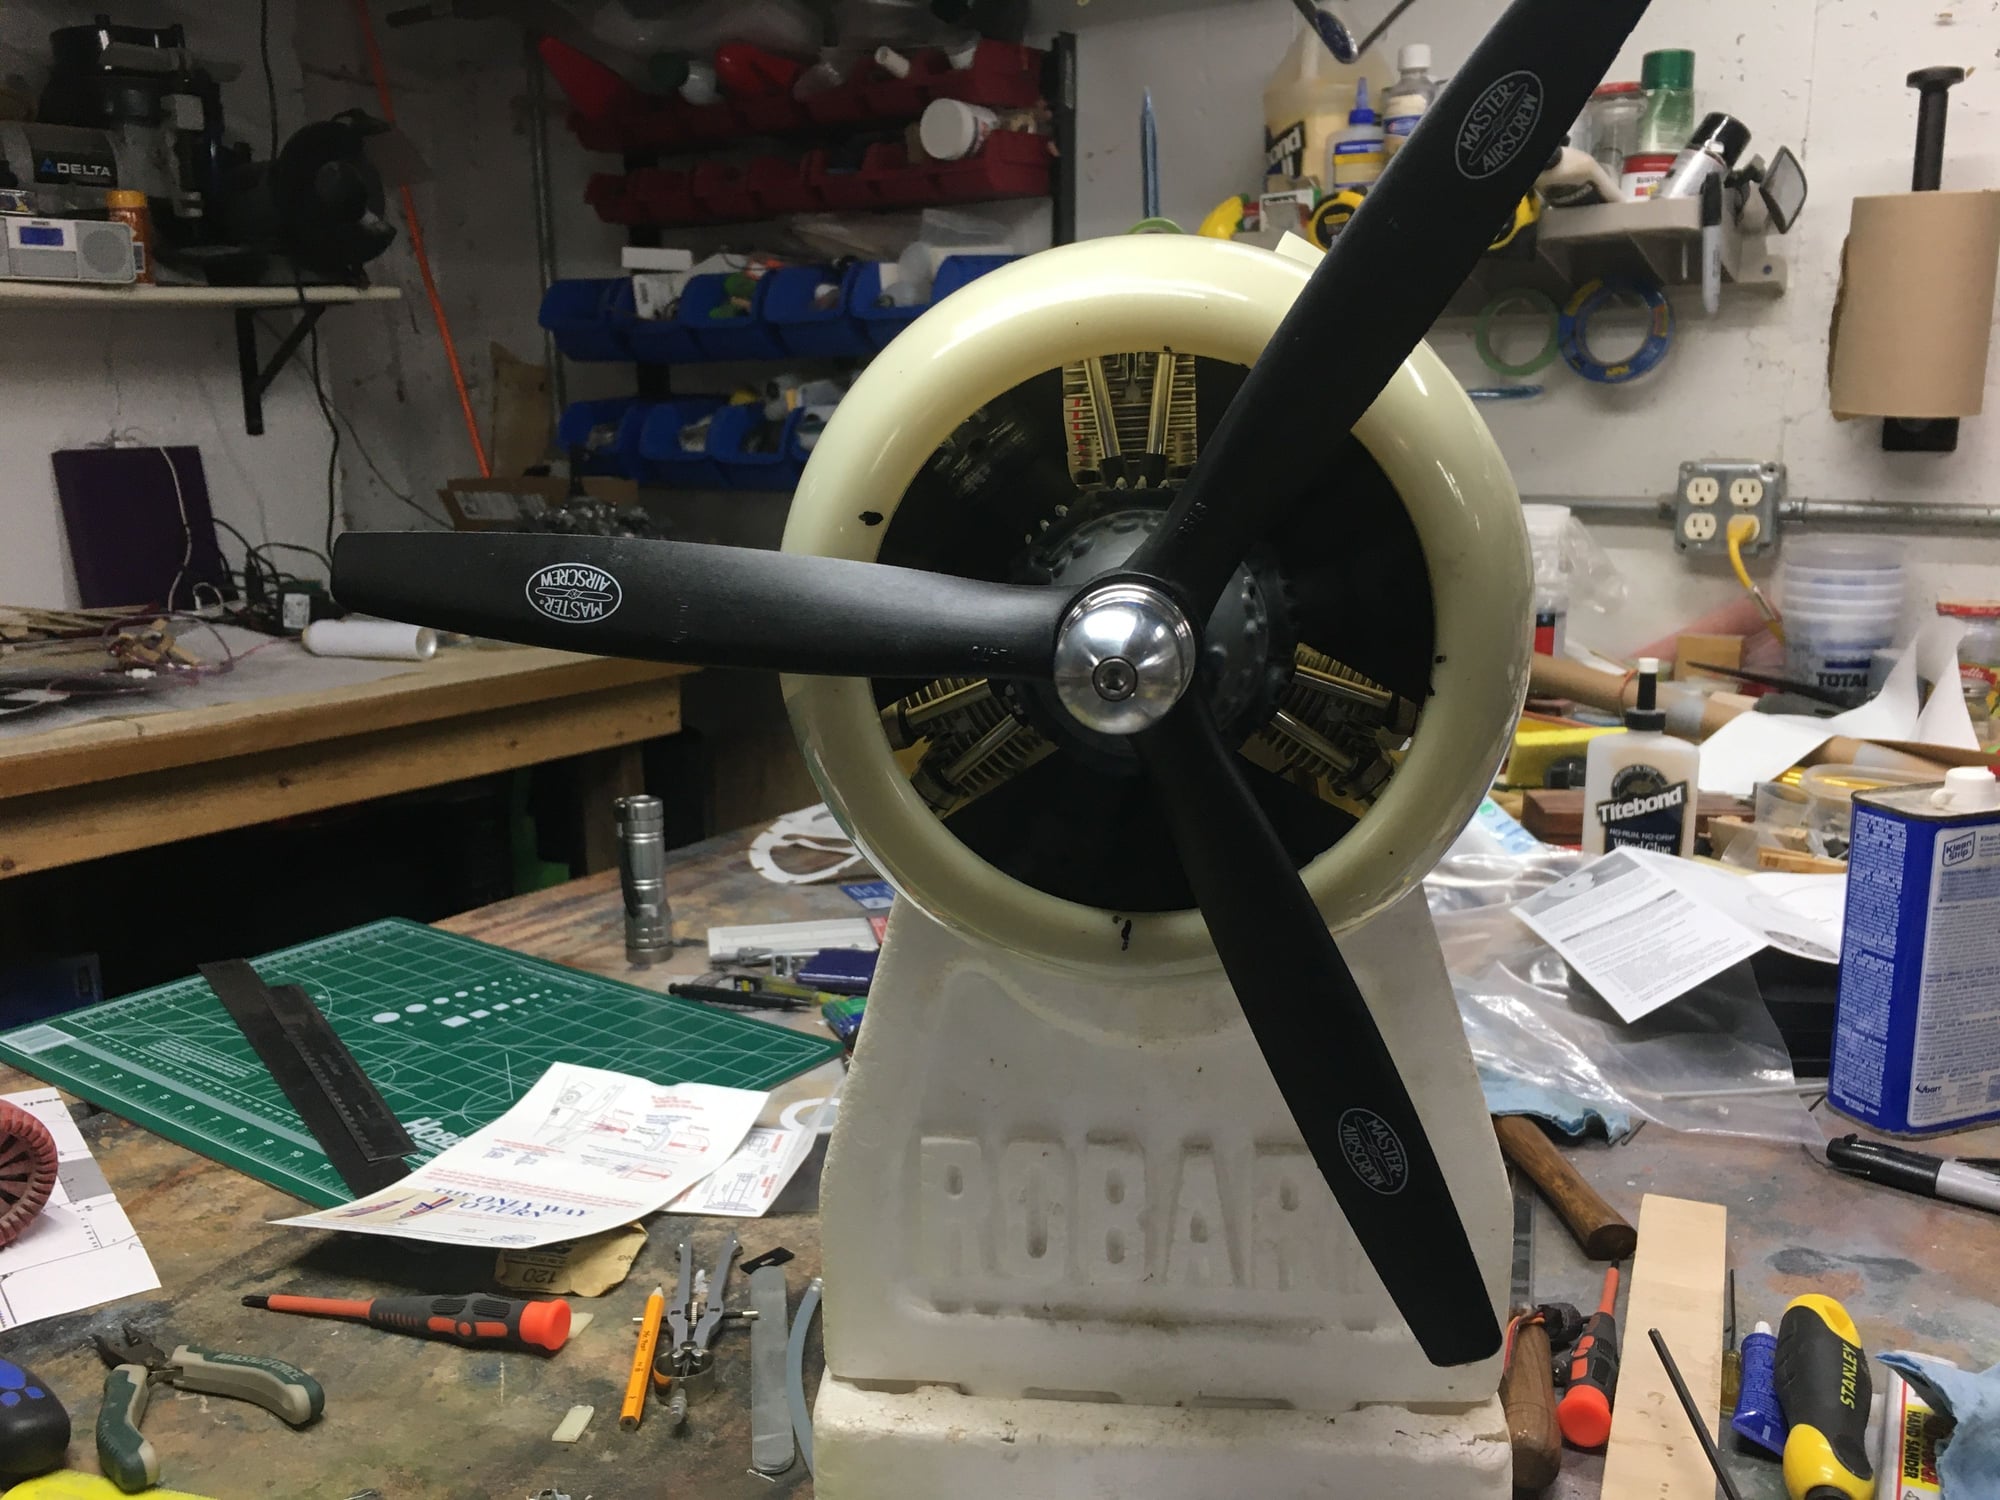
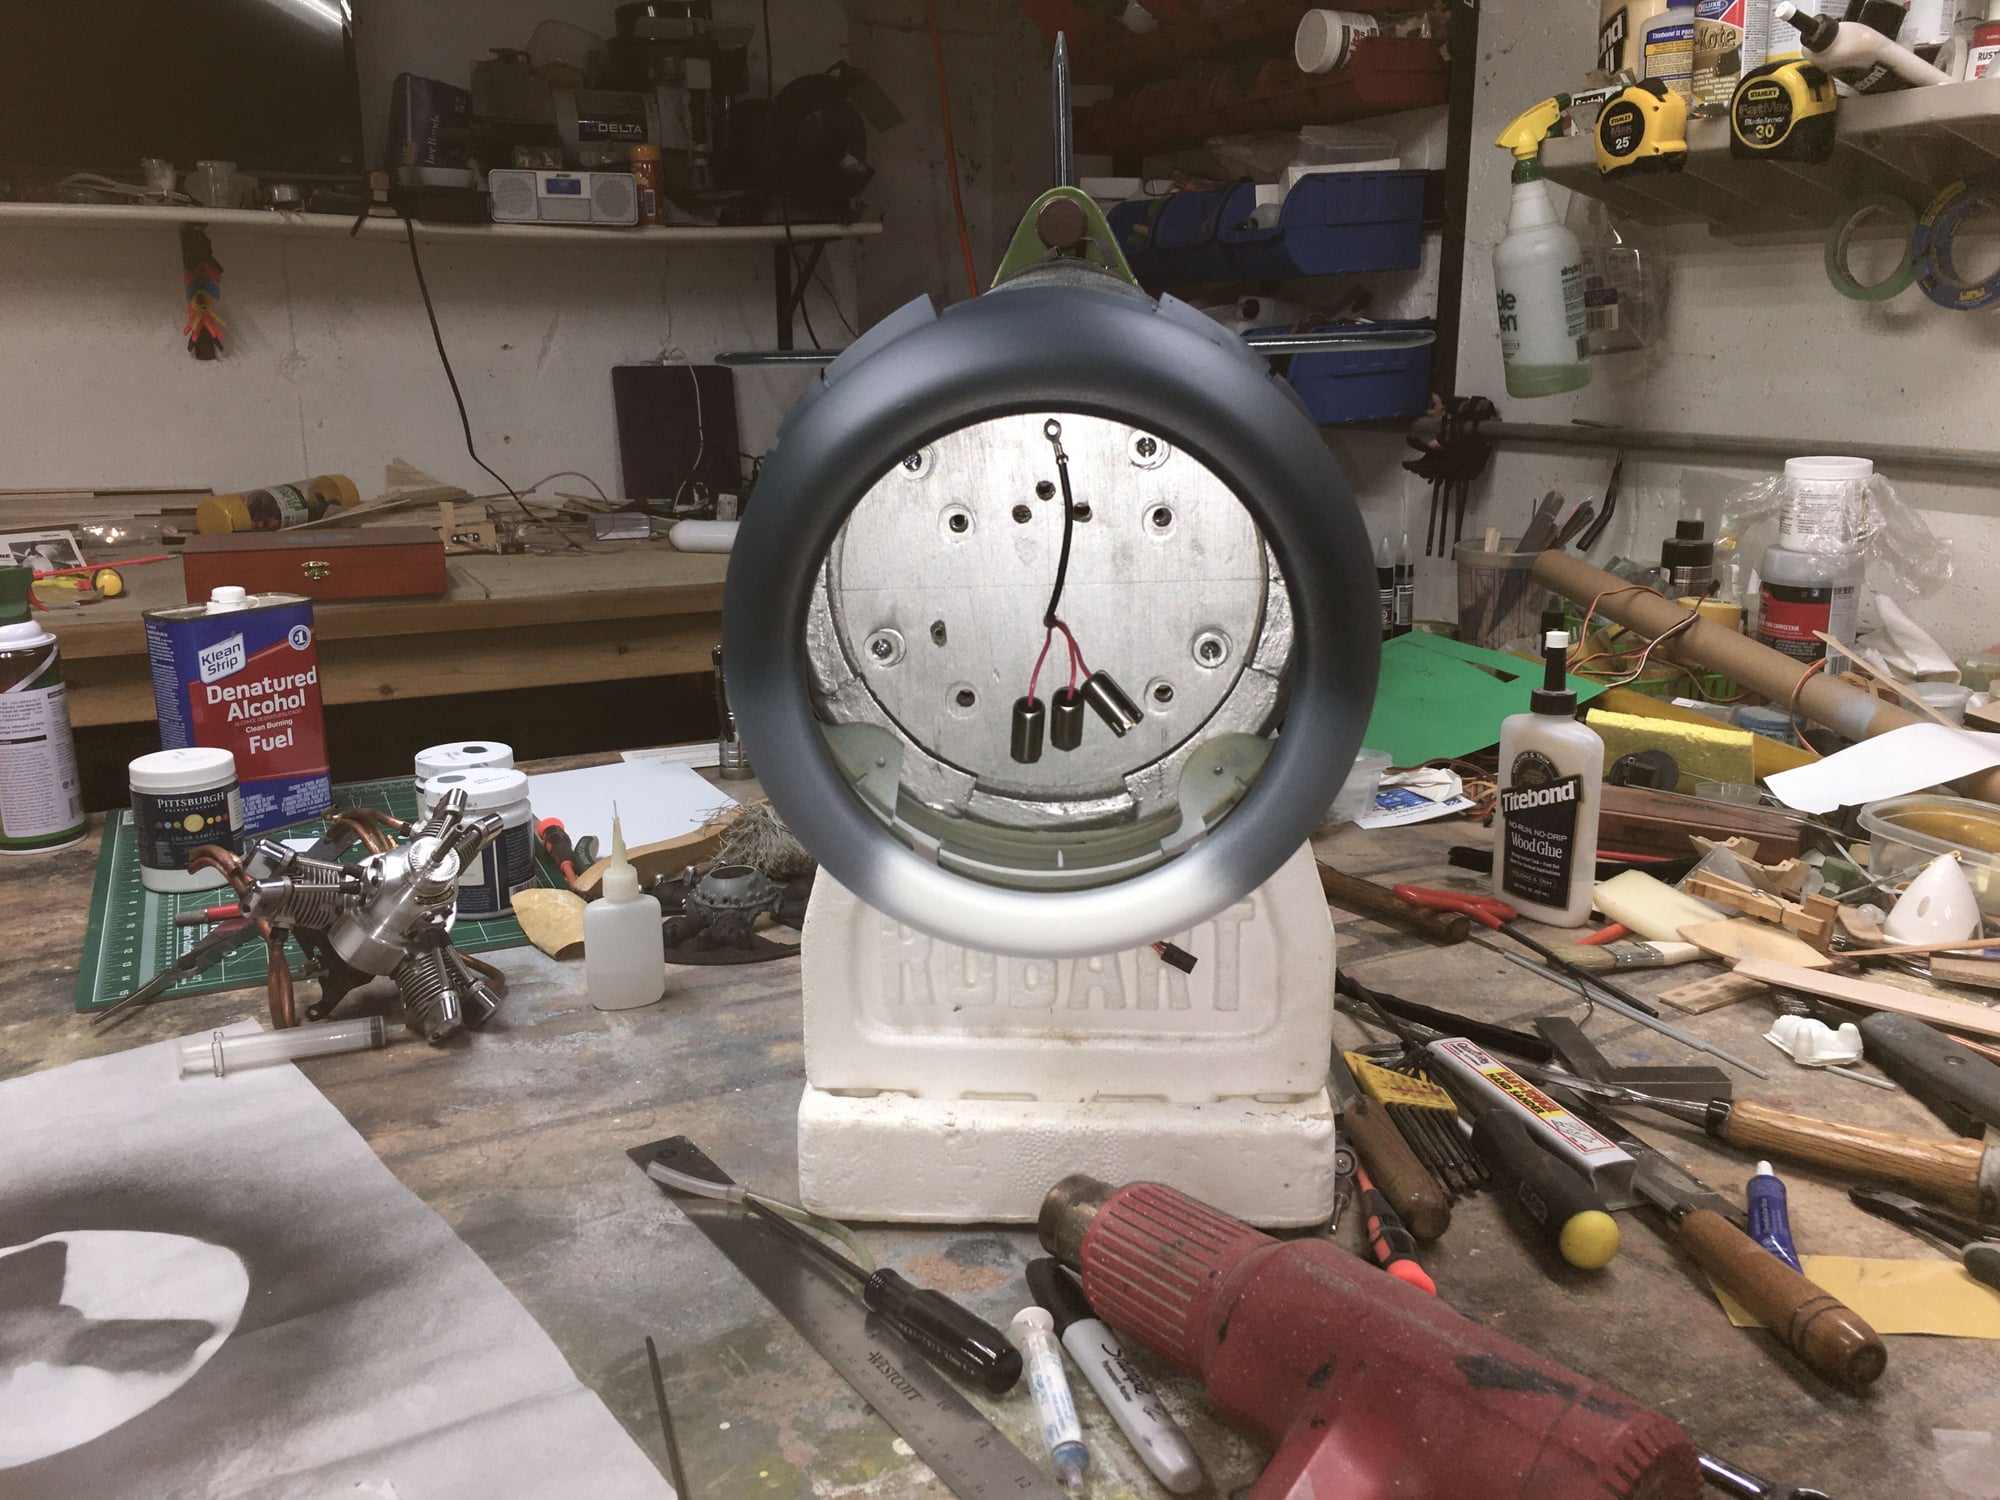
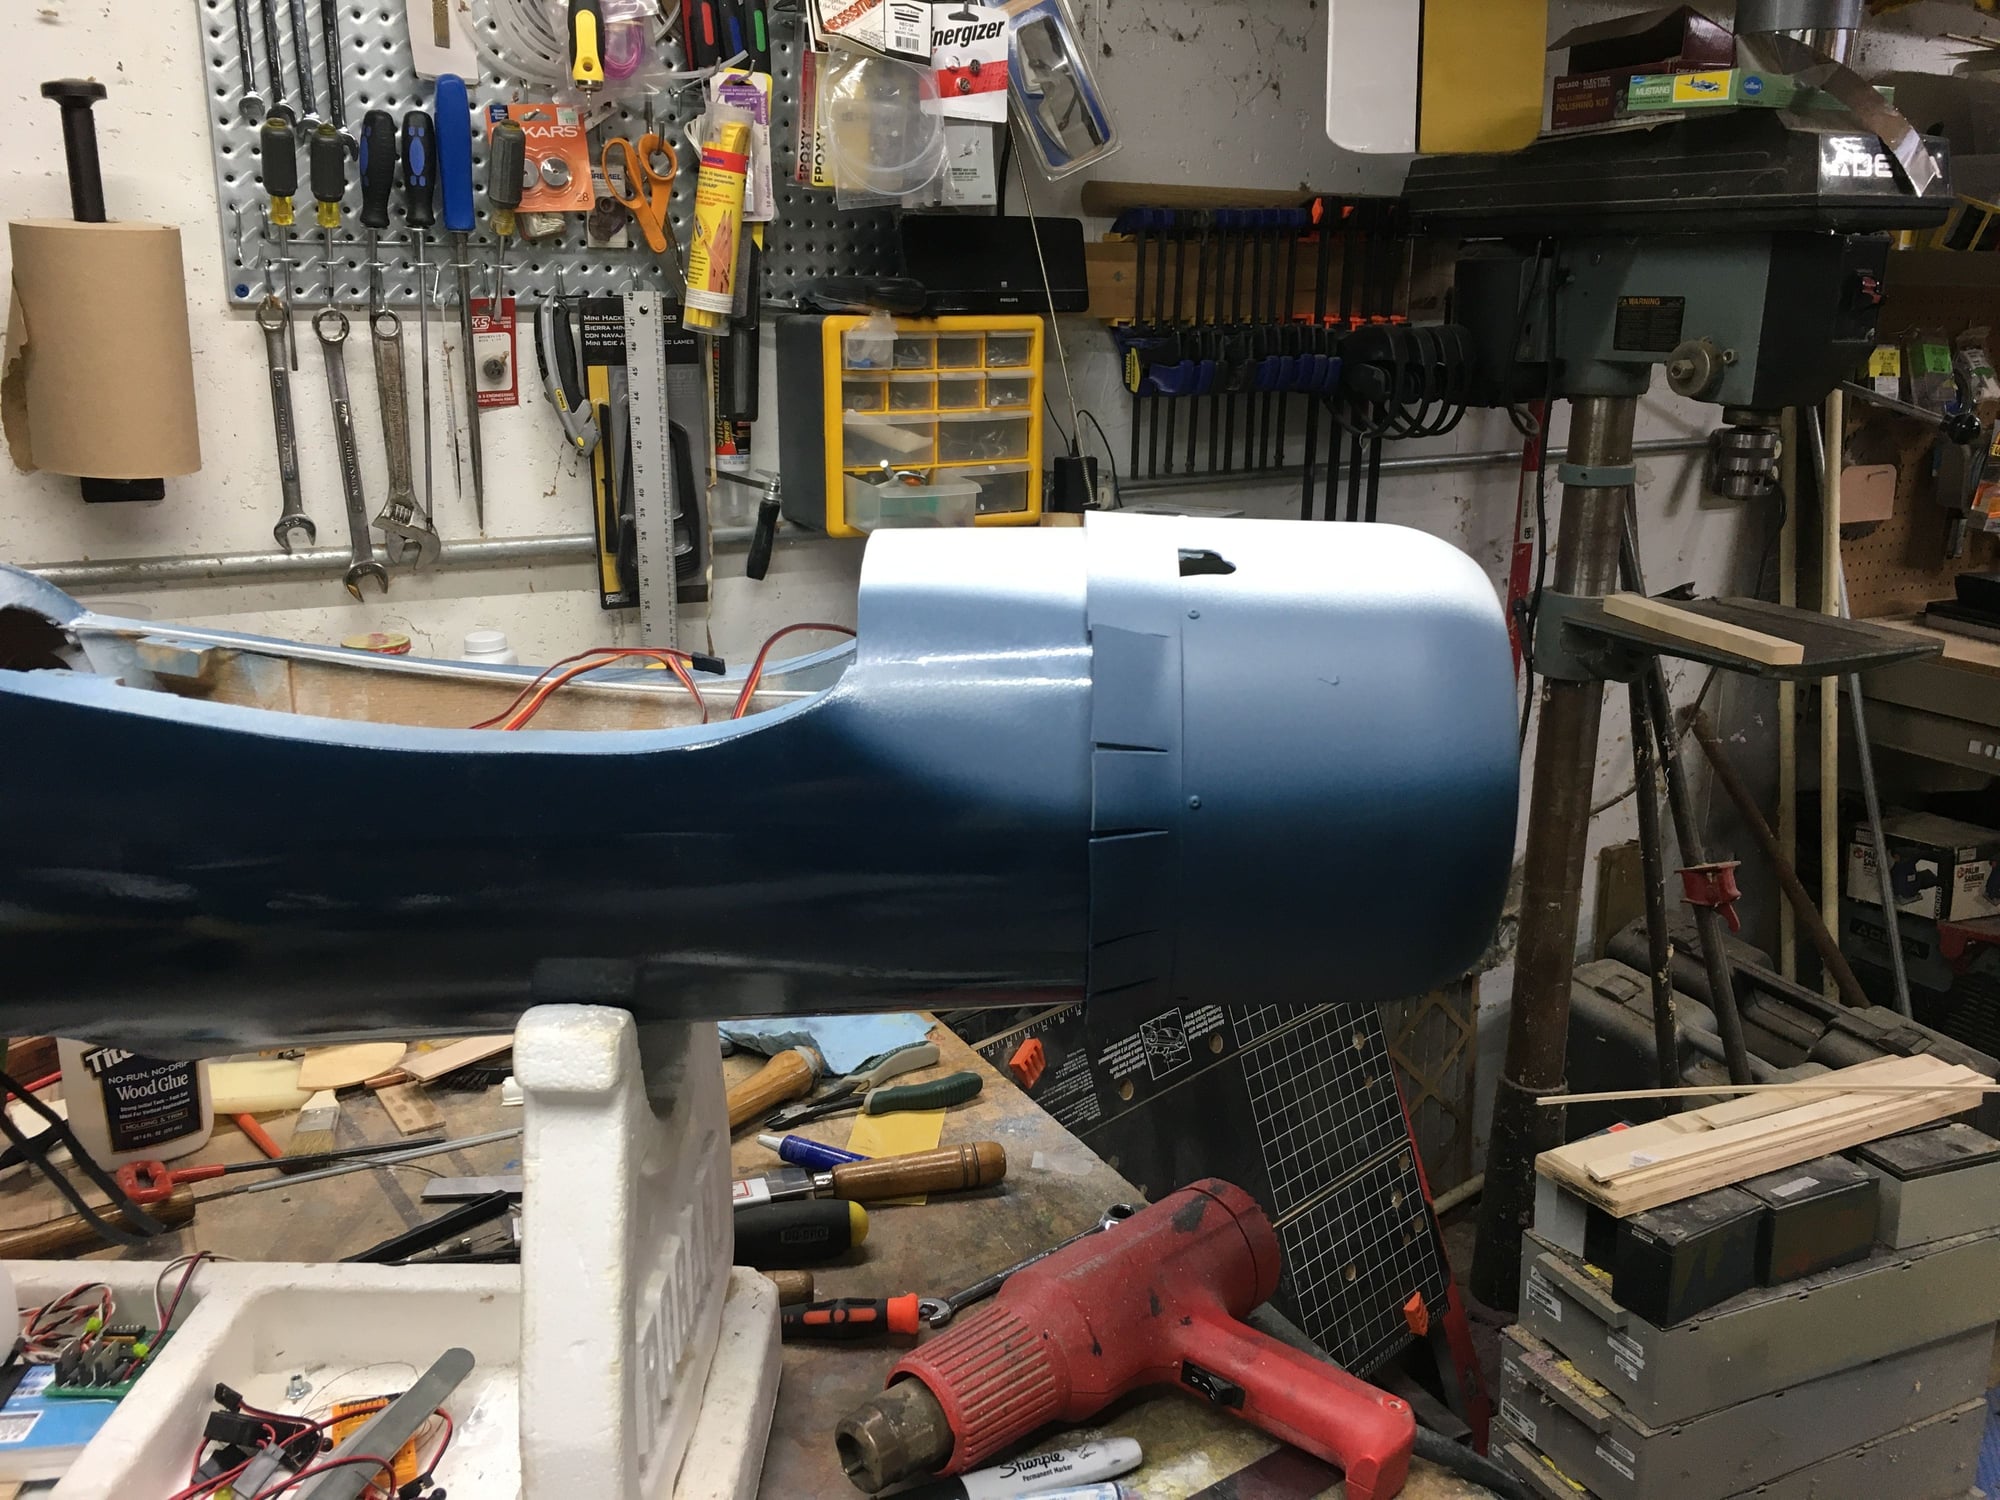
Thanks. I used my heat gun to soften it up a bit and bent them while hot. Had to use my Ov Glove or would have burned my fingers. Downside the glove left marks. I will clean them up and get them to a consistent angle, but it now has plenty of exit area to keep the engine cool. I left 3 cowl flaps closed on the bottom due to the exhaust poking out, part of the ring was cut away for clearance and would have lost structural integrity if I did them. I left it as a 2 piece cowl and used button head screws to secure it. I plan to put thin polystyrene between the flaps like on the real ones. I have a 1/48 scale Corsair that I used the open cowl on and was able to measure the flaps, multiply by 48 then divide by 8 to get as close to scale as I could. The Top Flight is not a true 1/8th scale, but close enough that it worked. The bottom small flap is just slightly larger than all the other small flaps, and that is the only difference.
The lower case vent, anything special I should do with it? Would it help to have an extraction pipe at the end of the exhaust pipe like I have on a couple others. or just leave it hang out the cowl? I still have to figure out a filling system and primer for it. Hate to have them sticking out of the cowl, but may put them under the cowl where they can't really be seen. I just remembered that I do have a refueler bracket I can use, so will study that today.
The lower case vent, anything special I should do with it? Would it help to have an extraction pipe at the end of the exhaust pipe like I have on a couple others. or just leave it hang out the cowl? I still have to figure out a filling system and primer for it. Hate to have them sticking out of the cowl, but may put them under the cowl where they can't really be seen. I just remembered that I do have a refueler bracket I can use, so will study that today.
01-23-2021, 12:44 PM
Thanks. I used my heat gun to soften it up a bit and bent them while hot. Had to use my Ov Glove or would have burned my fingers. Downside the glove left marks. I will clean them up and get them to a consistent angle, but it now has plenty of exit area to keep the engine cool. I left 3 cowl flaps closed on the bottom due to the exhaust poking out, part of the ring was cut away for clearance and would have lost structural integrity if I did them. I left it as a 2 piece cowl and used button head screws to secure it. I plan to put thin polystyrene between the flaps like on the real ones. I have a 1/48 scale Corsair that I used the open cowl on and was able to measure the flaps, multiply by 48 then divide by 8 to get as close to scale as I could. The Top Flight is not a true 1/8th scale, but close enough that it worked. The bottom small flap is just slightly larger than all the other small flaps, and that is the only difference.
The lower case vent, anything special I should do with it? Would it help to have an extraction pipe at the end of the exhaust pipe like I have on a couple others. or just leave it hang out the cowl? I still have to figure out a filling system and primer for it. Hate to have them sticking out of the cowl, but may put them under the cowl where they can't really be seen. I just remembered that I do have a refueler bracket I can use, so will study that today.
The lower case vent, anything special I should do with it? Would it help to have an extraction pipe at the end of the exhaust pipe like I have on a couple others. or just leave it hang out the cowl? I still have to figure out a filling system and primer for it. Hate to have them sticking out of the cowl, but may put them under the cowl where they can't really be seen. I just remembered that I do have a refueler bracket I can use, so will study that today.
Thanks Todd, sent you a PM on cowl flap info.
Those little "L" brackets that come with remote glow and remote fuelers are bendy little things. I create a little strengthening web by putting a solder blob at both corners of the inside of the bend. Really helps to keep them from bending back when inserting a stubborn fueler tip. With the Corsair cowl being so thick/rigid I would just drill it to mount the fueler.
Last edited by Glowgeek; 01-23-2021 at 05:19 PM.
01-23-2021, 05:48 PM
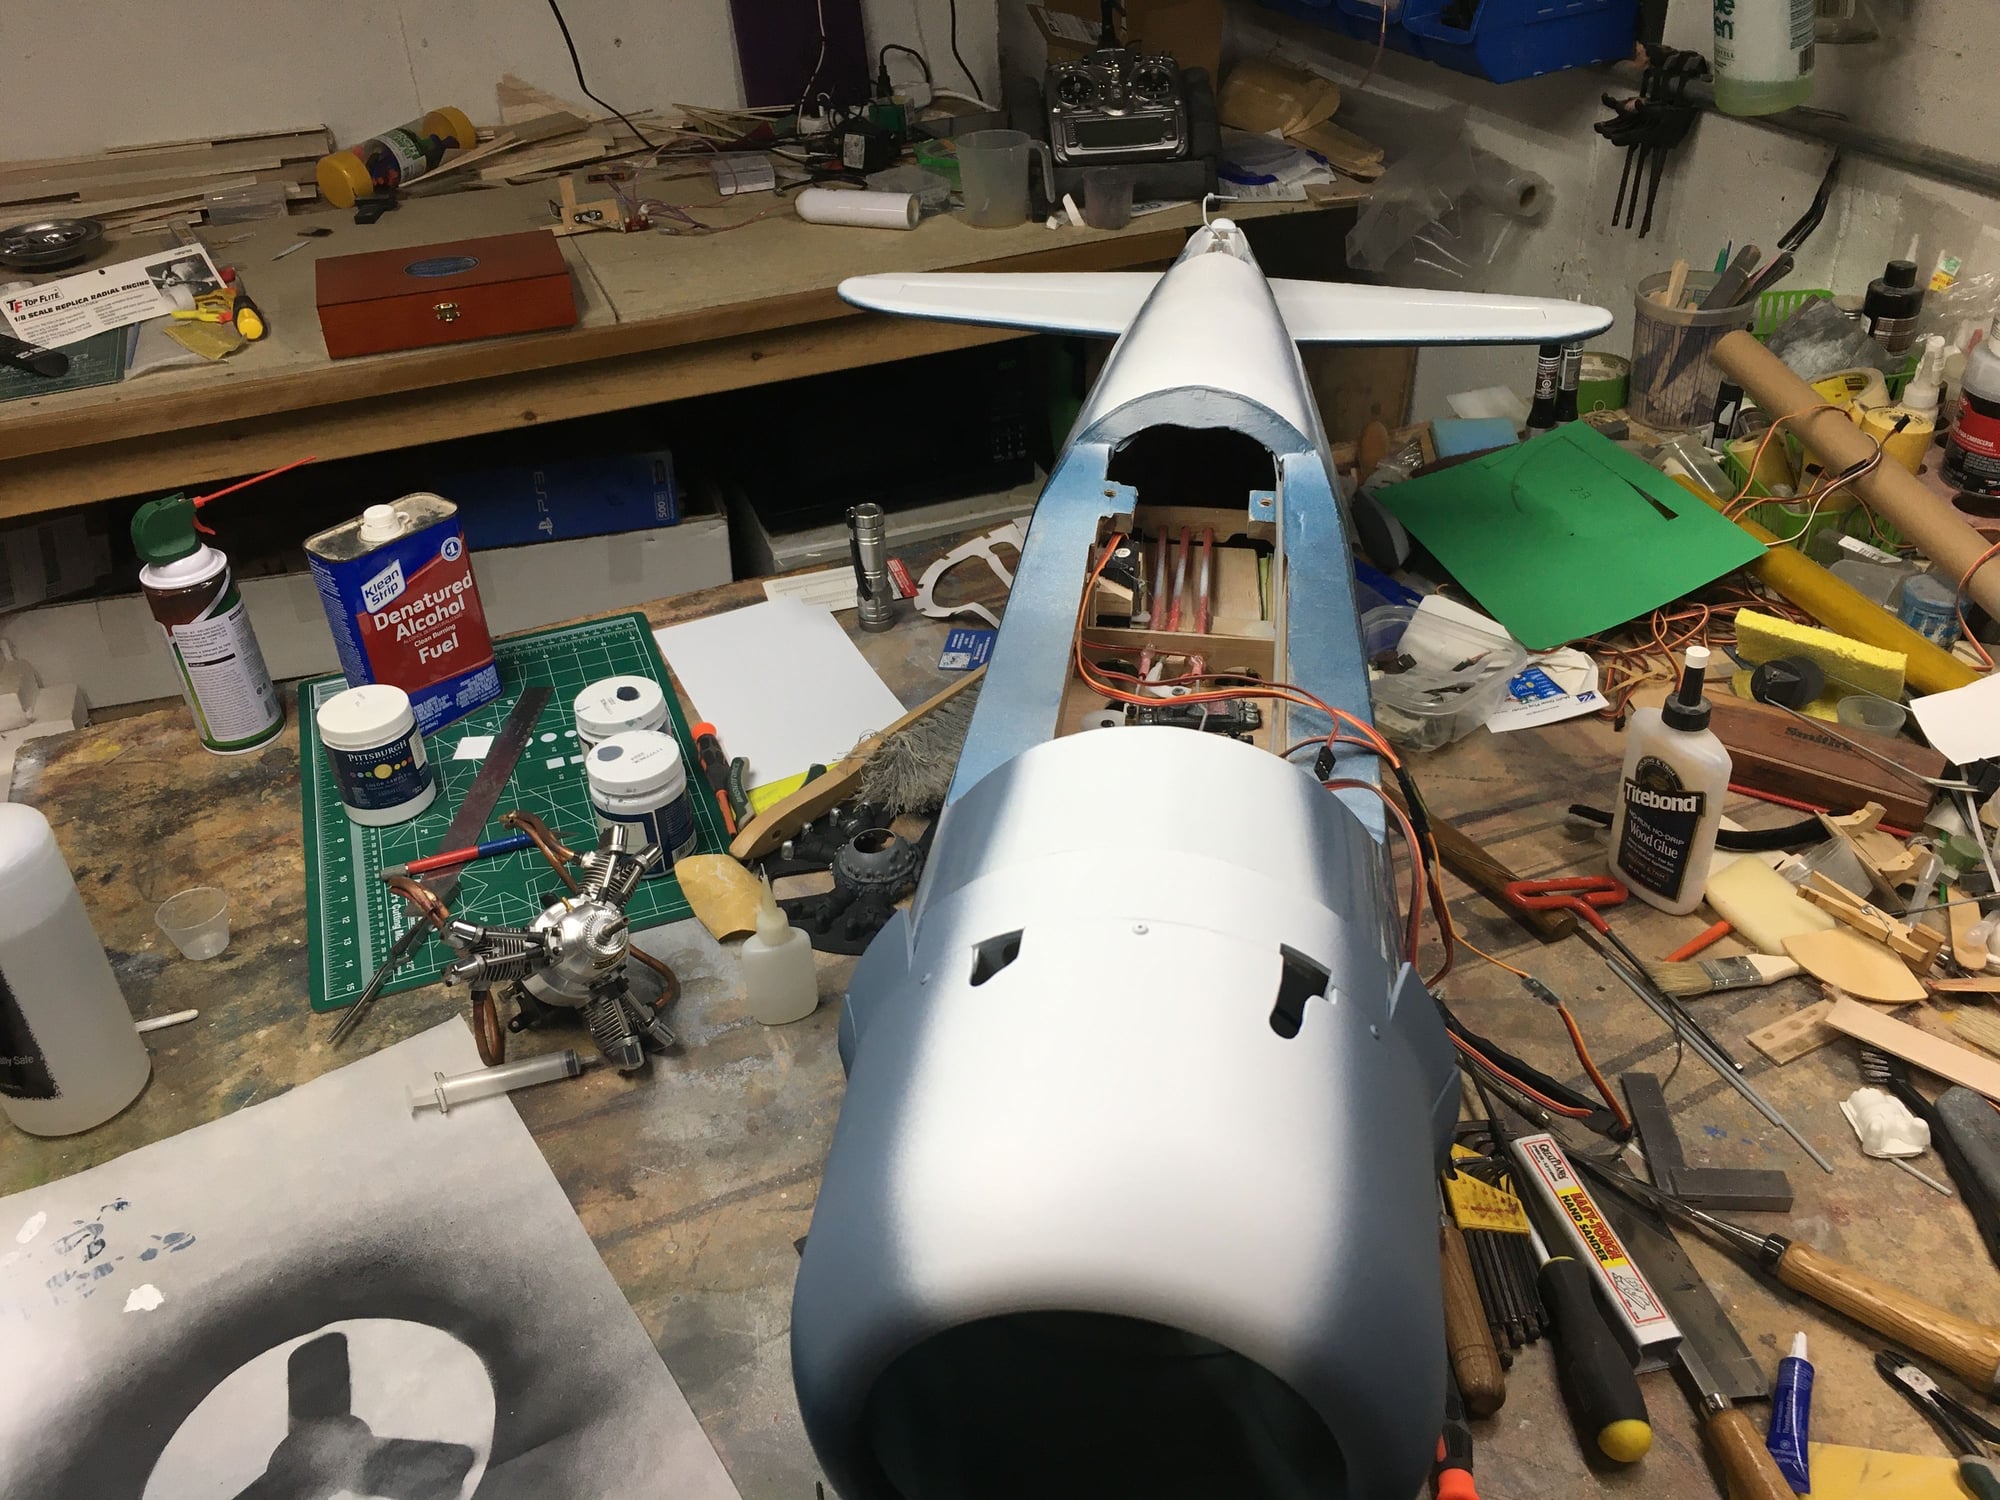
Just need to touch up a few spots, let it dry a few days, work on fixing the wing damage I caused, then clear coat and finish assembly. I think it came out better than expected 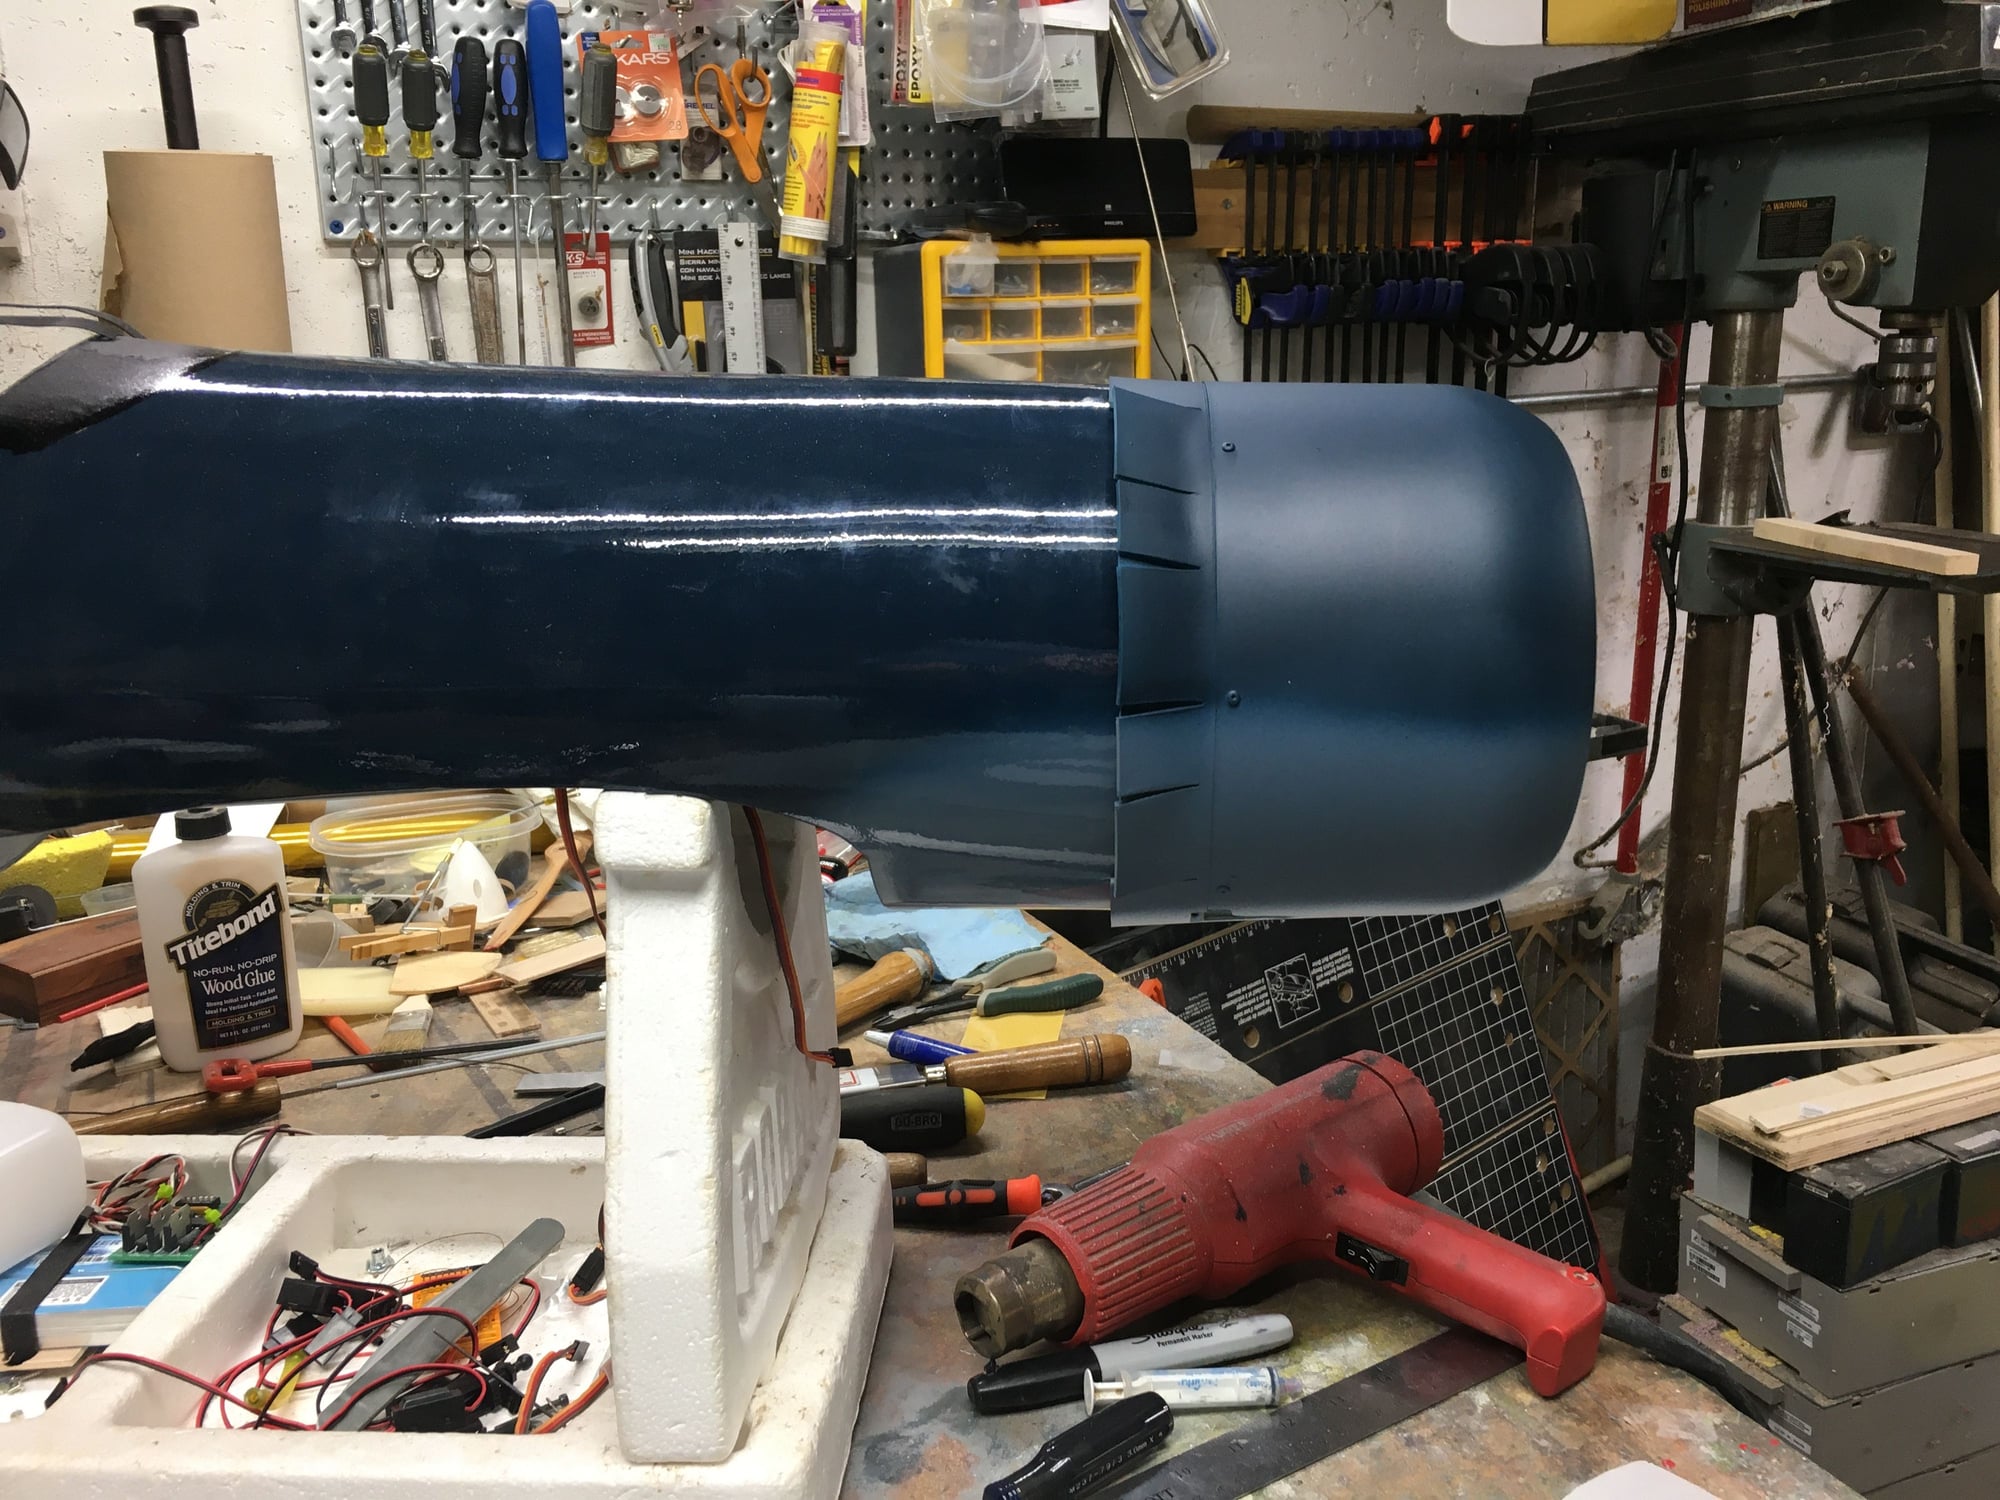
01-24-2021, 03:13 AM
Senior Member
I set up the ailerons and flaps on the Rascal 110 yesterday, I opted to not use a reversing Y harness for the left flap. The mfr set the servo mounts up so you turn the mount around, then flip the servo over and still have the servo arm centered in the arm slot. That places one servo arm 2" further outboard than the other. The ailerons are pre-drilled to place the control horn in either position. I programmed the DX 7 for a nice slow flap movement.
I used Spektrum DS 821servos on the ailerons and Hobbico CS 64's on the flaps. I was surprised at how quiet the CS 64's are.
I used Spektrum DS 821servos on the ailerons and Hobbico CS 64's on the flaps. I was surprised at how quiet the CS 64's are.
Last edited by 1200SportsterRider; 01-24-2021 at 03:35 AM. Reason: Add content.
01-25-2021, 03:46 AM
Senior Member
Thanks, pictures coming up right after the Urologist visit/consultation.
I made my own control rods from Sullivan 4-40 rods and Golden Clevis's, threaded on only one end and a Solder link on the other. The supplied rods were cut to length and threaded on both ends but loose and sloppy.
I made my own control rods from Sullivan 4-40 rods and Golden Clevis's, threaded on only one end and a Solder link on the other. The supplied rods were cut to length and threaded on both ends but loose and sloppy.