


Road trips: 2024
 07-08-2024, 12:59 PM
#51

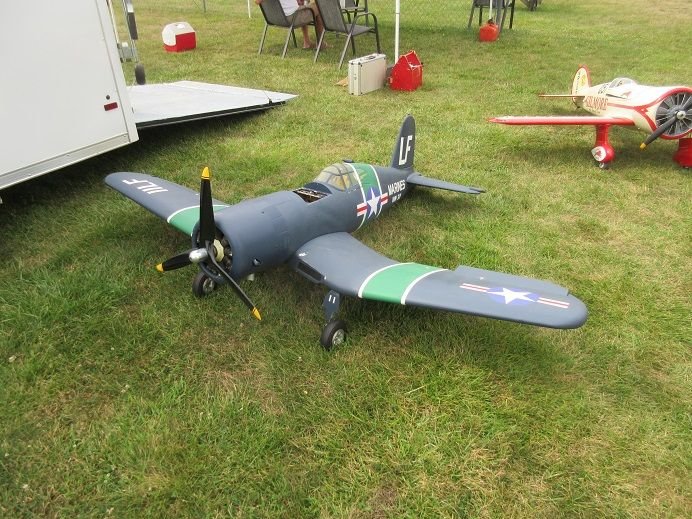
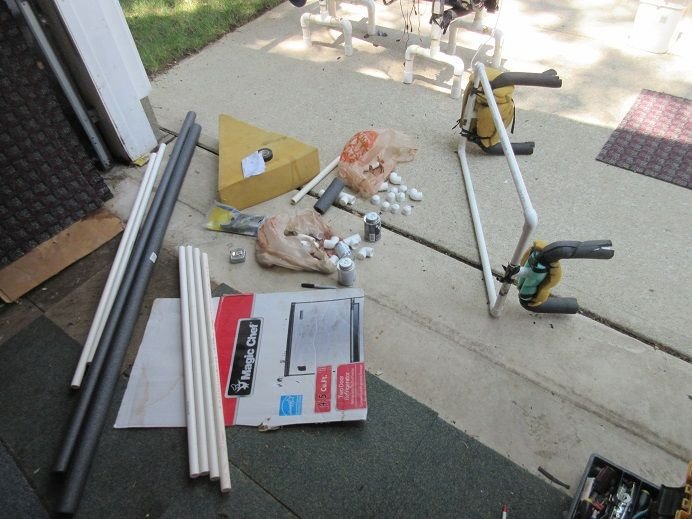
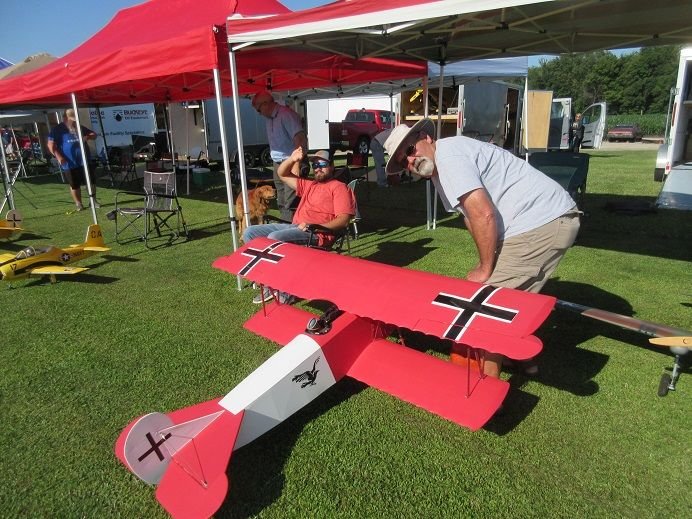
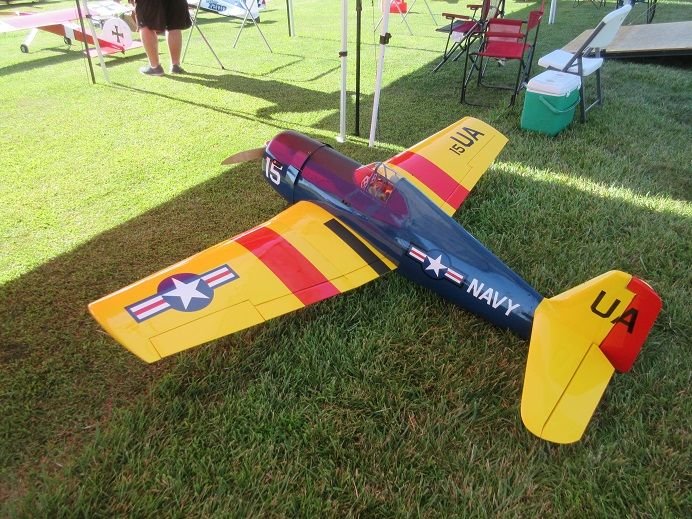
PM the P-40, Zero and Gilmore.
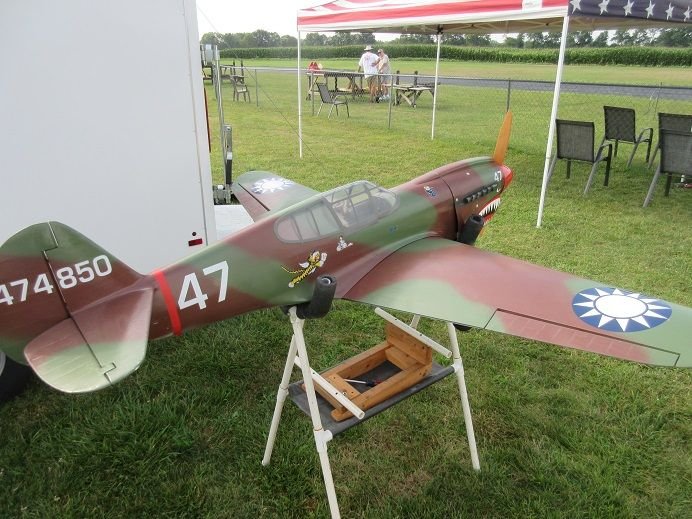
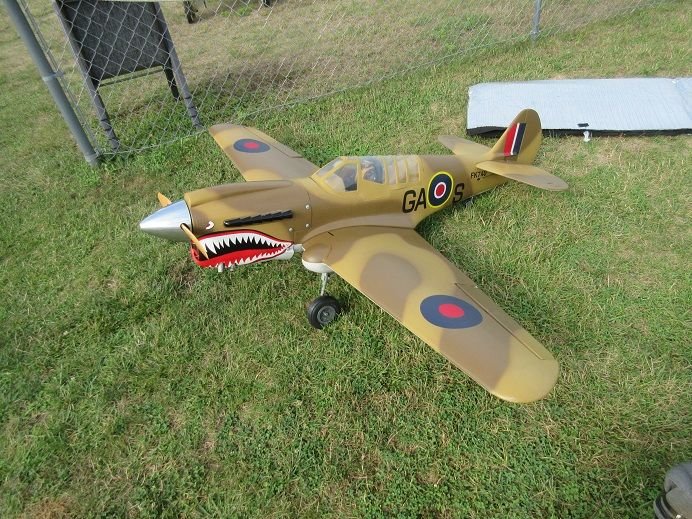
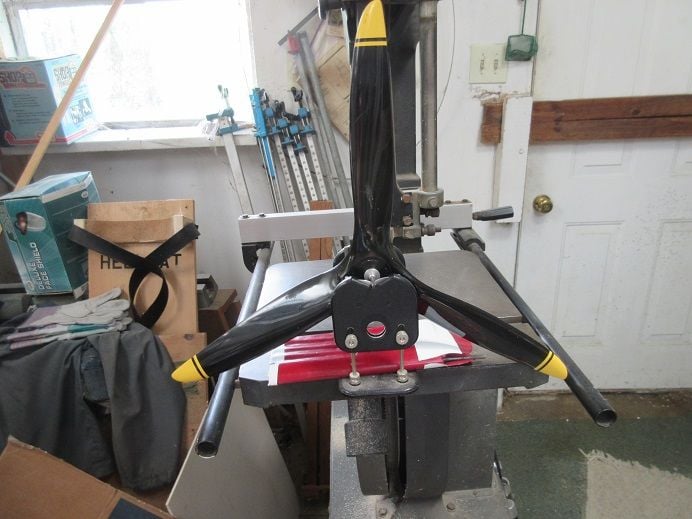
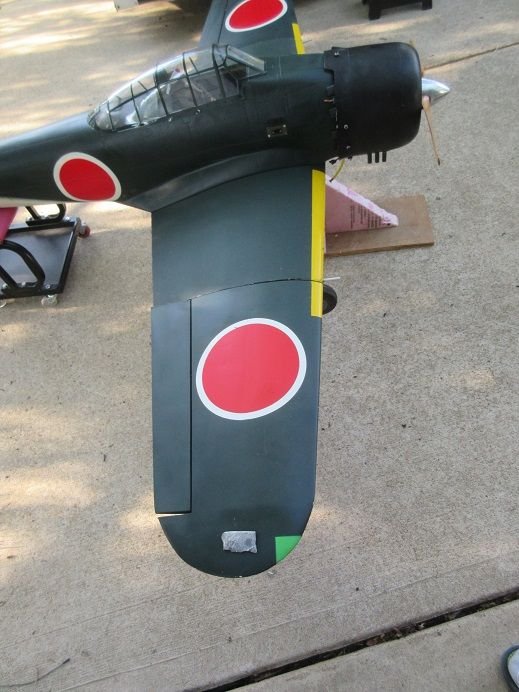
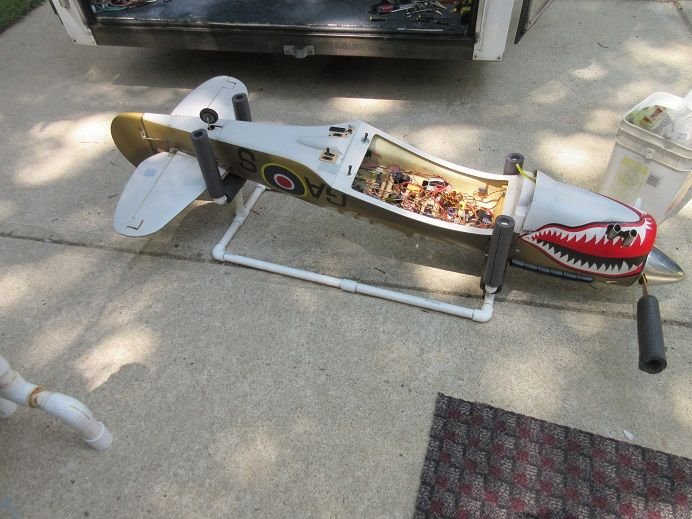
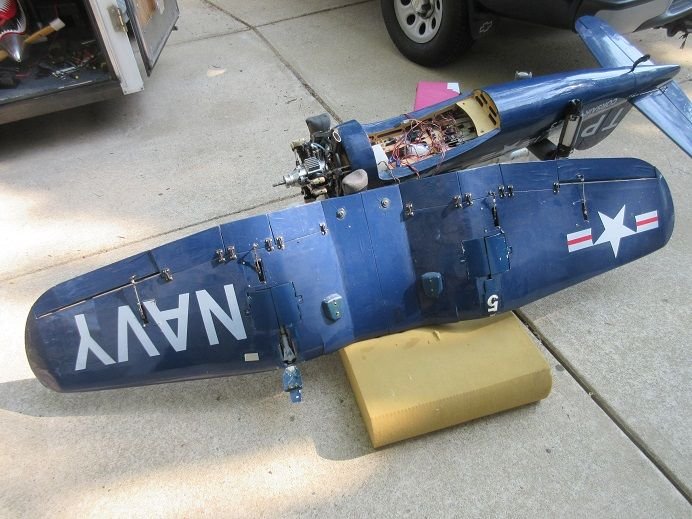
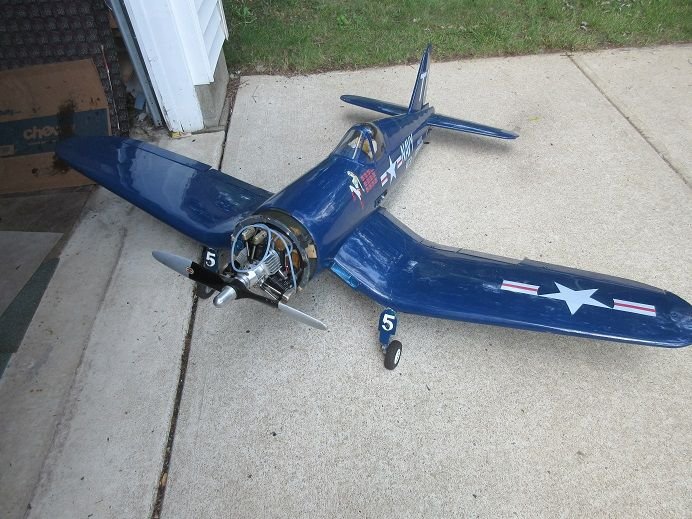
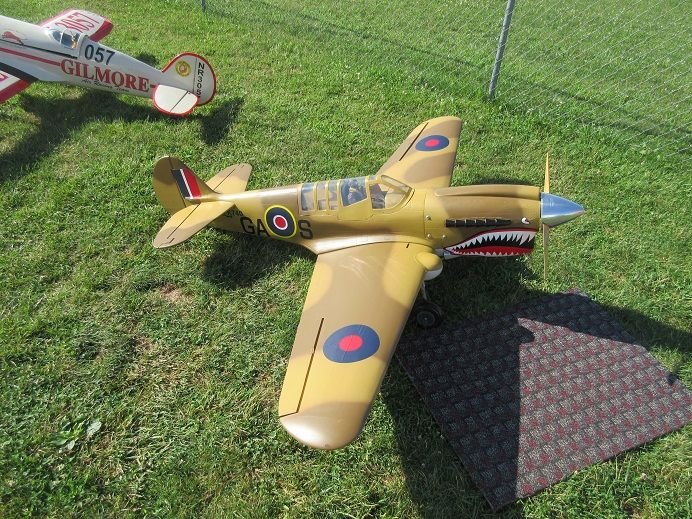
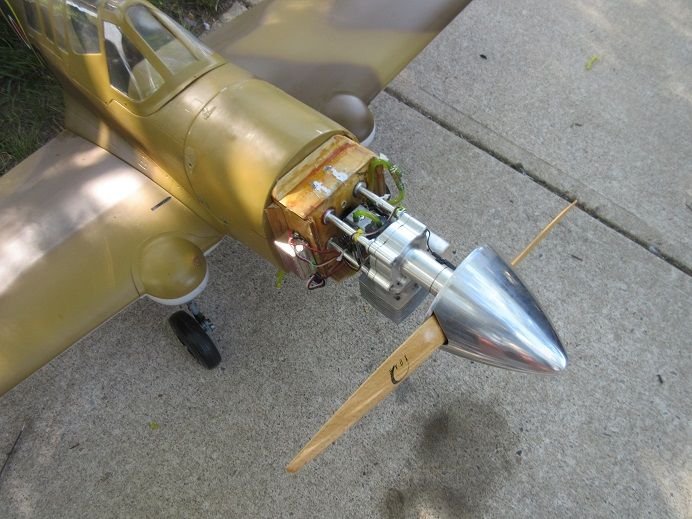
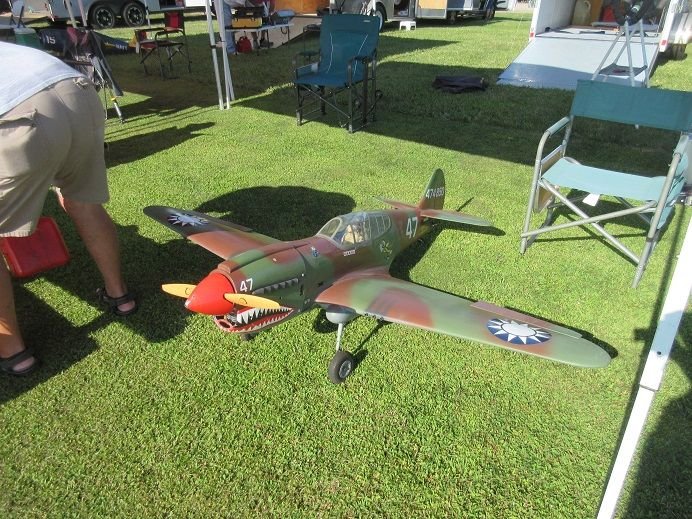
Skyshark 82" P-40.
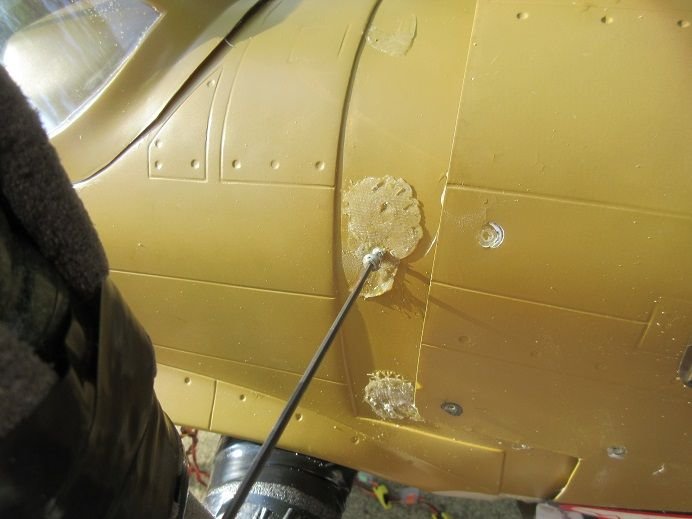
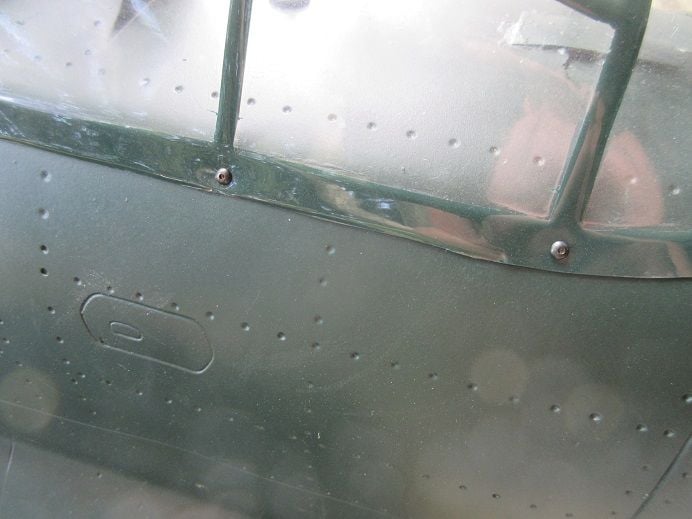
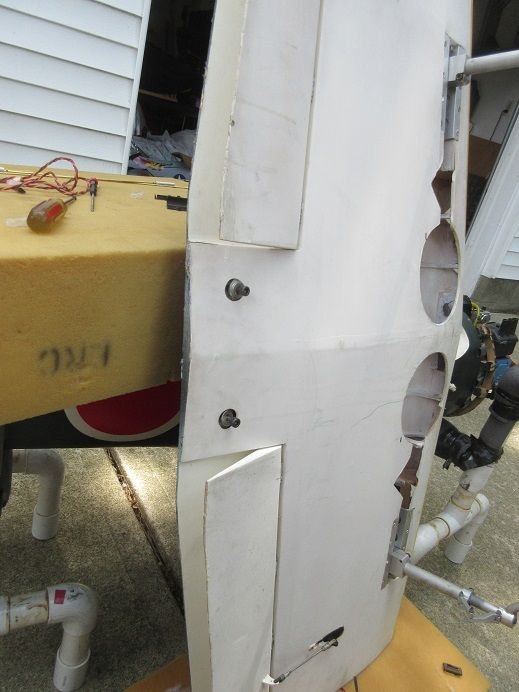
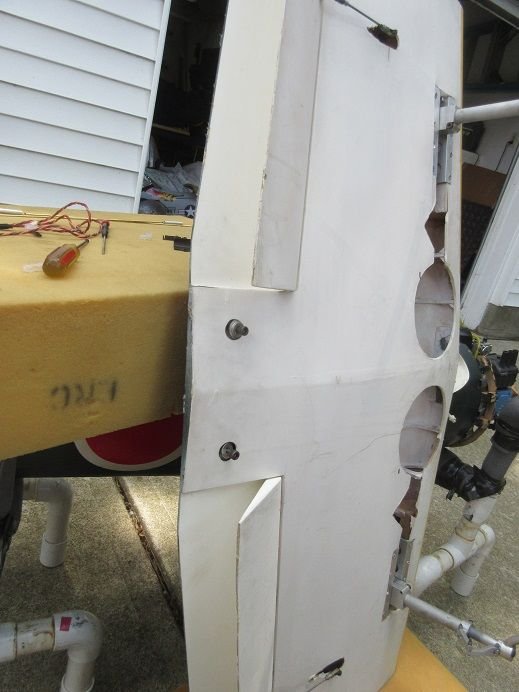
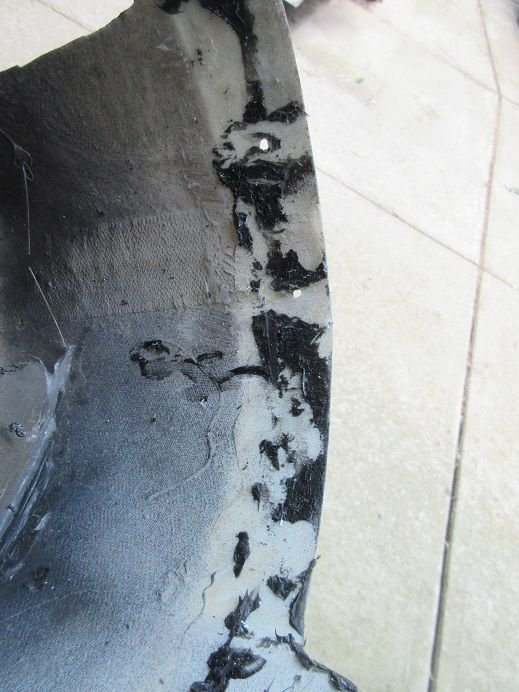
The right side of the cowl screw holes got enlarged during flight so the holes were glassed.
Some 'finishing resin' was, also, inserted in each screw hole in the fuse for the cowl.
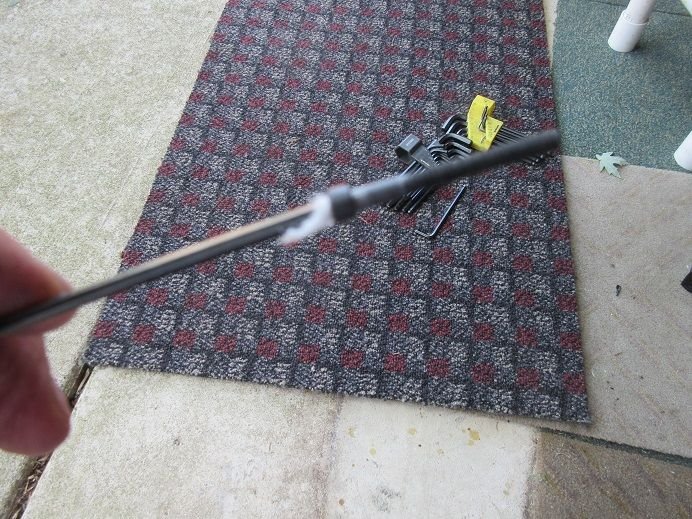
They were drilled and a hex head servo screw was used to tap the holes for the small button head screws.
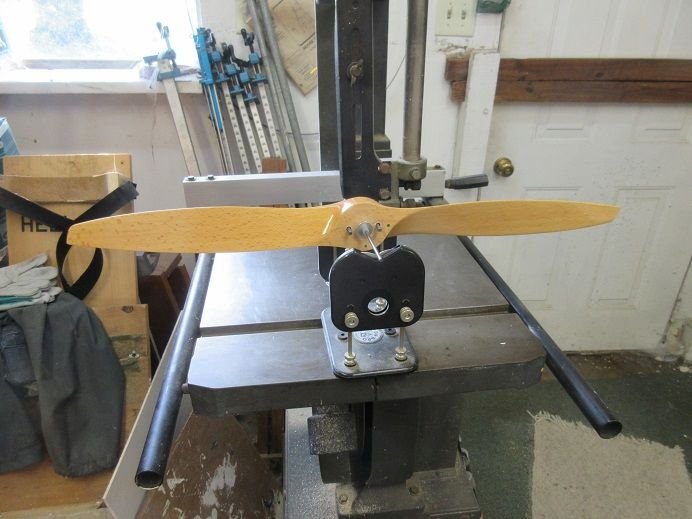
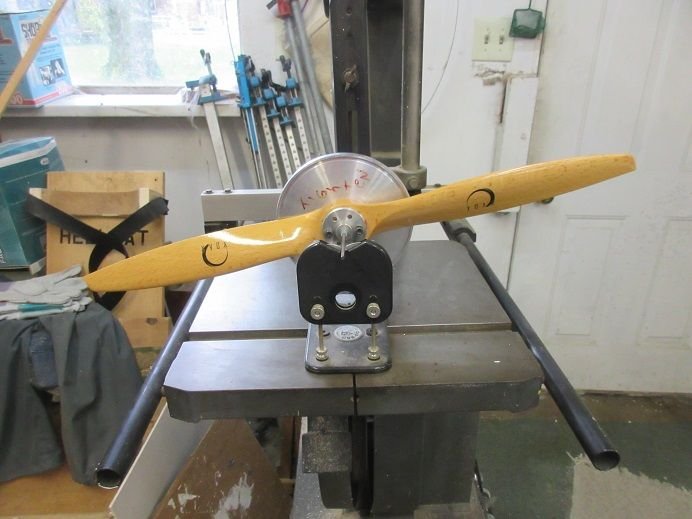
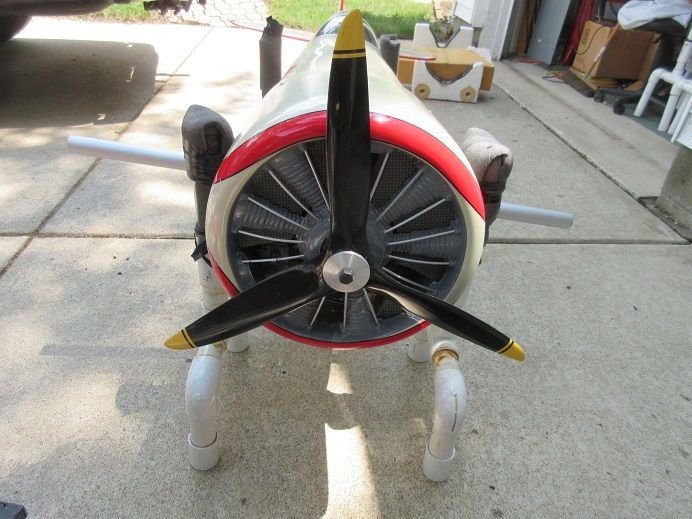
Prop needed a couple light sprays of clear lacquer for 'balancing'.
All the weight was removed from the front of the cowl and the plane was rebalanced.
I took the center piece of foam out of my 'balance stand' as I think it will give a more accurate 'reading' for this plane.
Slightly nose heavy with gear down.
Slightly tail heavy with gear up.
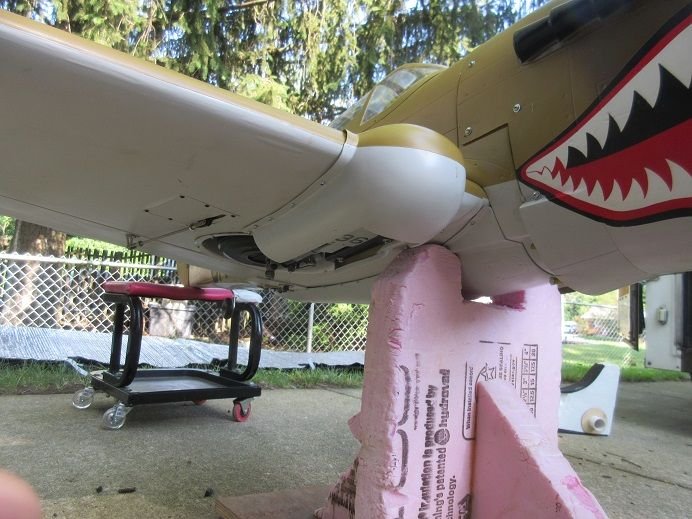
'good to go' for the next flight!
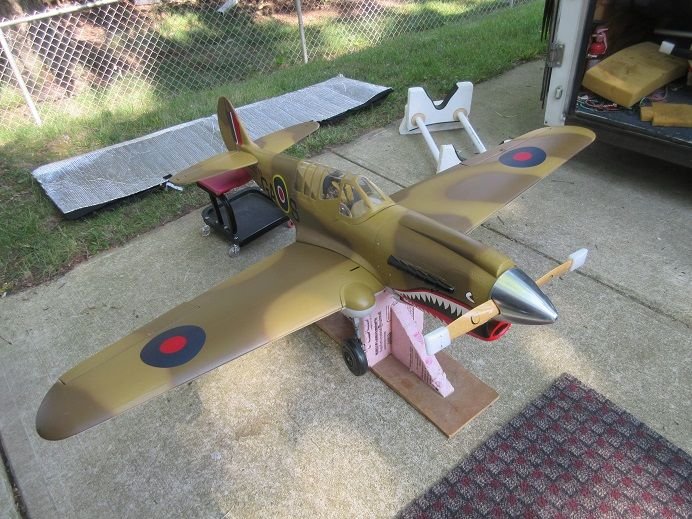
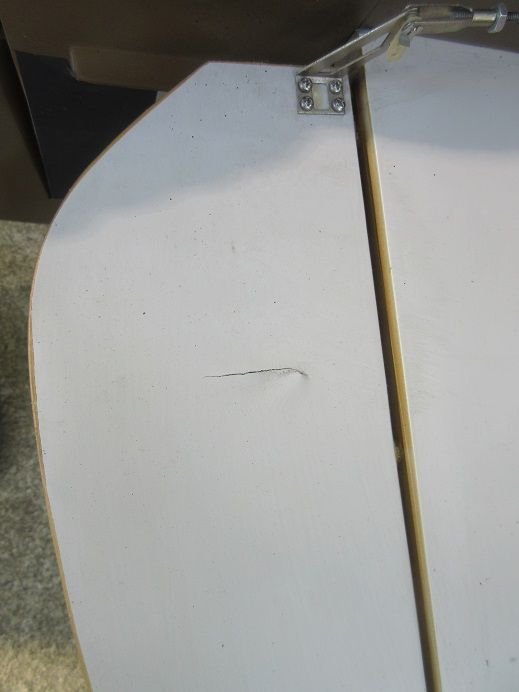
I used some light grey Ultracote to repair a small tear in the elevator that I forgot to repair as it was damaged when I acquired the plane.
===========
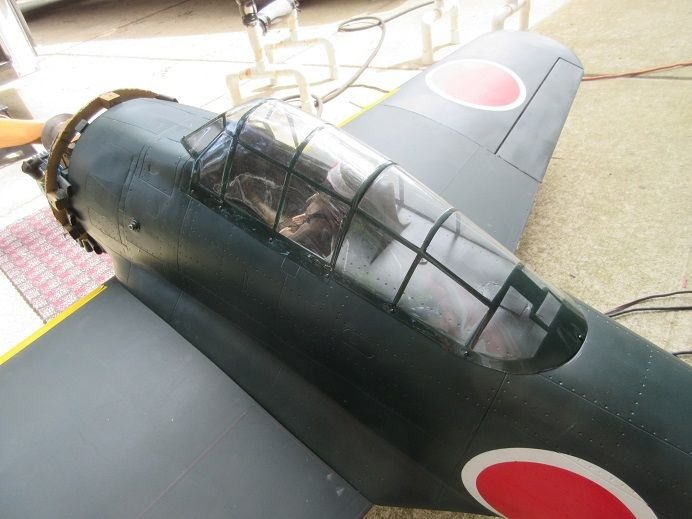
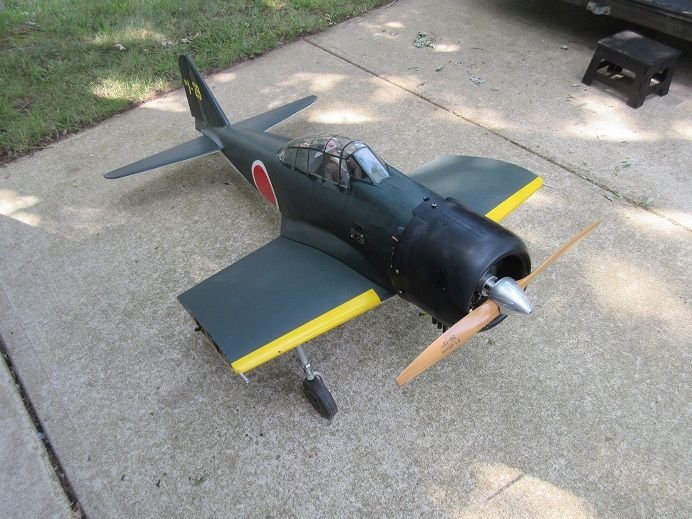
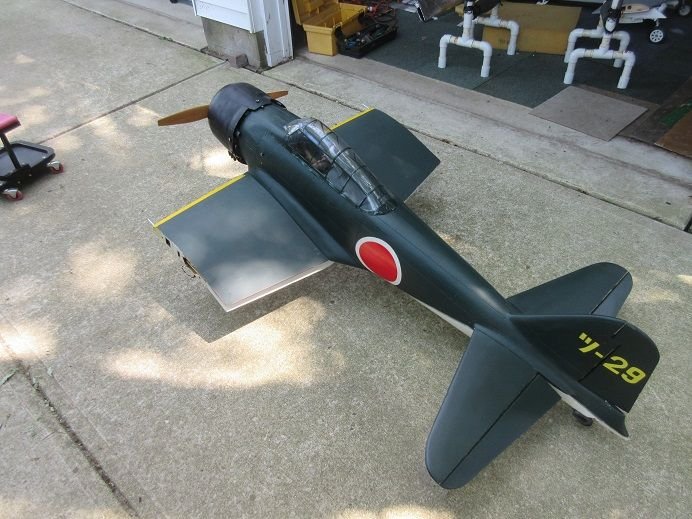
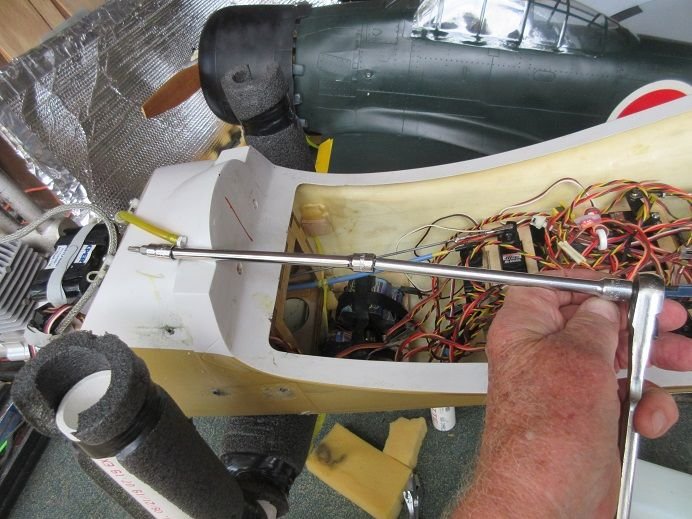
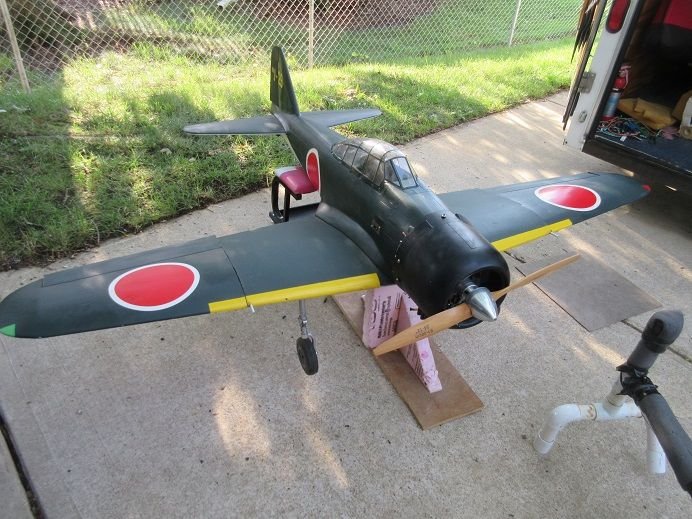
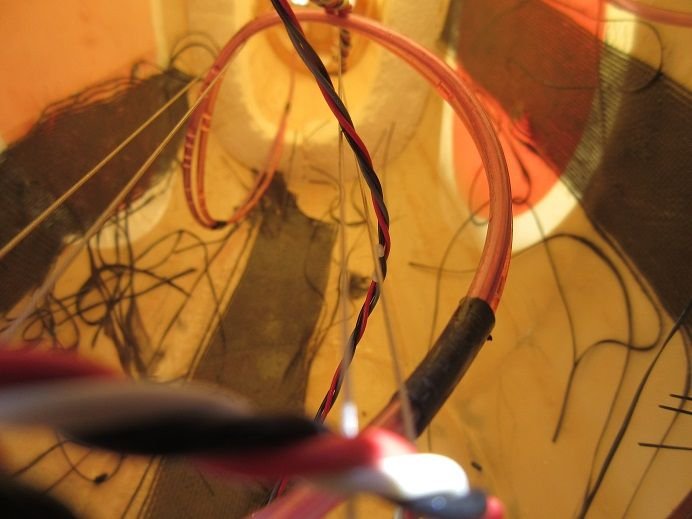
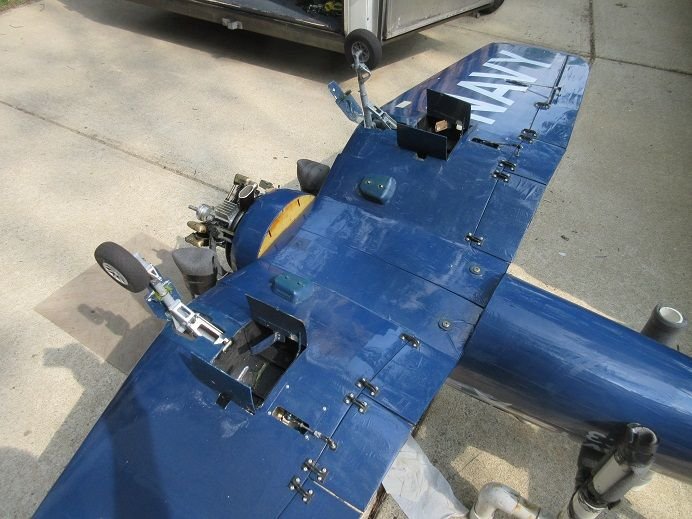
CY A6M Zero PM.
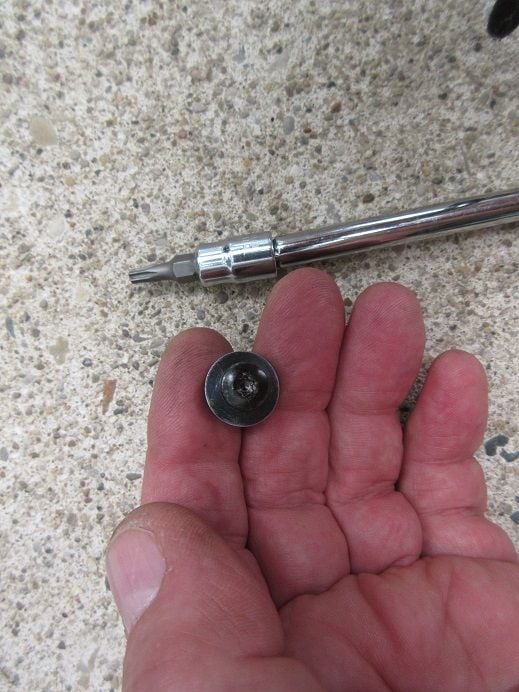
Used some small button head screws to secure the canopy to the fuse.
Drilled and used a hex head servo screw to tap the hole for the small button head screws.
The small button head screws 'strip out' if not tapped.
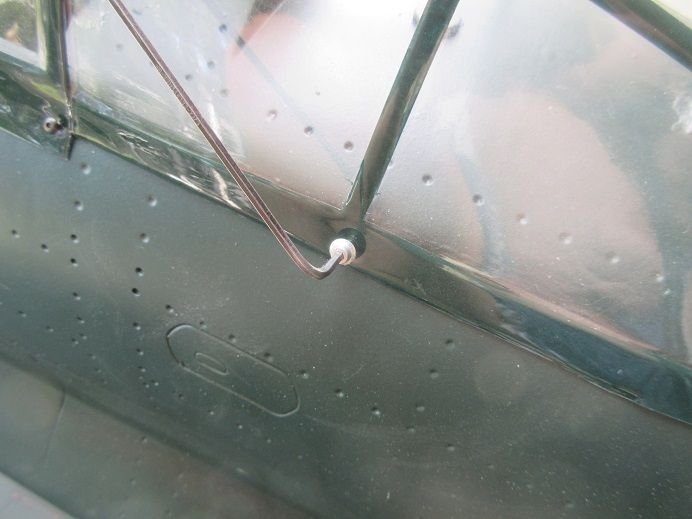
One screw by each 'vertical support'.
One flap servo was defective so both replaced with HS-645 MS.
Access is via the end of the wing.
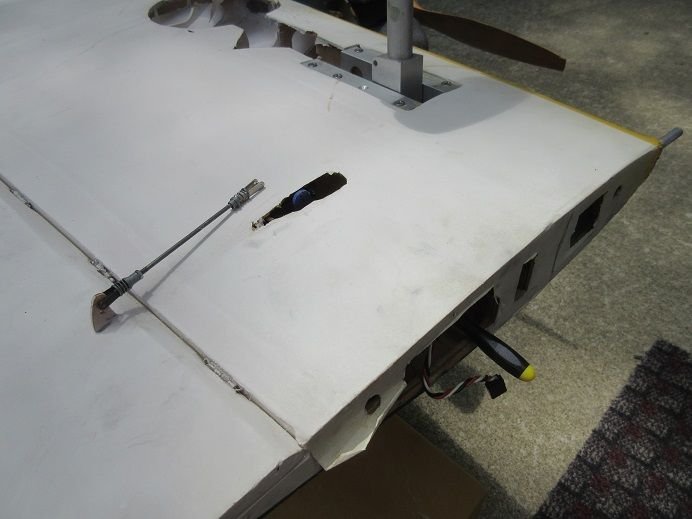
Old servo wire was too short so an extension was added to easily pull the wires through the wing.
Used longer servo arms to clear the surface of the wing.

Flaps setup for mid and full extension.
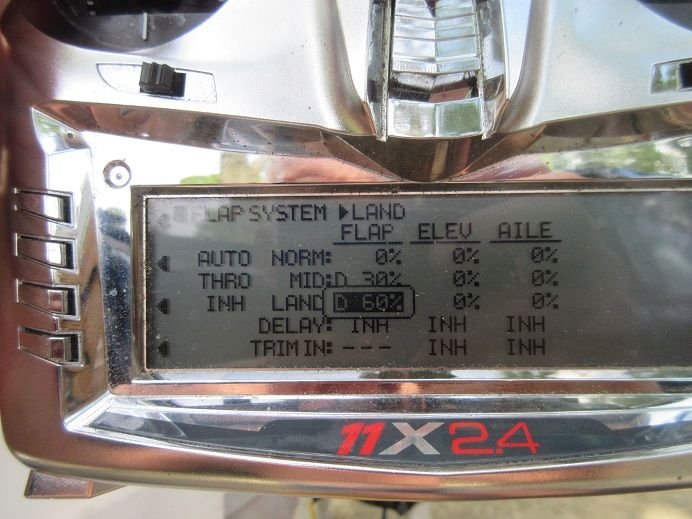
Mid.
Full.
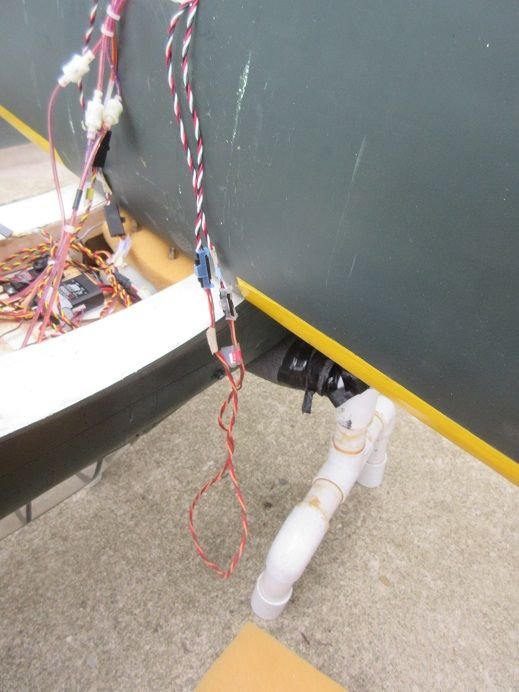
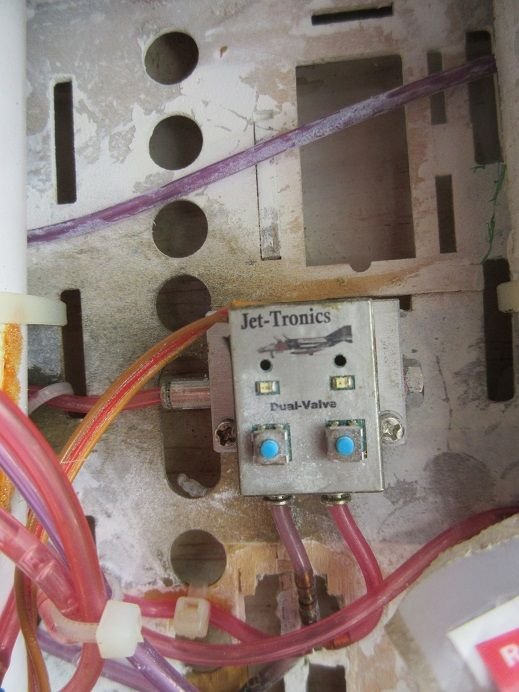
Original owner used this air valve.
I'm used to Robart's or UP's sold by Darrell.
This one works well though.
==================
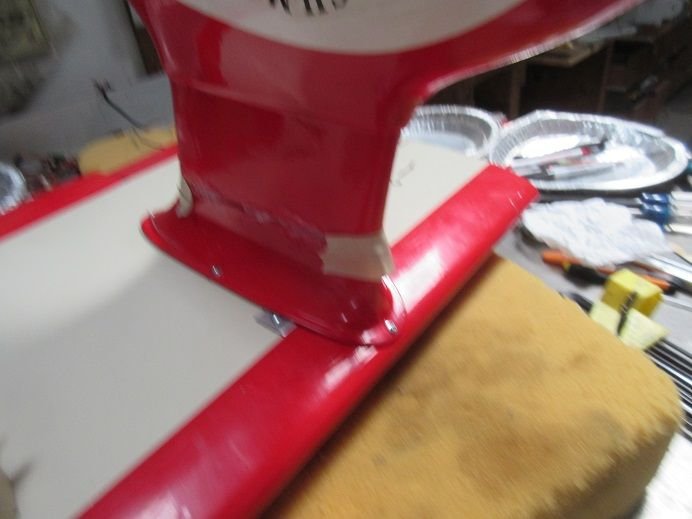
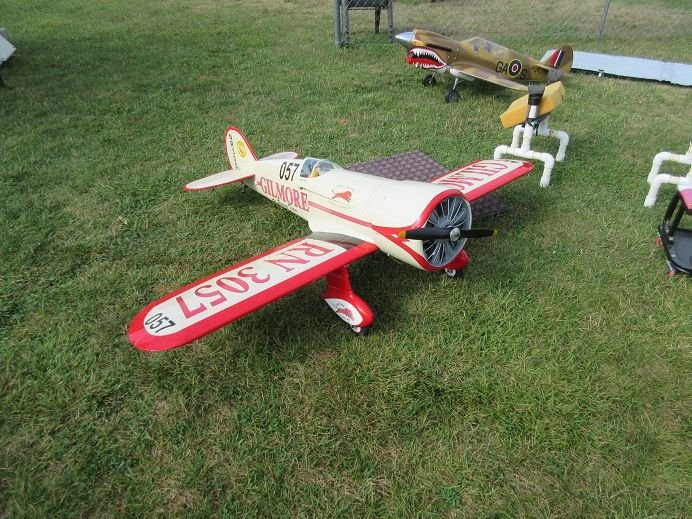
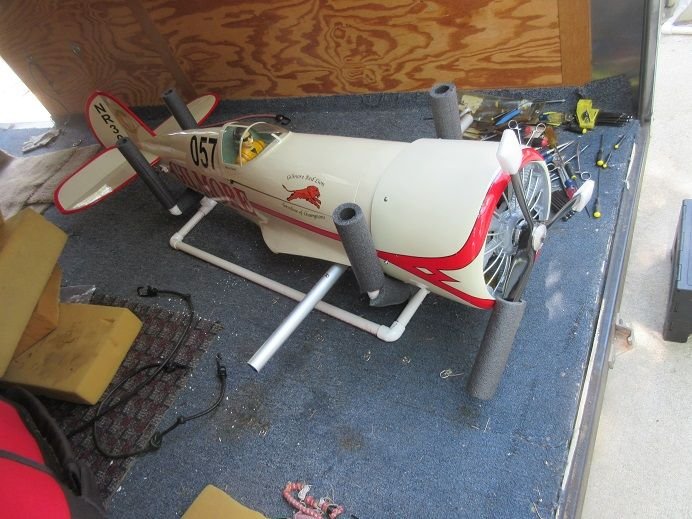
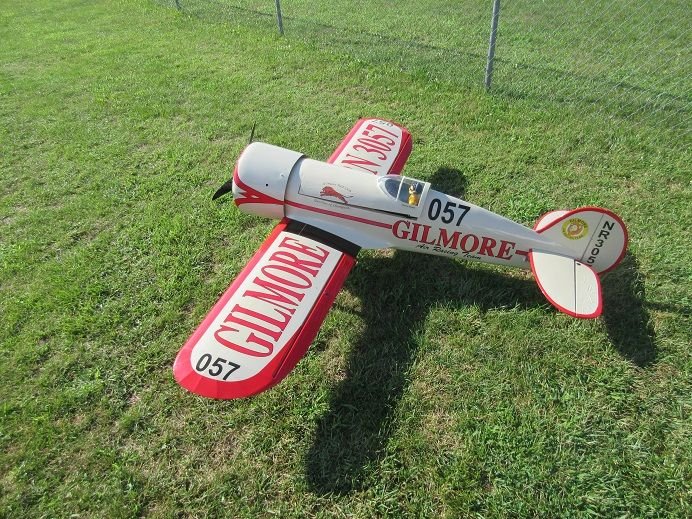
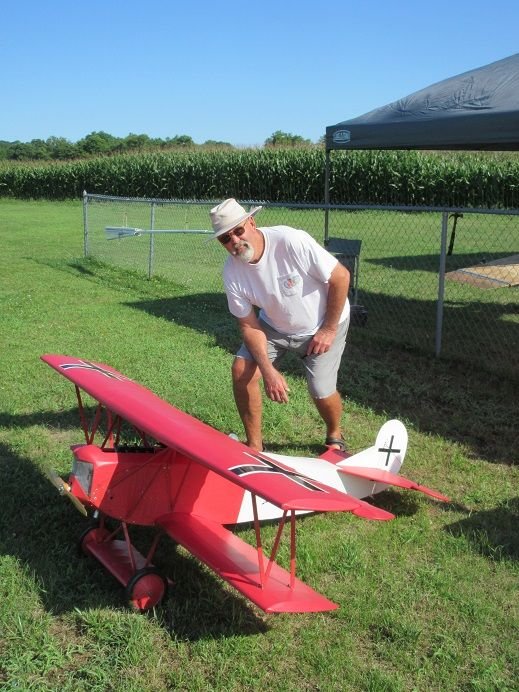
Black Horse 84.5 Gilmore racer.
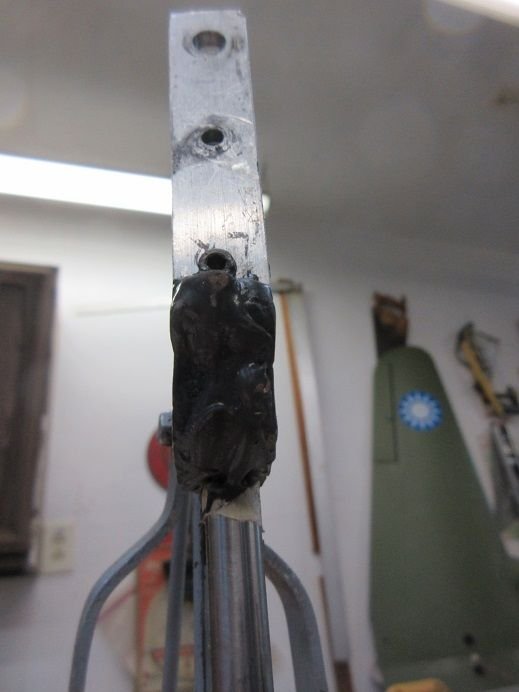
One gear got a small 'bend' after landing.
The section that holds the wheel bent.
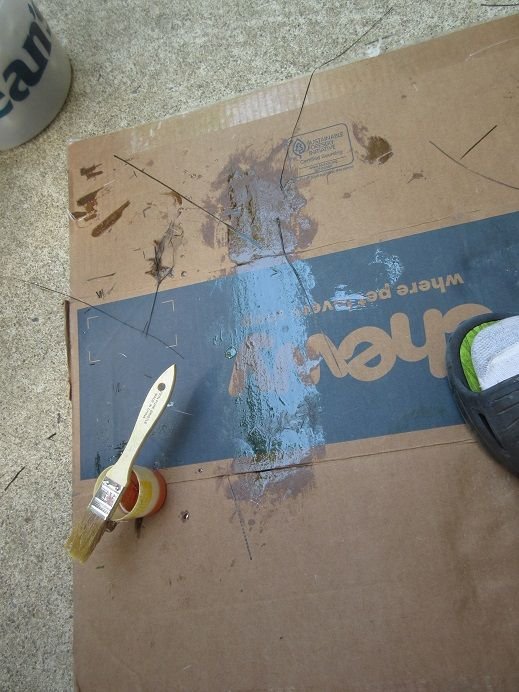
After 'straightening' the bend I roughed up the curved surface and applied a 'ton' of JB weld to that area.
I have no 'idea' if this will work but I'll try something new.
The original Gilmore had 'wires' to the gear but there are no 'hard points' on the wing and I don't want to 'remove the covering'
plus those could 'rip out' and cause more severe damage.
All 'better'.
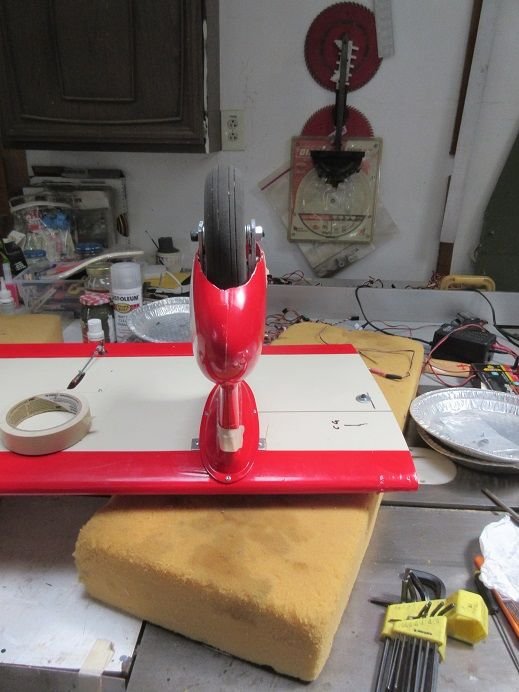
Cutting the 3 dabs of caulk on each side 'worked' on removing the 'pants' for PM.
Caulk re-applied.
Skyshark 82" P-40.
The right side of the cowl screw holes got enlarged during flight so the holes were glassed.
Some 'finishing resin' was, also, inserted in each screw hole in the fuse for the cowl.
They were drilled and a hex head servo screw was used to tap the holes for the small button head screws.
Prop needed a couple light sprays of clear lacquer for 'balancing'.
All the weight was removed from the front of the cowl and the plane was rebalanced.
I took the center piece of foam out of my 'balance stand' as I think it will give a more accurate 'reading' for this plane.
Slightly nose heavy with gear down.
Slightly tail heavy with gear up.
'good to go' for the next flight!
I used some light grey Ultracote to repair a small tear in the elevator that I forgot to repair as it was damaged when I acquired the plane.
===========
CY A6M Zero PM.
Used some small button head screws to secure the canopy to the fuse.
Drilled and used a hex head servo screw to tap the hole for the small button head screws.
The small button head screws 'strip out' if not tapped.
One screw by each 'vertical support'.
One flap servo was defective so both replaced with HS-645 MS.
Access is via the end of the wing.
Old servo wire was too short so an extension was added to easily pull the wires through the wing.
Used longer servo arms to clear the surface of the wing.
Flaps setup for mid and full extension.
Mid.
Full.
Original owner used this air valve.
I'm used to Robart's or UP's sold by Darrell.
This one works well though.
==================
Black Horse 84.5 Gilmore racer.
One gear got a small 'bend' after landing.
The section that holds the wheel bent.
After 'straightening' the bend I roughed up the curved surface and applied a 'ton' of JB weld to that area.
I have no 'idea' if this will work but I'll try something new.
The original Gilmore had 'wires' to the gear but there are no 'hard points' on the wing and I don't want to 'remove the covering'
plus those could 'rip out' and cause more severe damage.
All 'better'.
Cutting the 3 dabs of caulk on each side 'worked' on removing the 'pants' for PM.
Caulk re-applied.

 07-10-2024, 03:21 PM
#53
PM the Gilmore, P-40 and A6M Zero.
Gilmore.
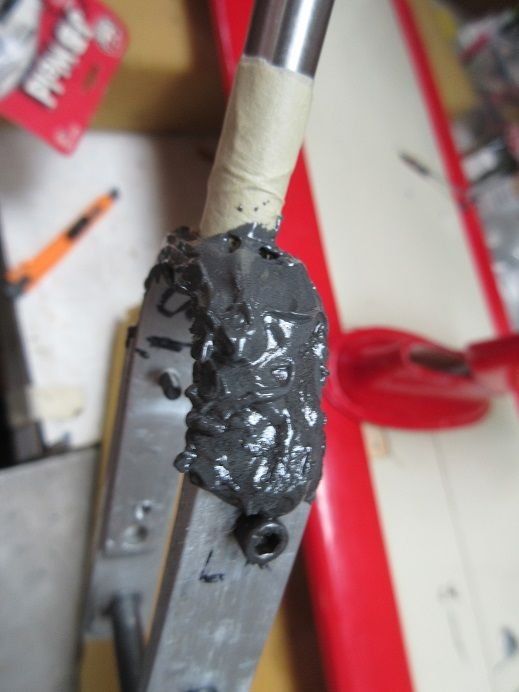
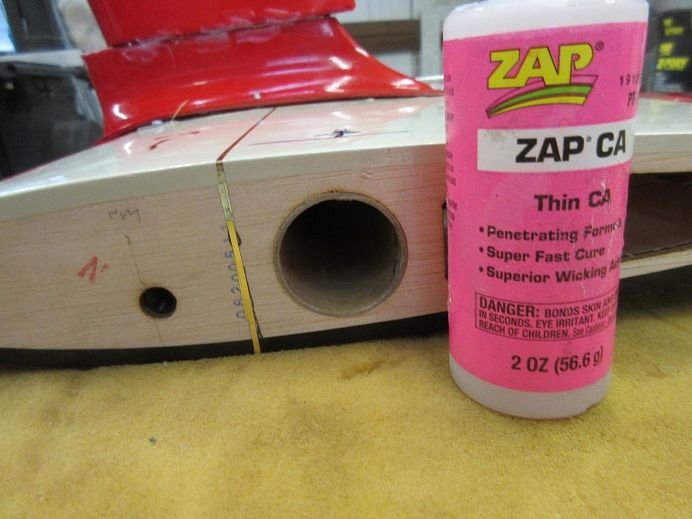
For some extra strength, I added some thin CA to the wing's balsa surface and the cardboard wing tube where the screws secure the wings to the fuse.
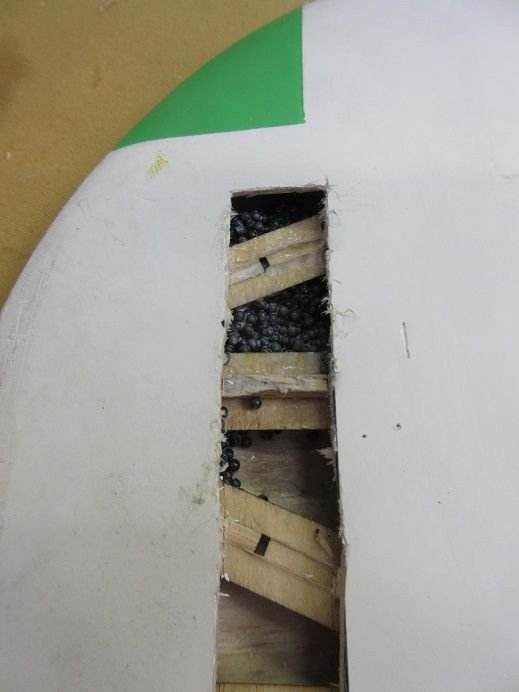
On my last landing the oleo on the left wing hit the 'pants' and damaged it.
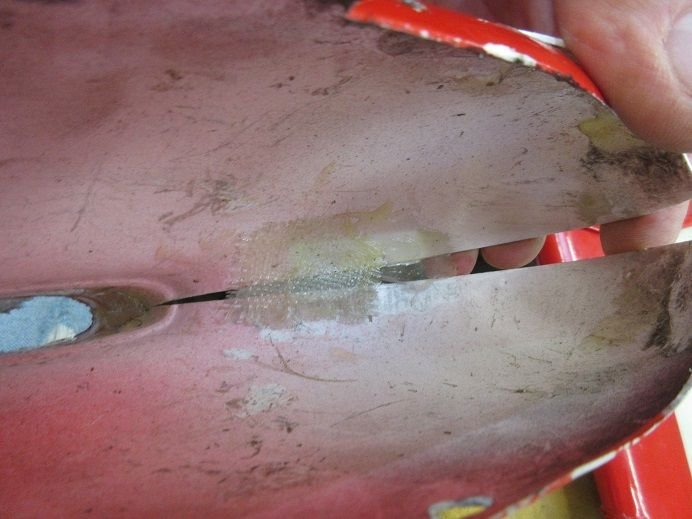
While the FG cloth and epoxy dried, I put a 'spacer' between the wheel opening to enlarge the hole hoping to prevent the axle nut and bolt from hitting the bottom of the 'pants'.
The JB weld seems to be 'working' although I put no side pressure on the plane during the landing.
Everything's fixed so clear caulked the bottom of the 'pants' to the top.
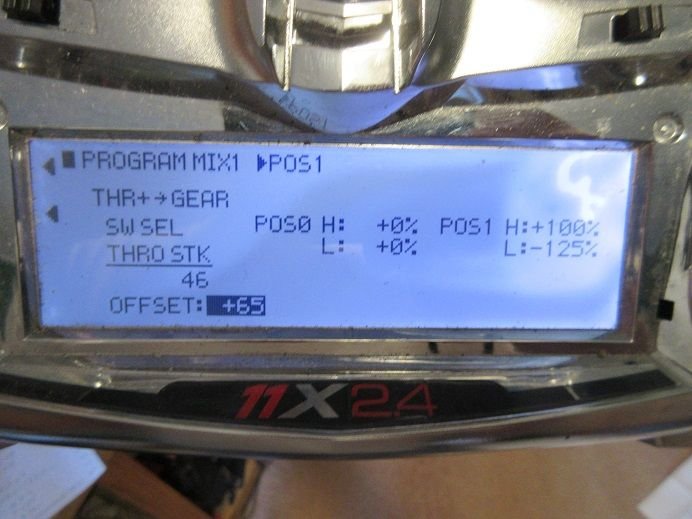
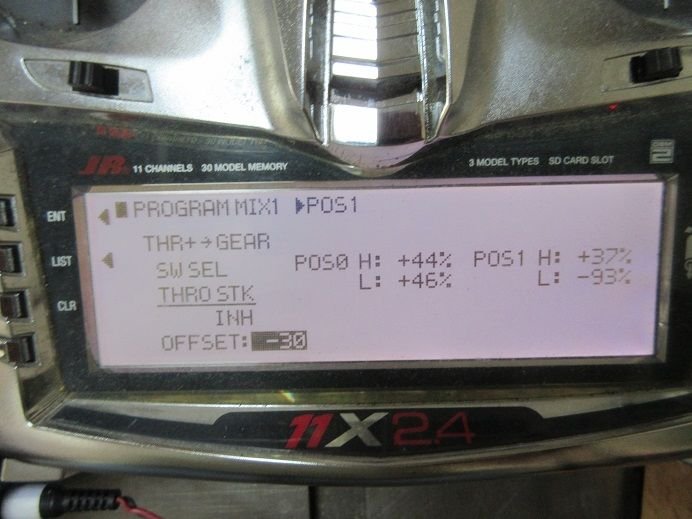
For 'smoke' these are the parameters that I've inputted into the 'mix'.
Will test tomorrow.
=================
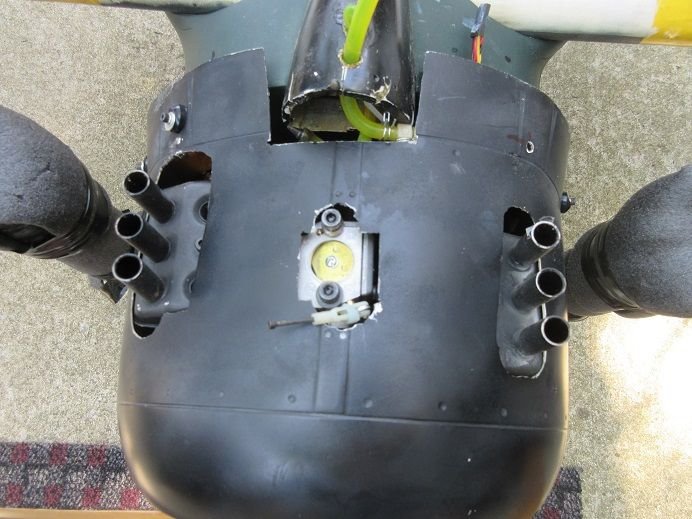
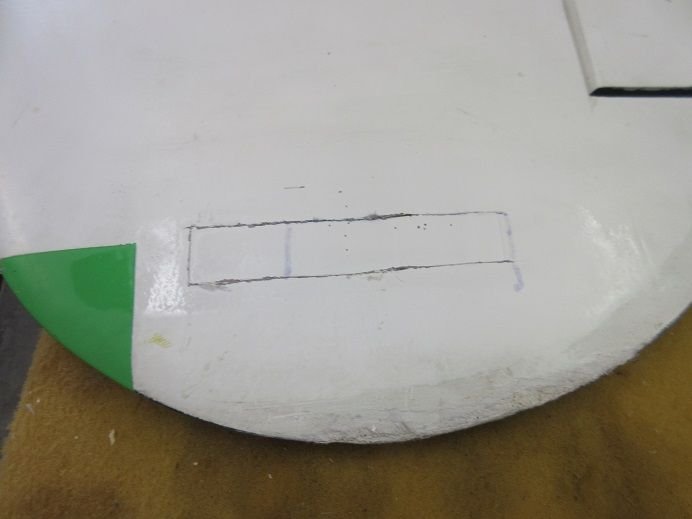
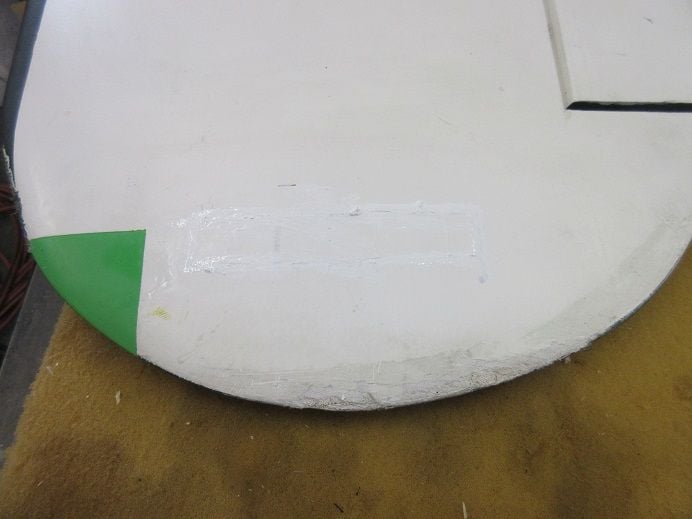
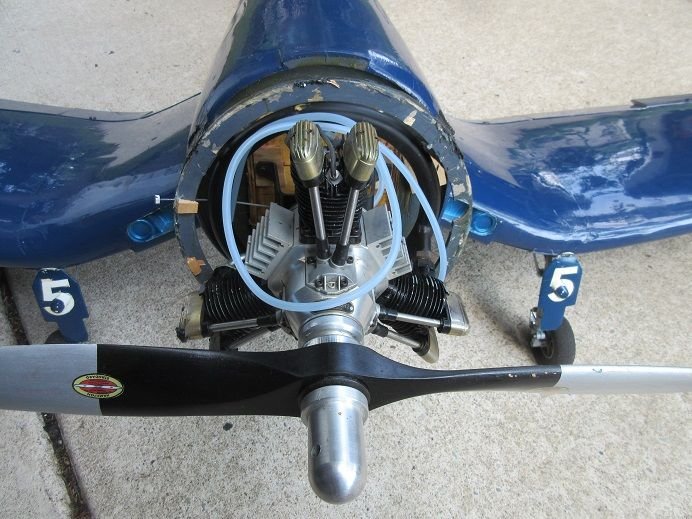
P-40.
The engine has vibration at low/idle RPM's and it enlarged the mounting holes in the cowl.
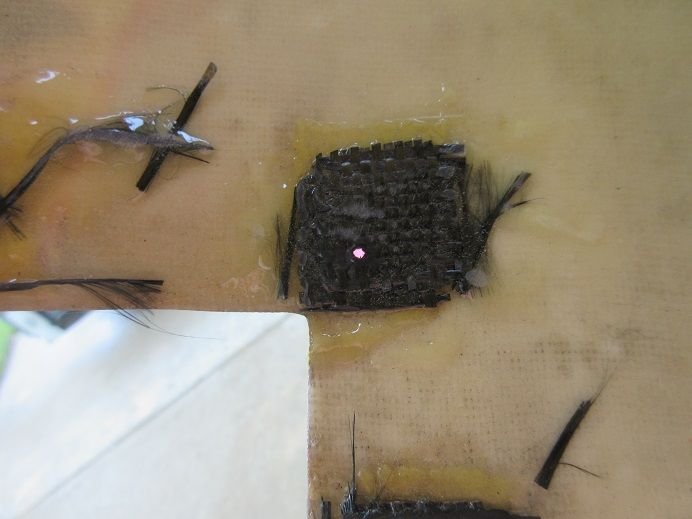
This time I used CF cloth and 'double layered' it .
Also put some CF cloth on each side of the fuse for some 'extra strength'.
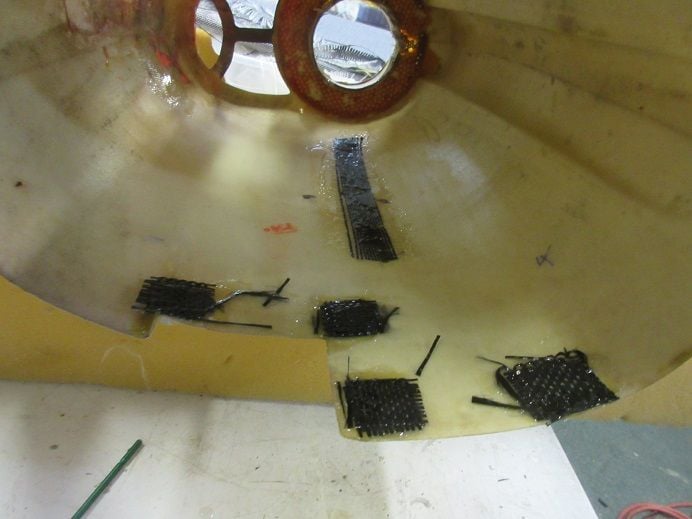
Still using the CF cloth that my brother gave me about 15 years ago!
He used it to build his experimental airplane.
For the cowl also used some rubber based washers to prevent 'hole enlargement'.
Double checked the prop with the spinner base and all's 'good'.
================
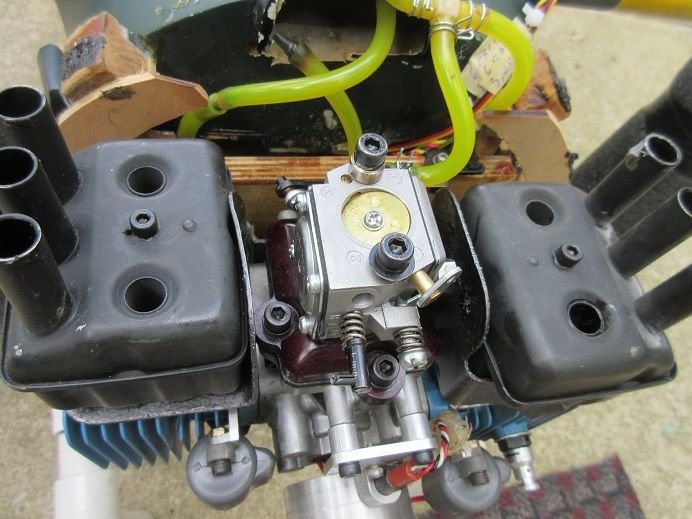
A6M Zero.
Replacement carb that has a choke was installed.
The engine test was good.
I have to manually set the choke but it's a lot better than squirting fuel into the carb several times!
Will explore trying to attach a servo to the choke.
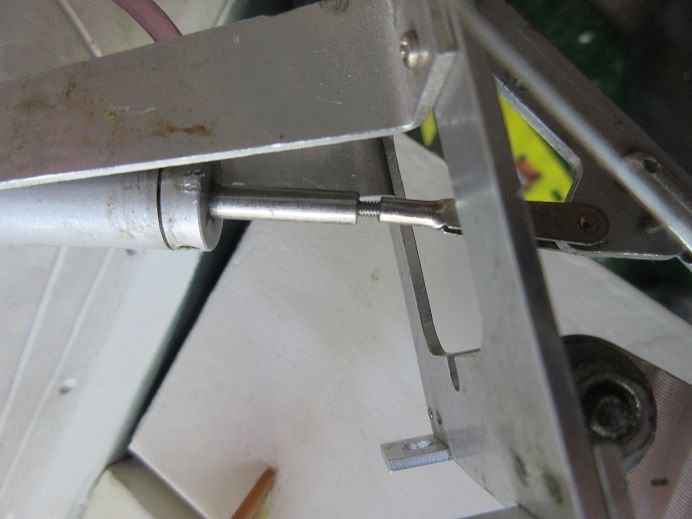
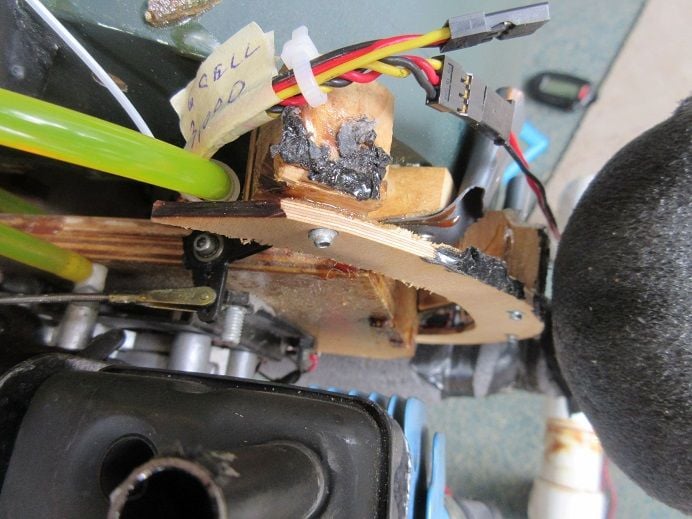
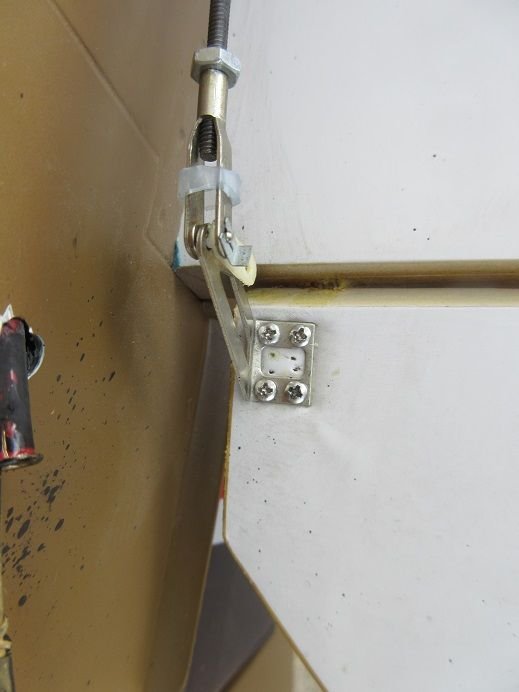
Removed the tail gear as it won't lock in the 'down' position when the tail weight is placed upon it.
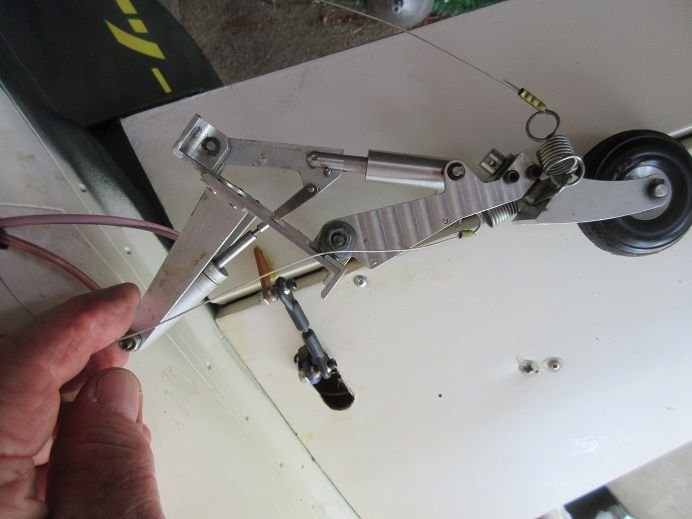
I turned the clevis out several 'turns' so hoping that will fix it.
Paper towels make it easy to screw in hex head bolts in small access areas.
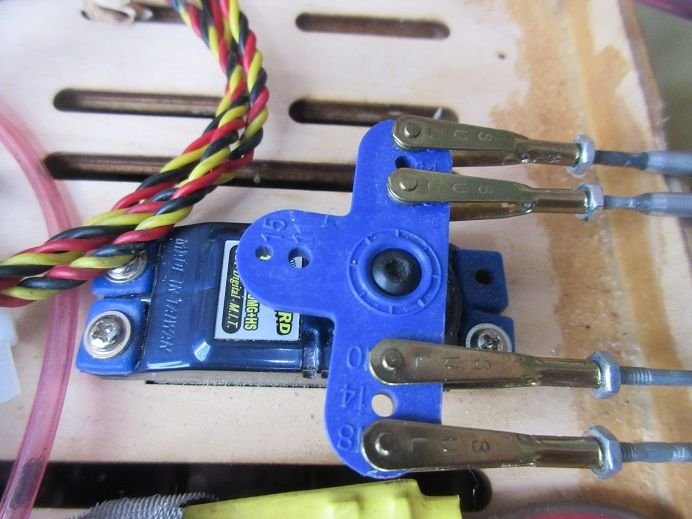
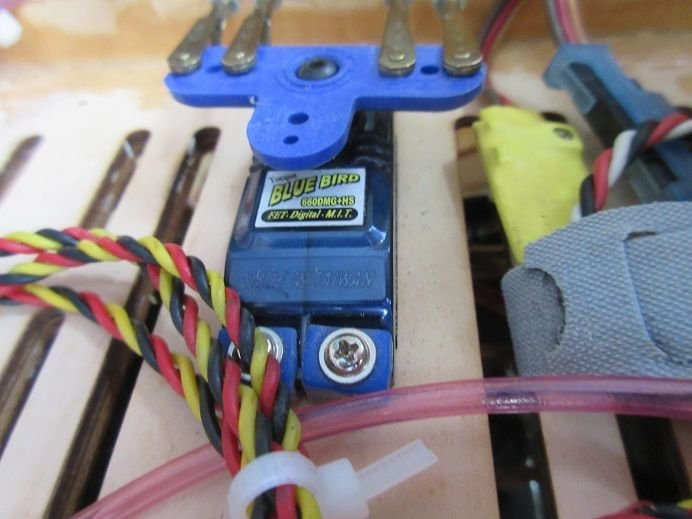
Never heard of this servo made by 'bluebird' which is used for the rudder/tail gear.
I do like that they use hex head servo arm screws.
Glued and screwed the two lower cowl mounts which the previous owner 'missed'.
Gilmore.
For some extra strength, I added some thin CA to the wing's balsa surface and the cardboard wing tube where the screws secure the wings to the fuse.
On my last landing the oleo on the left wing hit the 'pants' and damaged it.
While the FG cloth and epoxy dried, I put a 'spacer' between the wheel opening to enlarge the hole hoping to prevent the axle nut and bolt from hitting the bottom of the 'pants'.
The JB weld seems to be 'working' although I put no side pressure on the plane during the landing.
Everything's fixed so clear caulked the bottom of the 'pants' to the top.
For 'smoke' these are the parameters that I've inputted into the 'mix'.
Will test tomorrow.
=================
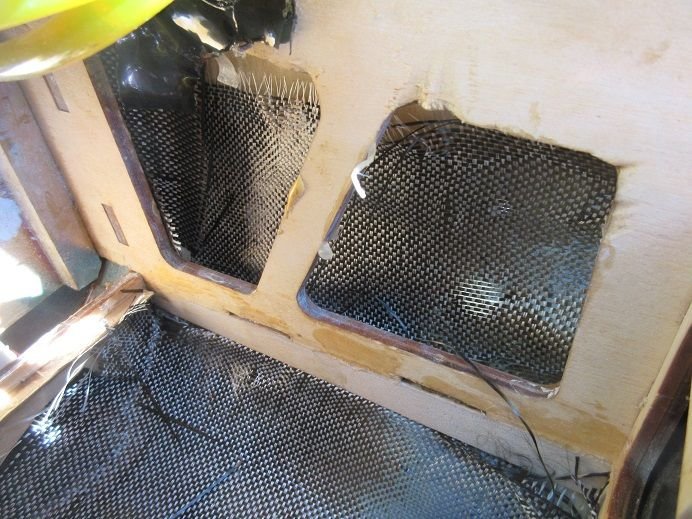
P-40.
The engine has vibration at low/idle RPM's and it enlarged the mounting holes in the cowl.
This time I used CF cloth and 'double layered' it .
Also put some CF cloth on each side of the fuse for some 'extra strength'.
Still using the CF cloth that my brother gave me about 15 years ago!
He used it to build his experimental airplane.
For the cowl also used some rubber based washers to prevent 'hole enlargement'.
Double checked the prop with the spinner base and all's 'good'.
================
A6M Zero.
Replacement carb that has a choke was installed.
The engine test was good.
I have to manually set the choke but it's a lot better than squirting fuel into the carb several times!
Will explore trying to attach a servo to the choke.
Removed the tail gear as it won't lock in the 'down' position when the tail weight is placed upon it.
I turned the clevis out several 'turns' so hoping that will fix it.
Paper towels make it easy to screw in hex head bolts in small access areas.
Never heard of this servo made by 'bluebird' which is used for the rudder/tail gear.
I do like that they use hex head servo arm screws.
Glued and screwed the two lower cowl mounts which the previous owner 'missed'.
Last edited by samparfitt; 07-10-2024 at 03:25 PM.
07-11-2024, 02:05 PM
#54
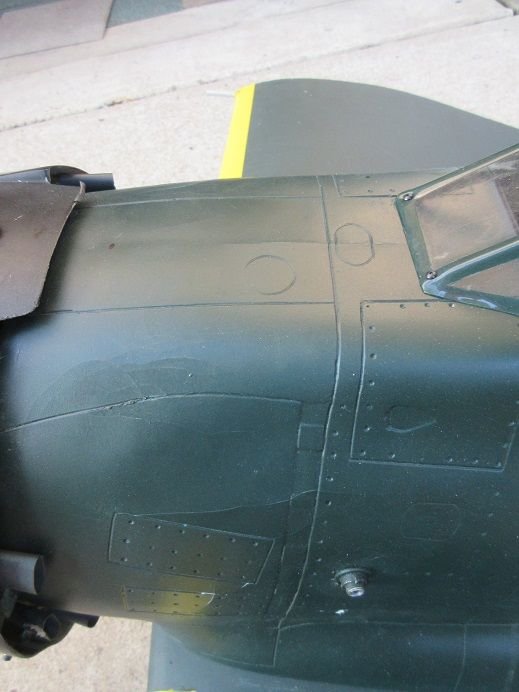
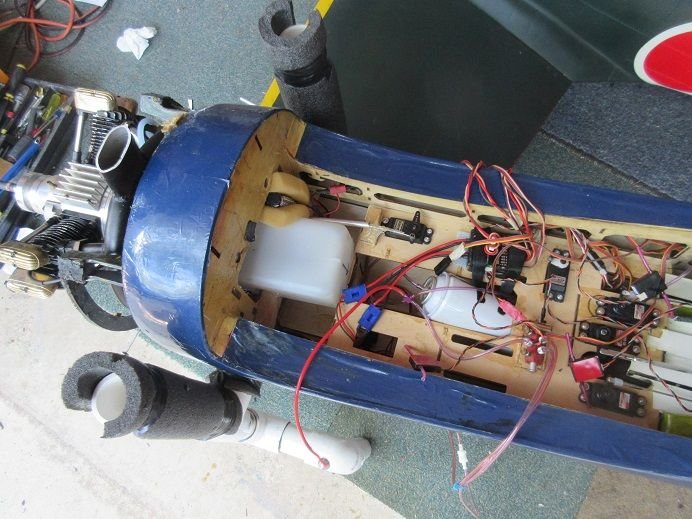
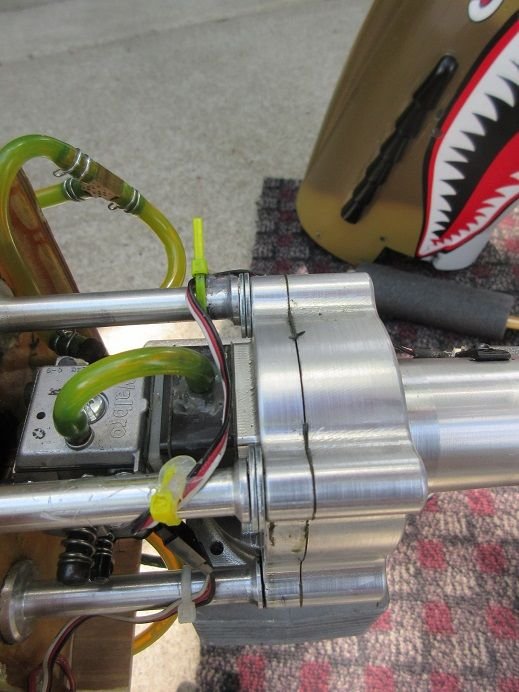
A6M Zero by CY 91.5" (cont).
A new record: took about 6 hours to install a cowl!
The cowl a few wood screws securing it to the fuse.
The holes were enlarged so I filled them in with toothpicks and finishing resin.
Then, I noticed that there were 'blind nuts' on all the cowl mounts.
So I pulled all the toothpicks out and cleaned out the holes with a drill bit.
I tried different size bolts to see what size 'blind nuts' were installed but nada.
I used a bolt to knock out one of the blind nuts while also breaking that mount.
Found that the 'blind nuts' takes 4/40 bolts.
I tapped all of them to insure no foreign material was in them and one other one was bad so 2 new blind nuts plus a mount was re-glued.
Finally, was able to place the cowl on the mounts but it wouldn't fit.
1) the cowl had a lot of black glue that had to be removed.
2) had to sand the cowl mount ring to reduce it's radius to match the cowl.
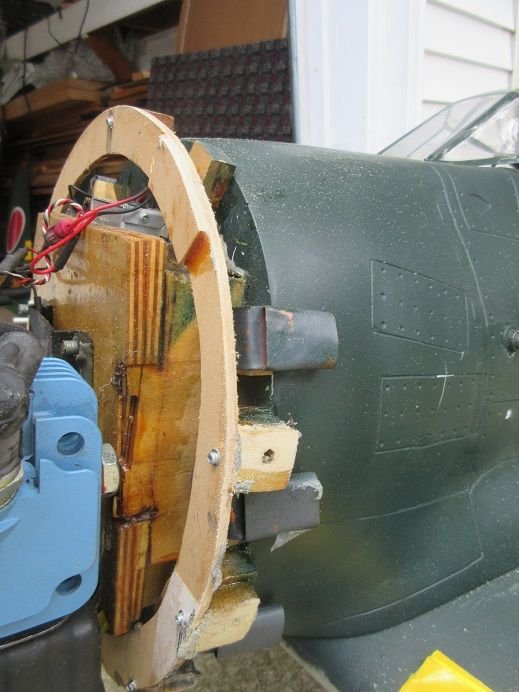
I was going to need some very long 4/40 bolts and was hoping they make such a small diameter bolt at least 1 1/4" long.
By luck my 'stash' had 2 packages of 4/40 X1 1/2" long.
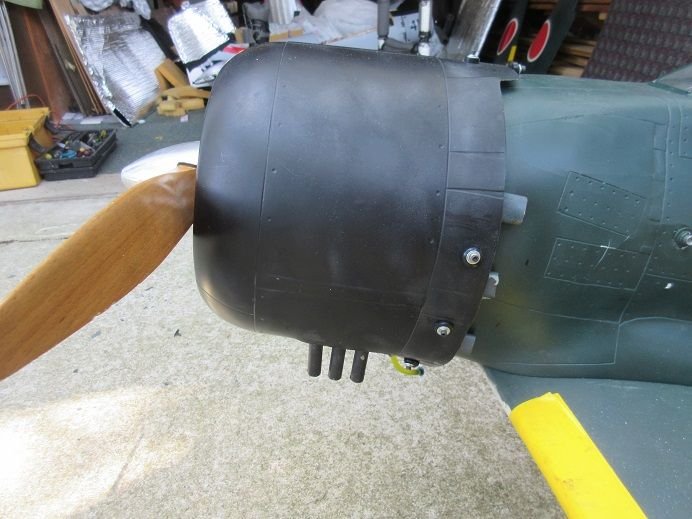
This cowl weighs over 3 pounds so it needs plenty of support at the mounts.
Fortunately, the previous owner added an aircraft ply 'ring' to support the cowl mounts.
I used some faucet washers to distribute the weight better on the cowl.
7 bolts: one at top and 3 on each side should 'do it'!
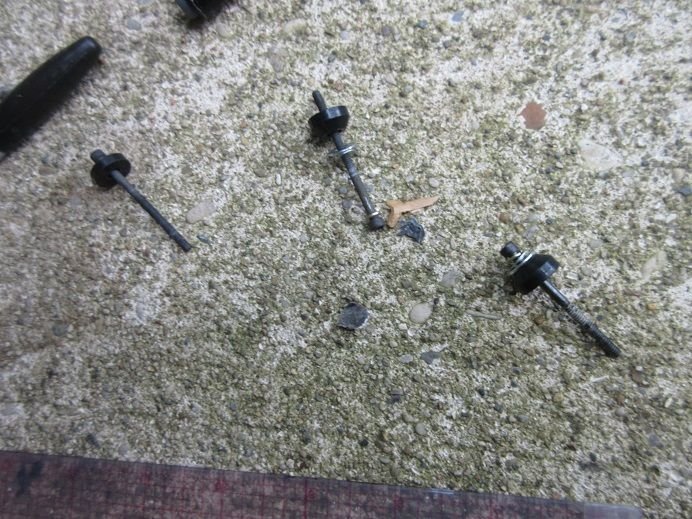
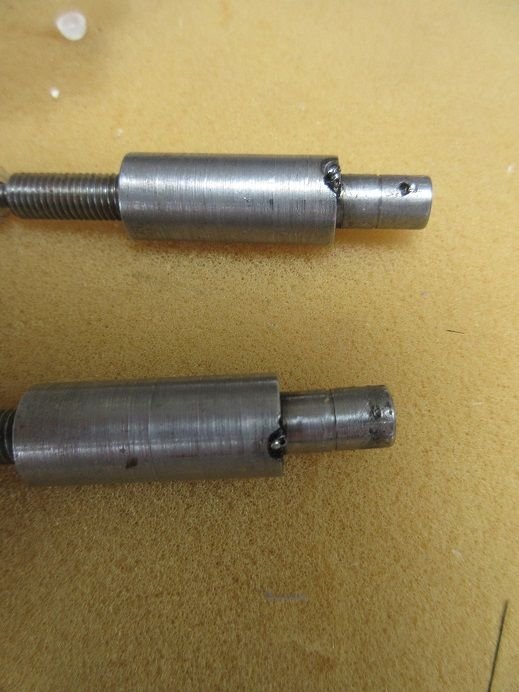
I added a clevis to manually operate the choke.
The cowl 'just' clears the motor for installation.
Put the plane on it's 'feet' and the tail wheel 'folded' again.
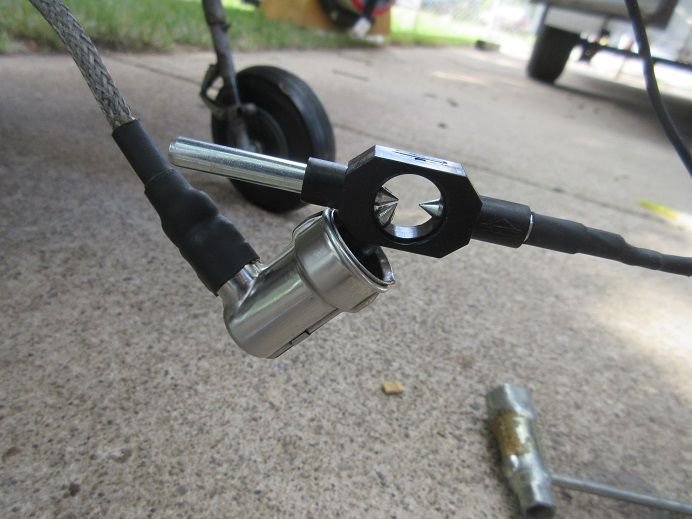
The clevis fell out of the threaded rod on the air cylinder.
Figure I'd just rotate the threaded rod 'out farther' but it's not adjustable.
Was trying to 'figure out' how to extend the threaded rod and noticed that I could change the 'other end'.
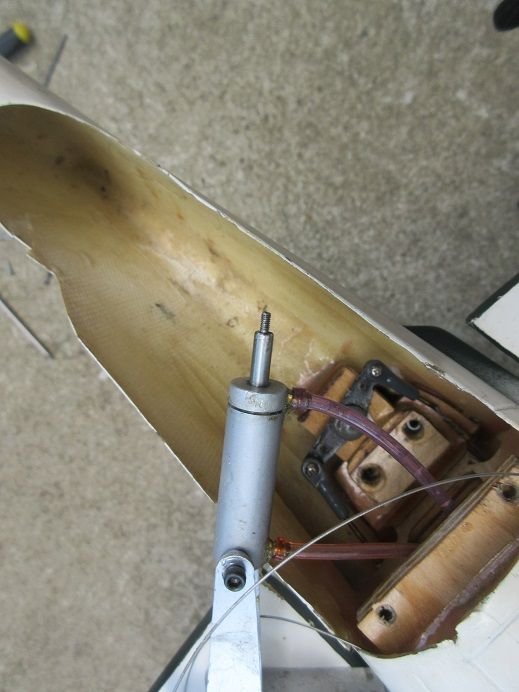
I marked and drilled a hole at the other end and secured the air cylinder about 3/32" from the original hole.
The tail wheel doesn't 'fold' anymore but it, also, won't 'raise'.
It's staying 'as is'; besides the gear is only retracted 'part of the way' into fuse anyway!
CG check and ready for a maiden flight.
One more 'down'.
Charged up my 'back up' transmitter plus my old 9303.
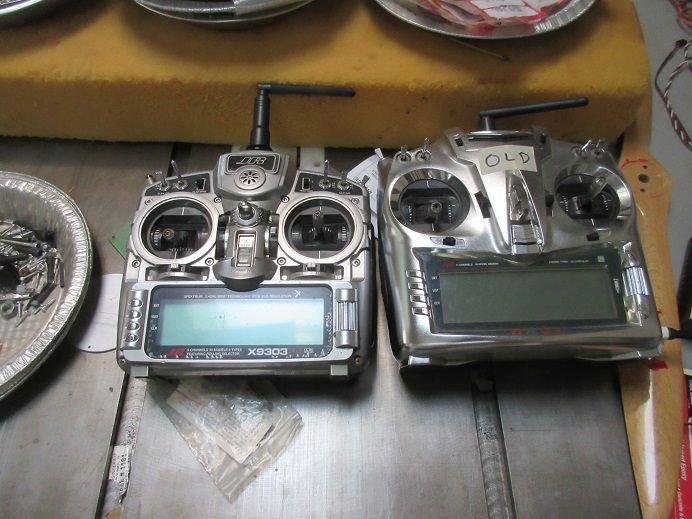
The 'back up' still has the Nieuport 28 that had smoke so I wrote down the 'numbers' for the Gilmore.
=============
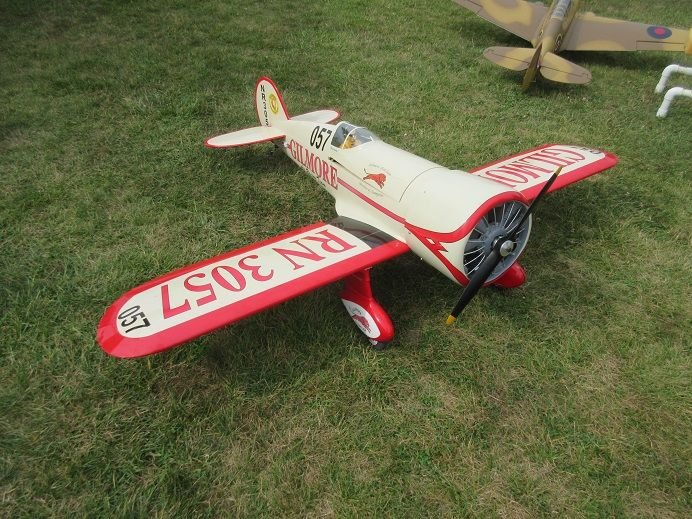
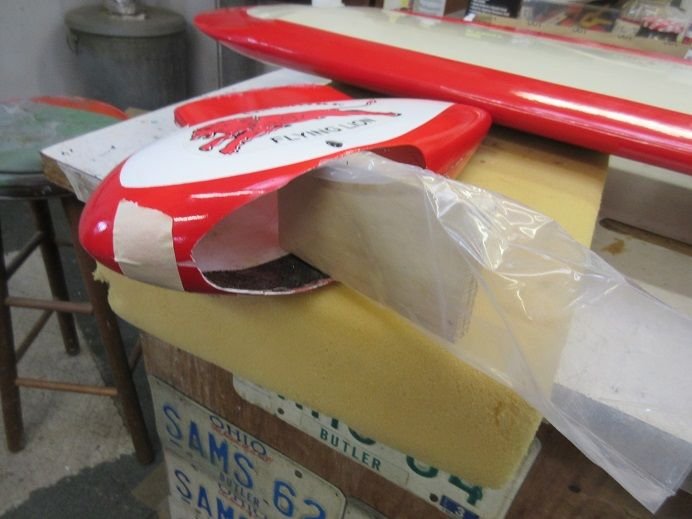
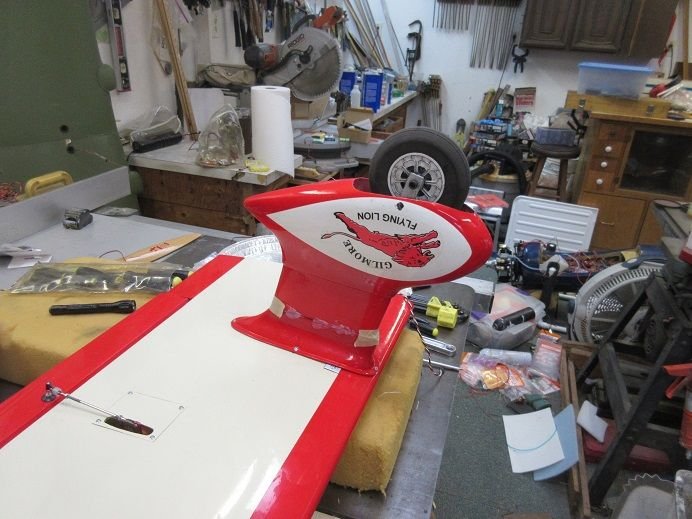
Gilmore racer.
Stuffed some foam between the oleos and 'pants' hoping that keeps the axle nuts from hitting the pants when the oleos compress on landings.
Next 'up' will be the Ziroli F4U with the 3 cylinder Saito engine.
A new record: took about 6 hours to install a cowl!
The cowl a few wood screws securing it to the fuse.
The holes were enlarged so I filled them in with toothpicks and finishing resin.
Then, I noticed that there were 'blind nuts' on all the cowl mounts.
So I pulled all the toothpicks out and cleaned out the holes with a drill bit.
I tried different size bolts to see what size 'blind nuts' were installed but nada.
I used a bolt to knock out one of the blind nuts while also breaking that mount.
Found that the 'blind nuts' takes 4/40 bolts.
I tapped all of them to insure no foreign material was in them and one other one was bad so 2 new blind nuts plus a mount was re-glued.
Finally, was able to place the cowl on the mounts but it wouldn't fit.
1) the cowl had a lot of black glue that had to be removed.
2) had to sand the cowl mount ring to reduce it's radius to match the cowl.
I was going to need some very long 4/40 bolts and was hoping they make such a small diameter bolt at least 1 1/4" long.
By luck my 'stash' had 2 packages of 4/40 X1 1/2" long.
This cowl weighs over 3 pounds so it needs plenty of support at the mounts.
Fortunately, the previous owner added an aircraft ply 'ring' to support the cowl mounts.
I used some faucet washers to distribute the weight better on the cowl.
7 bolts: one at top and 3 on each side should 'do it'!
I added a clevis to manually operate the choke.
The cowl 'just' clears the motor for installation.
Put the plane on it's 'feet' and the tail wheel 'folded' again.
The clevis fell out of the threaded rod on the air cylinder.
Figure I'd just rotate the threaded rod 'out farther' but it's not adjustable.
Was trying to 'figure out' how to extend the threaded rod and noticed that I could change the 'other end'.
I marked and drilled a hole at the other end and secured the air cylinder about 3/32" from the original hole.
The tail wheel doesn't 'fold' anymore but it, also, won't 'raise'.
It's staying 'as is'; besides the gear is only retracted 'part of the way' into fuse anyway!
CG check and ready for a maiden flight.
One more 'down'.
Charged up my 'back up' transmitter plus my old 9303.
The 'back up' still has the Nieuport 28 that had smoke so I wrote down the 'numbers' for the Gilmore.
=============
Gilmore racer.
Stuffed some foam between the oleos and 'pants' hoping that keeps the axle nuts from hitting the pants when the oleos compress on landings.
Next 'up' will be the Ziroli F4U with the 3 cylinder Saito engine.
Last edited by samparfitt; 07-12-2024 at 02:34 AM.
07-12-2024, 10:38 AM
#55
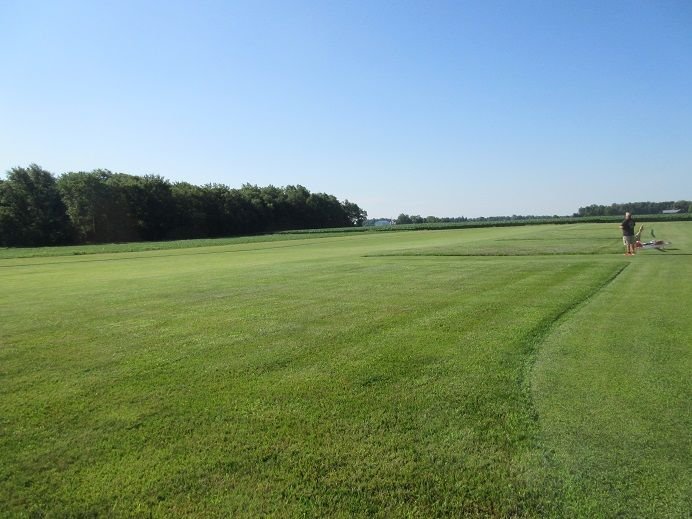
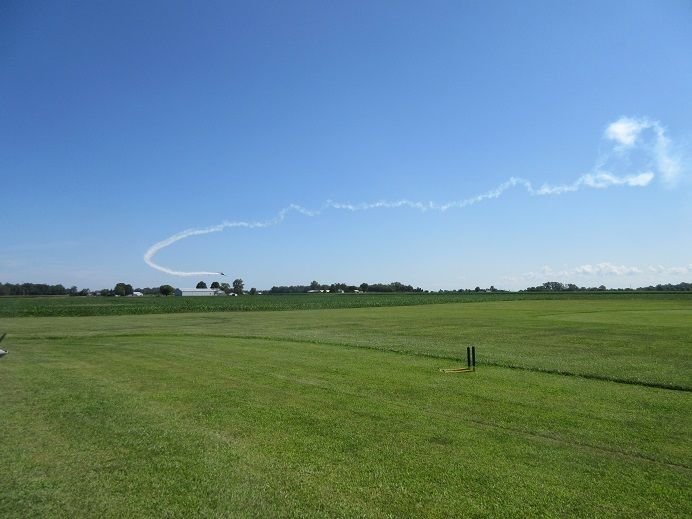
Morning flying at one of my local fields plus some PM; and then the 'rains' came.
Low winds.
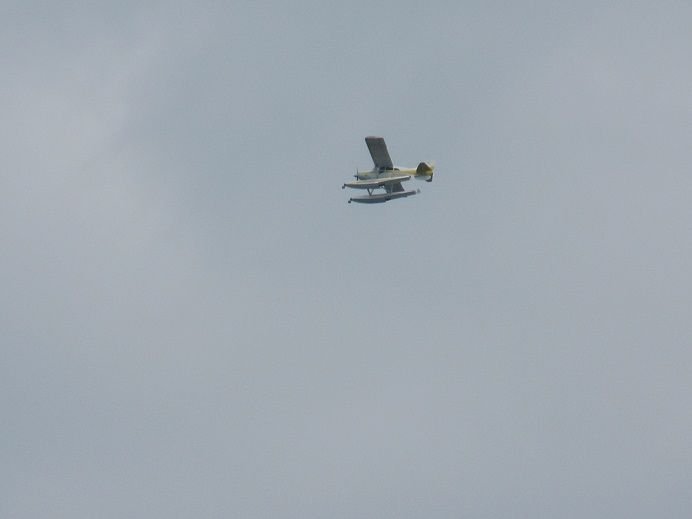
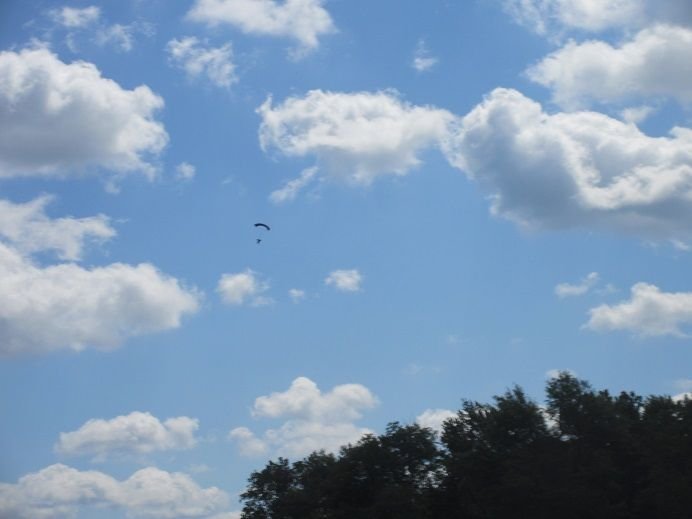
Full size float plane.
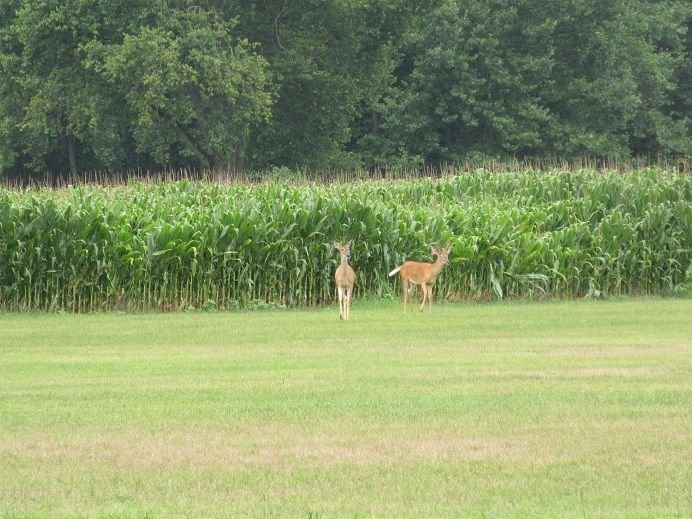
Local visitors.
===============
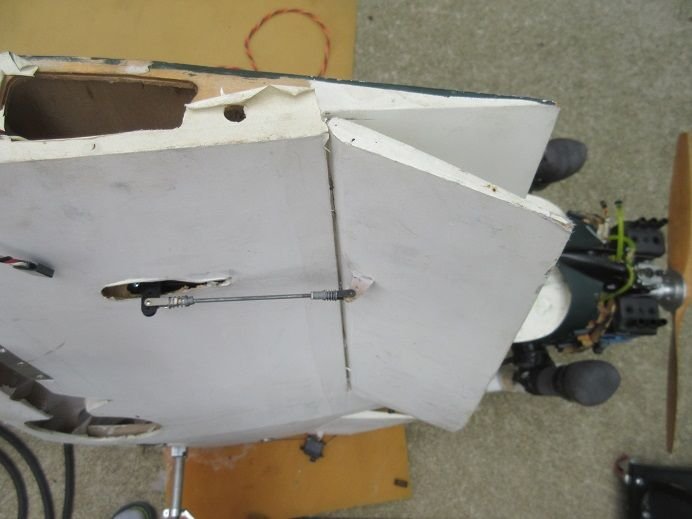
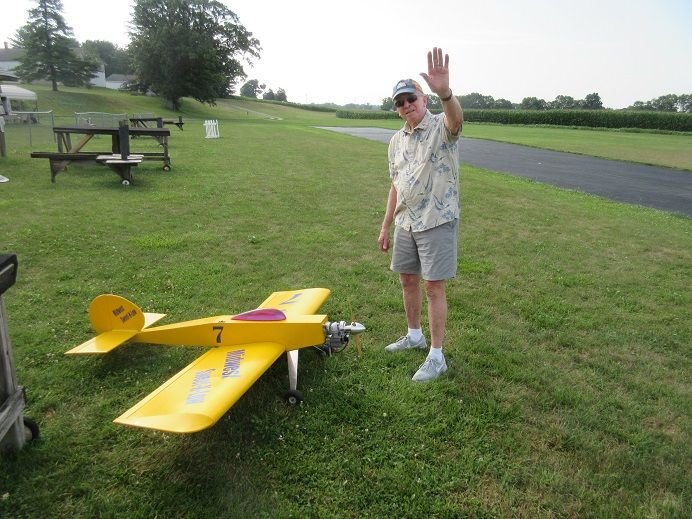
The Gilmore lands very fast so I'm switching from a 2-blade 22X10 to a 3-blade 20X10 to provide some 'prop braking' on landing.
Balanced.
=================
Skyshark P40 PM.
Upon landing the engine was vibrating.
Top 2 bolts came loose. One 'fell out'.

Star type T-20 bolt.
Might as well have chow since it's now raining.
Low winds.
Full size float plane.
Local visitors.
===============
The Gilmore lands very fast so I'm switching from a 2-blade 22X10 to a 3-blade 20X10 to provide some 'prop braking' on landing.
Balanced.
=================
Skyshark P40 PM.
Upon landing the engine was vibrating.
Top 2 bolts came loose. One 'fell out'.
Star type T-20 bolt.
Might as well have chow since it's now raining.
07-12-2024, 04:40 PM
#56
P-40 and A6M Zero PM.
After one flight at the field one of the bolts were loose and another 'fell out' on the engine mount to the fuse.
'Star type' heads on the bolts. T-20.

Had to use two 'extensions' to reach the bolt locations.
The CF cloth worked great.
With all that vibration from a loose engine, the cowl holes did not get 'enlarged'.
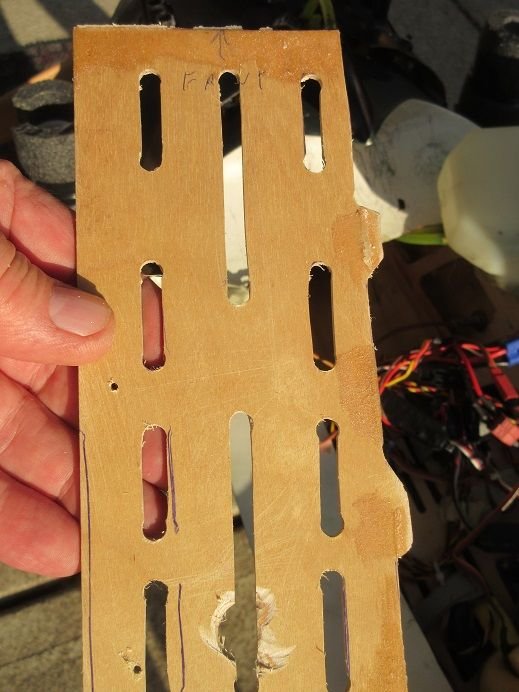
There appears to be no plywood for the control horns, just soft balsa so I made holes in that area and soaked it with thin CA.
============
A6M Zero.
Just a 'tad' nose heavy.
Not so on the lateral balance.
Need 2 ounces of lead on the right wing tip.
Used a utility knife to cut the bottom wing tip.
Weighed 2 ounces of lead pellets and...
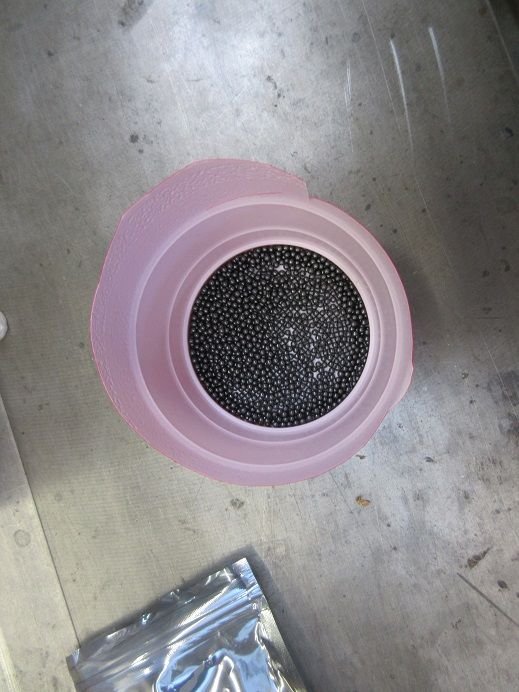
mixed carpenter's glue to the lead.
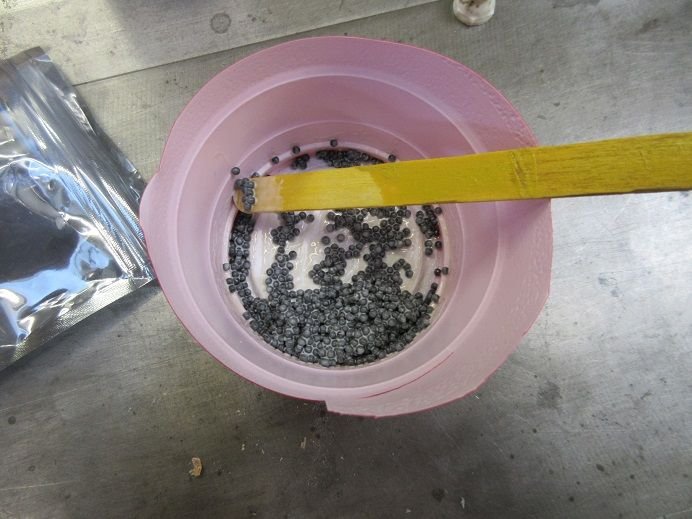
'Dumped' it into the wing tip.
Will let that 'cook' over night.
After one flight at the field one of the bolts were loose and another 'fell out' on the engine mount to the fuse.
'Star type' heads on the bolts. T-20.
Had to use two 'extensions' to reach the bolt locations.
The CF cloth worked great.
With all that vibration from a loose engine, the cowl holes did not get 'enlarged'.
There appears to be no plywood for the control horns, just soft balsa so I made holes in that area and soaked it with thin CA.
============
A6M Zero.
Just a 'tad' nose heavy.
Not so on the lateral balance.
Need 2 ounces of lead on the right wing tip.
Used a utility knife to cut the bottom wing tip.
Weighed 2 ounces of lead pellets and...
mixed carpenter's glue to the lead.
'Dumped' it into the wing tip.
Will let that 'cook' over night.
Last edited by samparfitt; 07-12-2024 at 04:42 PM.
07-13-2024, 01:31 PM
#57
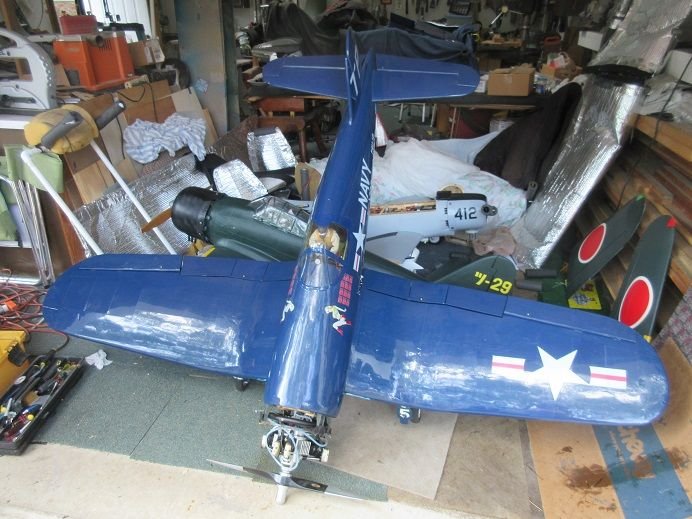
A6M Zero 91.5" PM, Transport stands and Ziroli F4U with Saito 3 cylinder engine.
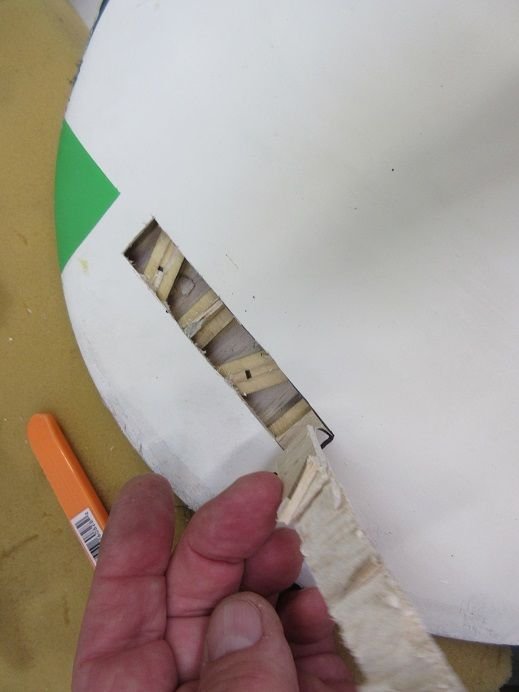
A6M Zero.
After the 2 ounces of lead was added to the right wing the radial balance is good.

Thin CA applied to the 'cut out' wing surface...
and painted.
The front top and sides of the fuse has 'cracks' and is easily 'pushed in'.
I'm thinking this is a potential area for failure.
Some heat used to remove the tank tray that I installed a few days ago!
With tank, batteries and tray removed it's 'easy access' to the top and sides of the fuse.
I removed the air fill valve as that area was 'weak'.
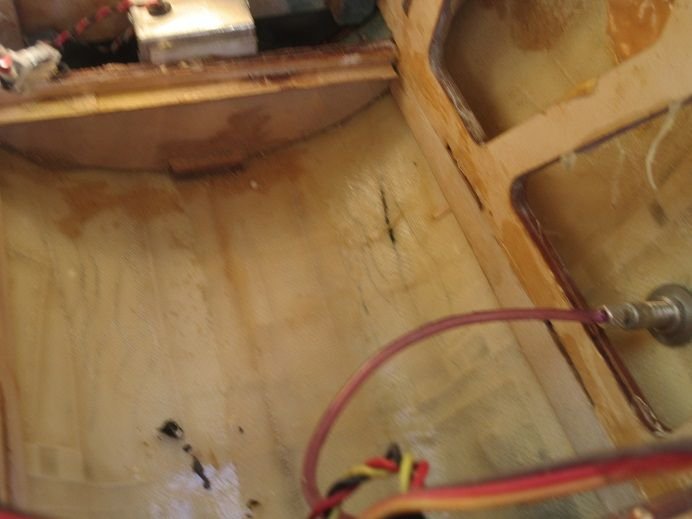
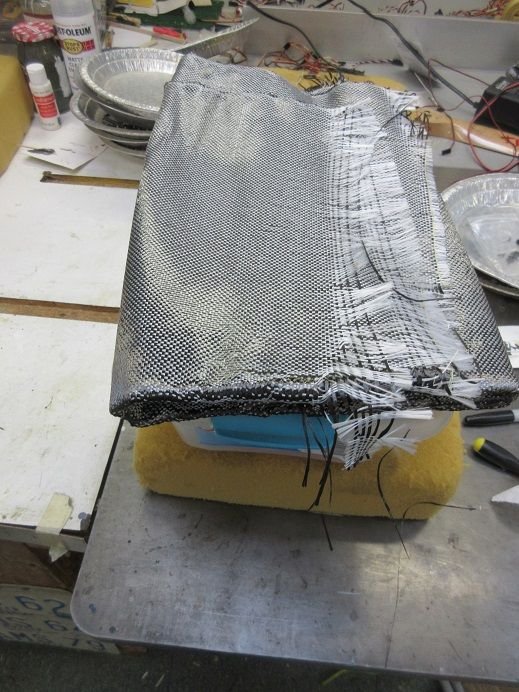
Used a paper template to cut out some CF cloth.
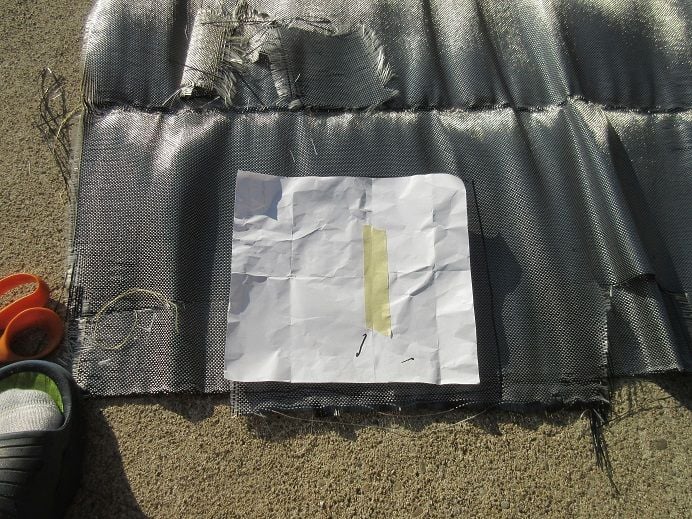
Put some thin CA along the sides as they tend to 'fray' easily.
A piece for the right side.
So 'much' for the template; found it easier to cut the CF cloth in half and do each half separately.
Need another piece along the center to cover all surfaces.
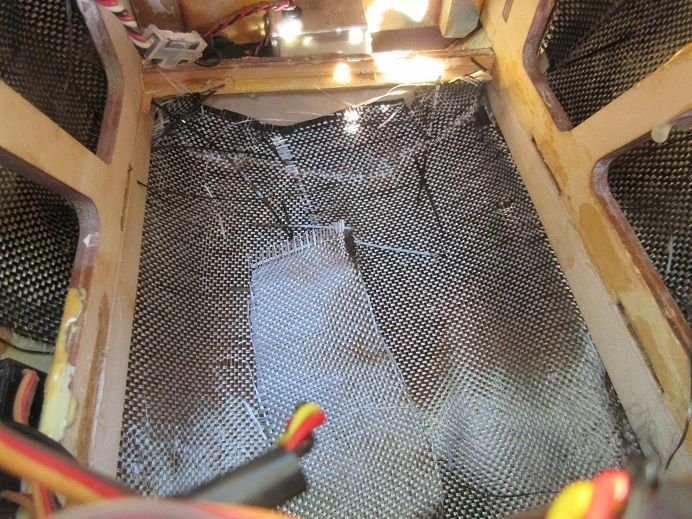
Left side.
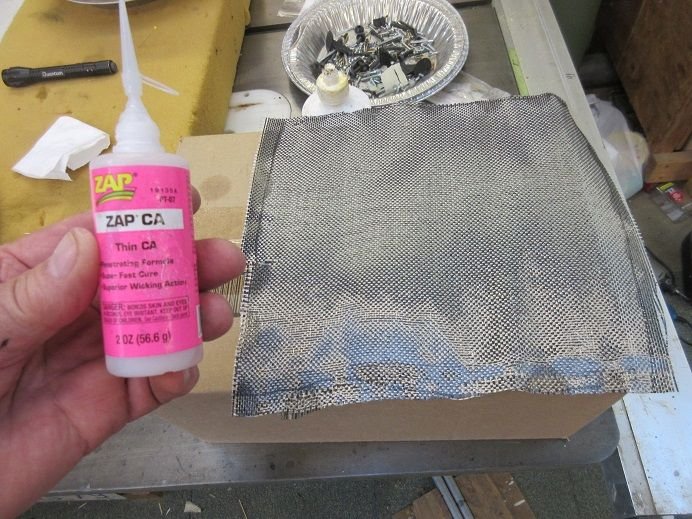
Lots of 'finishing resin' used.
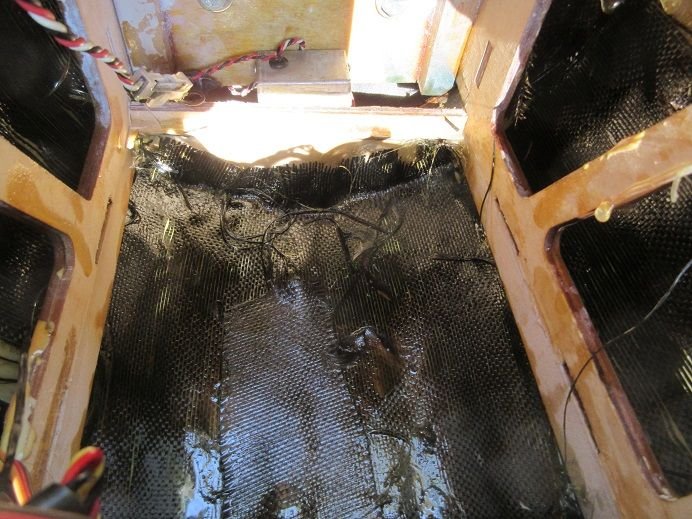
Back side of fuse.
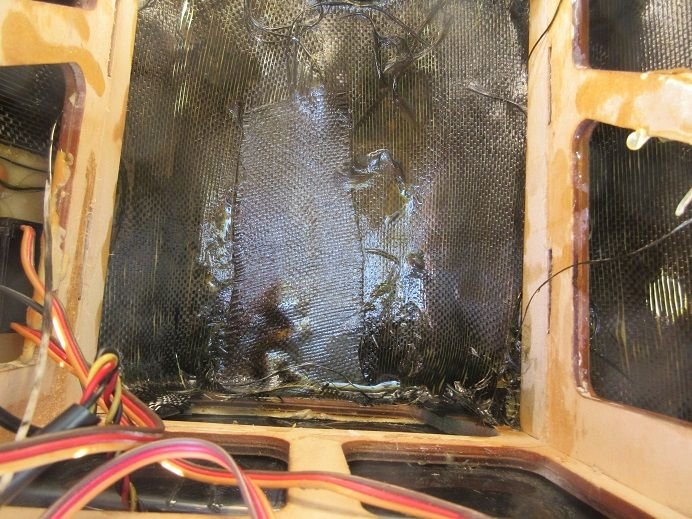
The 'tail had a crack on one side so applied some FG cloth to both sides plus the top.
Batteries and tank tray re-inserted.
Tank installed.
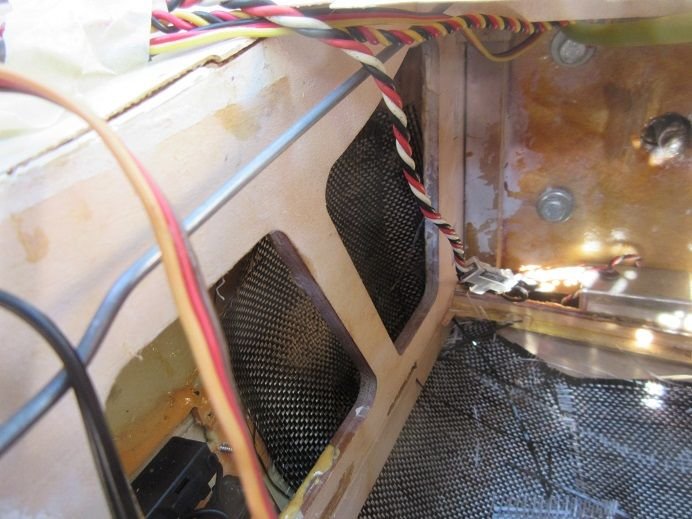
The fuse behind the wing was, also, 'soft' so I put some CF strips along each side.
Initially I had latex gloves on but removed them as I had to be able 'feel' where the cloth is in such a tight space.
Put some 'finishing resin' along the inside of the fuse but applied it directly to the cloth before inserting it as I figured that would be the easiest was to insure the cloth was completely covered with resin.
Had to remove the canopy as a lot of 'crud' got in there using the 'air hose' inside the fuse.
Cracks are still there but it no longer 'moves'.
=====================
Needed transportation stands for the new planes.
One for the new P-40.
and the Gilmore.
===========
Started working on the Ziroli F4U Corsair.
Installed ignition battery.
A6M Zero.
After the 2 ounces of lead was added to the right wing the radial balance is good.
Thin CA applied to the 'cut out' wing surface...
and painted.
The front top and sides of the fuse has 'cracks' and is easily 'pushed in'.
I'm thinking this is a potential area for failure.
Some heat used to remove the tank tray that I installed a few days ago!
With tank, batteries and tray removed it's 'easy access' to the top and sides of the fuse.
I removed the air fill valve as that area was 'weak'.
Used a paper template to cut out some CF cloth.
Put some thin CA along the sides as they tend to 'fray' easily.
A piece for the right side.
So 'much' for the template; found it easier to cut the CF cloth in half and do each half separately.
Need another piece along the center to cover all surfaces.
Left side.
Lots of 'finishing resin' used.
Back side of fuse.
The 'tail had a crack on one side so applied some FG cloth to both sides plus the top.
Batteries and tank tray re-inserted.
Tank installed.
The fuse behind the wing was, also, 'soft' so I put some CF strips along each side.
Initially I had latex gloves on but removed them as I had to be able 'feel' where the cloth is in such a tight space.
Put some 'finishing resin' along the inside of the fuse but applied it directly to the cloth before inserting it as I figured that would be the easiest was to insure the cloth was completely covered with resin.
Had to remove the canopy as a lot of 'crud' got in there using the 'air hose' inside the fuse.
Cracks are still there but it no longer 'moves'.
=====================
Needed transportation stands for the new planes.
One for the new P-40.
and the Gilmore.
===========
Started working on the Ziroli F4U Corsair.
Installed ignition battery.
07-14-2024, 07:31 AM
#58
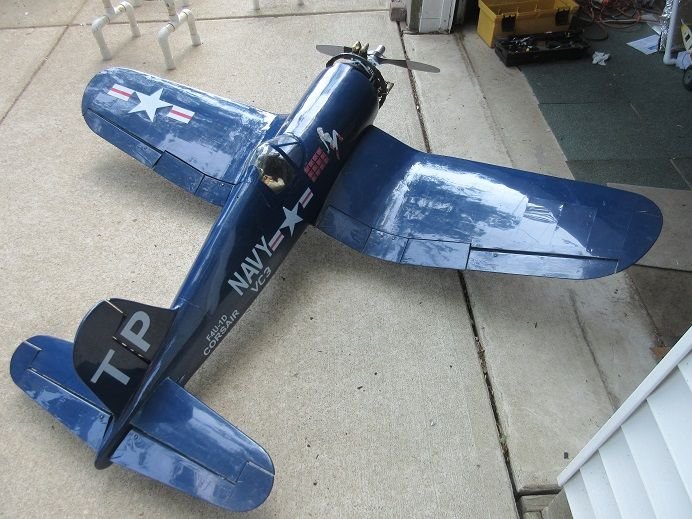
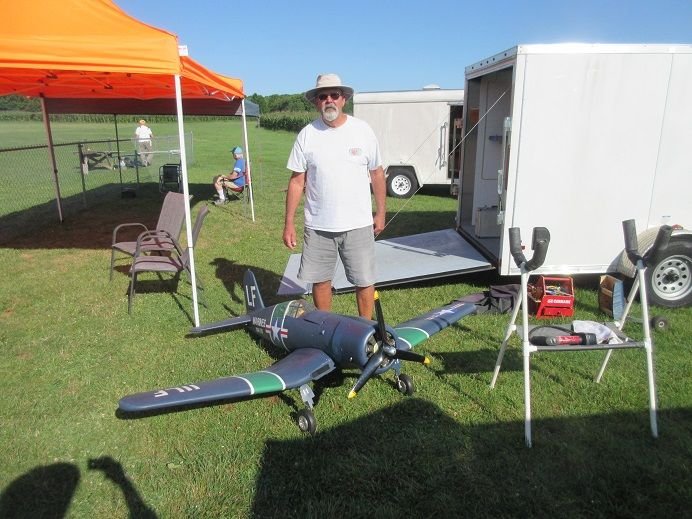
PM a Ziroli F4U Corsair 91" that I acquired at an estate sale last Fall.
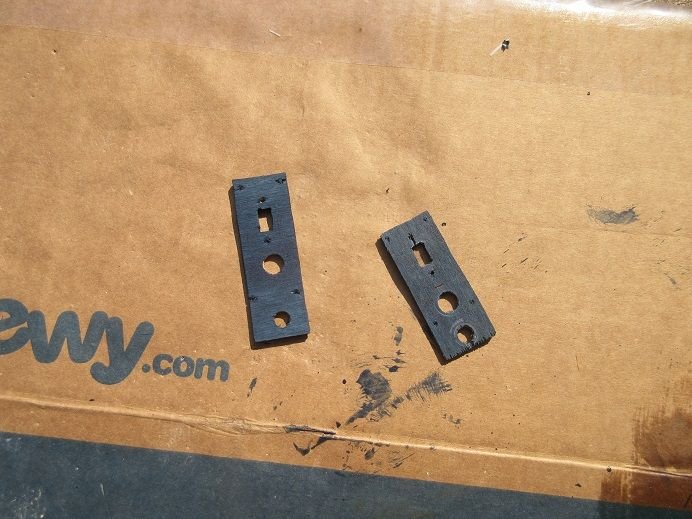
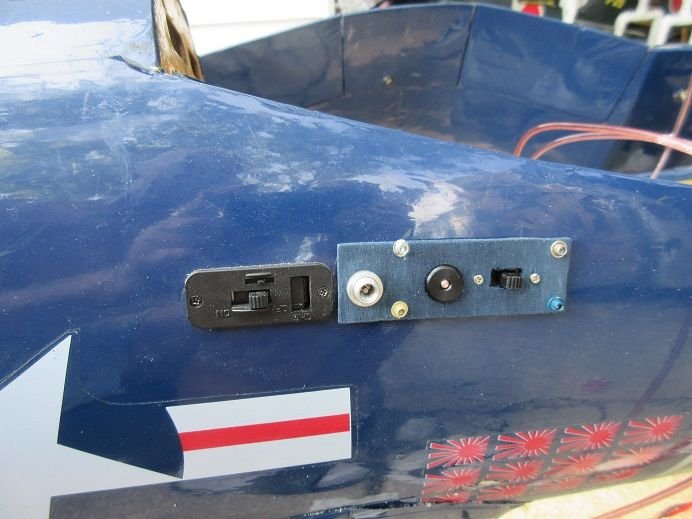
Made a 'plate' to hold the ON/OFF switch, air fill and air gauge valve.
Had to make 2 as did not allow enough room between a fuse former for the 2 valves.
When I build and glass a plane it gets a nice hatch for all the 'switches'.
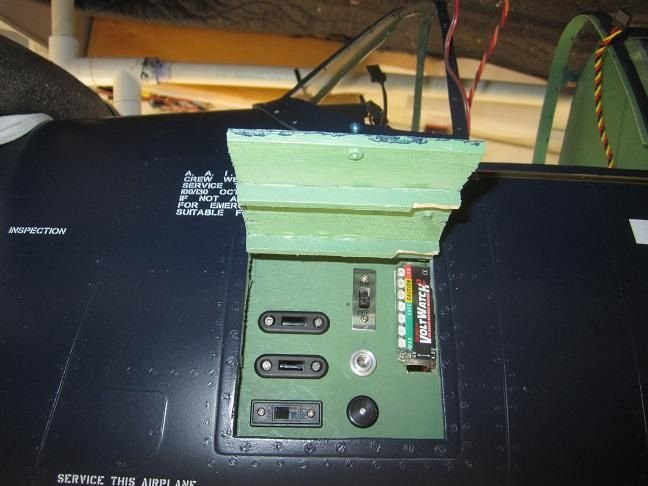
When the plane is in Monocote and already has switches on the fuse, one switch just gets replaced.
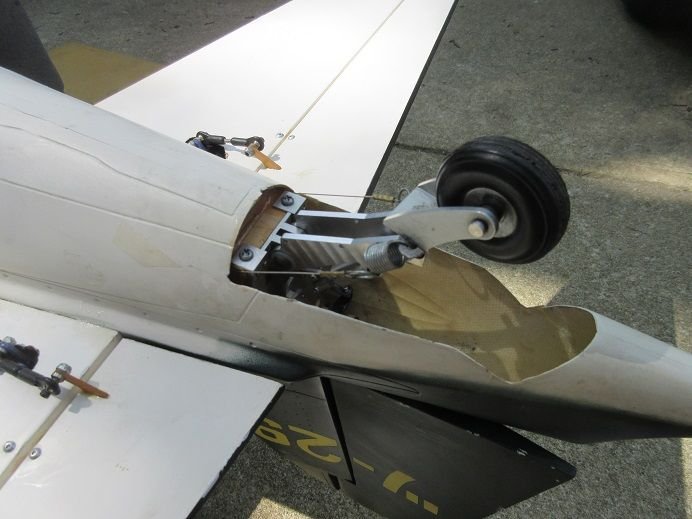
Gear and moving surfaces checked.
Gear down.
The plane has mechanically operated doors.
Had to adjust the flaps and elevator.
One elevator is warped so had to take the 'average' for alignment!
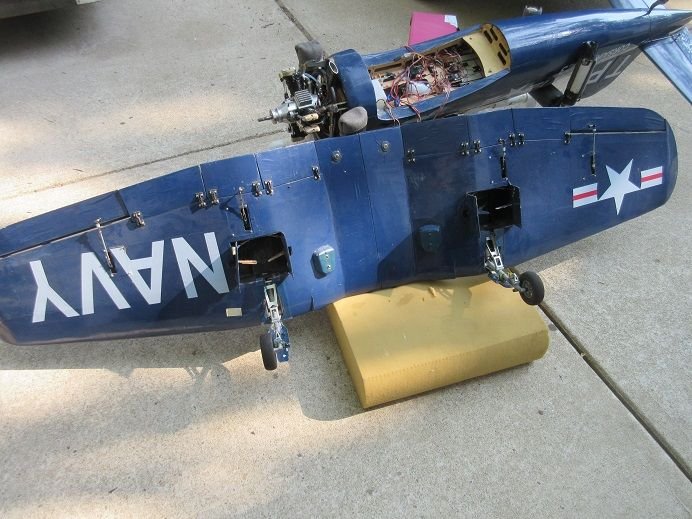
Gear UP.
'Wind' will close the front doors.
It has functional bomb drops but no bombs came with it and that's a 'subject' for another 'time'.

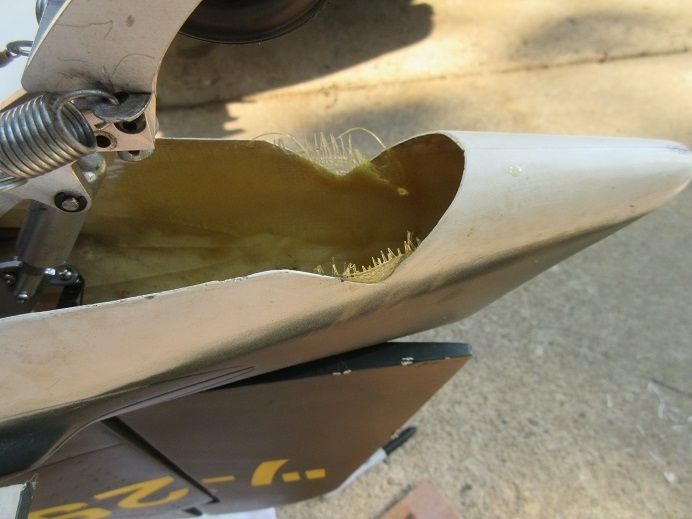
MMMM: just noticed there is no belly pan and I'm sure it's won't be found at last Fall's estate sale!
I've got plans so can make one.
First time on it's 'feet'.
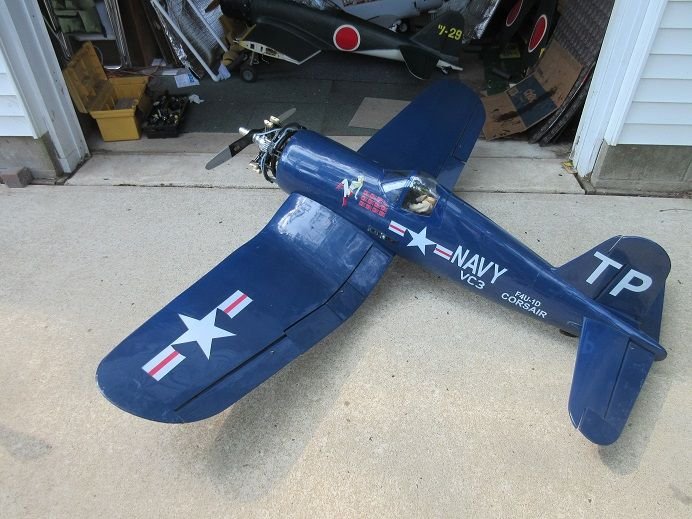
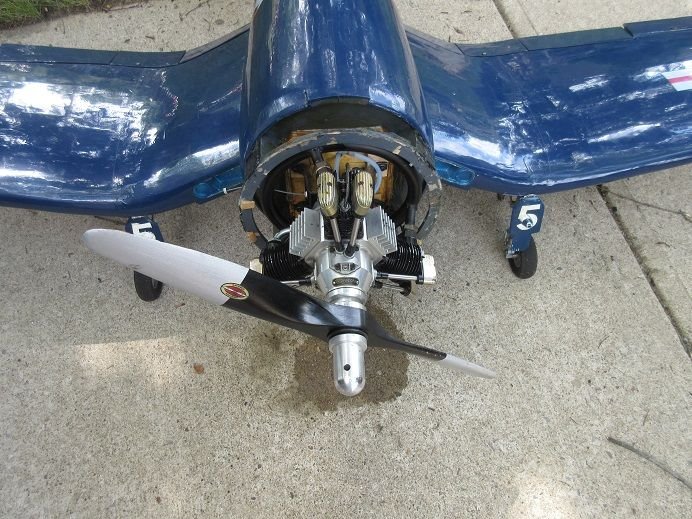
Saito glow 450 75CC 3-cylinder engine.
Should be 'fun': haven't had glow in 20 years!
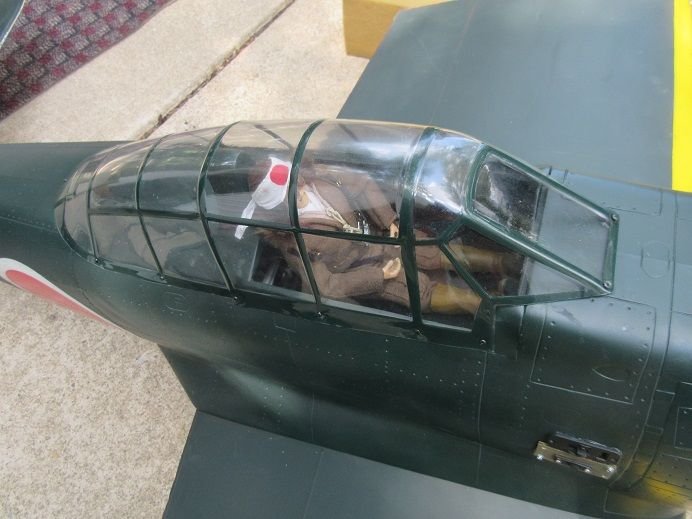
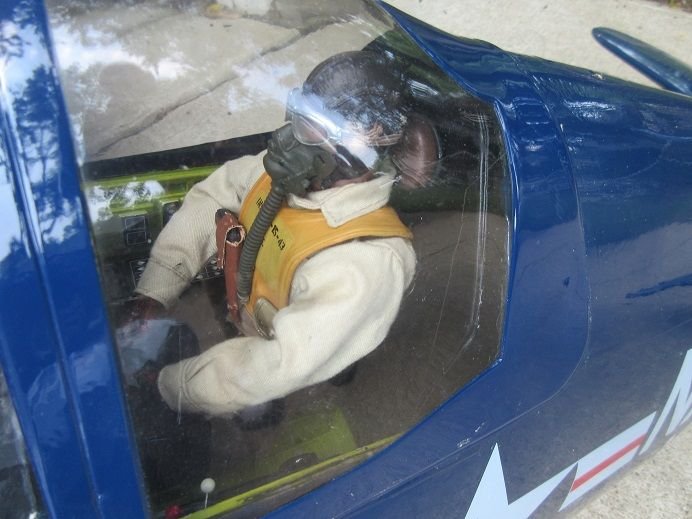
Nice pilot and full cockpit.
That's 'it' for today as I've got a NMRA monthly Division railroad meet this afternoon.
It just 'makes' it in the shop with the wings attached!
Made a 'plate' to hold the ON/OFF switch, air fill and air gauge valve.
Had to make 2 as did not allow enough room between a fuse former for the 2 valves.
When I build and glass a plane it gets a nice hatch for all the 'switches'.
When the plane is in Monocote and already has switches on the fuse, one switch just gets replaced.
Gear and moving surfaces checked.
Gear down.
The plane has mechanically operated doors.
Had to adjust the flaps and elevator.
One elevator is warped so had to take the 'average' for alignment!
Gear UP.
'Wind' will close the front doors.
It has functional bomb drops but no bombs came with it and that's a 'subject' for another 'time'.
MMMM: just noticed there is no belly pan and I'm sure it's won't be found at last Fall's estate sale!
I've got plans so can make one.
First time on it's 'feet'.
Saito glow 450 75CC 3-cylinder engine.
Should be 'fun': haven't had glow in 20 years!
Nice pilot and full cockpit.
That's 'it' for today as I've got a NMRA monthly Division railroad meet this afternoon.
It just 'makes' it in the shop with the wings attached!
Last edited by samparfitt; 07-14-2024 at 07:36 AM.
07-16-2024, 02:52 PM
#59
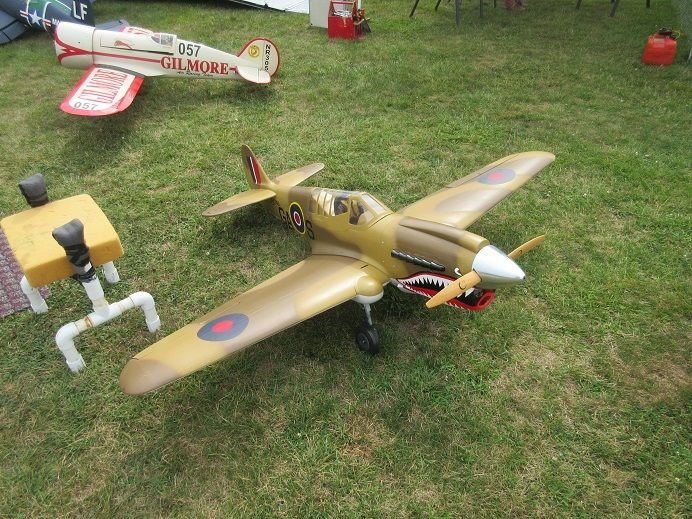
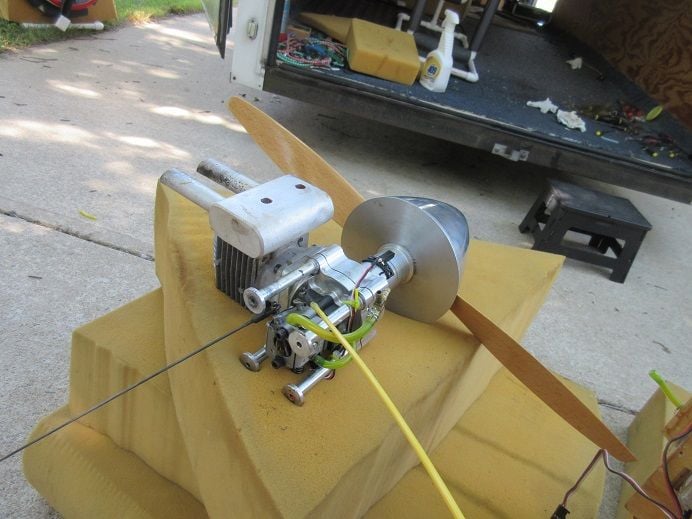
A-1 Skyraider gear actuators and F4U Saito 450 3-cylinder engine attempted test.
A-1 Skyraider.
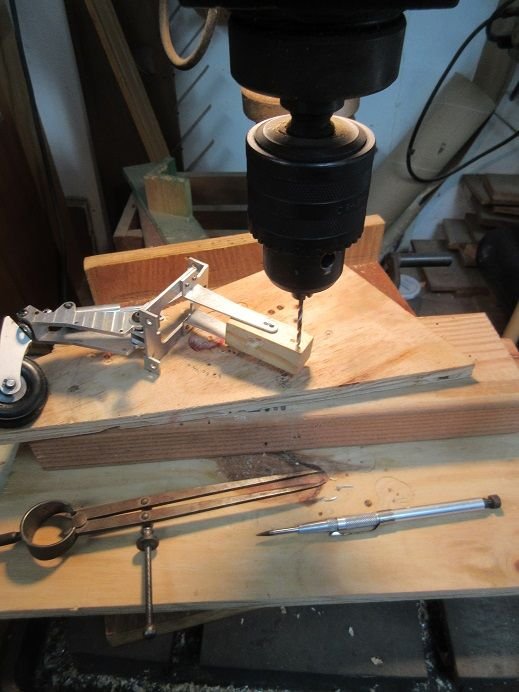
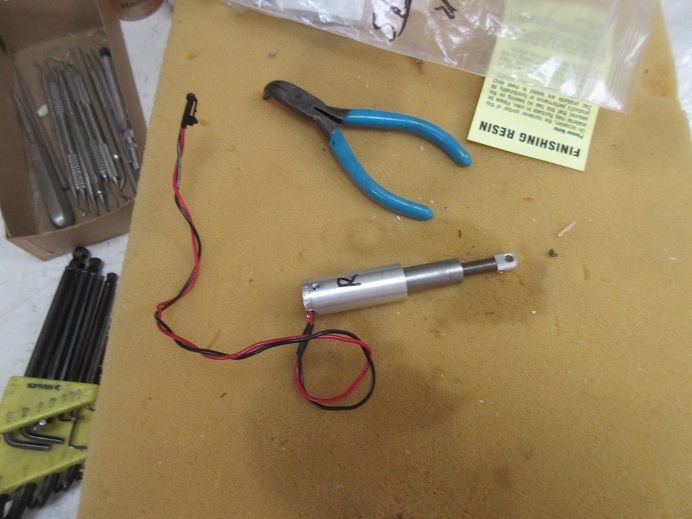
Got the 2 actuators that my local auto guy 'spot welded' for me.
One works but he missed a 'spot weld' on one side of the other actuator.
Easy for him to miss as he only touches the object for a split second to put a very small 'weld' on a very small part.
A file was used to 'clean up' any excess.
One 'back up' actuator.
===========
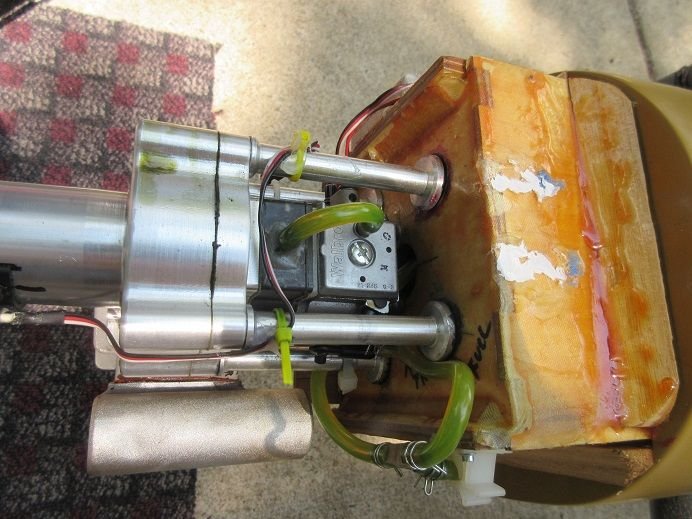
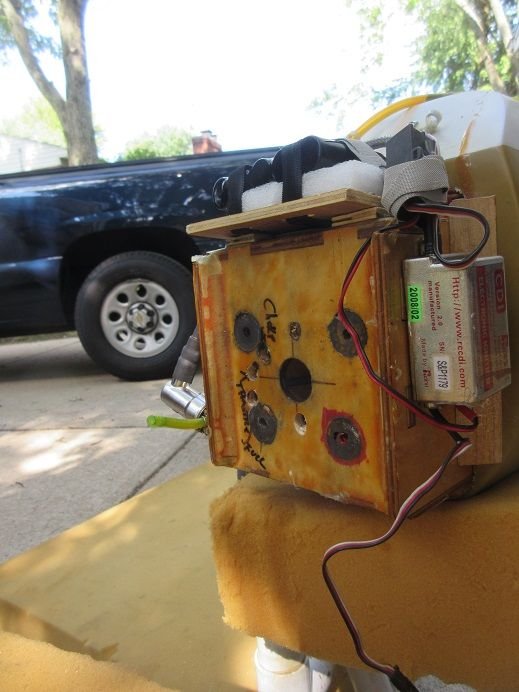
Ziroli F4U with Saito glow 450 3-cylinder engine.
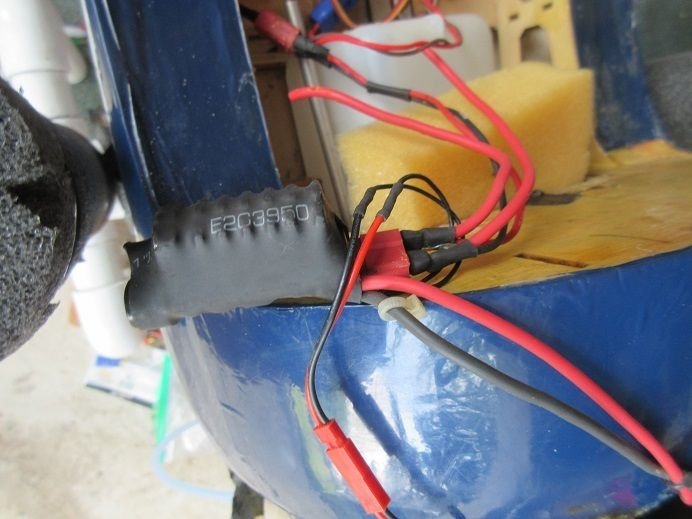
It appears I'm not getting any current to the glow plugs.
I bypassed the switch and connected the battery directly to the engine ignition system.
Also checked that the glow plugs were functional.
Bypassed the On/Off switch that goes to the ignition system.
Glow fuel 'spurted' out of the carb so getting fuel.
Glow engine ignition module for the engine.
Horizon hobbies said to use 6-8 volts so I had a 5 cell 2,700 ma battery pack and checked that it was 'good'.
The 'thick' wires goes to the battery pack and the thin wires goes to the On/Off switch ( I tried 'both ways'.)
A-1 Skyraider.
Got the 2 actuators that my local auto guy 'spot welded' for me.
One works but he missed a 'spot weld' on one side of the other actuator.
Easy for him to miss as he only touches the object for a split second to put a very small 'weld' on a very small part.
A file was used to 'clean up' any excess.
One 'back up' actuator.
===========
Ziroli F4U with Saito glow 450 3-cylinder engine.
It appears I'm not getting any current to the glow plugs.
I bypassed the switch and connected the battery directly to the engine ignition system.
Also checked that the glow plugs were functional.
Bypassed the On/Off switch that goes to the ignition system.
Glow fuel 'spurted' out of the carb so getting fuel.
Glow engine ignition module for the engine.
Horizon hobbies said to use 6-8 volts so I had a 5 cell 2,700 ma battery pack and checked that it was 'good'.
The 'thick' wires goes to the battery pack and the thin wires goes to the On/Off switch ( I tried 'both ways'.)
07-20-2024, 12:44 PM
#60
A6M Zero PM, flying and P-40 PM.
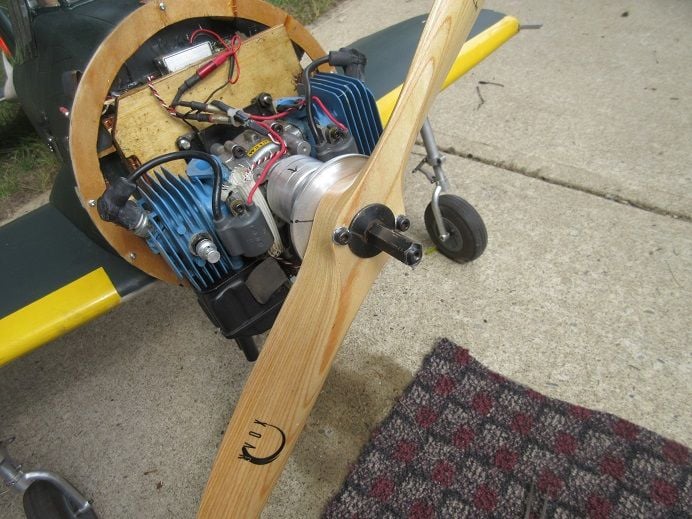
A6M Zero.
I needed to add 2 anti-slip bolts to the prop and hub.
Hub removed for easy drilling/tapping.
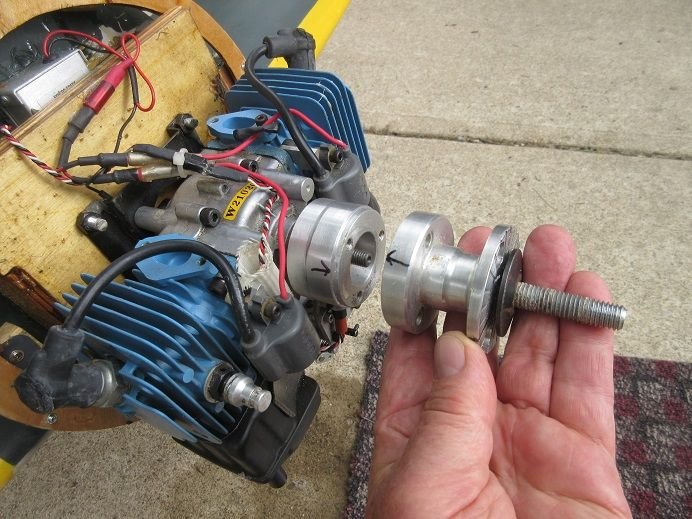
Had to make sure the bolts were 'outside' the prop washer.
'AFTER' I wish I would have used a prop washer that was larger and already had holes in it!
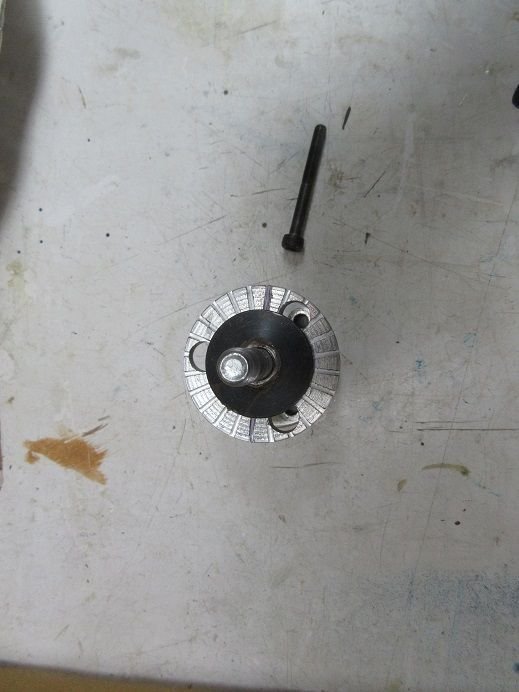
Used calipers and center punch for accuracy.
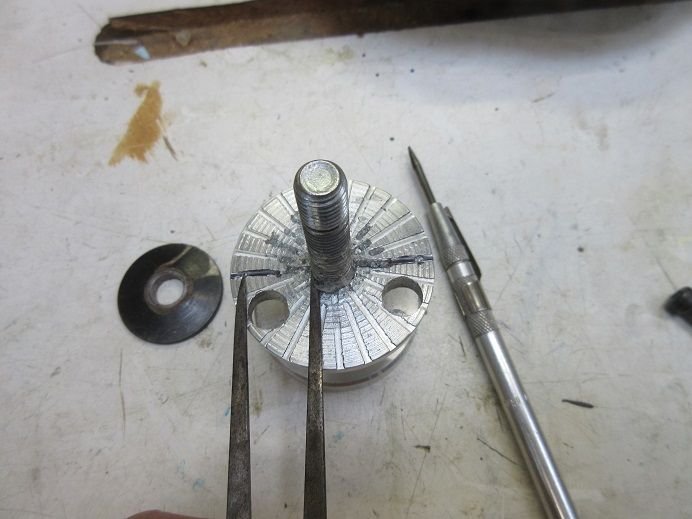
Drilled/tapped for the bolts.
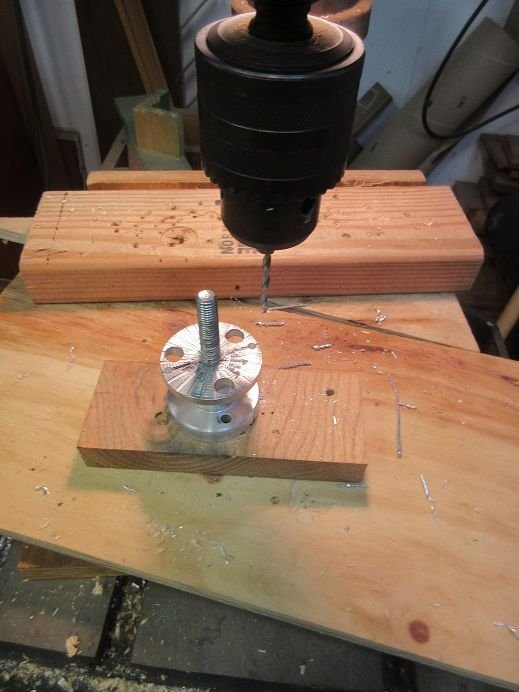
Cutting oil used and still could only turn the tap a quarter turn before backing out, cleaning off metal filings and re-tapping.
Taps are hard but very brittle so any 'side load' will 'snap them'.
First I tested on some scrap metal to insure I had the proper tap for the bolt.
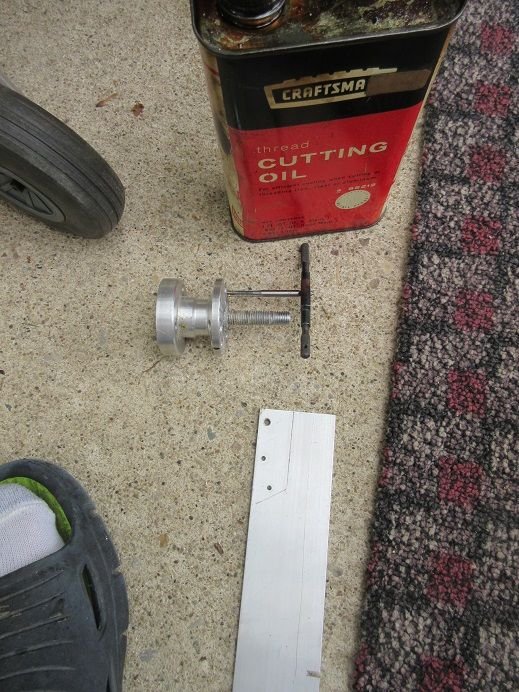
A slow process.
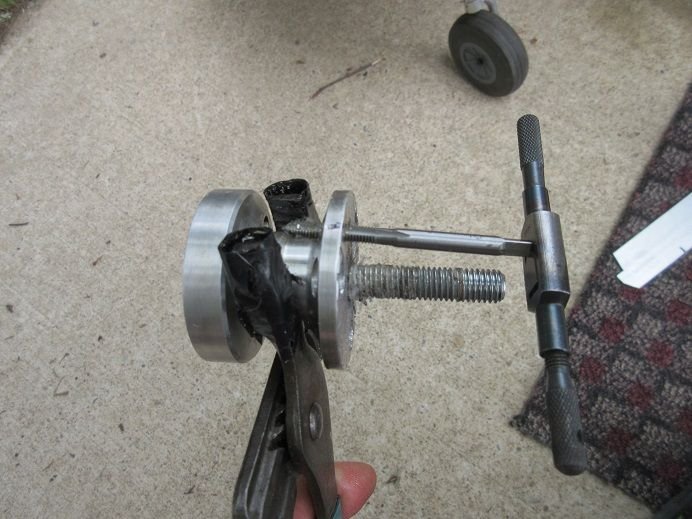
Much better. No more prop 'slippage'!
Carb needs rebuilding: ordered some new carb kits.
=====================
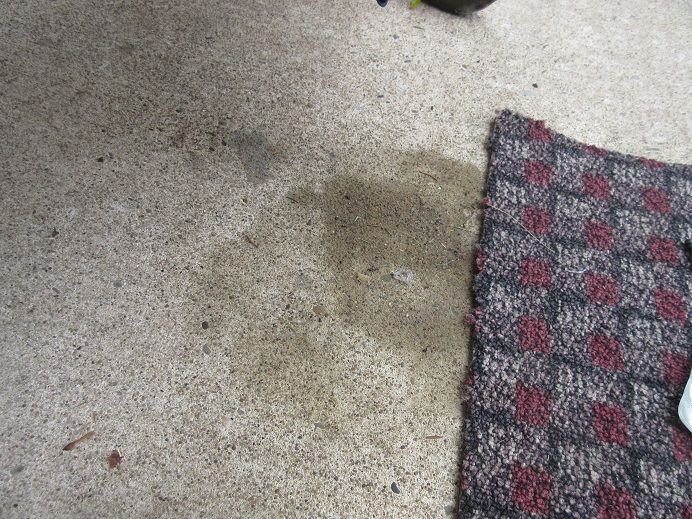
Found out 'something' about glow fuel: it stains concrete!
==============
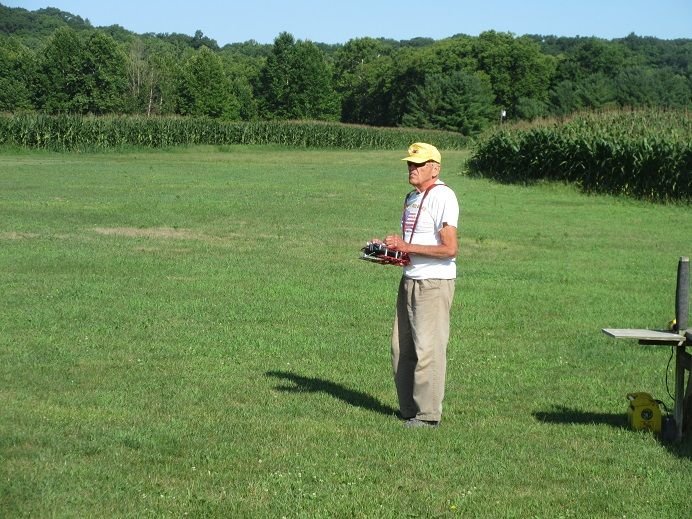
Field flying.
The P-40 carb, also, needs re-building.
'Landings' are much slower with a 3-blade prop on the Gilmore as the prop adds more 'breaking'.
=============
P-40 is climbing on full throttle and found that the engine is slanted up instead of down.
Add 2 washers to each top mount.
Forgot I had this handy device. Easy to check if the engine is getting 'spark'!
Had to remove the engine to tighten the mounts to the engine as the holes in the engine are threaded so can't make a tight bond to the mounts.
Weird: never seen an engine like this. There is no name on the engine.
Enlarged the holes for the fuel lines.
All 'back together' but waiting for a new carb kit as this engine spark plug is 'dry as a bone'.
Got about 6 flights before the carb just 'quit'.
A6M Zero.
I needed to add 2 anti-slip bolts to the prop and hub.
Hub removed for easy drilling/tapping.
Had to make sure the bolts were 'outside' the prop washer.
'AFTER' I wish I would have used a prop washer that was larger and already had holes in it!
Used calipers and center punch for accuracy.
Drilled/tapped for the bolts.
Cutting oil used and still could only turn the tap a quarter turn before backing out, cleaning off metal filings and re-tapping.
Taps are hard but very brittle so any 'side load' will 'snap them'.
First I tested on some scrap metal to insure I had the proper tap for the bolt.
A slow process.
Much better. No more prop 'slippage'!
Carb needs rebuilding: ordered some new carb kits.
=====================
Found out 'something' about glow fuel: it stains concrete!
==============
Field flying.
The P-40 carb, also, needs re-building.
'Landings' are much slower with a 3-blade prop on the Gilmore as the prop adds more 'breaking'.
=============
P-40 is climbing on full throttle and found that the engine is slanted up instead of down.
Add 2 washers to each top mount.
Forgot I had this handy device. Easy to check if the engine is getting 'spark'!
Had to remove the engine to tighten the mounts to the engine as the holes in the engine are threaded so can't make a tight bond to the mounts.
Weird: never seen an engine like this. There is no name on the engine.
Enlarged the holes for the fuel lines.
All 'back together' but waiting for a new carb kit as this engine spark plug is 'dry as a bone'.
Got about 6 flights before the carb just 'quit'.
Last edited by samparfitt; 07-20-2024 at 12:57 PM.
07-20-2024, 12:50 PM
#61
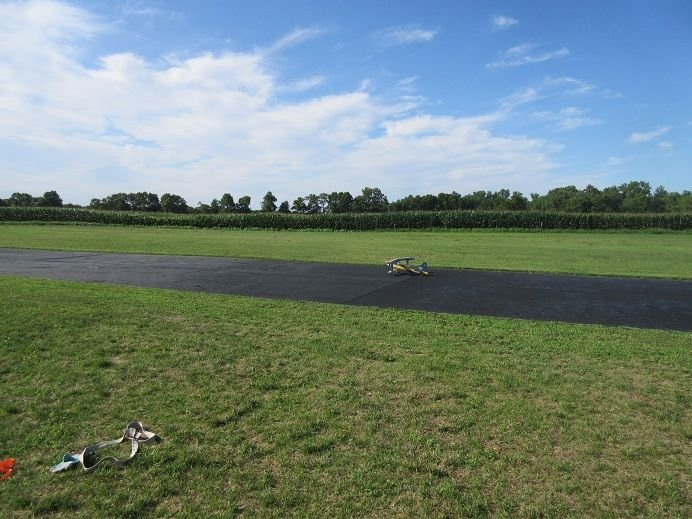
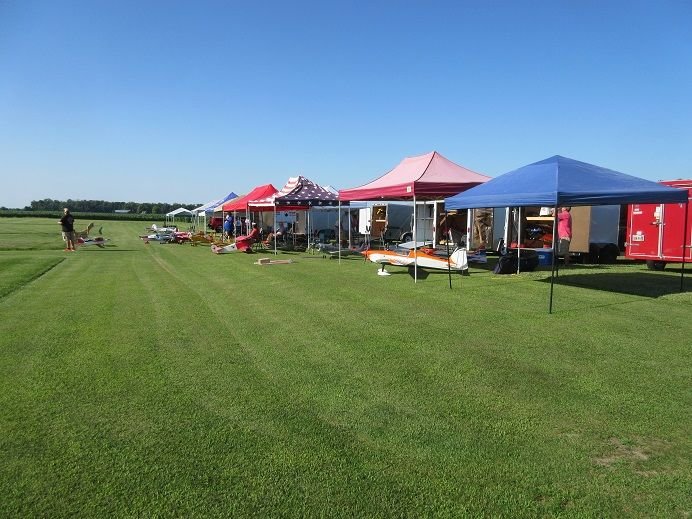
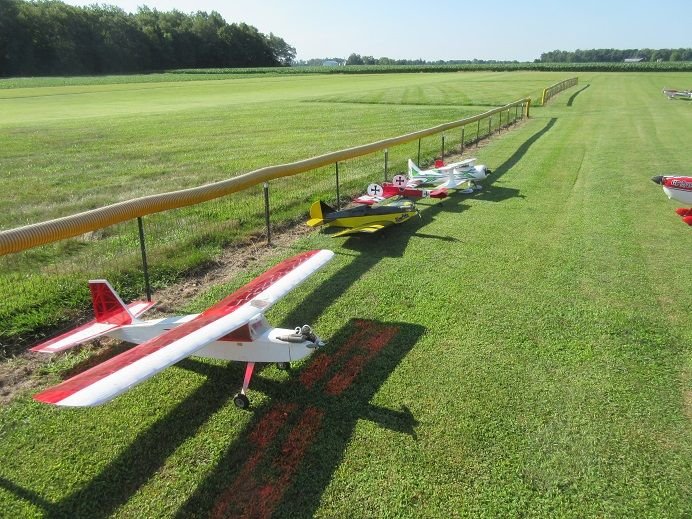
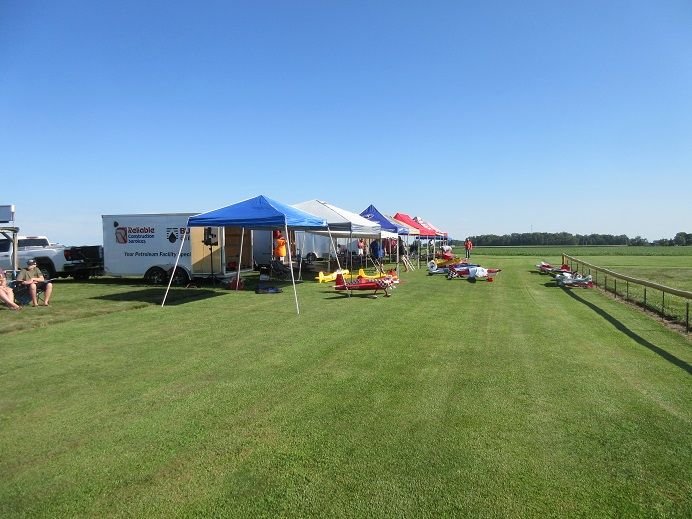
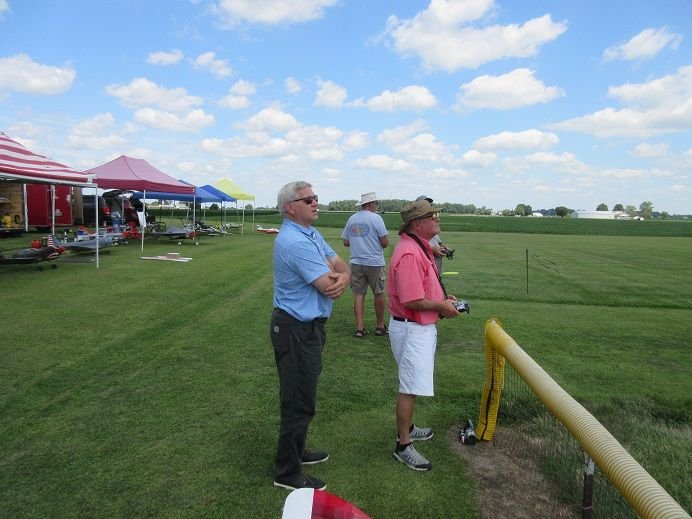
July 20; Fun fly at FAST RC club in Brookville, Ohio.
Miles: 60.
An all grass 600' runway that is 'putting green' cut; very nice.
NOTE:
55 years ago today.
Neal's 1st step on the moon.
Ohio;
1st flight
1st American to orbit the earth
1st step on the moon.
Invented the light bulb.

Miles: 60.
An all grass 600' runway that is 'putting green' cut; very nice.
NOTE:
55 years ago today.
Neal's 1st step on the moon.
Ohio;
1st flight
1st American to orbit the earth
1st step on the moon.
Invented the light bulb.
