


Top RC Models MkIV full Composite Spitfire-a game changer


 11-10-2020, 03:26 PM
#727
Sorry for your loss, I feel your pain. I think I had pm'd you that I recently lost my spitty. Mine was a complete shatter unfortunately. Sounds like yours is salvageable if all you need is an electric motor box?? If you can't find one, I'm sure Mike at GatorRC could set you up.
good luck sir!
good luck sir!
I spoke to Mike at Gator and he gave me a price for the motor box. A bit steep for a few pieces of wood so I'm hoping someone here will have a set before I orderone.
 11-11-2020, 12:53 PM
#729

Join Date: Jul 2017
Location: Just East of Cleveland Ohio
Posts: 51
Likes: 0
Received 1 Like
on
1 Post
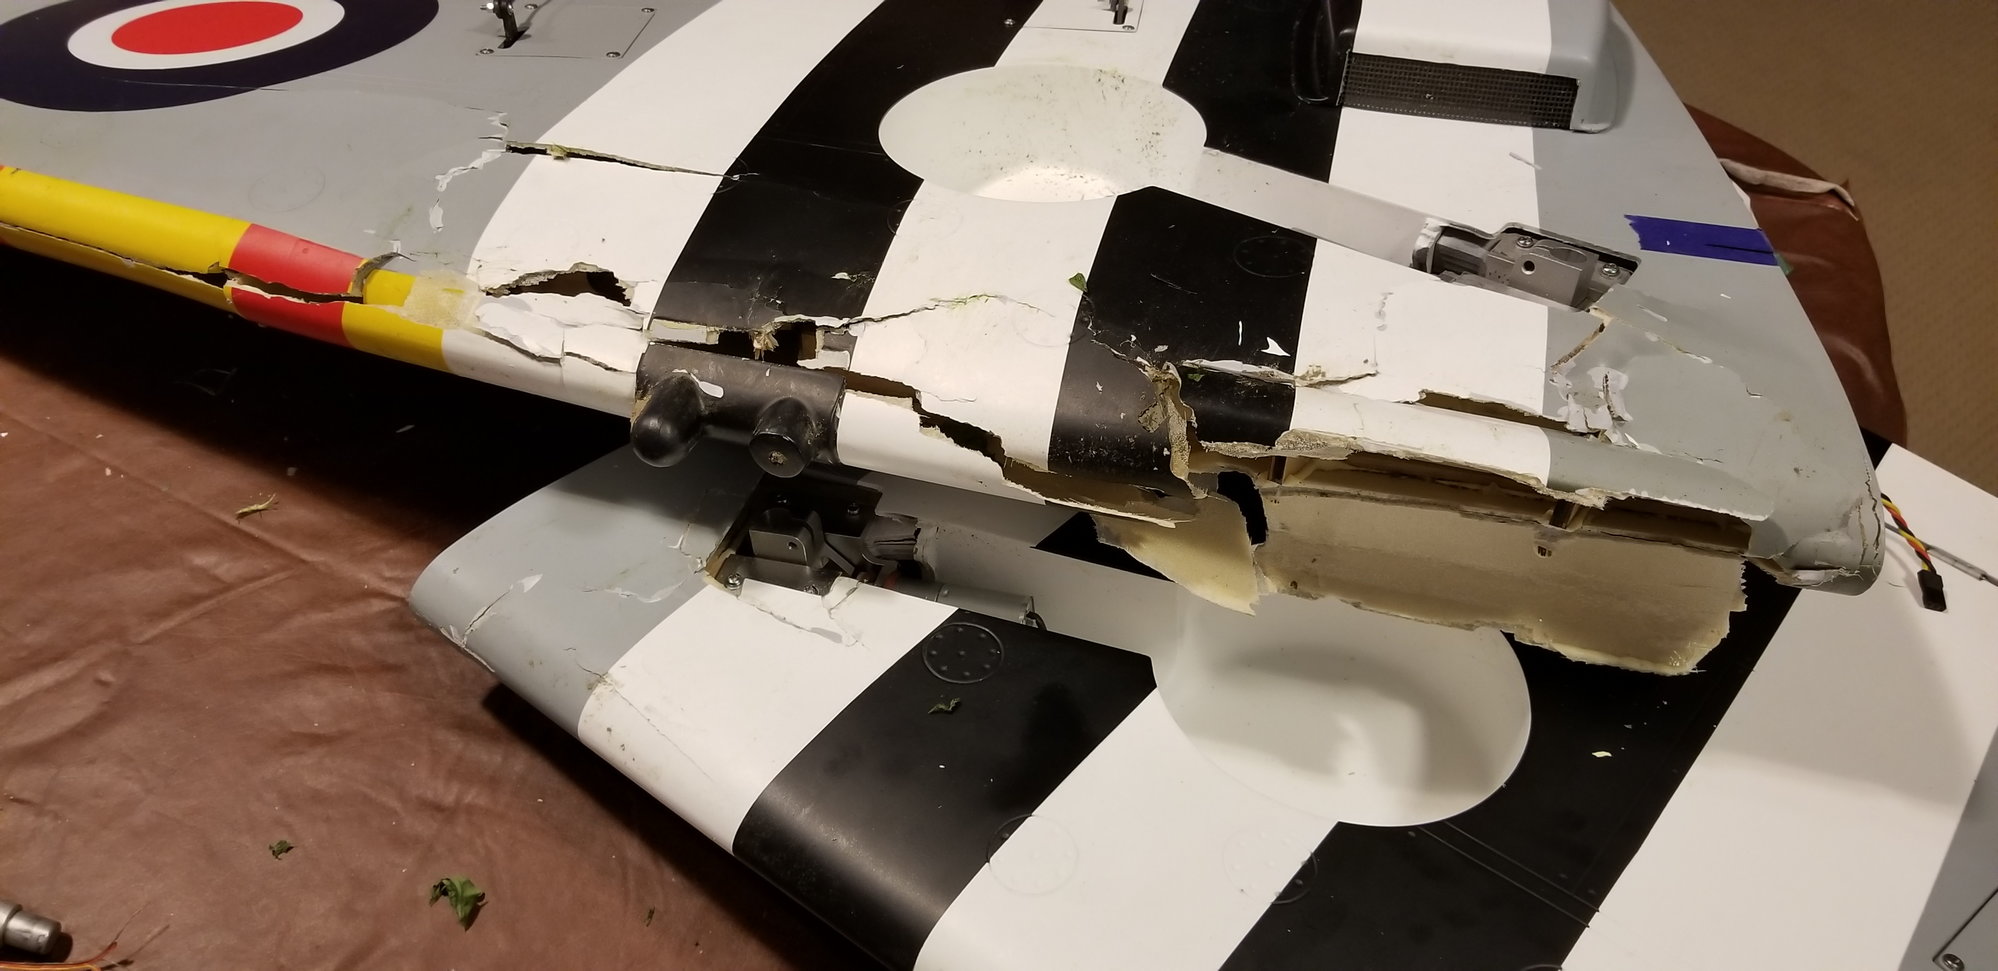
Very nice with the repairs! I don't think I will be as lucky. I will take another look this winter, but it would be major rebuilding of the internal support structures, and I don't think its do-able....
11-12-2020, 07:57 AM
#730

Dsa 44, looks like yours is done. More repairs than I would try. What happened to cause your crash? 50 flights on mine. Is still alive but you never know for sure. There are lots of ways to lose an RC plane. Hopefully your hardware survived.
11-12-2020, 08:20 AM
#731
Join Date: Jul 2017
Location: Just East of Cleveland Ohio
Posts: 51
Likes: 0
Received 1 Like
on
1 Post
Yep RBean, I looked at it again, not gonna try to repair...
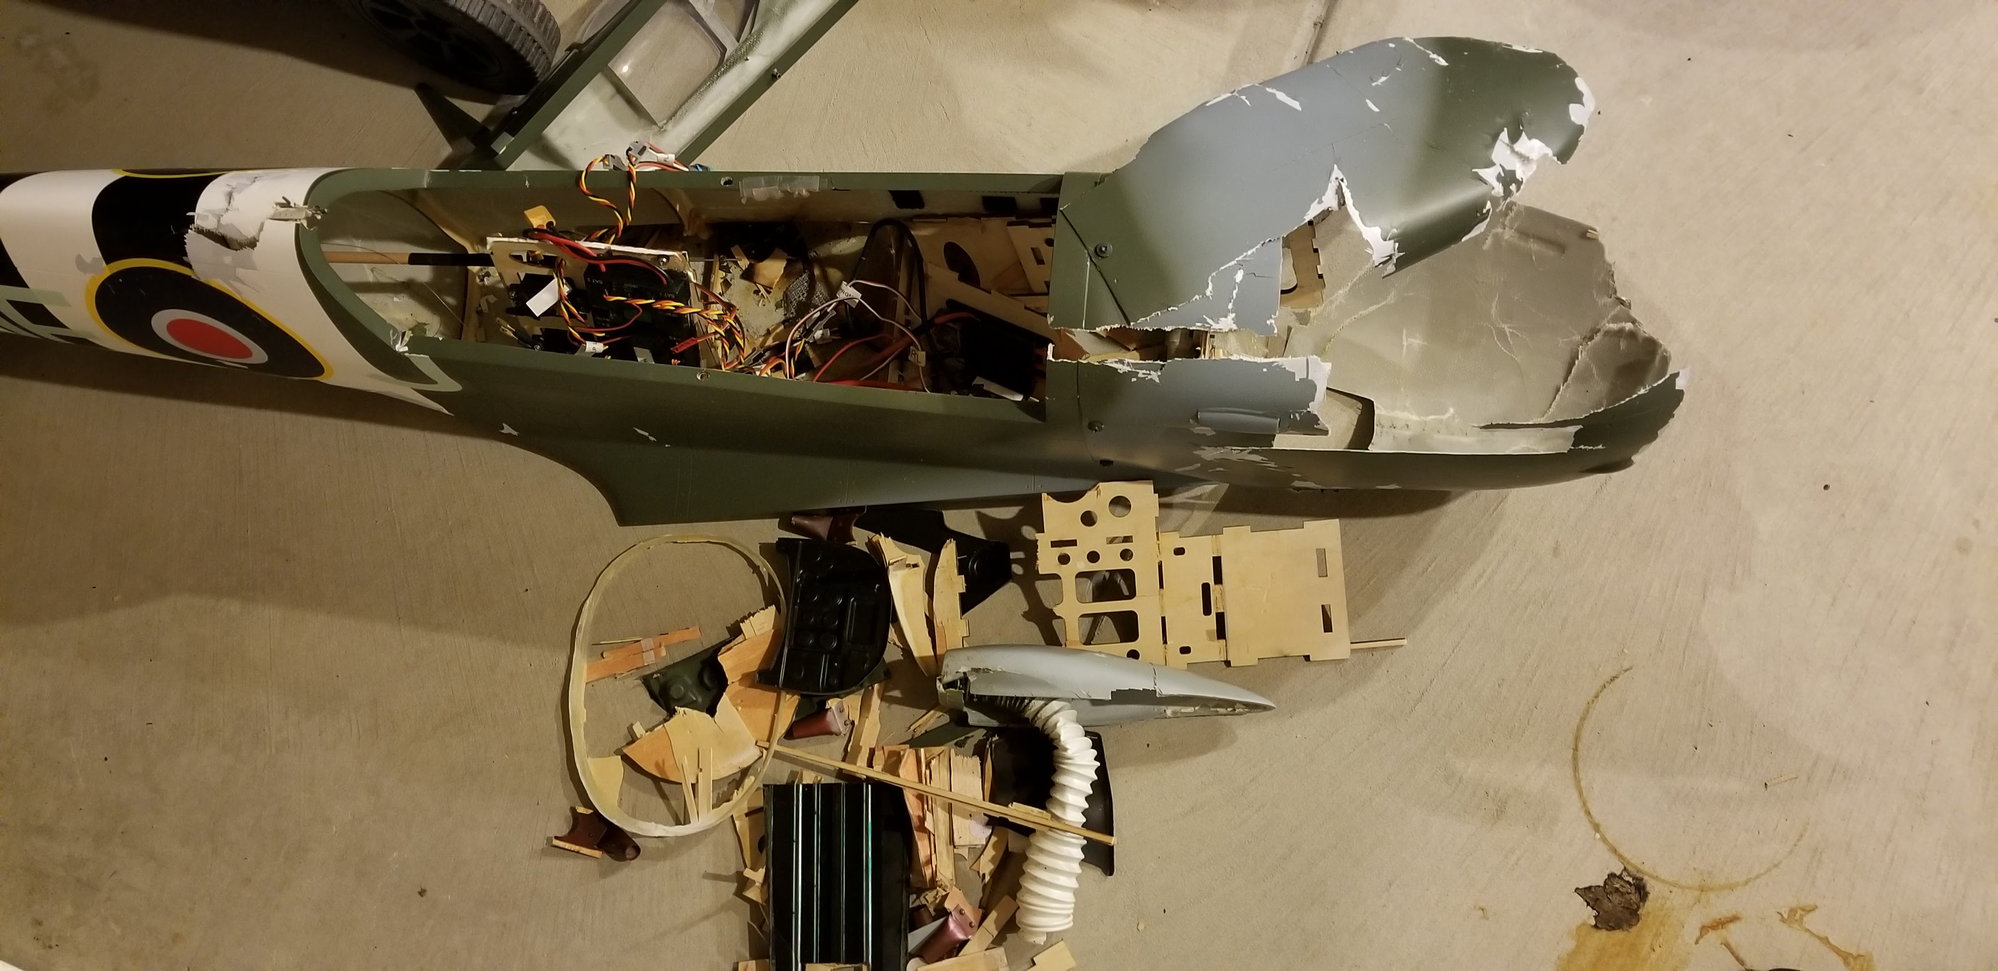
Not sure what happened... The gear would not cycle, that was some sort of warning, so I thought I would fly a circuit or two and just bring her back with the gear still down. I was at 1/2 to 3/4 throttle and added rudder to start a turn for my landing approach, and she just spiraled in, just like that. Would not respond to anything. Then started smoking on the ground as one of the lipos was burning. dunno if she had a short or something first which caused lost rx control, maybe a tip stall, but had plenty of altitude and just would not respond...just dunno. Very sad. I think some of the electronics are still salvageable, going to have to do lots of bench testing before I would put them elsewhere.
I don't think I will replace with same model. Although beautiful, I had to add 3 LBS! of lead up front to hit a reasonable CG. It is unfortunately manufactured quite tail heavy.
I have seen the Seagull model before, but don't like the non-scale gear placement. Maybe the new Black Horse one? I think that can fly auw at 17lbs, a lot lighter than this 24lb beast!
Keep flying safe! and look forward to seeing Carrera's re-maiden!
11-18-2020, 08:17 AM
#732
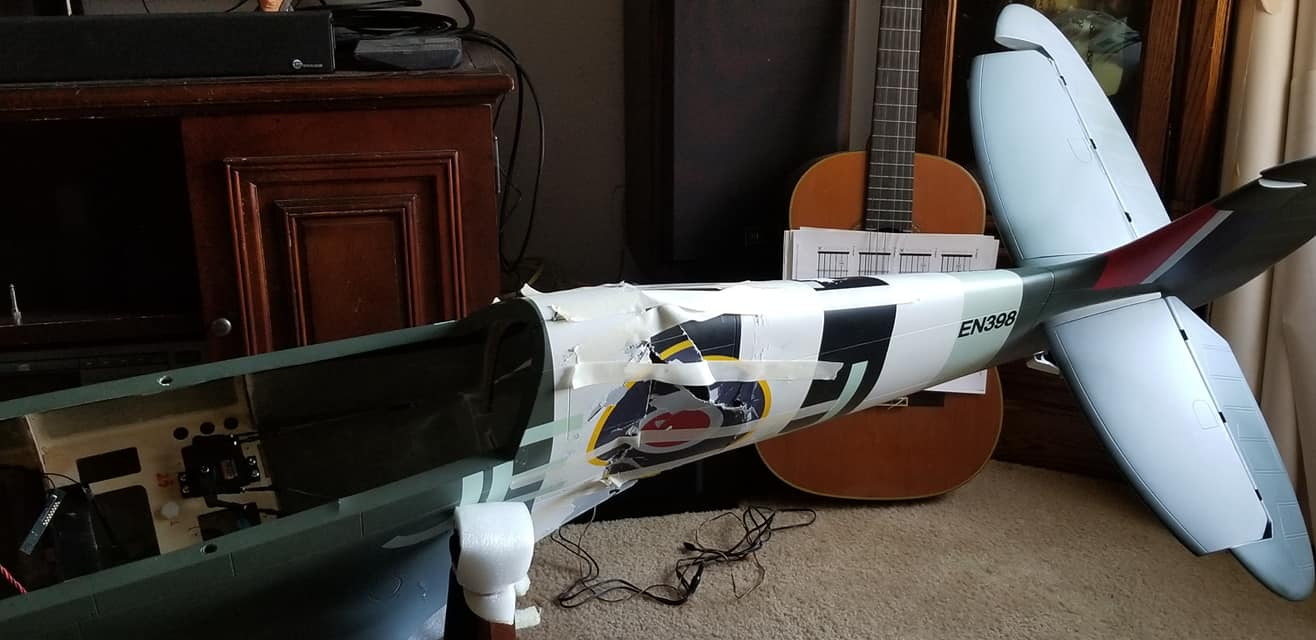
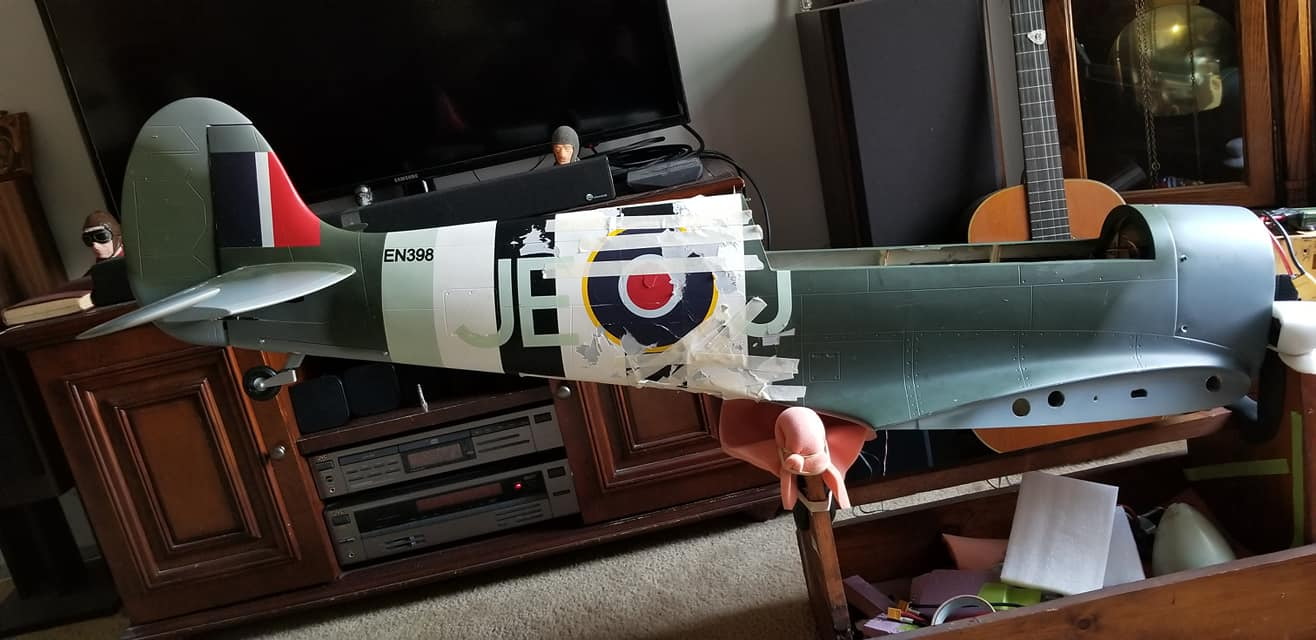
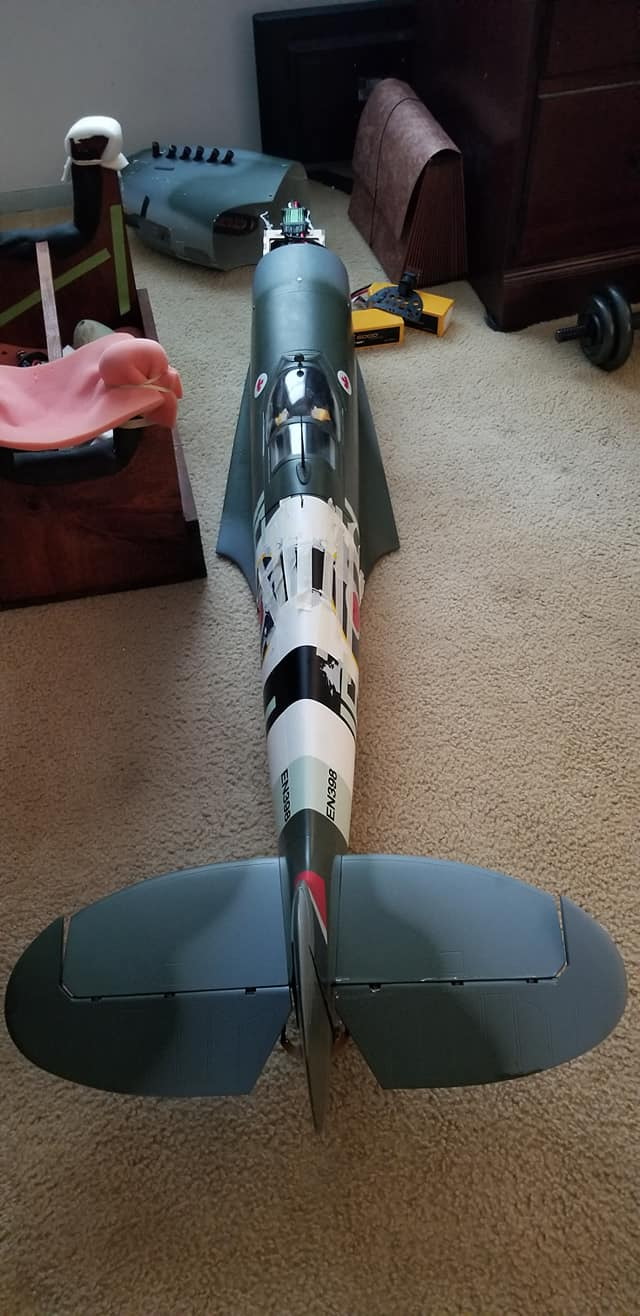
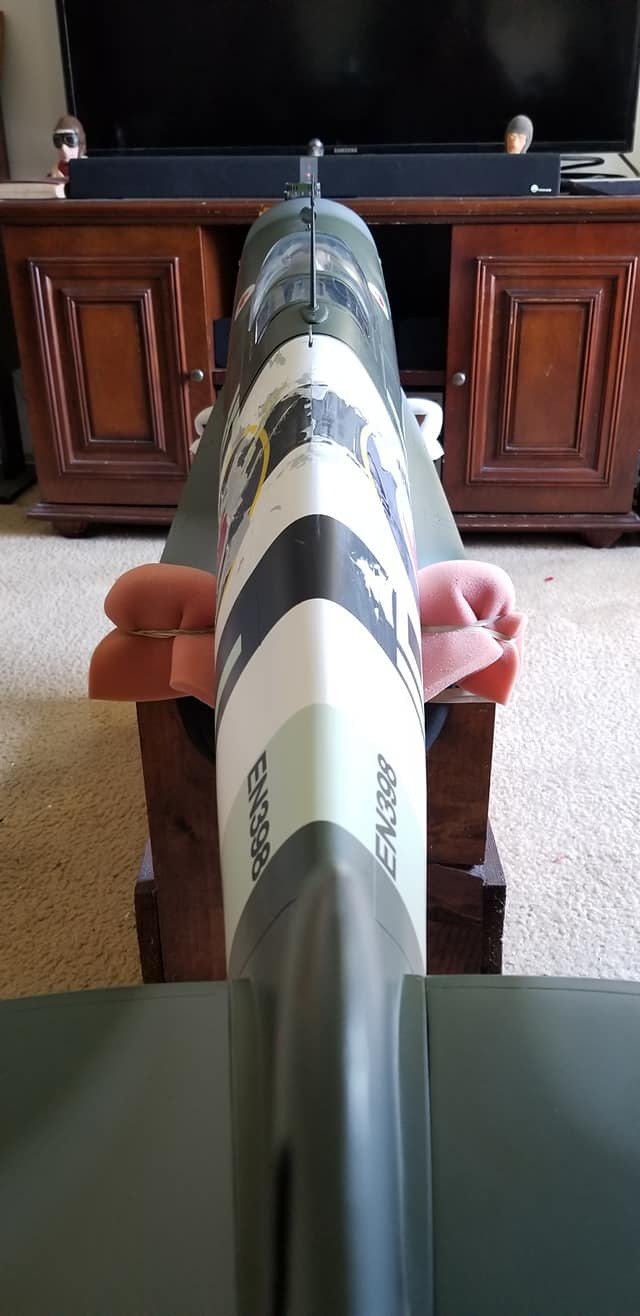
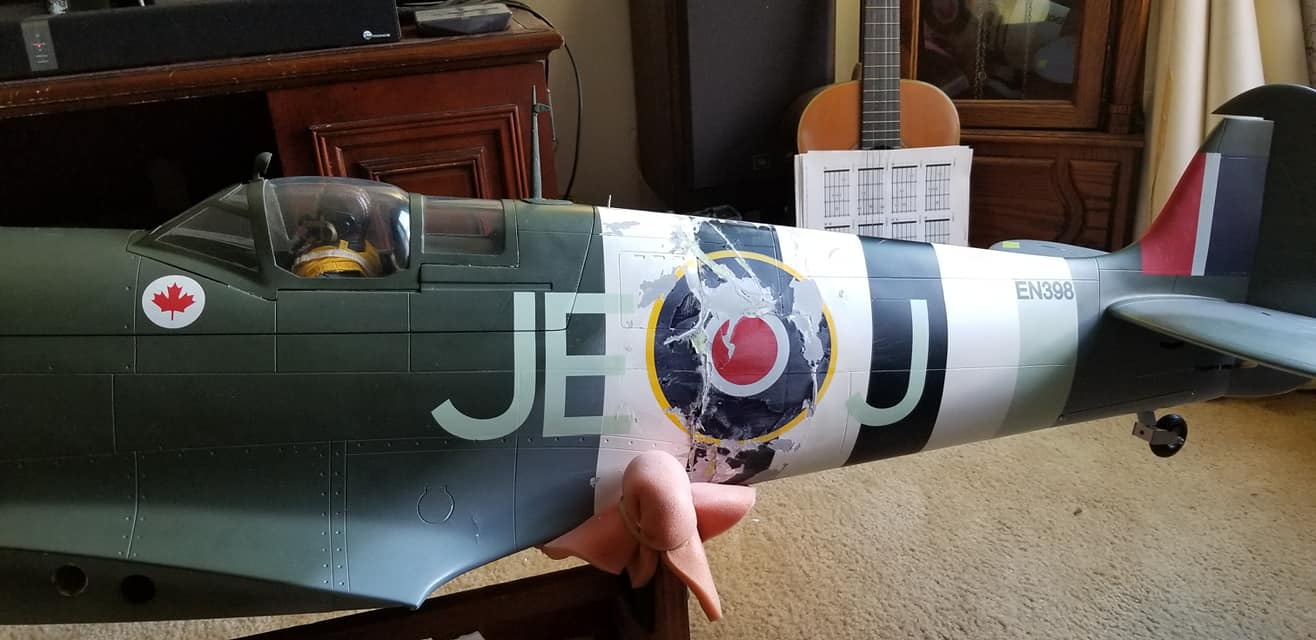
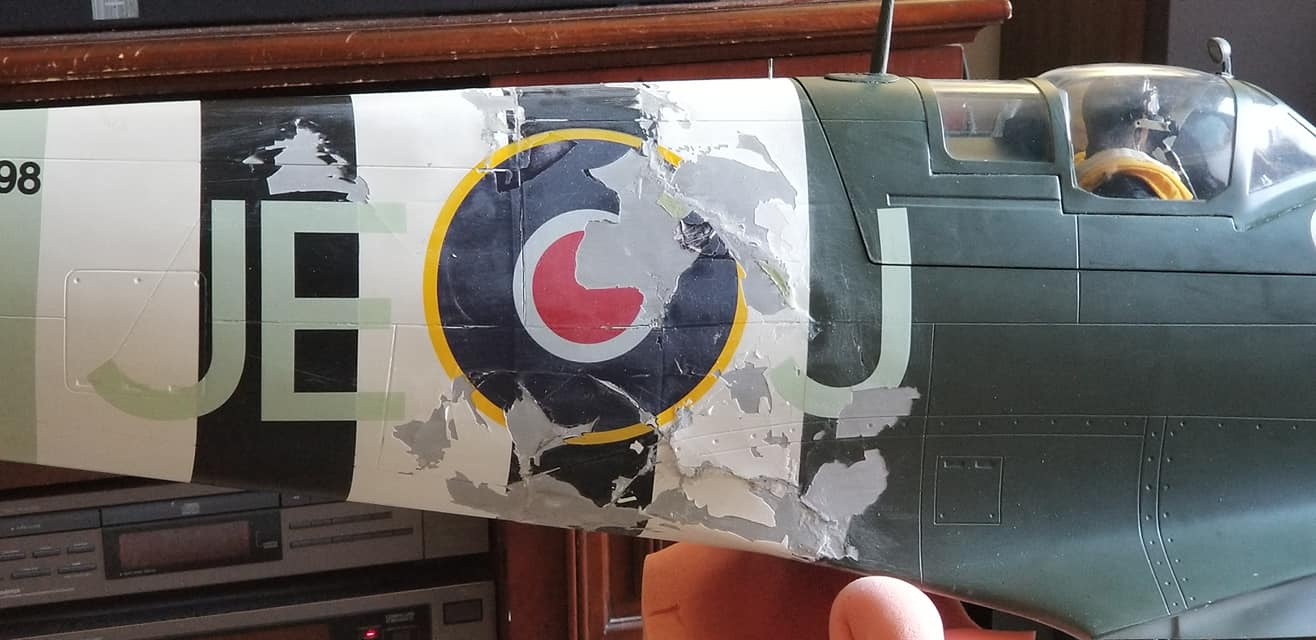
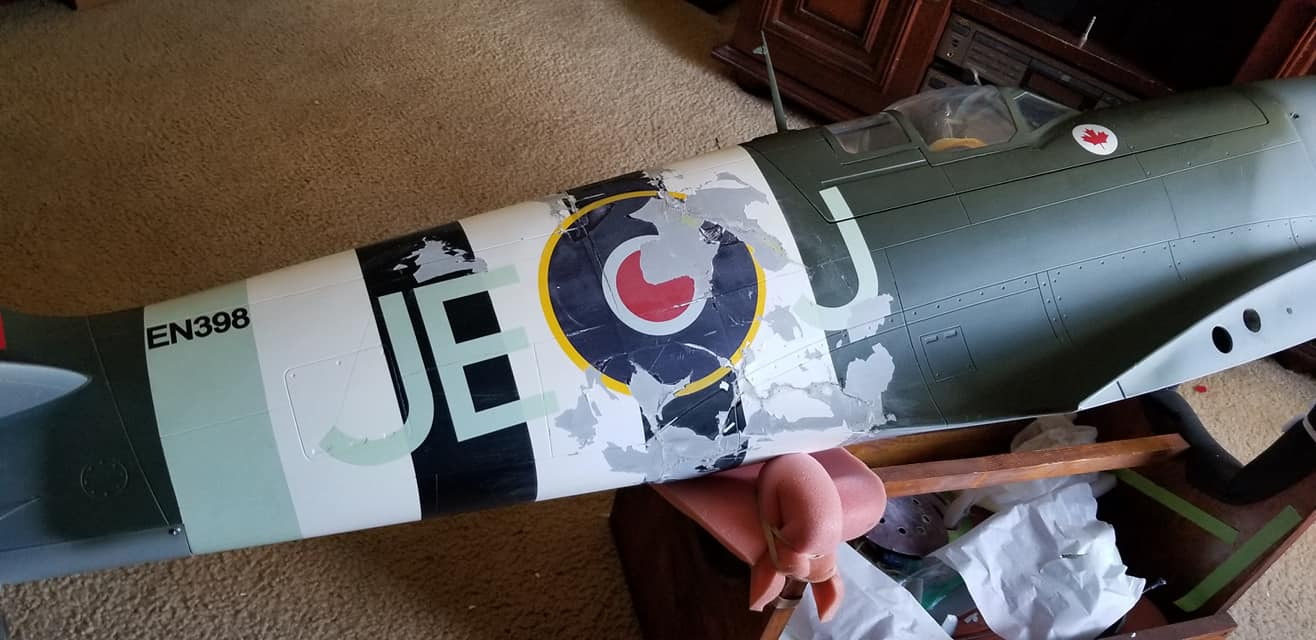
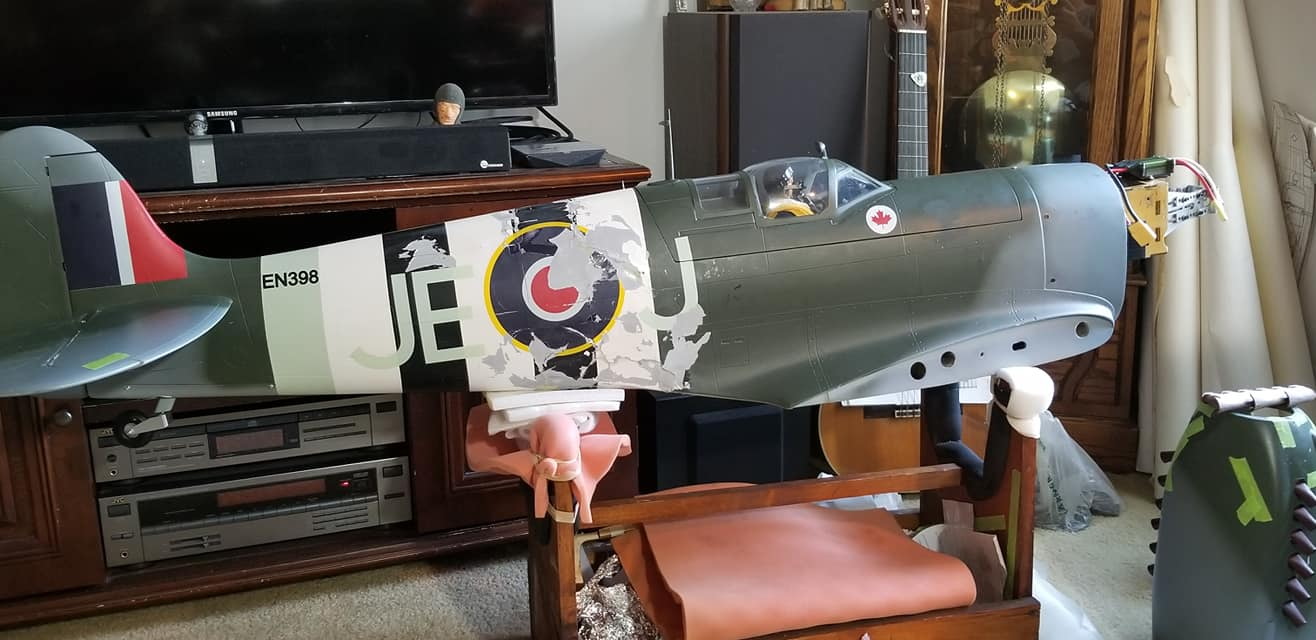
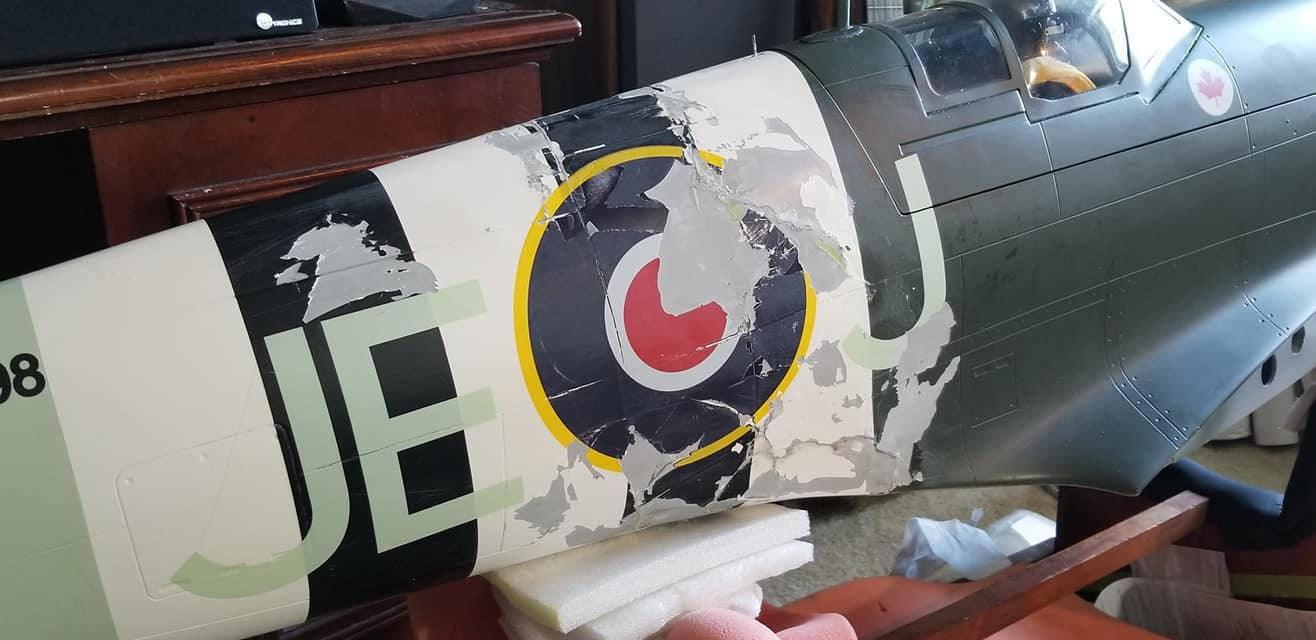
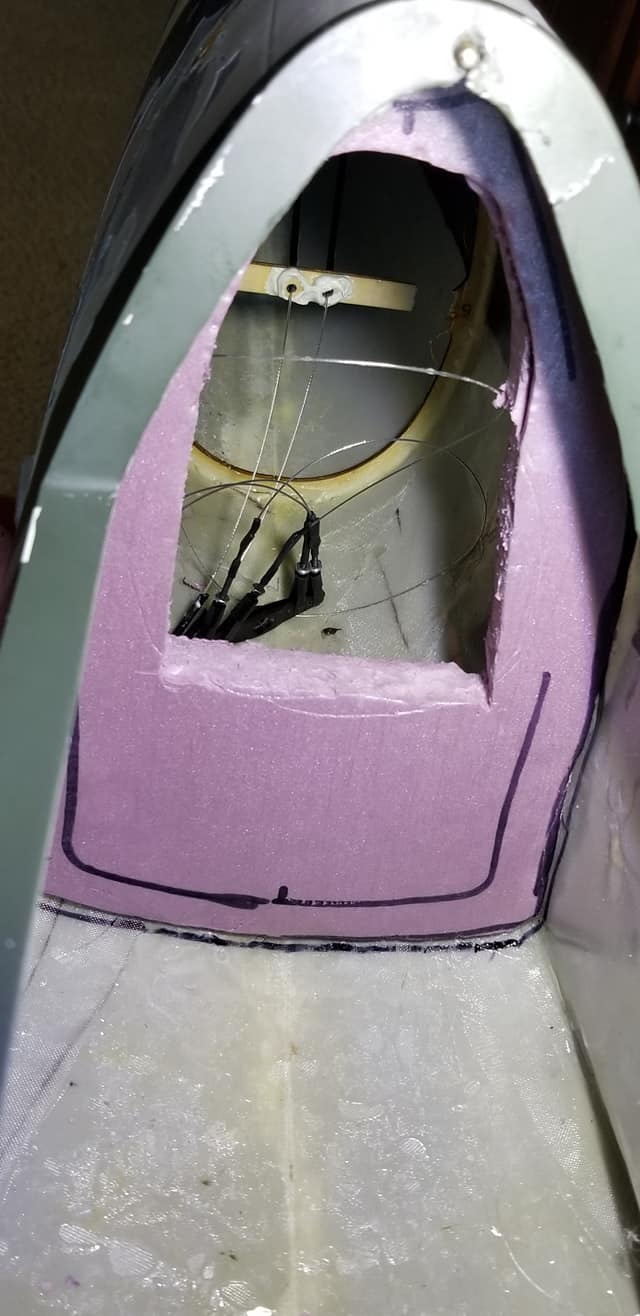
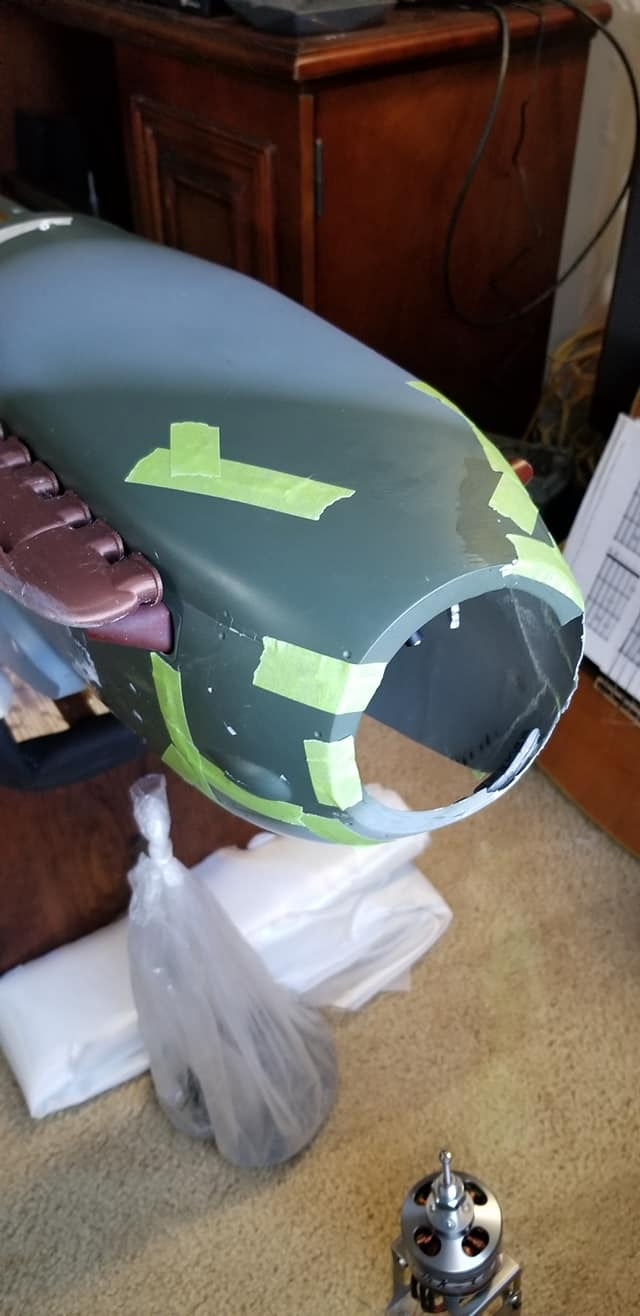
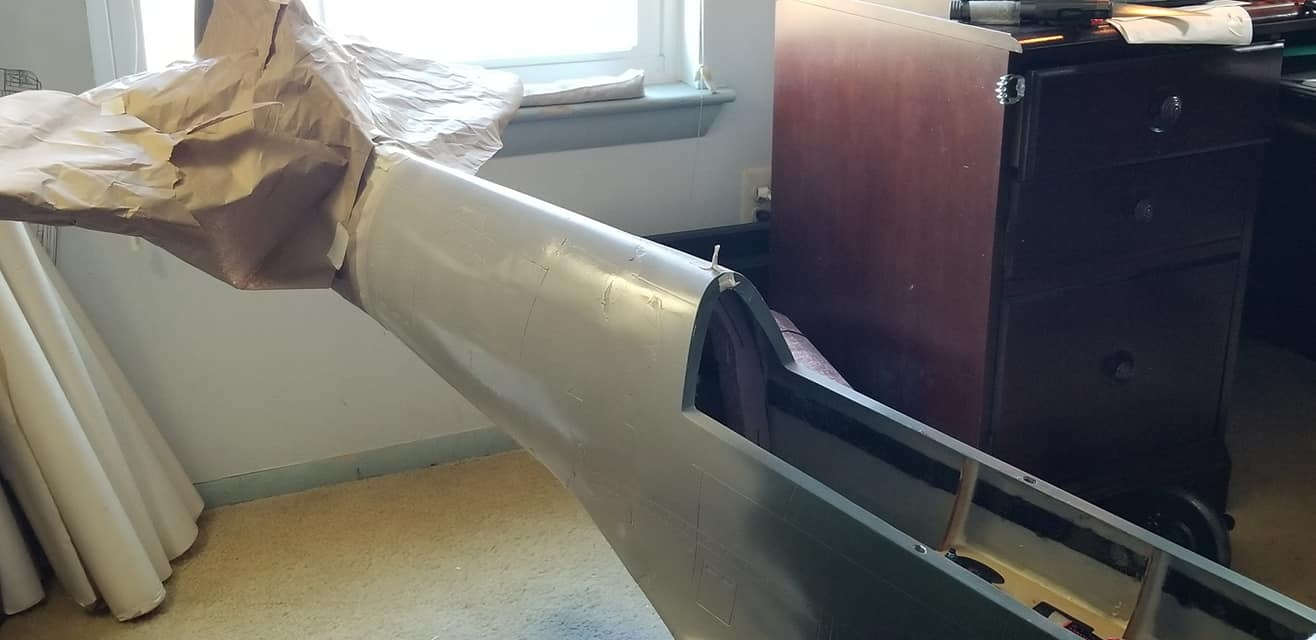
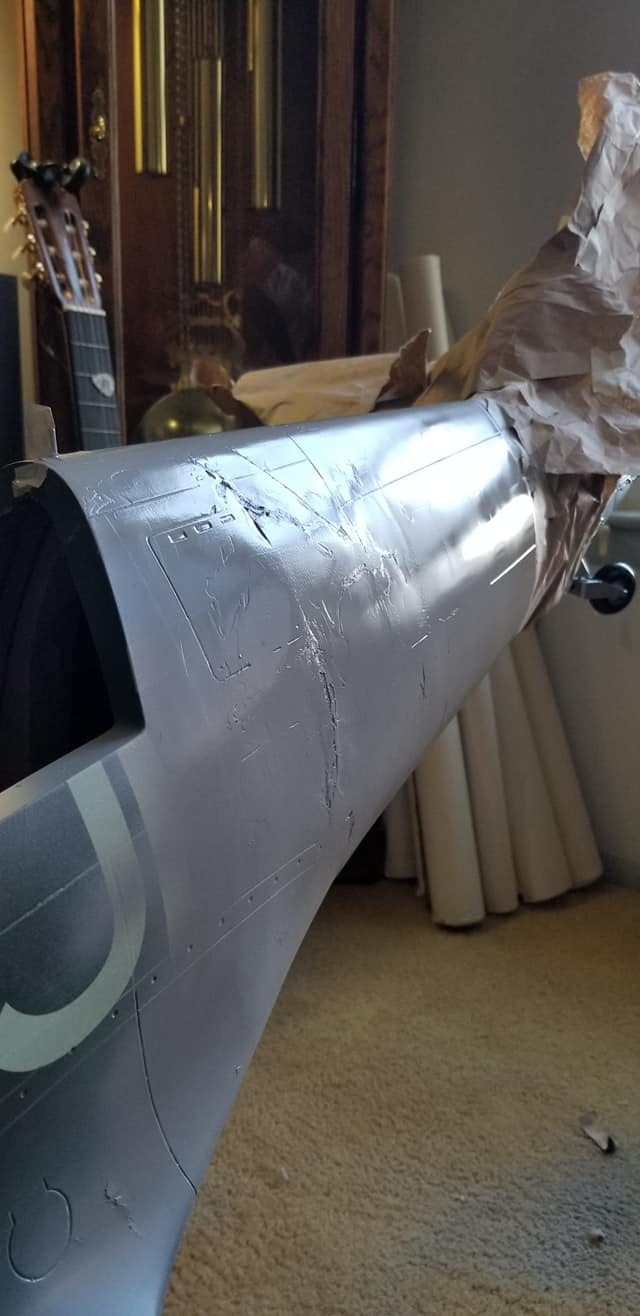
Wow dsa, that looks pretty bad. That looks a little bit beyond repair. Mine is coming along. I'll post more pics later. I used thin CA and accelerator to piece the shell back together and put it back into as closely aligned a position as possible. Yesterday I spent the day fiberglassing the interior in the area of damage. I used slow set epoxy resin and two layers of 1/2 oz cloth on the bottom and sides. Later today I'll venture out to the store and get a small can of two part body putty. Before using the body putty on the exterior of the fuselage I need to sand the heck out of the damaged area to make it as smooth as I can. It's really flexible so I will replace the damaged internal former with one made of 1" pink foam and perhaps some longerons of either square carbon tube of 1" foam. Either way would add very little weight while giving a lot of stiffness to sand against.
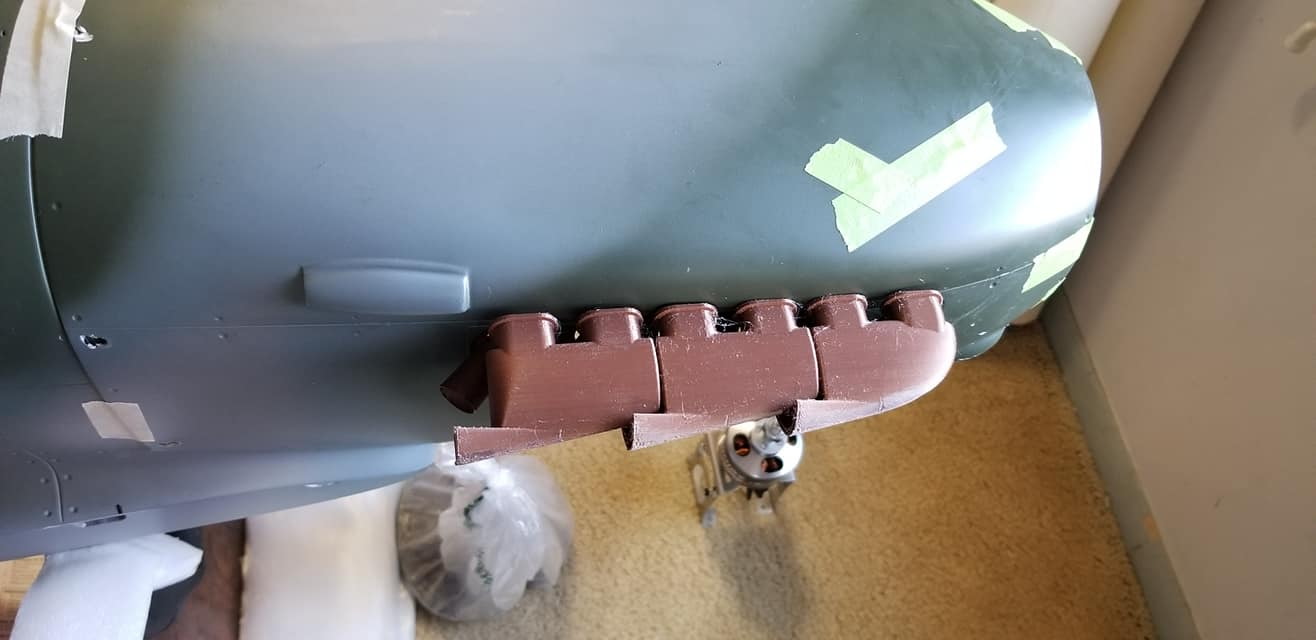
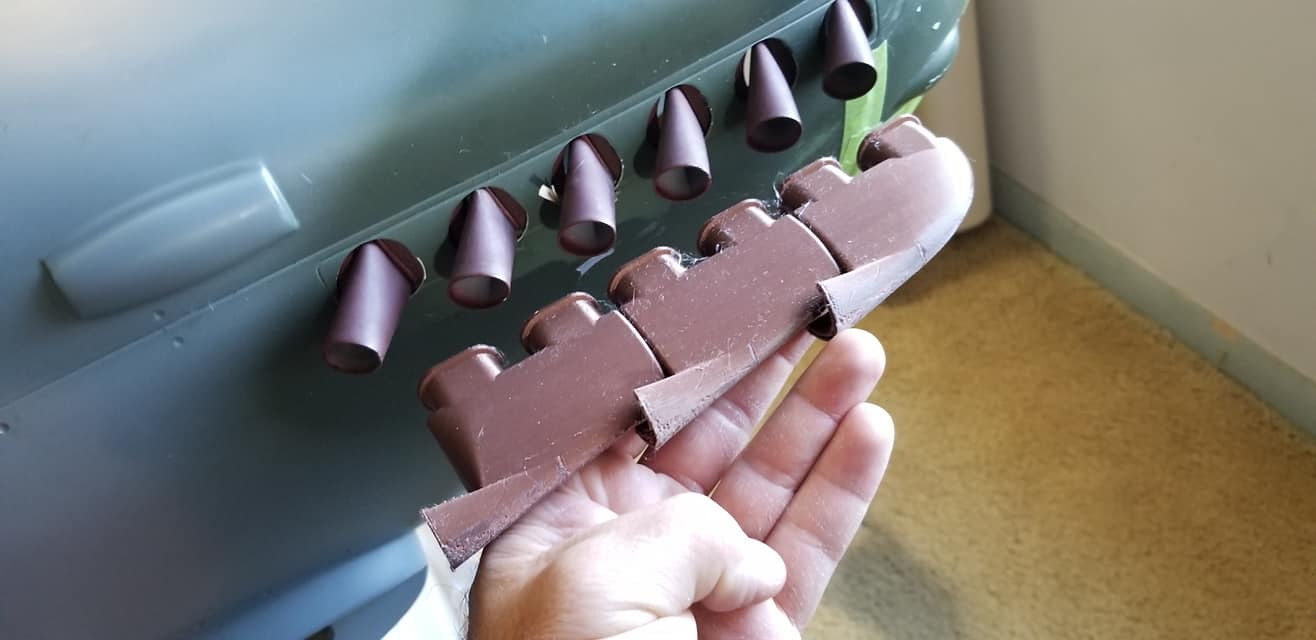
I'm thinking of doing a full repaint as a Battle of Britain MkV. Will remove the canons from the wings. I've already printed one of the two into one/six into three exhaust manifolds. I know the nose will be too long but only the most sharped eyed Spitfire nerd will notice. BTW, I'm ordering a replacement cowl from JP (Jiri Prekin).
PLEA: Does anyone have the wood parts to extend the motor box for electric power? I tried Gator who said they could get it but I heard nothing after telling them I wanted to order it. I'd even take just the dimensions or scans of the parts and I'll make my own.
Thanks,
Mike
Last edited by CarreraGTSCS; 11-18-2020 at 09:08 AM.

 11-19-2020, 05:44 AM
#734
Join Date: Jul 2017
Location: Just East of Cleveland Ohio
Posts: 51
Likes: 0
Received 1 Like
on
1 Post
Nice looking repairs Mike! I could not bring myself to throw away my wreckage yet, so let me look thru my pieces/parts and see if I can find the slivers of the electric mount at least to give you some measurements. Don't hold your breath cuz the firewall was a splintered mess.....hang tight for a few days.....
11-20-2020, 08:02 AM
#735
Nice looking repairs Mike! I could not bring myself to throw away my wreckage yet, so let me look thru my pieces/parts and see if I can find the slivers of the electric mount at least to give you some measurements. Don't hold your breath cuz the firewall was a splintered mess.....hang tight for a few days.....
11-23-2020, 02:38 PM
#736
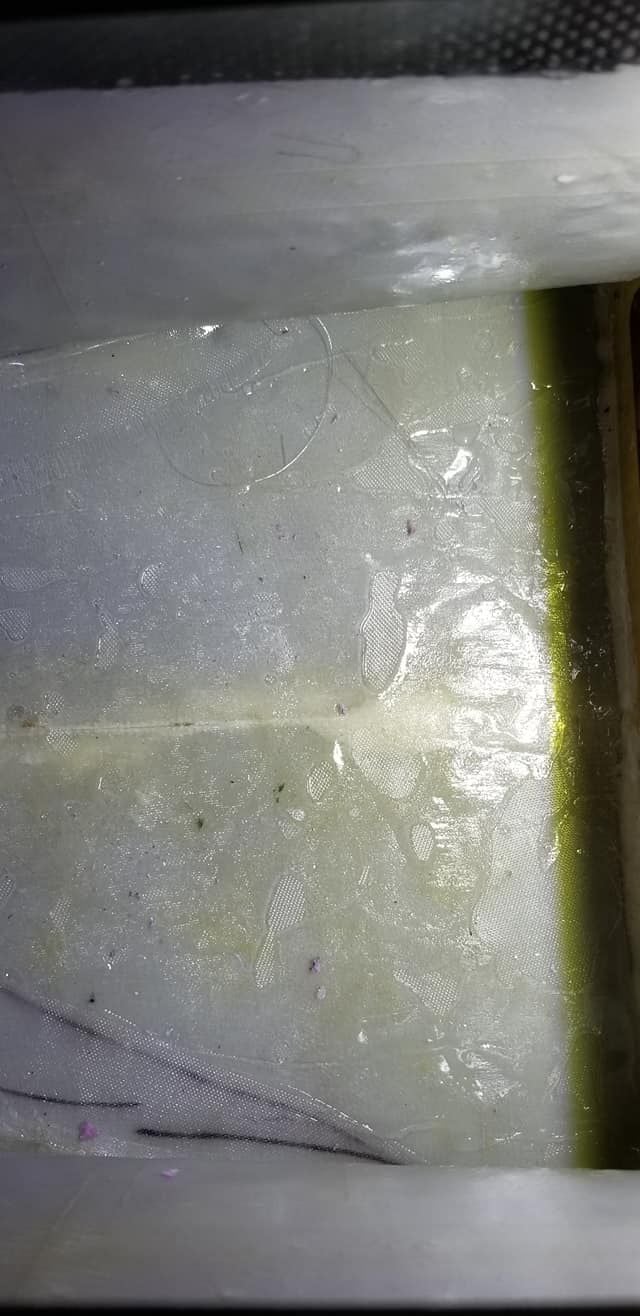
More progress on the repairs of the Spitfire. The fiberglass repairs to the fuselage are done. I sanded it as much as I dared then just today shot two coats of Rustoleum 2X Ultra Cover Paint & Primer in grey satin. I'll let it cure until the weekend before giving it a light sanding and then apply some filler. I was going to use body putty but since it seems to need just a skim coat I may use lightweight spackle. Lightweight spackle seems to remain slightly flexible after drying which may be beneficial on this flexible fiberglass fuselage.


11-29-2020, 10:52 AM
#737

Hey I like the battle proven , field repaired look . I suspect there were far worse looking repairs flying over Europe during the war. Patch it up and get it back in the air as quickly as feasable was the order of the day .
12-05-2020, 02:14 PM
#740
Join Date: Jul 2017
Location: Just East of Cleveland Ohio
Posts: 51
Likes: 0
Received 1 Like
on
1 Post
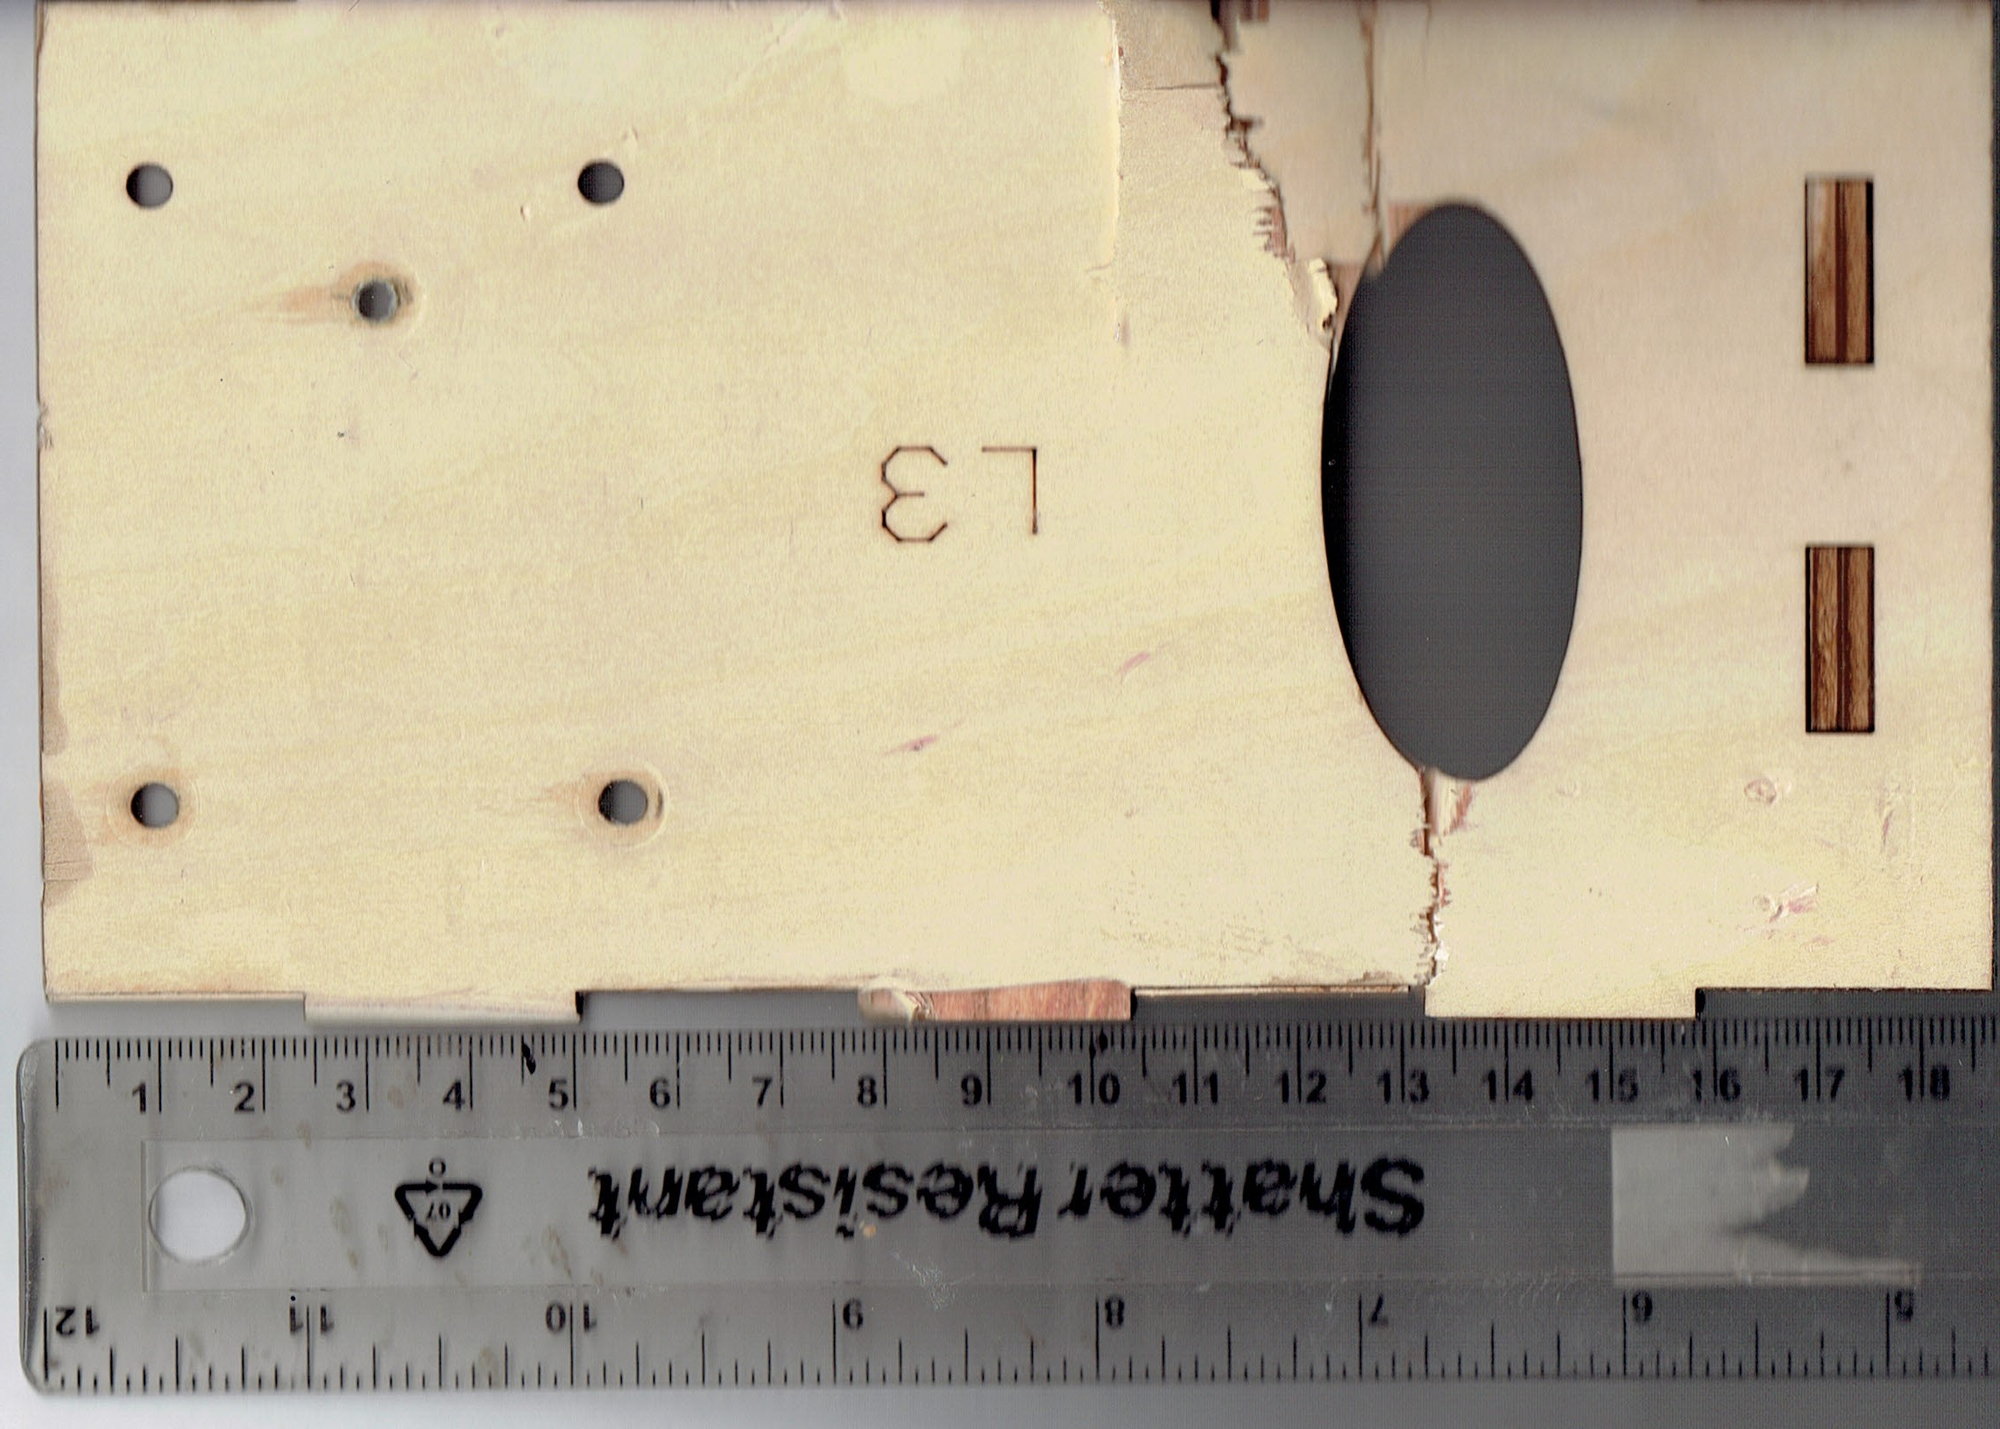
Hey Mike, sorry for the delay. I pulled this fragment of the motor mount box. Its all that was left in the splinter bag. As you can see it is about 18.7mm overall. The short edge would measure about 9.6mm and then 10.2mm if you include the tabs. The motor would mount to the far right where those thick ply tabs are, about 17.5mm from the left. I hope this is what you were looking for. I would think some metal standoffs or spacers might be easier.
Good luck!
Good luck!
12-05-2020, 02:46 PM
#741
[QUOTE=Dsa44;12648500]Hey Mike, sorry for the delay. I pulled this fragment of the motor mount box. Its all that was left in the splinter bag. As you can see it is about 18.7mm overall. The short edge would measure about 9.6mm and then 10.2mm if you include the tabs. The motor would mount to the far right where those thick ply tabs are, about 17.5mm from the left. I hope this is what you were looking for. I would think some metal standoffs or spacers might be easier.
Good luck
Thanks man. That's awesome!!
Good luck
Thanks man. That's awesome!!
12-07-2020, 06:05 PM
#742
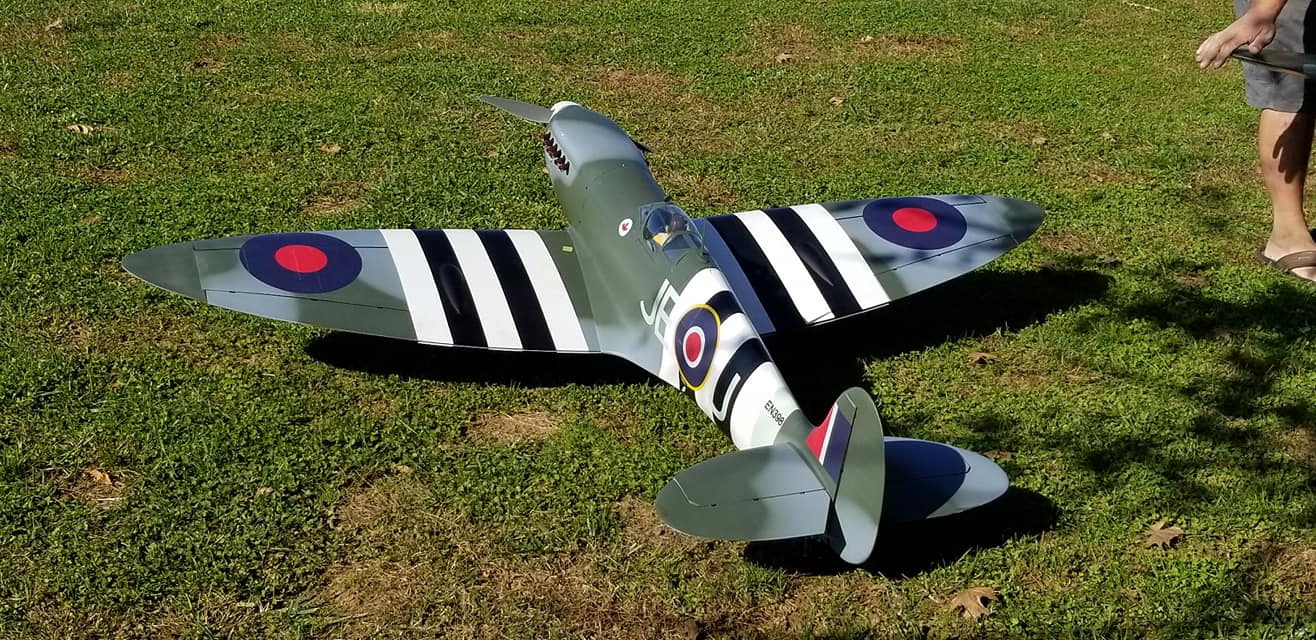
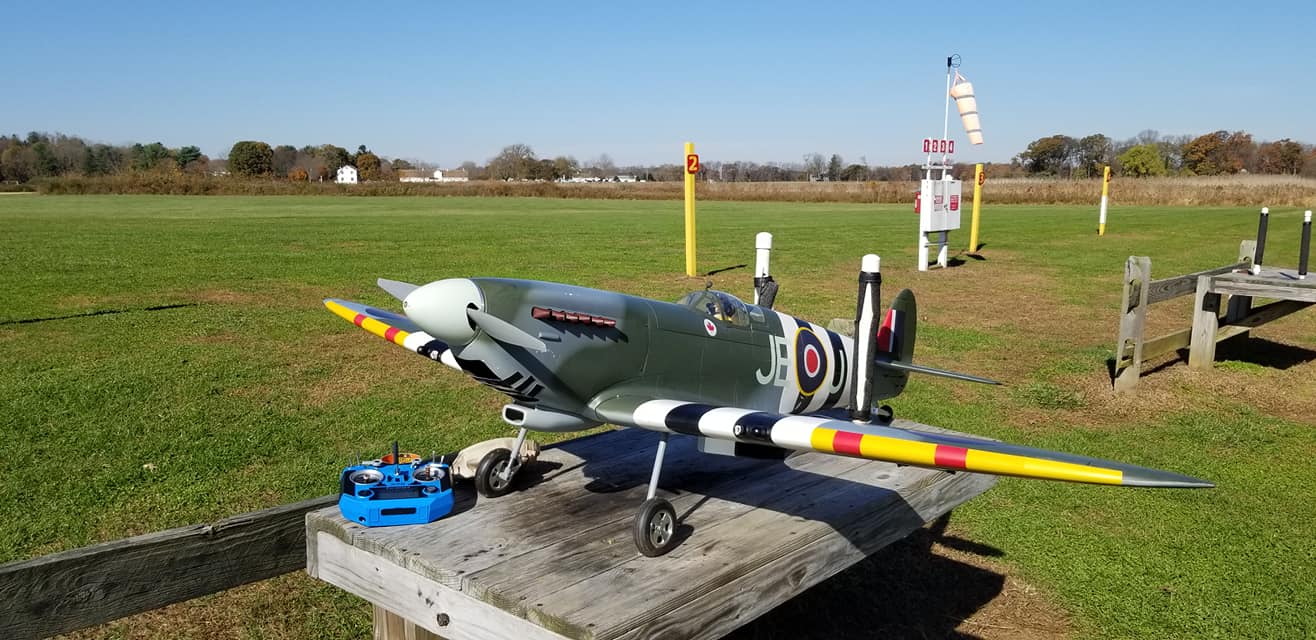
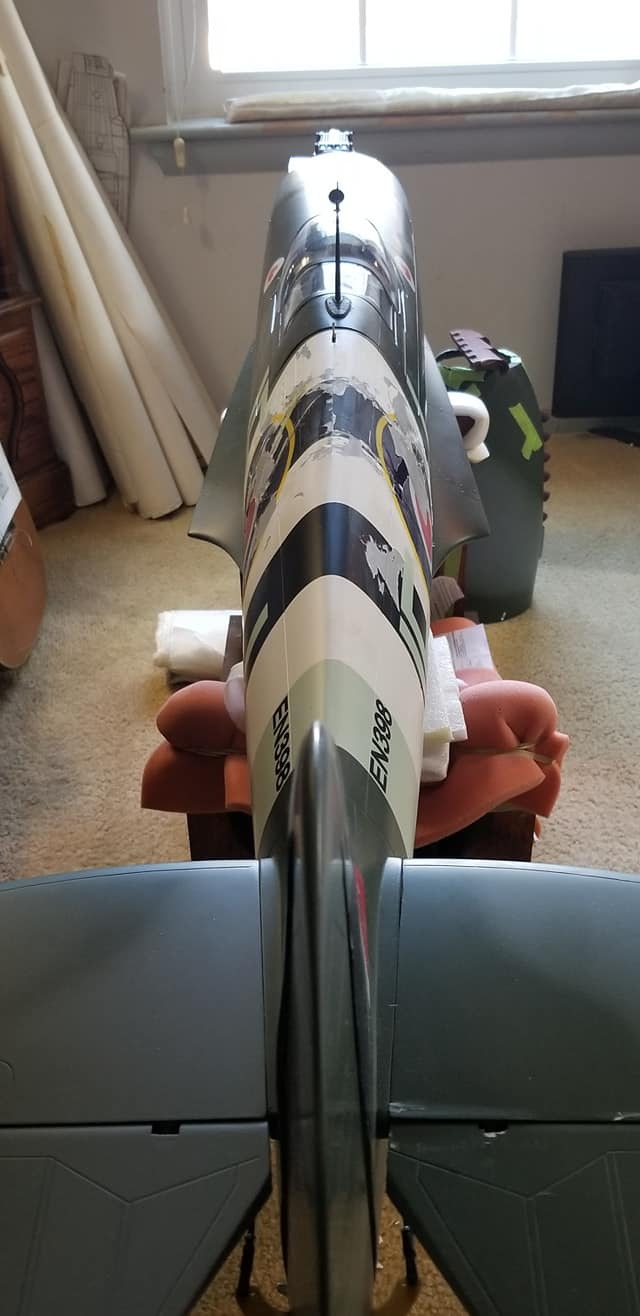
I had a few minutes before sundown to get out to the field and fly the repaired Spitfire this evening. What a honey this plane is. Two circuits trimming her which was just me dialing in more and more down elevator until there wasn't any more. Didn't touch the aileron trim or the rudder trim. Flew for 5 minutes and checked the main packs (down to 3.85v/cell which would give another minute or two of conservative flight) and figured I'd give myself a good buffer in case I needed a go around. Did a pass to confirm gear and flaps down. All good this time. There is absolutely no pitch change with full flaps. Mine are dialed to just about 90 degrees. Did another circuit try to decide the direction of the light breeze. Set up for a left to right landing and just let her come down. I kept some throttle on until the wheels touched and eased back the stick. My best landing yet. I wish there was video. What a lovely model. It feels very light in the air. Glad that I spent the time to fix her. Now to think about smoothing things out some more, rescribing the panel lines and paint.
The before and after pic.


The before and after pic.
12-09-2020, 08:51 AM
#743
Join Date: Jul 2017
Location: Just East of Cleveland Ohio
Posts: 51
Likes: 0
Received 1 Like
on
1 Post
Wow, that's a really nice repair, glad you got 'er back in the air so soon.
And that is a great looking 3d printed spinner. did you use the stock aluminum backplate? Any chance you are able to post the stl file?
Cheers, DSA
And that is a great looking 3d printed spinner. did you use the stock aluminum backplate? Any chance you are able to post the stl file?
Cheers, DSA
12-09-2020, 09:59 AM
#744
01-10-2021, 03:13 PM
#745
Join Date: Dec 2007
Location: silver spring,
MD
Posts: 1
Likes: 0
Received 0 Likes
on
0 Posts
I have one of these, brand new still in the box plus electric retracts, spinner and battery tray. I got from Mike at Gator couple years ago. Anyone want to buy it? Let me know.
02-05-2021, 08:24 AM
#748
Junior Member
Join Date: Feb 2021
Posts: 1
Likes: 0
Received 0 Likes
on
0 Posts
That was windsurfa that moved his servo tray. He's got pix a few pages back...
I'm on the road right now, but I can already see why you might need more nose weight than I do. I have my throttle servo under where your fuel tank is, and my electronics are all where your (I assume) throttle servo is. I also have a choke servo just aft of my firewall. I have 4 NiMH batts...two are just aft of the firewall...next to my choke servo, and two are just aft of the first former (bulkhead). The batteries were further aft for my maiden, but still forward of the CG line.
I epoxied 24oz of lead (plus whatever the massive ammount of JB weld I used weighs) in the upper front of my cowling to get it as far forward as possible. The remaining 28oz of lead is bolted to the engine box under where my choke servo is located and safetywired to my motor mounts (though I plan to relocate those). I also reinforced my cowling to cope with the extra weight.
Mine is powered by an EME 35, which is probably comparable to the weight of your DLE 35, but curious how far from your firewall your cylinder (the heaviest part) is compared to mine. I'll measure mine and let you know.
Ill take pix of my setup and post them when I get back (about a week from now).
 02-05-2021, 11:14 PM
#750