


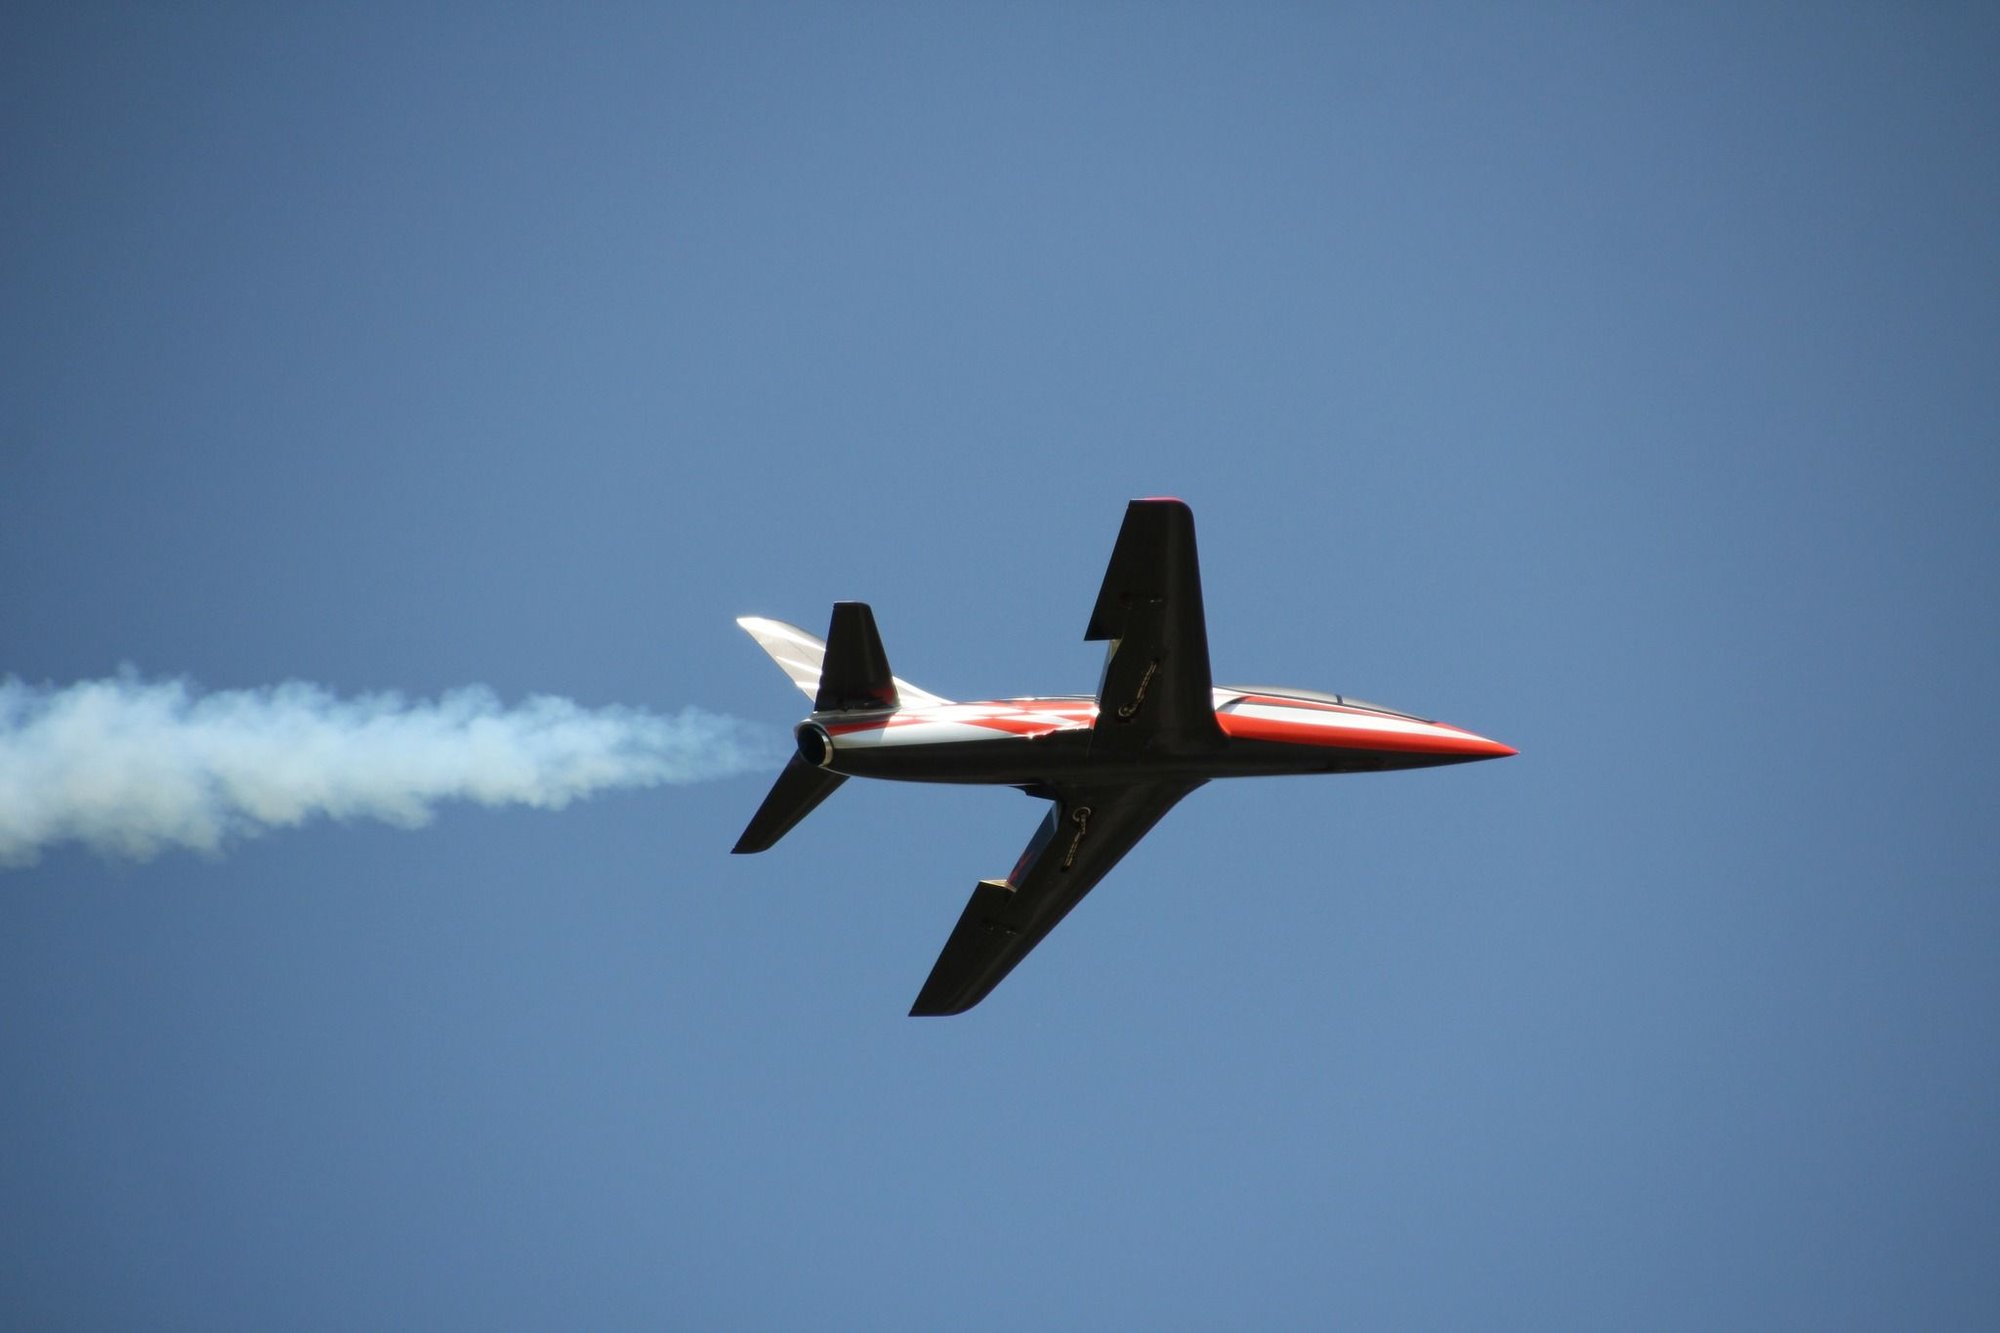
CARF REBEL 2m
 03-14-2024, 12:35 PM
#851

There's not a whole lot I can do to reduce the amount of air entering the nose gear opening but cut additional openings in the top hatch. As you can see in my earlier postings, I cut 8 "gills" in the top hatch but there's room for 2 or 3 more per side. I have already laminated some carbon to the inside of the hatch so opening it up even more is not a problem.
...but really just Electron nose oleo spring being too soft. I got fed up with modifying them for customers (Diablo too) so we are working with Electron for stronger springs.
TBH the Electron nose leg is a bit short for the Rebel, a 5mm spacer would make a huge difference, but what you need to do is fill the spring + 15-20mm extra of 3/32 Tygon. Sit the spring in the plunger, push a length of Tygon through till it hits the bottom of the plunger, with the spring uncompressed cut the Tygon flush with the top. Reassemble and go fly.
TBH the Electron nose leg is a bit short for the Rebel, a 5mm spacer would make a huge difference, but what you need to do is fill the spring + 15-20mm extra of 3/32 Tygon. Sit the spring in the plunger, push a length of Tygon through till it hits the bottom of the plunger, with the spring uncompressed cut the Tygon flush with the top. Reassemble and go fly.
Last edited by bluelevel; 03-14-2024 at 12:37 PM.
 03-14-2024, 01:56 PM
#852

That's the way I did it and was quite baffled that it didn't want to rotate. Your CG check is supposed to be done for turbine powered planes with just landing fuel on board, I did it with take-off weight.
There's not a whole lot I can do to reduce the amount of air entering the nose gear opening but cut additional openings in the top hatch. As you can see in my earlier postings, I cut 8 "gills" in the top hatch but there's room for 2 or 3 more per side. I have already laminated some carbon to the inside of the hatch so opening it up even more is not a problem.
That's good advice. I can fabricate some wooden packers 5-6mm strong and put them between the nose retract and the mounting rails. Also stiffening the nose oleo spring sounds like a good idea as it was compressing way too much when I accelerated.
Leave the inlet set up. Do the nose leg and packer and it will be away
The following users liked this post:
DenisFerrari (03-24-2024)

The following users liked this post:
RC Rich (03-27-2024)
03-27-2024, 05:27 PM
#854
Just wanted to post an update on my previously reported take off rotation problem. Also wanted to give huge a shout-out to Electron. Parallel to posting here I contacted Electron to report my issue and ask them for advice. My email was answered quickly and Adrian suggested to try a stiffer front spring and increase the front height by using a 70mm dia tire instead of the stock 60mm one. I received all promised parts in the mail free of charge, that's what I call awesome customer service!
I had already made 5mm packers to raise the front, the bigger front tire will be installed as well in case that I need a few more millimeters of height. The new spring feels fine as well.
No flying weather right now, I'll report back here as soon as I was able to test the changes.
I had already made 5mm packers to raise the front, the bigger front tire will be installed as well in case that I need a few more millimeters of height. The new spring feels fine as well.
No flying weather right now, I'll report back here as soon as I was able to test the changes.
The following users liked this post:
RC Rich (03-27-2024)
04-07-2024, 01:20 PM
#855
OK guys, seems as if I got my take off rotation problem sorted. As stated in an earlier post, I started with a stock version of the Electron ER-40 retracts and could not get the plane off the ground. The thick golf course like turf at our field doesn't help and coming from turbines I also learned that EDFs simply do not deliver the same thrust at take-off speed. In a first attempt I added 6mm packers under the nose retract to improve the angle of attack and put a thick 4mm spacer in the nose oleo to increase the pre-tension of the spring. That helped a bit, but I was only able to get the plane off the ground by jerking back the elevator stick completely. The take off roll looked as if I were a complete beginner and the plane was close to stalling.
Today I test flew the bigger front tire (70mm instead of 60mm) and I have also installed the firmer red spring I received from Electron. I started with the CG location as per Dave's recommendation but moved it way back. The small Rebel still needs a firm pull to get it off the ground but I can live with that. Flew 4 battery sets today to dial in the throws, expo & gyro gains and I moved back the CG 2 times (it is now about 3cm aft of the spar behind the wing tube).
Comparing the smaller 2m Rebel to my bigger Rebel Max there are still worlds between those 2 planes, but of course it's a bit unfair to expect that the Classic flies as nice as its bigger brother. All in all I am happy with the plane now. Still not a huge fan of EDFs but our field doesn't allow turbines on weekends, so what can you do...
Last edited by bluelevel; 04-07-2024 at 01:31 PM.
The following users liked this post:
grolleman (04-21-2024)
04-21-2024, 03:37 AM
#858
But as I said in my previous post the spring swap wasn't the only thing I did. I also replaced the original 60mm tire with a 70mm dia and I added about 5mm of packers under the nose retract. This elevated the nose 10mm.
Last edited by bluelevel; 04-21-2024 at 02:52 PM.
The following users liked this post:
grolleman (04-21-2024)
05-06-2024, 01:28 AM
#862
Junior Member
Join Date: Jun 2023
Location: Germany (near to Mainz/Frankfurt)
Posts: 5
Likes: 0
Received 0 Likes
on
0 Posts
Hi Guys.
A question about the JP retract controller.
I connected the JP controller power line directly to a 2S Lipo and it will sucks it empty, if I connect it for some weeks together.
The hope was, that it only takes energy, if the RX is on. But it sucks energy every day....
Do you have a separate switch in the power line between the Lipo and the JP controller?
Thanks for your answer.
Holger
05-06-2024, 02:25 AM
#863

My Feedback: (53)

Hi Guys.
A question about the JP retract controller.
I connected the JP controller power line directly to a 2S Lipo and it will sucks it empty, if I connect it for some weeks together.
The hope was, that it only takes energy, if the RX is on. But it sucks energy every day....
Do you have a separate switch in the power line between the Lipo and the JP controller?
Thanks for your answer.
Holger
A question about the JP retract controller.
I connected the JP controller power line directly to a 2S Lipo and it will sucks it empty, if I connect it for some weeks together.
The hope was, that it only takes energy, if the RX is on. But it sucks energy every day....
Do you have a separate switch in the power line between the Lipo and the JP controller?
Thanks for your answer.
Holger
05-24-2024, 05:58 AM
#865
Junior Member
Join Date: Oct 2006
Location: Cranves sales, FRANCE
Posts: 19
Likes: 0
Received 0 Likes
on
0 Posts
My setup for the Rebel:
K142G4, 2 smoke tanks, powerbox sr2, 2 RX Futaba 7008 and 7108, 2 batteries Jeti lion 5200 for RX, Life 3S 3000 for engine, ER40 Electron r�tracts landing gear and LGC15 controler. A lot off parts Asa and PC 3D printed.
11Kg with full uat . CG on the rear side of the wings tube. It flies perfectly


K142G4, 2 smoke tanks, powerbox sr2, 2 RX Futaba 7008 and 7108, 2 batteries Jeti lion 5200 for RX, Life 3S 3000 for engine, ER40 Electron r�tracts landing gear and LGC15 controler. A lot off parts Asa and PC 3D printed.
11Kg with full uat . CG on the rear side of the wings tube. It flies perfectly
Last edited by looping-74; 05-25-2024 at 04:01 AM.
 Yesterday, 10:32 AM
#869
Last year on flight #6 I lost my Rebel classic. I was flying at a airfield with a grass strip that had a wire fence on both sides of the runway (to keep the cows off the runway). The runway is not super narrow, but not overly wide either, probably about 40-50 feet wide. Anyway, on take off, right as I was starting to rotate the nose wheel hit a clump of grass and the control arm on the Electron nose strut slipped and the jet immediately turned left. Because it slipped left there was no throw to counter the left turn and it hit the wire fence at take off speed. Needless to say, the airframe was totally destroyed, but turbine, retracts, and all electronics survived. A friend of mine with a brand new Rebel offered to sell me his right on the spot so I would not lose the summer flying season, which I graciously accepted. I have often thought that having only a single set screw on the control arm seemed not ideal, now I know why and should have trusted my gut. Oh well, live and learn, no one got hurt so I've moved on.
To prevent this from happening again I have made the following modification to all of my Electron nose struts. This is really easy to do with just a drill and offers me some assurance that the nose steering arm won't slip from the nose strut in the future. Thought I would share my learnings with others such no body else has to learn this the hard way. I do use the flat spot on the nose pin to align the set screws, but the nose steering arm set screw is 90 degrees from the set screws on the strut and the nose steering pin only comes with a flat spot on one side.
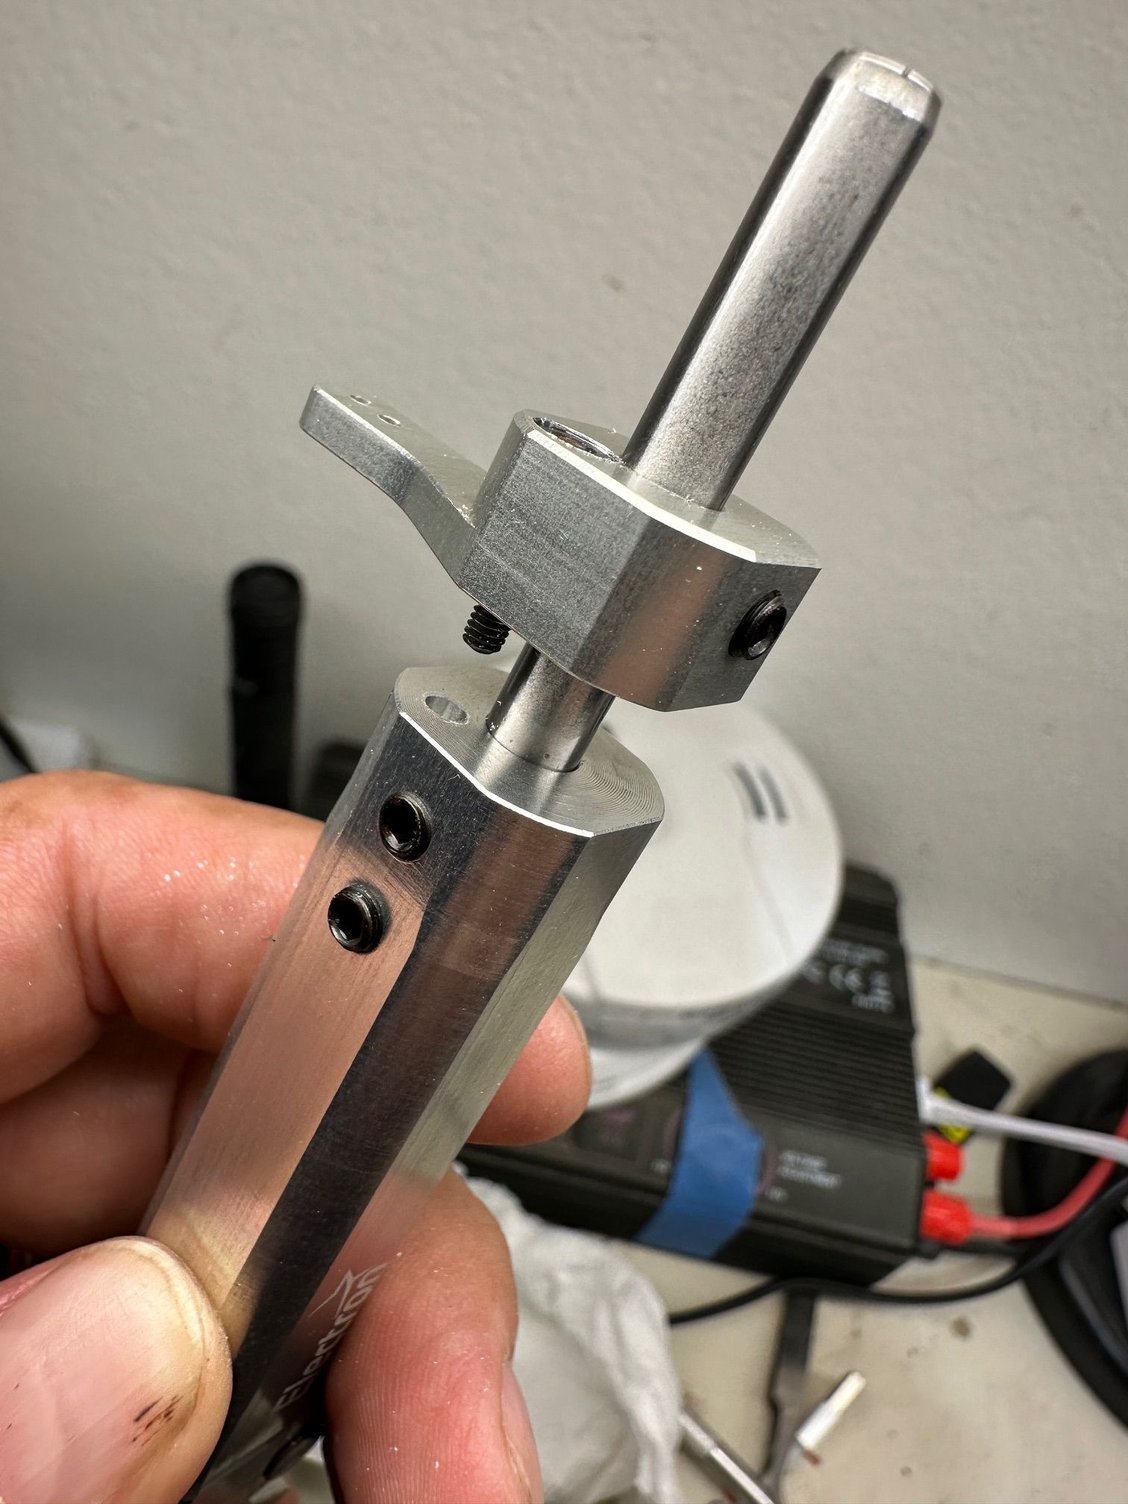

To prevent this from happening again I have made the following modification to all of my Electron nose struts. This is really easy to do with just a drill and offers me some assurance that the nose steering arm won't slip from the nose strut in the future. Thought I would share my learnings with others such no body else has to learn this the hard way. I do use the flat spot on the nose pin to align the set screws, but the nose steering arm set screw is 90 degrees from the set screws on the strut and the nose steering pin only comes with a flat spot on one side.

