


Ripmax Xcalibur Sports jet
 12-15-2019, 08:46 PM
#2376
Junior Member
Join Date: Feb 2019
Posts: 9
Likes: 0
Received 0 Likes
on
0 Posts
Hi again..
sorry another newbie question..
Excalibur ..with supplied air retracts and brakes.
having trouble keeping air pressure.
have traced that issue to the brake side.
If I pinch the brake system feed line off system is pressurised and holds.
UC goes up and down all good.
however as soon as I fill the tanks ( tanks are in parallel) brakes are hard on immediately.
that is with the valve plunger fully "in".
if a move the plunger "out" there is siginificant air noise from the valve area.
brakes dont release until tanks empty AND the plunger is pushed fully in again then they release.
its probably me..doing something dumb but dont understand once the brakes are on how do they release ? or is it just a one shot system that is you get to use the brakes only once ??? Would seem a bit weird..
air valves are new as supplied with kit.
no instructions with kit in regard to UC system.
as mentioned tanks are tied together although I am wondering if I should have one for each function.
seems to be various opinions on that point.
anyway, any feedback would be very appreciated before the urge to commit violence takes over :-)
regards and thanks in advance.
Ray
 12-15-2019, 10:08 PM
#2377

Thread Starter
Ray
I'm guessing you have the valve connected up backwards, or a faulty valve. Disconnect the line to the brakes from the valve, attach your air pump directly to this line. Add pressure in little amounts and see if the brakes come on stronger each time. Then release the connection and see if the brakes release. If they do this the brakes and lines are good and it the valve ( probably connections)
Dave
12-16-2019, 12:09 PM
#2378
Junior Member
Join Date: Feb 2019
Posts: 9
Likes: 0
Received 0 Likes
on
0 Posts
Dave to the rescue again... many thanks.
yes the connections were back to front. I had (wrongly) assumed that as there were only two connections it didnt matter.
obviously the brake air release mechanism is built into that valve as well.. just not visible..
hence why they were locked on until the tank was empty.
Been at this game since 1976 and theres still heaps to learn... first plane ever with brakes !!
Be good if they had done a page or two in the manual on the retracts and brakes as it is sold as a jet trainer so highly likely there will be people who dont know the basics on some jet related items..
once again really appreciate the input and the fast answers..👍
Please standby for the next problem..🙄
cheers
Ray
12-16-2019, 12:25 PM
#2379
Thread Starter
Ray
Yes unfortunately manuals are often poor, the cost of a decent one is so high manufacturers hope there is enough knowledge around to salve the problems...hence this forum.
Waiting for the next one 😉
Dave
Yes unfortunately manuals are often poor, the cost of a decent one is so high manufacturers hope there is enough knowledge around to salve the problems...hence this forum.
Waiting for the next one 😉
Dave
12-29-2019, 03:17 PM
#2380

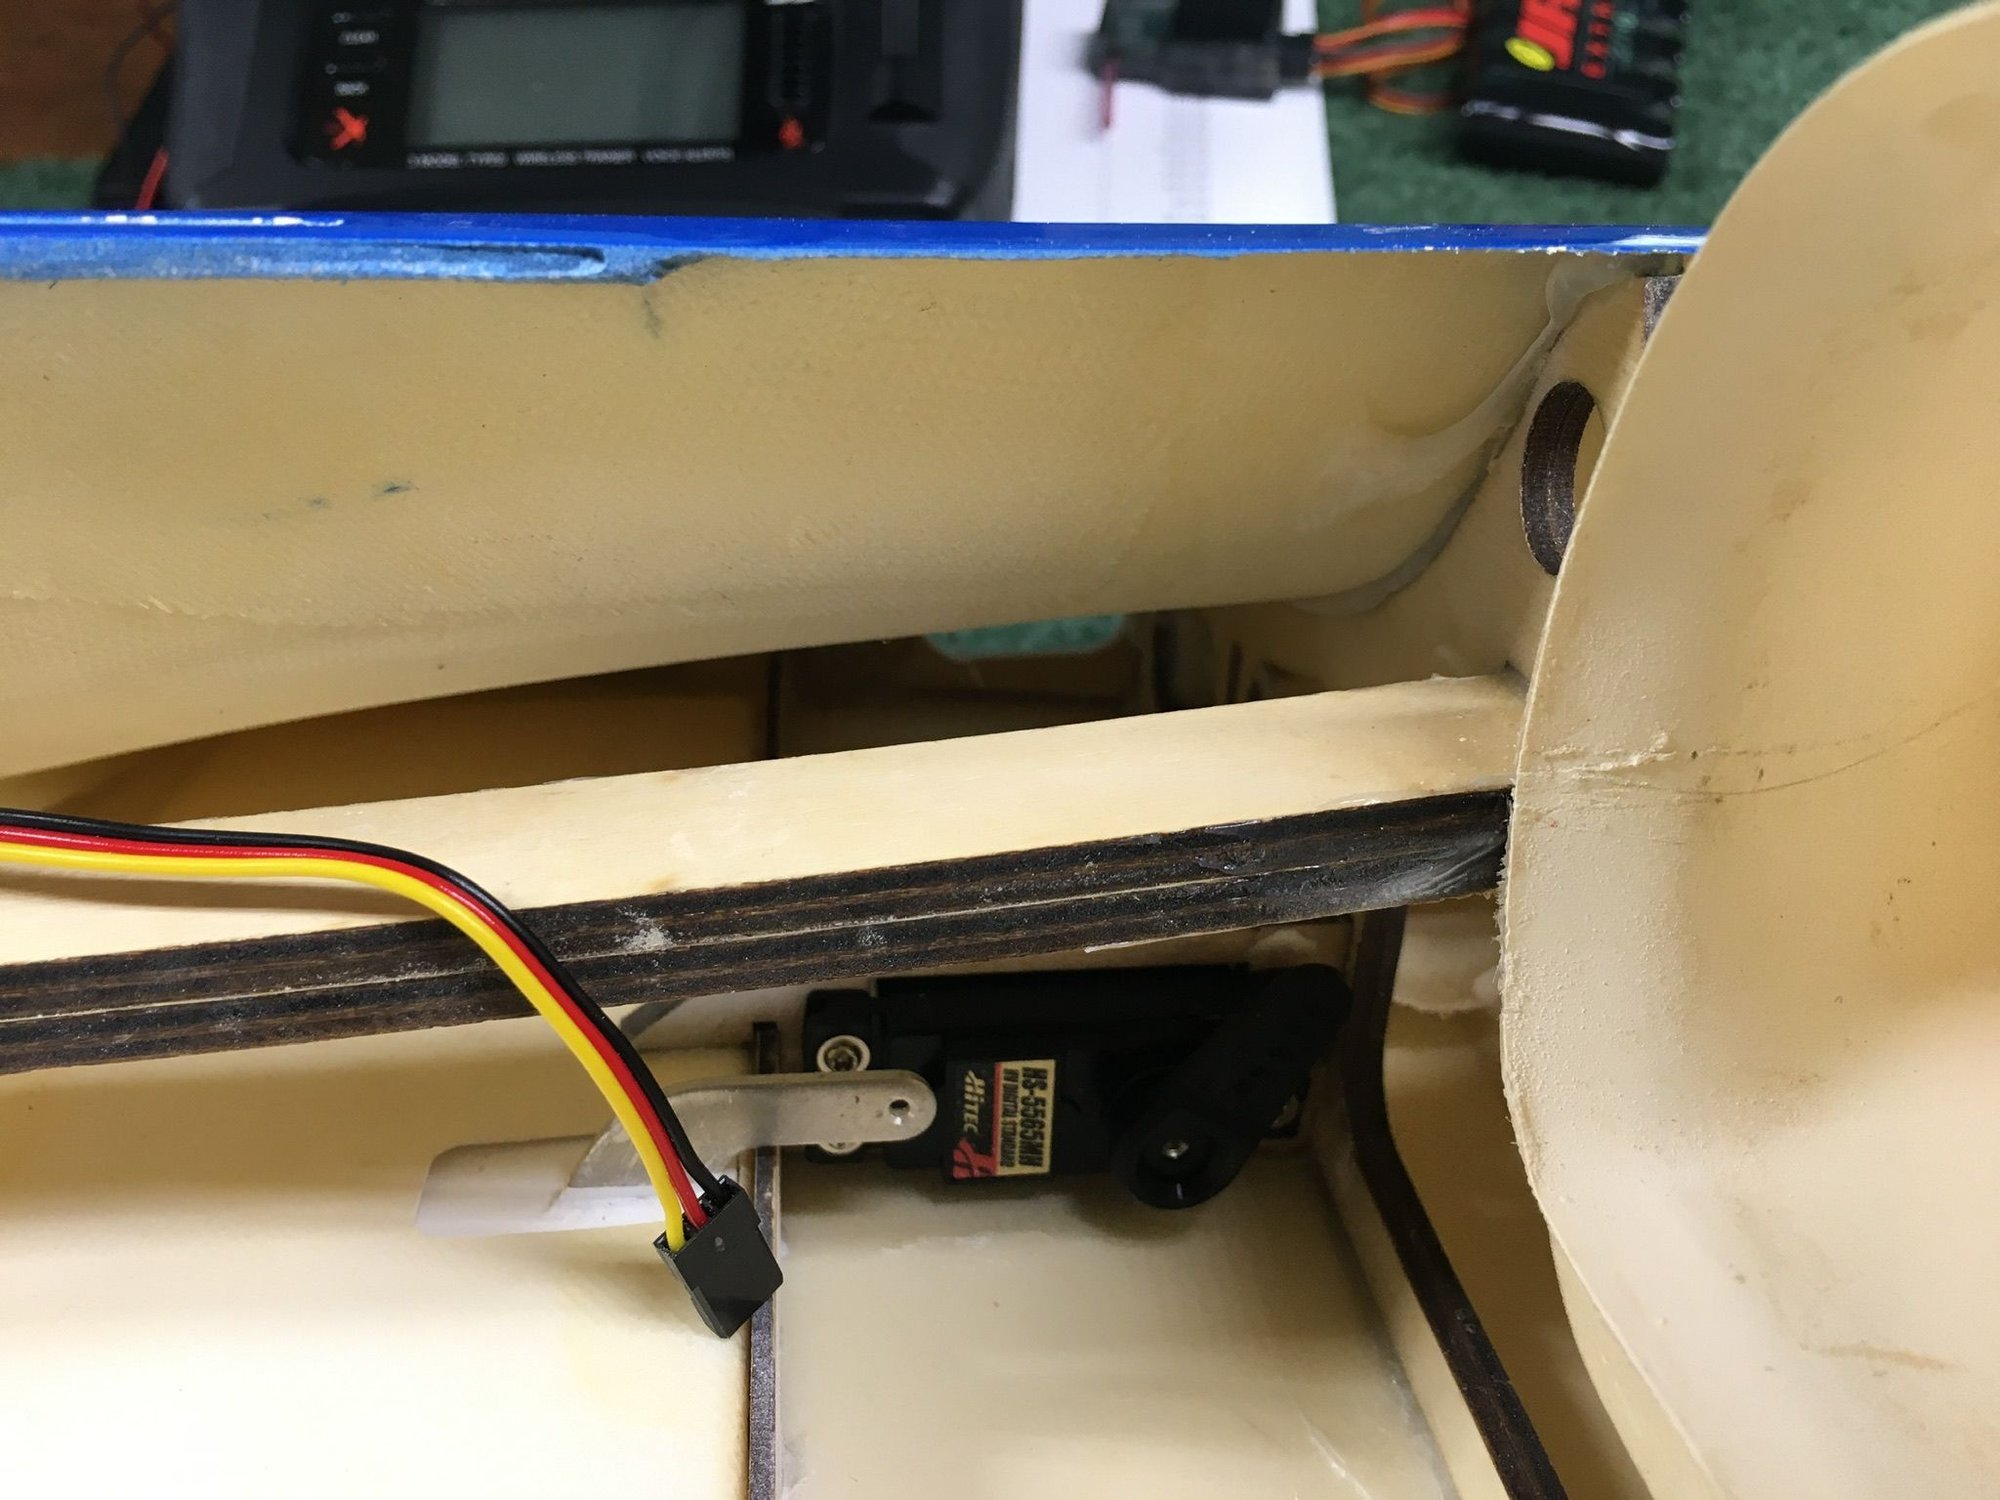
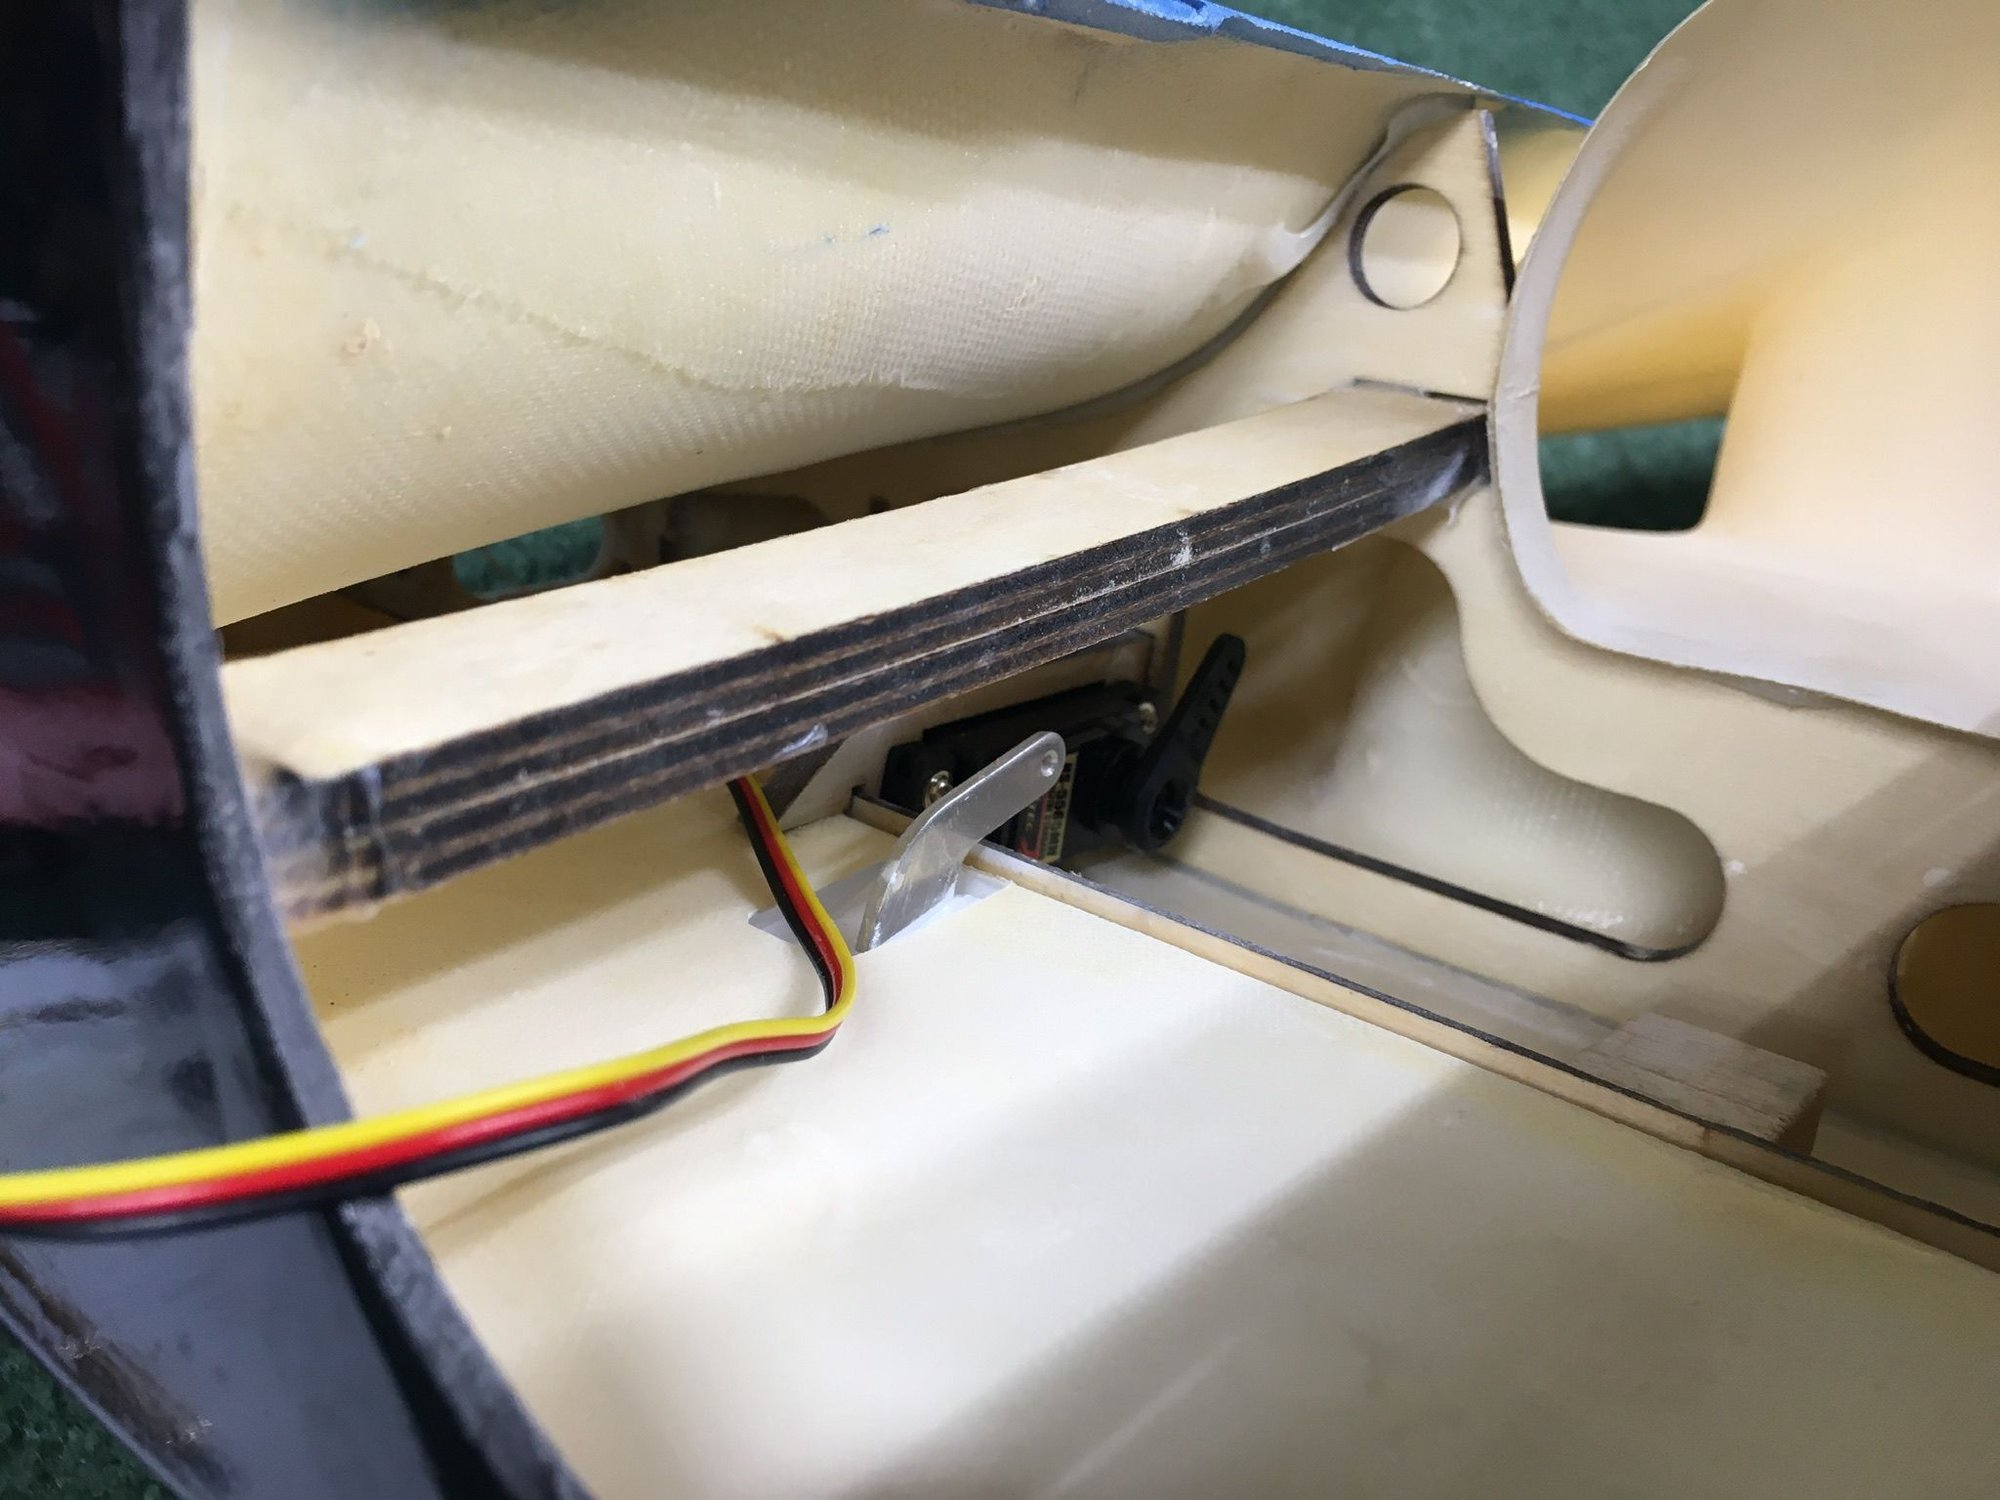
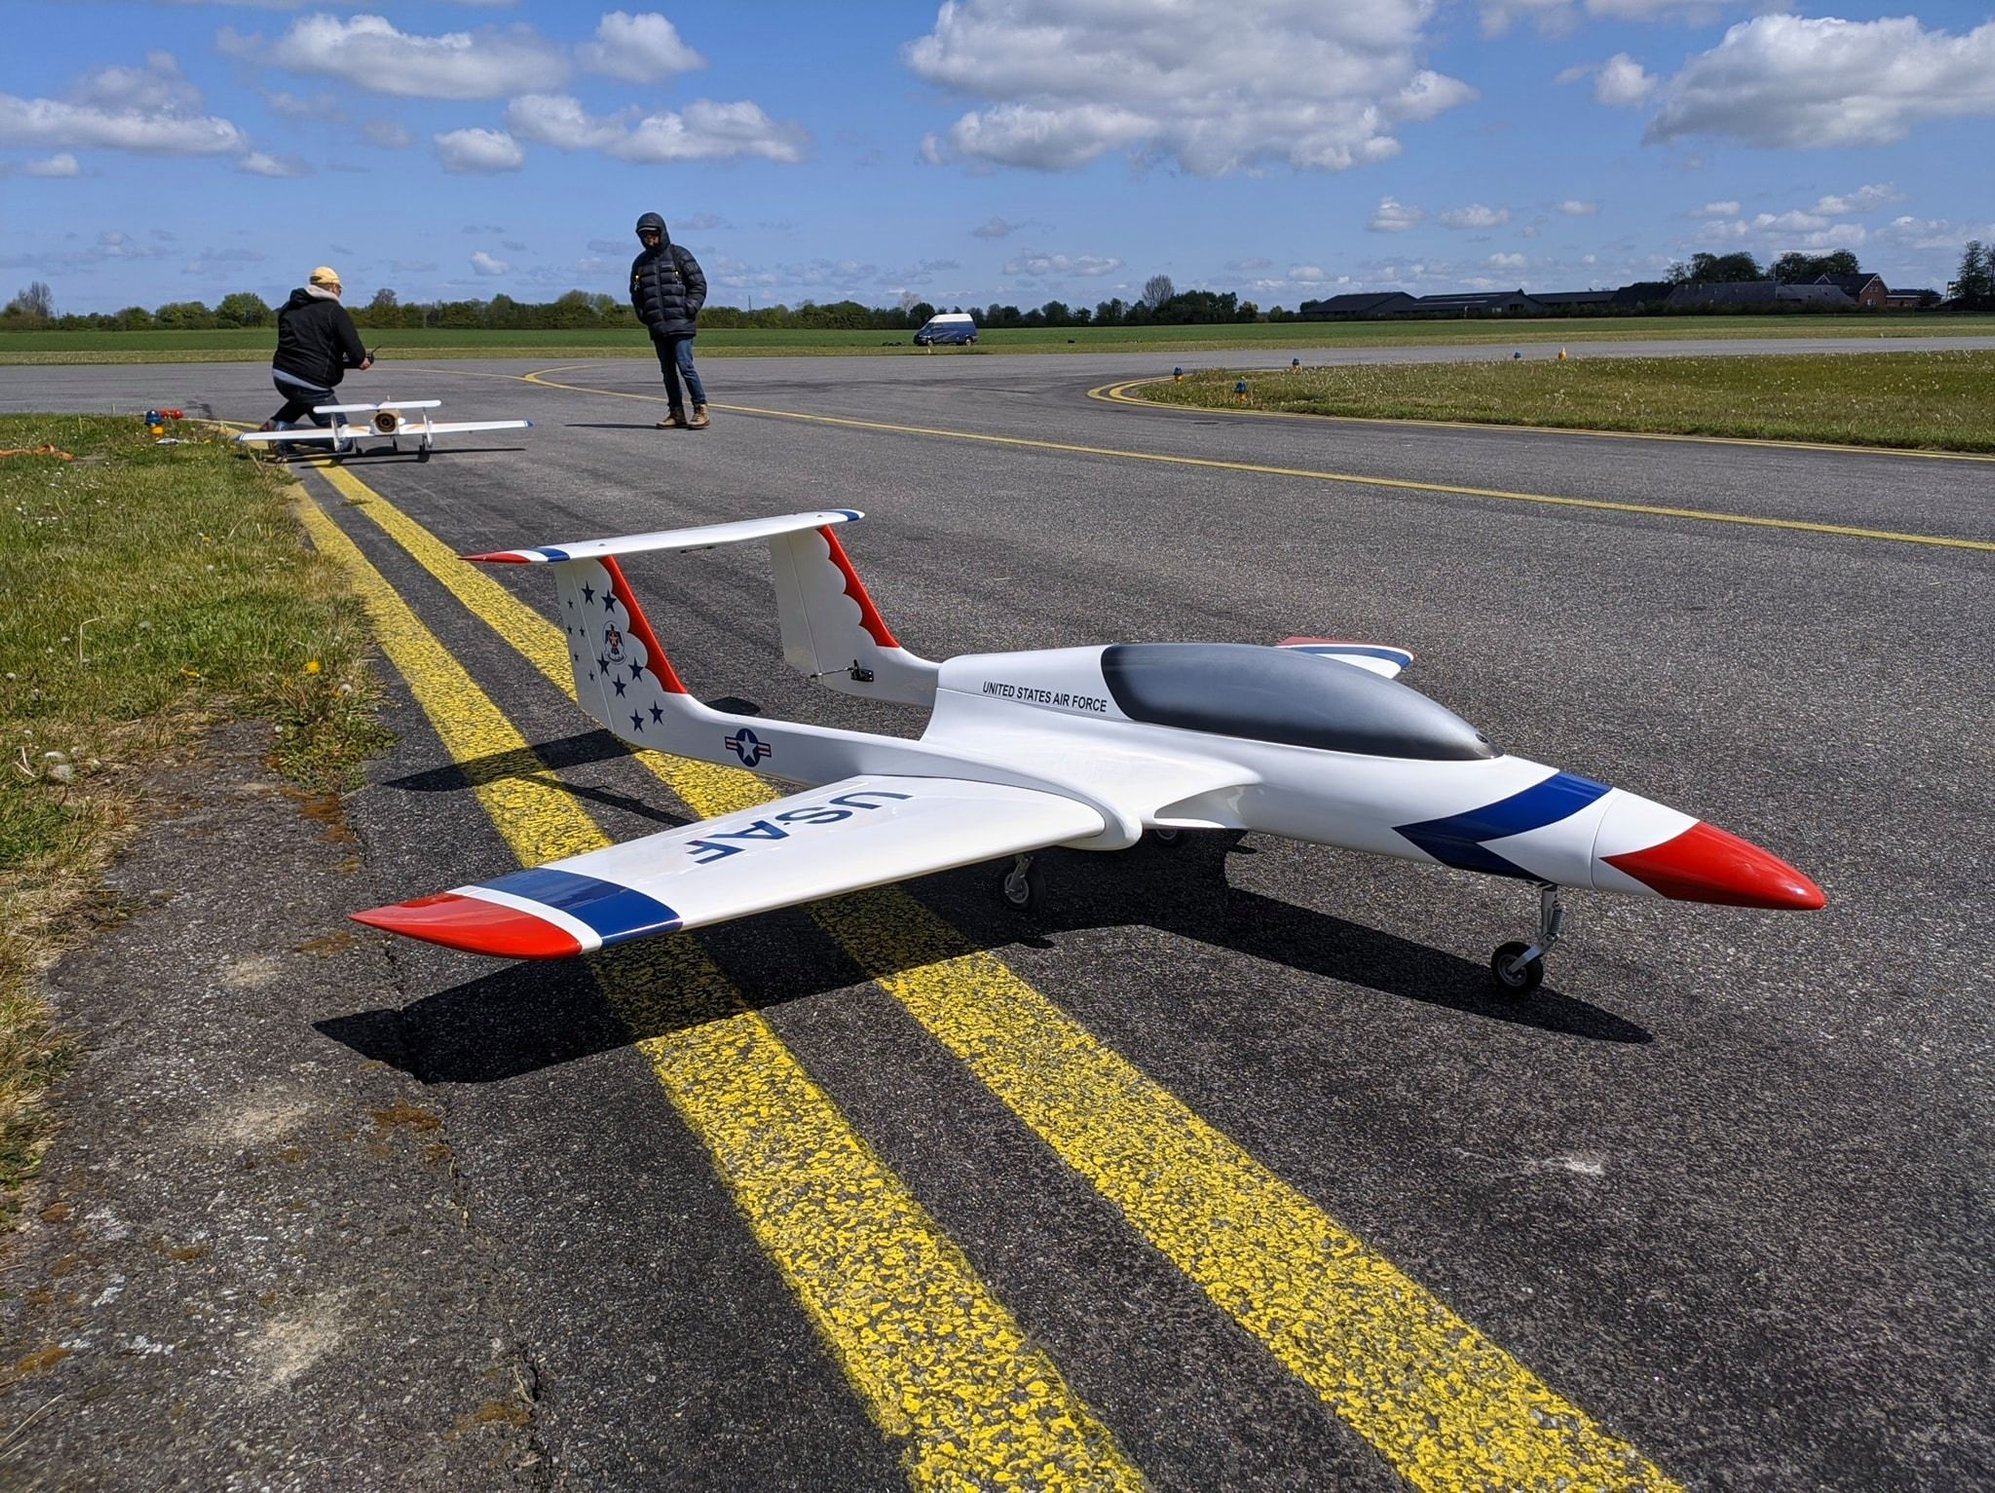
I’ve been working on my Xcalibur on and off over the past few weeks. Just started it. I took delivery on it around June this summer 2019. This post deals with the flap servo installation. It’s my first jet but not my first RC aircraft. I figured out an easier way to install the flap servo mounting screws. First, the pre-drilled holes in the mounting block make for a very tight fit given the awkward positioning of the screwdriver. I opened up these holes with a 1.9mm drill bit fitted to a pin vise. They still fit tight when fully seated but now are much easier to drive fully to their final position.
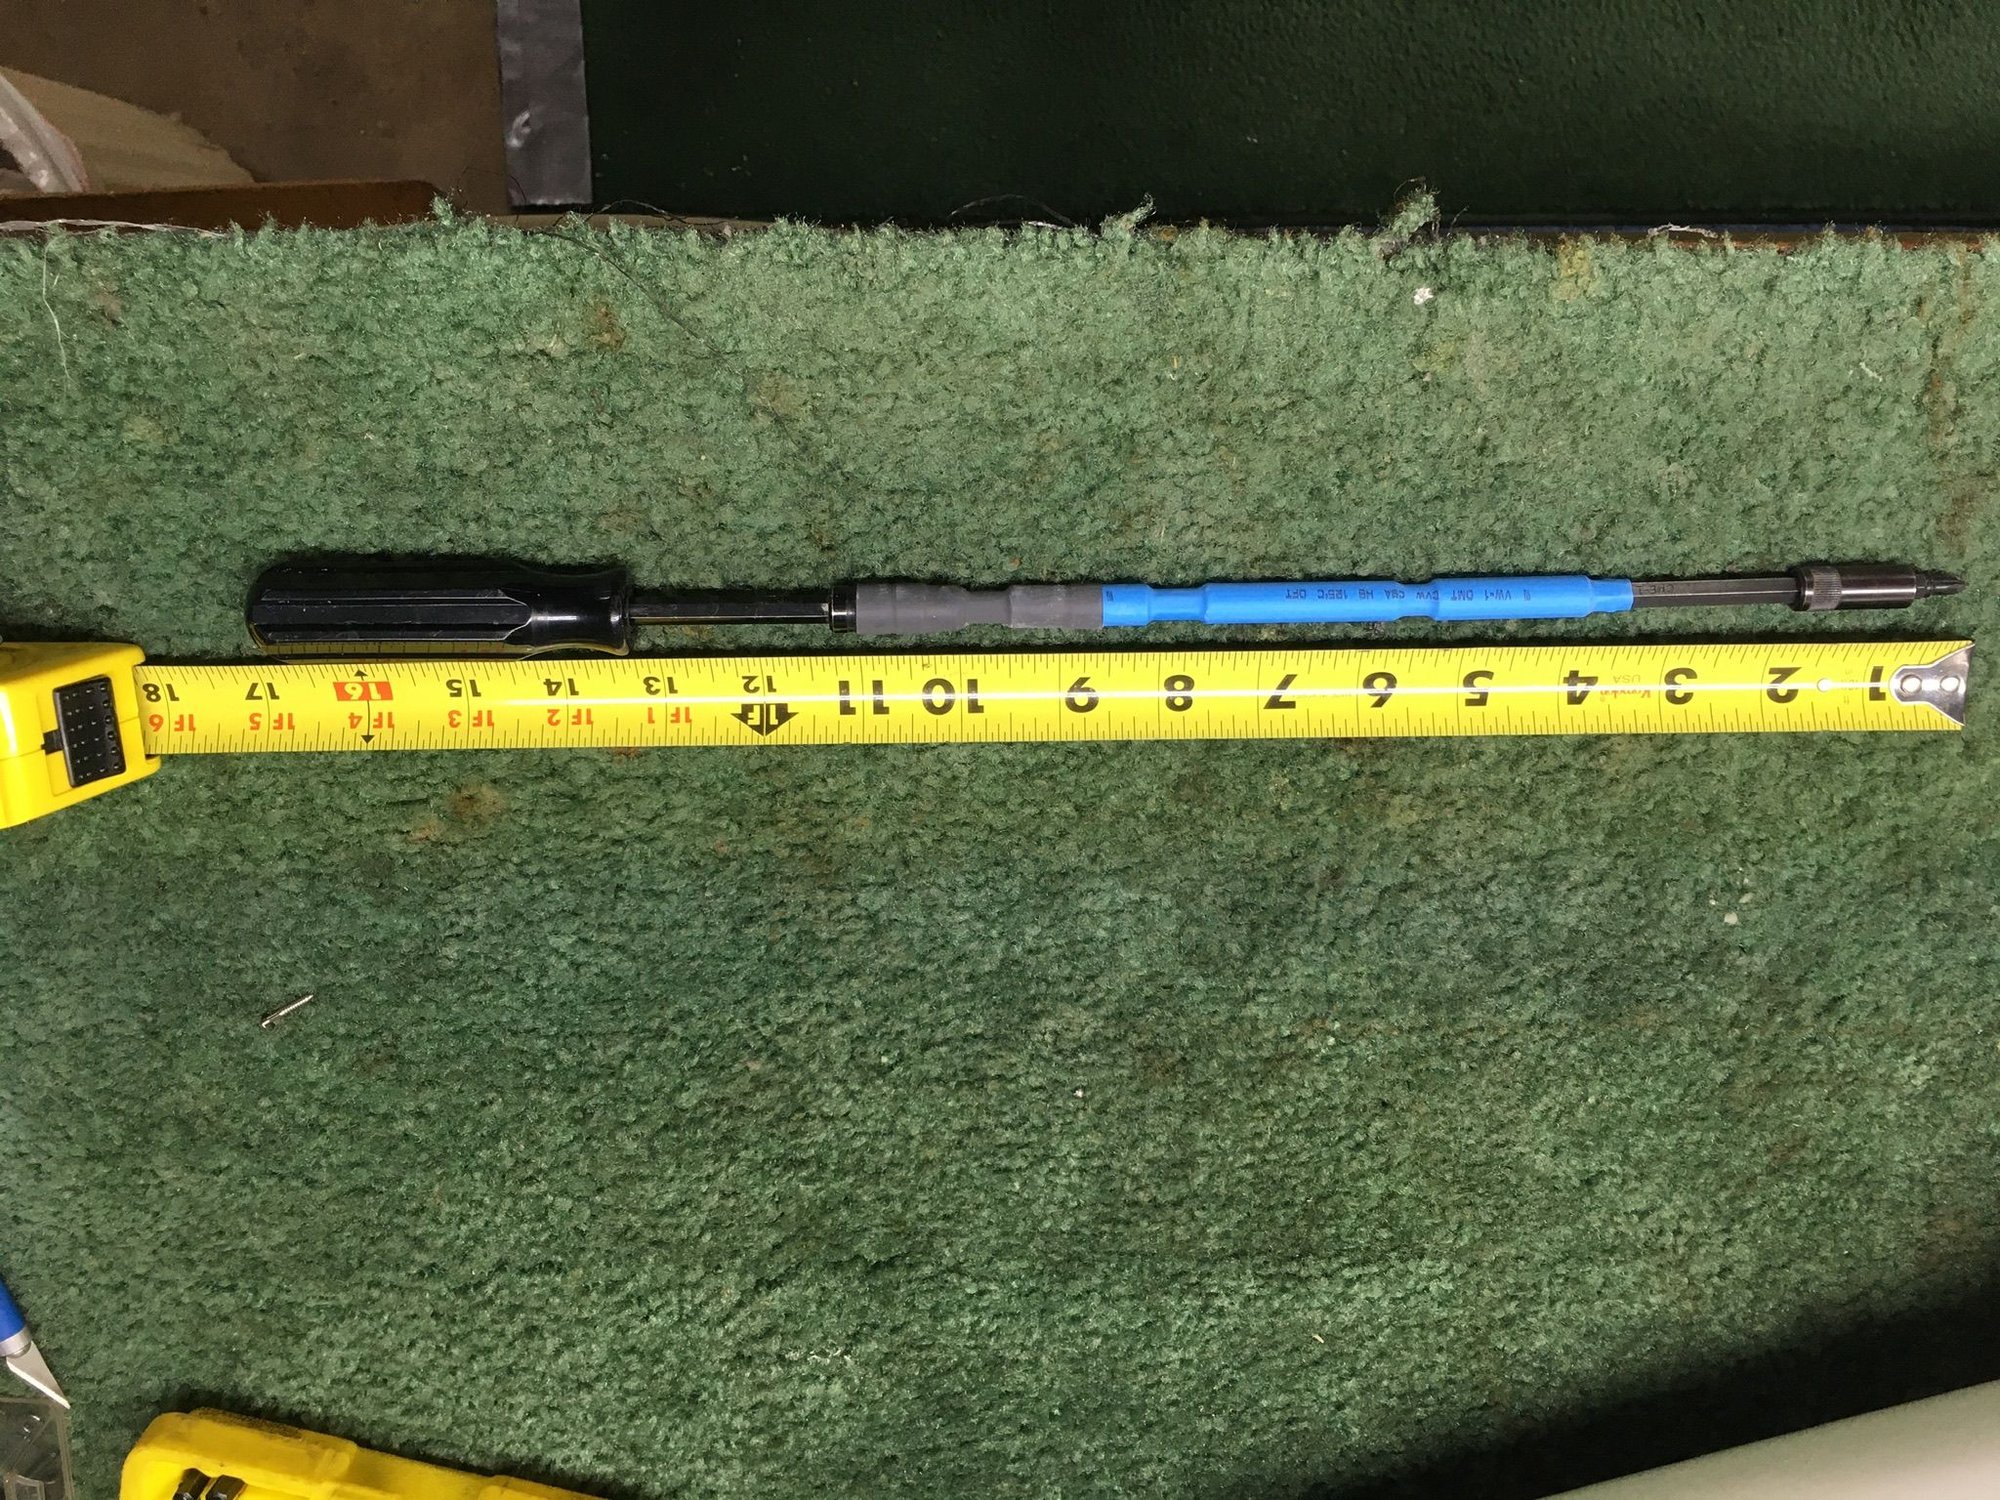
As for driving the screws, I mated up several hex driver extensions to a handle and secured them with heat shrink tubing. The total length is about 17 inches (43 cm). This is how I easily drive the two forward mounting screws. The two rear screws were driven with a jewelers screwdriver until tight. Needle nose pliers help to drop the screws into their holes. I positioned the fuse on its side to install these two screws. Much easier this way.
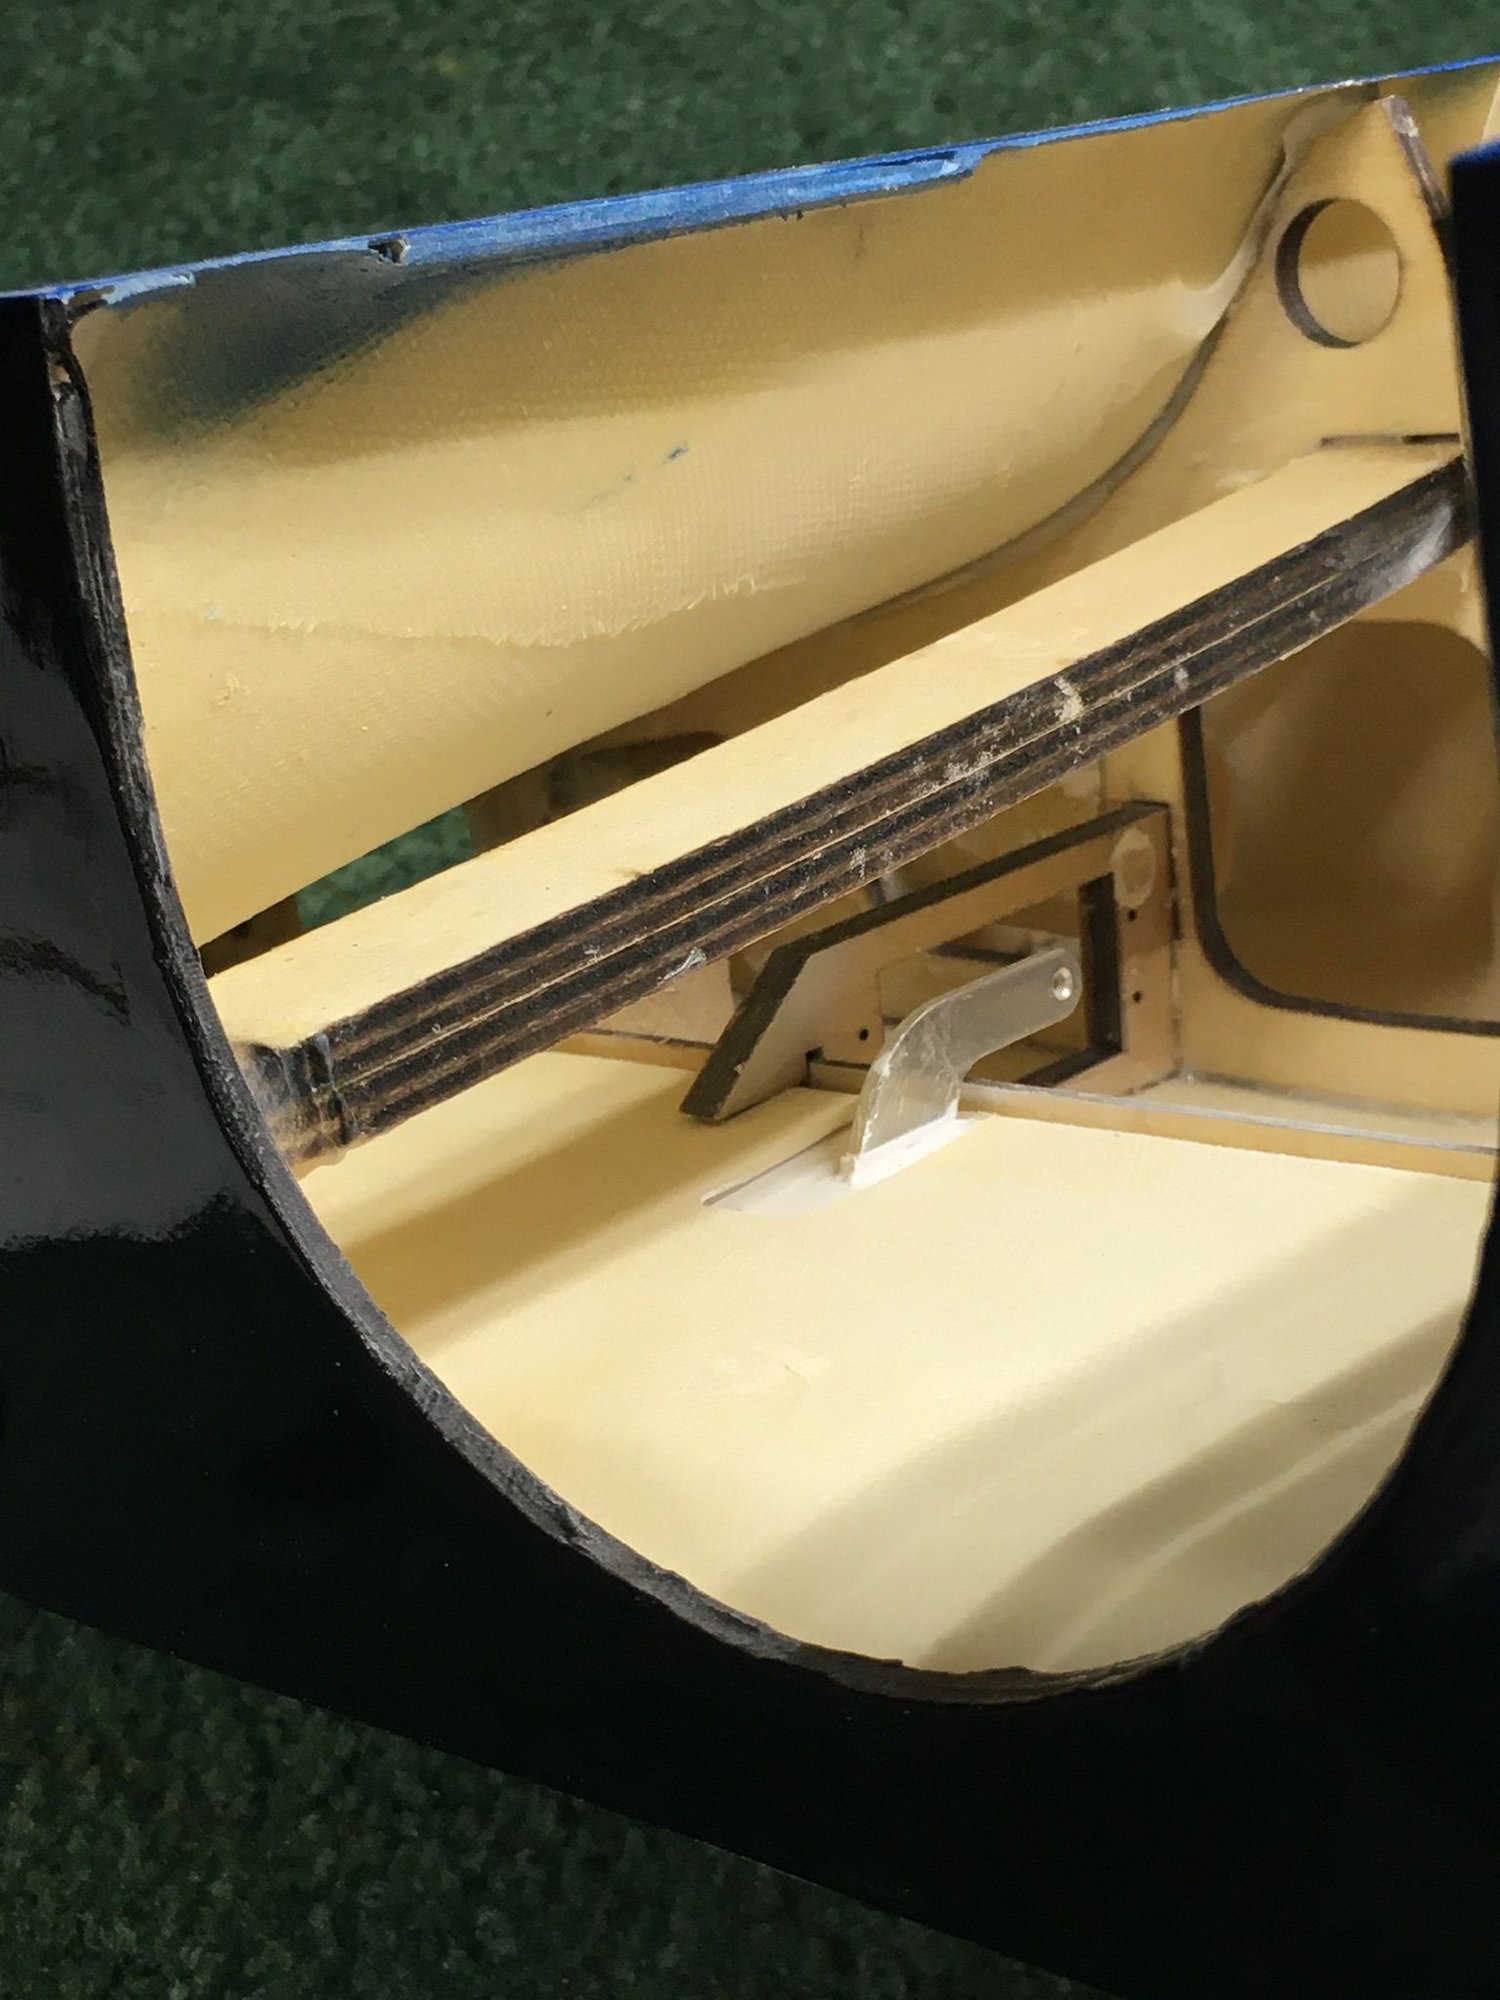
Be sure the mount is completely glued in place line was NOT and was loose in the aft end where it dovetails to the fiberglas.
Adaptive Phillips screwdriver
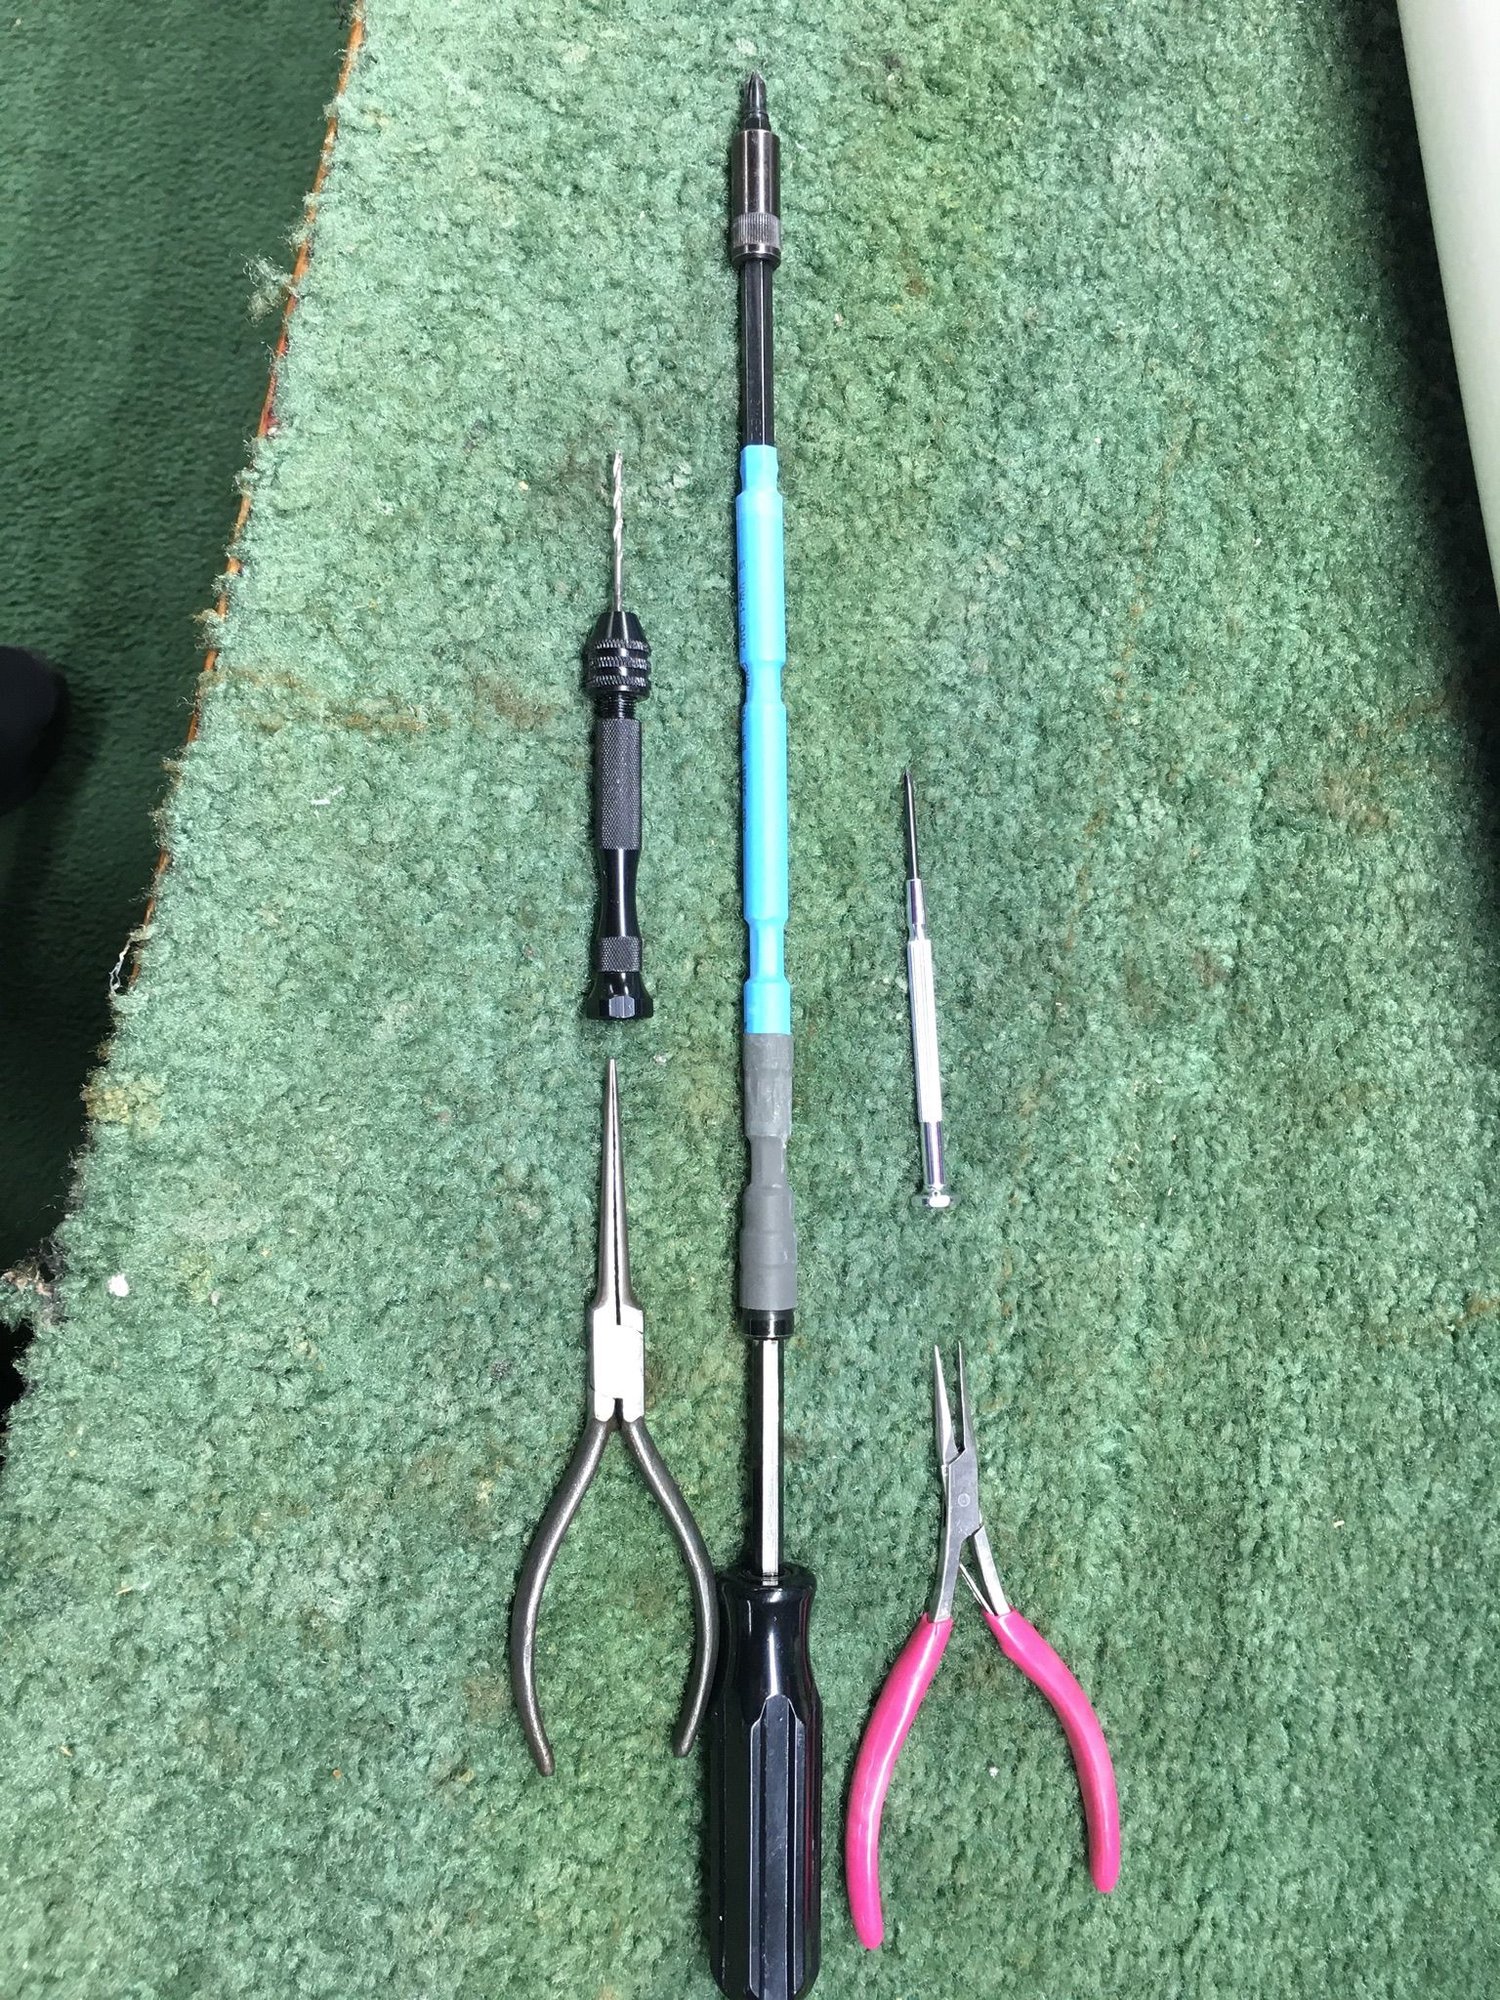
Tools to install the servo mounting screws.
Next- fashion the linkage. Sorry to say but the supplied hardware was incomplete for this linkage.
As for driving the screws, I mated up several hex driver extensions to a handle and secured them with heat shrink tubing. The total length is about 17 inches (43 cm). This is how I easily drive the two forward mounting screws. The two rear screws were driven with a jewelers screwdriver until tight. Needle nose pliers help to drop the screws into their holes. I positioned the fuse on its side to install these two screws. Much easier this way.
Be sure the mount is completely glued in place line was NOT and was loose in the aft end where it dovetails to the fiberglas.
Adaptive Phillips screwdriver
Tools to install the servo mounting screws.
Next- fashion the linkage. Sorry to say but the supplied hardware was incomplete for this linkage.
01-01-2020, 09:43 AM
#2382
The inspectors here wont sign off on the jet here if I only screw them on from one side, that is for sure, even if I tell them it works fine everywhere else :-)
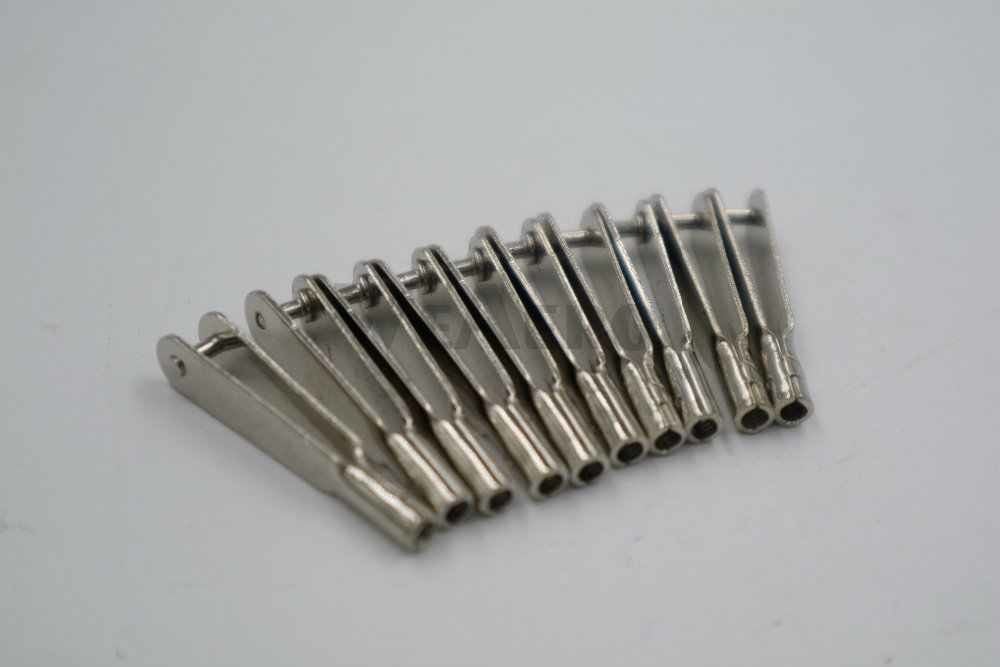
I also bought mine from Lindinger, and a friend also, and we are both missing our 3 mm control clevises. Are they included in your kit ?
I also bought mine from Lindinger, and a friend also, and we are both missing our 3 mm control clevises. Are they included in your kit ?

 01-16-2020, 09:23 AM
#2384
Tom, thanks for the follow up. Ended up buying SWB push rods and employed 4-40 Sullivan gold n’ clevis on one end with swivel connectors on the other. I appreciate the input.
rick
rick
The following users liked this post:
CobraJet (01-16-2020)
01-16-2020, 09:41 AM
#2385
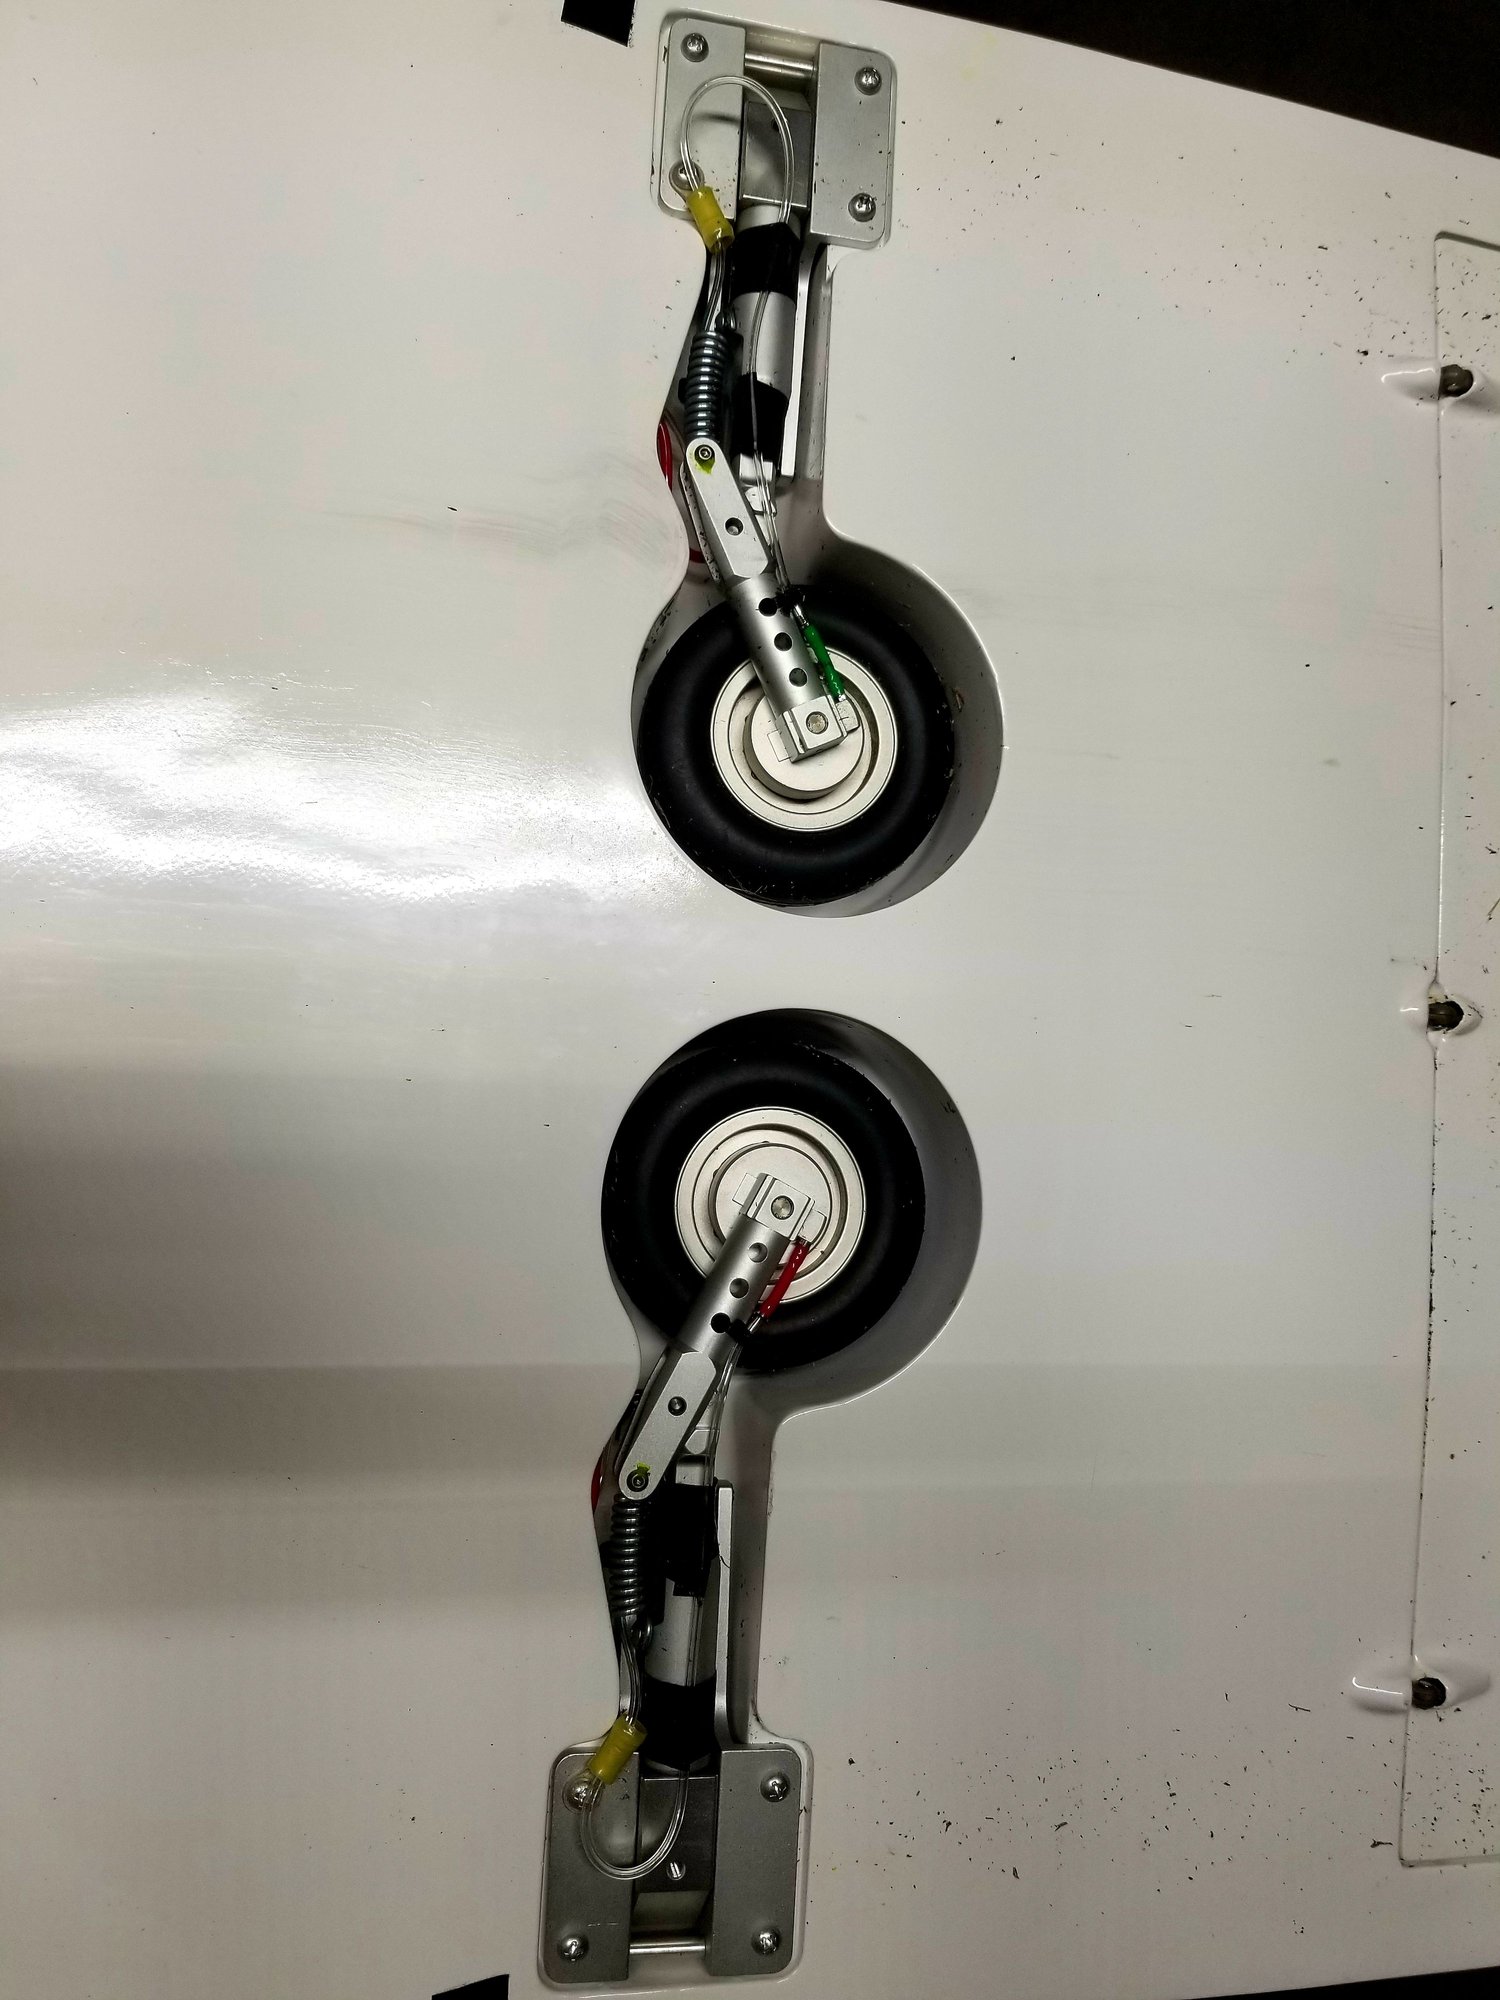
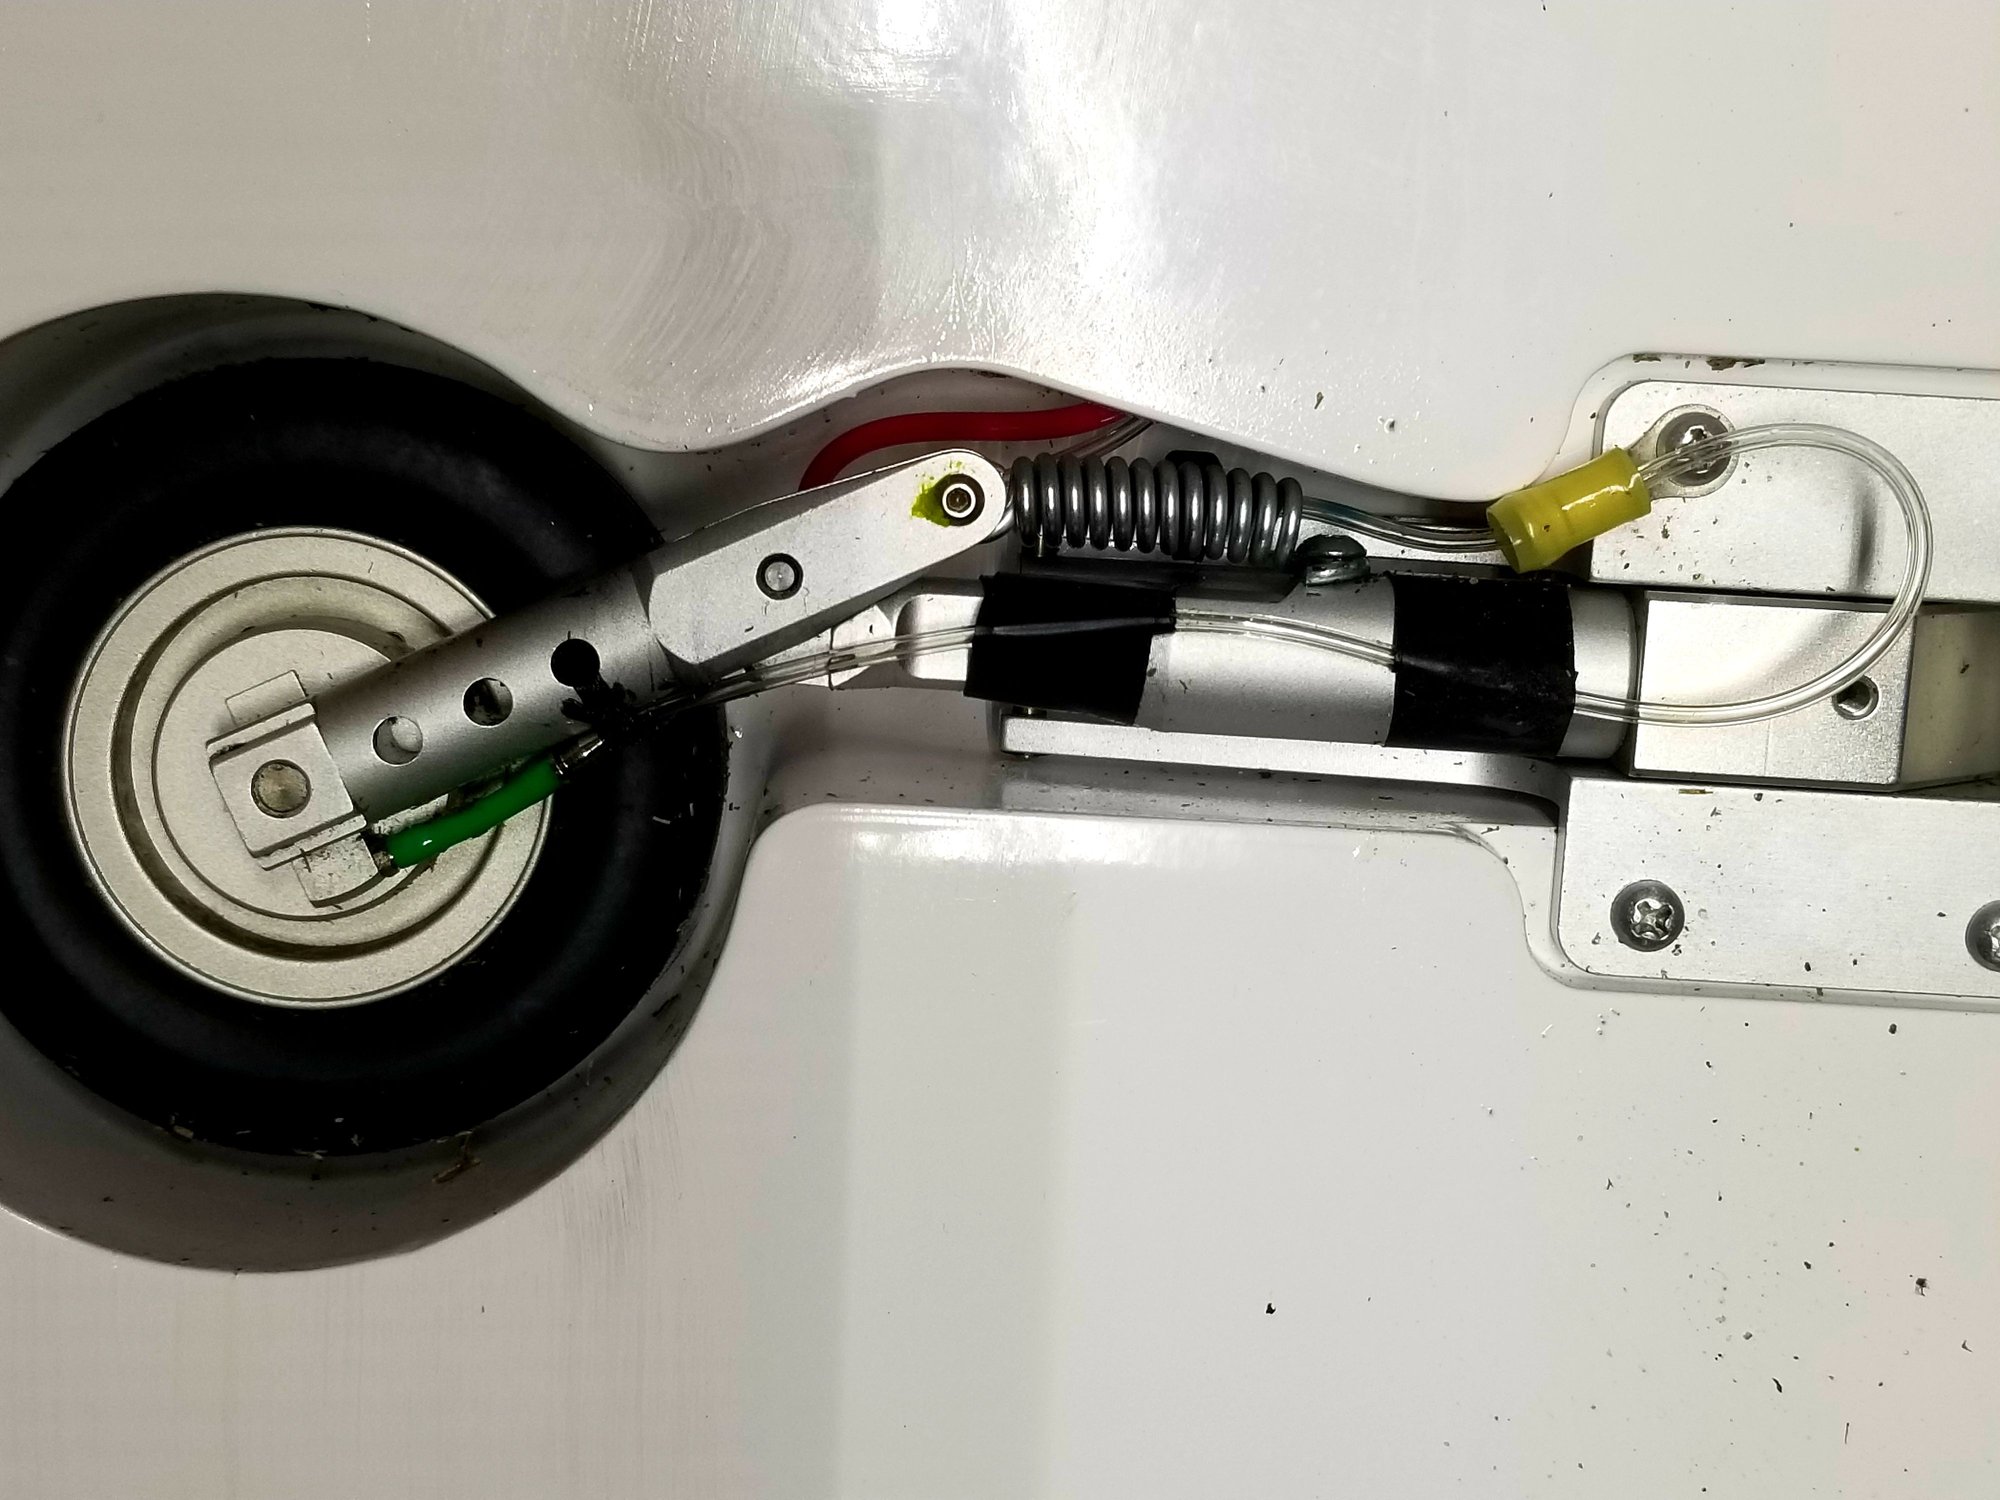
Looking for input on how builders are securing the brake air lines on the landing gear struts. I saw a couple posts somewhere on this forum but finding them is quite a job.
if anyone can share how you did it with a couple photos, I would appreciate it.
if anyone can share how you did it with a couple photos, I would appreciate it.
 01-16-2020, 05:06 PM
#2388
Thanks guys. I like the idea of using the wire lug/terminal as a line stay. I do have some very small wire ties too. The concern I have with the wire ties though is that you cannot tighten them very much. I’m using Clippard poly air line and it’s very flexible, so it’s softer than some.
01-16-2020, 05:18 PM
#2389
Zip ties tend to slide off or can snag if you fly off grass and I prefer the old school wax cord that's still used in acft today. You can also try the low temp heat shrink sleeve to capture most of the brake line on the down strut if you dont care for tape.
01-16-2020, 06:36 PM
#2390
Thanks again Tom. I’ve got a few ideas I’ve come up with. Tonight’s effort focused on the nose gear retract install, along with its air lines and steering cables. My first jet.
The following users liked this post:
CobraJet (01-17-2020)
02-16-2020, 12:04 AM
#2391
Junior Member
Join Date: Feb 2019
Posts: 9
Likes: 0
Received 0 Likes
on
0 Posts
HI,
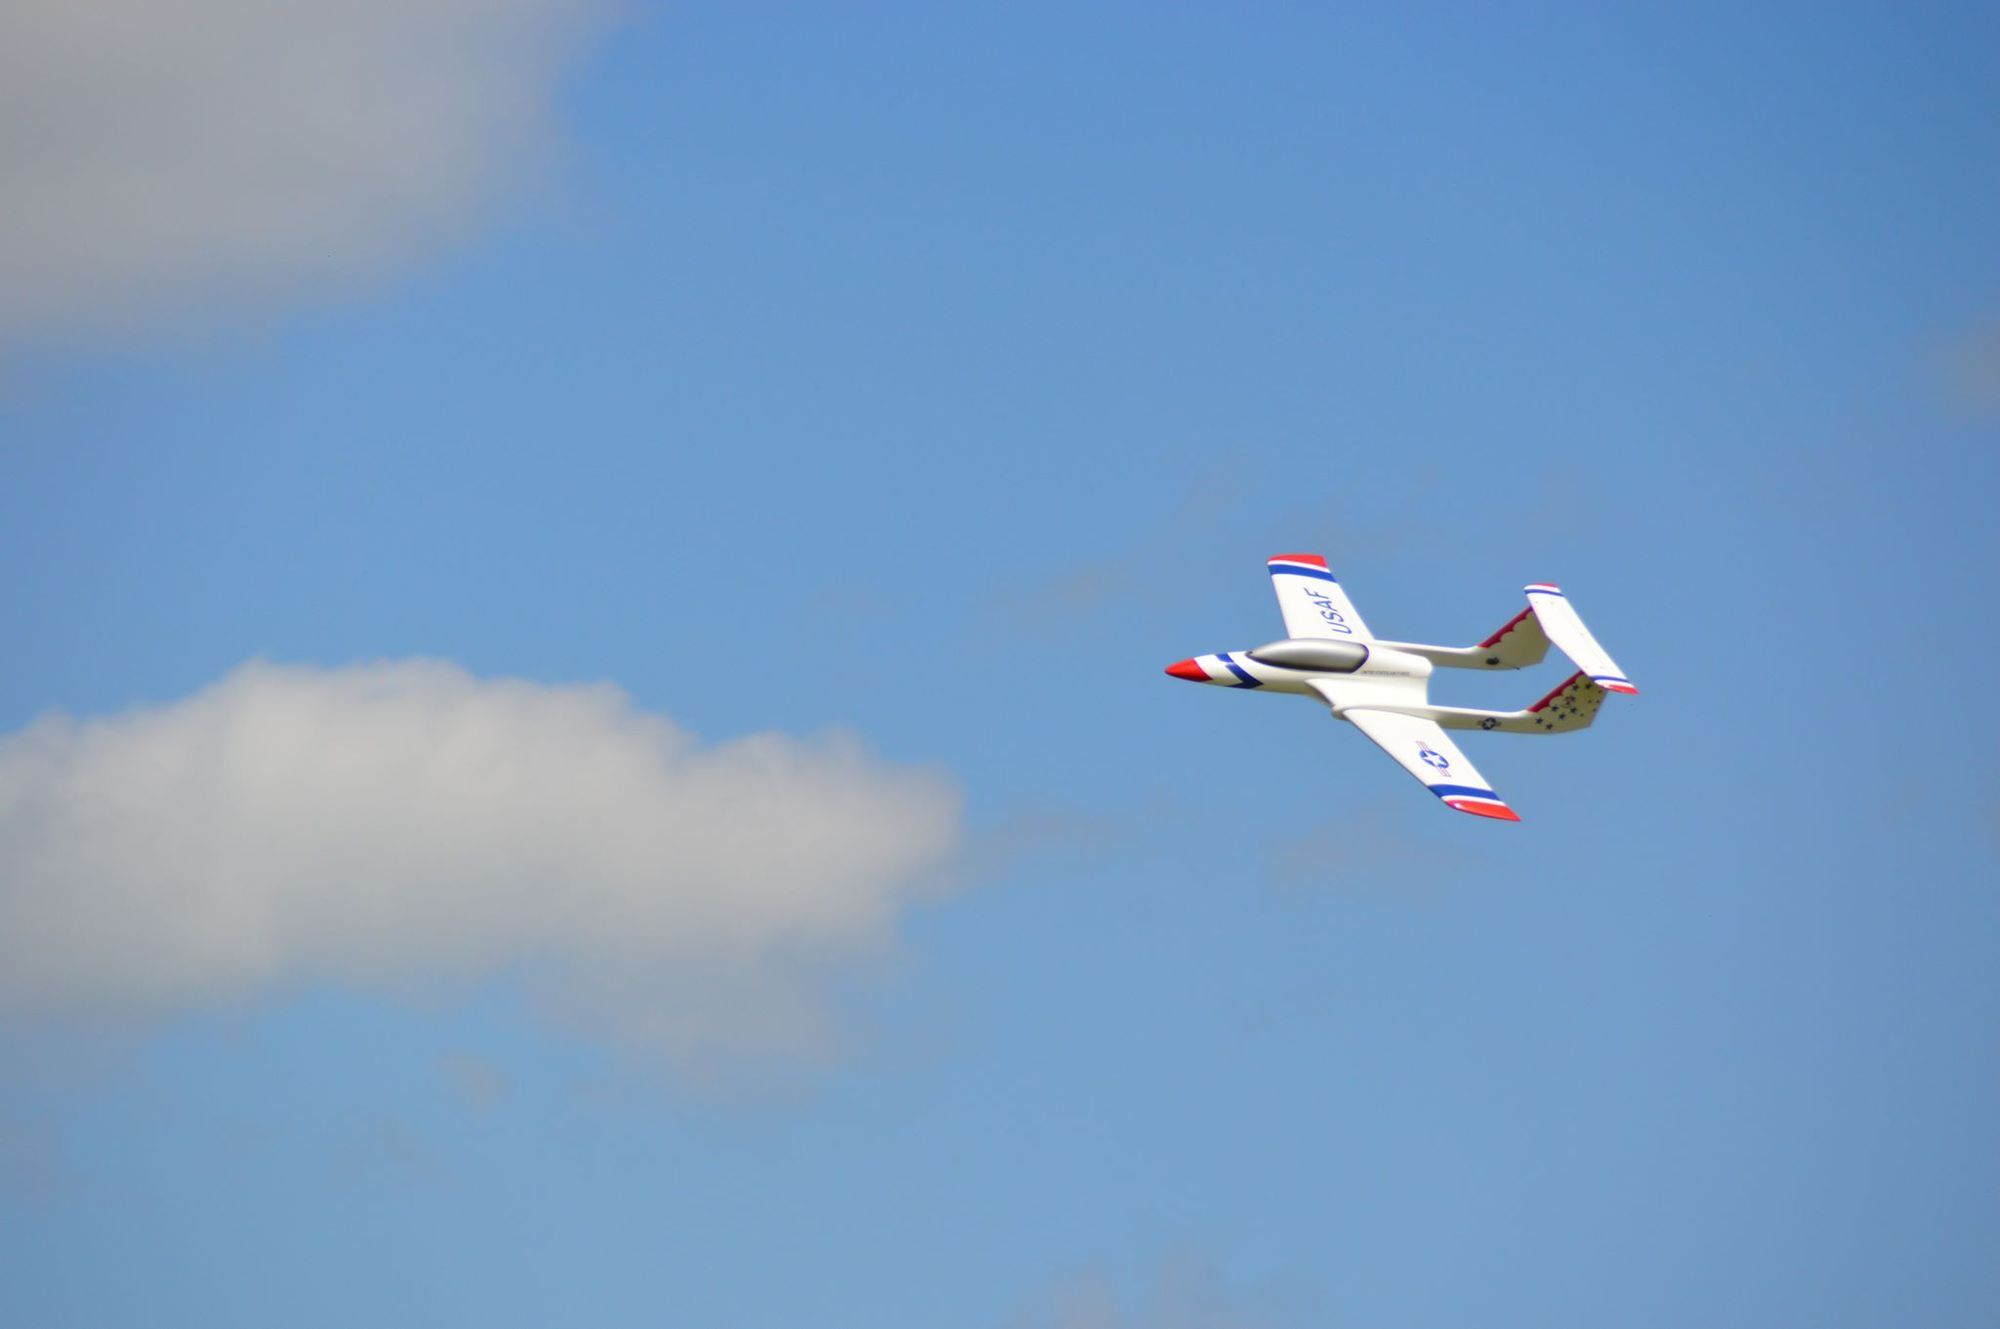
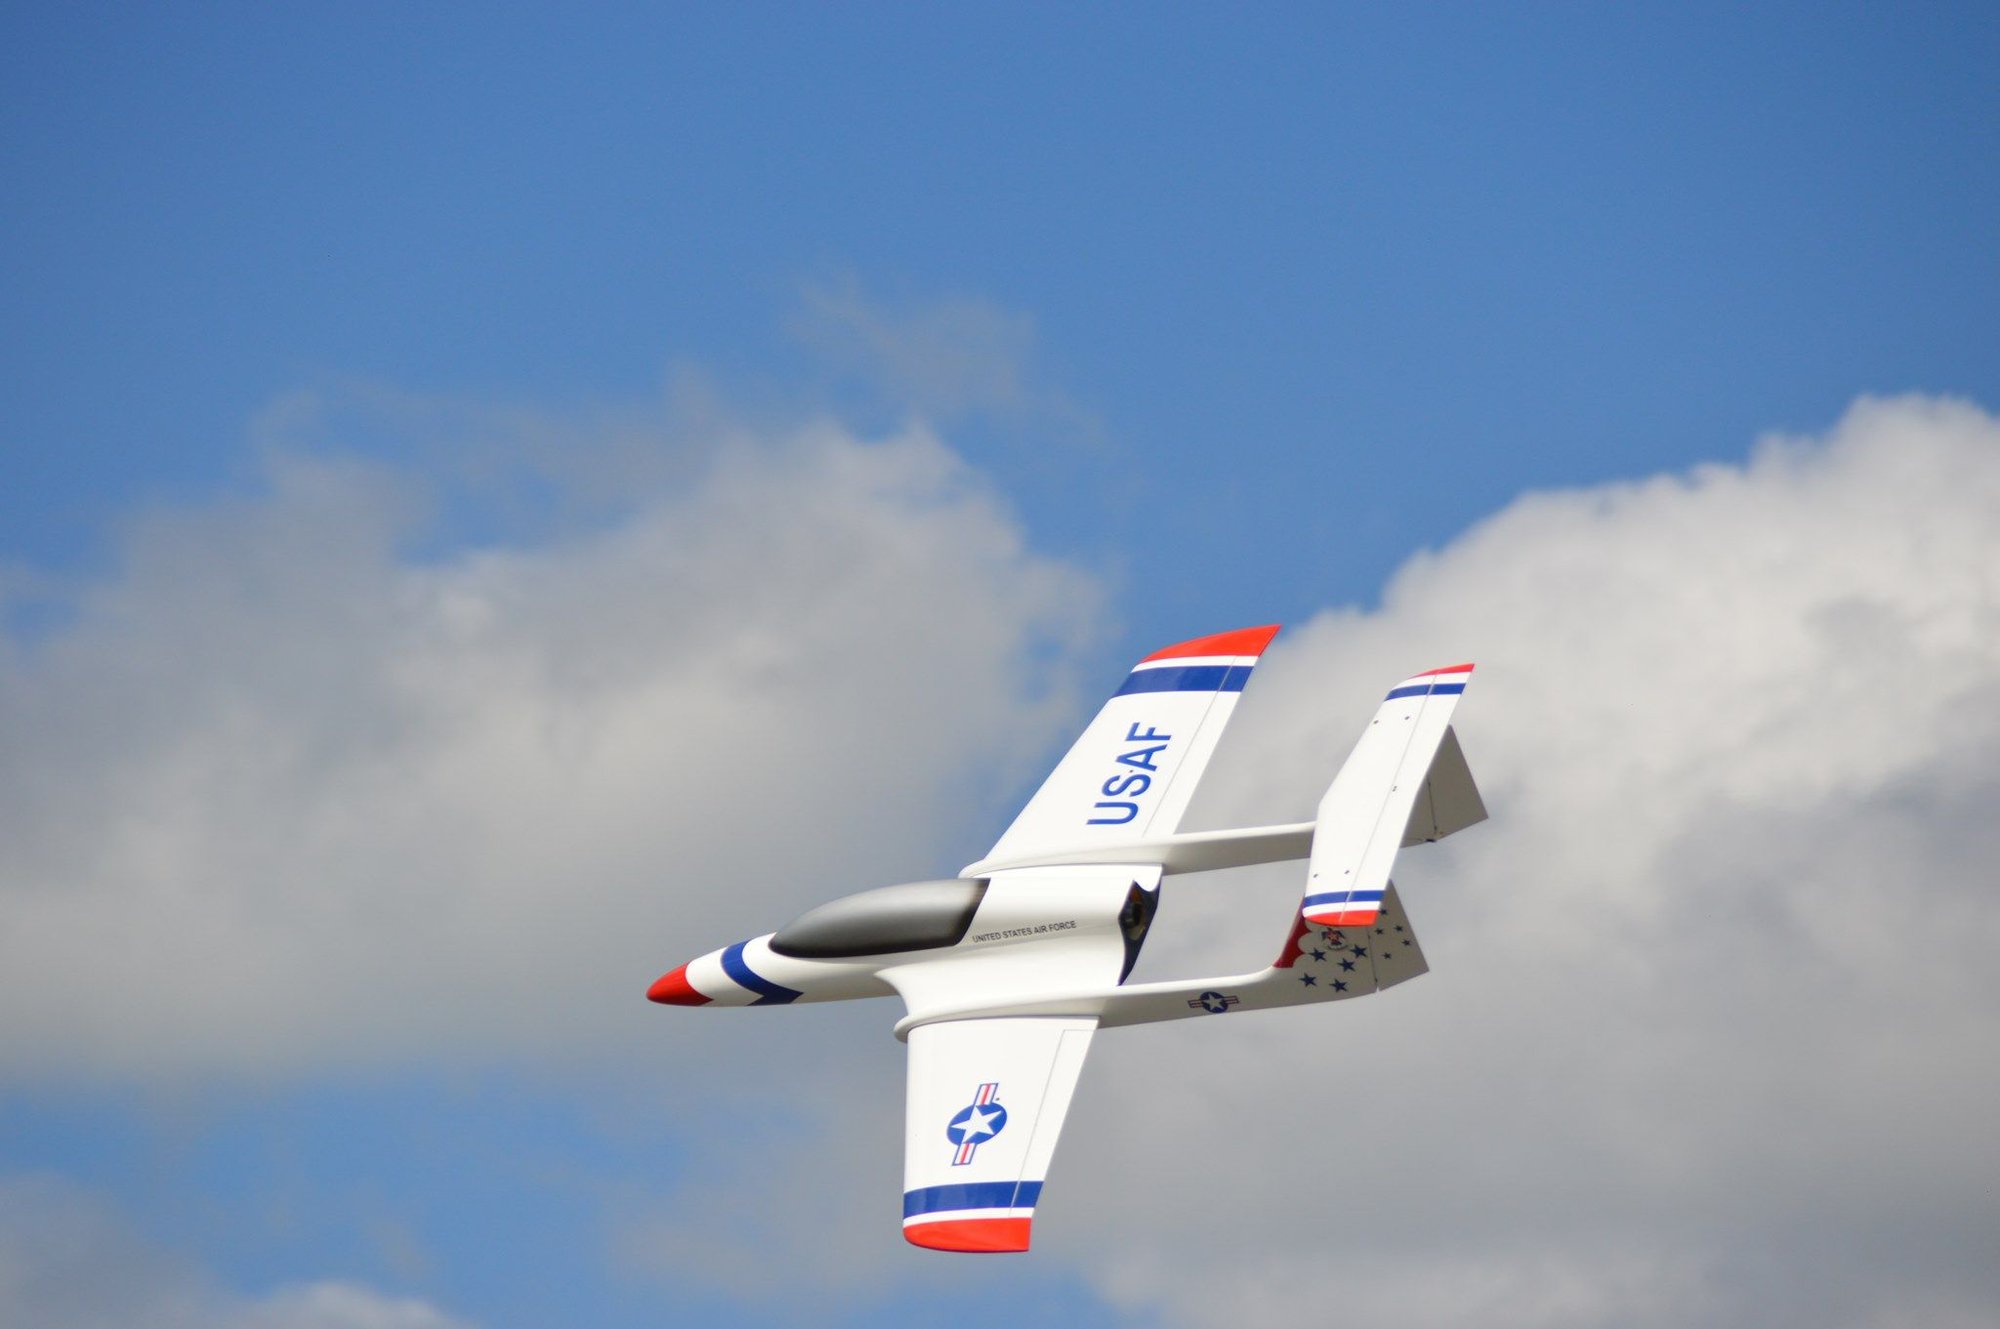
Finally flown the Excalibur.. flies very nice.
No additional weight required.. CofG right on as per manual. (160mm)
But, there has to be a but !!!
it needs quite a bit of elevator down trim.. about 3 to 4mm.
in level flight and inverted no trim change is necessary.
elevator mix on flaps is working well with no pitch.
Stab is sitting down nicely onto the "step".
everything is per design.
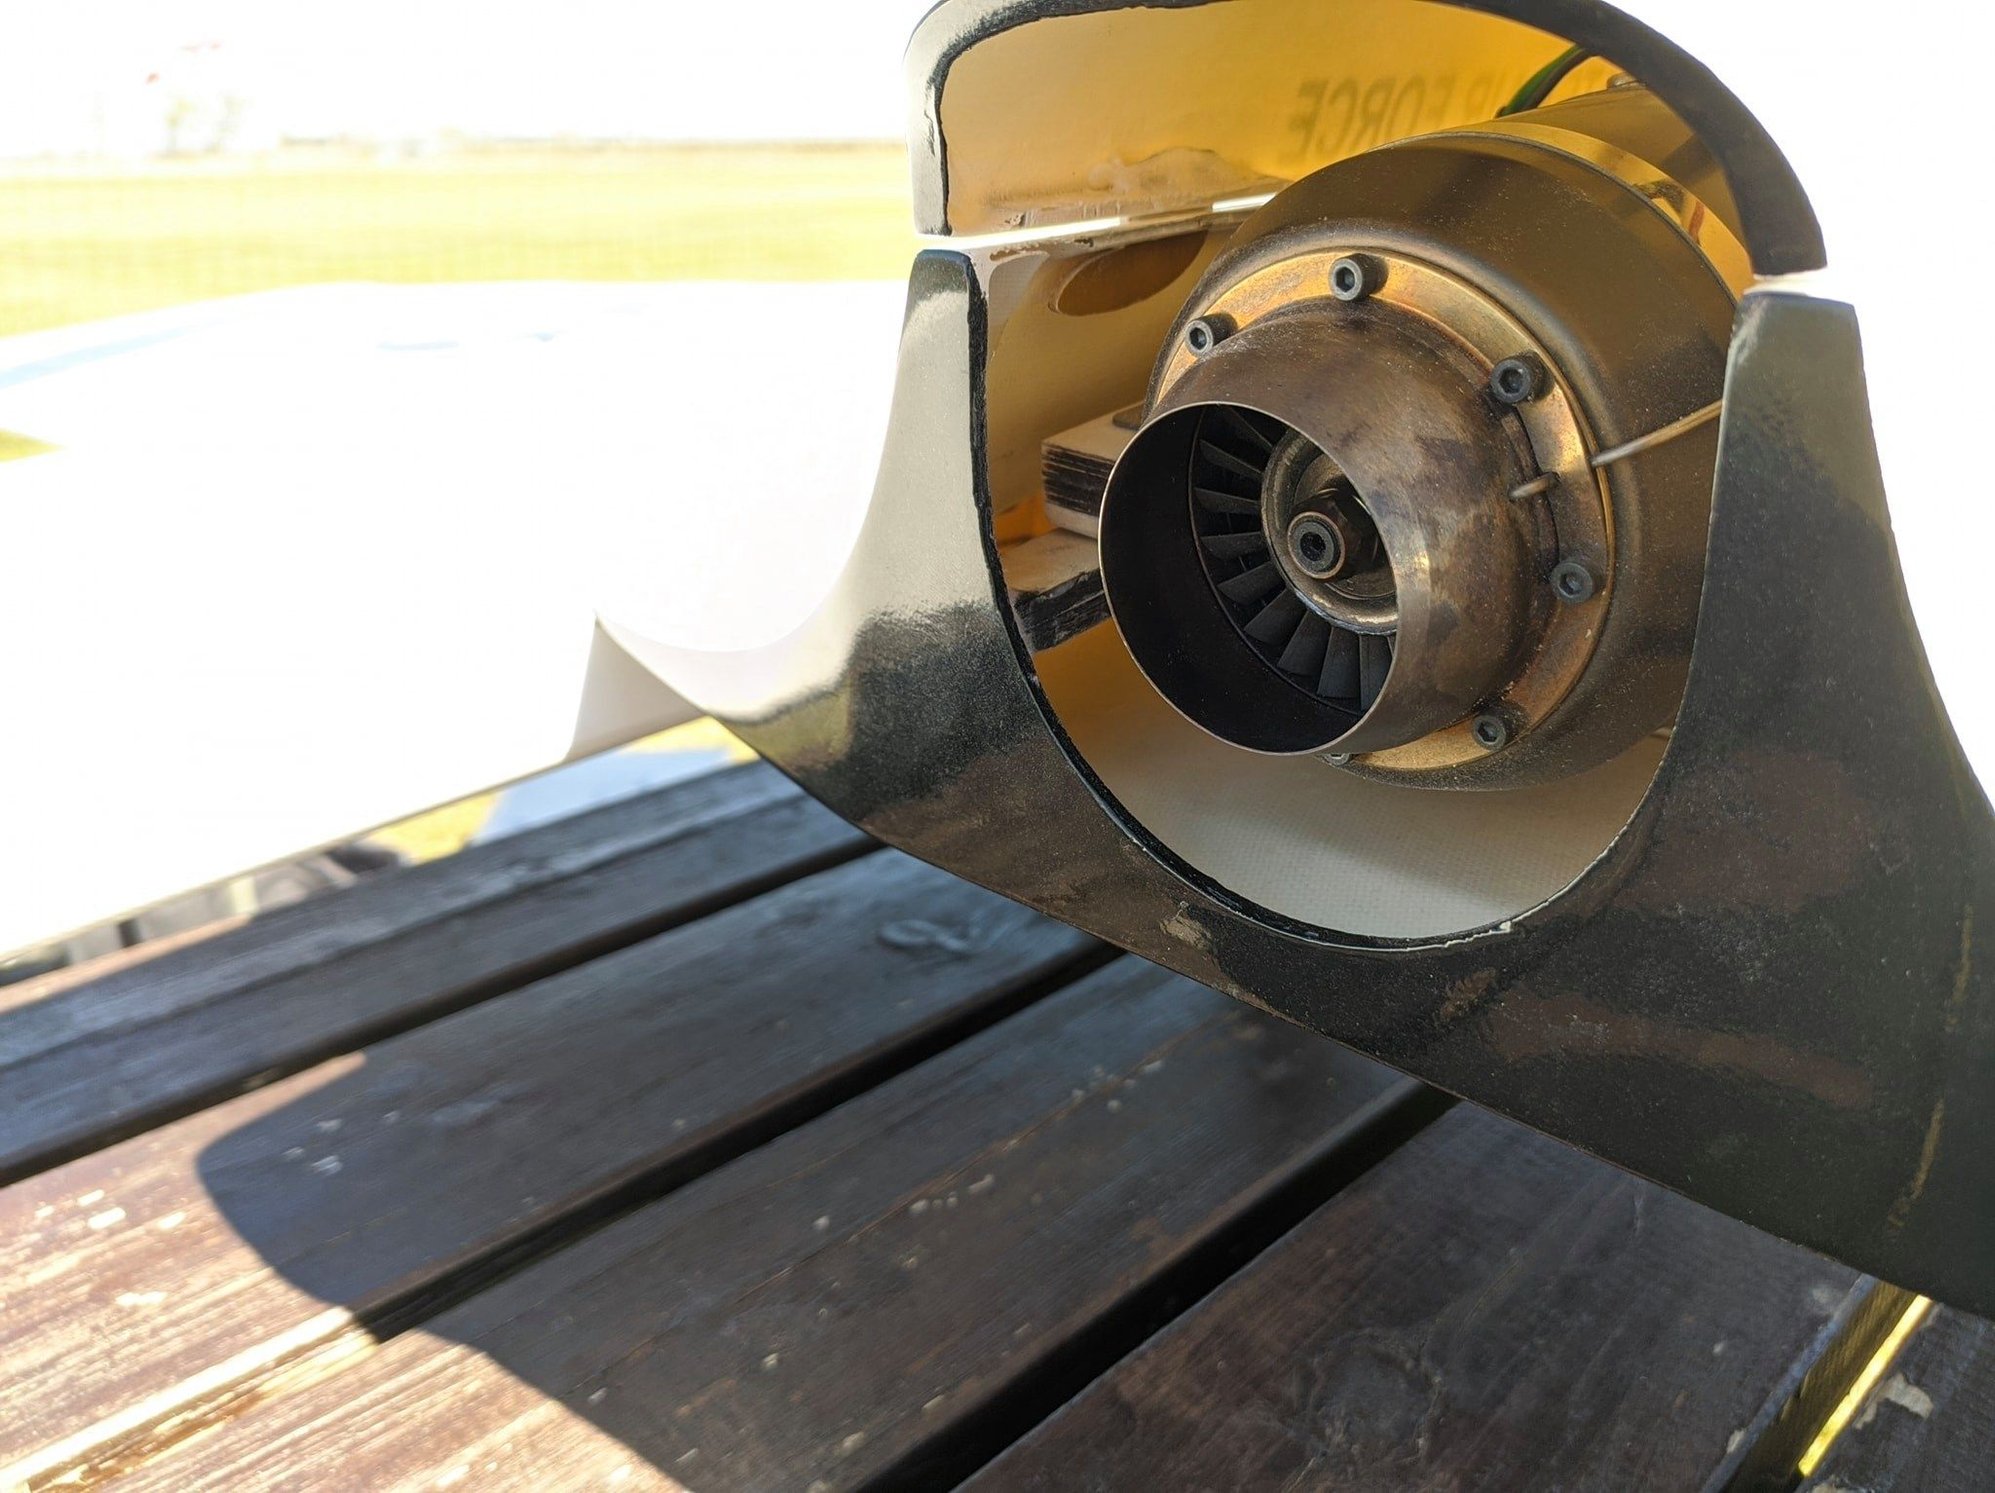
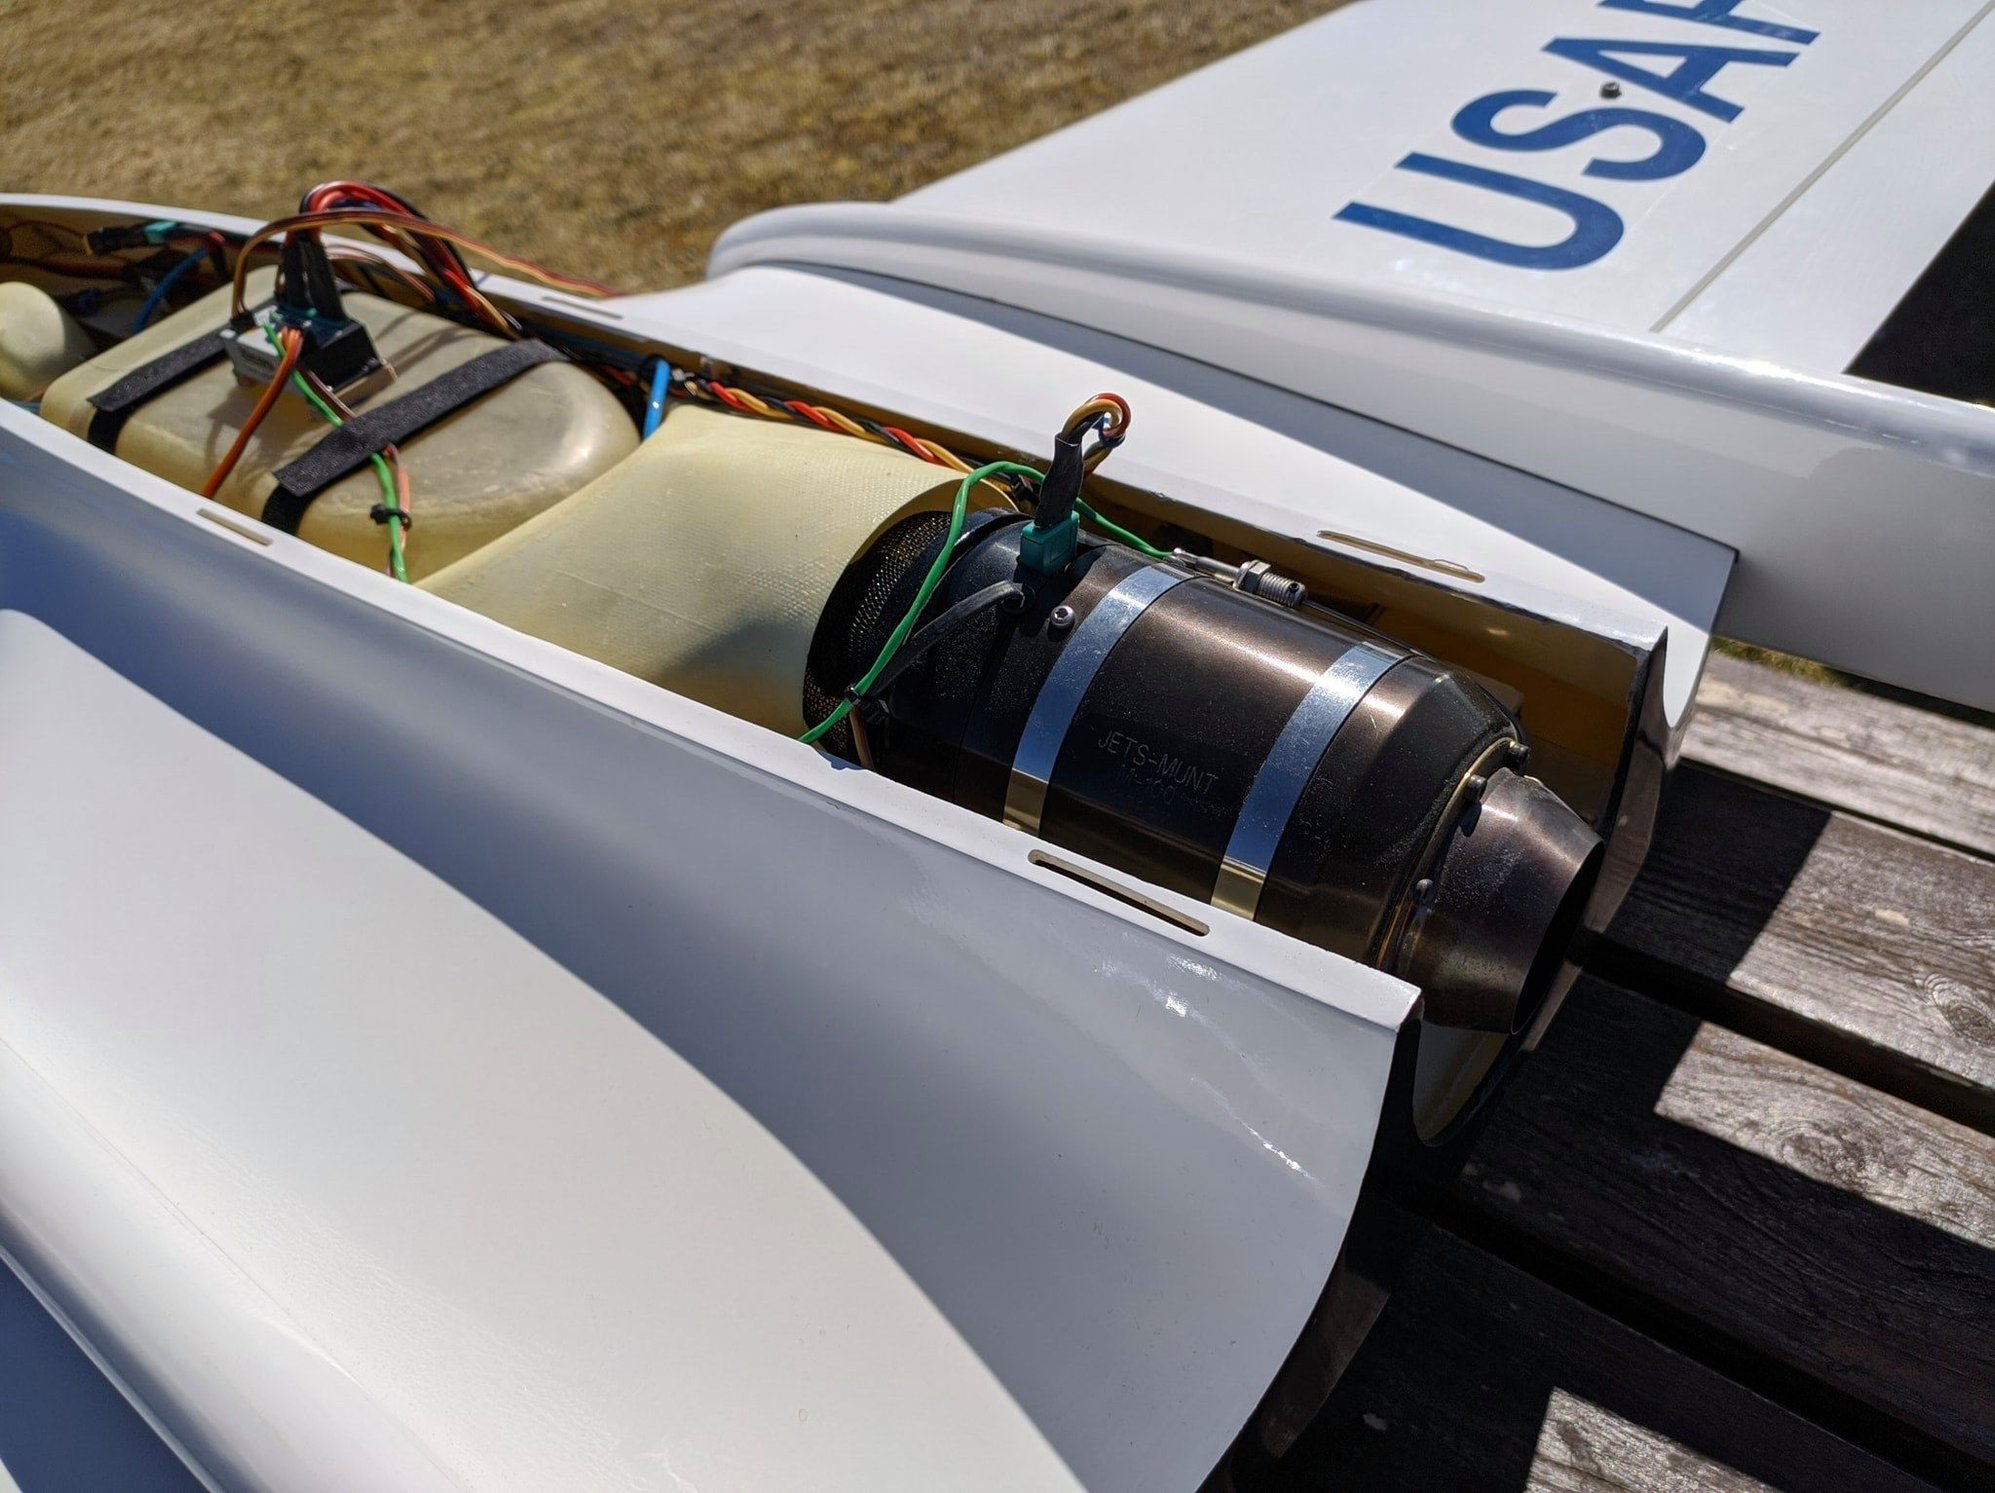
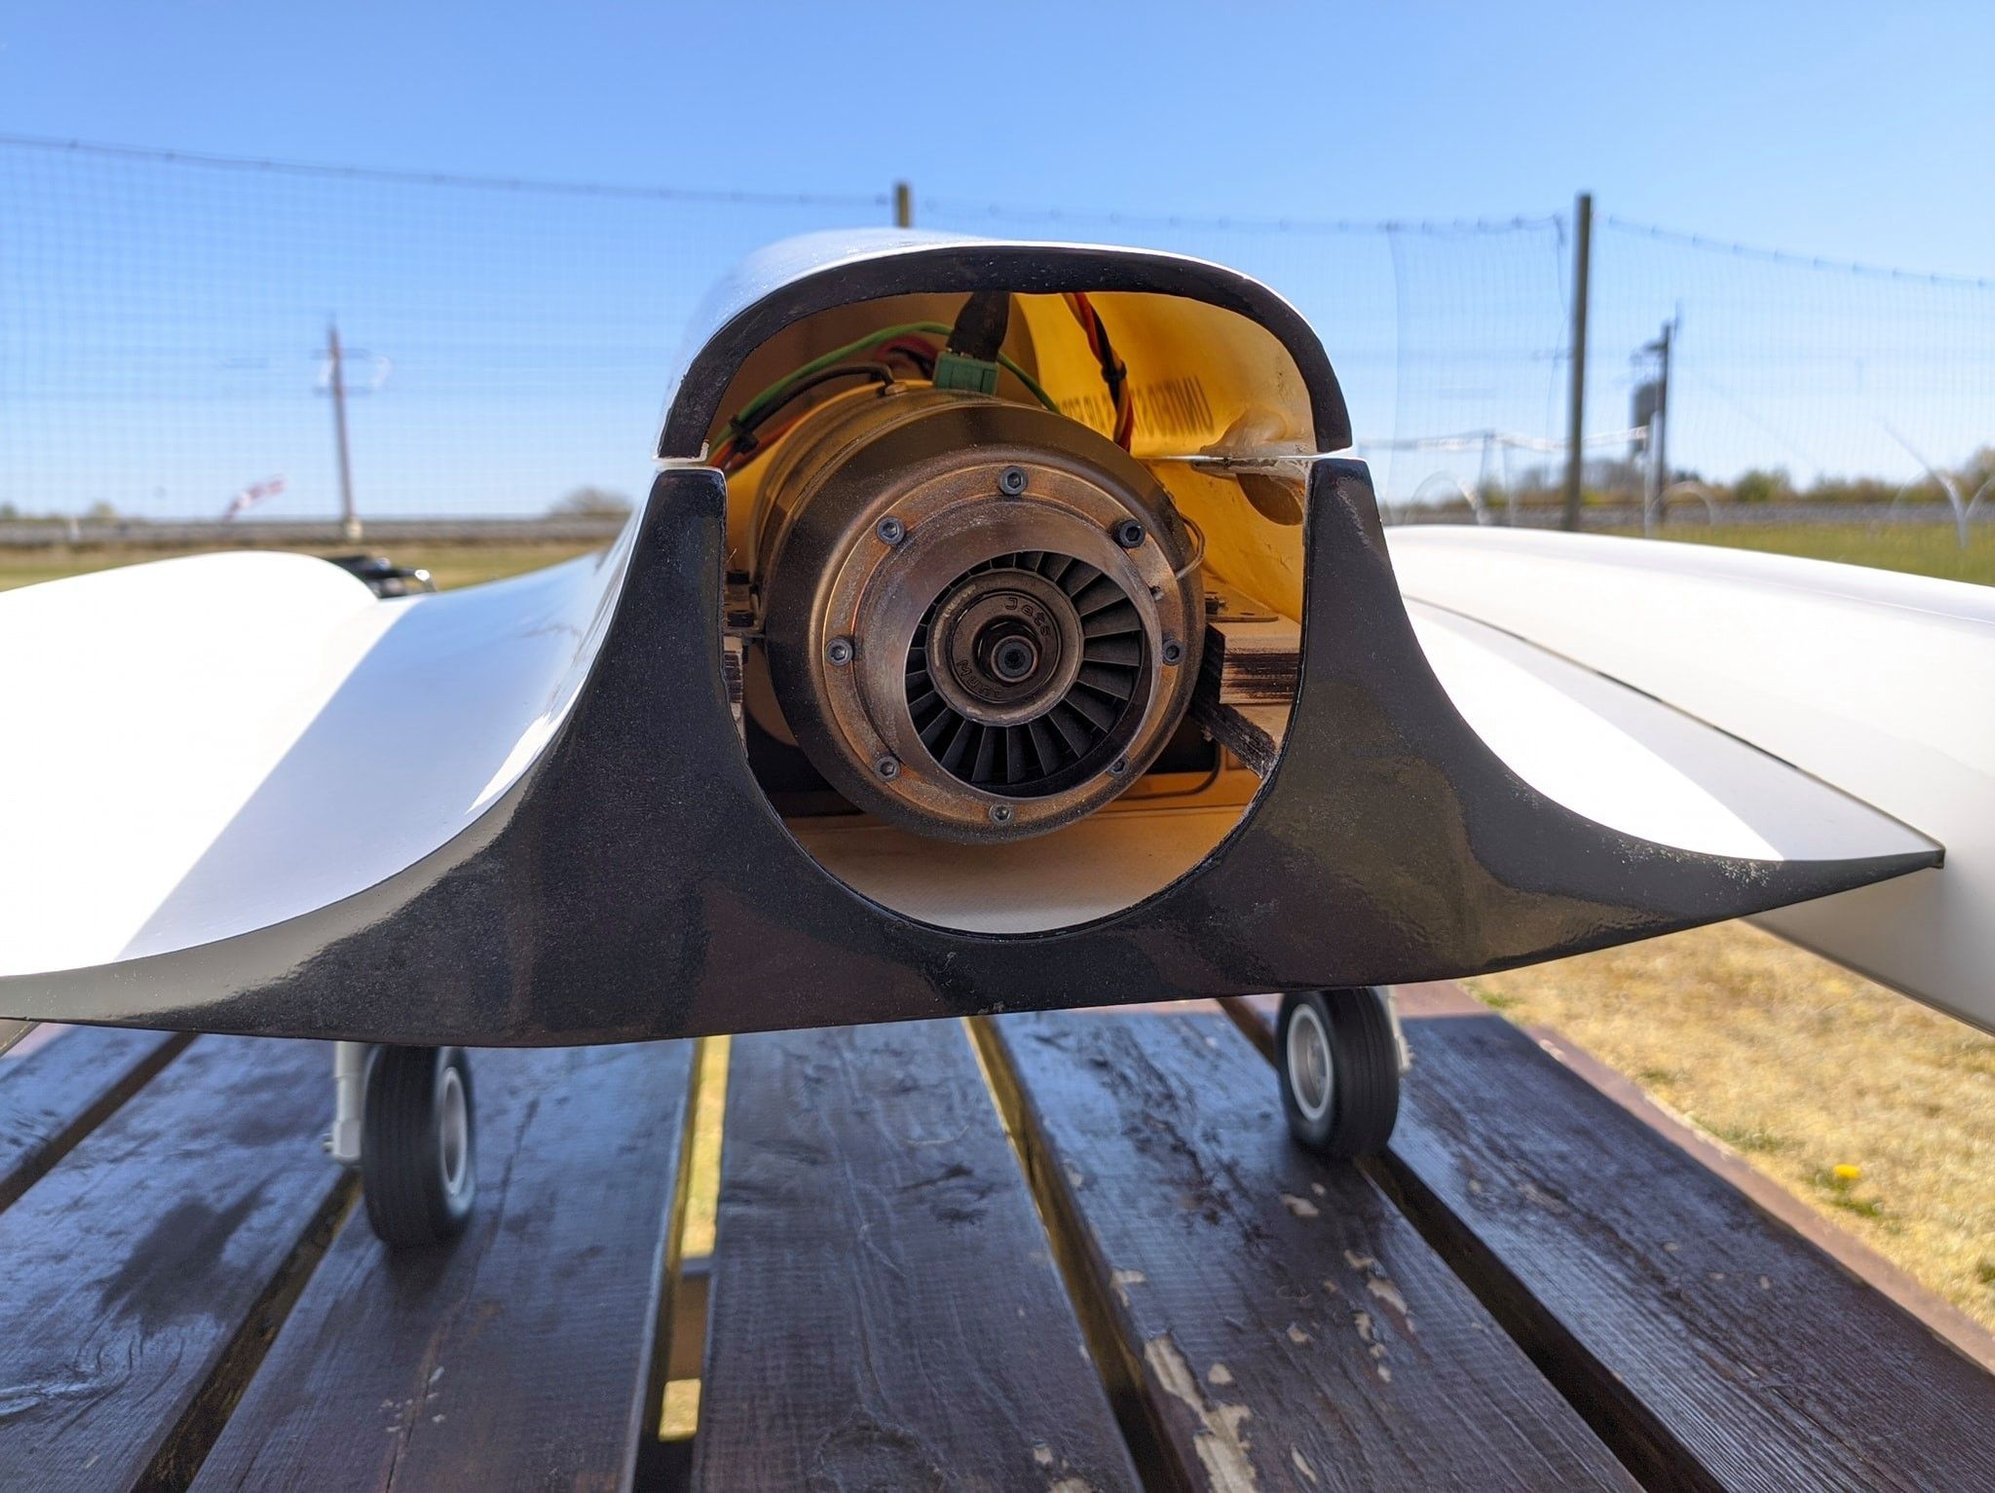
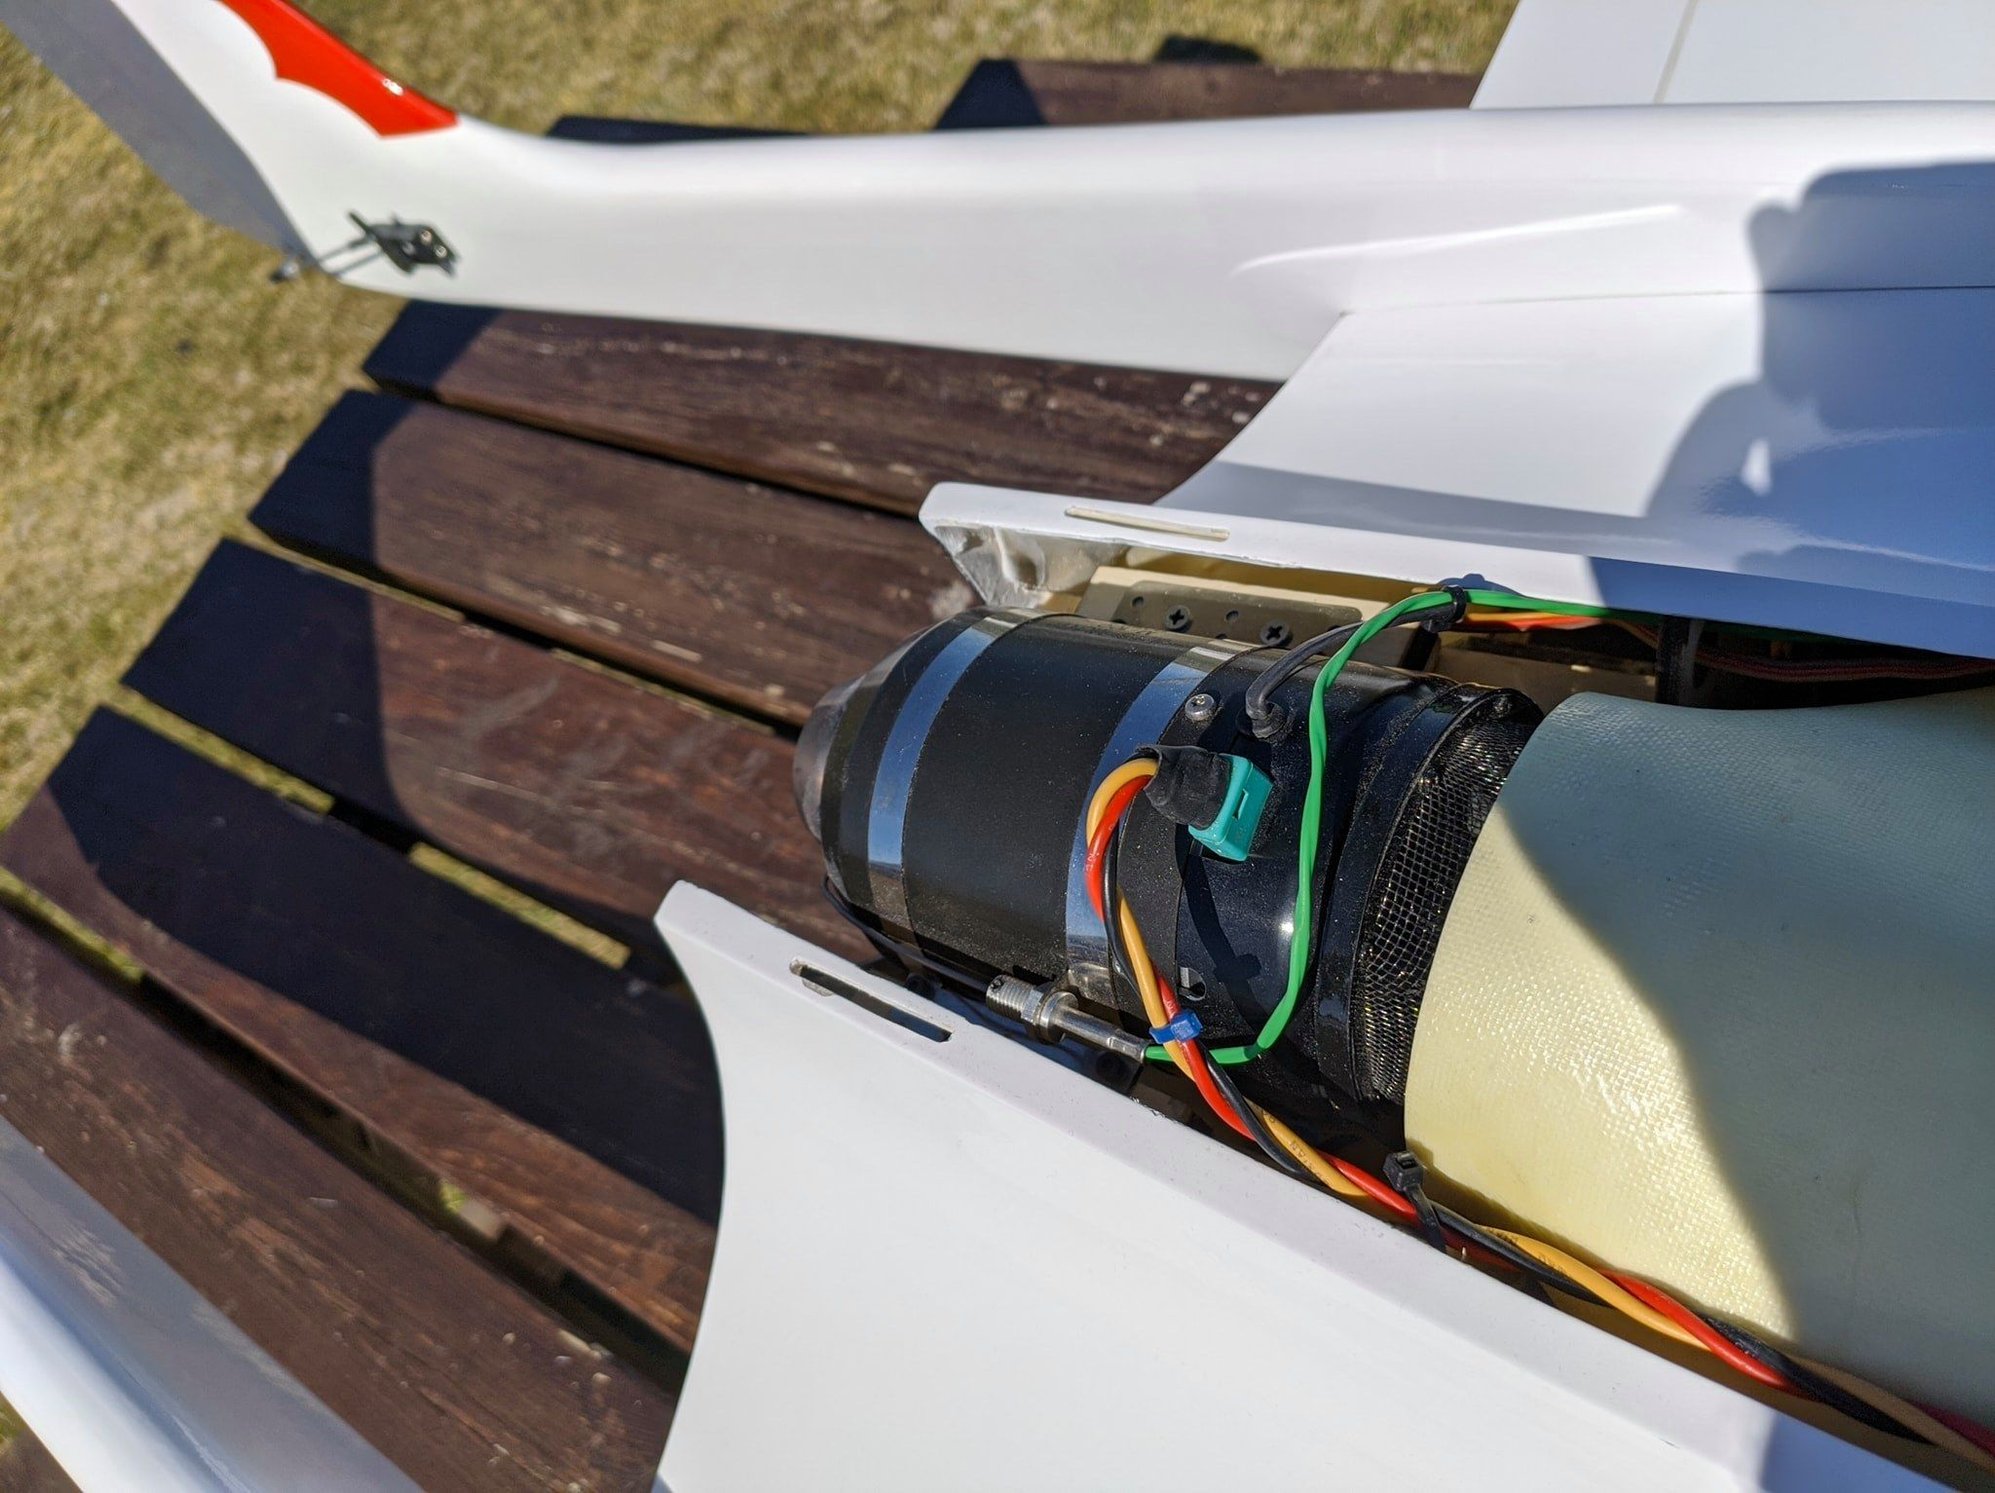
the only difference I made is to get the Kingtech 85g2 sitting in the middle of the airintake I had to add a 6mm block under the turbine mounts. Thus turbine is sitting 6mm higher than the mounting blocks supplied.
question ? would it be an idea to add a couple of washers under the leading edge screws in the stab so I can get rid of the down trim..
any thoughts appreciated.
thanks once again.
Finally flown the Excalibur.. flies very nice.
No additional weight required.. CofG right on as per manual. (160mm)
But, there has to be a but !!!
it needs quite a bit of elevator down trim.. about 3 to 4mm.
in level flight and inverted no trim change is necessary.
elevator mix on flaps is working well with no pitch.
Stab is sitting down nicely onto the "step".
everything is per design.
the only difference I made is to get the Kingtech 85g2 sitting in the middle of the airintake I had to add a 6mm block under the turbine mounts. Thus turbine is sitting 6mm higher than the mounting blocks supplied.
question ? would it be an idea to add a couple of washers under the leading edge screws in the stab so I can get rid of the down trim..
any thoughts appreciated.
thanks once again.
02-16-2020, 12:27 AM
#2392
Thread Starter
Look at the back of the tailplane lower skin, behind the fin slots-is there a dent? If so the notch on the back of the fin needs cutting 1/16 deeper to clear the lower tailplane skin.
02-16-2020, 01:00 AM
#2393
Junior Member
Join Date: Feb 2019
Posts: 9
Likes: 0
Received 0 Likes
on
0 Posts
Hi Dave,
thanks for quick reply once again 😇
I have now removed the stab .l. ( lost the flipping bolt down the right hand tube would you beleive... what ate the chances of that 😡 ill get that out tomorrow. 🙄
yes there is a slight indentation on the skin at the step point ( T E of the inderside of stab)
I measure the "step" at 8.5mm from fin top to the step bottom.
I measure the fin caivity on the stab at 10.5mm so about 2 maybe 2.5mm .
if I read that right the stab is not sitting fully down onto the fin at the rear..
so I would need to cut away say 2.5mm so it can bed in correctly.. true ?
once again many thanks
Ray
04-26-2020, 12:59 AM
#2395
Join Date: Feb 2006
Location: Parkes, AUSTRALIA
Posts: 1
Likes: 0
Received 0 Likes
on
0 Posts
Hey guy's,
For those that are using Electron retracts, which of the steering systems available is the best to use ?. Thinking about a set of these for a new kit. Thanks.
Rodney
For those that are using Electron retracts, which of the steering systems available is the best to use ?. Thinking about a set of these for a new kit. Thanks.
Rodney
04-26-2020, 02:10 PM
#2396
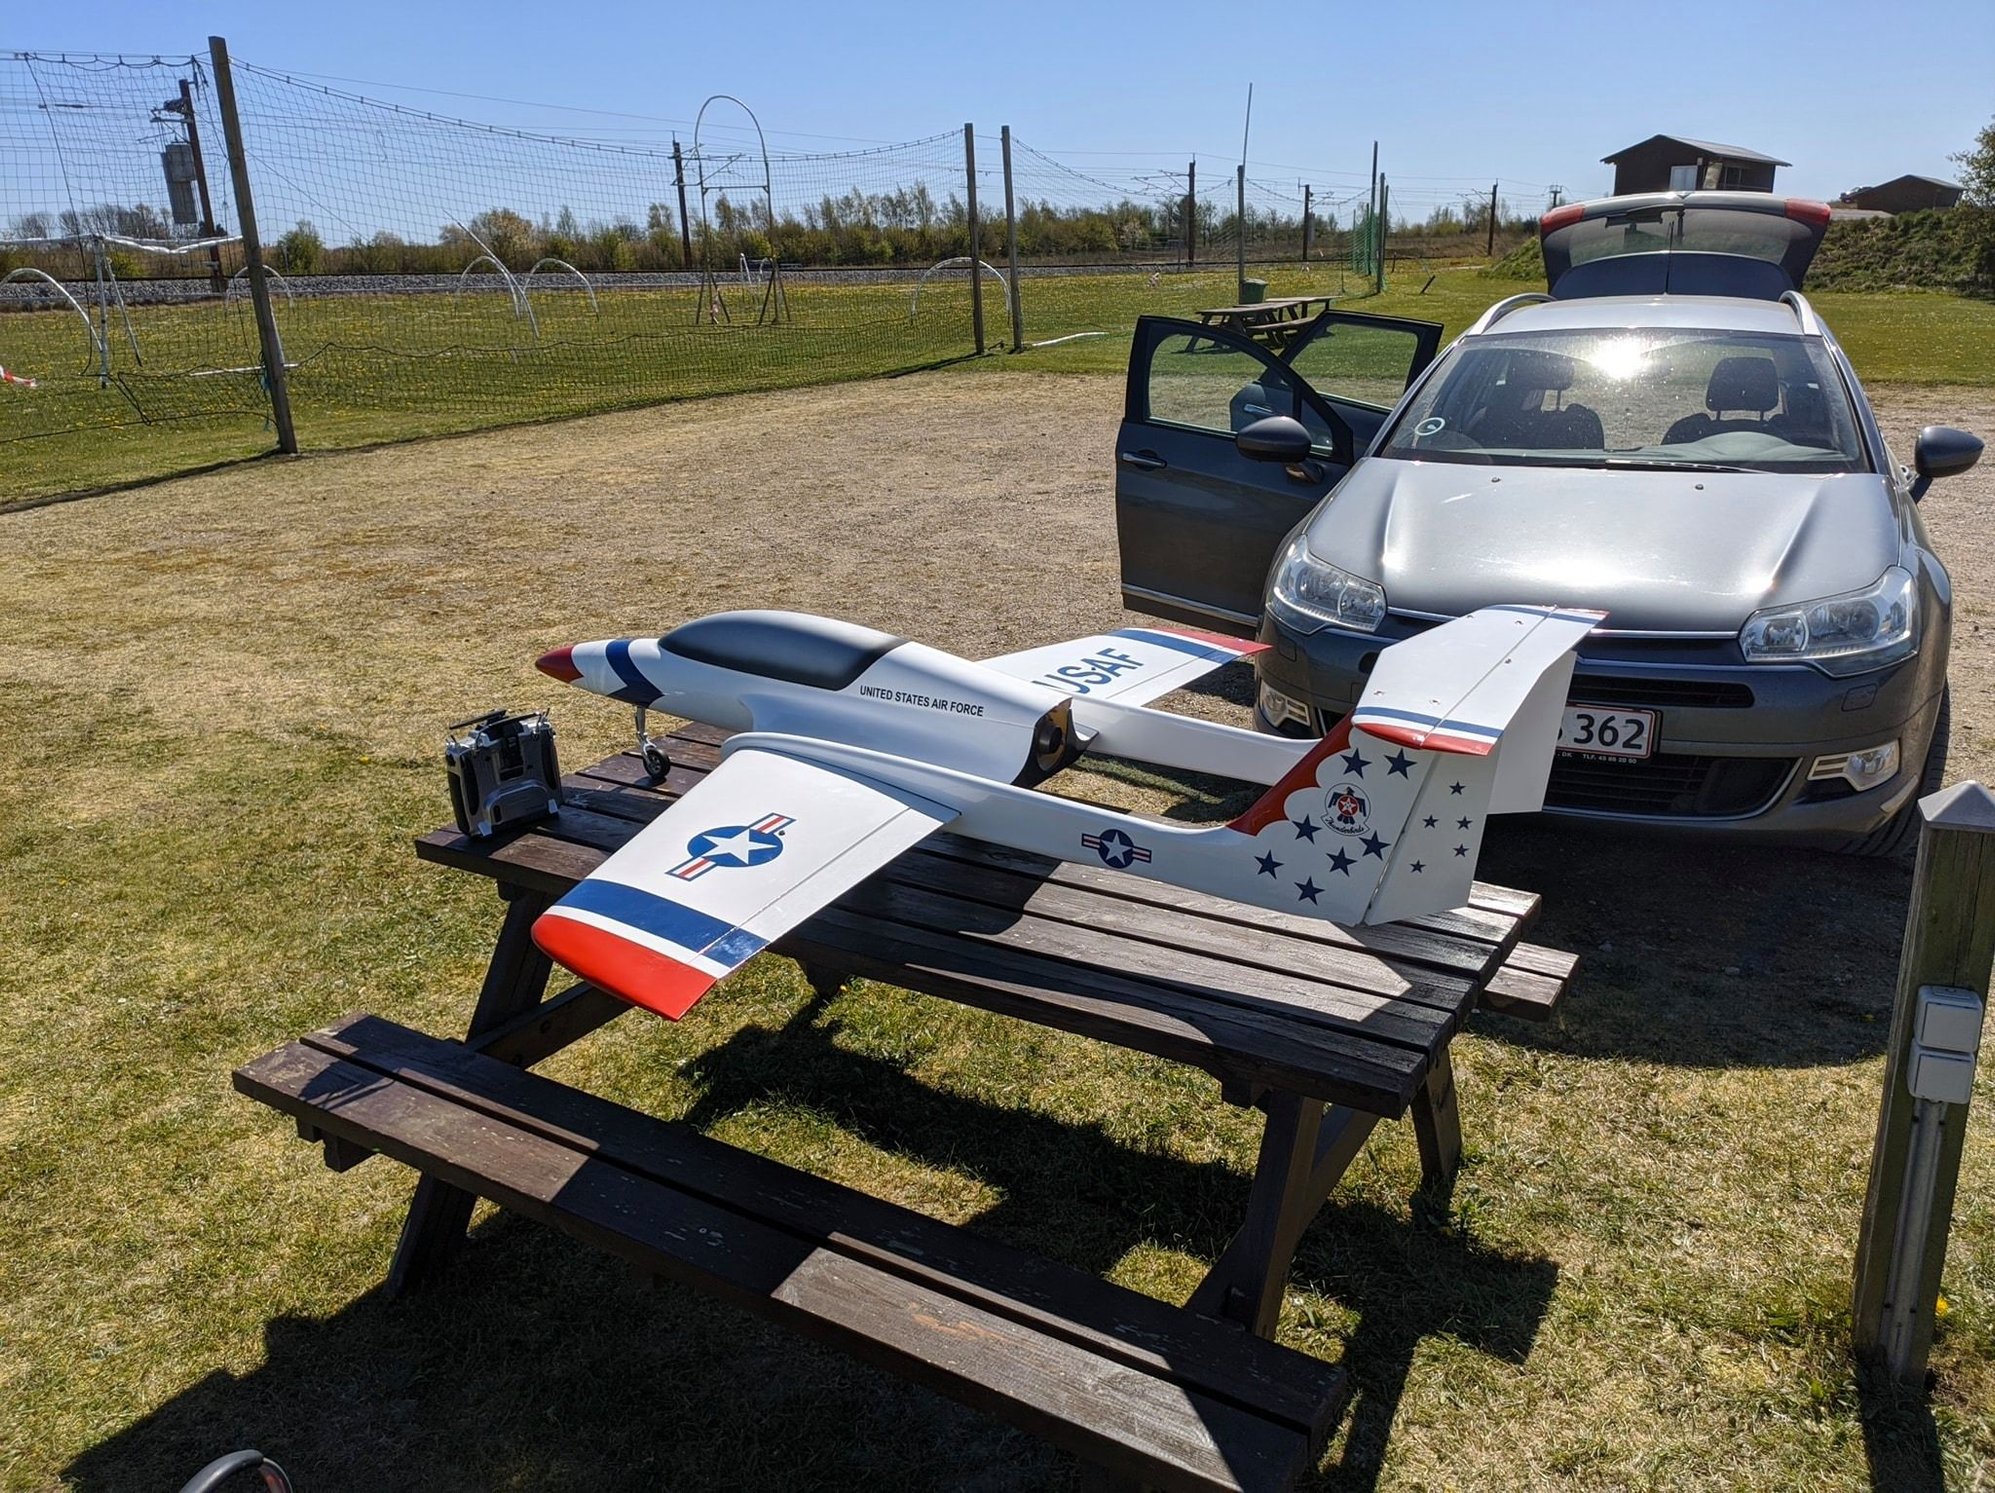
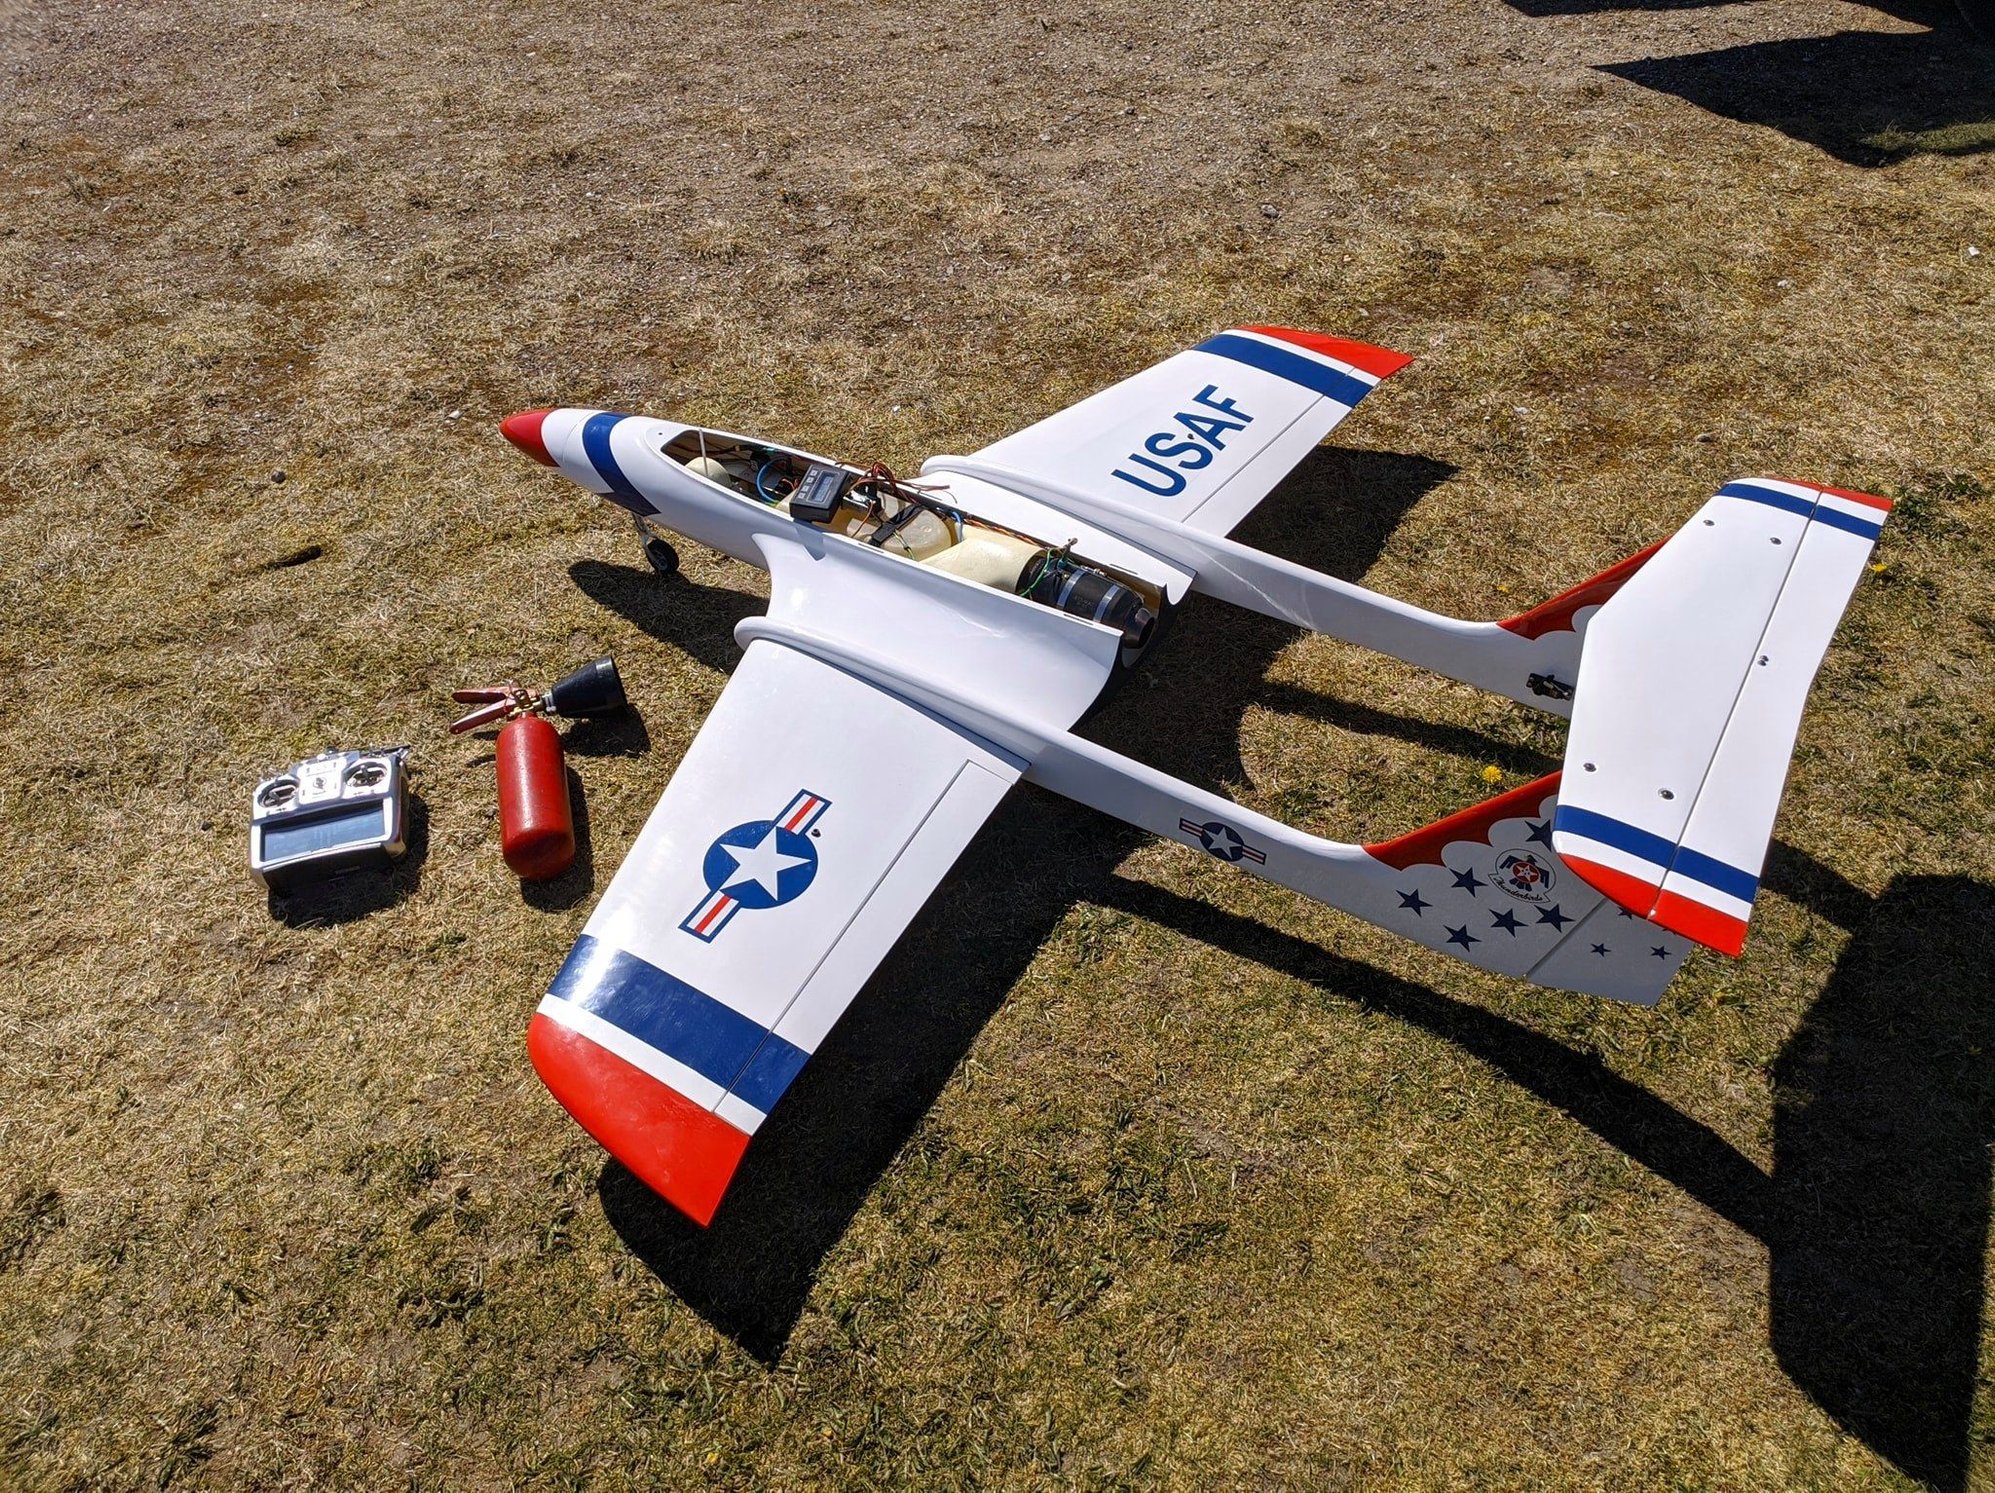
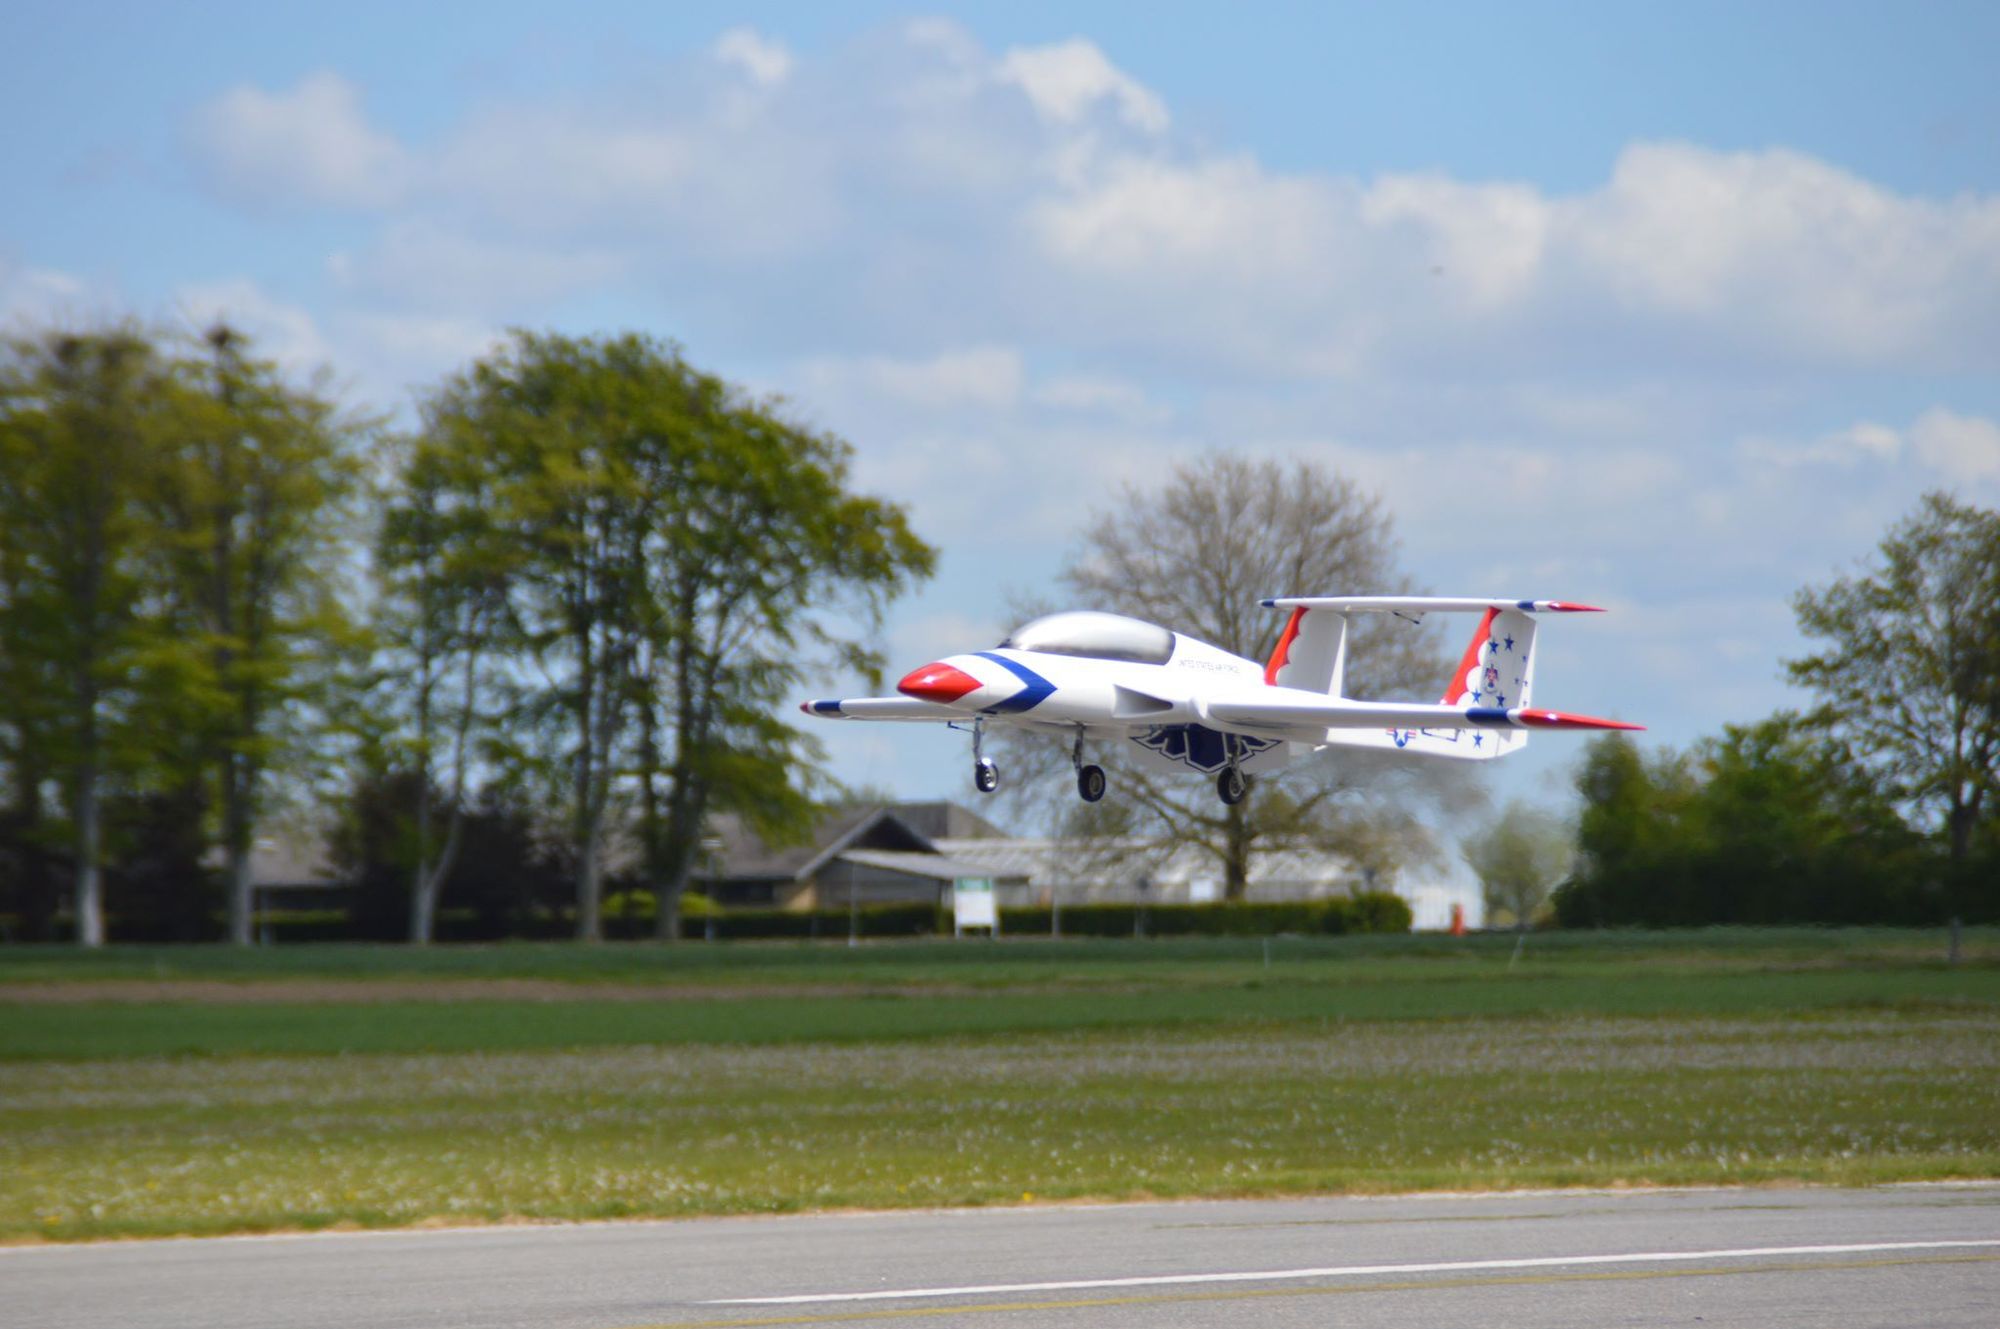
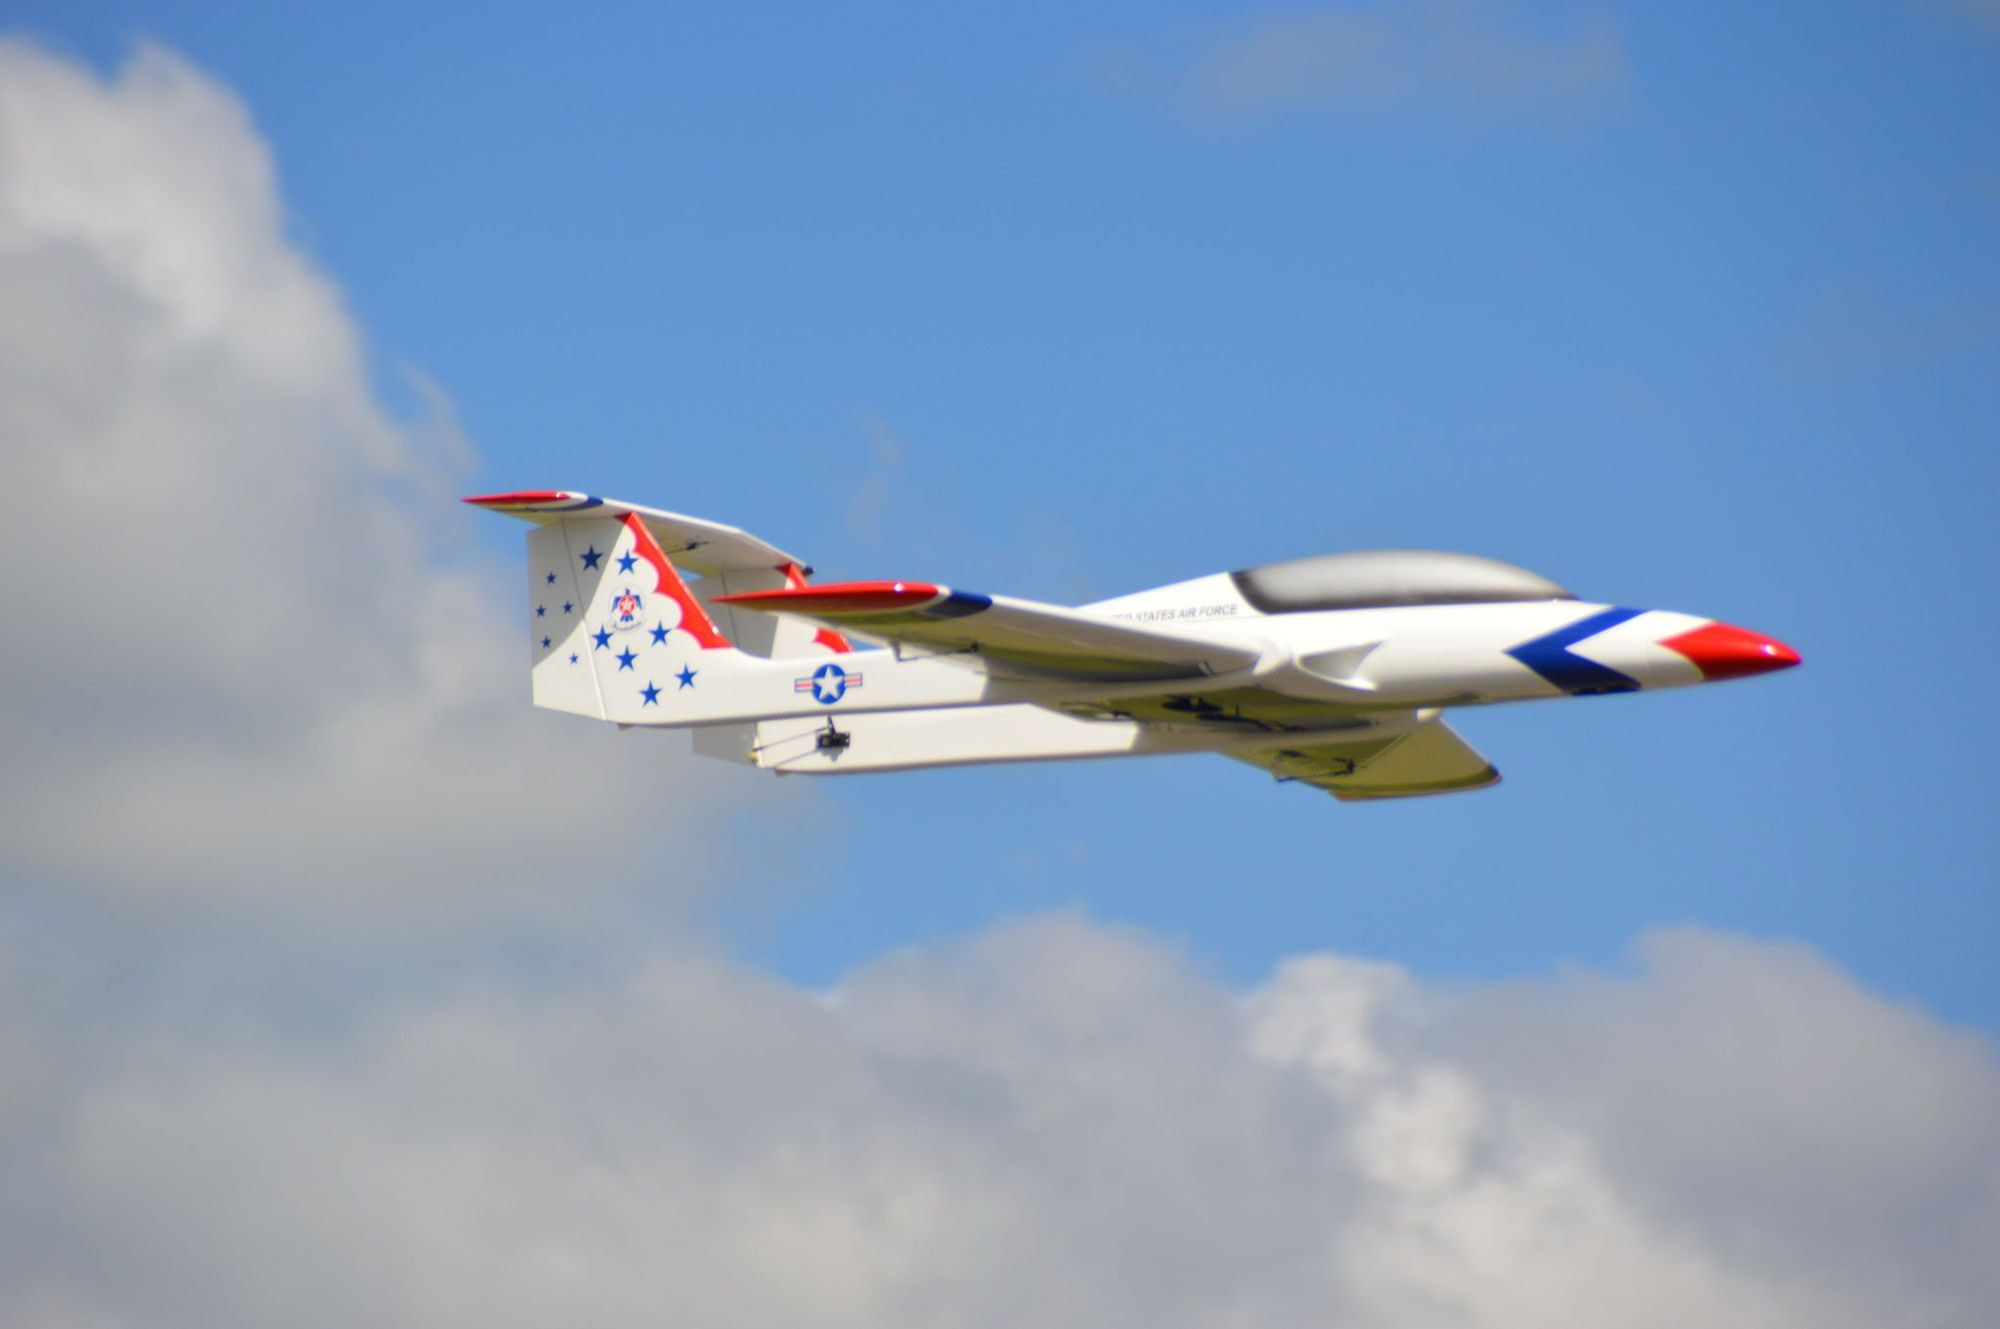
Finally got mine in the air :-)
Fantastic plane. Very stable and easy to fly.....a great trainer.
Neded a few down clicks on the elevator, and that was about it.
Very easy to land, and slows down very well with the airbrake. With the airbrake deployed, it sure does want to climb :-)
The Merlin 100 is great. Cruise around at half thottle, and give a real punch at 100% throttle for some vertical.
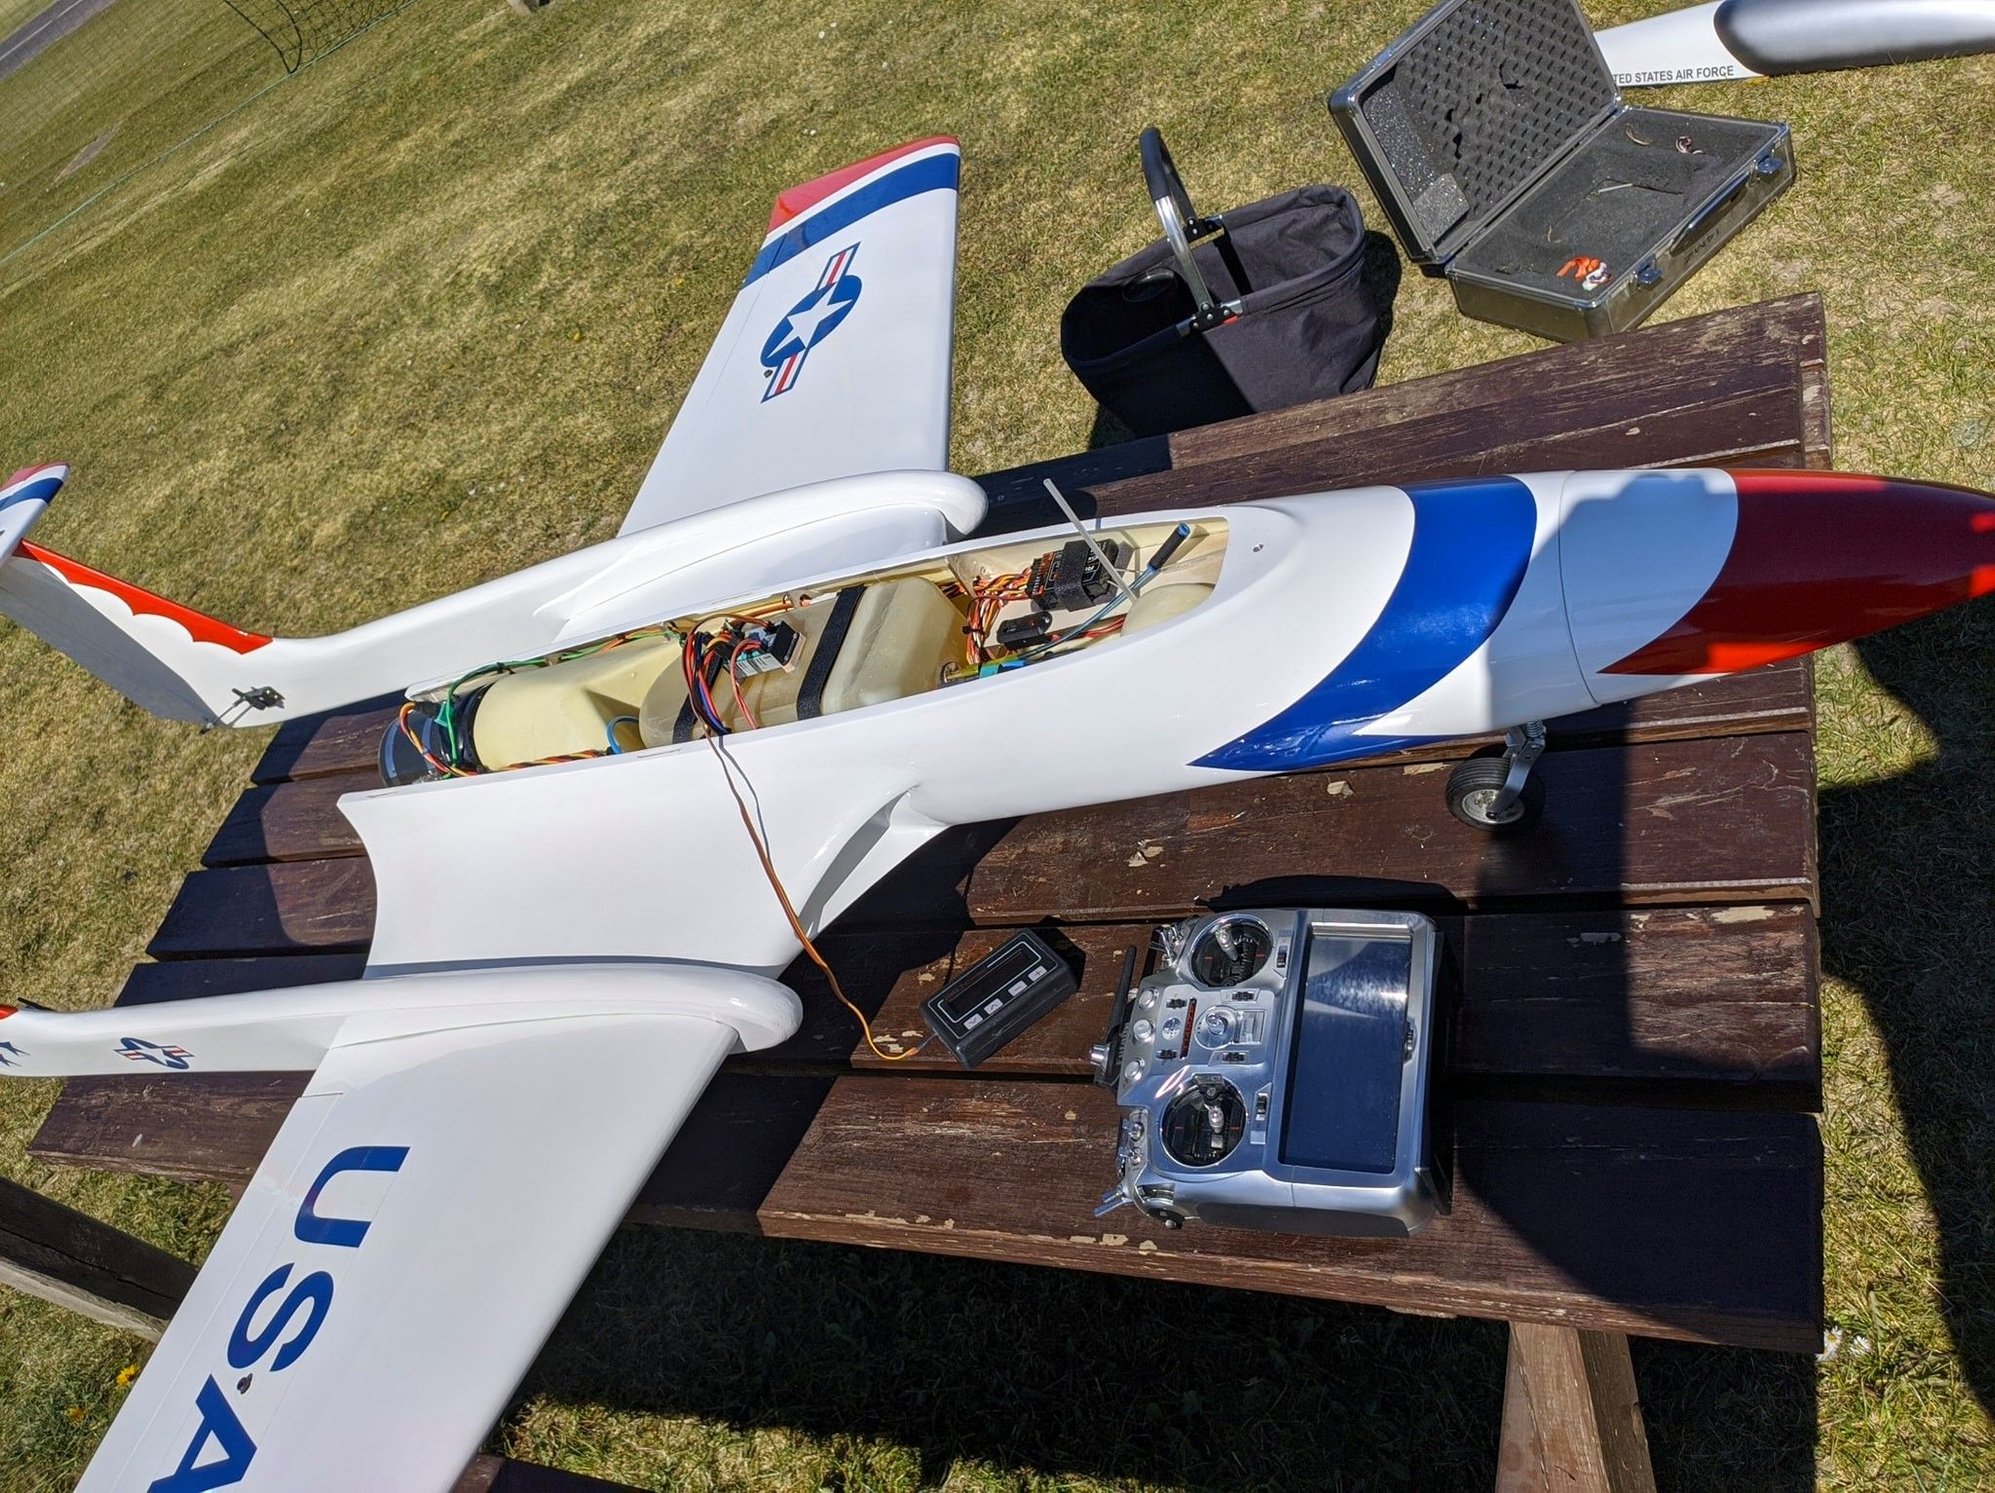
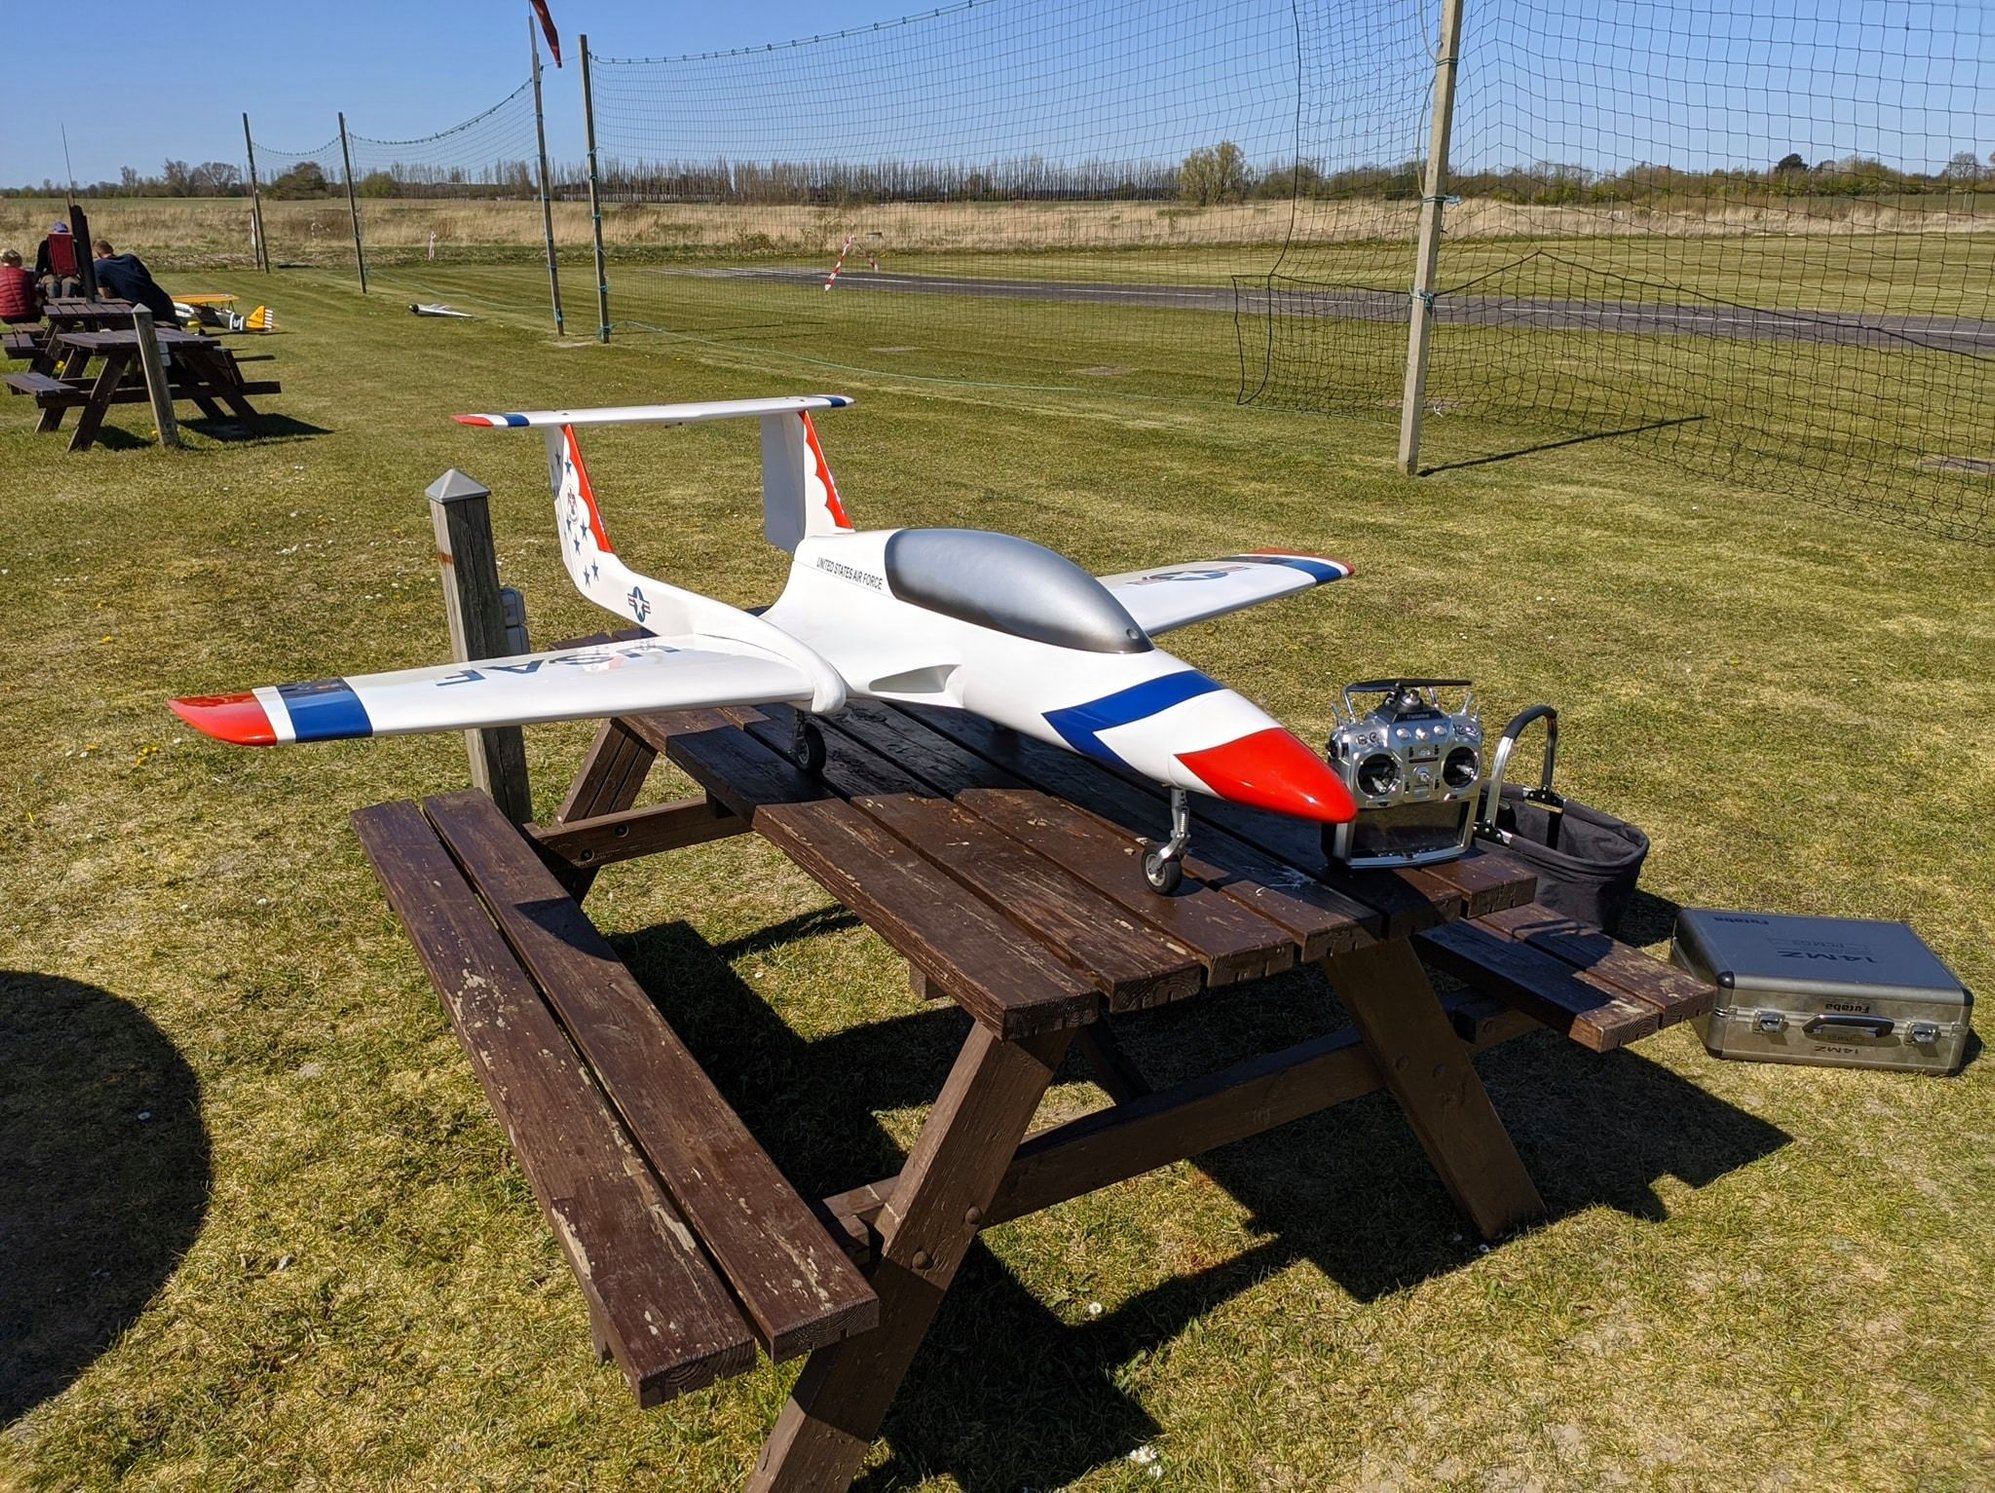

 05-16-2020, 02:43 PM
#2400

Electric retracts :-)
See the post`s above #2354........its fantastic not having to fill air tanks. My first jet with electric retracts.
See the post`s above #2354........its fantastic not having to fill air tanks. My first jet with electric retracts.
some of the best money I ever spent