Top RC Models MkIV full Composite Spitfire-a game changer
#1
Senior Member
Thread Starter
Join Date: Mar 2010
Location: Eugene, OR
Posts: 269
Likes: 0
Received 0 Likes
on
0 Posts
Greetings all Warbird Fans,
Magnum RC introduces the first of it's kind in a build review of the Top RC Models, hereafter known as TRCM, in reference to the new MkIV Spitfire. The unit arrived on my doorstep and the first thing I noticed that never happened before is when the female delivery driver was packing the 55" crate in one arm and her paperwork in the other, I was clued in about this company's new "Sandwich Composite" Technology. The crate was extremely light. Personally, I have never experienced a full composite Warbird with a weight like this. I unpacked the crate and also noticed that their packaging was unique in that all of the parts were suspended inside the crate without touching each other.. You just lift the foam ribs, and begin removing parts. I examined all parts and everything is cherry. Another thing I noticed was the scale like hinging, and it is all predone. No fussing around here, just a drop of epoxy in the holes and it went together quickly. Another love, is the fiberboard control horns, all predone and preslotted. The control rod to the elevator is pre made, the hatch is preinstalled and aligned the tailwheel assembly is done and ready to install. Three screws on a plate and done. I have weighed each piece of this plane and was surprised to discover that the fuselage weighs in at 3 lbs. The wings WITH the aluminum tubes installed in them weigh two lbs. each. I am installing the EME 35cc engine because for a 35 it is an animal, all of the EME engines are. This engine will cowl in with a pitts muffler, well you have to make cooling holes. With the retracts installed, the engine installed, all of the batteries, the aluminum spinner and prop with all of the radio gear, I would be surprised if the entire weight of the plane breaks 18lbs. for a 1/5 scale Warbird. This plane is so completely preassembled, I am confident it could be flying in two days of arrival. See pics, this is the first installment of this build thread for this awesome Spit. I will post more pics as assembly progresses. Can't wait to fly her.
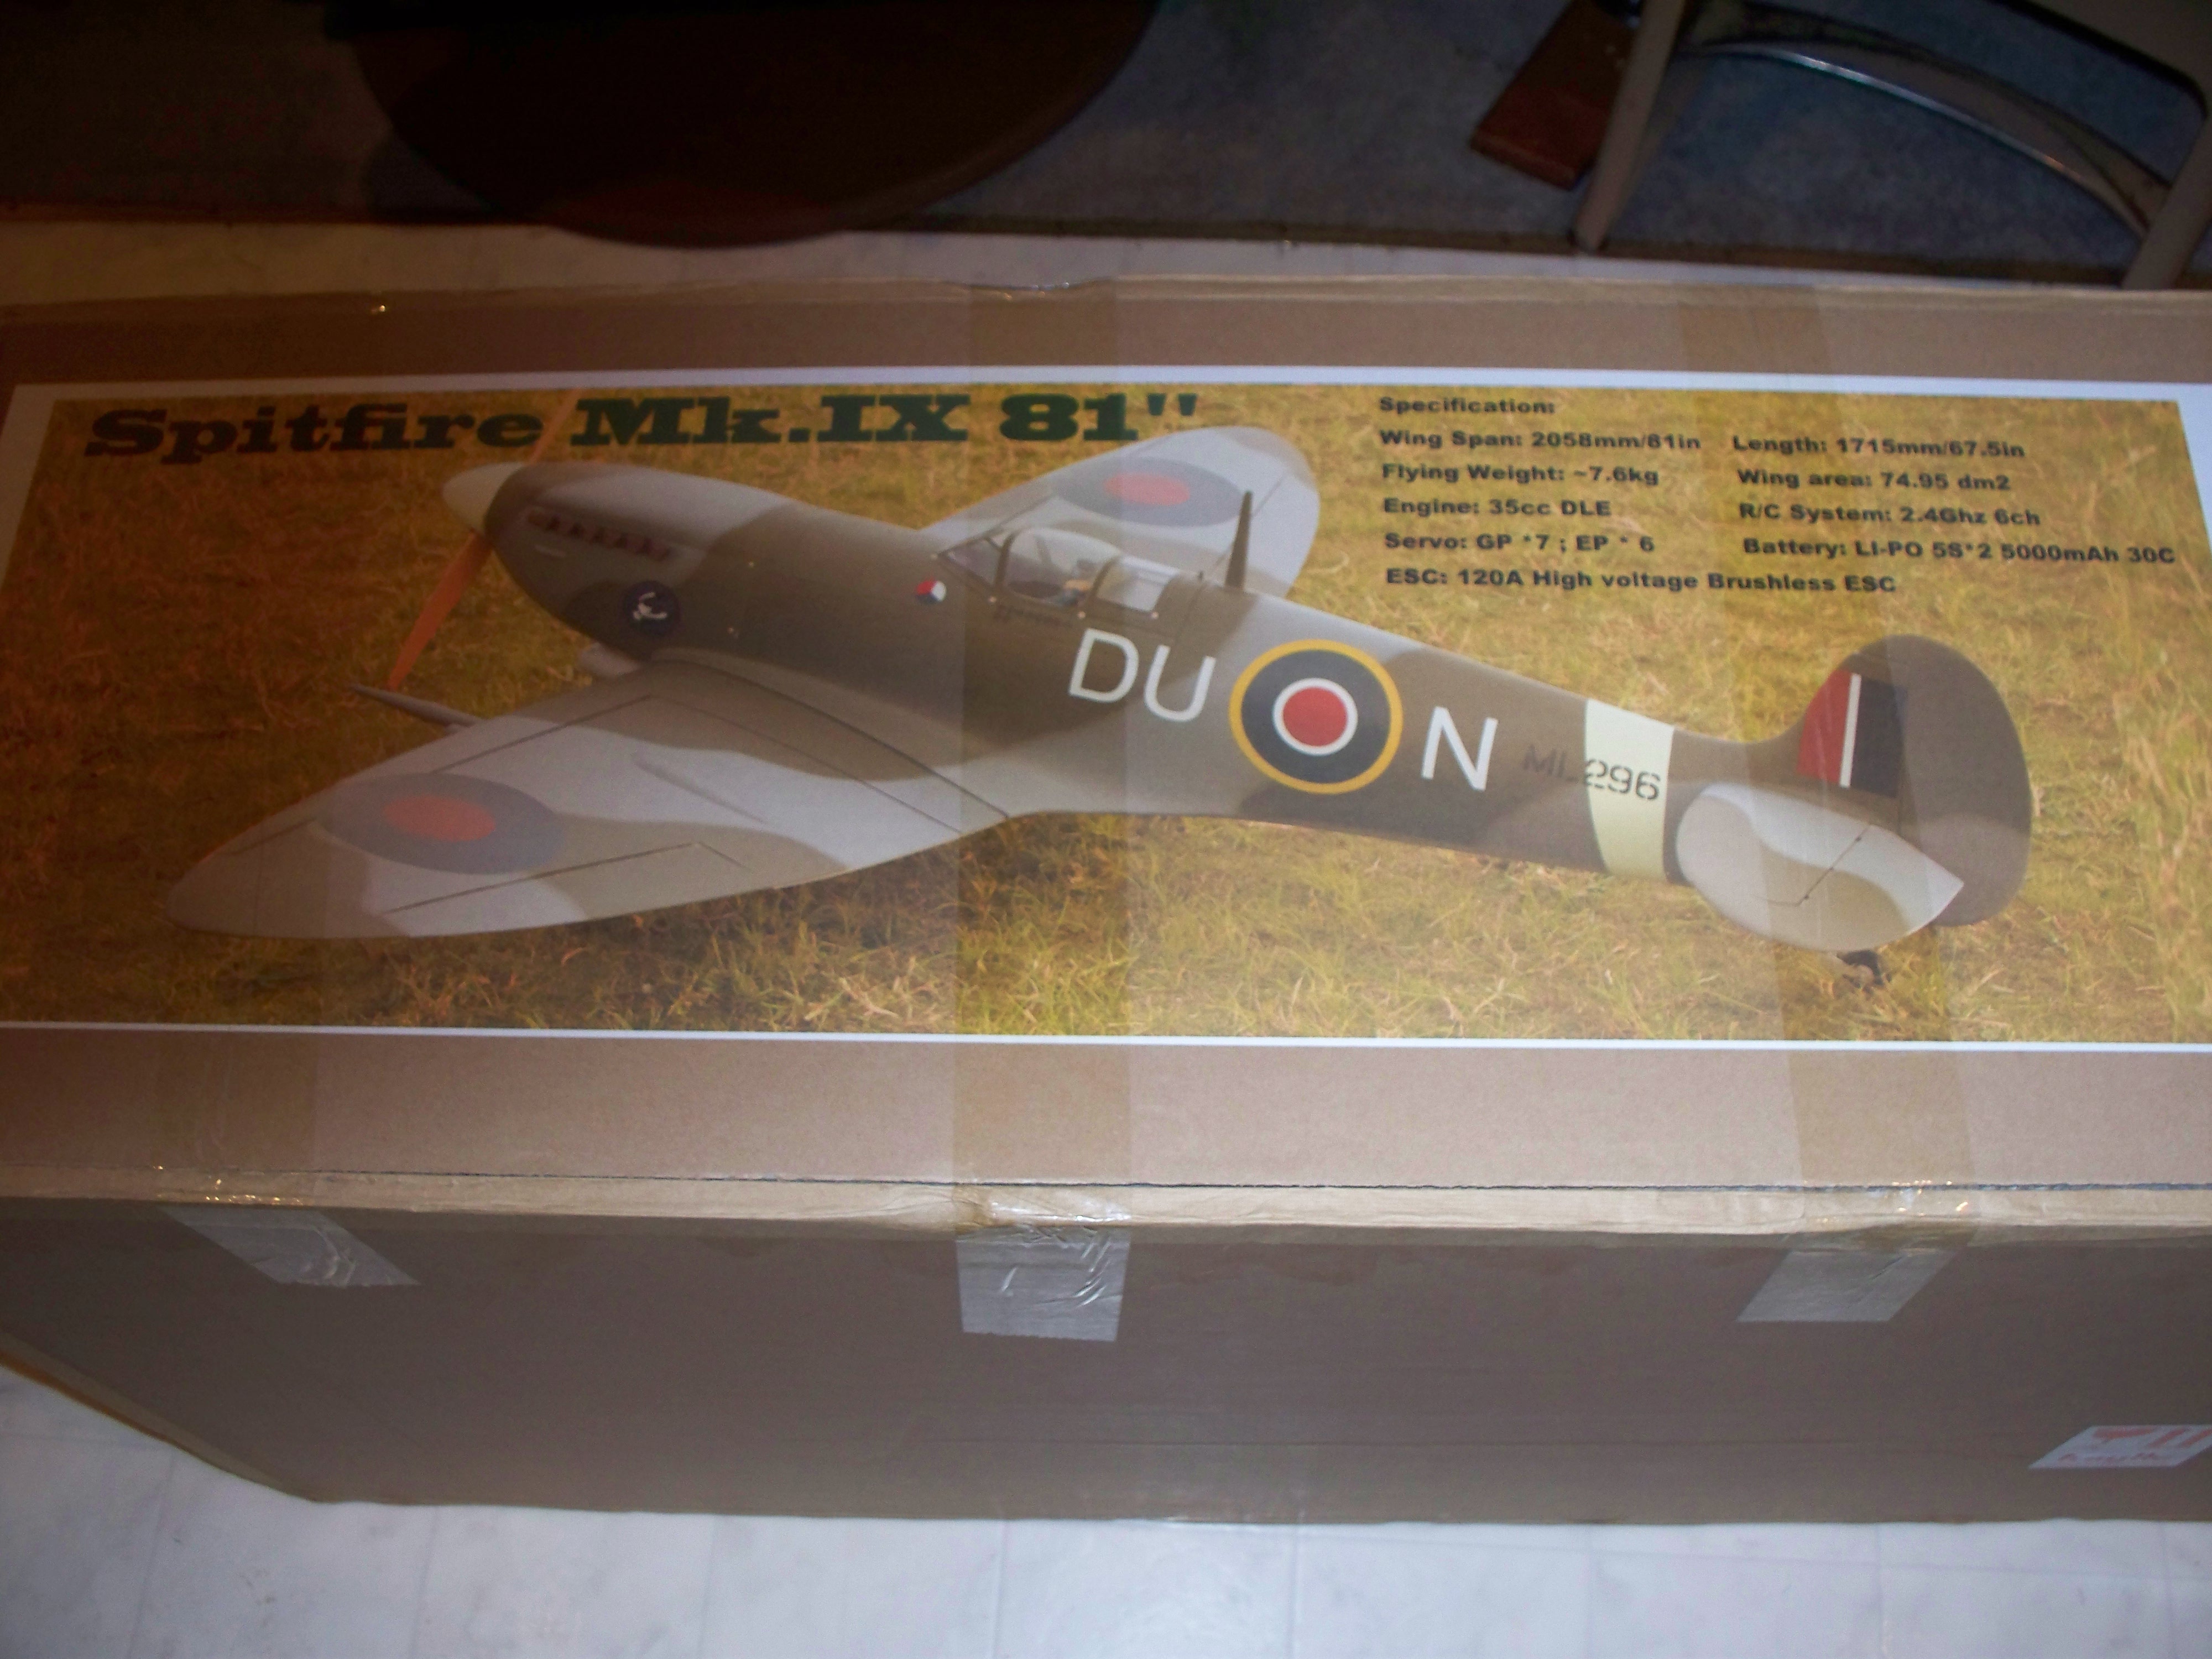
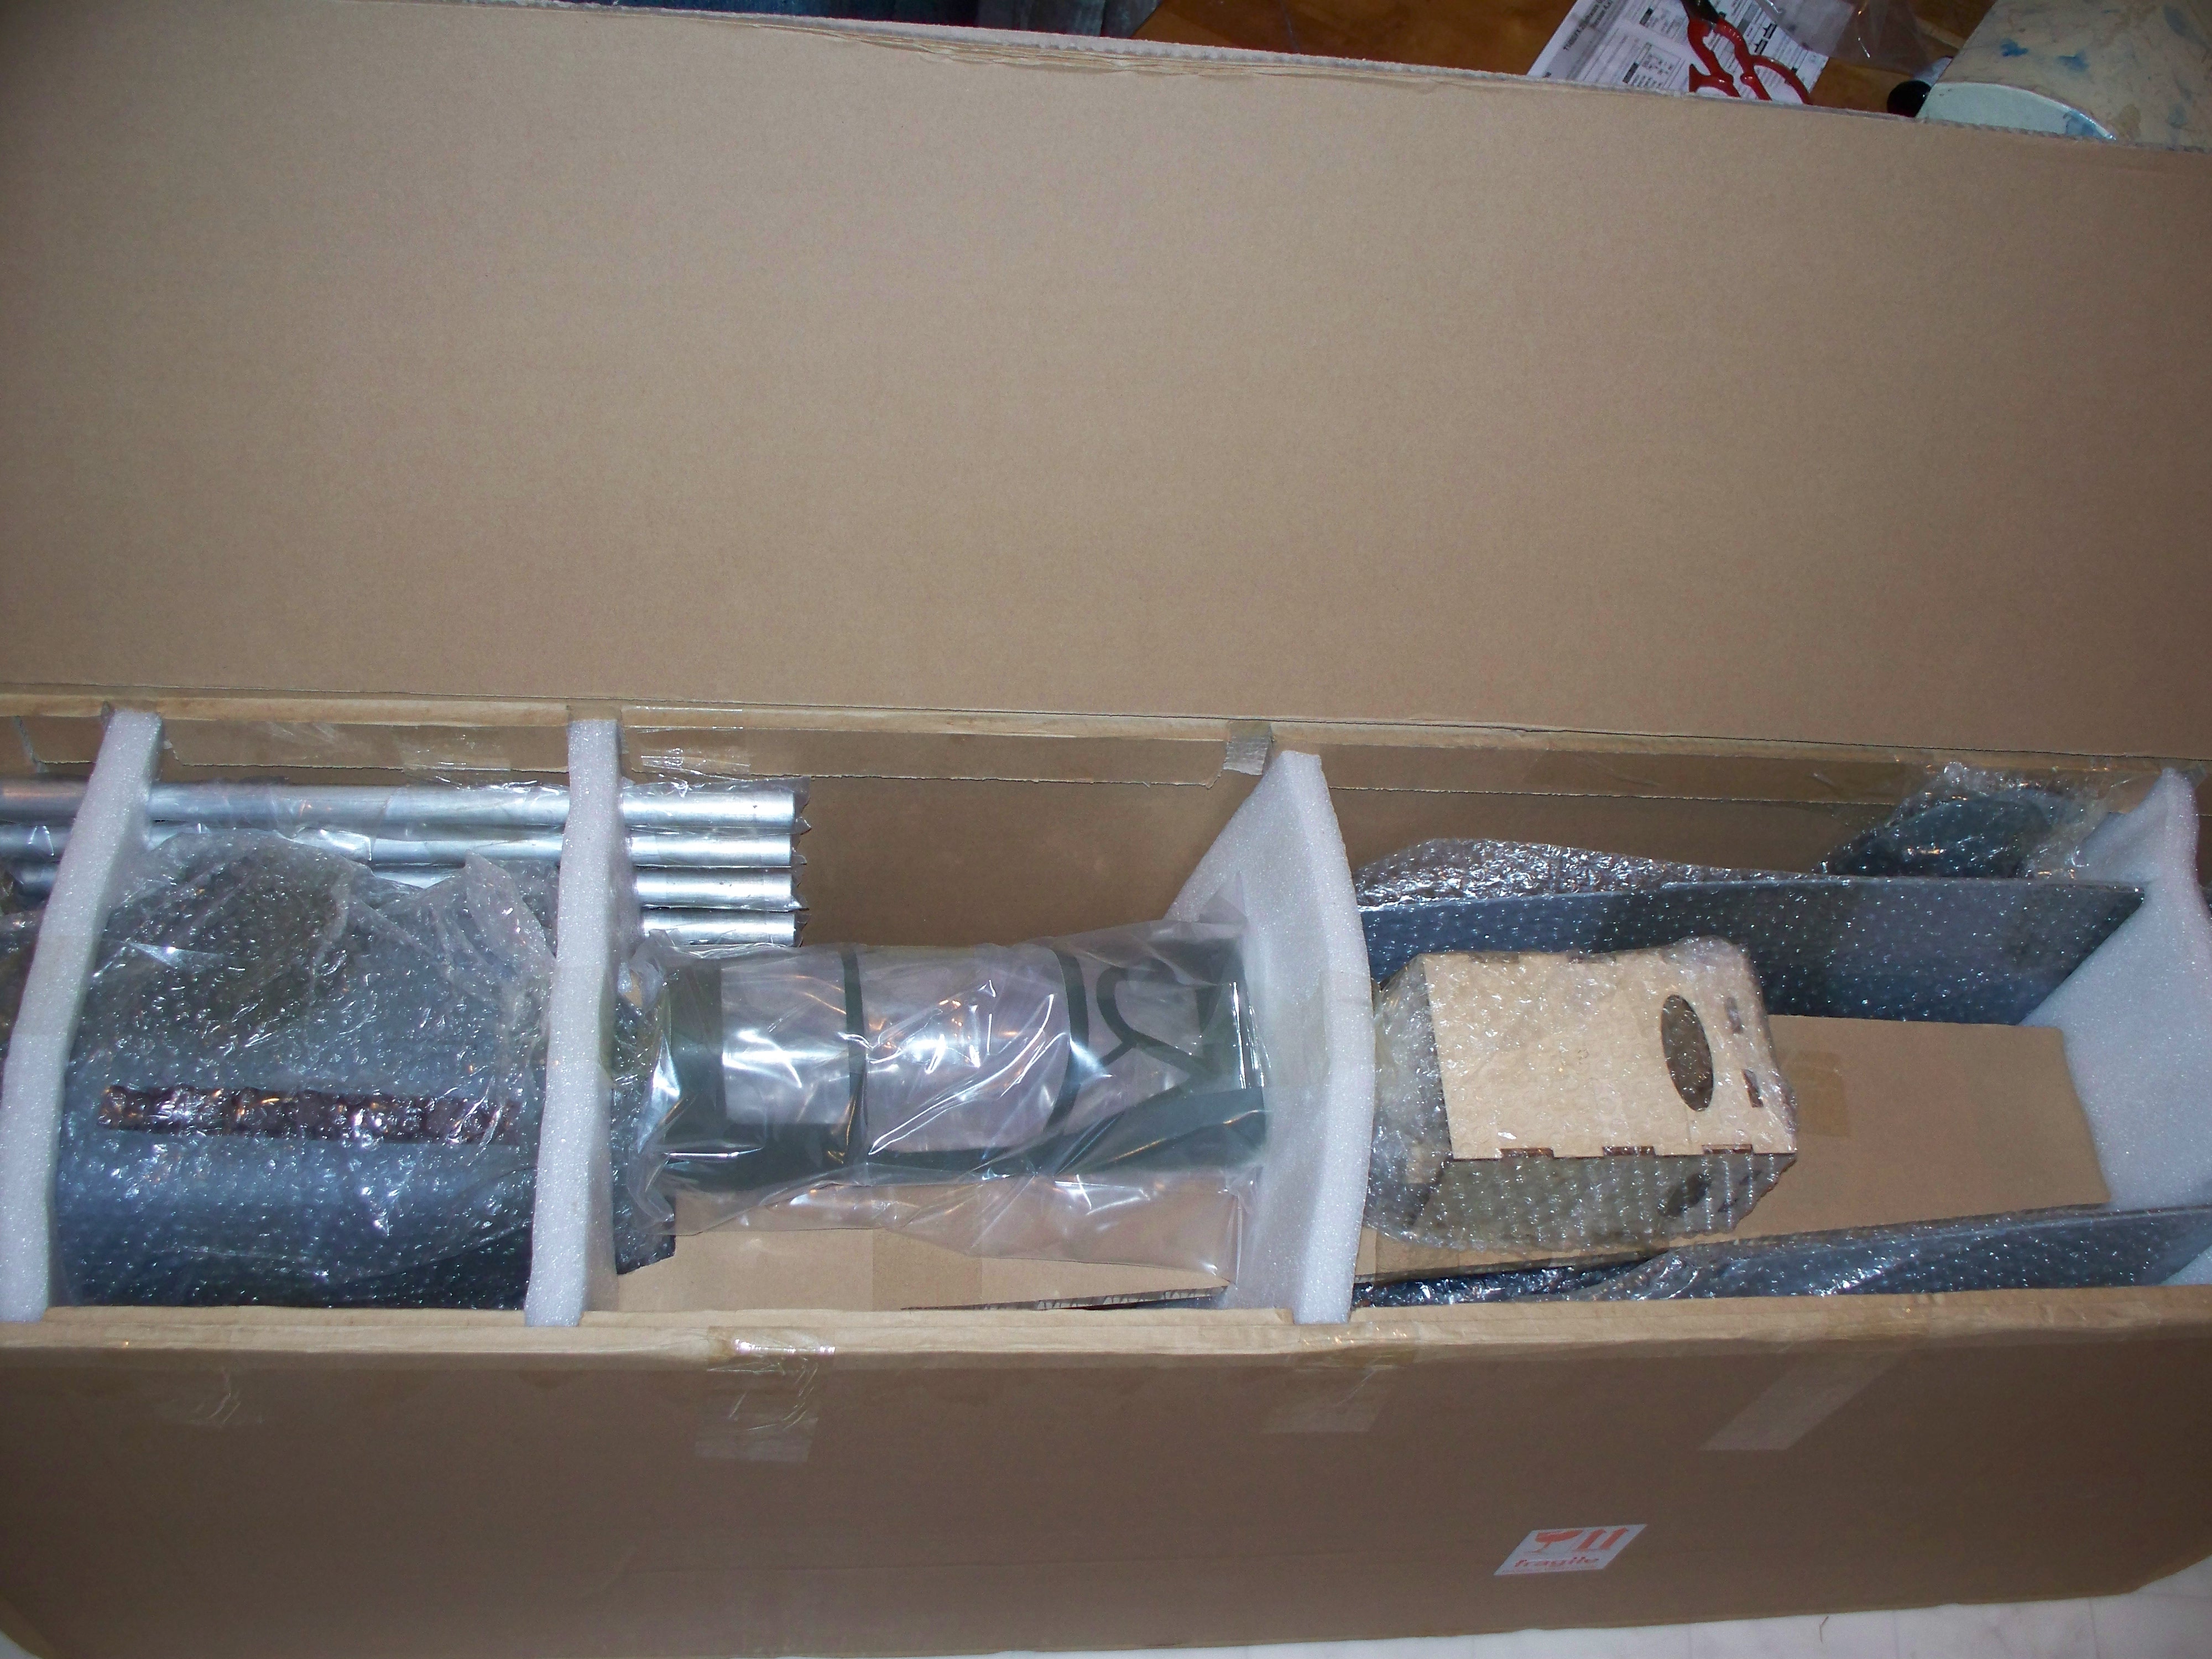
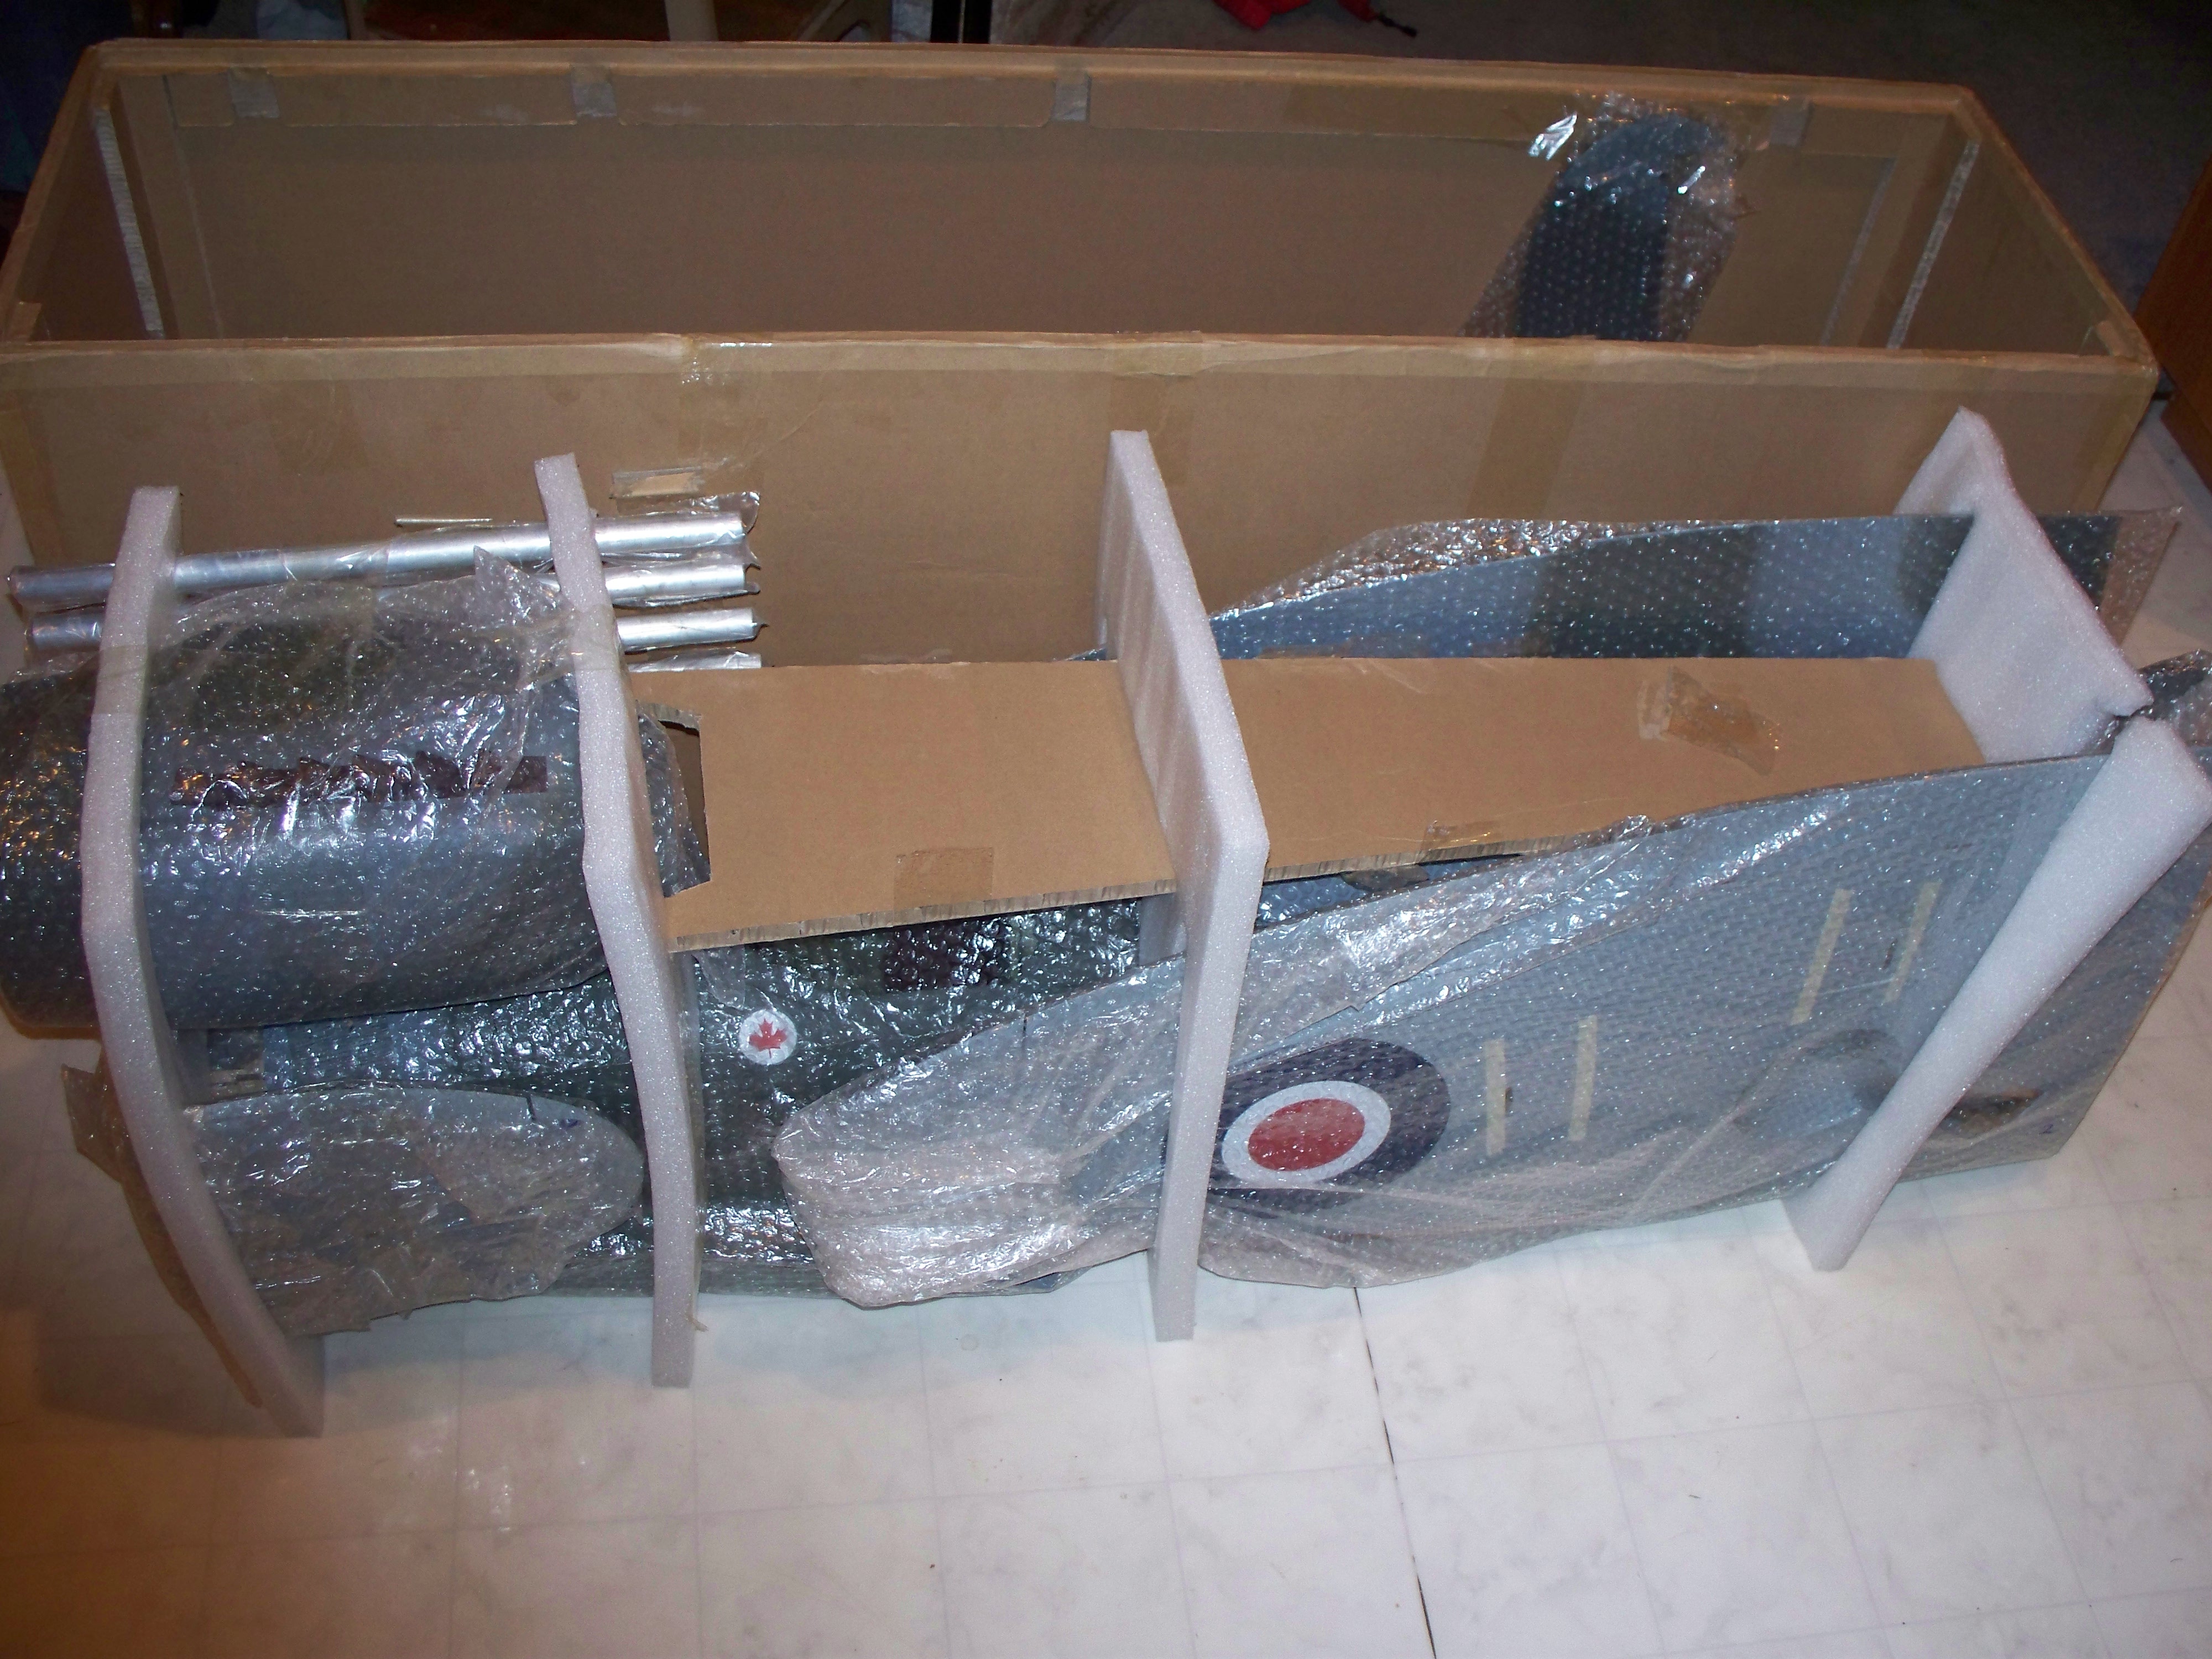
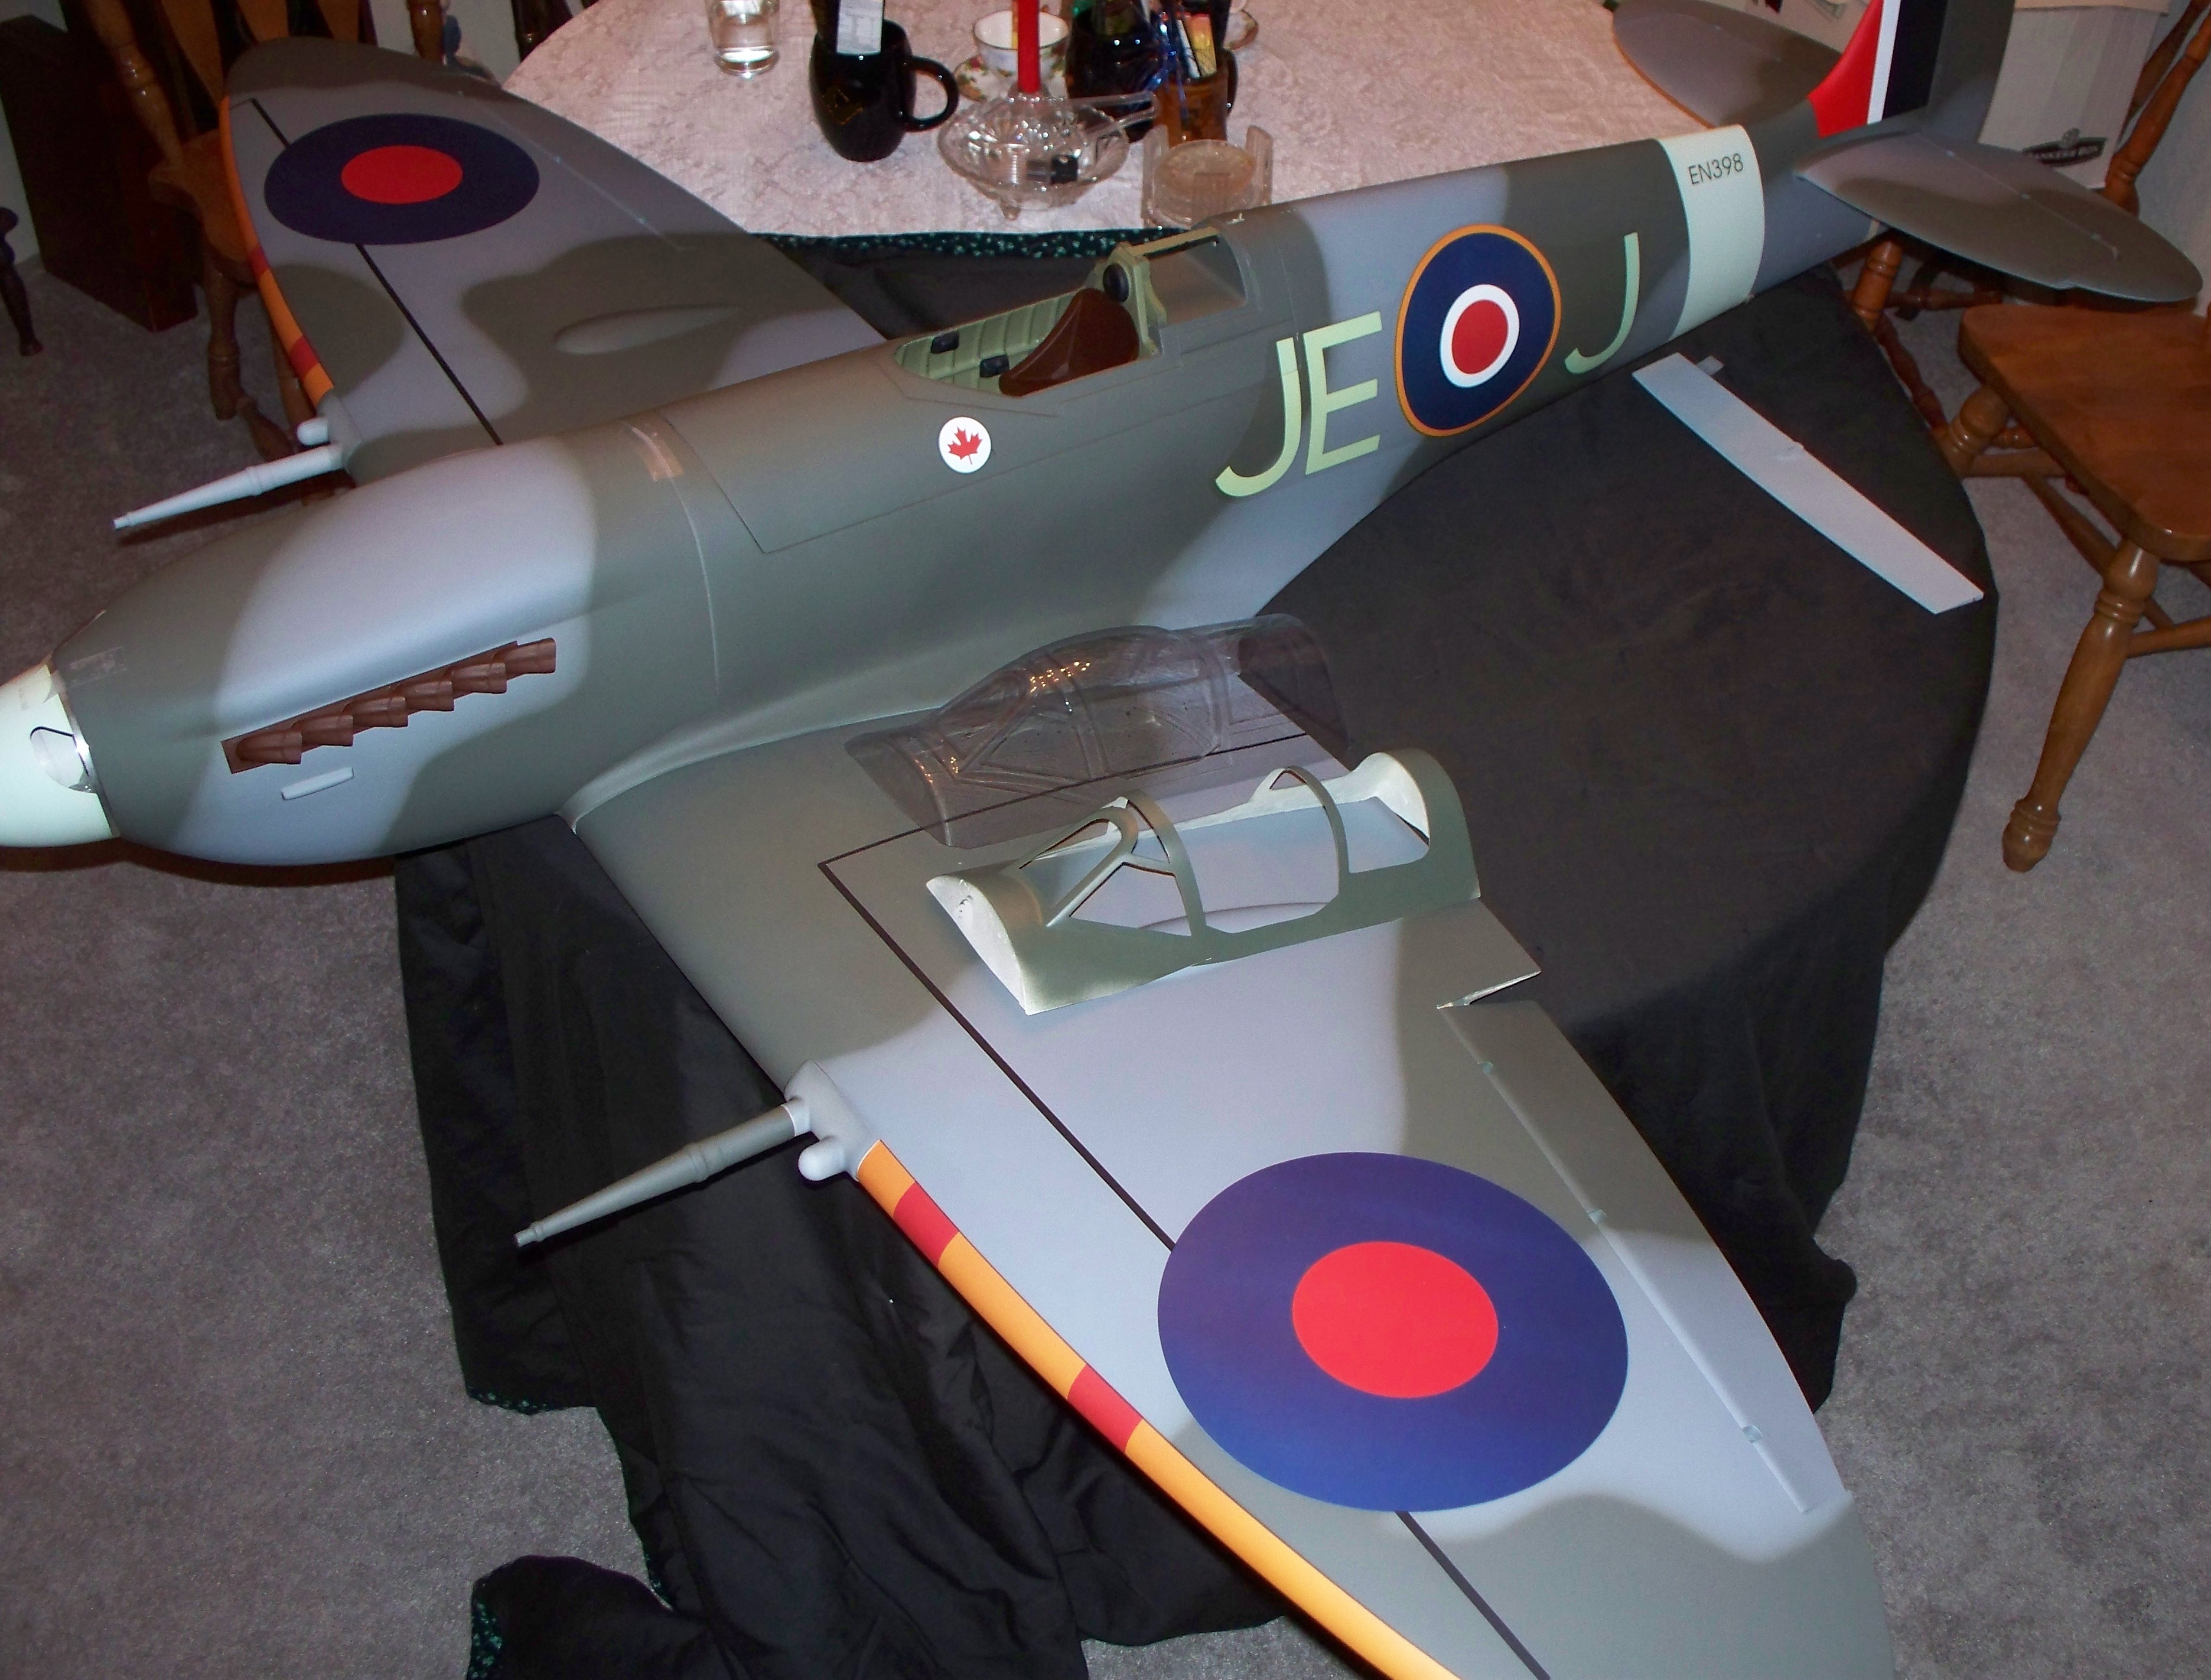
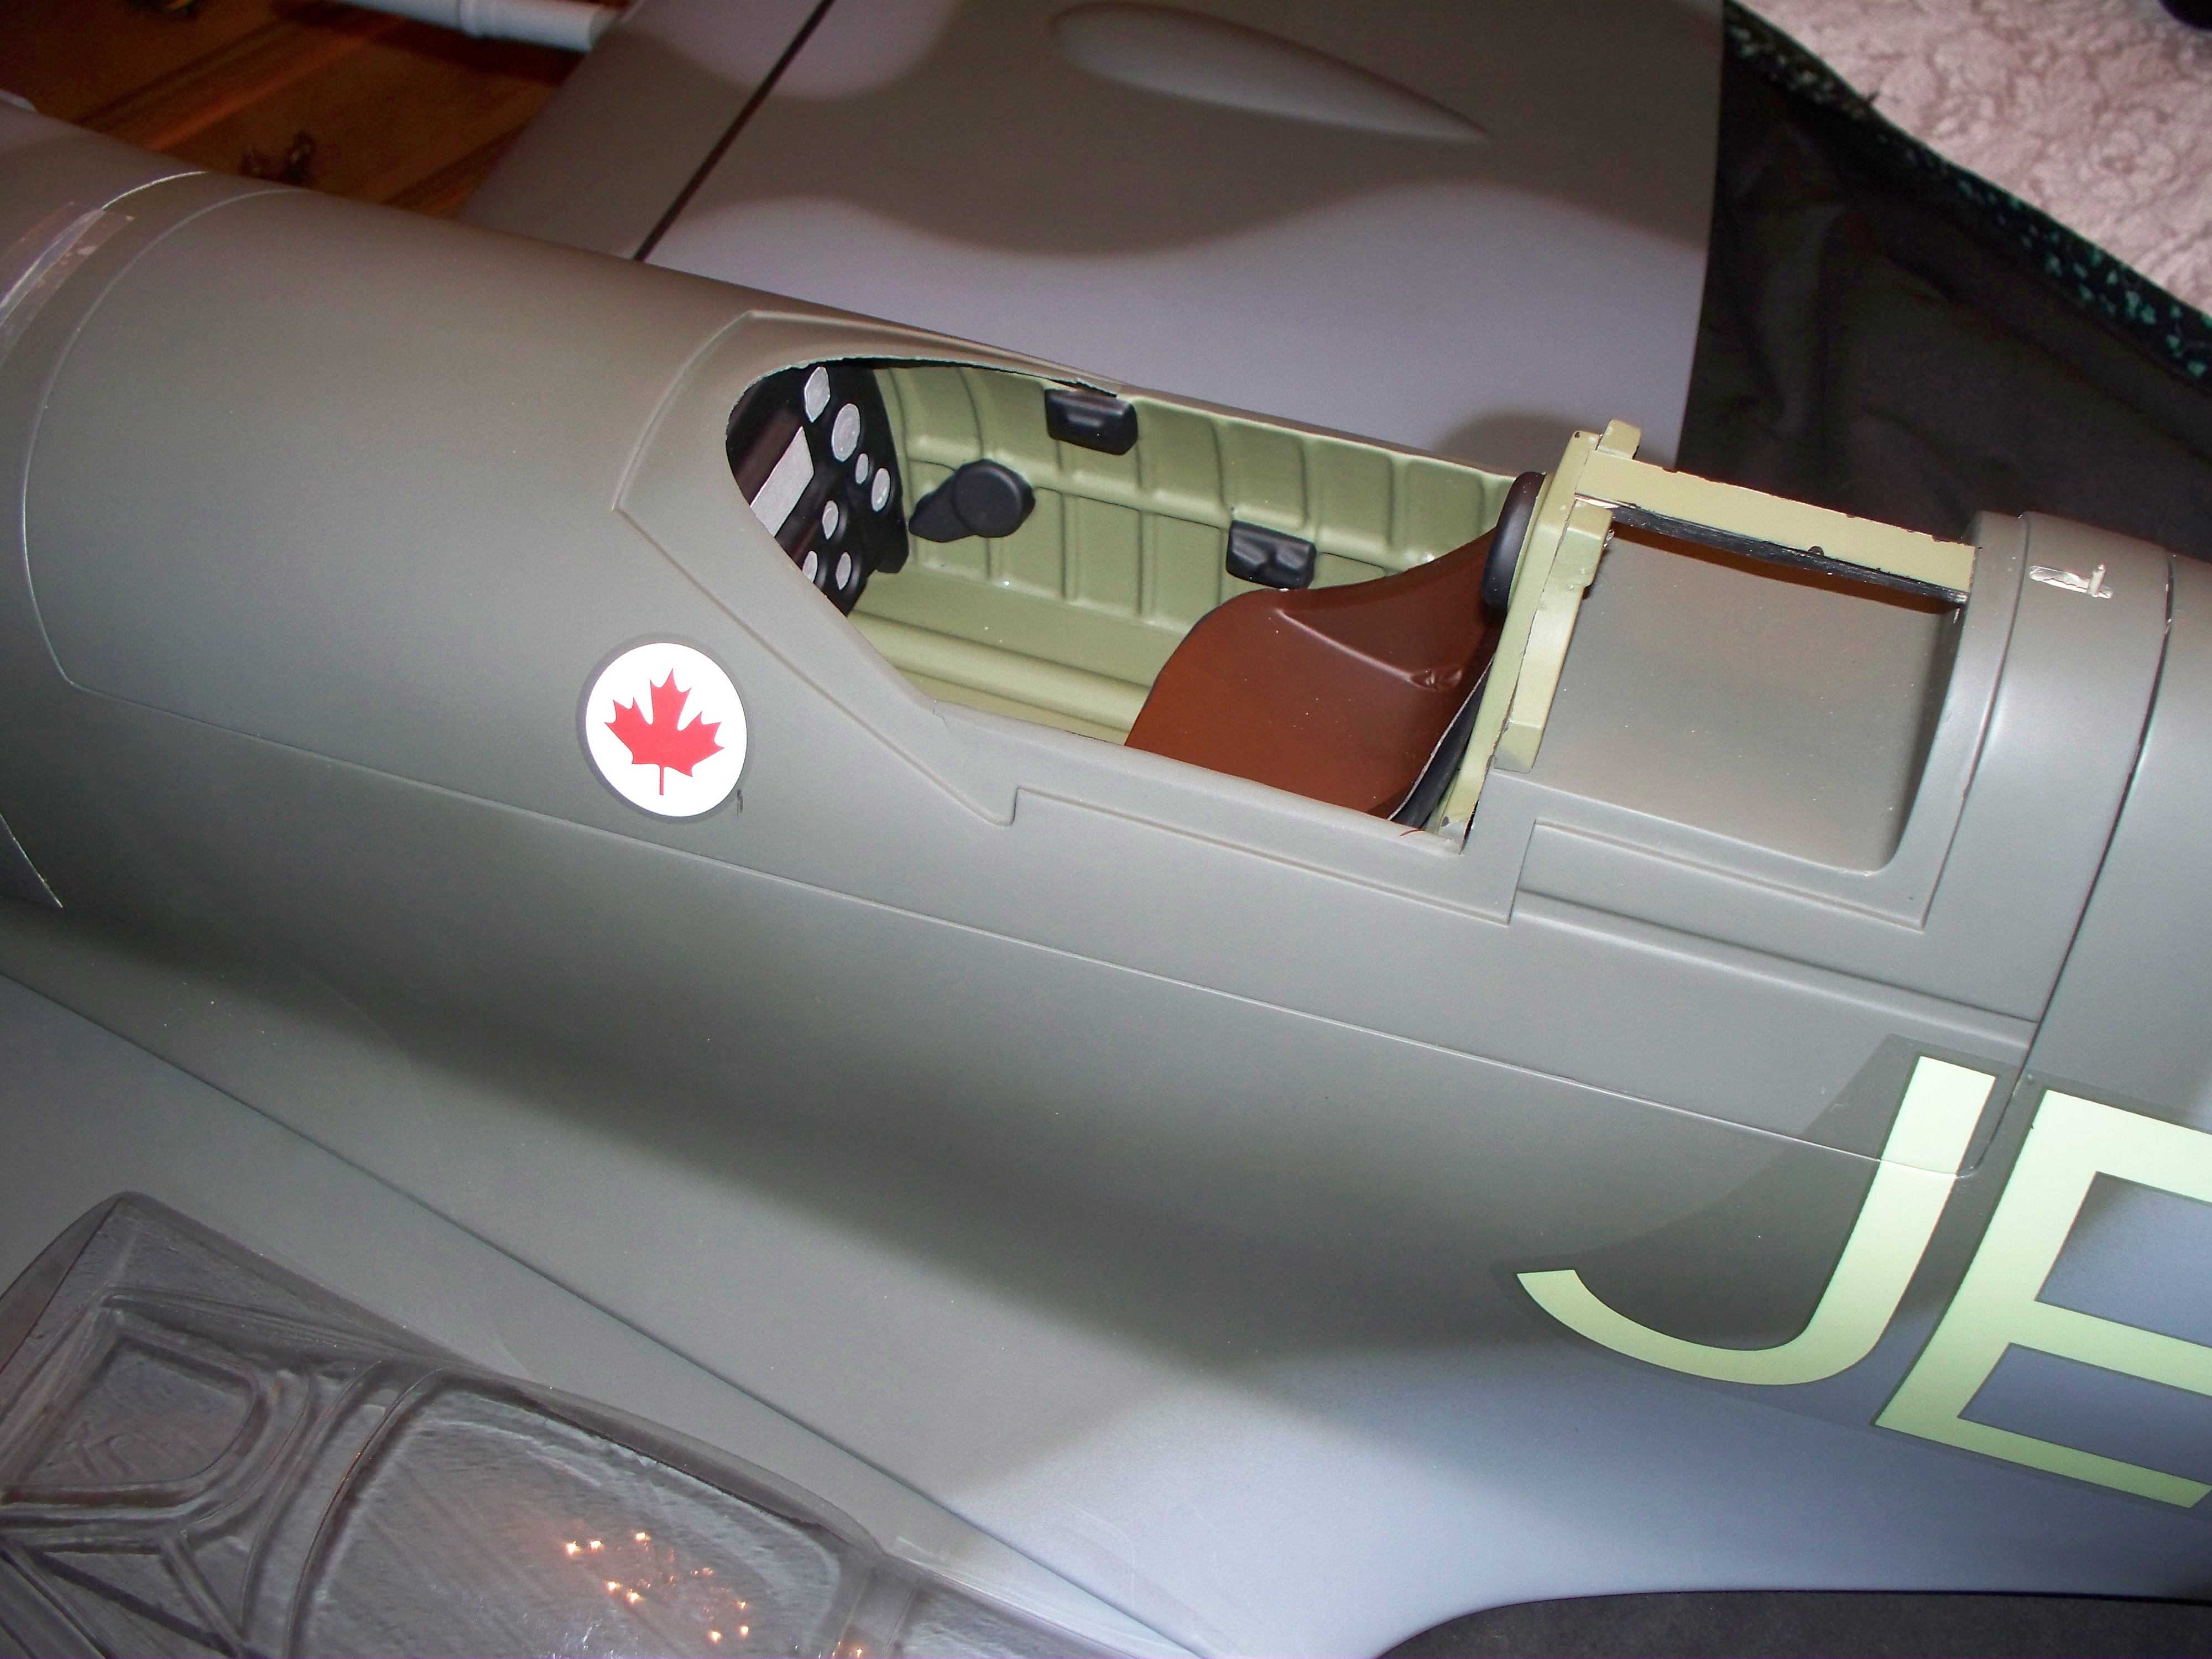
Magnum RC introduces the first of it's kind in a build review of the Top RC Models, hereafter known as TRCM, in reference to the new MkIV Spitfire. The unit arrived on my doorstep and the first thing I noticed that never happened before is when the female delivery driver was packing the 55" crate in one arm and her paperwork in the other, I was clued in about this company's new "Sandwich Composite" Technology. The crate was extremely light. Personally, I have never experienced a full composite Warbird with a weight like this. I unpacked the crate and also noticed that their packaging was unique in that all of the parts were suspended inside the crate without touching each other.. You just lift the foam ribs, and begin removing parts. I examined all parts and everything is cherry. Another thing I noticed was the scale like hinging, and it is all predone. No fussing around here, just a drop of epoxy in the holes and it went together quickly. Another love, is the fiberboard control horns, all predone and preslotted. The control rod to the elevator is pre made, the hatch is preinstalled and aligned the tailwheel assembly is done and ready to install. Three screws on a plate and done. I have weighed each piece of this plane and was surprised to discover that the fuselage weighs in at 3 lbs. The wings WITH the aluminum tubes installed in them weigh two lbs. each. I am installing the EME 35cc engine because for a 35 it is an animal, all of the EME engines are. This engine will cowl in with a pitts muffler, well you have to make cooling holes. With the retracts installed, the engine installed, all of the batteries, the aluminum spinner and prop with all of the radio gear, I would be surprised if the entire weight of the plane breaks 18lbs. for a 1/5 scale Warbird. This plane is so completely preassembled, I am confident it could be flying in two days of arrival. See pics, this is the first installment of this build thread for this awesome Spit. I will post more pics as assembly progresses. Can't wait to fly her.
Last edited by Magnum RC; 01-23-2015 at 12:48 PM.
#2

My Feedback: (4)
I notice on the box it also lists an electric power suggestion. Looks like the canopy hatch is pretty big, giving a lot of access possibly... Would love to see some photos of what sort of hardware it comes with. What about retracts for this model? Mounts?
Looks really interesting for sure. Saw some more photos on your website. I like the hinges, nice touch. I note the spinner is not included but will be available. Is it metal? When do you think you will have more information on the landing gear and other things like the spinner? Also, what's the firewall made of (reinforced with) and is there a basic level of thrust offset in the firewall as-is right now? I know it will have to be extended for E power, but just curious. Have you had a chance to fly a pre production one yet?
Looks really interesting for sure. Saw some more photos on your website. I like the hinges, nice touch. I note the spinner is not included but will be available. Is it metal? When do you think you will have more information on the landing gear and other things like the spinner? Also, what's the firewall made of (reinforced with) and is there a basic level of thrust offset in the firewall as-is right now? I know it will have to be extended for E power, but just curious. Have you had a chance to fly a pre production one yet?
Last edited by Eddie P; 01-09-2015 at 09:09 PM.
#3
Senior Member
Thread Starter
Join Date: Mar 2010
Location: Eugene, OR
Posts: 269
Likes: 0
Received 0 Likes
on
0 Posts
Yes Eddie, the plane is designed for either engines or electric power. They even have a power package to offer all figured out for you. The area under the cowl has a standard box like plywood fixture for the engine, one must epoxy it all together, and reinforce it if you want an engine, or there is an optional box for electric that slides over the engine box and voila, the electric motor bolts to this piece. There is a big gap in the top of the box for air cooling the battery and ESC. The entire top of the Canopy/Hatch is removable for battery access. It is wonderfully designed for choice and one doesn't have to modify anything to choose engine power or electric. The Chinese have flight tested it, but this is one of the first production units in the states. Hence, this thread. We will build it here, and fly it. The manufacturer makes a set of electric retracts for it, quite robust with a 1/2" strut. I will show pictures of these this weekend, but I have delivered the specs to CJM to make an American made set so a new owner of this plane can have a choice. The Spinner is a heavy duty Aluminum spun in a 4.25" size. It is available in 3 blade or two blade. For myself, I am an engine guy. I need the sound of that engine horsing it around and I hate waiting on batteries to charge. I will submit some more pics soon of the inside, after all that is where the value lies, in that "sandwich composite" construction.
#4
Senior Member
Thread Starter
Join Date: Mar 2010
Location: Eugene, OR
Posts: 269
Likes: 0
Received 0 Likes
on
0 Posts
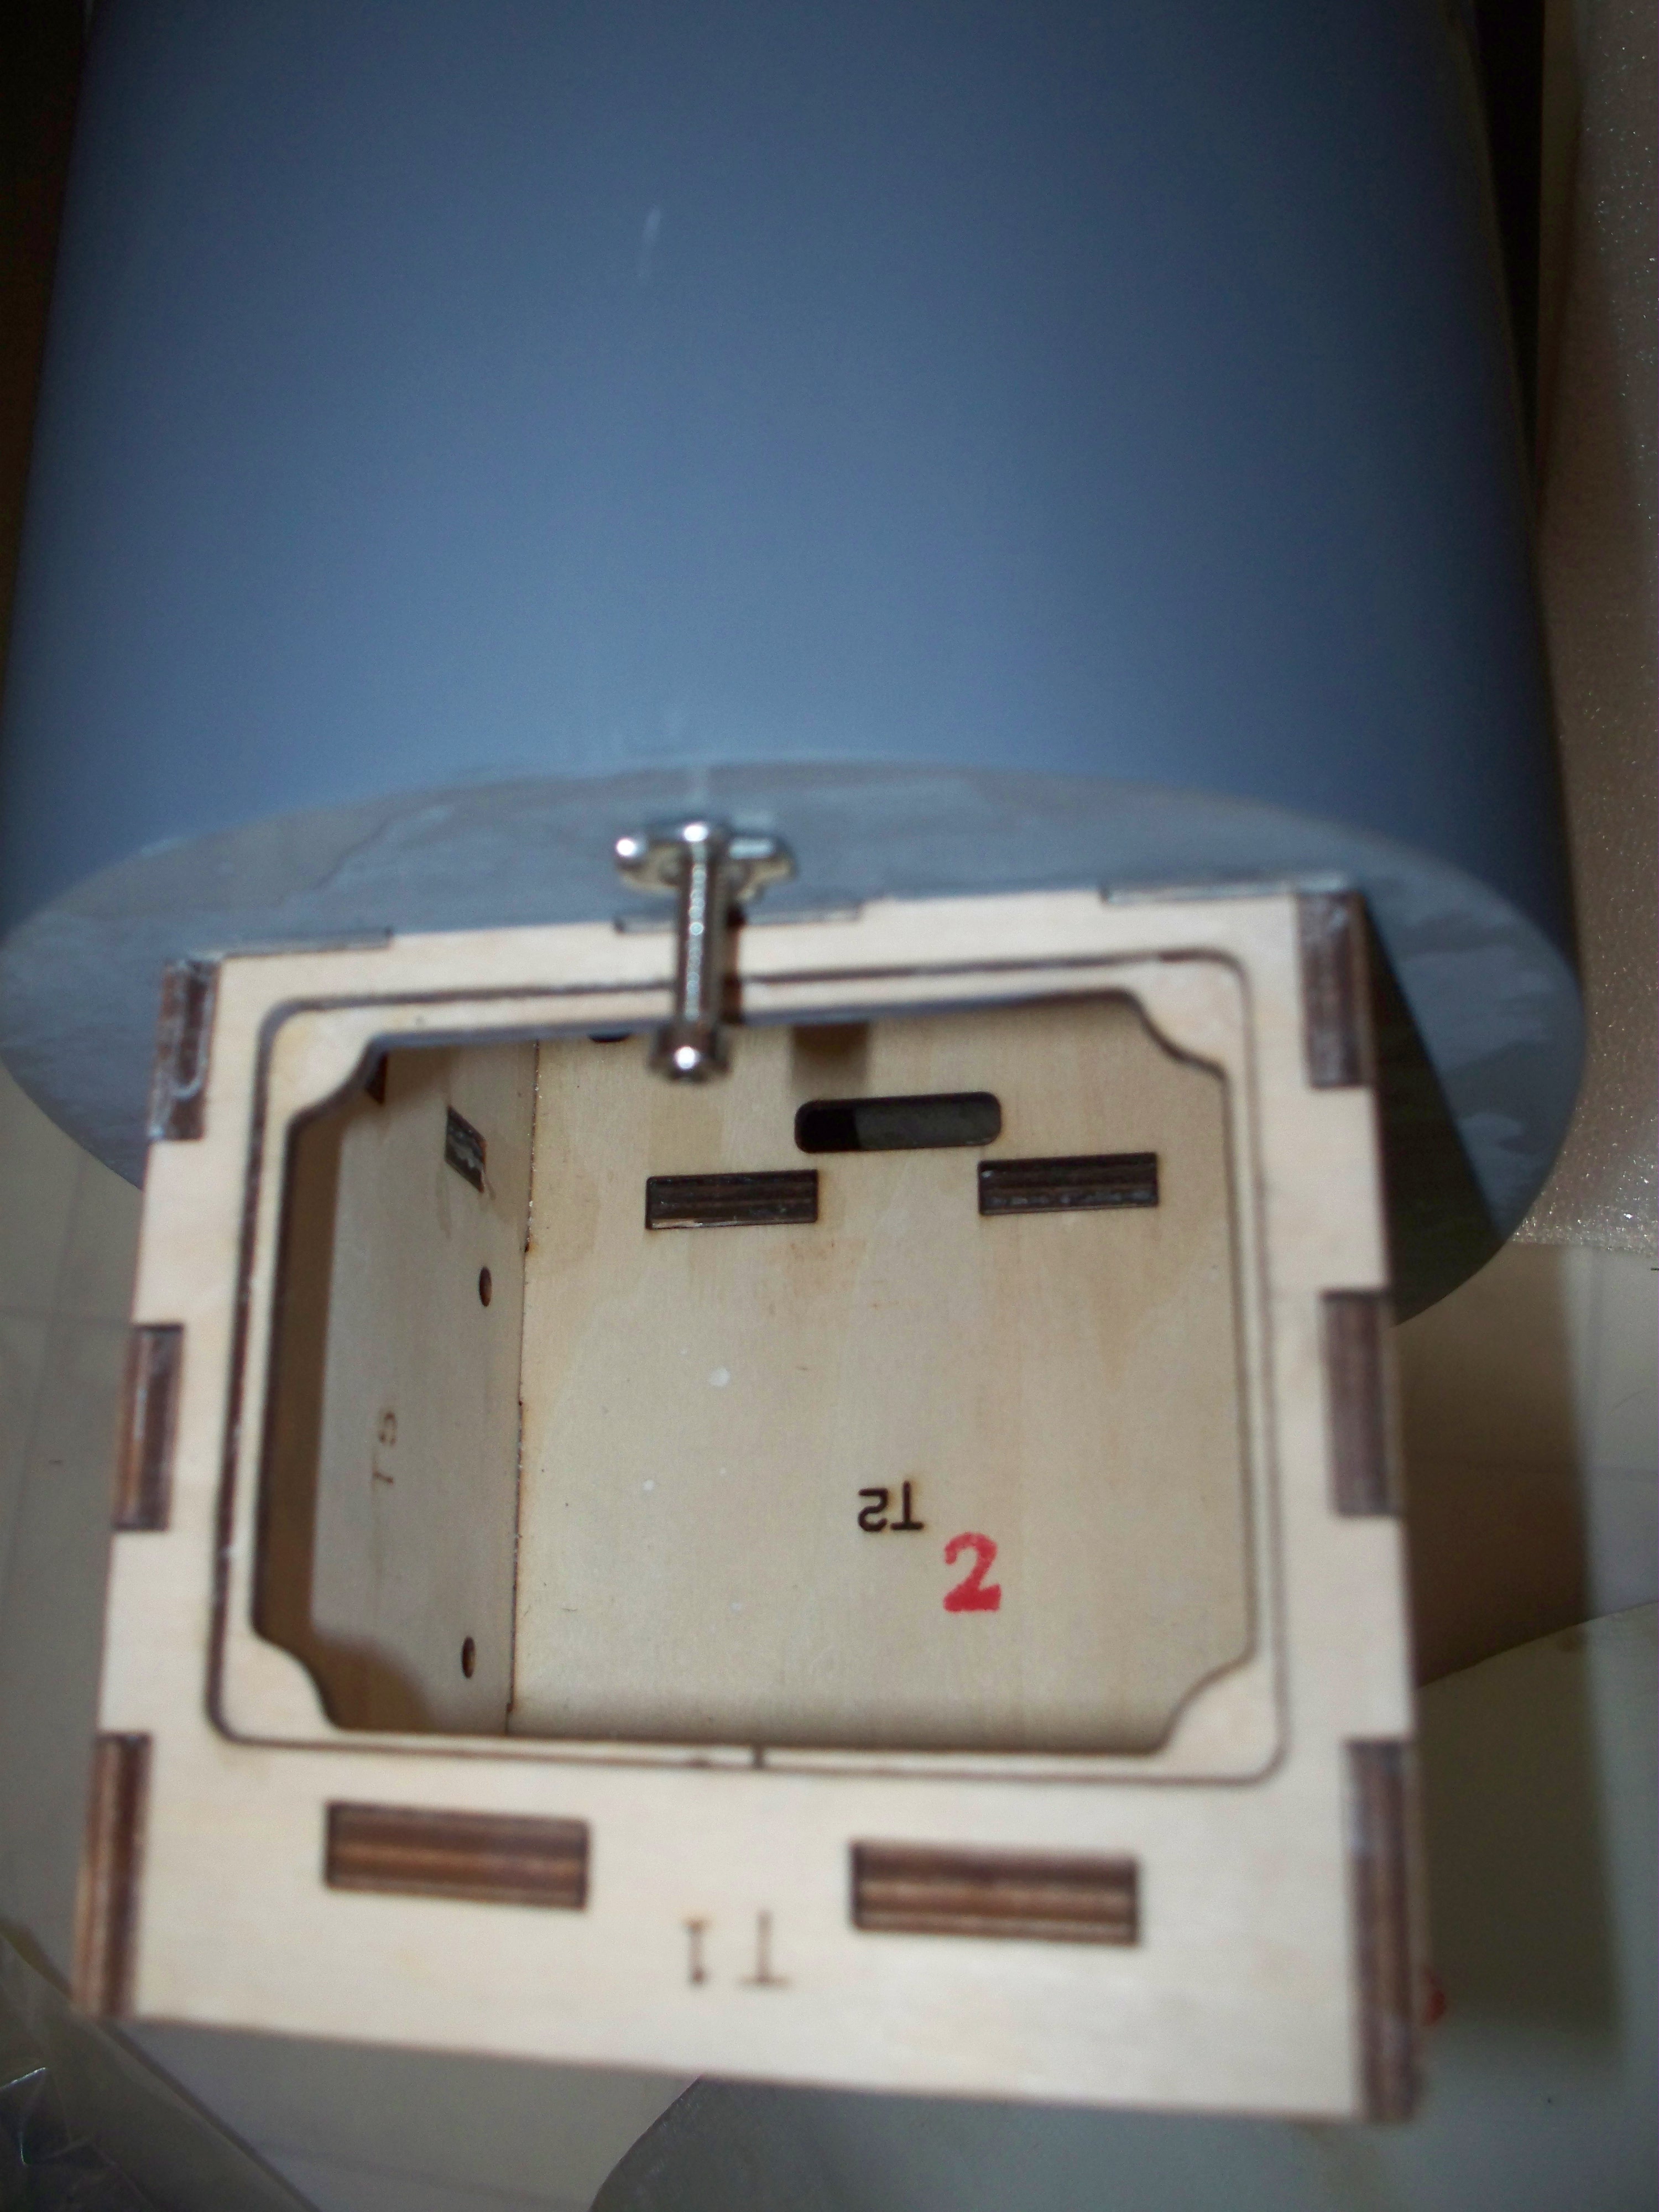
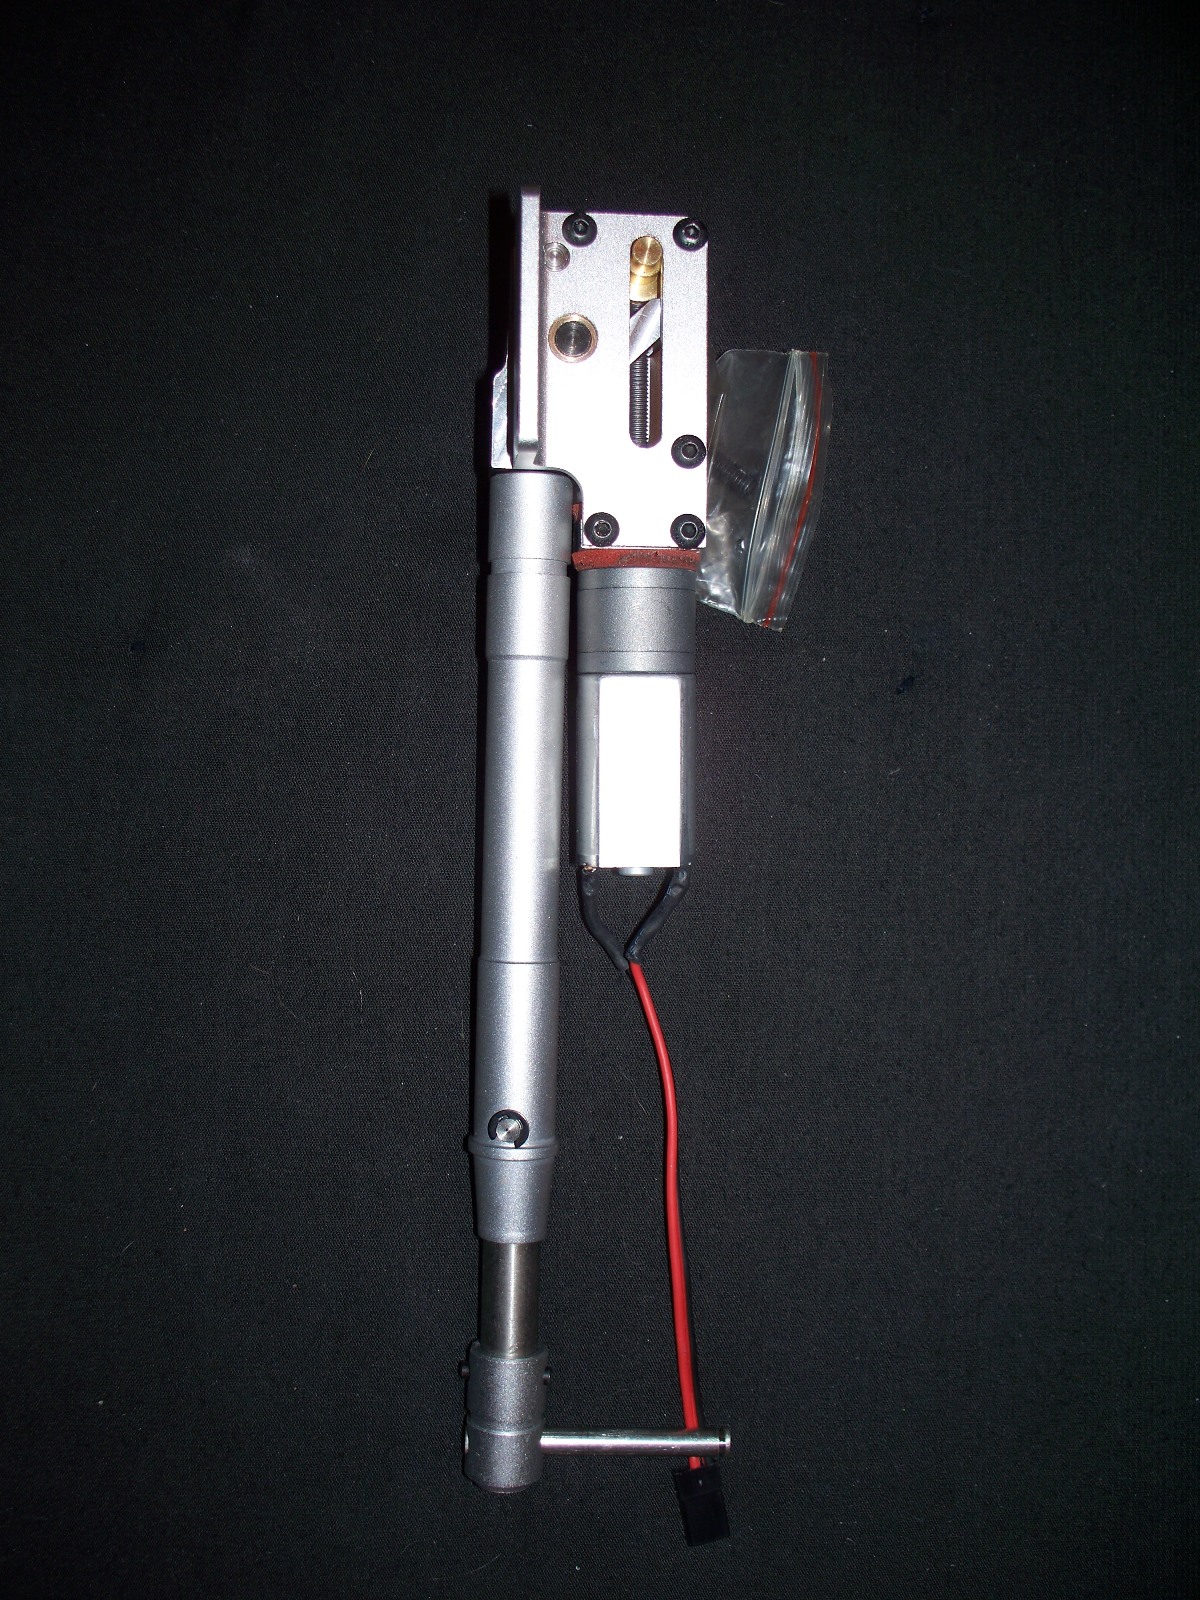
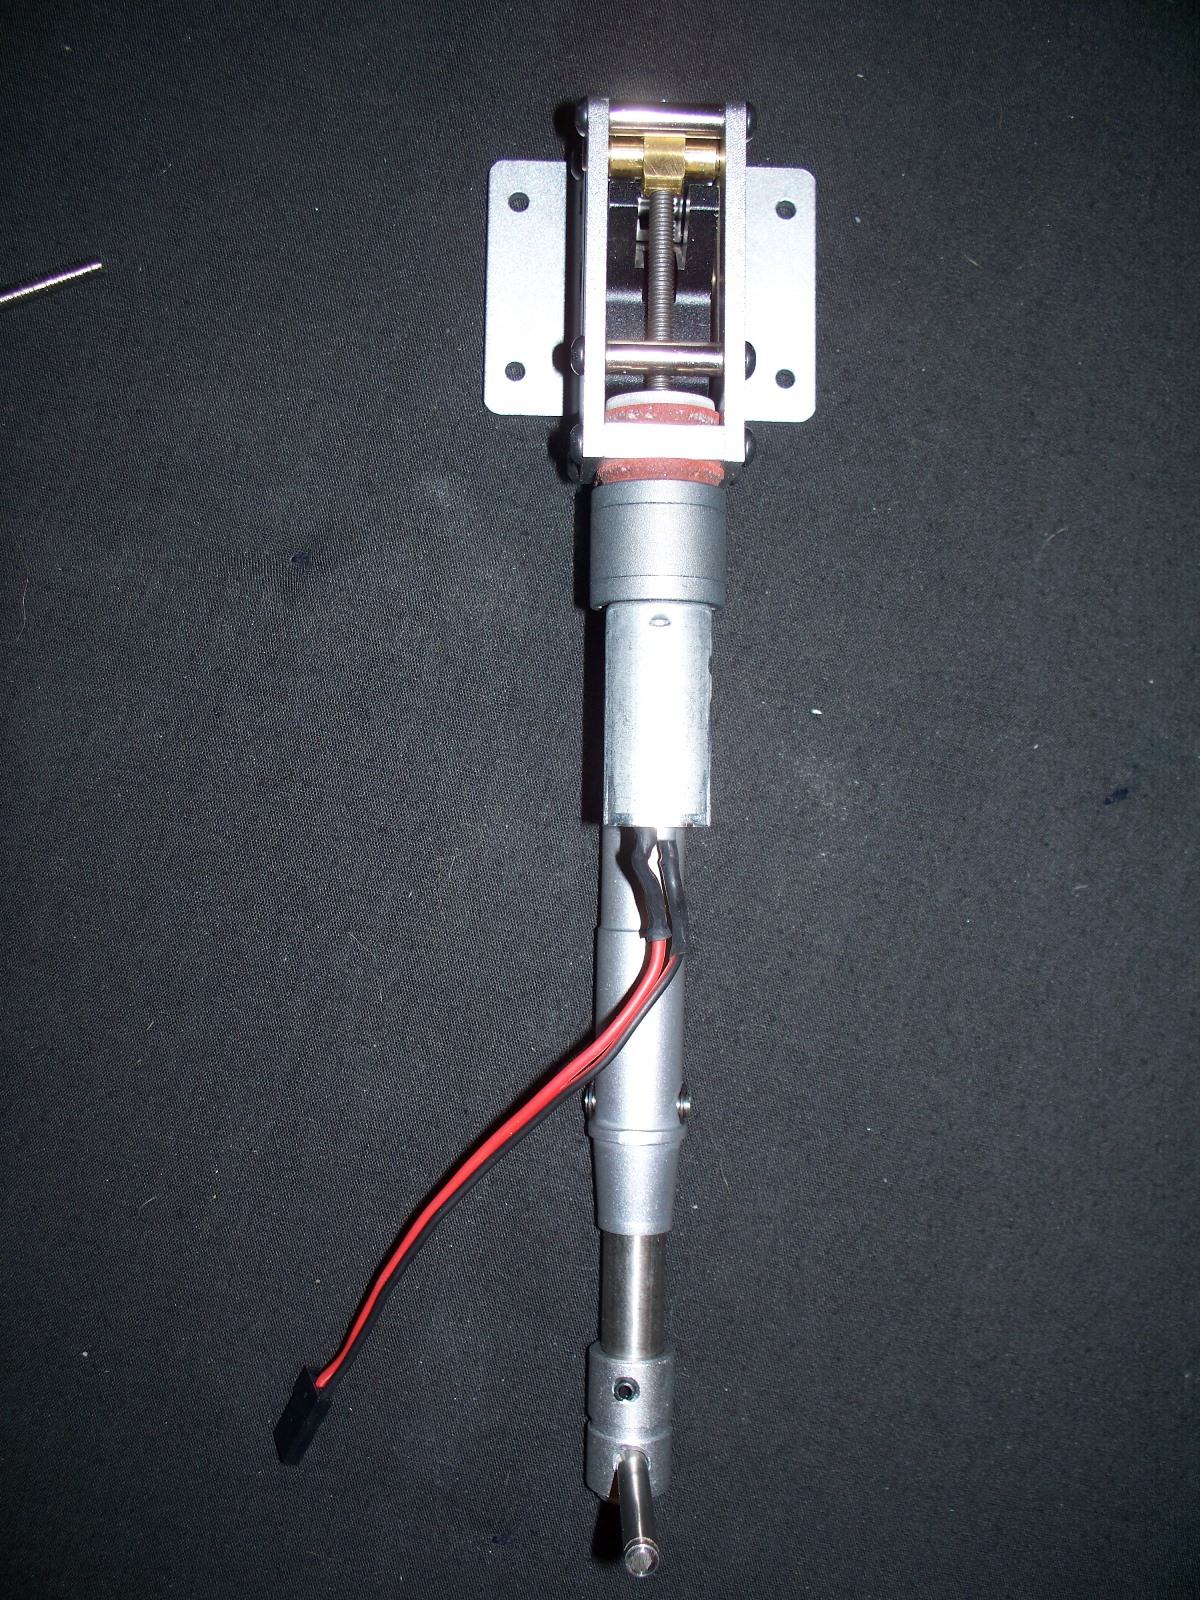
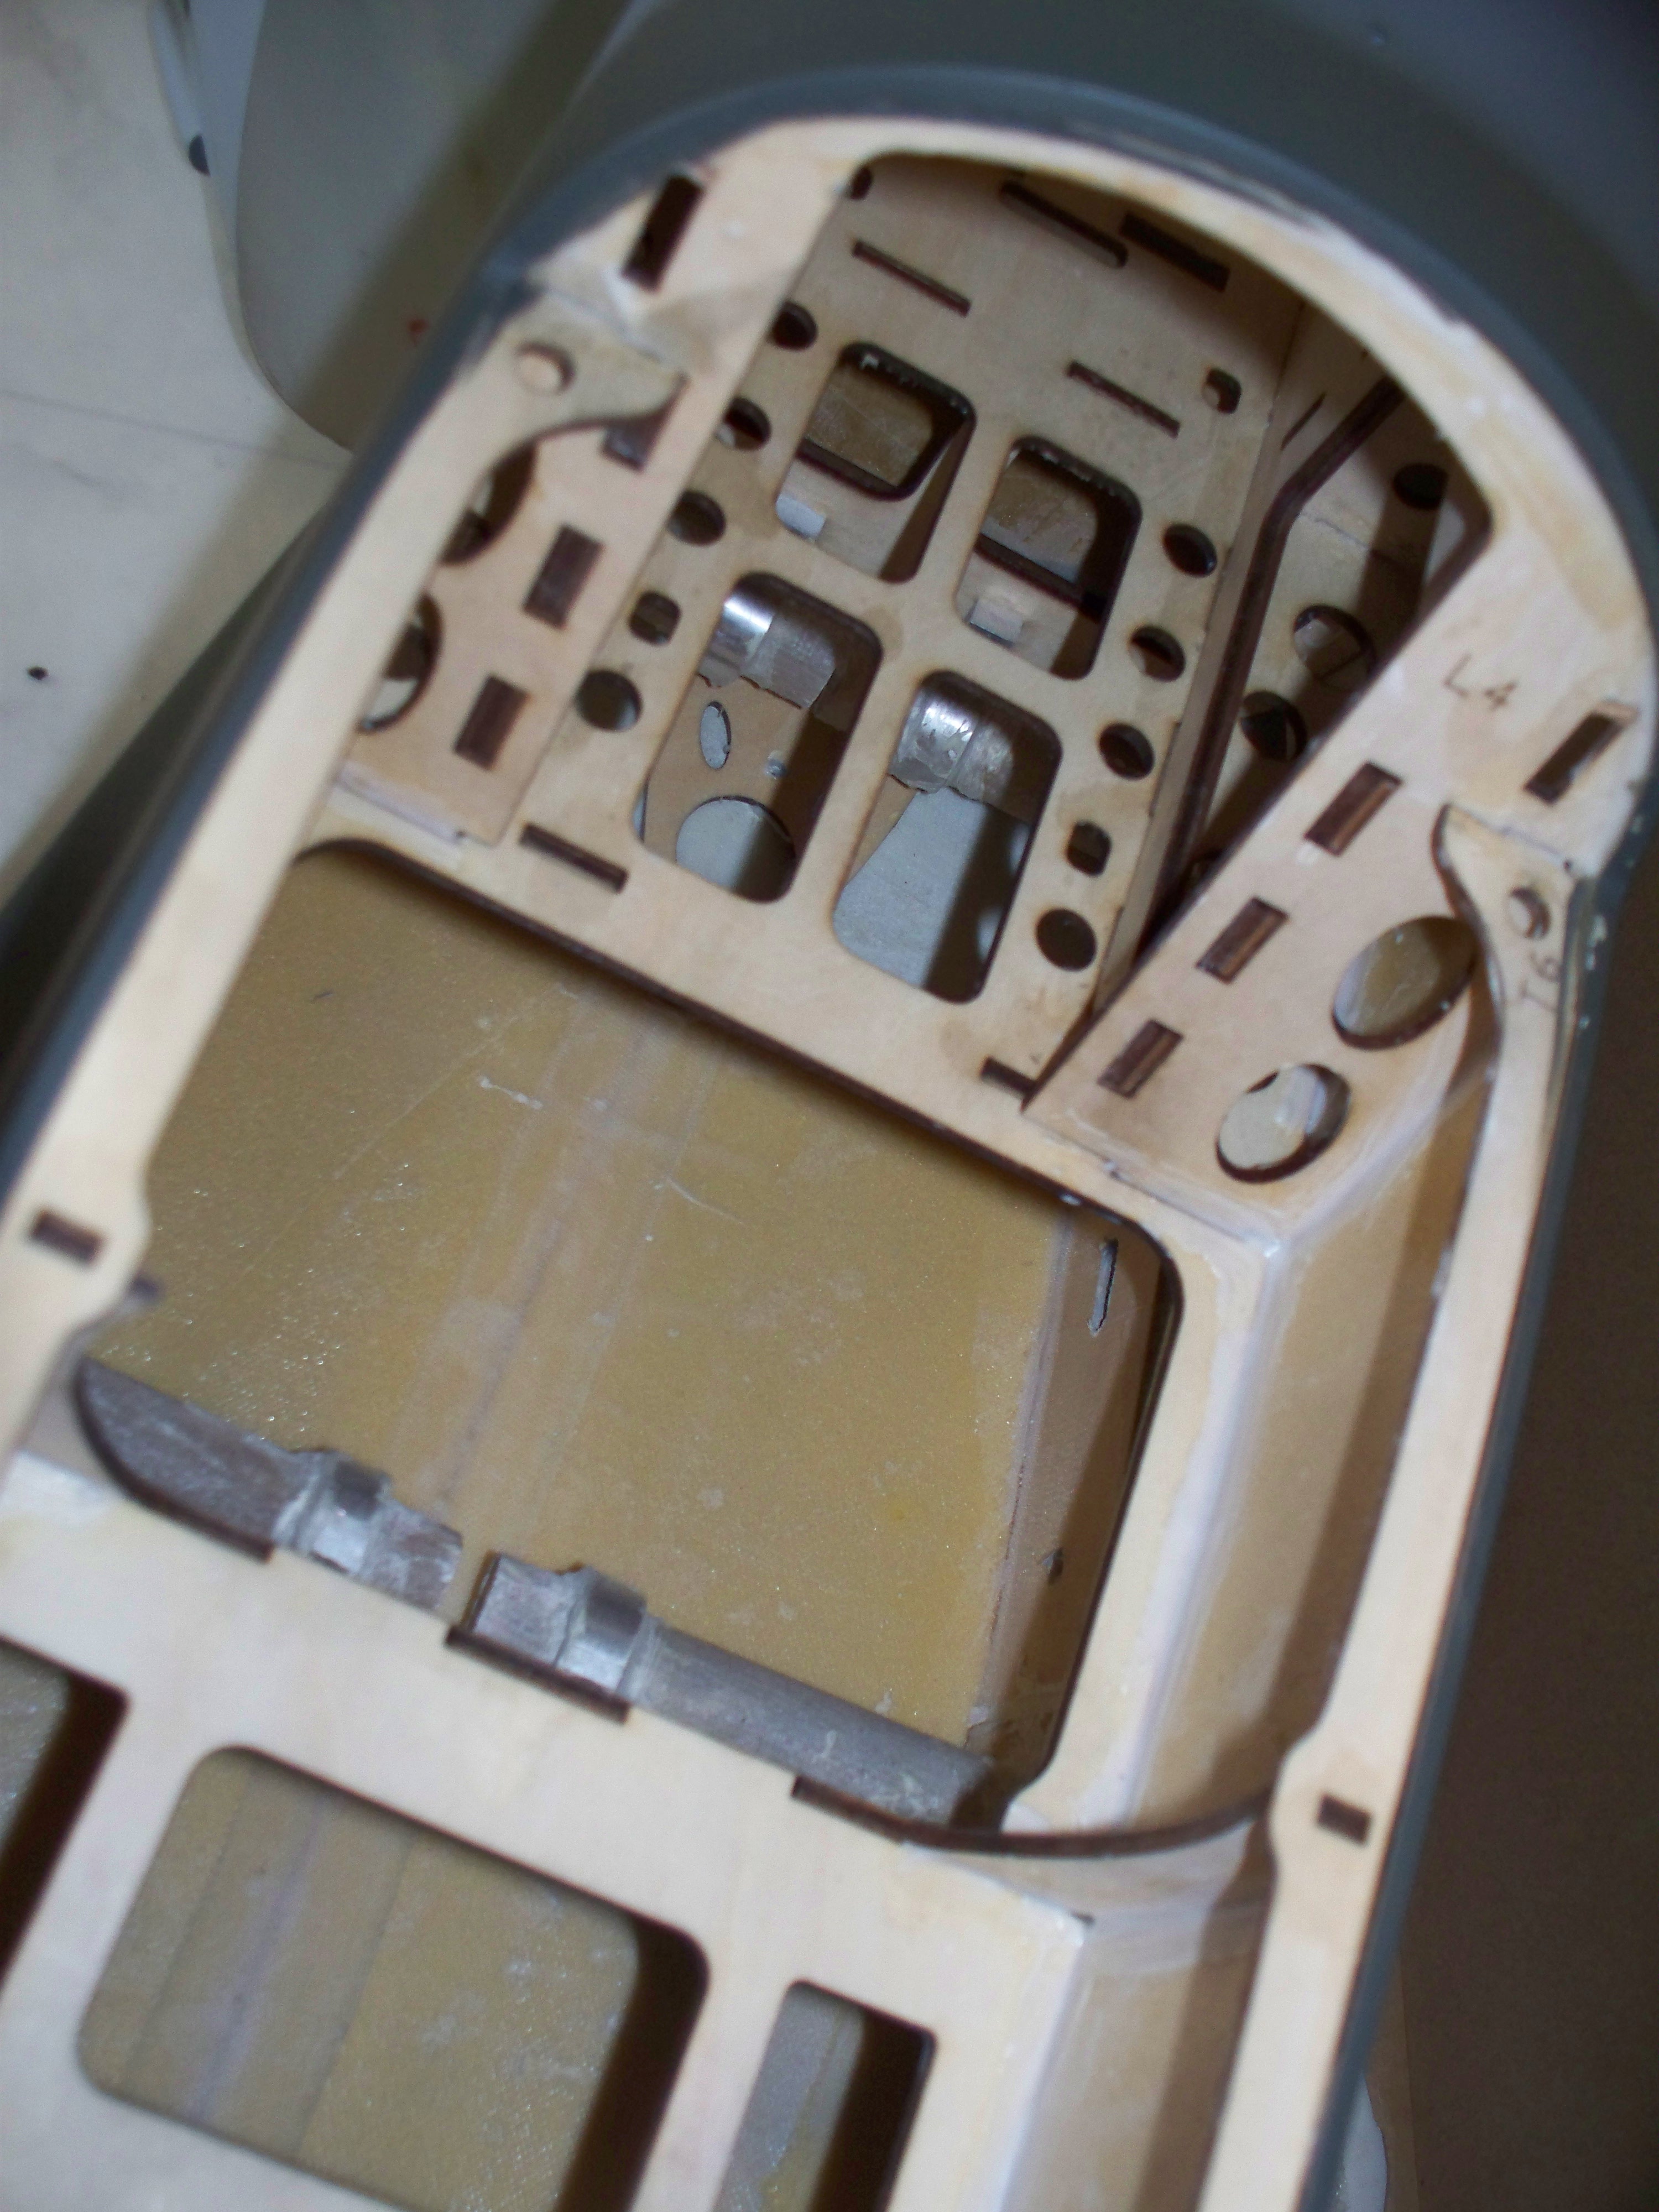
Here you go as promised, a picture of the front of the fuselage and the retracts. As you can see, the plywood box comes not epoxied together so you can make the choice of engine power or electric power. The top of the box is completely open so as to easily install the tank, or the motor and battery wiring with ESC. You will notice how accessible the forward compartment is as you lift the canopy hatch away and easy access for your battery. I didn't take a picture of the "Electric" plywood box that fits over this one, but it is designed to move the firewall forward to be used with electric motors. It slides over this box. The socket head bolt is used for the engine choice to help in anchoring the electronic ignition module and engine battery if needed.
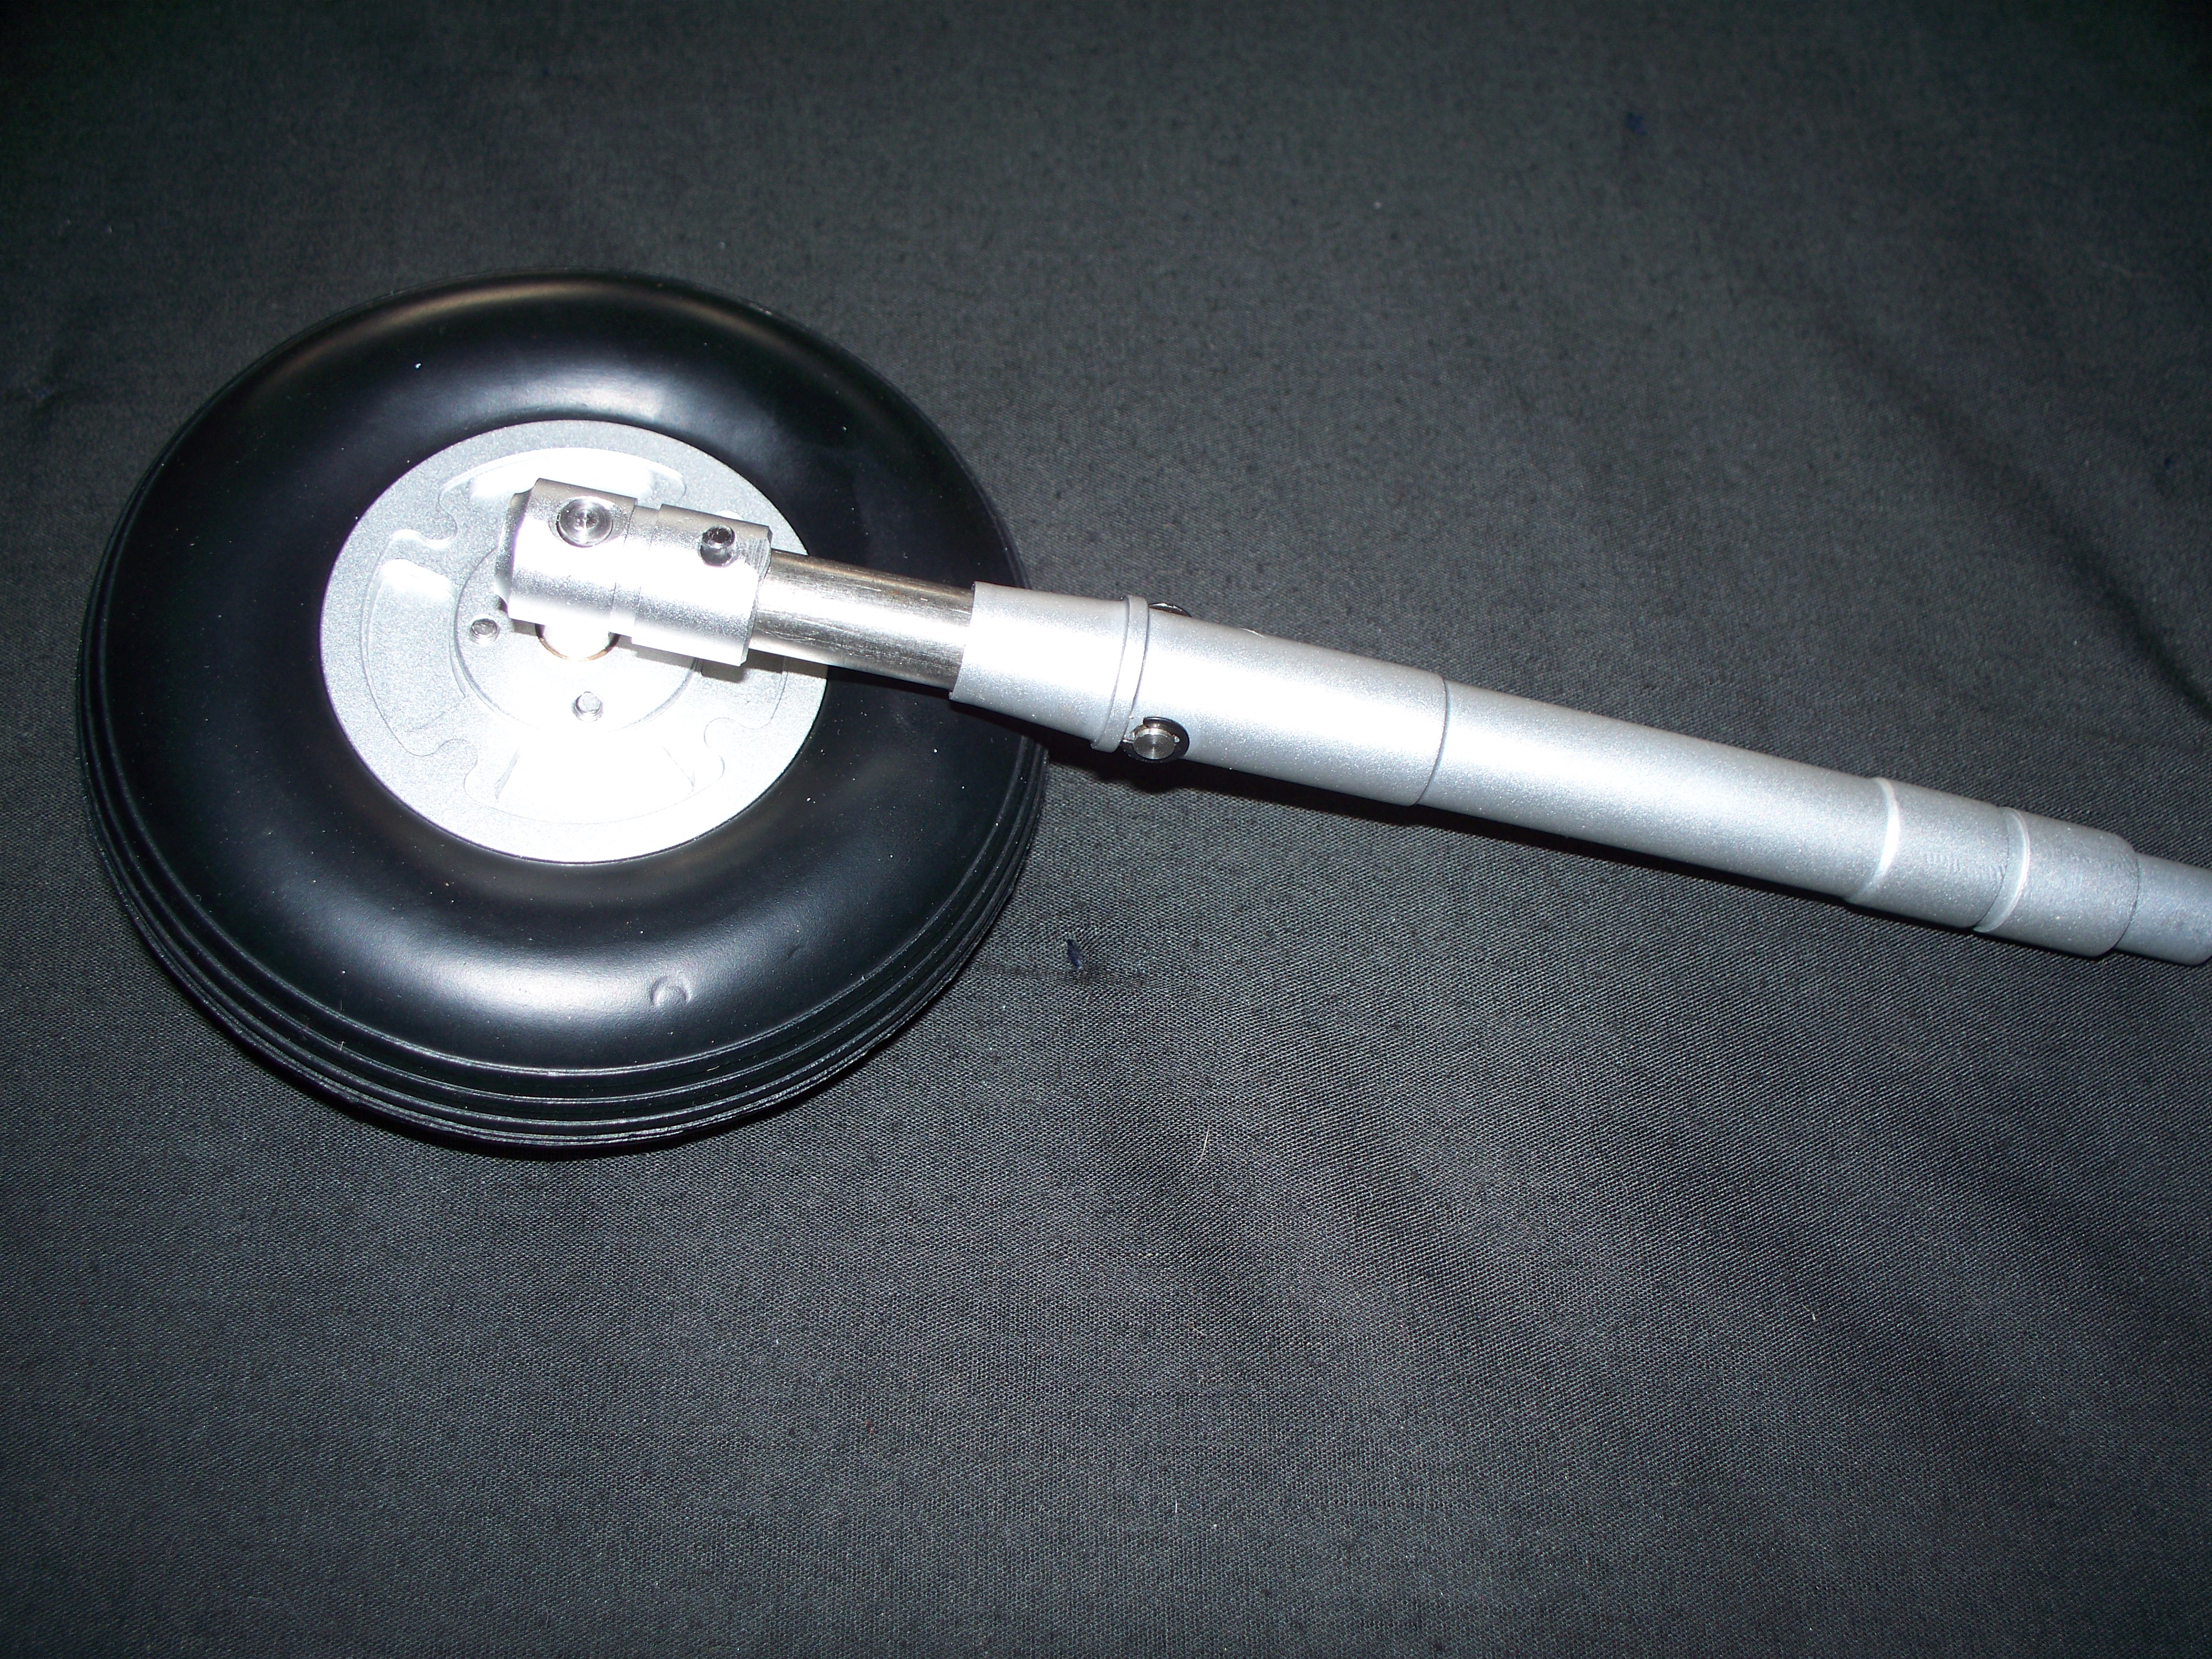
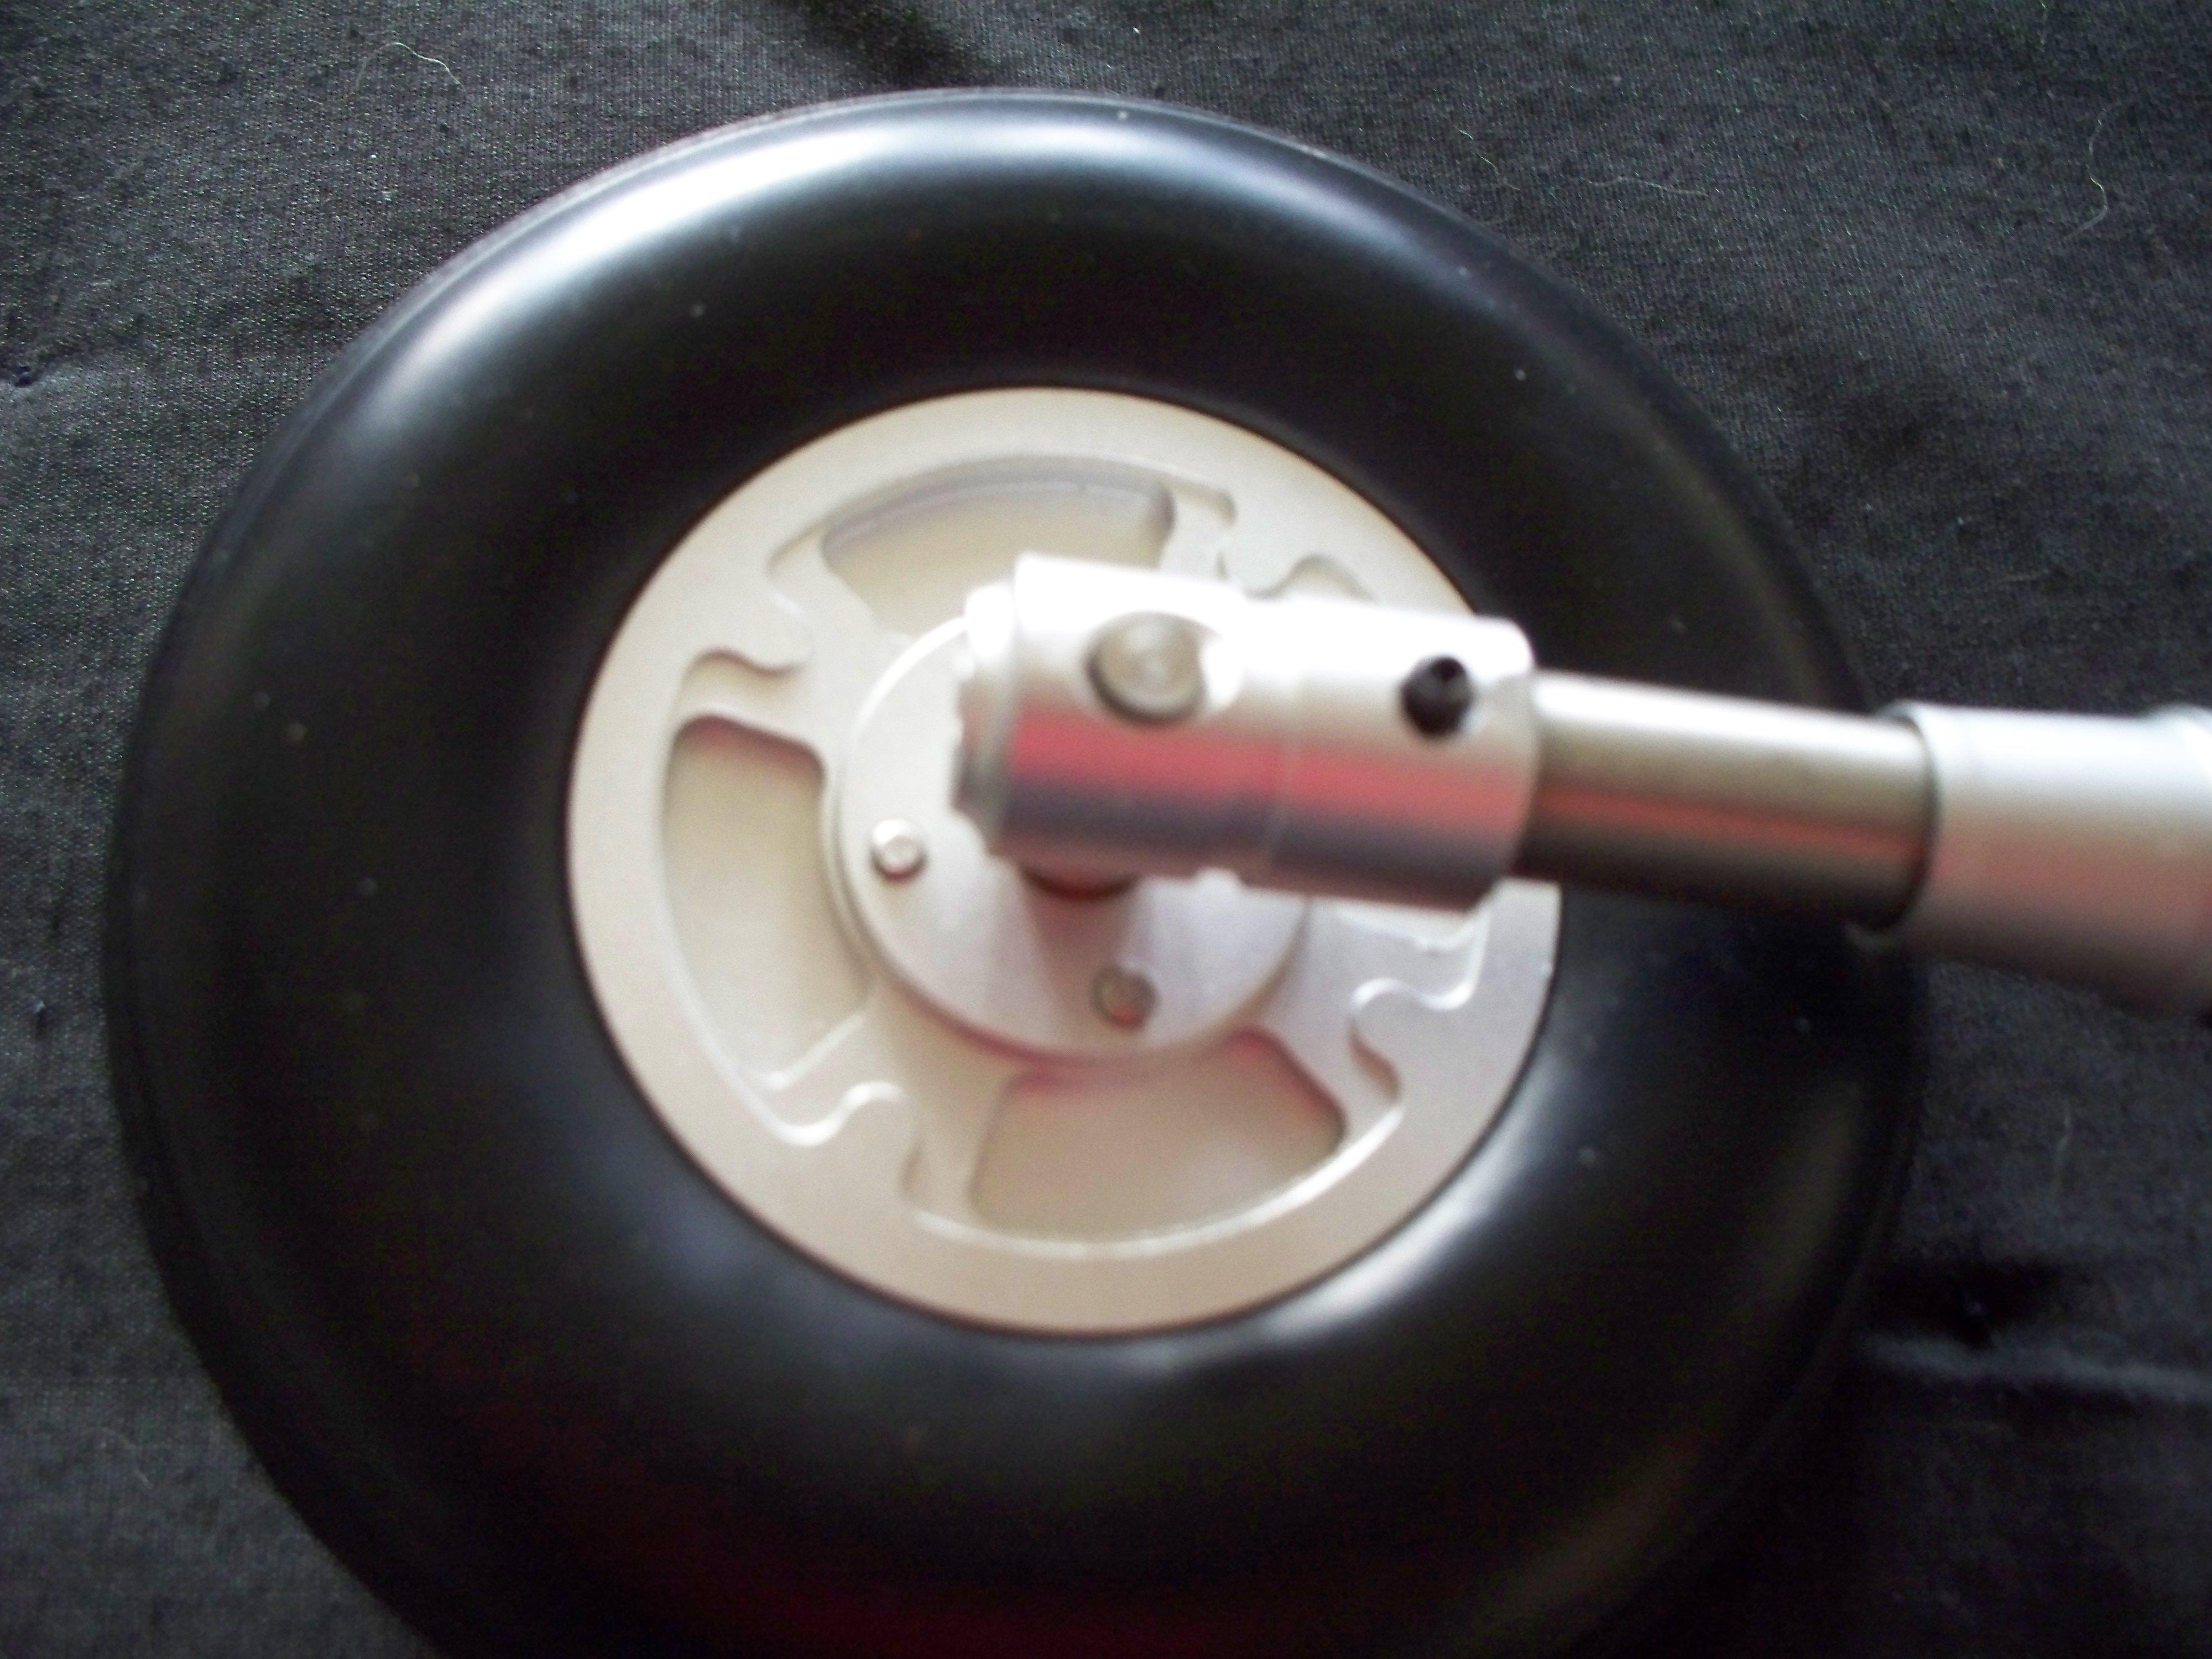
These are the pictures of the retracts, pretty straight forward and there has been great assurance from the factory a great deal of money and engineering has gone into these mechanisms. The retracts come with aluminum hubbed rubber wheels with a brass bushed bearing for the axle. These retracts now depend on a separate7.4 volt battery for powering them. There is an outboard controller board that plugs into the battery, the radio and the retracts. The retracts come with a scale looking tailwheel, and the wheels.
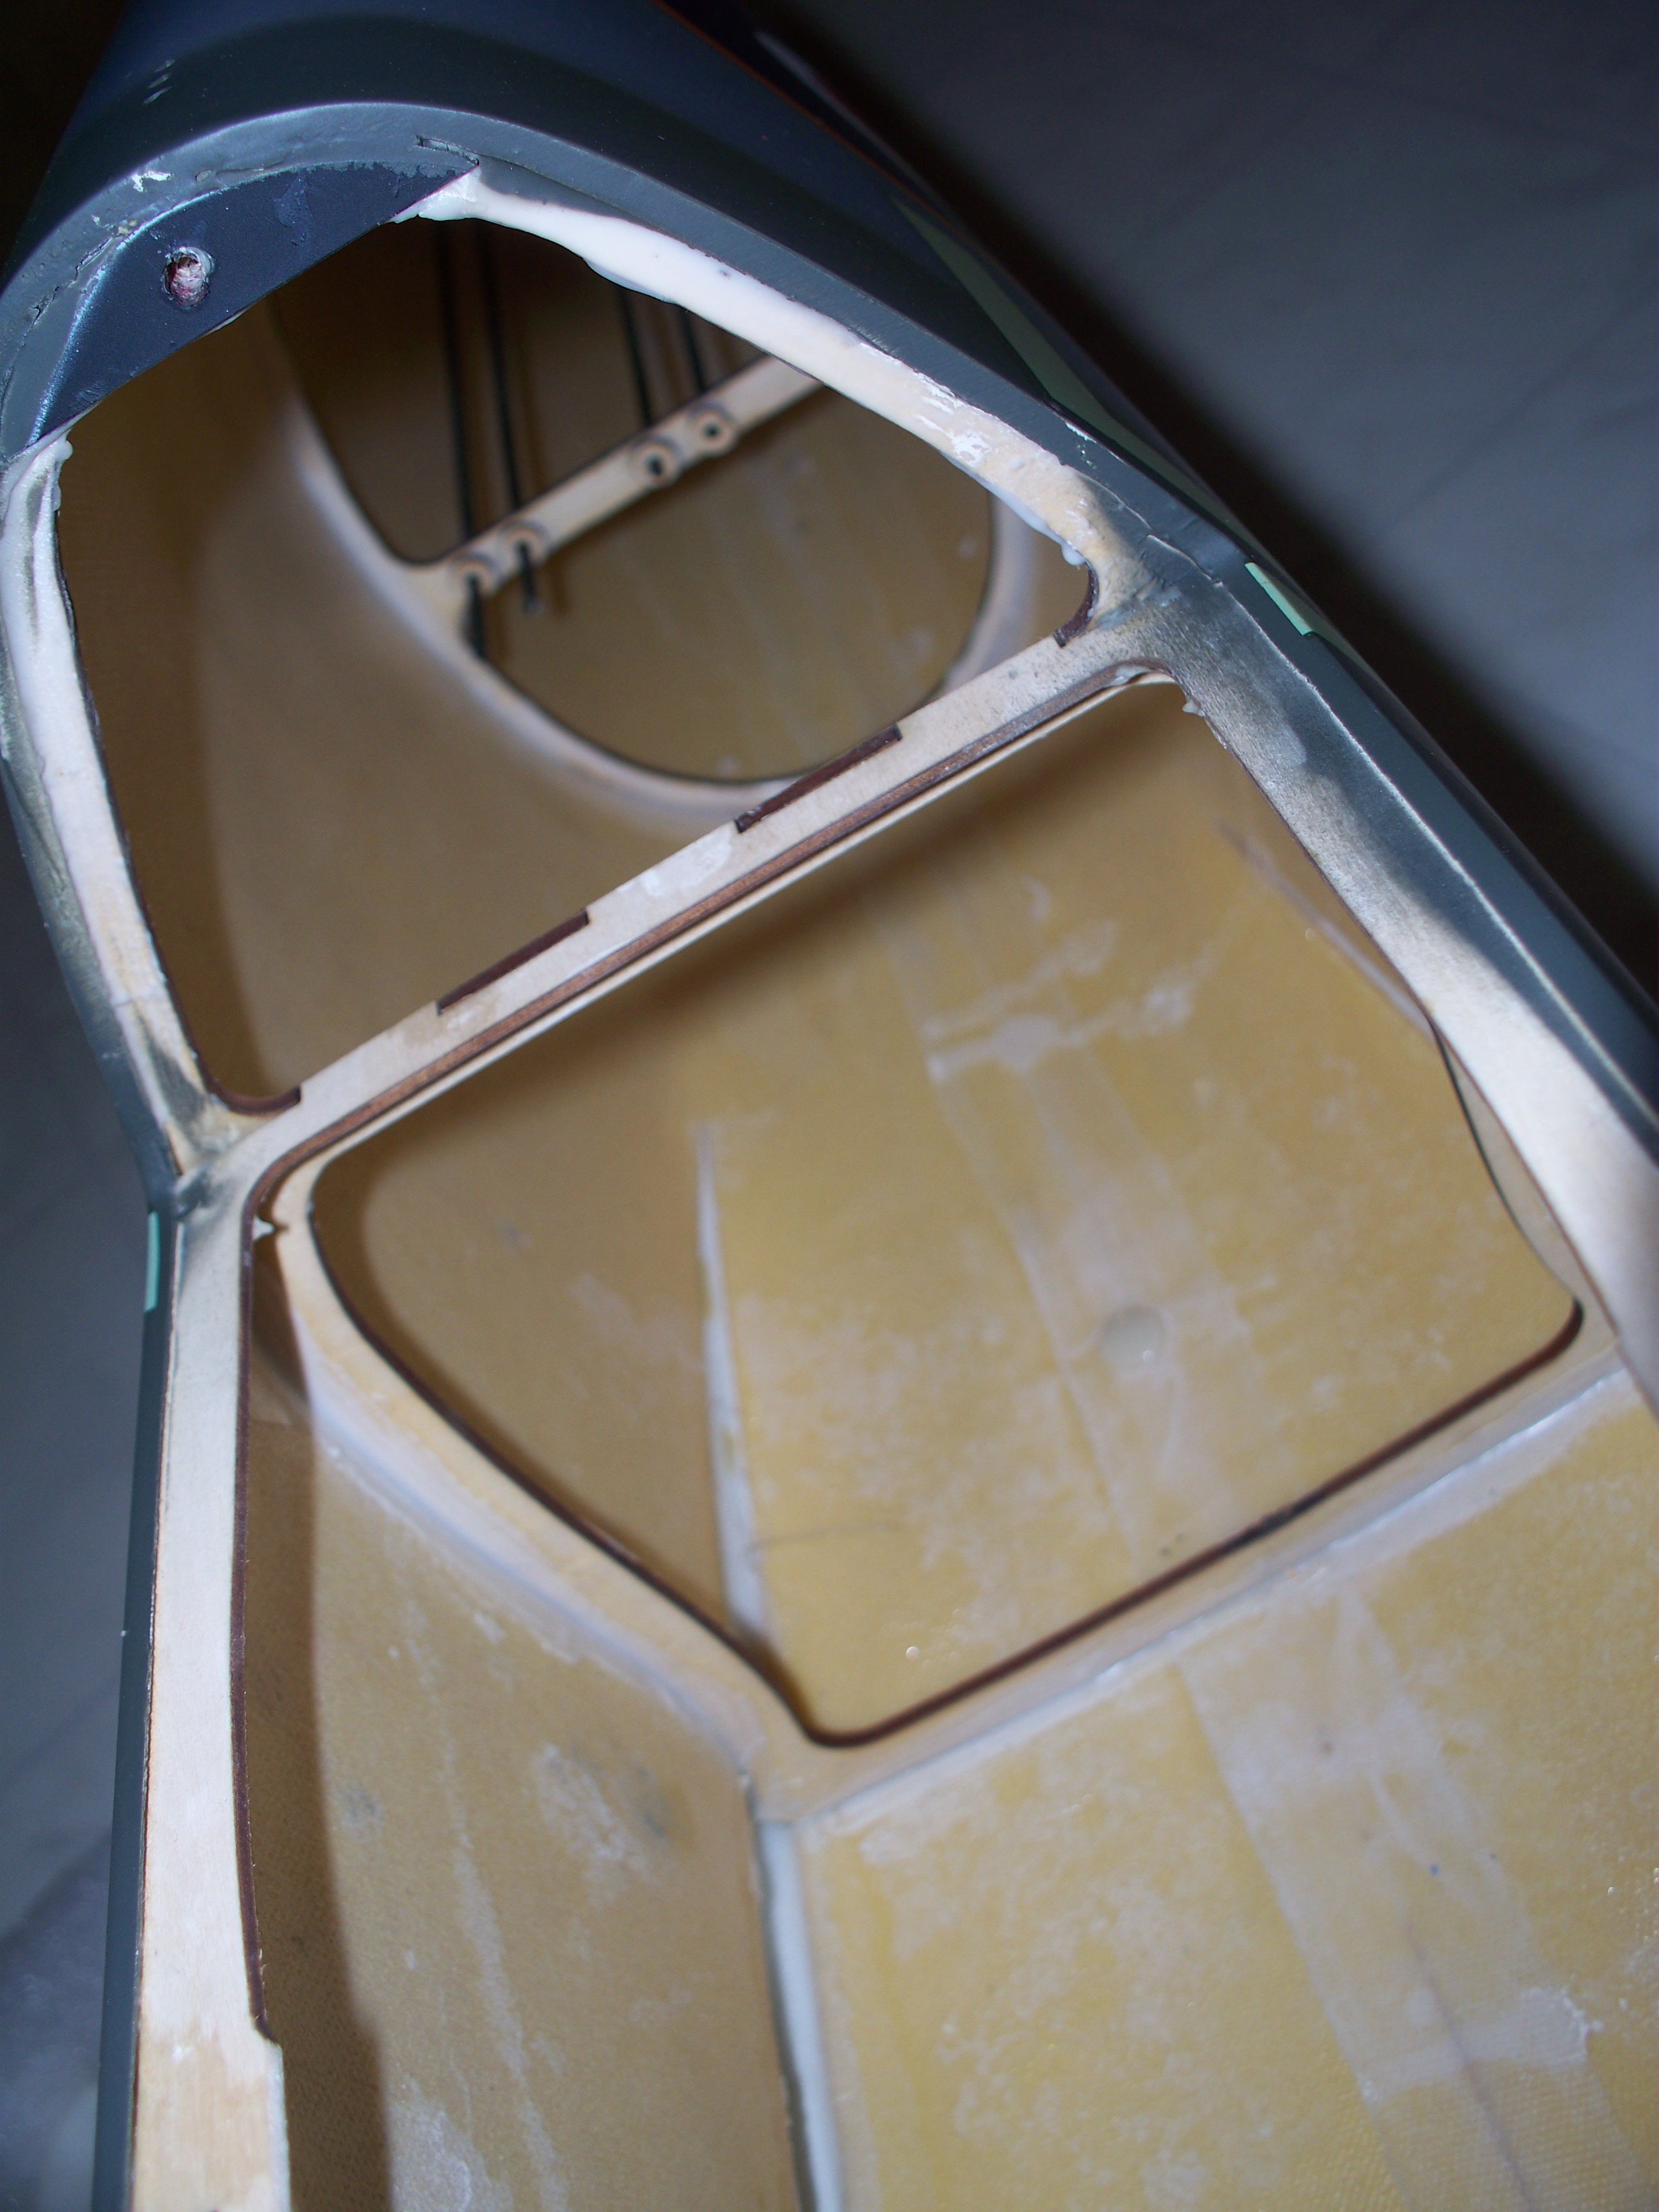
Take a look inside the hatch! The first thing you will notice is design, design, and better design. The battery can easily be slipped into the nose where the tank goes and you have it. The first thing I noticed was the fiberglass wasn't white like most planes I have unpacked. You are looking at the "Sandwiched Material" that is between two layers; I am not separating the layers to confirm what it is just for you guys, but that is why the entire airframe is so light and strong... You gotta love it!
Last edited by Magnum RC; 01-10-2015 at 05:46 PM. Reason: forgot something
#8

#9
Thanks for all your supports,We sincerely hope all of you our friends here enjoying your flights and enjoying your lives all the time, thanks.
Last edited by Toprcmodel; 01-14-2015 at 04:51 PM.
The following users liked this post:
marvair (05-03-2020)
#12

My Feedback: (8)
Join Date: May 2002
Location: Yoncalla, OR
Posts: 383
Likes: 0
Received 0 Likes
on
0 Posts
Hello Iroc,
If you look closely, the retract struts are robust and quite different. These are not the continuation of ESM's line. Having worked for KMP in the past, The design is much different. There is an outside board that an external 7.4 volt battery attaches too and the motor is rubber bumpered to ease the stop at the end of each retraction. The ESM gear were designed to operate off of your flightpak. At any rate, these are straight forward 90 degree retracts, very common in nature.
If you look closely, the retract struts are robust and quite different. These are not the continuation of ESM's line. Having worked for KMP in the past, The design is much different. There is an outside board that an external 7.4 volt battery attaches too and the motor is rubber bumpered to ease the stop at the end of each retraction. The ESM gear were designed to operate off of your flightpak. At any rate, these are straight forward 90 degree retracts, very common in nature.
#13
Senior Member
Thread Starter
Join Date: Mar 2010
Location: Eugene, OR
Posts: 269
Likes: 0
Received 0 Likes
on
0 Posts
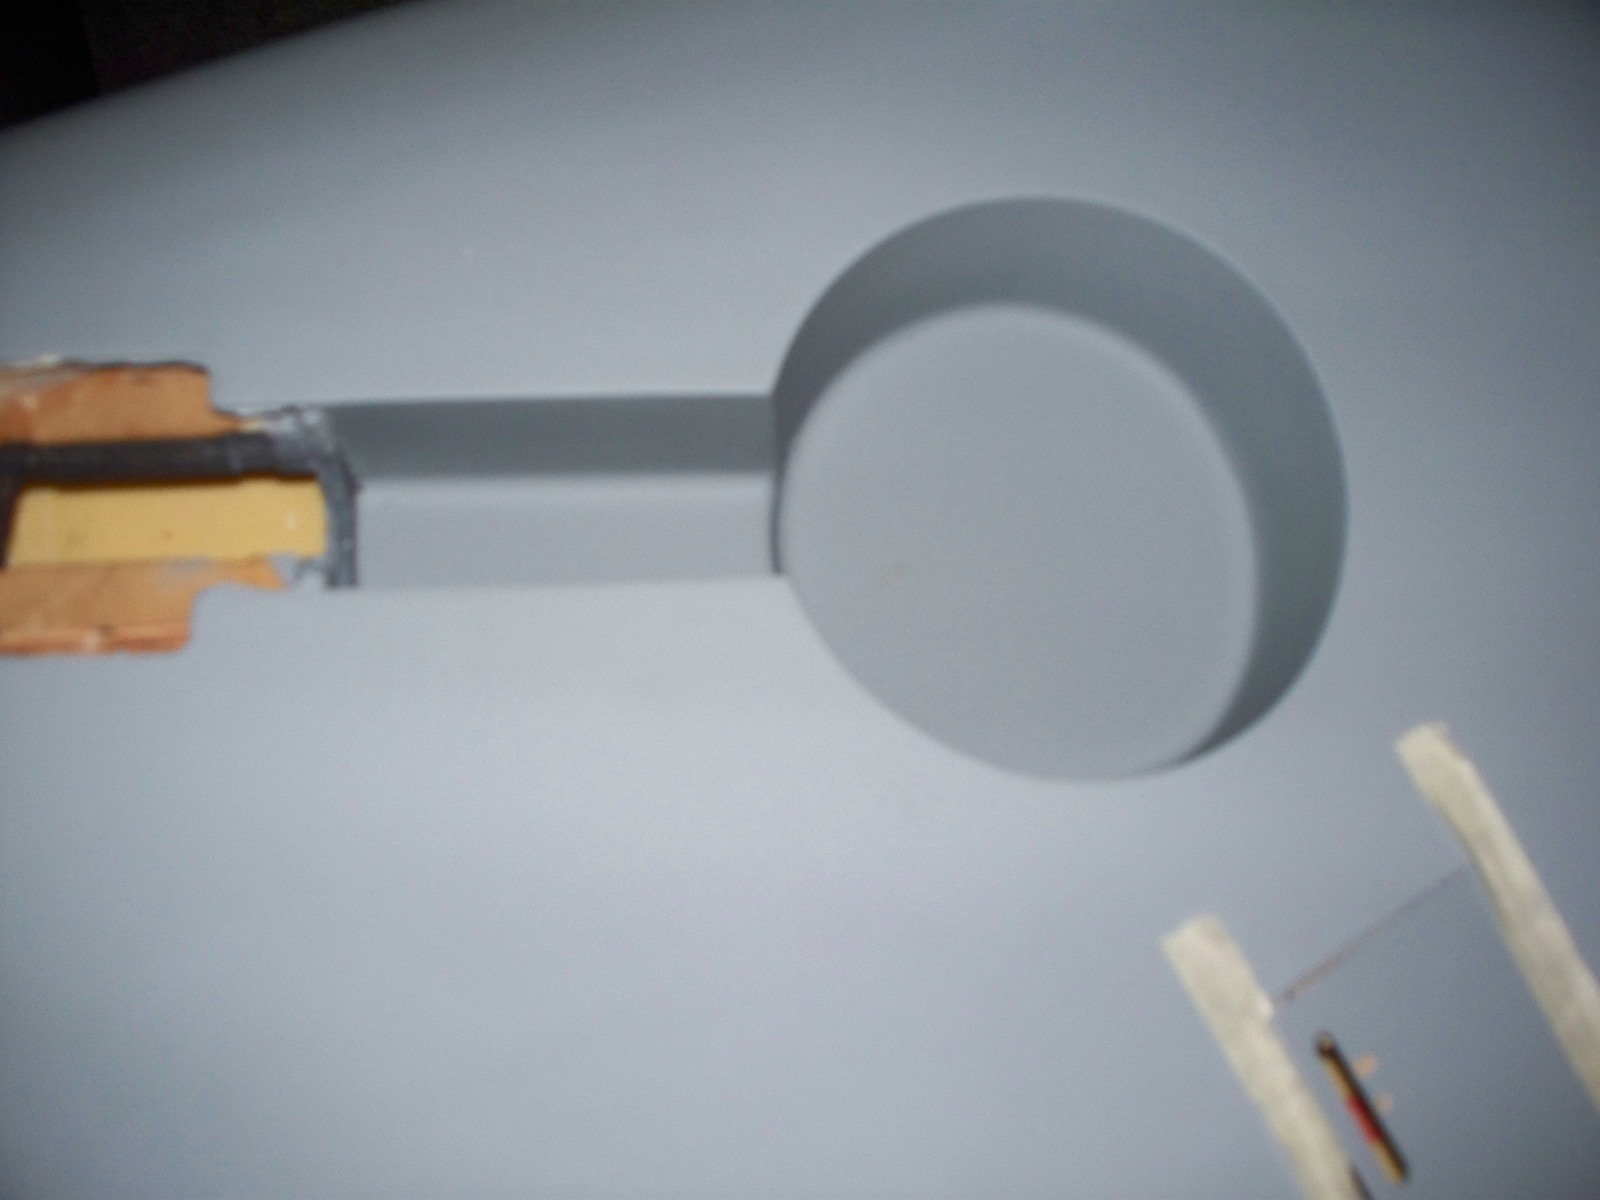
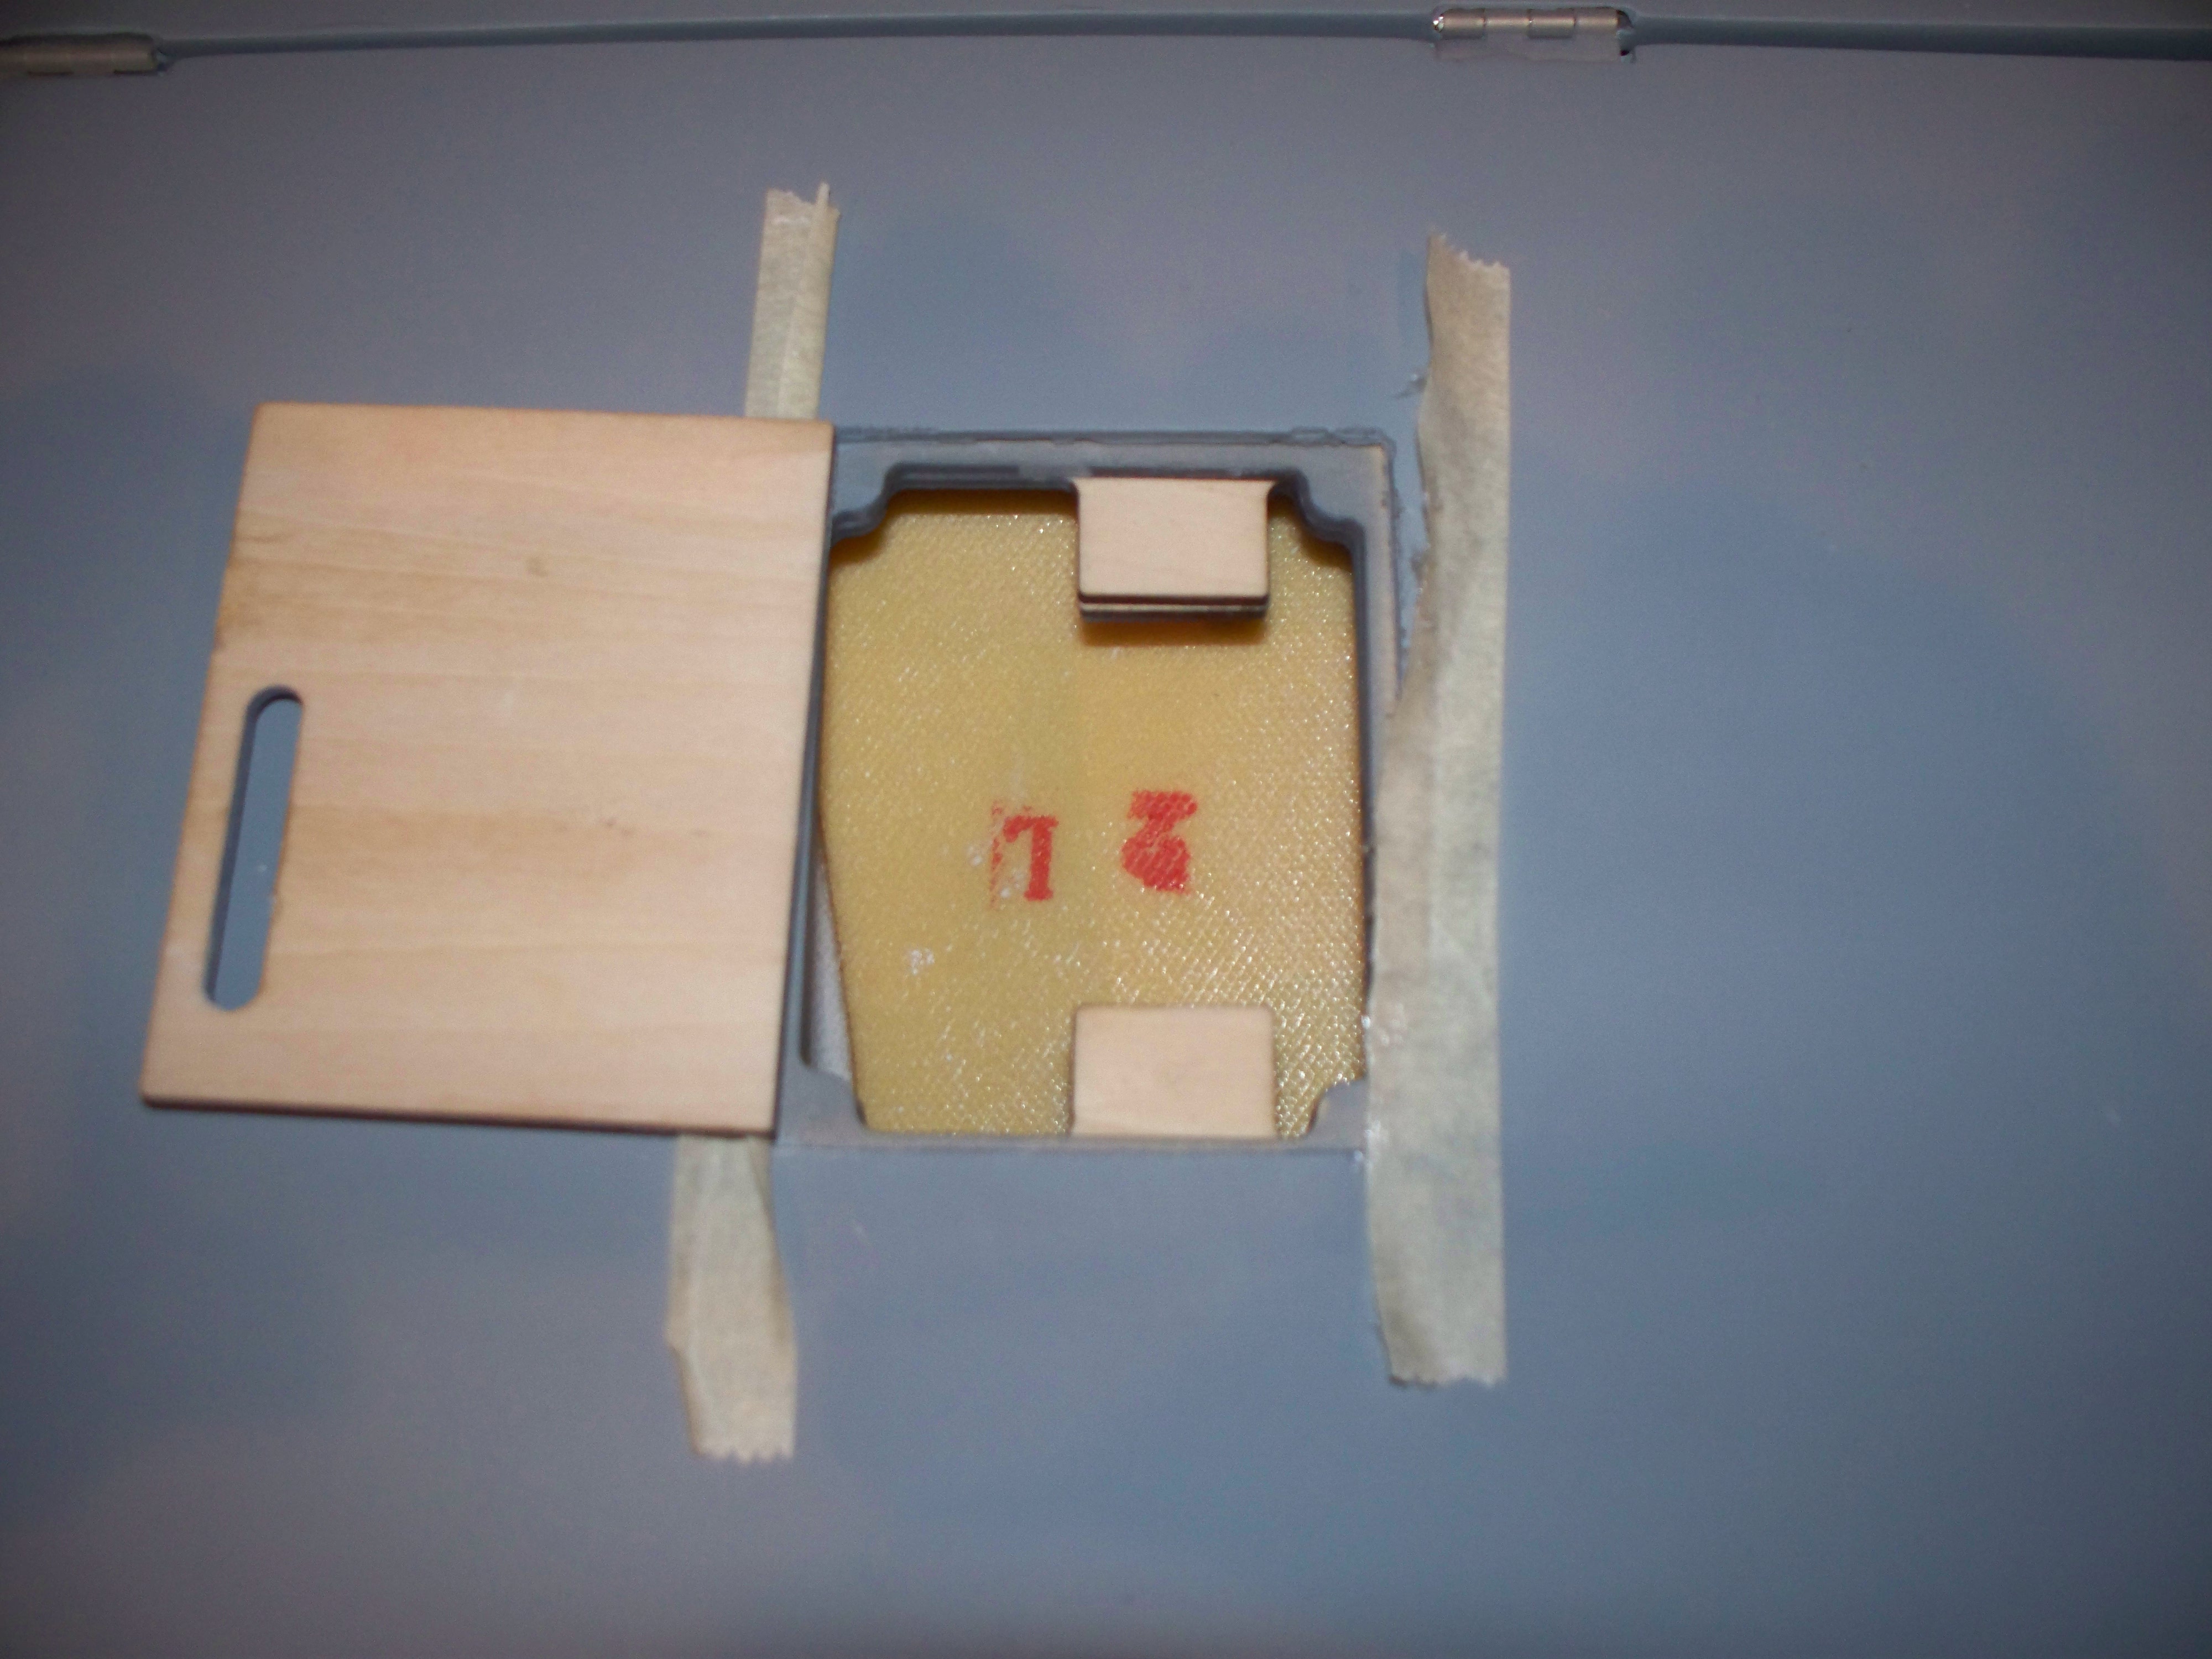
The internal components of the wing show ribbing, but rather inaccessable due to the composite nature of the wing. You get a peek thru the servo hatches and the landing gear mounts. The skin of the plane is where most of the strength lies like most composites. Notice the wheel well is built in, no liner to deal with...
#14
Senior Member
Thread Starter
Join Date: Mar 2010
Location: Eugene, OR
Posts: 269
Likes: 0
Received 0 Likes
on
0 Posts
Greetings all,
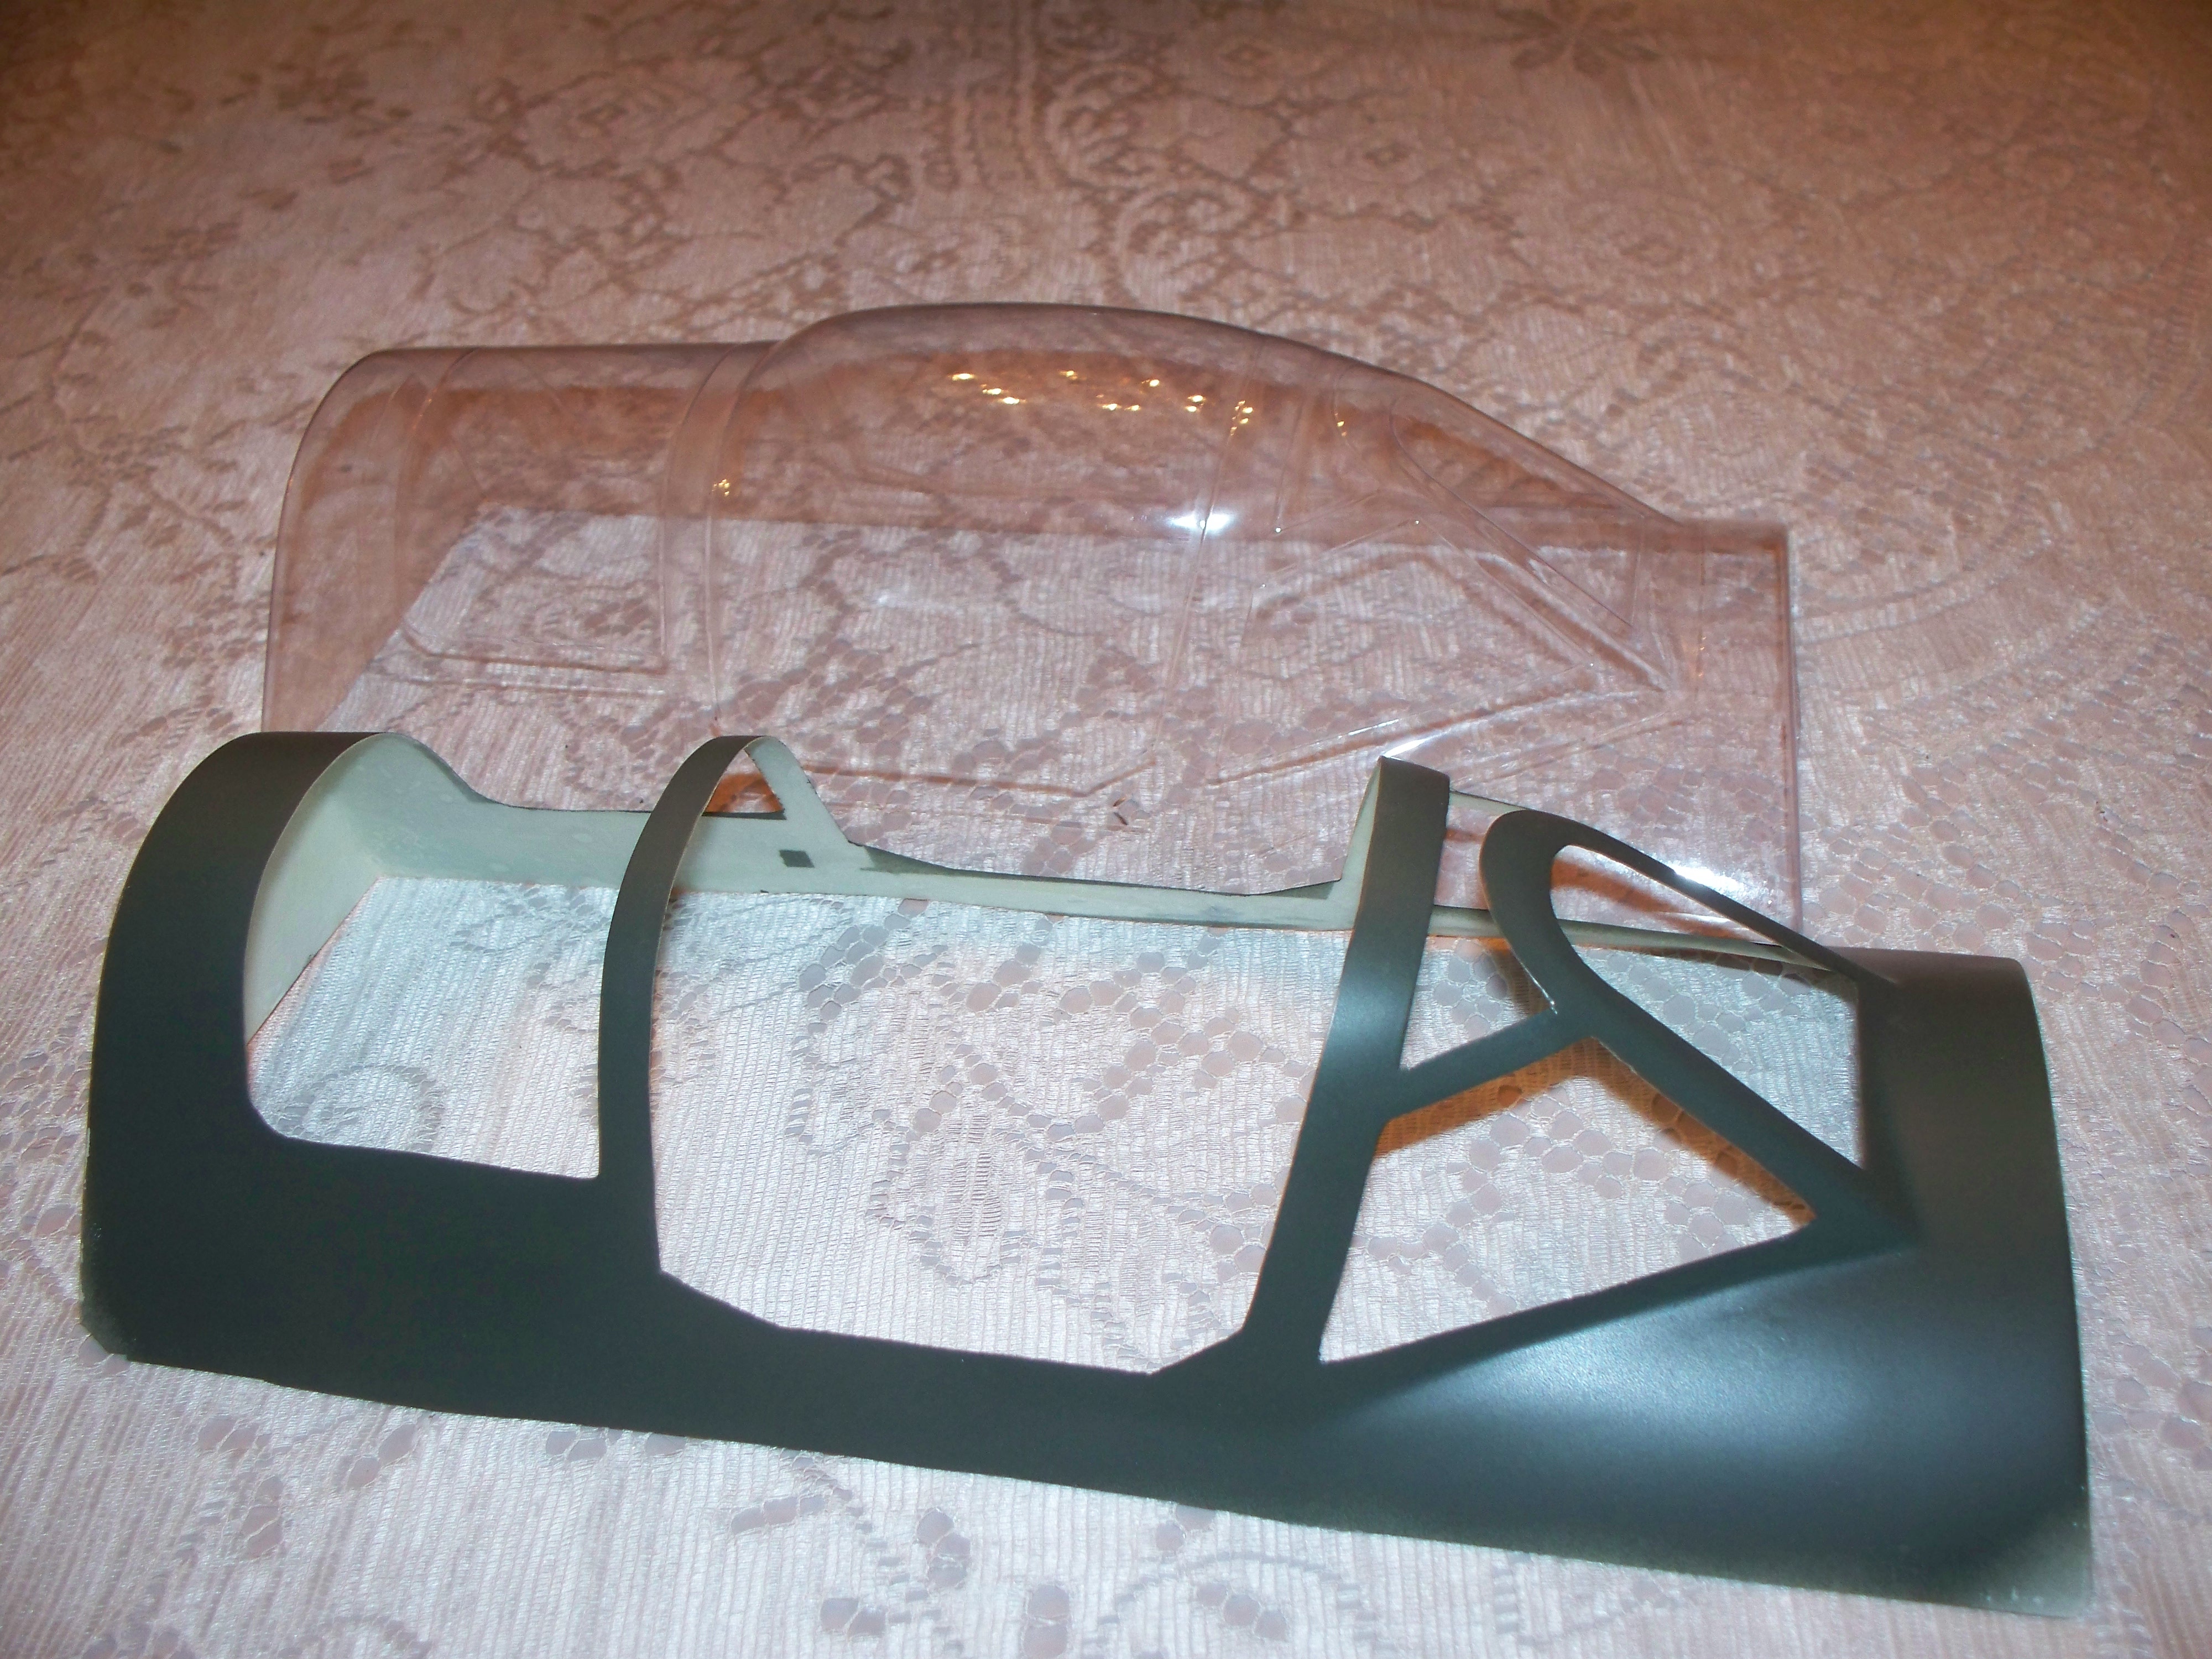
Everyone has skills and Ideas of how to accomplish an assembly task. Top RC sends you two parts to the canopy to assemble; a fiberglass frame, and the clear plastic glass part that fits inside. Notice on the picture, you have to cut them to fit the cockpit. The outline for the fit is on the plastic glass part and I took a cutting wheel and carefully went around the canopy to get the shape that fits perfect on the plane. I noticed right away that the canopy is thicker material than some of the ESM parts I have had to cut out. I then carefully laid the fiberglass frame over the now cut glass part and got it where I wanted it. Using scotch tape, I located the proper fit and anchored it in place. I then used the cutting wheel to make my way around the fiberglass part of the canopy assembly until they both matched perfect. Be careful removing the tape, as you can easily damage or break the fiberglass frame and that would suck. Now the tricky part. Gluing in place... Using a very small piece of 220 grit paper, I very carefully sanded the clear plastic where the frame glues on. Using "Canopy glue" not epoxy, I used a toothpick to apply the glue all around the glass and carefully positioned the frame onto it and again taped it into place. The glue dries very clear so even if just a little oozes out it won't be noticed. When dry, Voila!
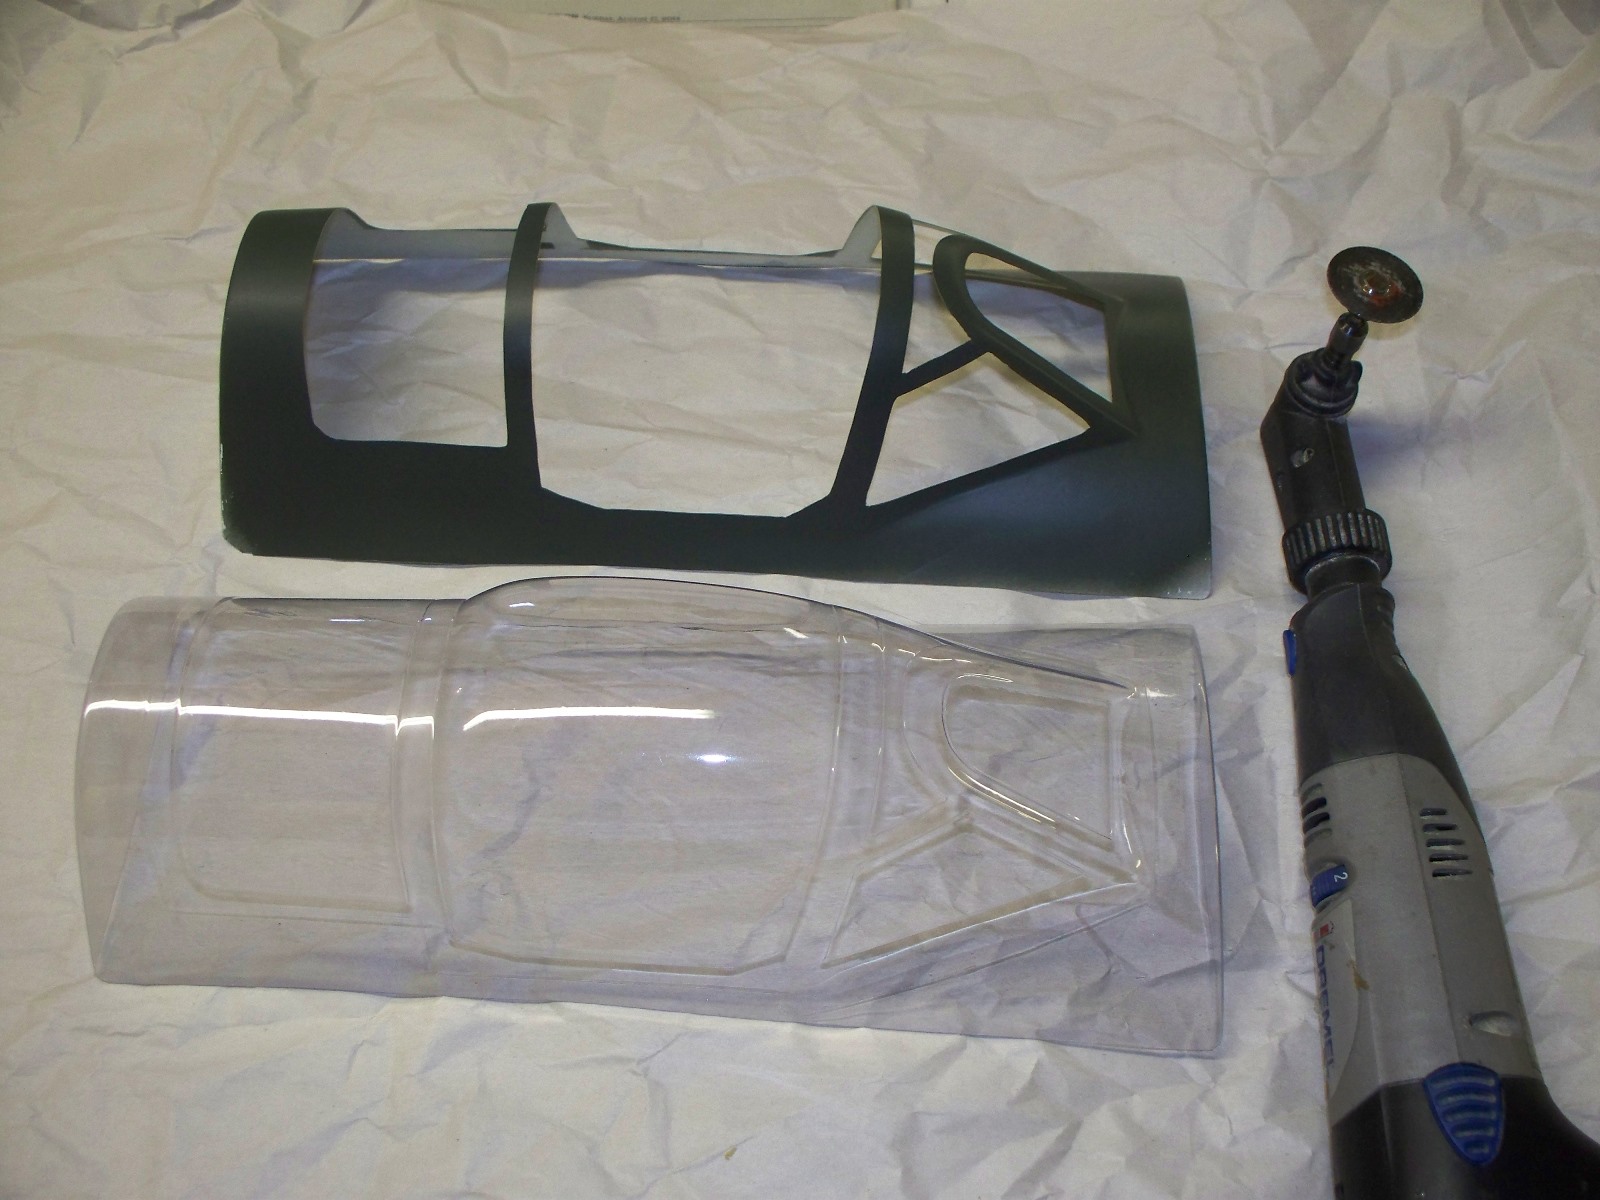
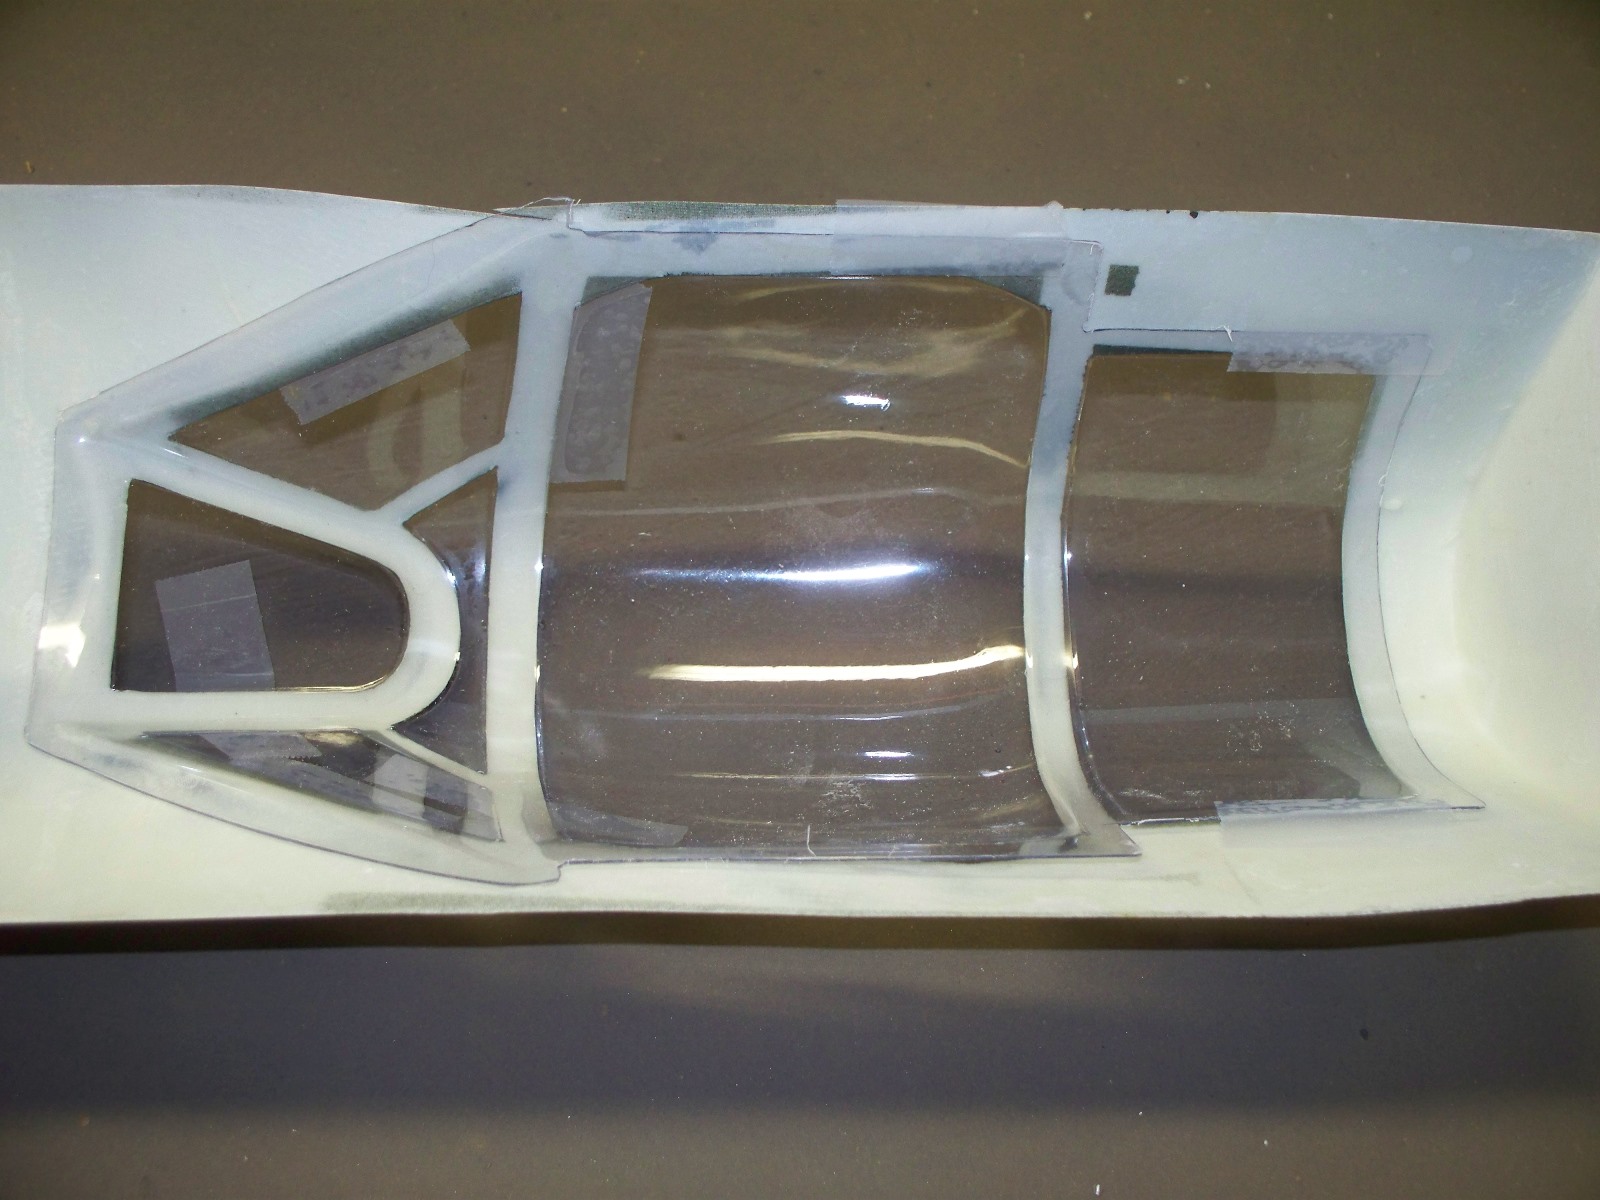
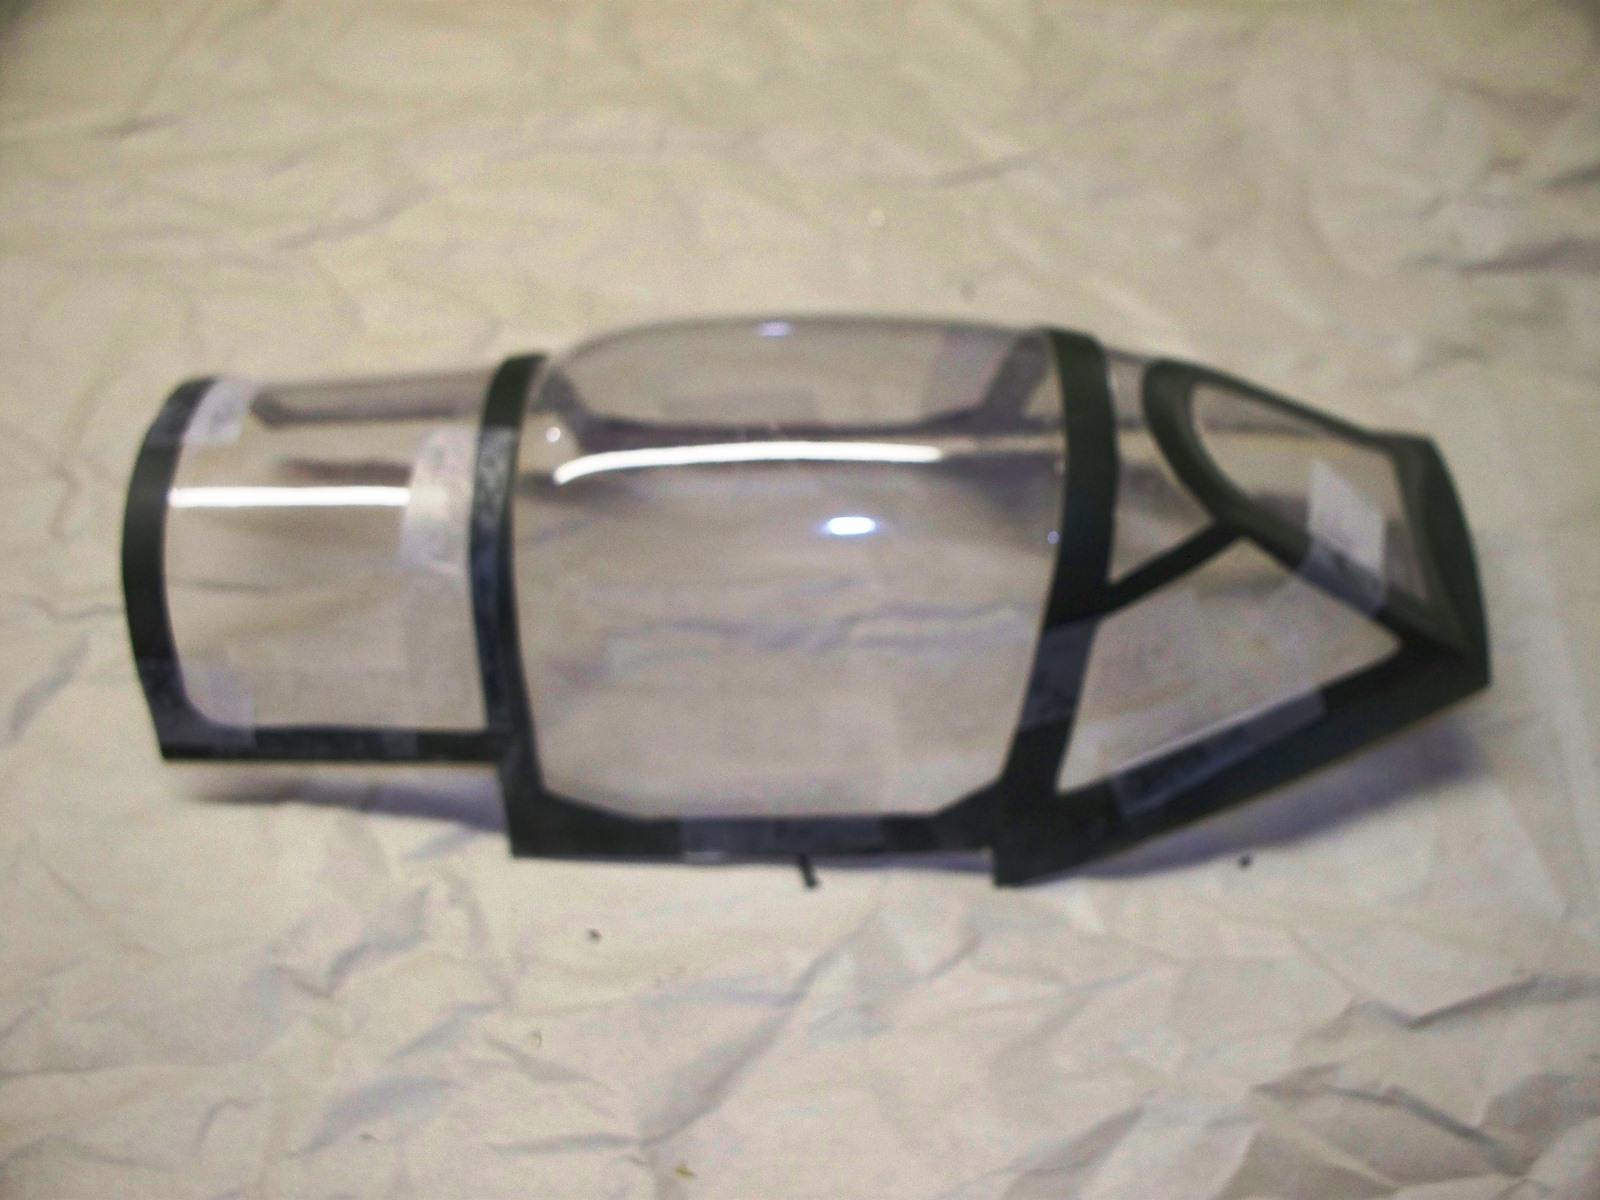
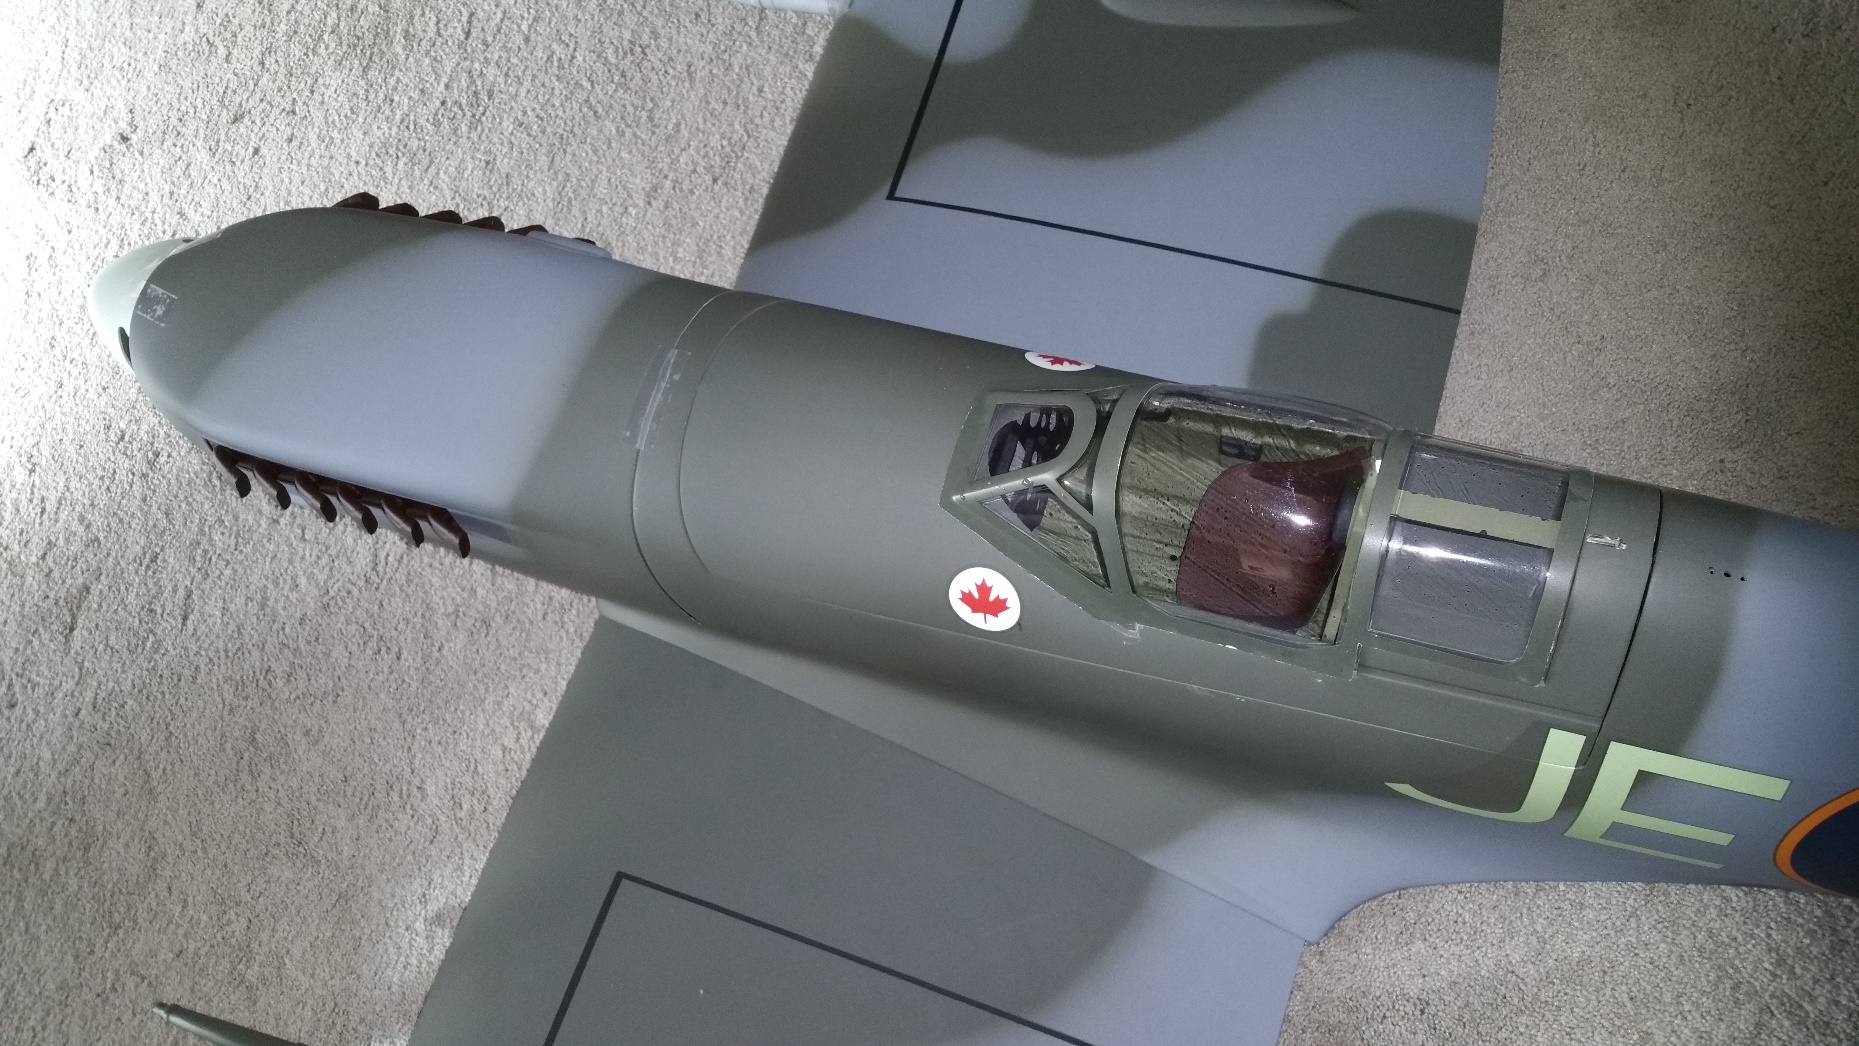
Everyone has skills and Ideas of how to accomplish an assembly task. Top RC sends you two parts to the canopy to assemble; a fiberglass frame, and the clear plastic glass part that fits inside. Notice on the picture, you have to cut them to fit the cockpit. The outline for the fit is on the plastic glass part and I took a cutting wheel and carefully went around the canopy to get the shape that fits perfect on the plane. I noticed right away that the canopy is thicker material than some of the ESM parts I have had to cut out. I then carefully laid the fiberglass frame over the now cut glass part and got it where I wanted it. Using scotch tape, I located the proper fit and anchored it in place. I then used the cutting wheel to make my way around the fiberglass part of the canopy assembly until they both matched perfect. Be careful removing the tape, as you can easily damage or break the fiberglass frame and that would suck. Now the tricky part. Gluing in place... Using a very small piece of 220 grit paper, I very carefully sanded the clear plastic where the frame glues on. Using "Canopy glue" not epoxy, I used a toothpick to apply the glue all around the glass and carefully positioned the frame onto it and again taped it into place. The glue dries very clear so even if just a little oozes out it won't be noticed. When dry, Voila!
#15

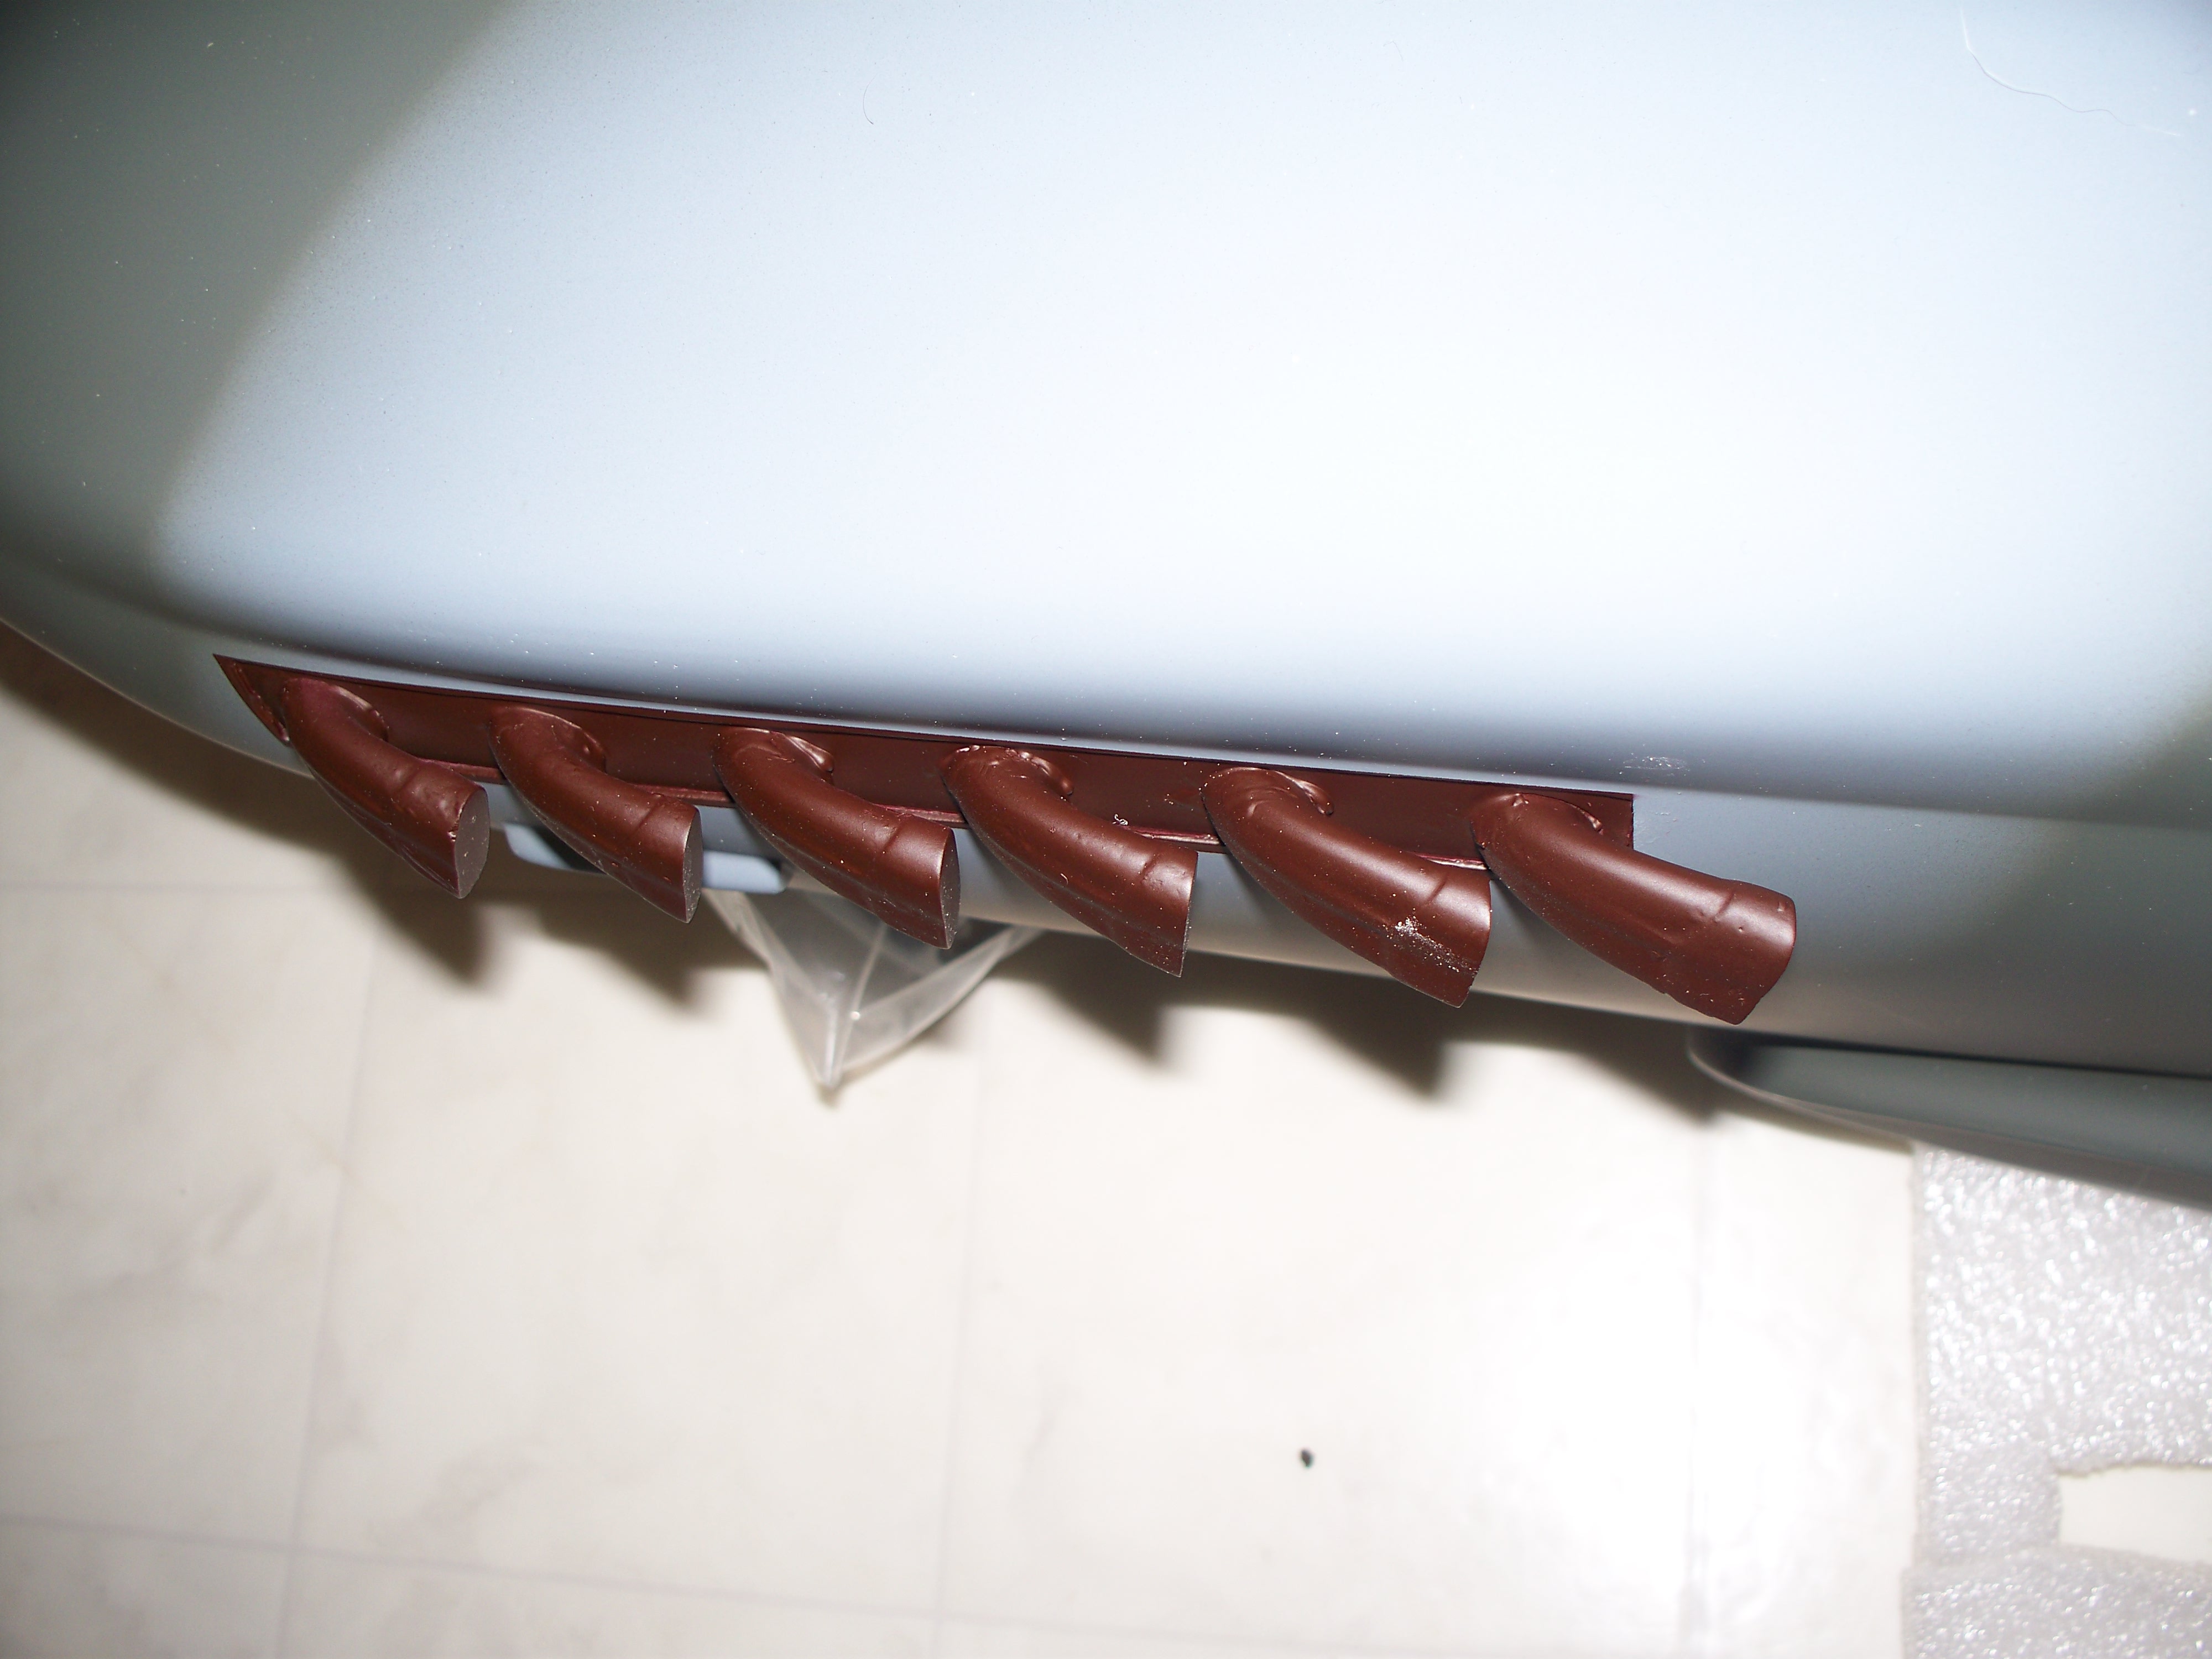
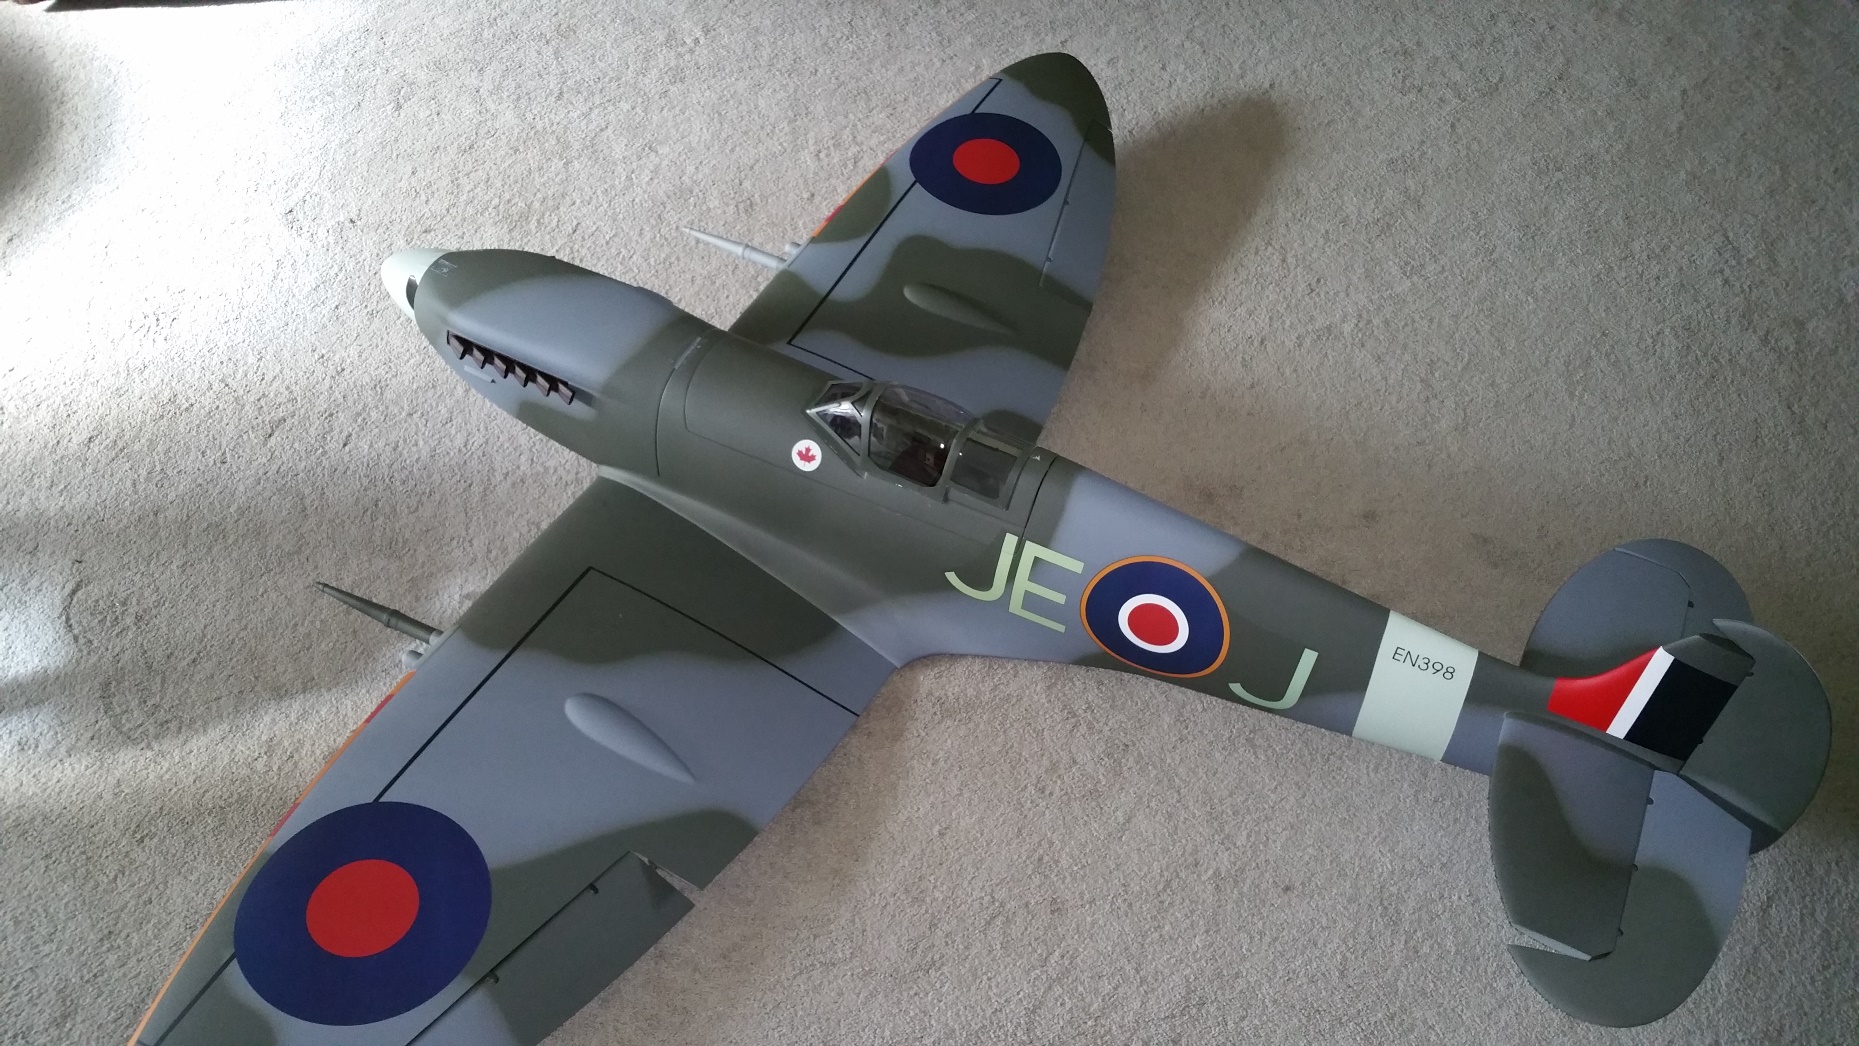
That's a very nice looking model, unfortunately it's another Spitfire with JEJ lettering; another Spitfire ace's lettering should have been chosen to adorn the fuselage. It's great to see the model comes with scale looking exhaust stacks, much better looking than what other manufacturers are offering with their ARFs. I will wait until this one is fully assembled and flown before I decide to purchase one.
Roger
Roger
#16

Join Date: Nov 2012
Location: Navarre, FL
Posts: 268
Likes: 0
Received 0 Likes
on
0 Posts
That's a very nice looking model, unfortunately it's another Spitfire with JEJ lettering; another Spitfire ace's lettering should have been chosen to adorn the fuselage. It's great to see the model comes with scale looking exhaust stacks, much better looking than what other manufacturers are offering with their ARFs. I will wait until this one is fully assembled and flown before I decide to purchase one.
Roger
Roger
#17

Roger, just curious why you are unhappy with it having Johhny Johnson's lettering? Do you just feel that it's over done, or is there another reason? Personally, I think I'm going to remark mine with VZ-H (unless there's an option to order the markings you want ; D ). Though McGee's bird was a MKIIa, High Flight just means a lot to me...I think I can be forgiven the historical inaccuracy!
Roger
#18

Join Date: Nov 2012
Location: Navarre, FL
Posts: 268
Likes: 0
Received 0 Likes
on
0 Posts
Ah, yep makes sense. I can think of a few I'd rather have...Bader being high on the list. But yeah, how cool would it be to make it up like Gentiel's or Peterson's spits (Eagle Squadrons). Then there's always Sailor Malan... Lots of good options...
#19

Join Date: Nov 2012
Location: Navarre, FL
Posts: 268
Likes: 0
Received 0 Likes
on
0 Posts
For that matter, Bob Hoover was shot down in a Spit V...so many options! Would be a simple matter to change the lettering...for that matter a total repaint wouldn't be out of the question...
#20
Senior Member
Thread Starter
Join Date: Mar 2010
Location: Eugene, OR
Posts: 269
Likes: 0
Received 0 Likes
on
0 Posts
Hello everyone,
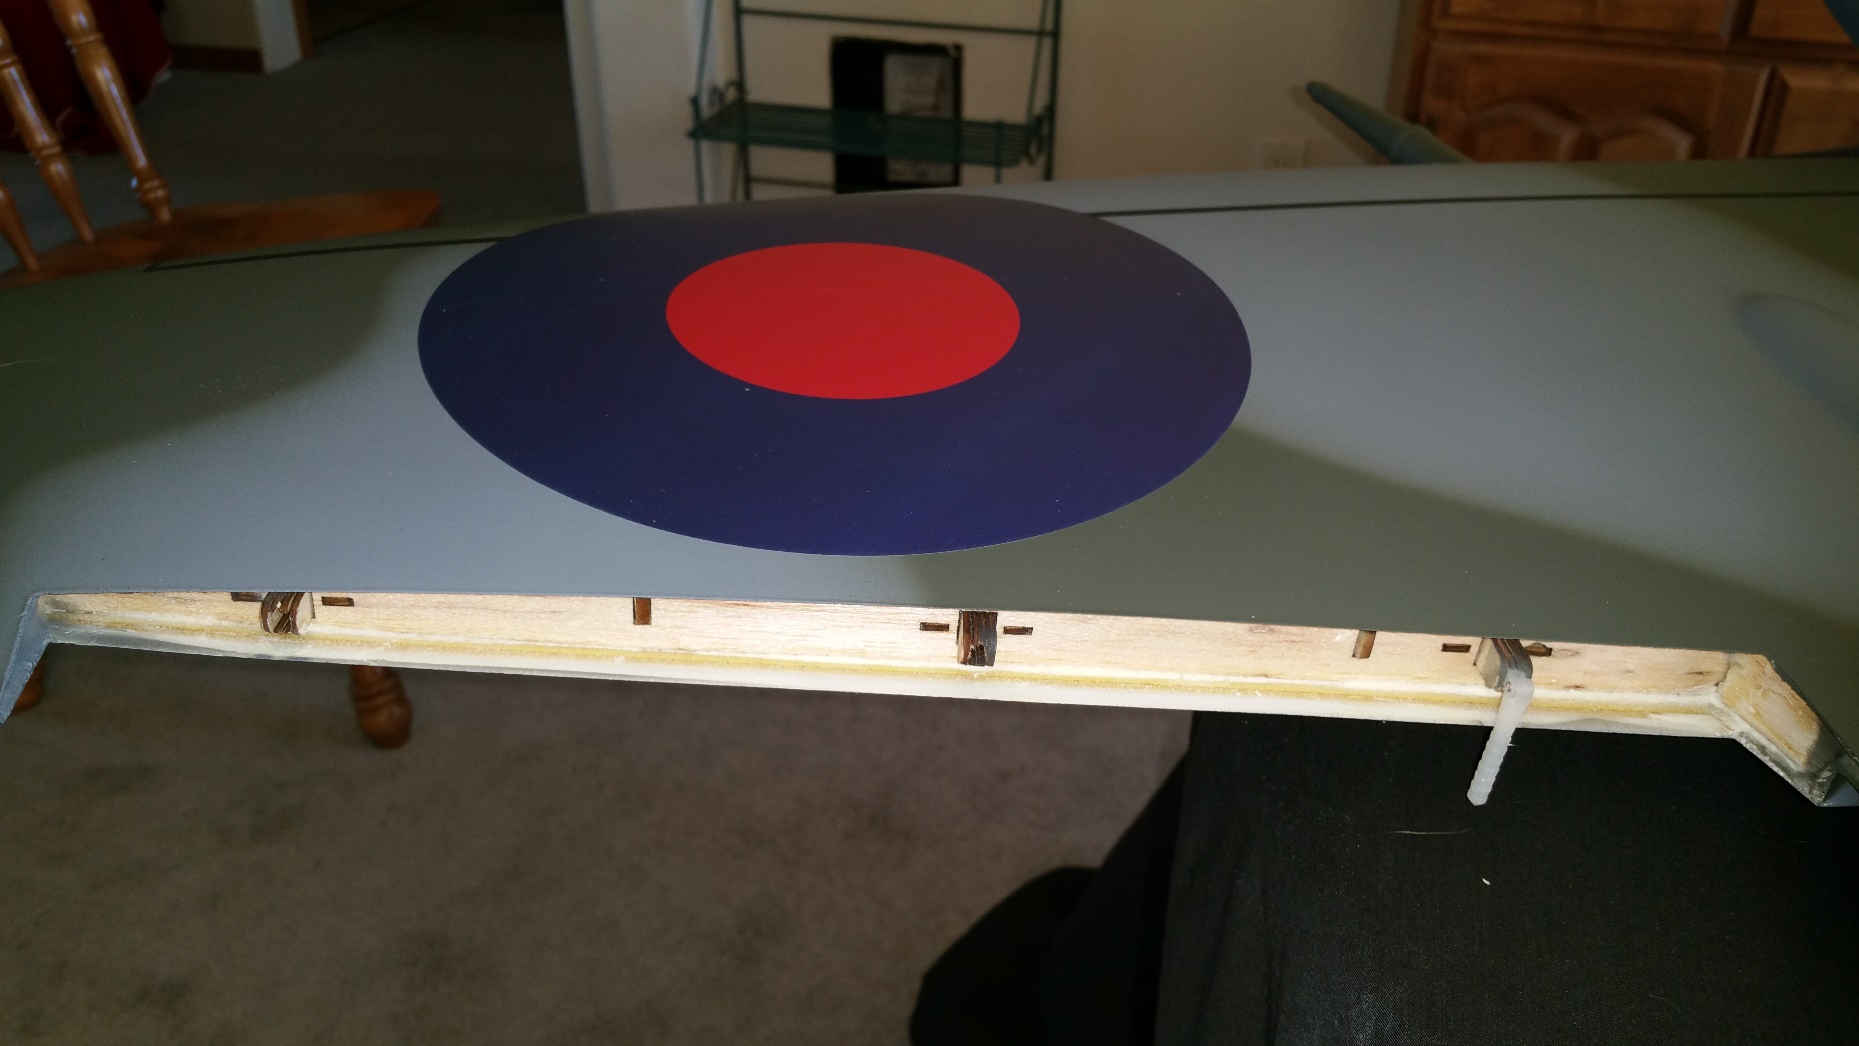
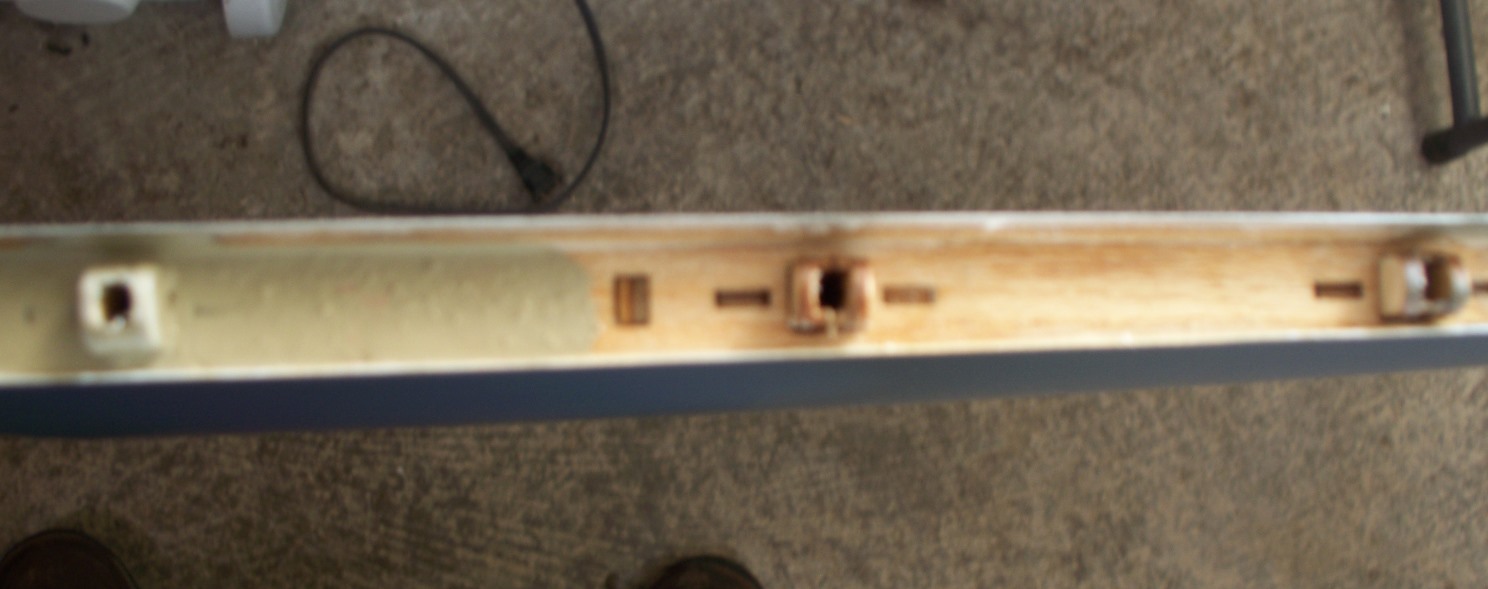
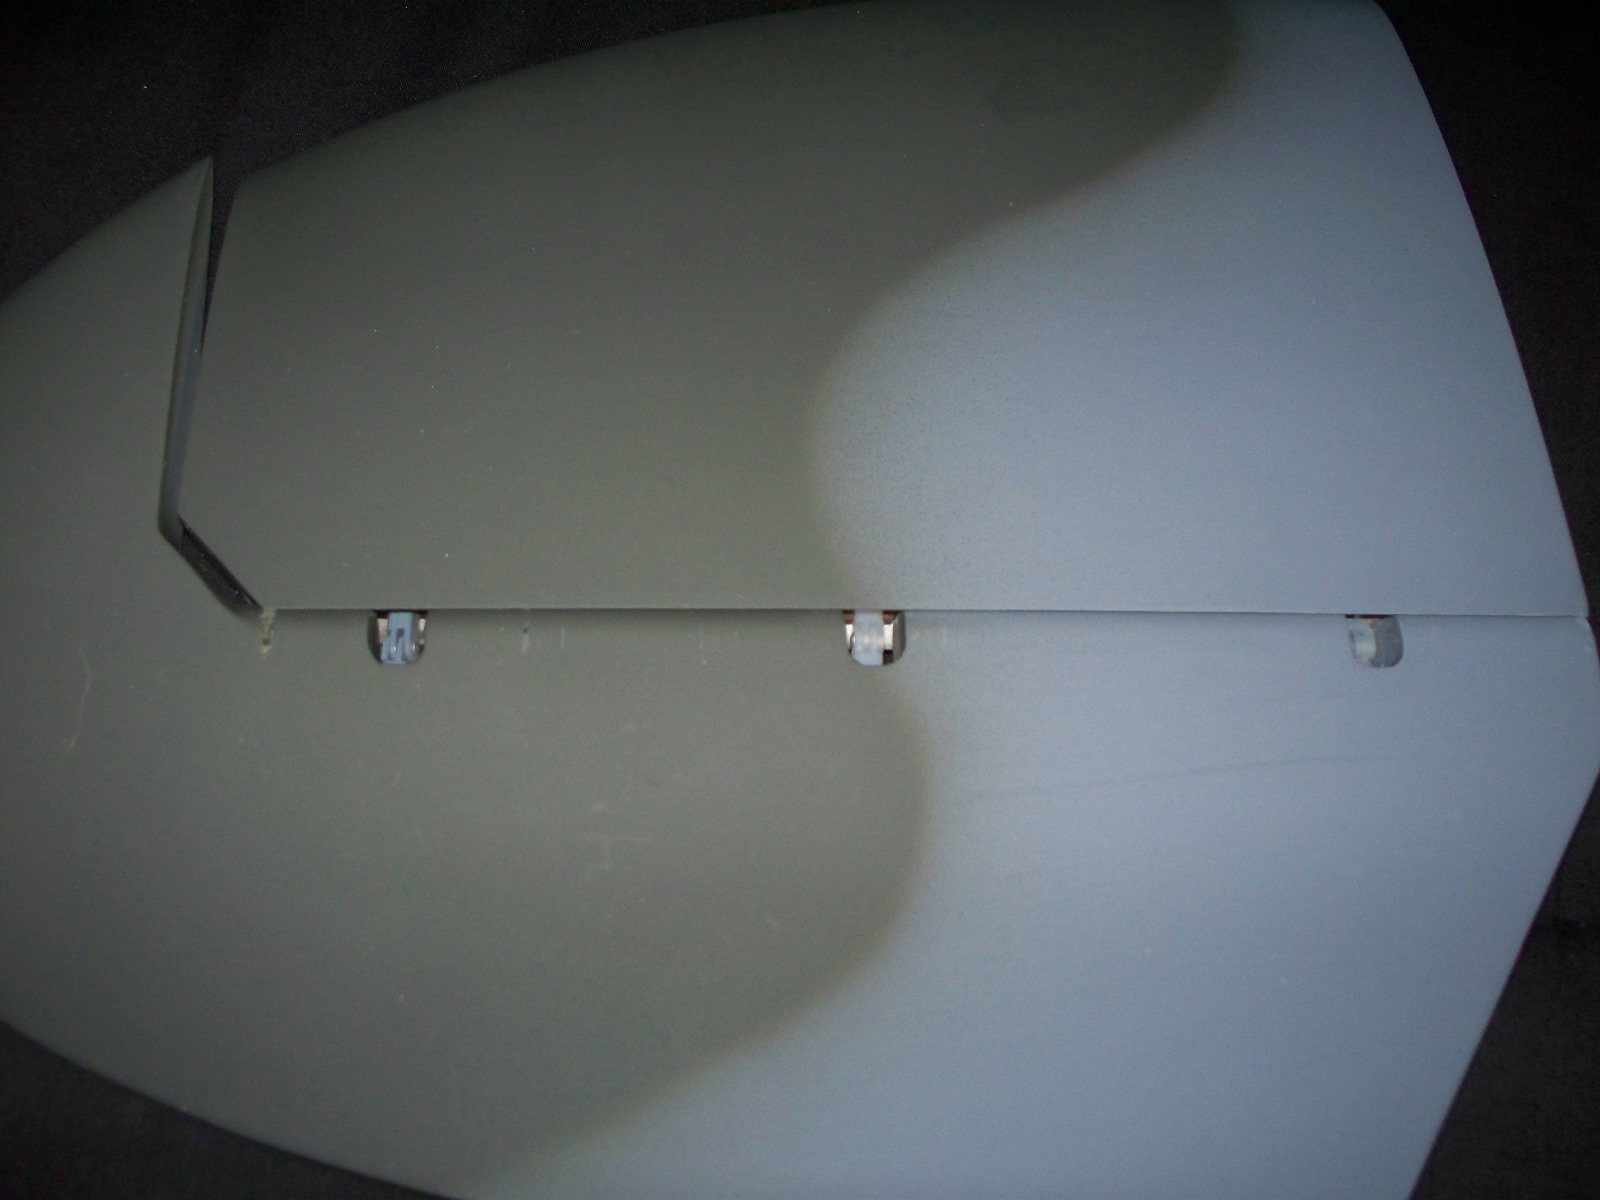
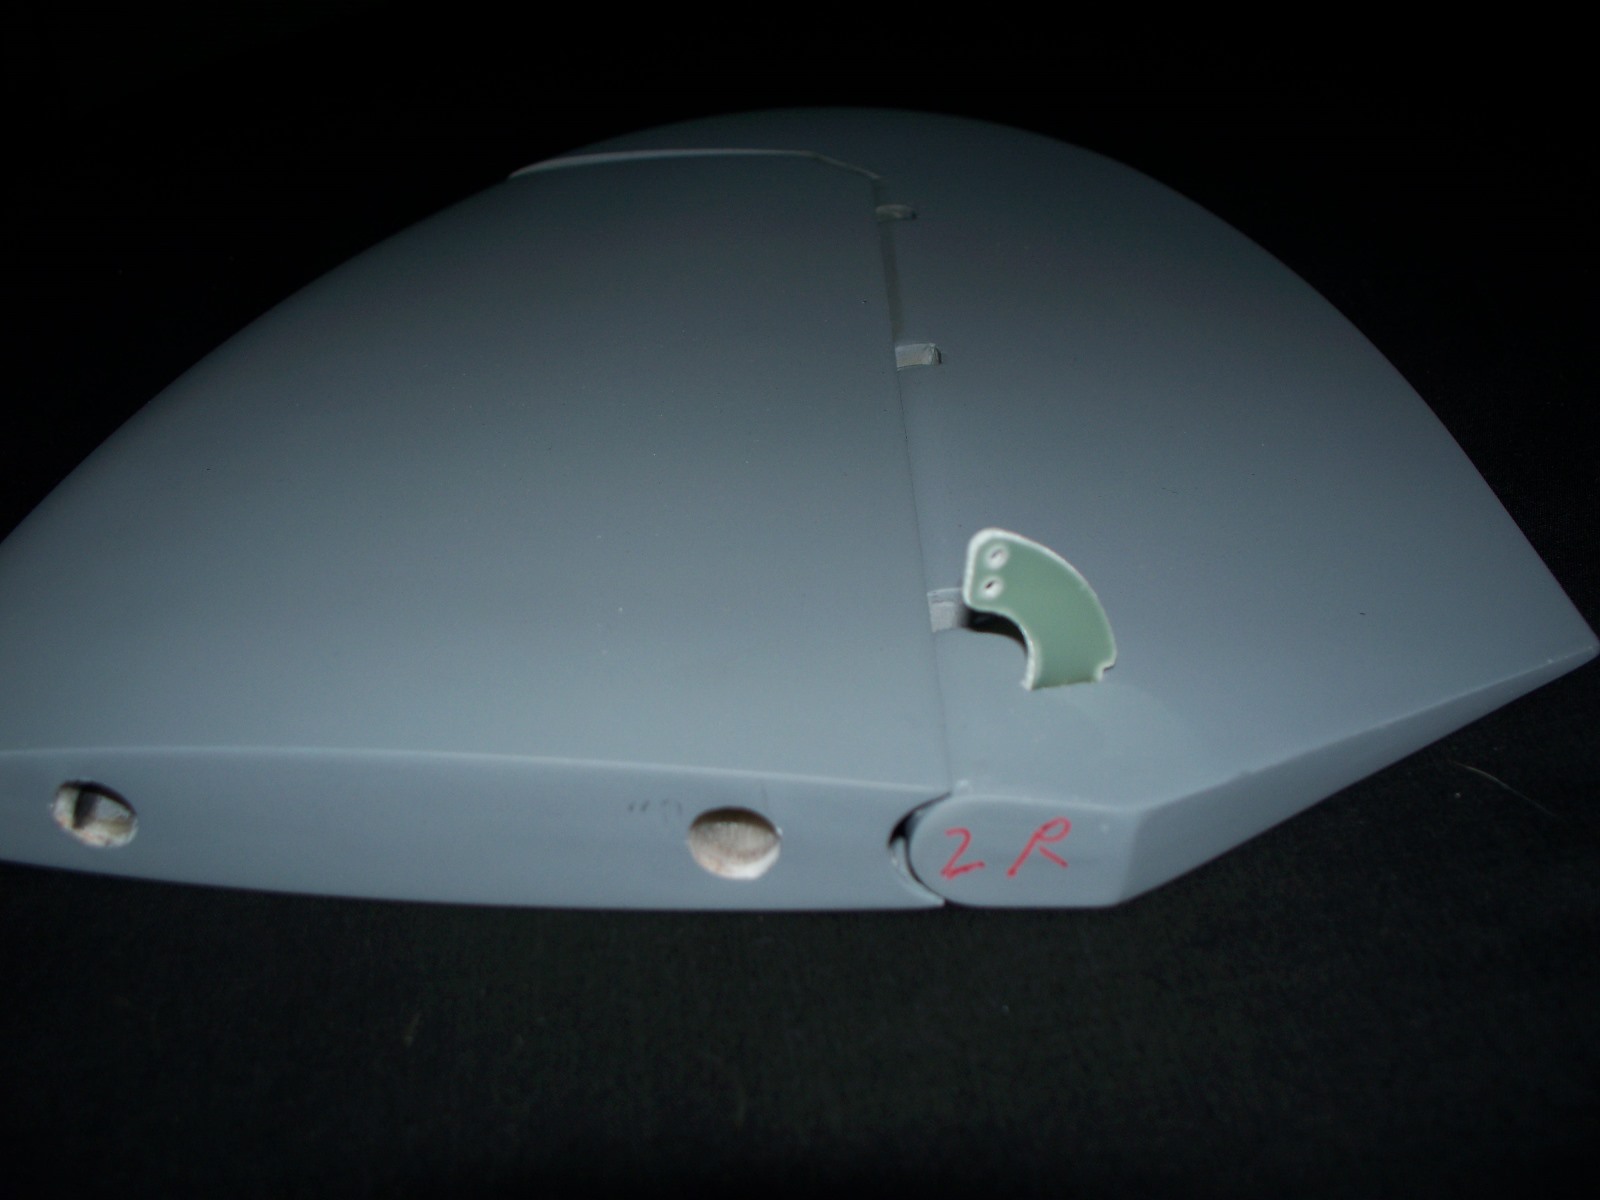
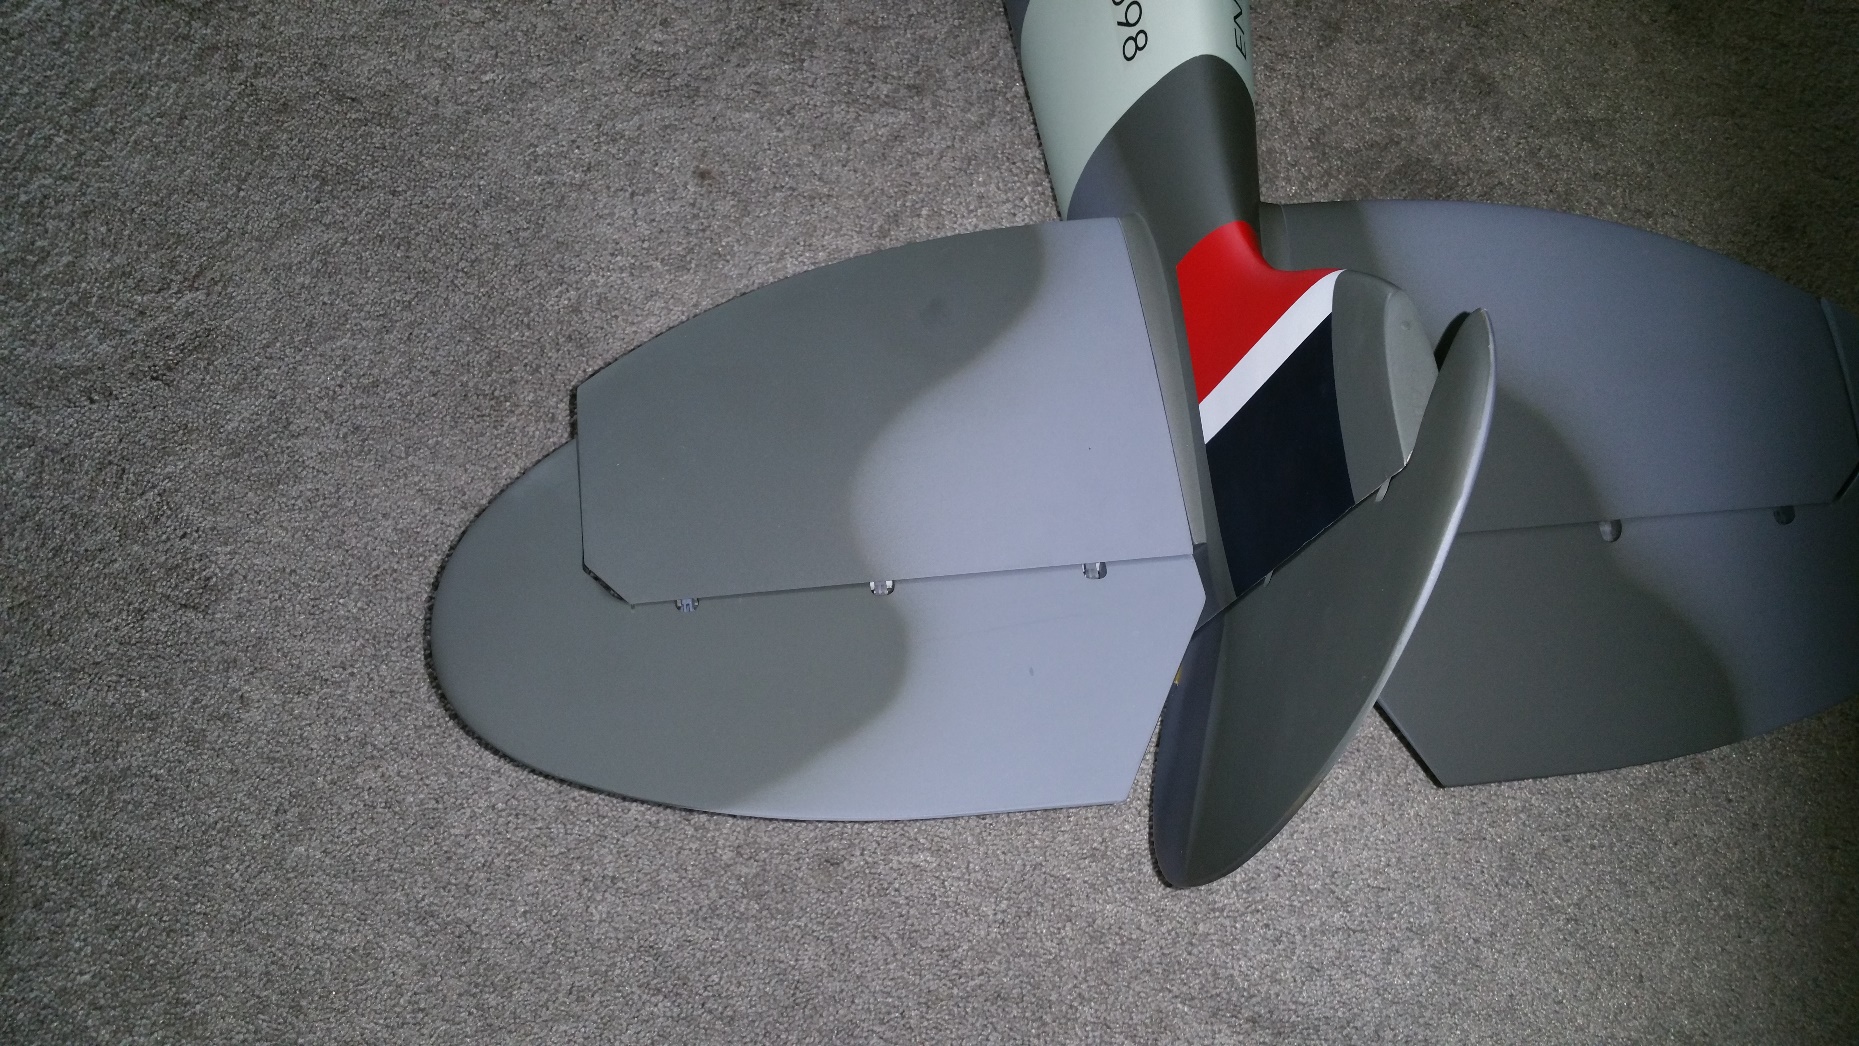
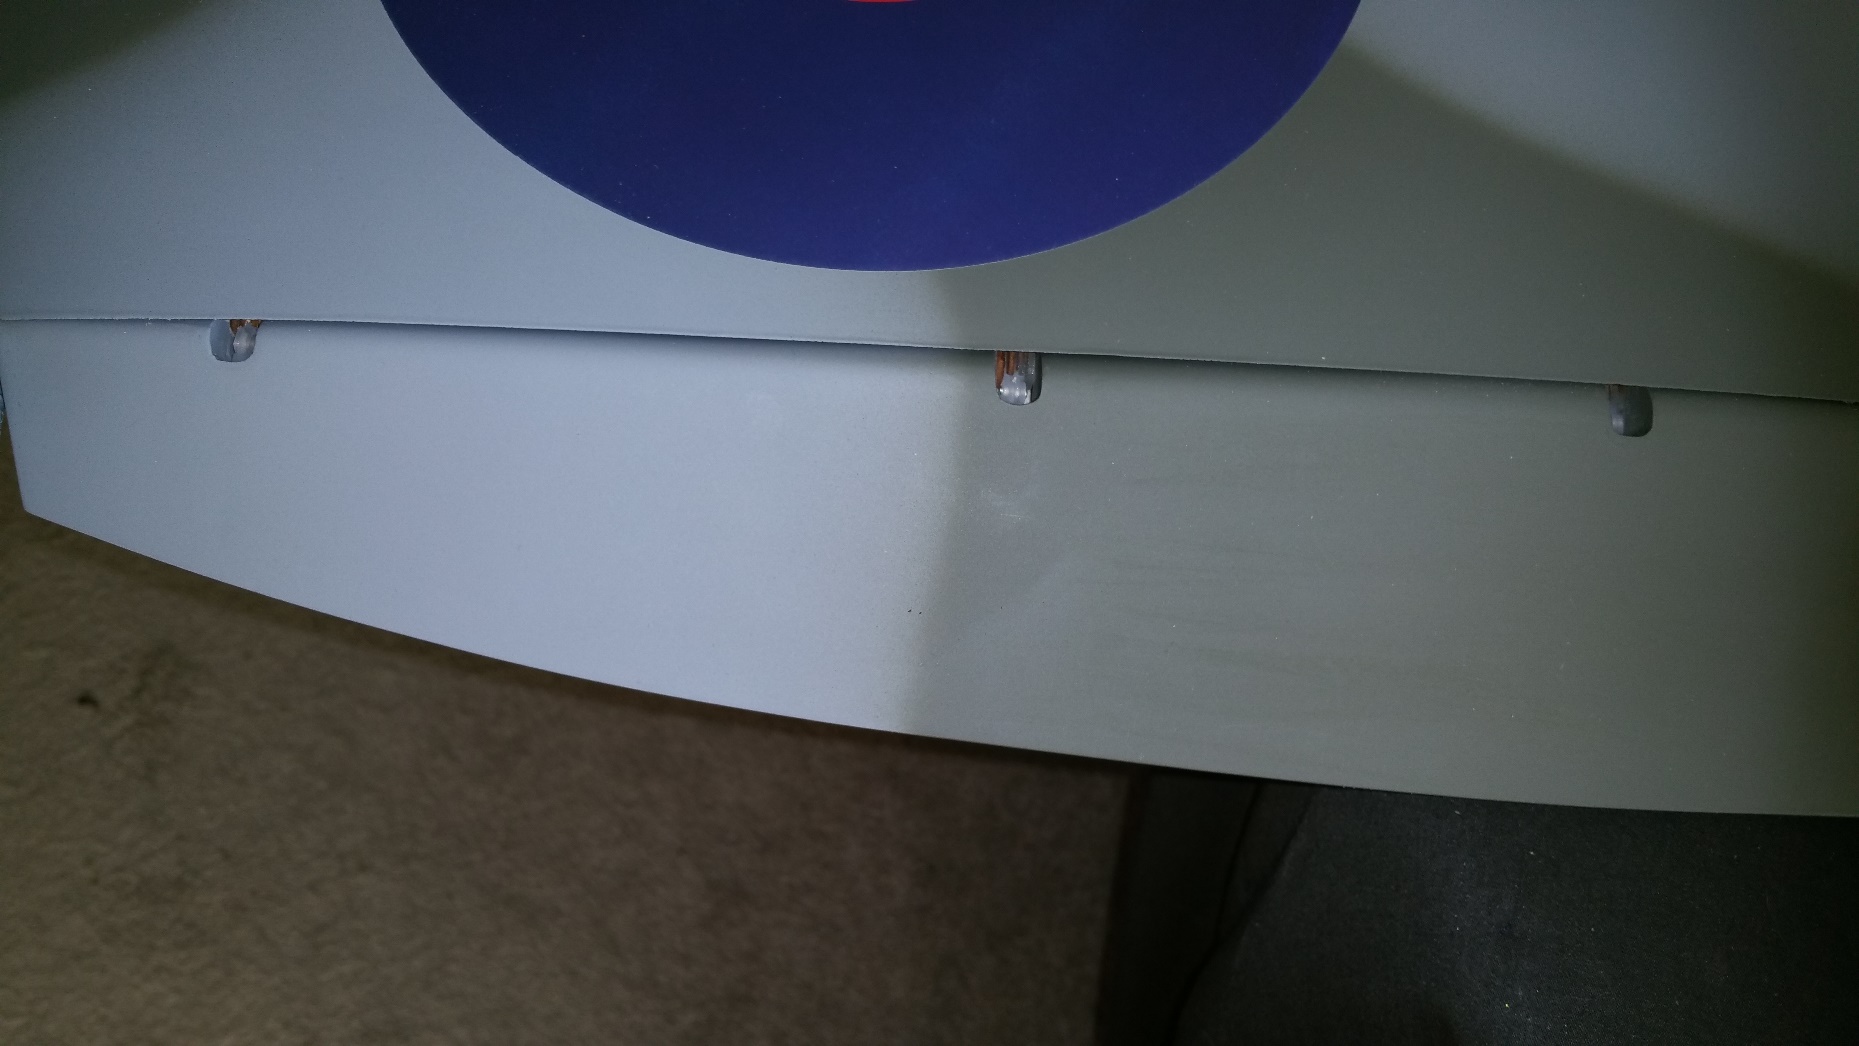
It's me again... (I think Ray Stevens made a song of that phrase) Assembly of the control surfaces are too easy!! Looking at the Pictures, you can tell the factory went the extra mile to install pin hinge alignment posts. These are made of laminated plywood that didn't stay laminated.... Dropped a few drops of CA to sandwich them together again and we were off and running. I didn't like having to paint the trailing edge wood in all the control surfaces, but it was about time I found something imperfect Heh... Painted all bare wood and let it dry before assembly, this is just my opinion. I don't know if not painting the surfaces would compromise something later or not, but I just as soon not have a potential issue later. Epoxy all pin hinges into post holes and make sure they are traveling in the right direction... You can do this after you trial fit to make sure everything aligns. The neat thing about these post holes, is the pins can only go in so far and that is where they need to be to align the hinges so the control surface moves without binding. Like I said too easy... In the past it has been a task to install hinges just so you wouldn't have any gaps between the trailing edge and control surface.. When satisfied with fit, use a drop of epoxy in each hole and install the control surface permanently.
 .
.
It's me again... (I think Ray Stevens made a song of that phrase) Assembly of the control surfaces are too easy!! Looking at the Pictures, you can tell the factory went the extra mile to install pin hinge alignment posts. These are made of laminated plywood that didn't stay laminated.... Dropped a few drops of CA to sandwich them together again and we were off and running. I didn't like having to paint the trailing edge wood in all the control surfaces, but it was about time I found something imperfect Heh... Painted all bare wood and let it dry before assembly, this is just my opinion. I don't know if not painting the surfaces would compromise something later or not, but I just as soon not have a potential issue later. Epoxy all pin hinges into post holes and make sure they are traveling in the right direction... You can do this after you trial fit to make sure everything aligns. The neat thing about these post holes, is the pins can only go in so far and that is where they need to be to align the hinges so the control surface moves without binding. Like I said too easy... In the past it has been a task to install hinges just so you wouldn't have any gaps between the trailing edge and control surface.. When satisfied with fit, use a drop of epoxy in each hole and install the control surface permanently.
#21

Join Date: Nov 2012
Location: Navarre, FL
Posts: 268
Likes: 0
Received 0 Likes
on
0 Posts
I guess I'm among the first to order this beast, and now I'm counting the days until that big box arrives on my doorstep! First off I want to thank Gus from Magnum for providing excellent customer support during this process. He's called me on no less than 3 occasions so far, to answer my questions! I ordered the EME 35 from him as well for this plane and, much to my surprise, it arrived yesterday (I figured he'd just ship everything in one big package).
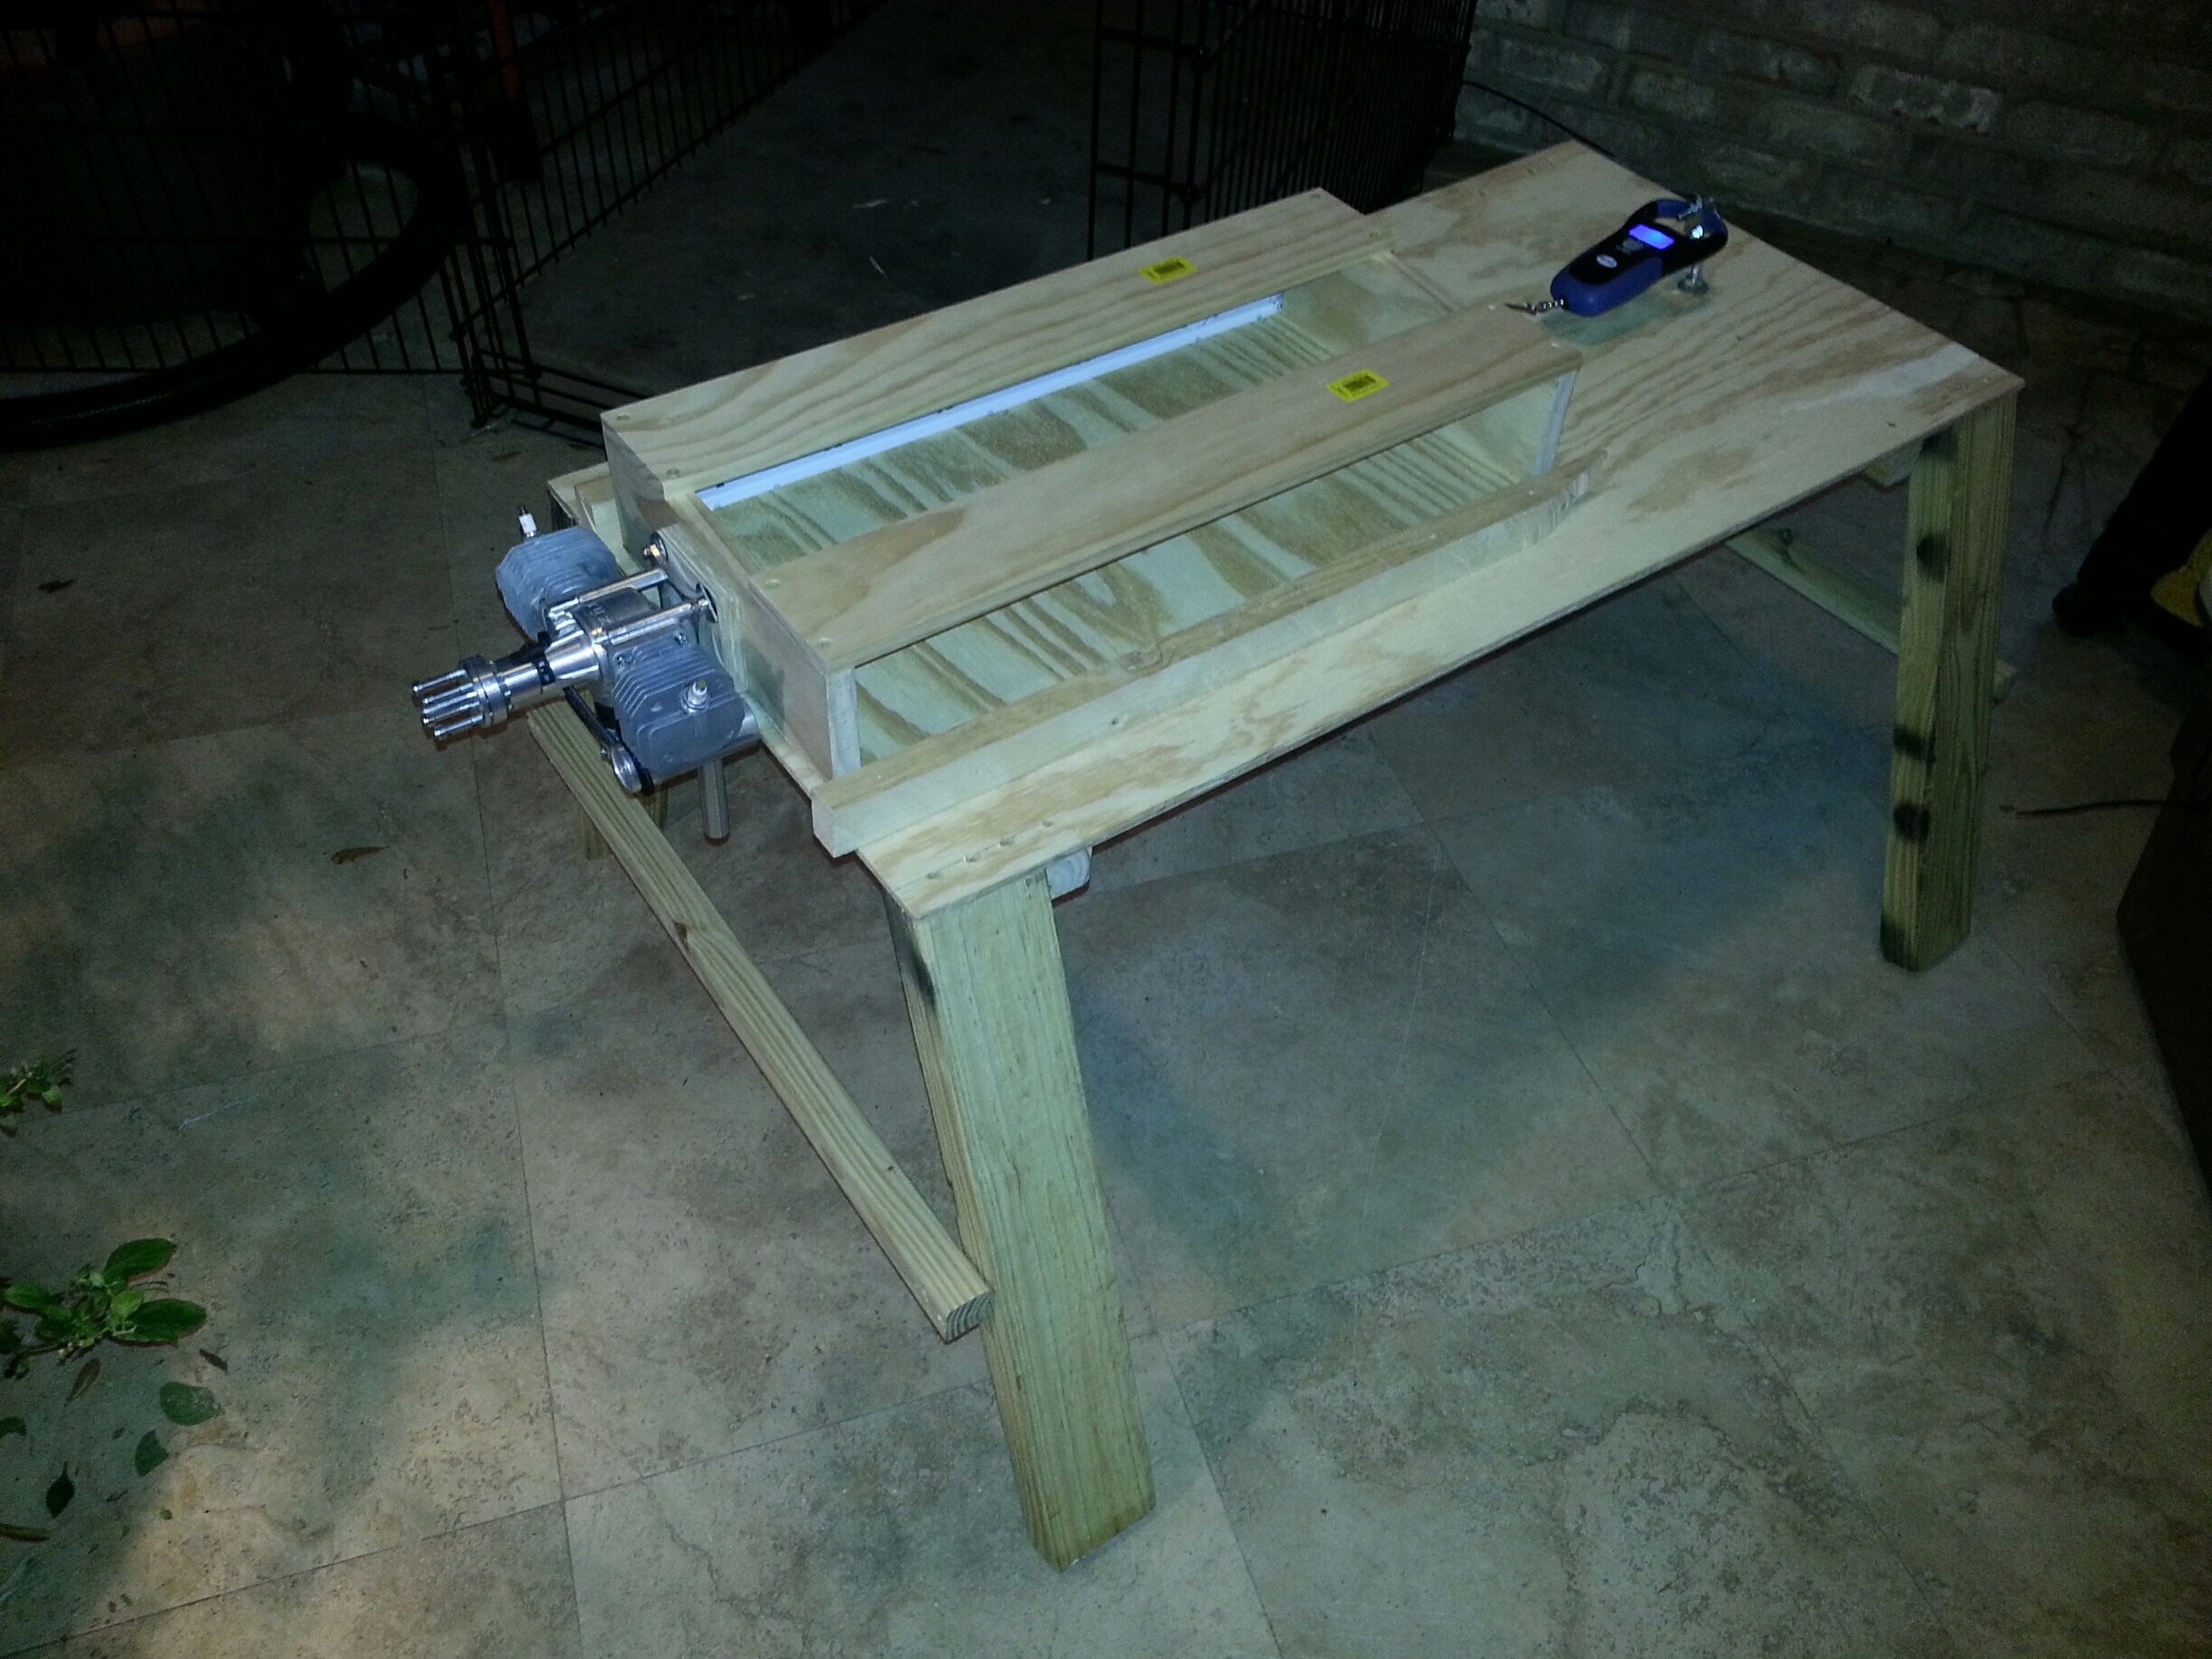
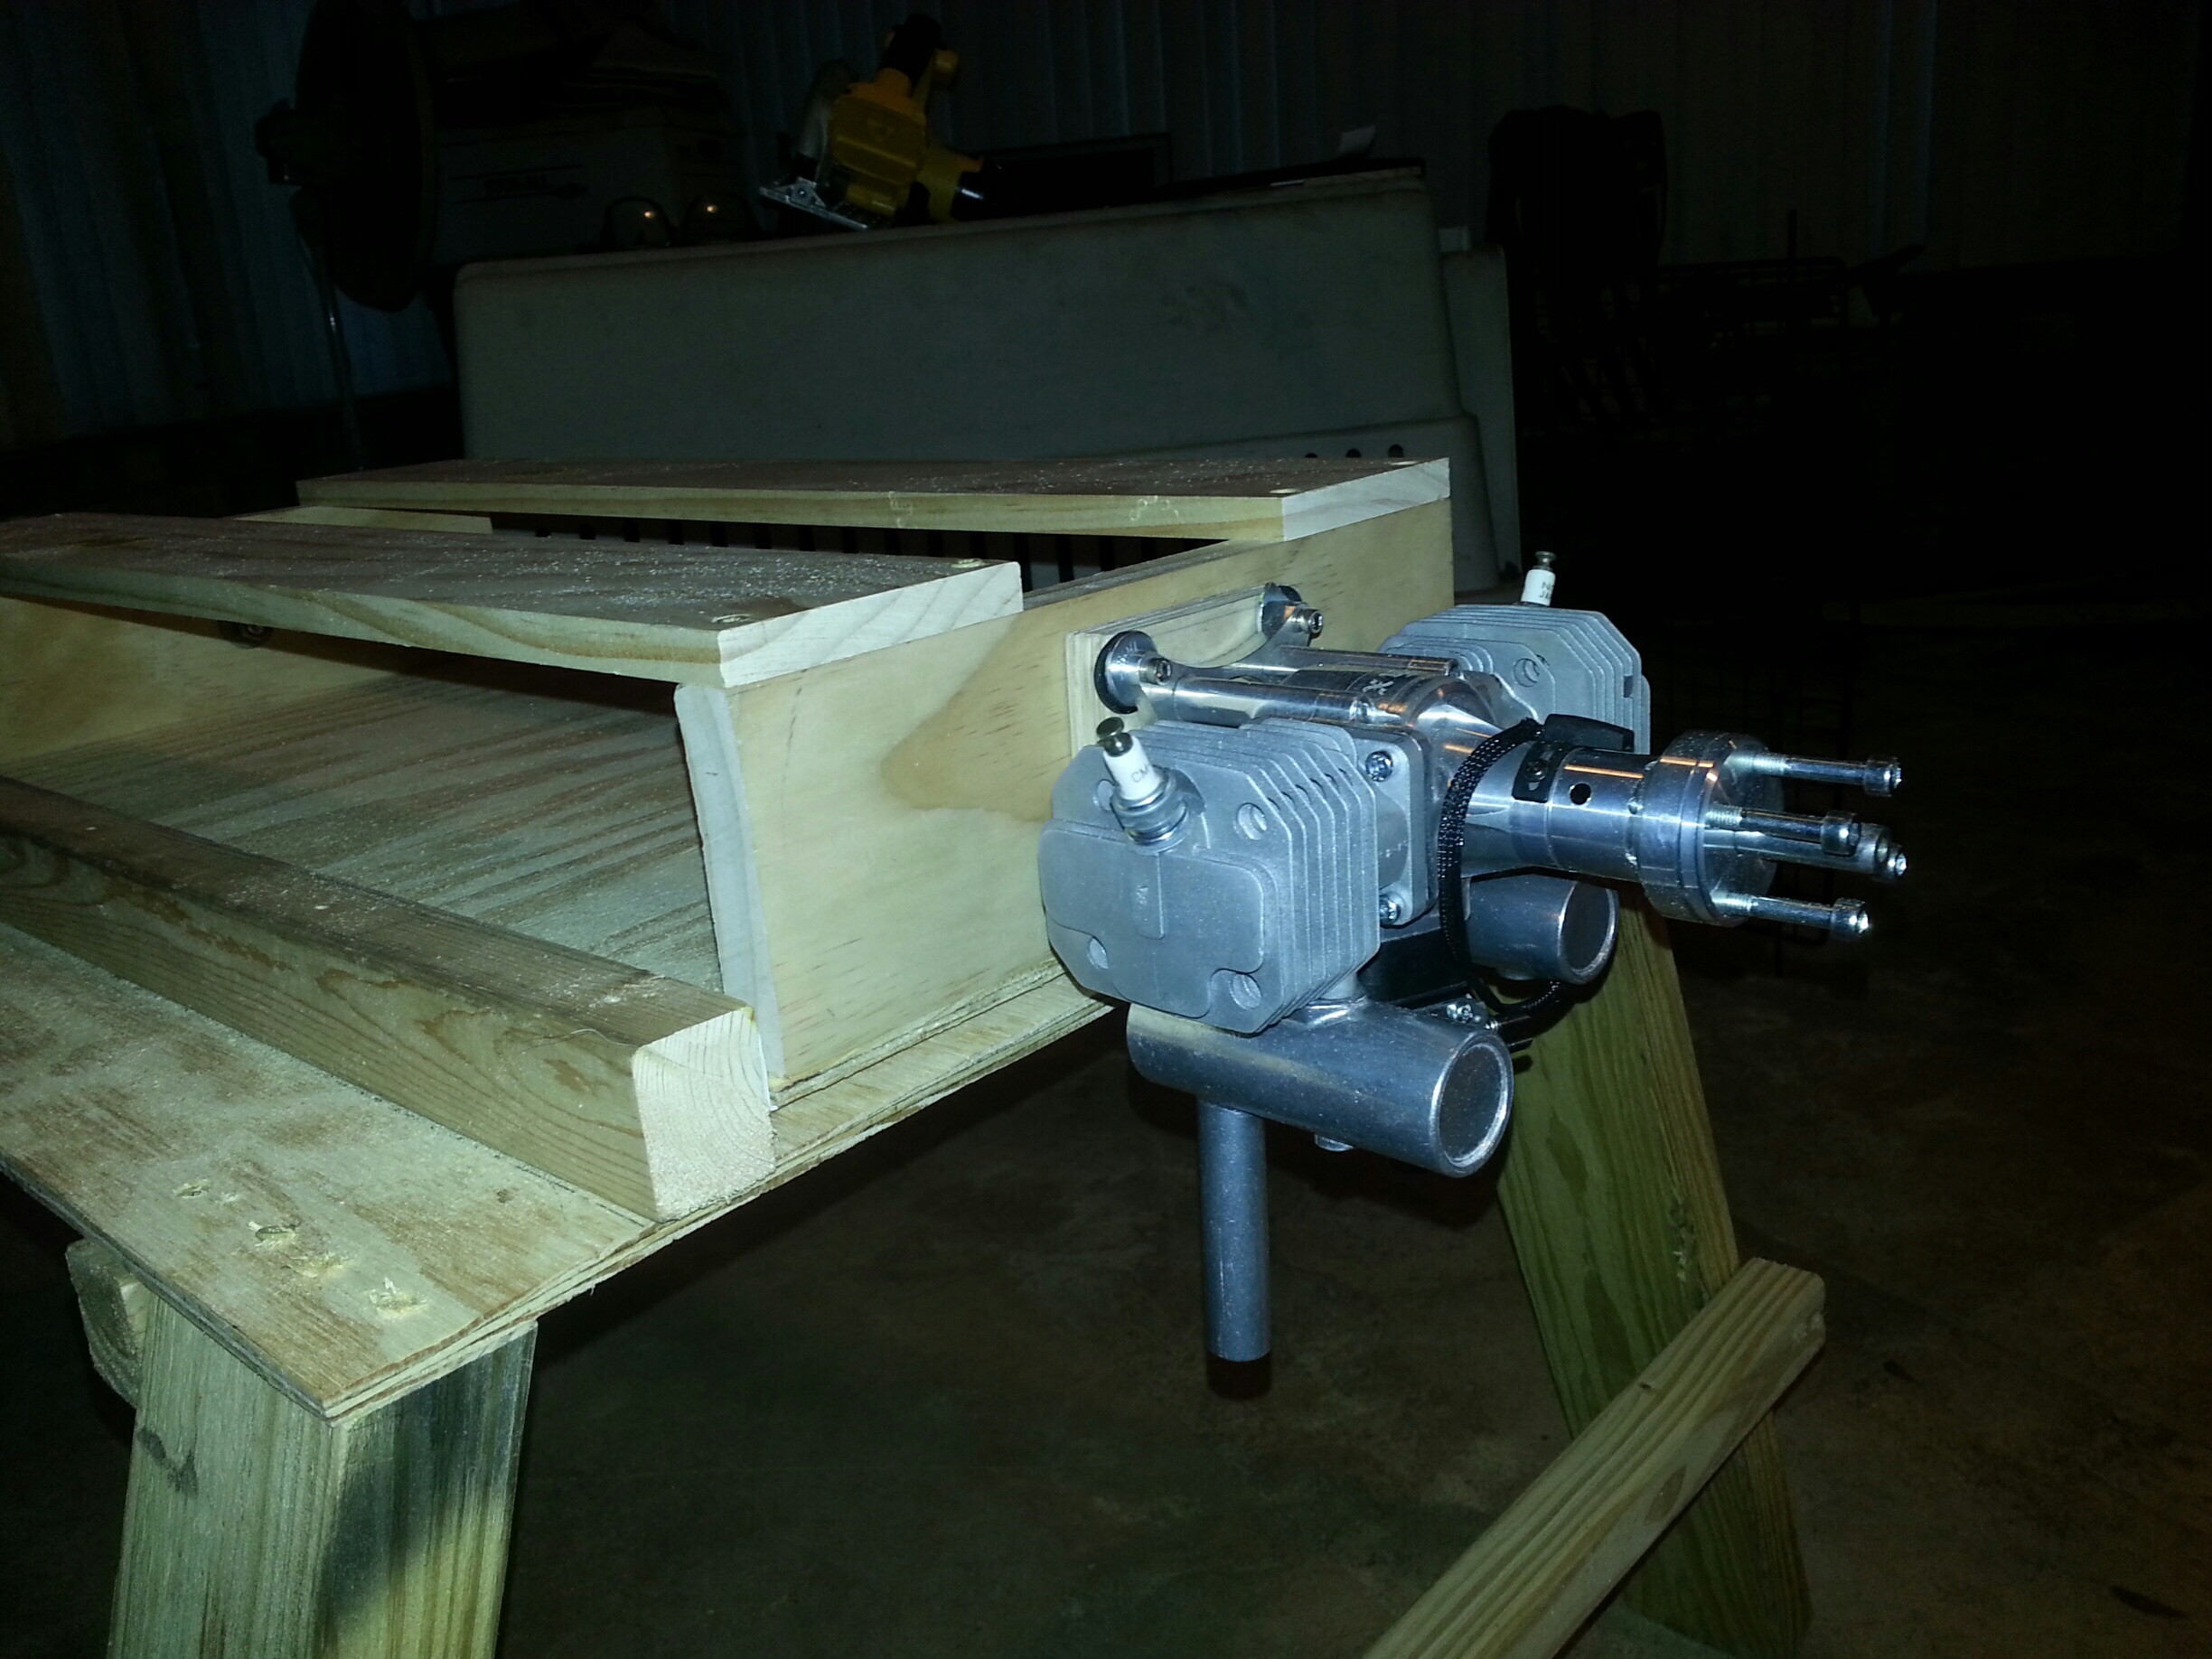
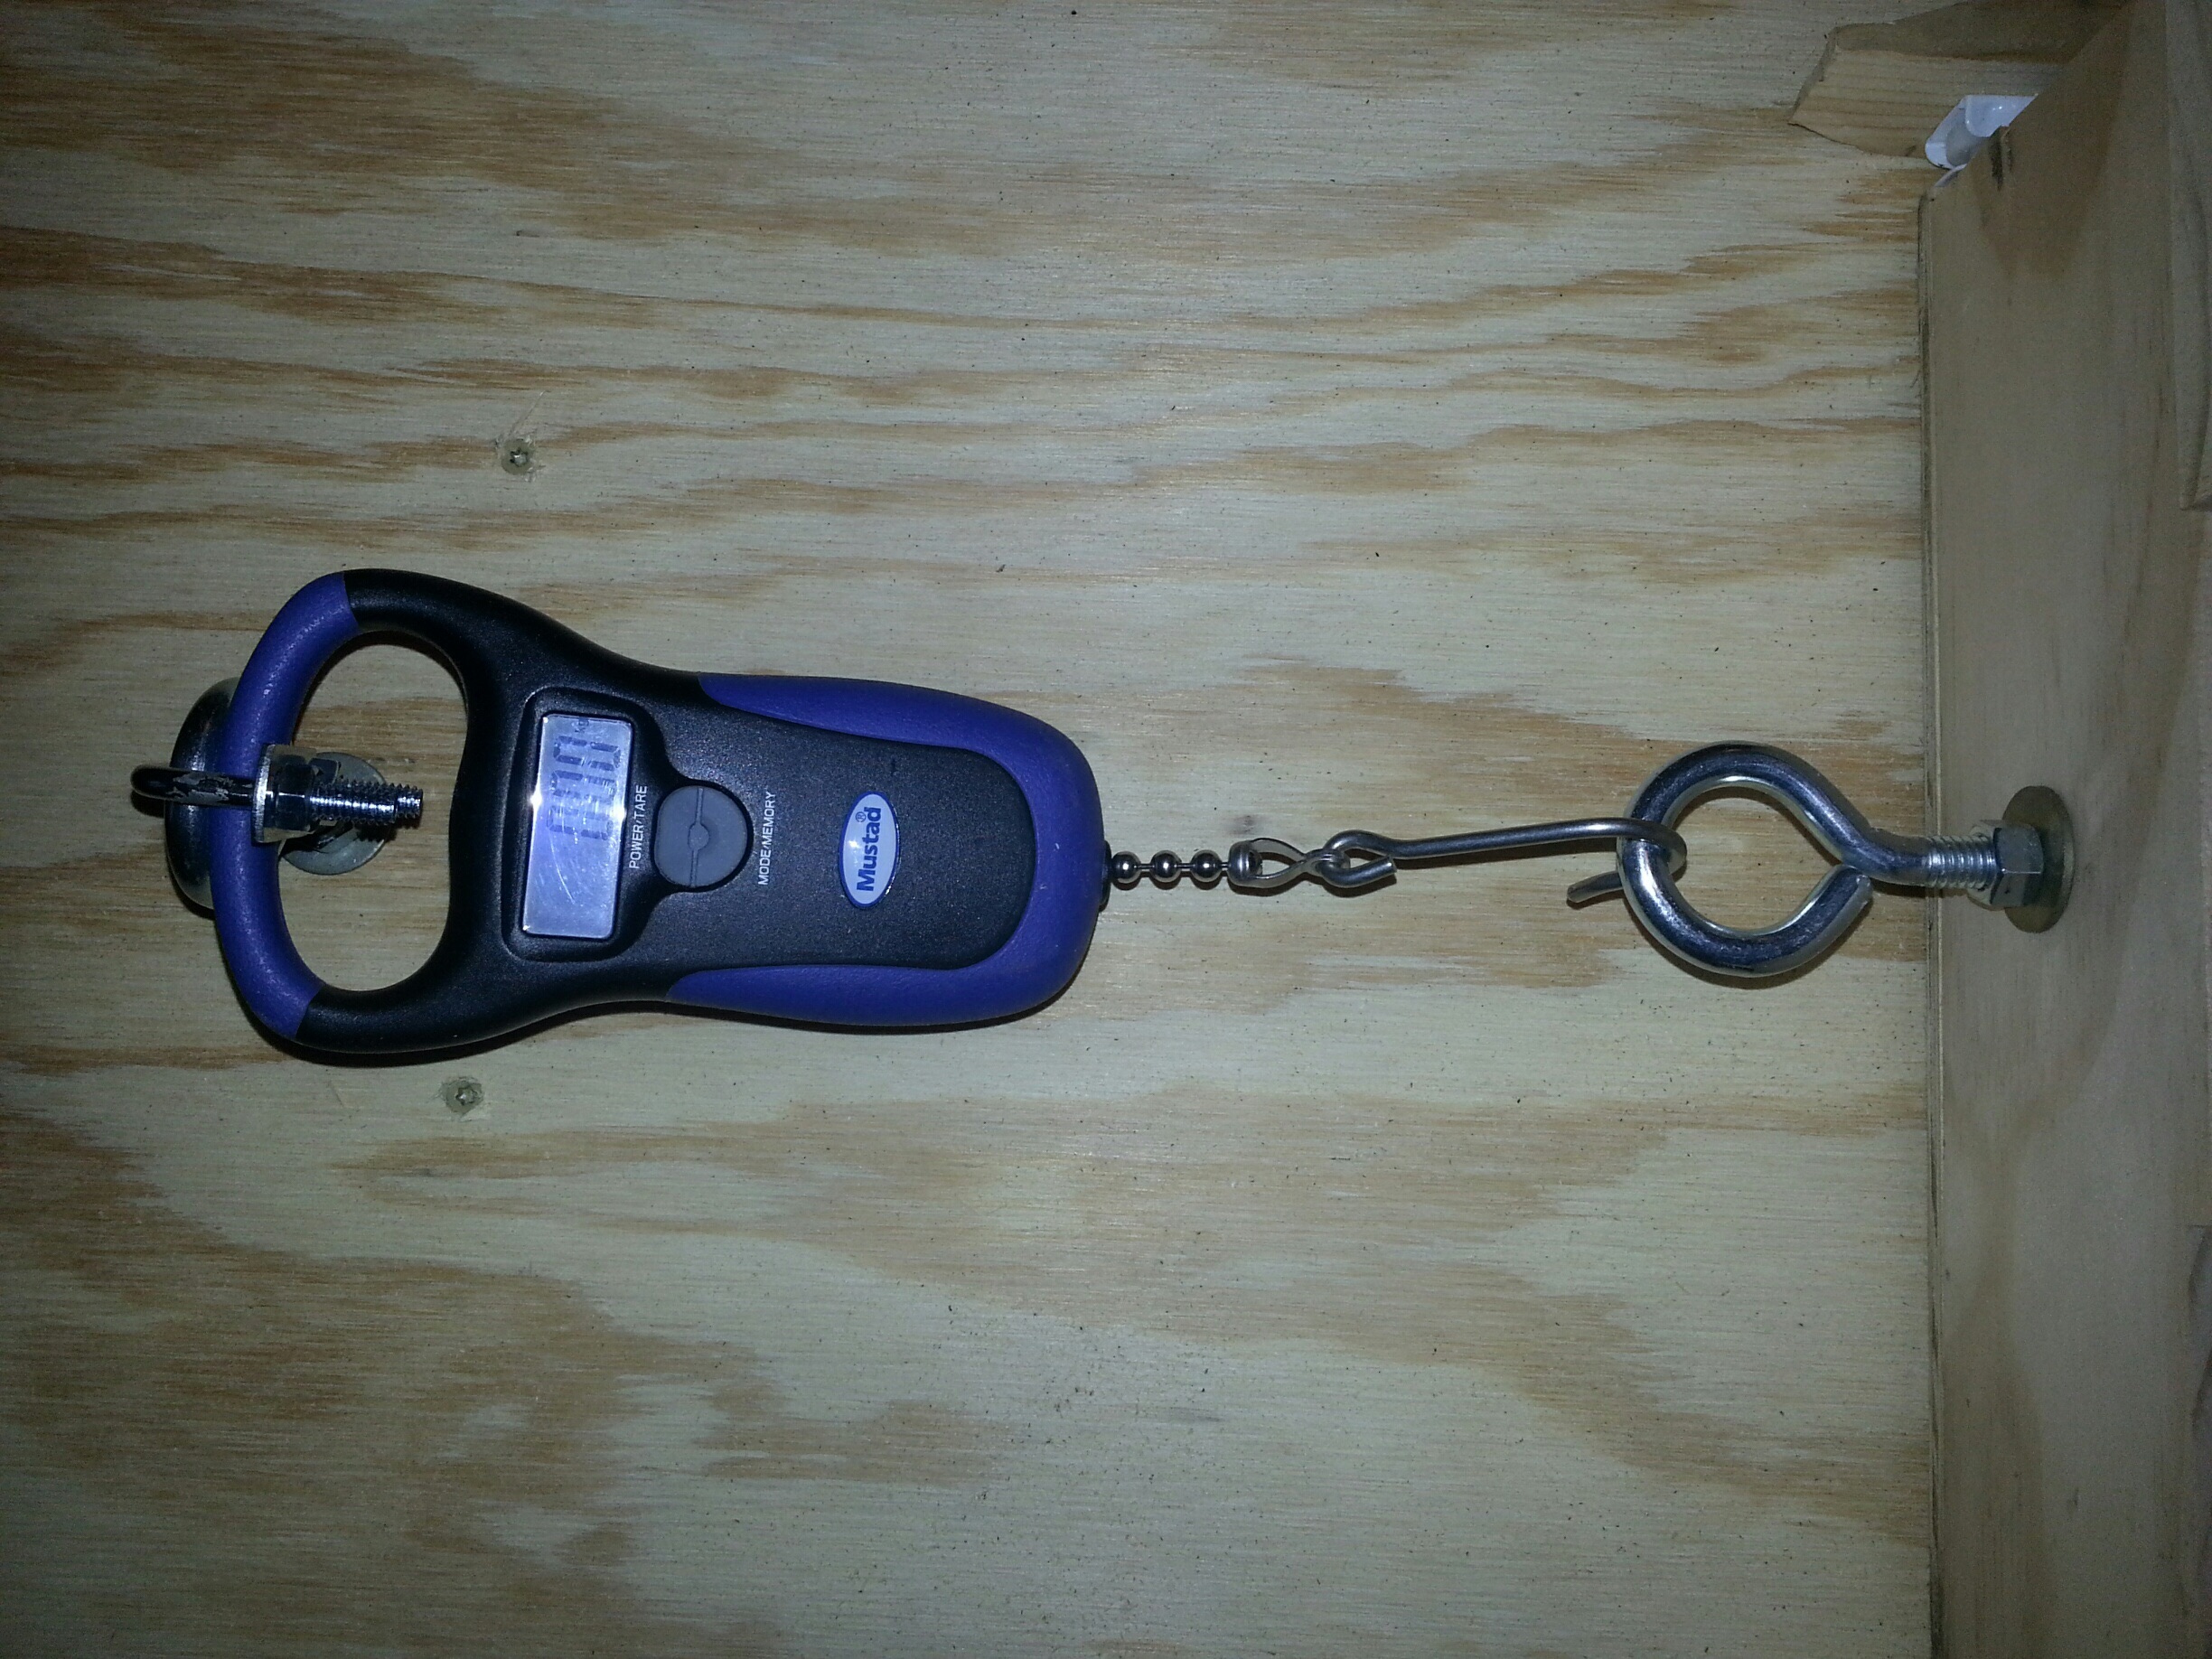
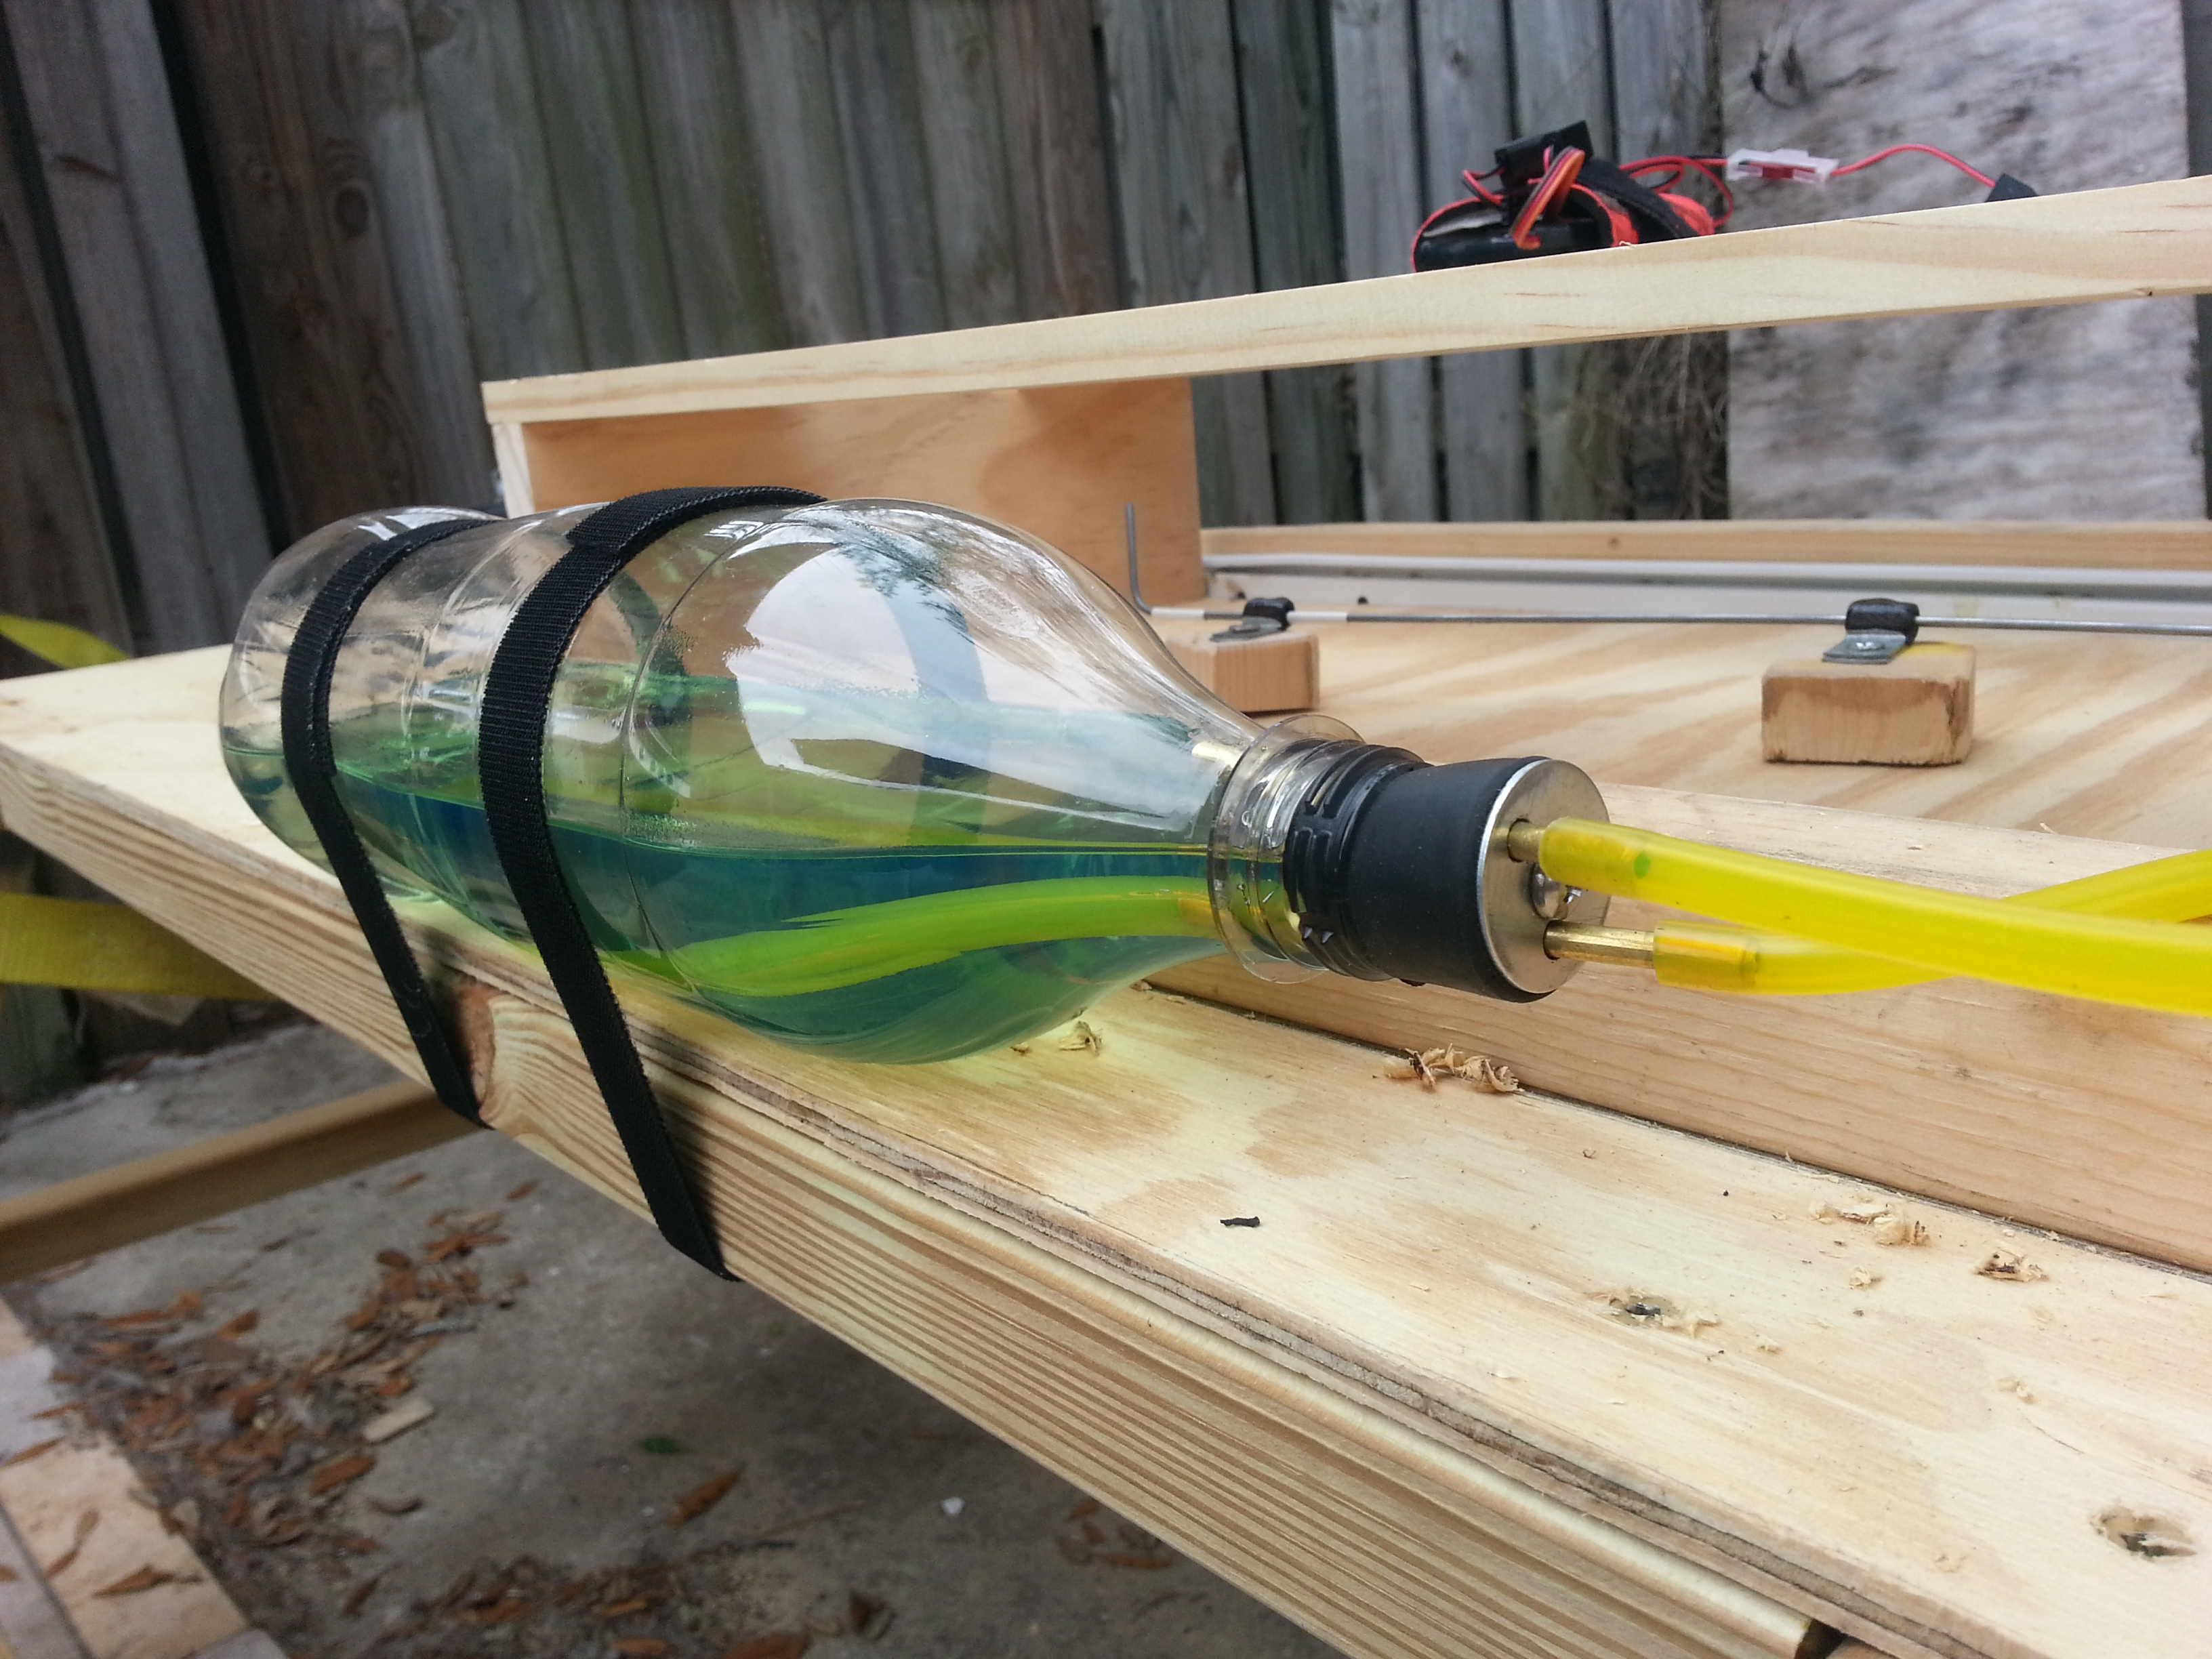
So, I have a run stand I put together recently. I wanted to compare the amount of thrust I was getting from different props on another motor (XYZ 53CC). I ended up building a "sled" I mounted to a base using drawer rollers and used a digital fish scale as a crude force meter.
I slapped the EME 35 on there and cranked her up! First off, the EME is the easiest starting motor I've owned...(that includes Evos, DLEs, and XYZs). That's a breathe of fresh air as I nearly wore my shoulder out on the XYZ. As the motor wasn't expected and I don't have a decent hobby shop near by, I used the only spare prop I had on hand, a Xoar 18-8 (not the optimal prop for this motor). With that prop and a 2500 ma 6V NIMH, the EME pulled a peak 16lb on the fish scale. Factoring in significant friction from my drawer roller set-up, the fact that there's no way I mounted the motor and linkage to the scale perfectly in line, the fact that it was the first run in the motor (rings aren't worn in and I didn't have the needles at their optimal adjustment), and the fact that I had the motor underpropped, it's not unreasonable to believe I could realize 18+lb of static thrust when everything's dialed in. Here are some shots of my stand under construction with the XYZ installed (ran out of daylight today)...I'll post pix of the full up unit with the EME installed, and the whole thing in action (including numbers on the scale) tomorrow.
Last edited by zrooster; 01-21-2015 at 06:58 PM.
#22

Join Date: Nov 2012
Location: Navarre, FL
Posts: 268
Likes: 0
Received 0 Likes
on
0 Posts
As promised here's my full set-up with the EME installed and running. My lovely assistant you see in some of the shots is Stryker...he's not allowed to be out there while it's running, but he likes to help during set-up!
I tried to get a shot of it when it hit 16lb...that takes some throttle tweaking and my current set-up isn't too precise. Got lots of shots with it at 15 (one of which is included).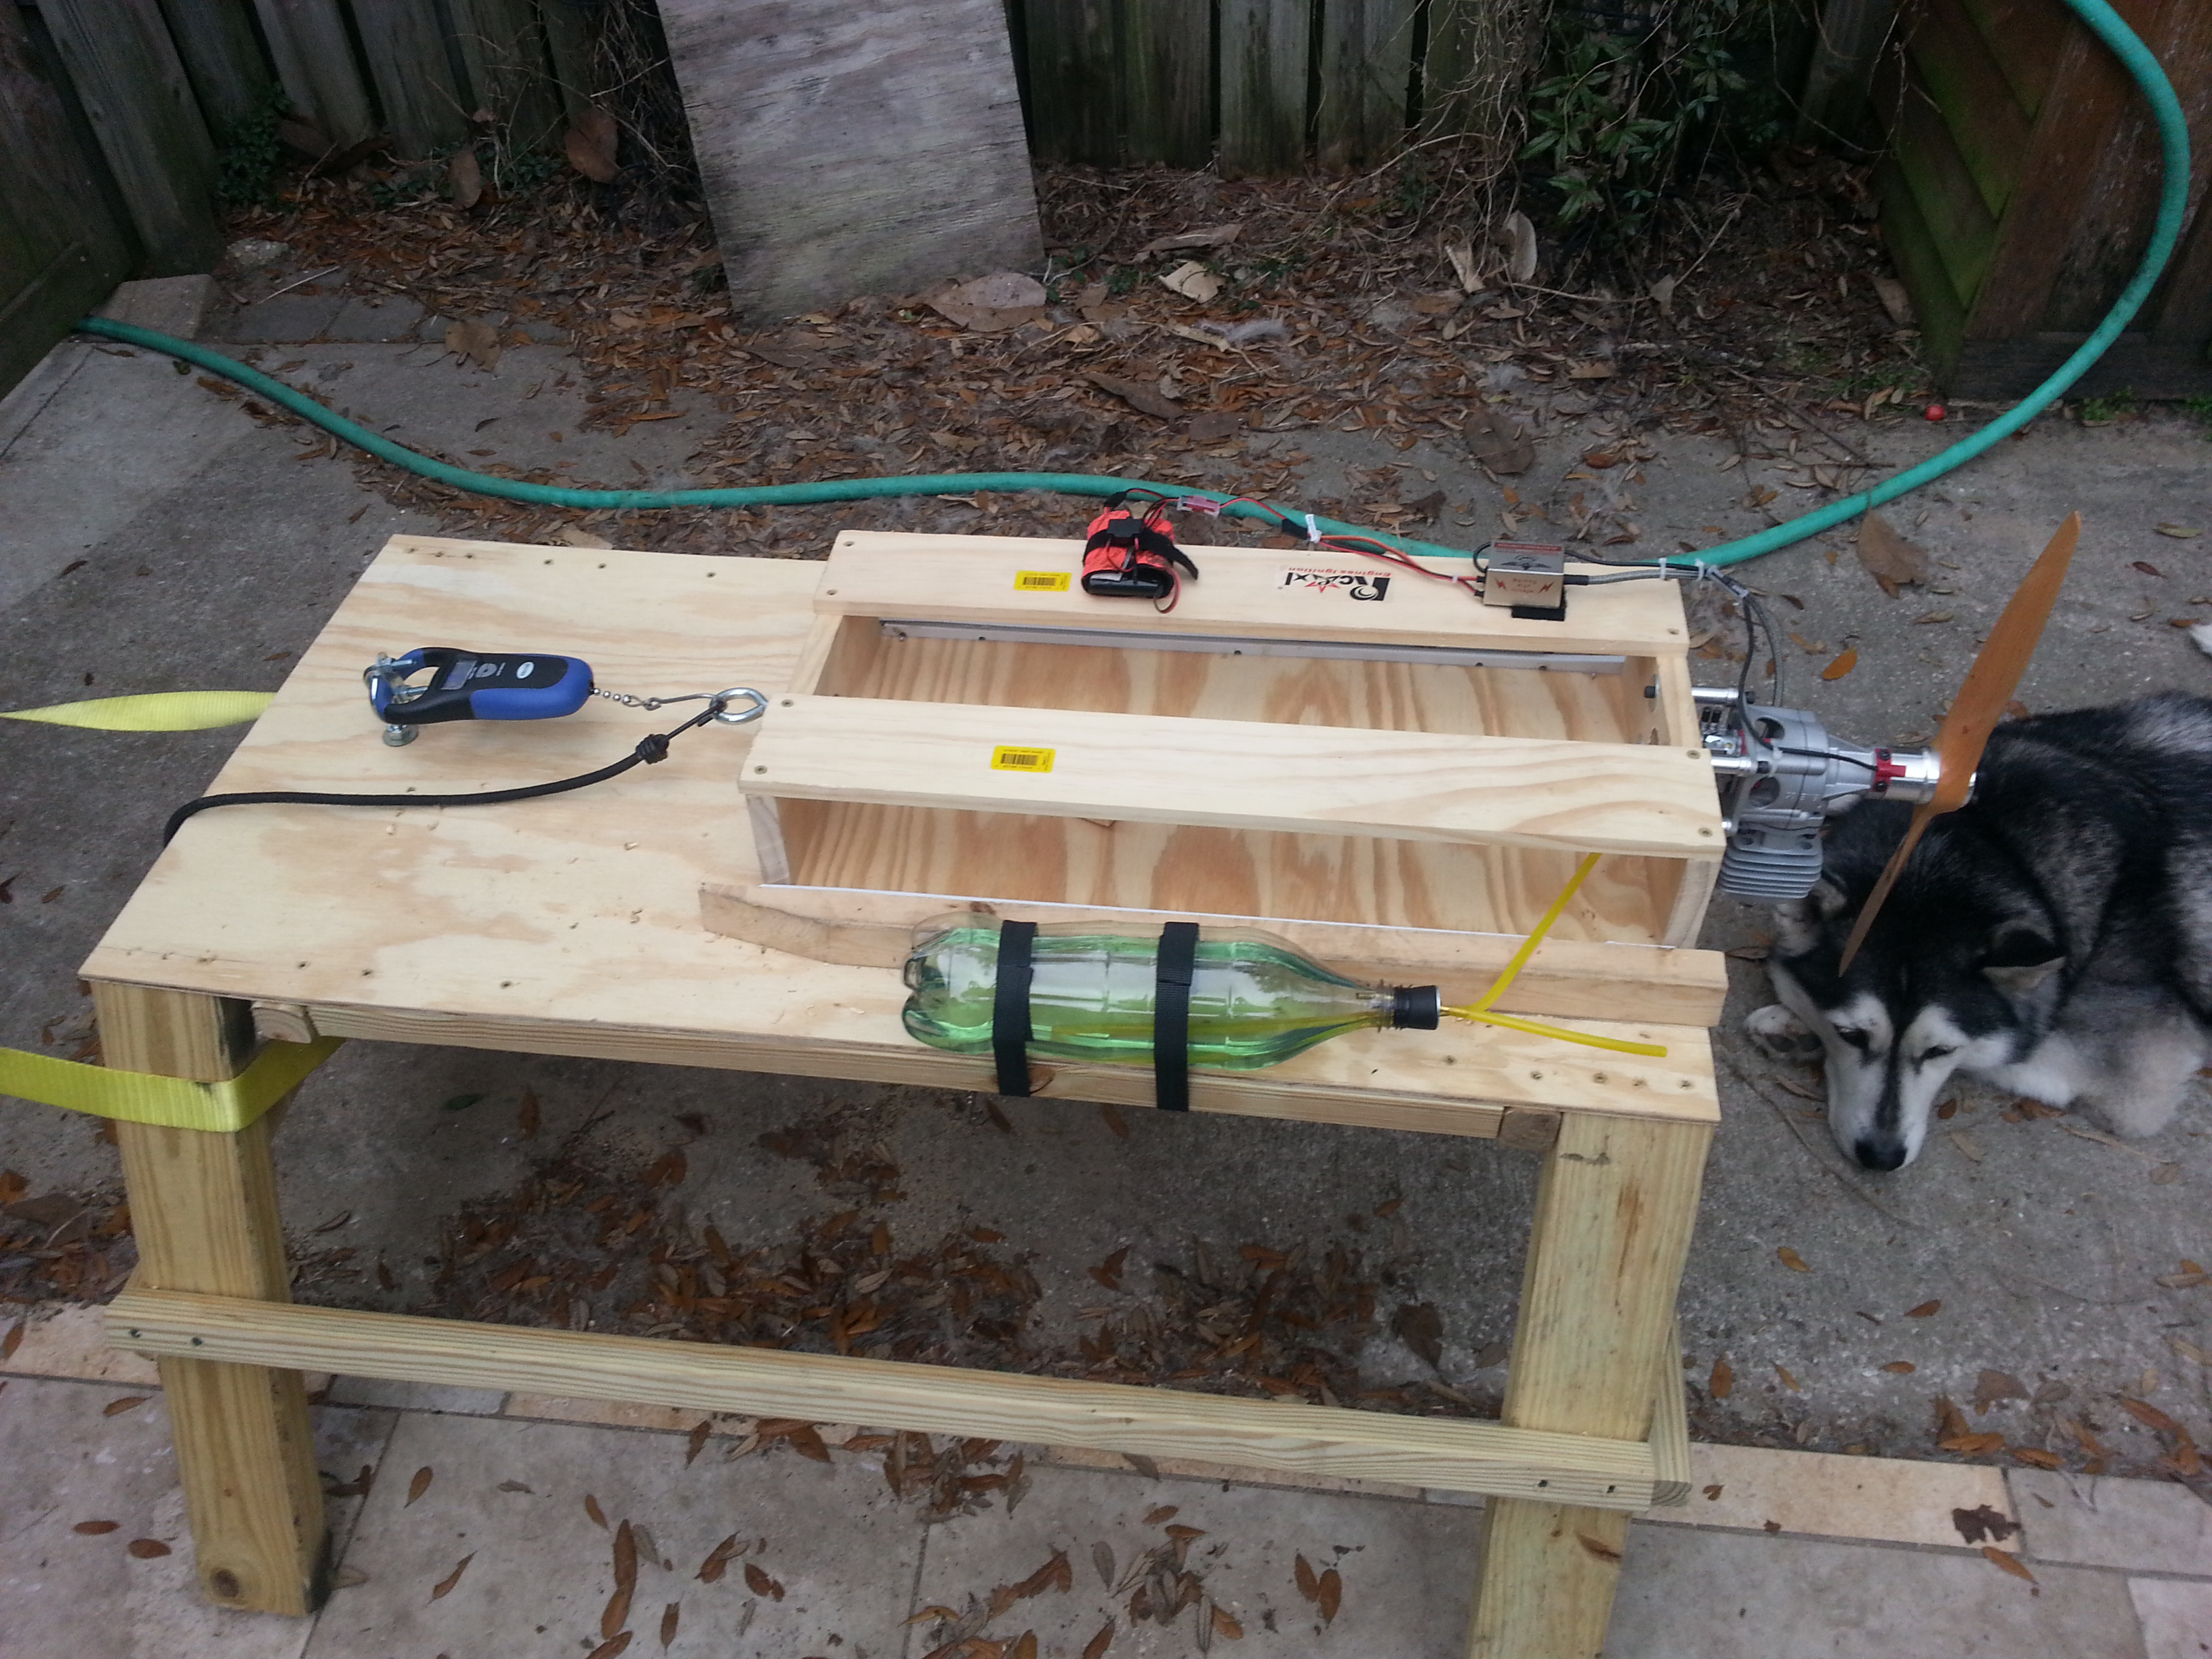
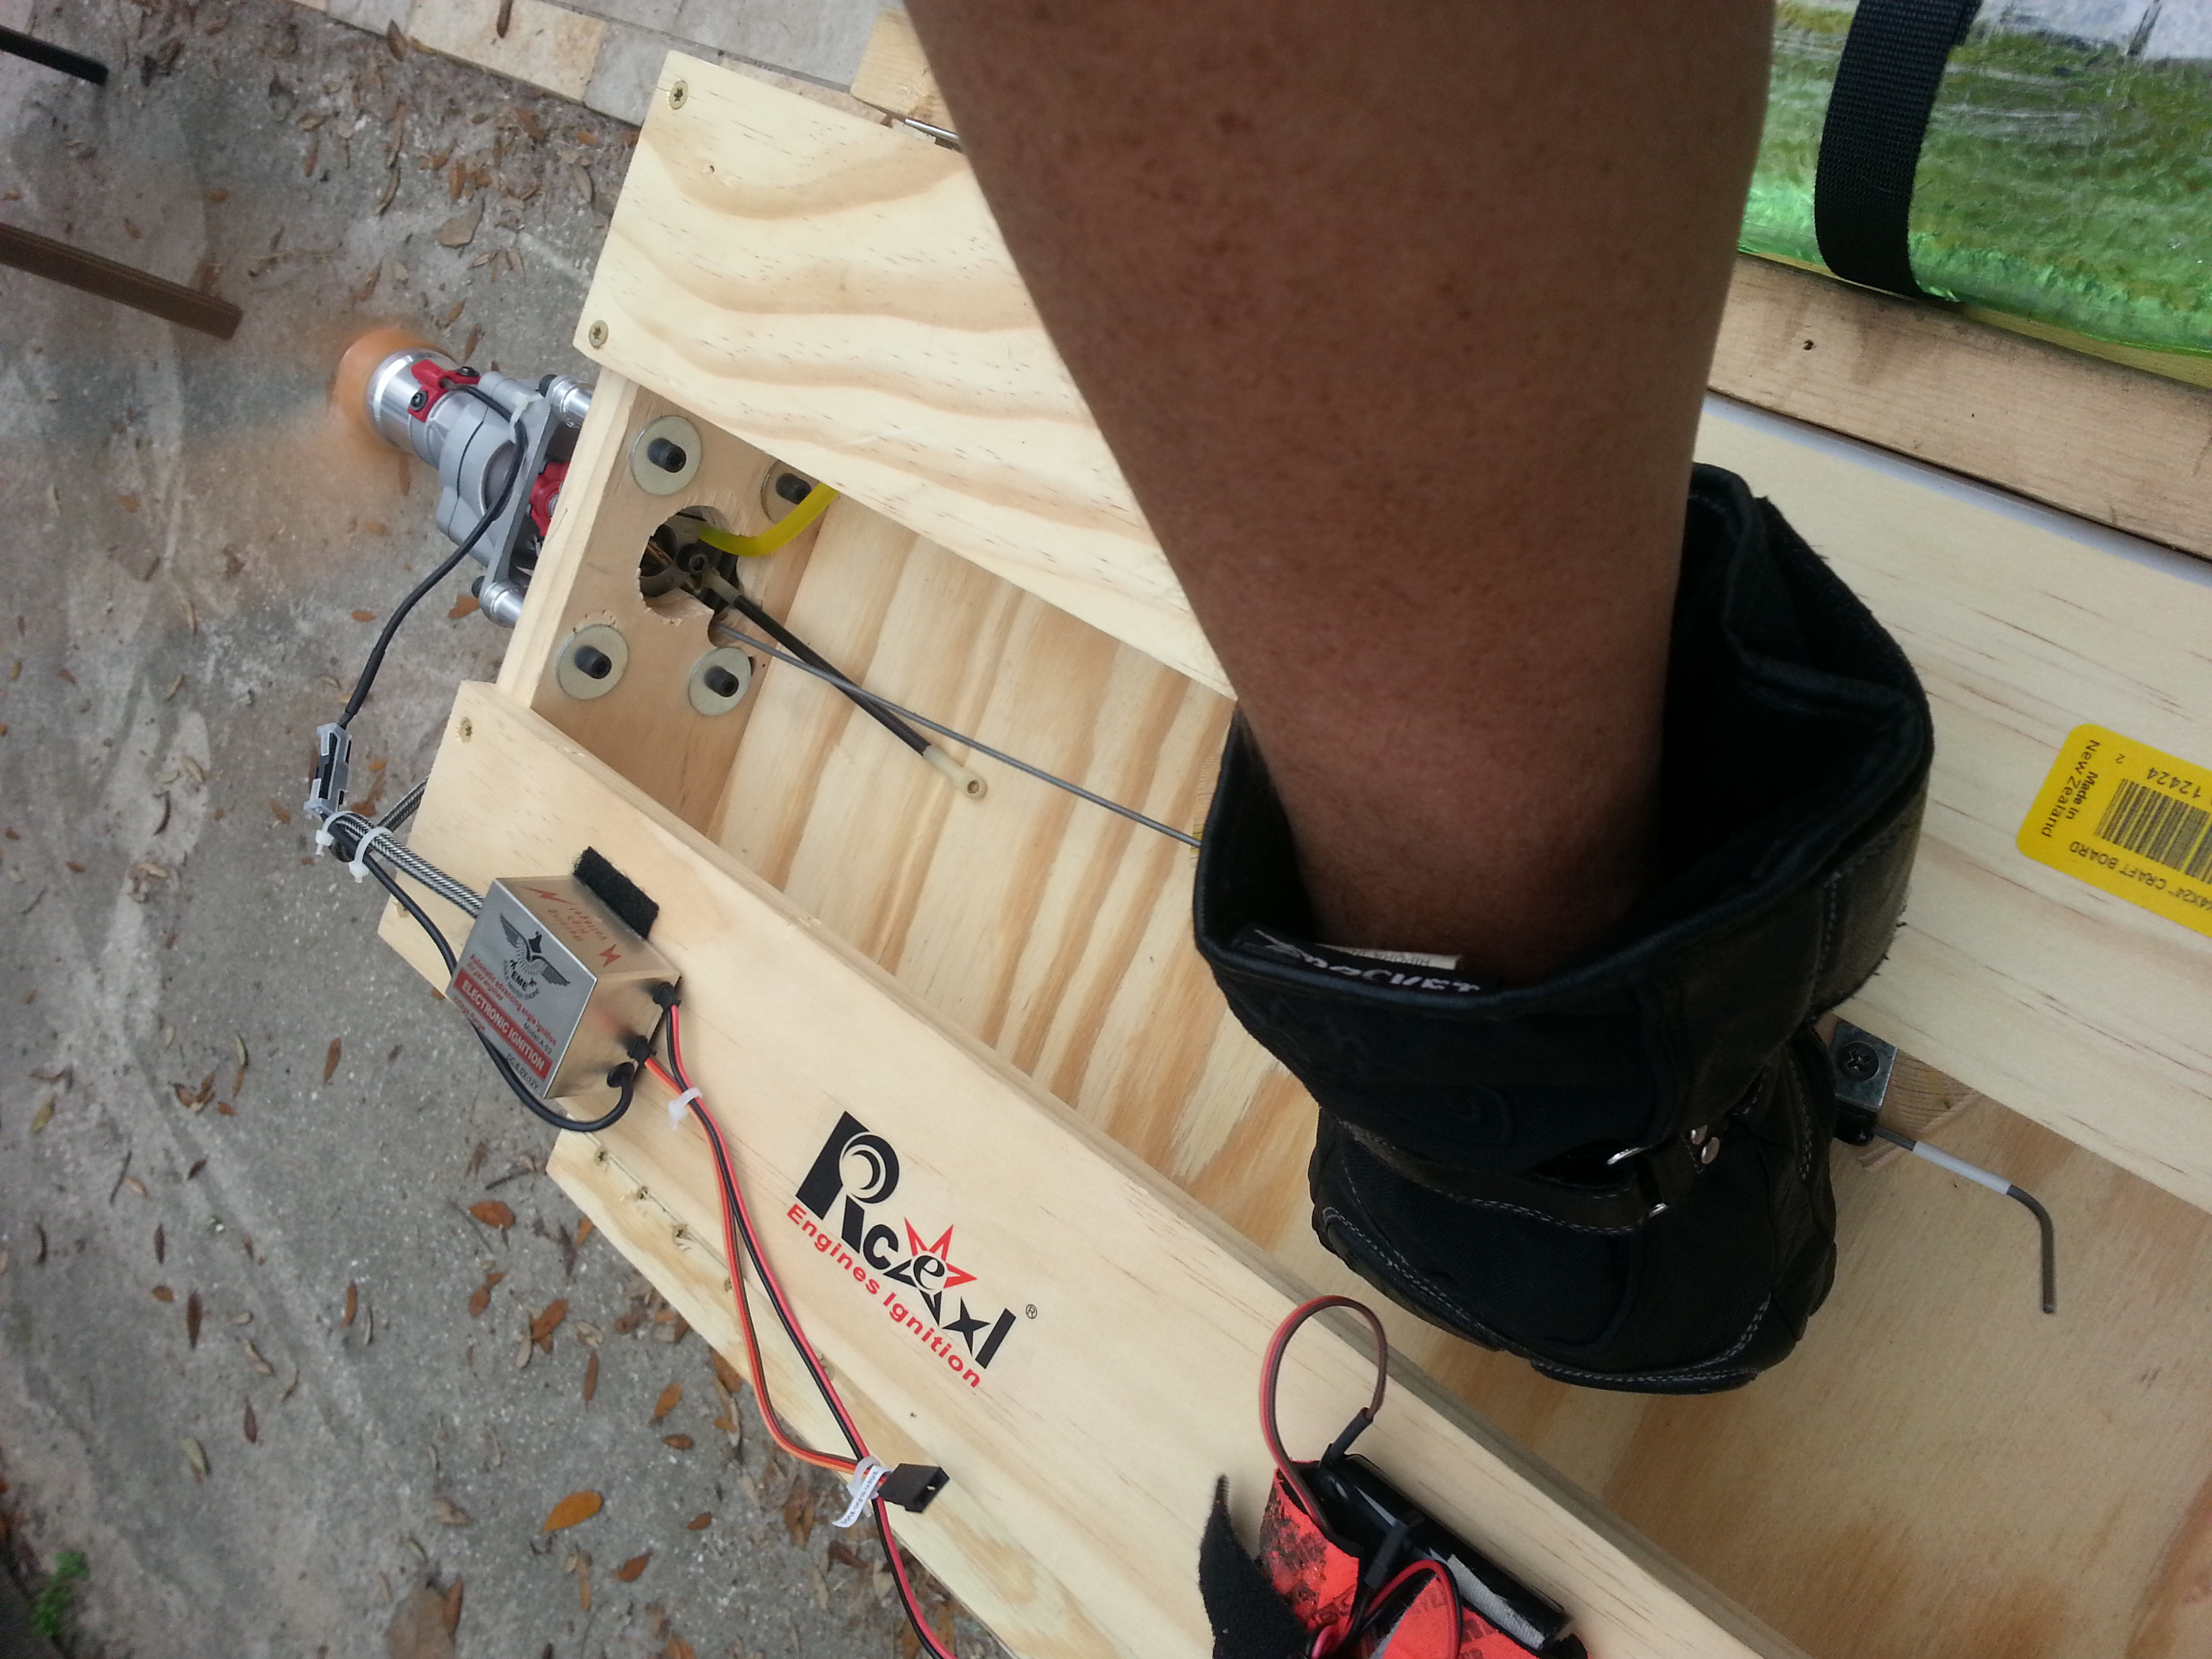
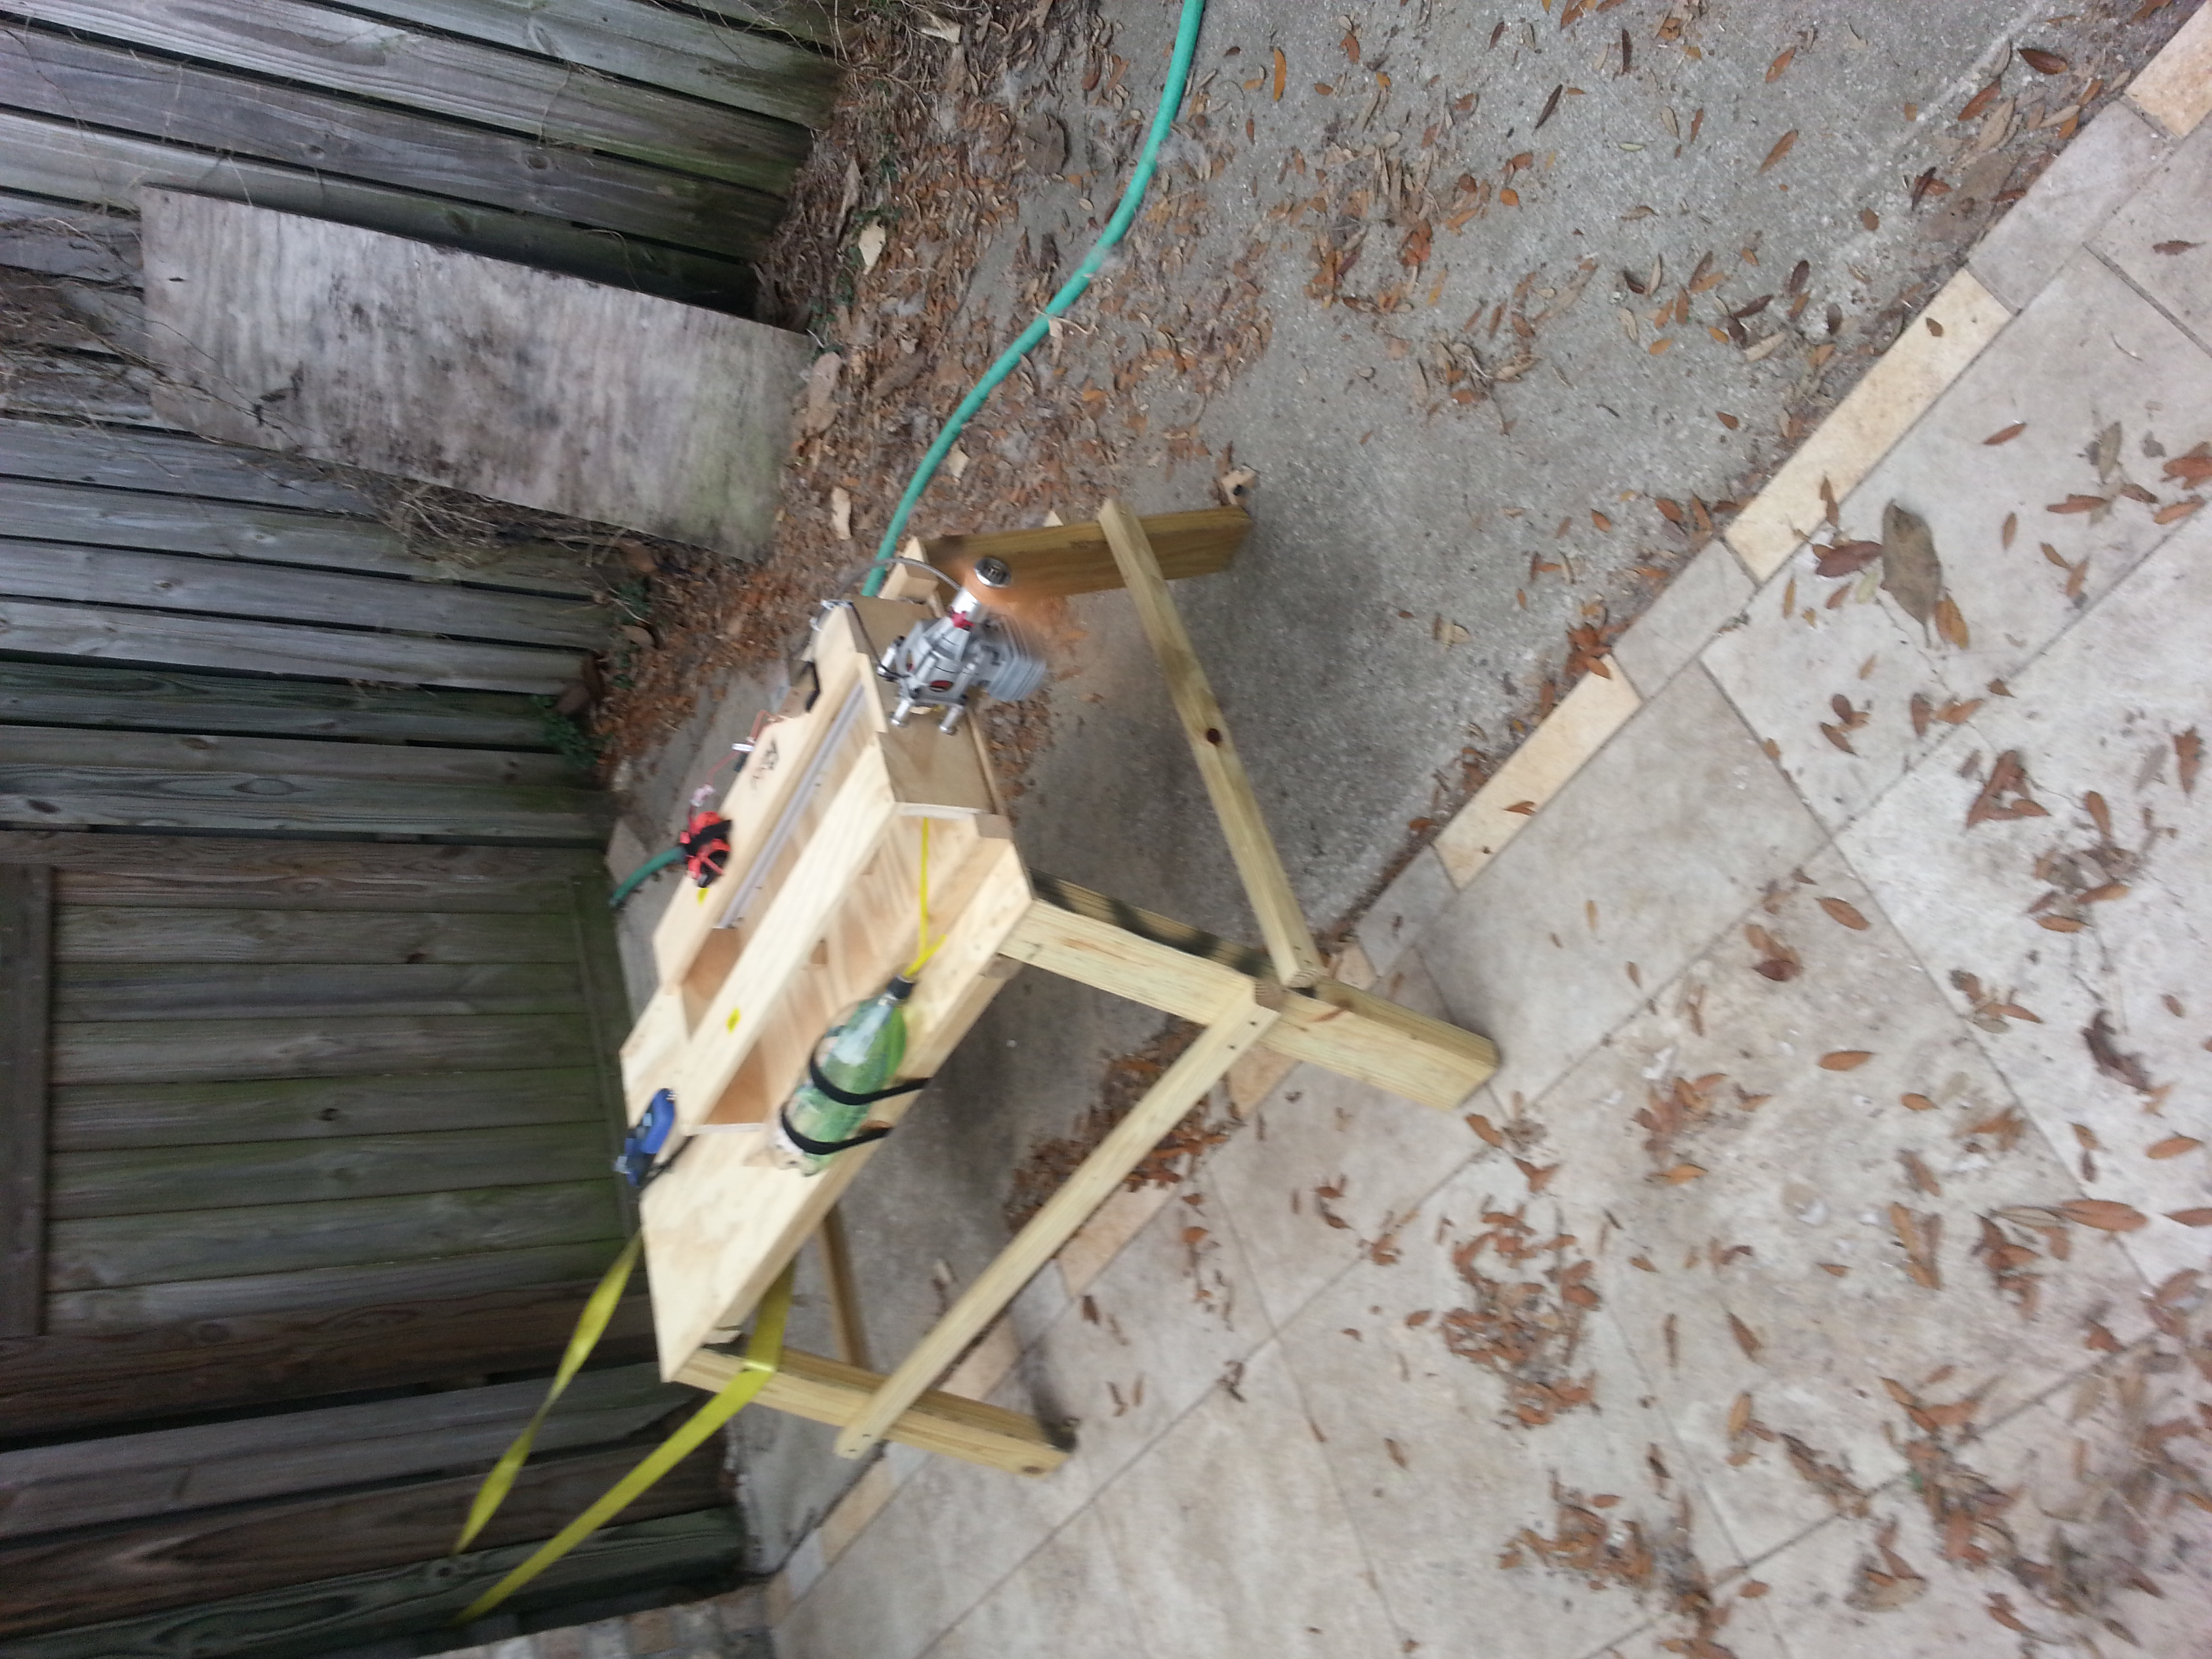
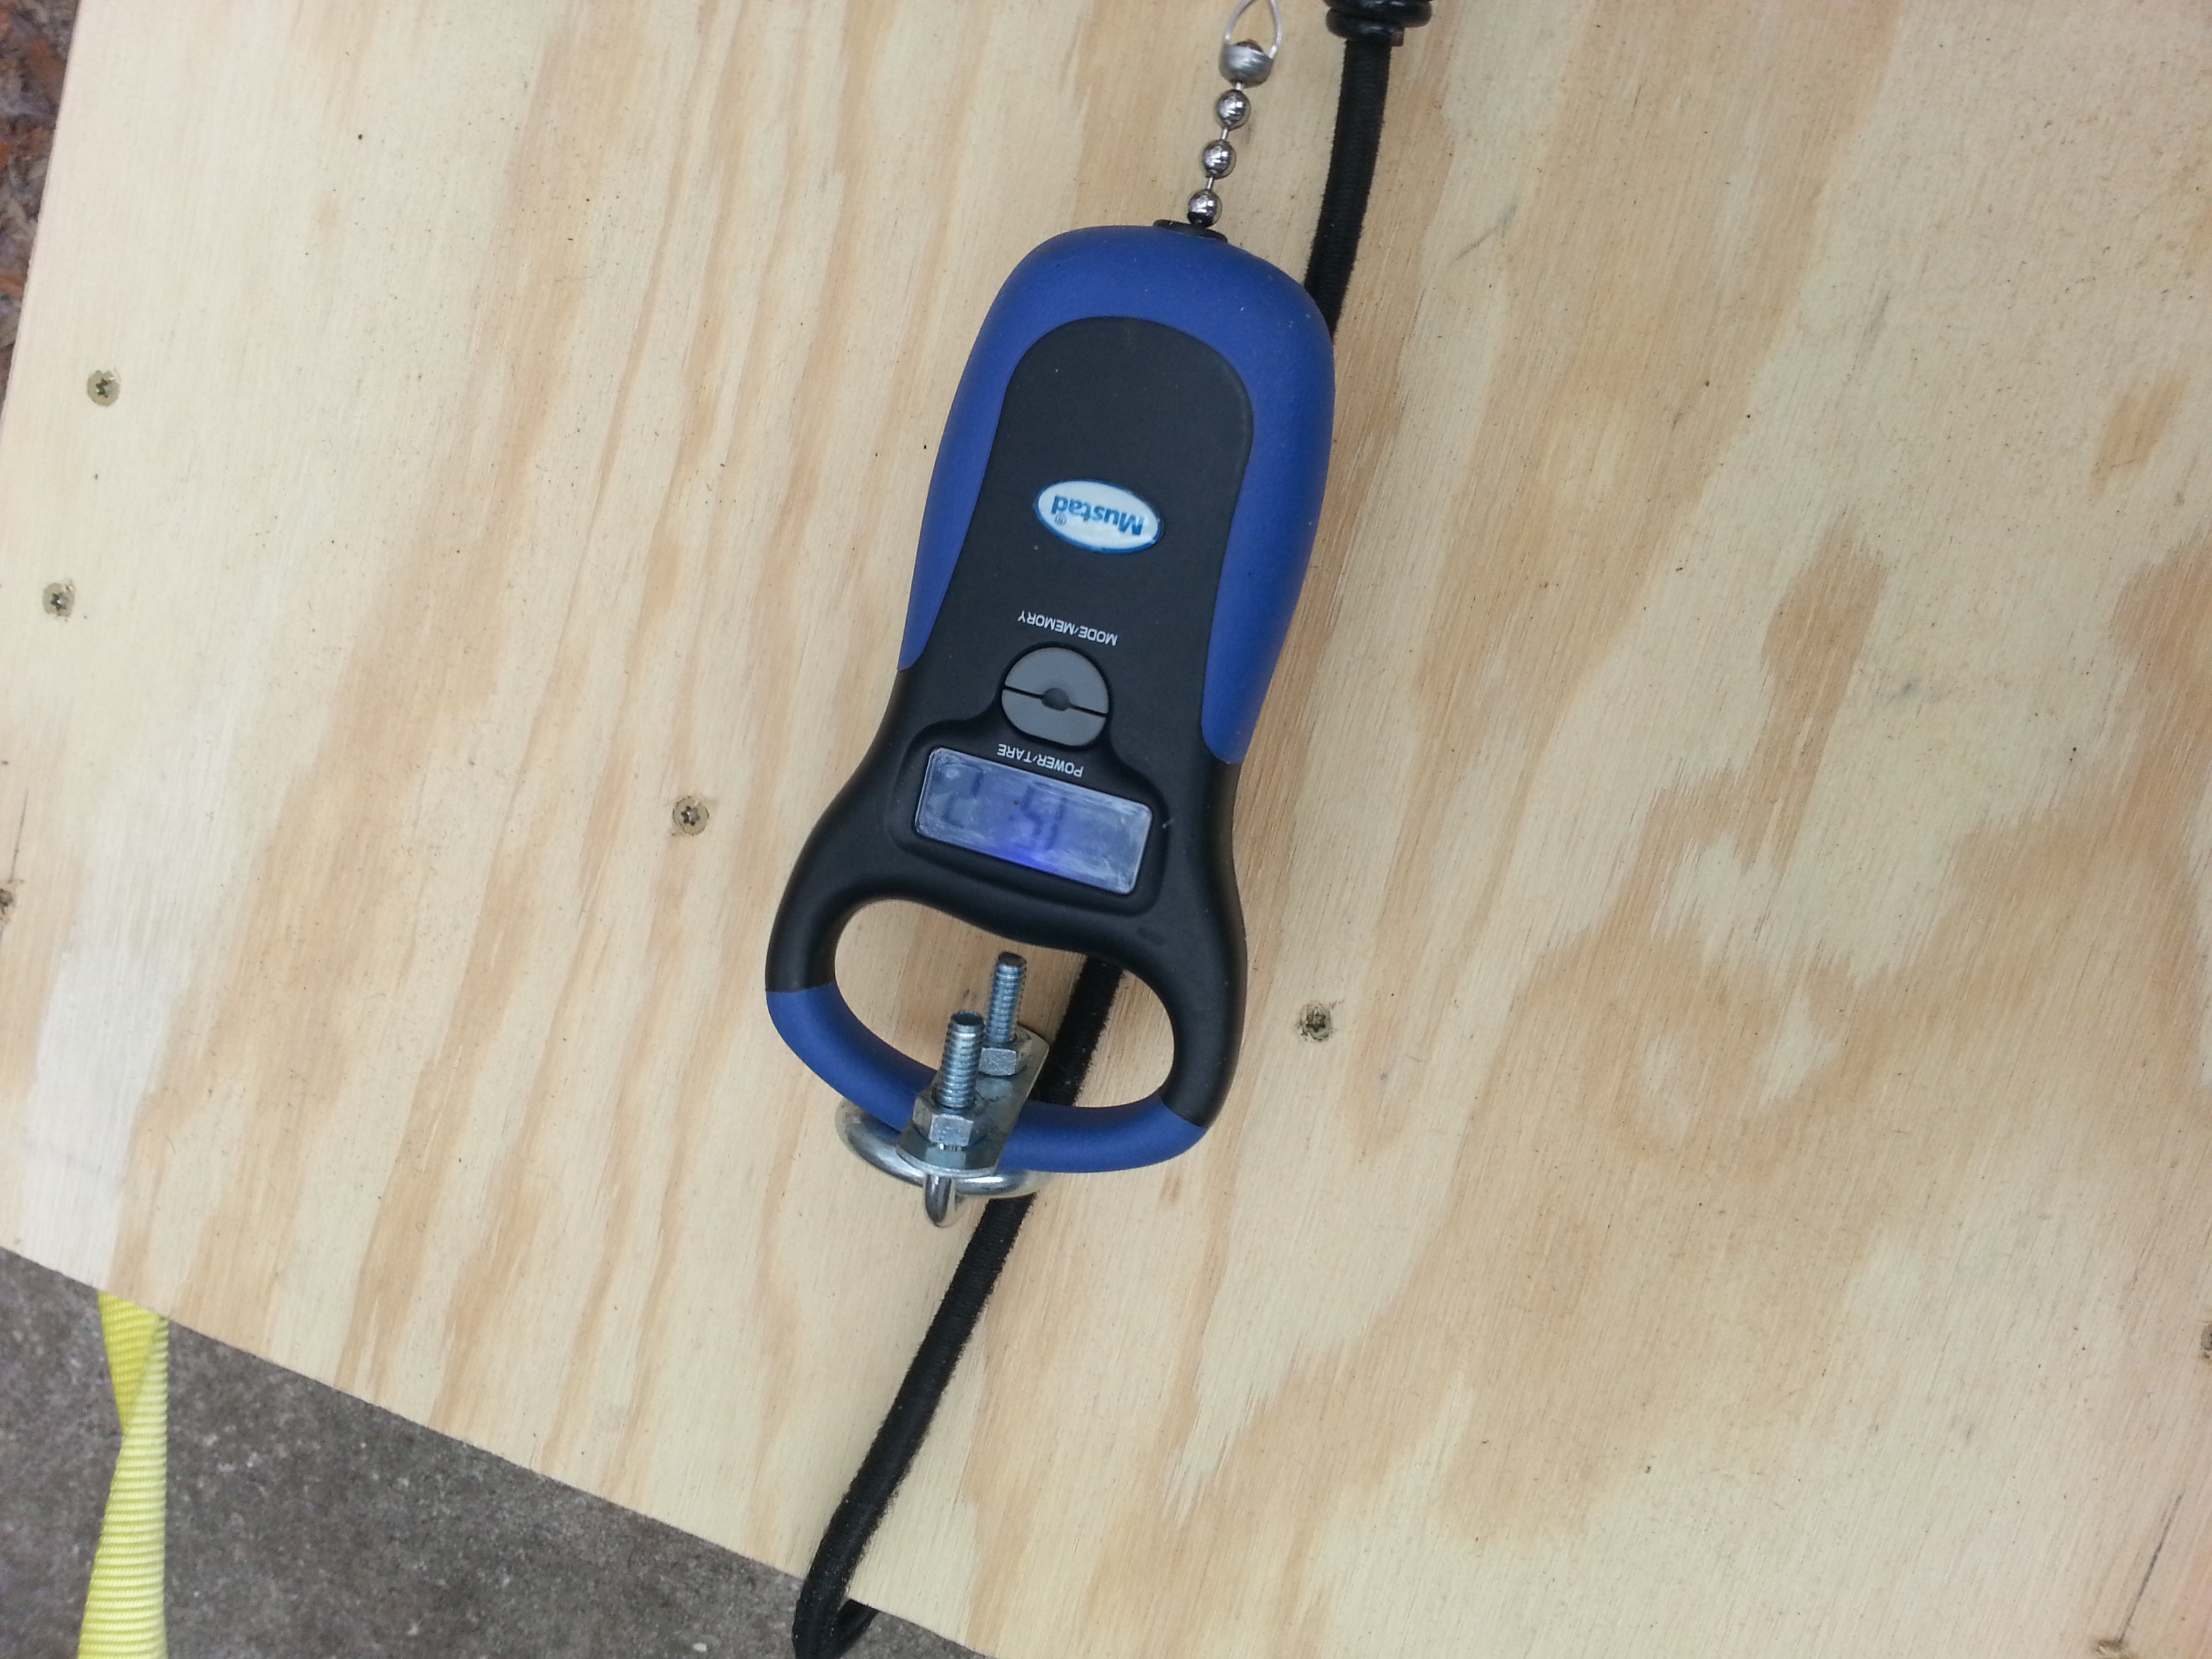
I tried to get a shot of it when it hit 16lb...that takes some throttle tweaking and my current set-up isn't too precise. Got lots of shots with it at 15 (one of which is included).
#23

My Feedback: (9)
Hi, I just reviewed the website for this beautiful Spitfire Mk IV. Nice job, prices look great. Please, can you do a P-51D Mustang say around 85" to 89" wingspan!! I know there are a bazillion P-51's out there. But not with this technology at these proces. I know it woild sell like mad..........
Thanx, Mark
Thanx, Mark
#24
Thank you for taking the time to do such a fantastic and detailed review. But you're title is making my head hurt. It's a Spit Mk IX (eye-ex) roman for 9, NOT a Mk IV (eye-vee) Roman for 4. But the number on the box top is a bit hard to read.
#25
Senior Member
Thread Starter
Join Date: Mar 2010
Location: Eugene, OR
Posts: 269
Likes: 0
Received 0 Likes
on
0 Posts
Hi, I just reviewed the website for this beautiful Spitfire Mk IV. Nice job, prices look great. Please, can you do a P-51D Mustang say around 85" to 89" wingspan!! I know there are a bazillion P-51's out there. But not with this technology at these proces. I know it woild sell like mad..........
Thanx, Mark
Thanx, Mark
Hi Mark, funny you should ask. Top RC Models first three planes this year are the Spitfire shown in this thread, an A6M5 Zero in a 93" wingspan, and a P-51D Mustang in a 88.5" wing. The Zero and the Mustang will be classified as "50cc" models. The Spitfire is classed as a "30cc" model. Here is a picture of the wing mold. The Mustang will be deliverable in late spring or early summer of 2015. Call us if you have specific questions on the birds.


