


3W Bearcat with Moki 300
 03-03-2015, 10:53 AM
#51
Junior Member
Join Date: Sep 2006
Location: Horten, , NORWAY
Posts: 21
Likes: 0
Received 0 Likes
on
0 Posts
Really nice scale exhaust and great way to make them look good.
I am battling along with mine as well. I spend a pile of hours strengthening the retract bed in the wings as they came far to week from the manufacturer in my mind.
There are some good threads of the 3W Bearcat building up here on RCU, including this one from Mark160 and his Moki 300. This is of great help and has saved me a lot of time and trouble - so thanks to all you guys sharing your great builds here.
I left some part-pictures of my Bearcat as well. Not much to show at the moment, but it will hopefully come out good once finished. I've decided on the South Vietnamese scheme and have ordered some paint from Ralle at Tailormade Decals.
Half way with the main wings I've started on the tail and are moving my way forward. I left both elevator servos and rudder servo in the tail. I made rudder push-pull integrated and hope that will work as well as it does on my CARF P-51.
For the moment I am stuck on how to arrange the rear gear door which is "too long" for a scale like operation. I've seen split door opening to each side, but thought of finding a good solution hinging it in front. Any idea anyone??
Thanks for great sharing and building support!
Frode
PS. I planned to share some pictures here, but pushing the "insert image" button does not bring me any closer to any pictures. Does anyone have a clue of what I am doing wrong?
I am battling along with mine as well. I spend a pile of hours strengthening the retract bed in the wings as they came far to week from the manufacturer in my mind.
There are some good threads of the 3W Bearcat building up here on RCU, including this one from Mark160 and his Moki 300. This is of great help and has saved me a lot of time and trouble - so thanks to all you guys sharing your great builds here.
I left some part-pictures of my Bearcat as well. Not much to show at the moment, but it will hopefully come out good once finished. I've decided on the South Vietnamese scheme and have ordered some paint from Ralle at Tailormade Decals.
Half way with the main wings I've started on the tail and are moving my way forward. I left both elevator servos and rudder servo in the tail. I made rudder push-pull integrated and hope that will work as well as it does on my CARF P-51.
For the moment I am stuck on how to arrange the rear gear door which is "too long"
for a scale like operation. I've seen split door opening to each side, but thought of finding a good solution hinging it in front. Any idea anyone??Thanks for great sharing and building support!
Frode
PS. I planned to share some pictures here, but pushing the "insert image" button does not bring me any closer to any pictures. Does anyone have a clue of what I am doing wrong?
 03-03-2015, 11:32 AM
#52

Thread Starter

Hi Greg, I ordered the prop through Vogelsang. SEP Germany makes the props and distributes through vogelsang in the U.S. Took about 6-8 weeks. regarding the exhaust, I know.... I was thinking about making them working, but at then just moved on. What I thought I needed was more air movement through the cowl.. so... I'm going to enclose the pipe area on each side and build air ducts through the fire wall to allow more air movement from the engine compartment and out the exhaust area.. for the actual exhaust I'll be using the flex pipes off the exhaust ring and have short down and out exhaust. At least the sound will be good.
03-03-2015, 07:22 PM
#53
Thread Starter
Hi Frode.. I'm going with a US Navy Scheme. I attached a photo of what it will hopefully end up as. Glenview NAS was a base near my home a kid. I had Pro-Mark Graphics make all the paint masks for me. Still a long way from painting. Regarding adding photos, I just hit the photo button, select the tab for "From Computer", I then select the photo from a directory, then hit the upload. it should work.


03-04-2015, 07:34 AM
#54
Thread Starter
I’m trying to make a final decision on the tail wheel assembly. I’m using the Sierra tailwheel, but concerned that once I glue & screw that in place, how would I access/remove the tail wheel assembly if maintenance is required. It’s is a hard to reach back and the actual door opening is too small to get into to work on tail wheel if required. I just really hate closing things in that may need to be accessed later. So... open to ideas since I’m not an expert builder. In my pictures below, for now I made it so you can reach back in the fuselage and unscrew the tail off the bulkhead and pull the whole thing out. I think this might work… I’d be interested in what others have done or are thinking of doing.


03-04-2015, 09:38 AM
#55
Junior Member
Join Date: Sep 2006
Location: Horten, , NORWAY
Posts: 21
Likes: 0
Received 0 Likes
on
0 Posts
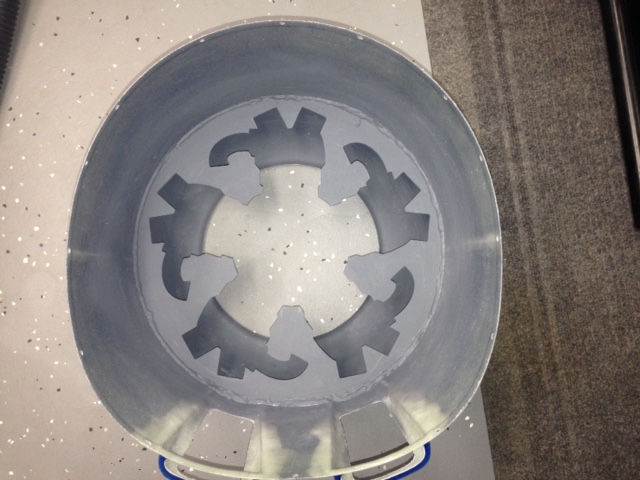
Well these are the pictures I was unable to upload in my previous posting - unknown for what reason. Anyway - I decided to install both elevator and rudder servos in the tail to achieve as short linages as possible. Instead of having long push-pull wires to the rudder with the rudder horns outside the rudder surface, I integrated them into the rudder, a method I tired on a CARF Mustang which worked just fine. The main wheel retract bed was far to weak from my point of view and I entered into an extensive project re-inforcing them. It does not look nice, but is rock solid without adding too much weight (I hope
 ). Finally I am troubling with the tail wheel gear door and have no solution to that yet.
To your question Rob. The solution you have selected is in my opinion the best you could do in order to get the tail wheel retract out if needed. I am using the Robart one and that is simpler to get our for "service". So I regret not to be able to serve you with a different solution to that challenge.
KR
Frode

 03-04-2015, 01:48 PM
#57
Junior Member
Join Date: Sep 2006
Location: Horten, , NORWAY
Posts: 21
Likes: 0
Received 0 Likes
on
0 Posts
Thanks a lot Greg. I've been searching for detailed pictures of just this, but they are hard to obtain.
This will be of great help and is much appreciated.
Kind regards,
Frode
This will be of great help and is much appreciated.
Kind regards,
Frode
03-28-2015, 06:09 PM
#58
Thread Starter
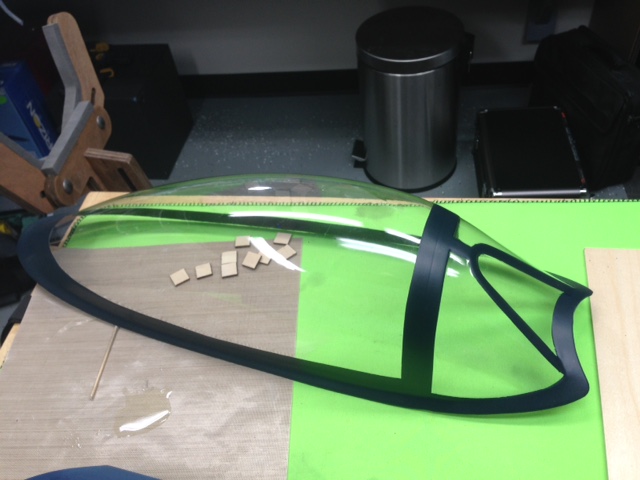
Thought I'd add some photos on progress made with my Bearcat. worked on the cowling and epoxied the baffle in place and then cut some vents underneath for airflow and where I'll have the exhaust exit. Always a scary thing to cut that cowl knowing I can't get another one easily . I've started sanding all the control surfaces and will hopefully be ready to start painted the fuse and wins in another week or so.


03-28-2015, 06:14 PM
#59
Thread Starter
I added a little detail to the prop to give a little more scale look to it. just seemed to plain. added painted tips and some of the serial number nomenclature.


04-06-2015, 04:15 PM
#60
Thread Starter
Getting ready to paint the exterior. I'vedecided on using WarbirdColors paint. I've sanded all surface with a 320wet/dry paper. I tested a few smallerpieces that I cut from the cowl. I've added a few photos. I havethe wheel wells primed and those will end up Zinc Chromate. I'm hoping to getmost of the exterior painted next weekend if the weather around here holds up.


04-07-2015, 08:34 AM
#61

The vent cutouts under your cowl are insufficient. I did the same thing with mine (250 Moki) and she overheated on the runway just before takeoff; thankfully. My cowling was baffled just as yours is. The fix is to remove virtually all of the space between the two cutsouts you have already made. In other words, the bottom of the cowl should have a large square section missing. Perhaps if you cut out an additional rectangular section between the existing cutouts, that would suffice. Trust me on this; what you have is not enough.
Last edited by MarkShapiro; 04-07-2015 at 08:37 AM.
04-07-2015, 09:36 AM
#62
Thread Starter
Thanks Mark!!! I was worried about that. I do have some additional venting through ducting I'm making for the scale vents on either side the side of the fuse. But agree, probably still not enough. Thanks for the input. This is my first "big" project and always appreciate help!
04-07-2015, 01:47 PM
#63
My pleasure to help. I remember how glad and how lucky I felt that my mock shut down just before the takeoff roll on the maiden, rather than on the climb out. Once opened up, the Moki runs like a champ and is a perfect power plant for the big Bearcat. You'll love yours.
04-11-2015, 07:33 PM
#64
Thread Starter
I started building a small spray booth in the garage tonight. Hopefully I can start painting this weekend. I built a simply square frame from PVC and hung from the garage door rails. I was trying to figure out how to hold the fuselage. I have a bike stand and took a piece of 1.5" PVC tubing and held it in the bike stand, that's what's in the picture below. I think it will work. I'll then use a box fan with a filter to vent out of the booth. It seems like a lot of static in the booth with the plastic sheets walls. I'm trying to figure out of to eliminate static. Any suggestion would be appreciated.


04-12-2015, 06:33 AM
#65
Junior Member

Hi Rob, Don't worry about static on the walls. You just need air movement through your booth. Filter the intake air. Filtered exhaust is optional. I have been finishing for 43 years, I can help if you have questions. My Rarebear build is on hold while I finish my
Me163 turbine build. See attached photo's of my automotive semi-downdraft spay booth. I manufactured the millwork for Gold Coast
Bentley-Lamborghini. Needless to say we had to meet the exacting standards set forth by Lamborghini!
Mark C. Byttow


Me163 turbine build. See attached photo's of my automotive semi-downdraft spay booth. I manufactured the millwork for Gold Coast
Bentley-Lamborghini. Needless to say we had to meet the exacting standards set forth by Lamborghini!
Mark C. Byttow
04-12-2015, 11:37 AM
#66
Thread Starter
Hi Mark,
Now that's a nice spray booth! Great advice on the filtered air coming in. I'll make sure to add and get good air flow. I'm just taking my time and want to get it right. This is the largest project I've done. The Me163 looks great. I've seen a few videos of them flying at some RC clubs in Europe.
Now that's a nice spray booth! Great advice on the filtered air coming in. I'll make sure to add and get good air flow. I'm just taking my time and want to get it right. This is the largest project I've done. The Me163 looks great. I've seen a few videos of them flying at some RC clubs in Europe.
04-17-2015, 08:52 PM
#67
Thread Starter
I finished the base "dark Sea Blue" color on all surfaces and started painting the insignia tonight with paint masks from Pro-Mark. It's my first time using them. I went slow and used the low setting on the heat gun to get them to lay nice. My first attempt was the cowl and learned that I thinned my paint just a little too much. I started some airbrushing on the exhaust plate to give it some weathering and will be adding some more. It's seems to be coming together now. Although it's been many, many long nights going slow, I'm having fun!!


04-19-2015, 05:10 PM
#69
Thread Starter
Good progress this weekend. Unfortunately ran out of white so I still need to paint the insignia on the wings. I still have a lot of work to do, but I assembled most of the plane to get a weight and Balance. Looks like I'm spot on so far with the C.G. about 7.5" from the wing root. With the heavier 300 I'm estimating the total weight to be around 45 lbs. I forgot to hook up the inner gear doors for the photo.


05-04-2015, 06:55 PM
#72
Thread Starter
Finished painting insignia on wings and opened up more ventilation in the cowl as Mark suggested. been working on all the internal "pluming" for the last few weeks.. I did another weight & balance tonight. Very small shift in my batteries and looks like the C.G. is coming out right on 7.5" from the wing root LE. The weight is a bit higher then I thought at out about 48 lbs. I'm hoping to be able to start the engine on the air frame this weekend. If I don't run into any issues, or have work get in the way, I'm probably only a few weeks from the maiden.


05-20-2015, 05:19 PM
#74
Thread Starter
I ran into some Walbro carb issues so had to send back to Vogelsang.. So, my maiden is delayed by a week until It get it back so I decided to work on the build out for the cockpit. I'm using a combination of parts from all over with the basic internal structure from Dynamic Balsa's Bearcat kit. Did some weathering on the instrument panel and started building a balsa tub to hold it all. And a whole lot of white plastic to paint.


