


Ziroli 1/6 Hellcat Build


 06-24-2024, 07:58 AM
#402

Thread Starter
Well, you could order from Mirce at NS Modelers, perhaps even the full detail kit. He scaled down his Hellcat kit panel details to 1/6 to fit my build. Or, just order rivets and/or screws ala carte. Or, check with ChadV - I saw on one of his pages that he made his own at one point, similar, I think, to what Mirce does. ChadV did post some comments here, fairly recently - but I don't know what he's up to.
Someone could probably put the NS Modelers rivets on faster than me. I get into a groove and then need a break, other things need attention....but that's been my whole build!
I had a company in EU interested in completing the cockpit details for me, but they wanted a complete set of cockpit drawings - the pictures I had were insufficient for them. I haven't found a set of such documents, yet.
06-26-2024, 06:09 PM
#403
Thread Starter
Did you see my other comment on rivets from Mirce or checking with ChadV?
06-27-2024, 06:49 AM
#404
I know exactly what you mean on the the glue drop rivets. I used that method on a Bearcat and it's more suitable for locomotive boiler plate than aircraft skin.
I'm planning to experiment with different glue and applicators to see how flat and small I can get them.
I'm planning to experiment with different glue and applicators to see how flat and small I can get them.
06-30-2024, 07:27 PM
#405
Thread Starter
Only 116 rivets left in my supply - will run out tomorrow! More on the way. I've gone through 15,196.
Rivets are completed from the nose to the 6th panel line behind the cockpit. 116 rivets will complete maybe half of the 7th panel line and the lateral lines between 6 and 7. Hopefully, the next set of rivets arrives soon as I've been on a roll. There are some odds and ends I can work on in the meantime.
Rivets are completed from the nose to the 6th panel line behind the cockpit. 116 rivets will complete maybe half of the 7th panel line and the lateral lines between 6 and 7. Hopefully, the next set of rivets arrives soon as I've been on a roll. There are some odds and ends I can work on in the meantime.
07-01-2024, 12:51 AM
#406
I'm not going to do it on this plane, being that the plan is just for a 10-20 footer but they sure add a lot to the realism. Looks great!
By the way, I broke down and used chart tape for the panel lines. It was just much quicker for me than doing all of the sanding against the tape and sending the result down, so forth.
A P-47 is a real hodge podge of panel shapes!
By the way, I broke down and used chart tape for the panel lines. It was just much quicker for me than doing all of the sanding against the tape and sending the result down, so forth.
A P-47 is a real hodge podge of panel shapes!
Last edited by G.F. Reid; 07-01-2024 at 12:55 AM.
07-01-2024, 05:56 AM
#407
Thread Starter
I'm not going to do it on this plane, being that the plan is just for a 10-20 footer but they sure add a lot to the realism. Looks great!
By the way, I broke down and used chart tape for the panel lines. It was just much quicker for me than doing all of the sanding against the tape and sending the result down, so forth.
A P-47 is a real hodge podge of panel shapes!
By the way, I broke down and used chart tape for the panel lines. It was just much quicker for me than doing all of the sanding against the tape and sending the result down, so forth.
A P-47 is a real hodge podge of panel shapes!
Have you seen the P-47 videos from Greg's Airplanes and Automobiles on YouTube? Here's the P-47 Playlist. He has several videos going into a lot of detail, including Bomber Command's resistance to drop tank development. After seeing all of his research, the P-51 doesn't look like the savior I was lead to believe that it was. Yes, the P-51 is still a great aircraft. But properly outfitted, the P-47 and P-38 could have led the bombers deep into Germany - because they were already covering greater distances in New Guinea in 1943. They had drop tanks in the South Pacific in 1943, because a general there took matters into his own hands and developed them with the Aussies and Ford Motor.
I always respected the P-47, but my level of respect increased dramatically after seeing Greg's research.
Maybe you've seen these already? If not, enjoy!
07-01-2024, 06:33 PM
#409
Thread Starter
15,312 rivets and I'm out! Next batch not received, yet. In the meantime, I realized I put the foot holds in the wrong place. I'll be drawing another set of lines in prep for moving the foot holds to their correct locations. Doh! I don't like doing things twice, but at least I didn't paint them in place. While waiting for the next batch of rivet details, there are still some screw details that I could work on placing, and I could work on improving the curvature of the air/elec. panel access cover.
I could go ahead and order the paint, too. Getting close!
I could go ahead and order the paint, too. Getting close!
The following users liked this post:
G.F. Reid (07-01-2024)
07-08-2024, 02:30 PM
#410
Thread Starter
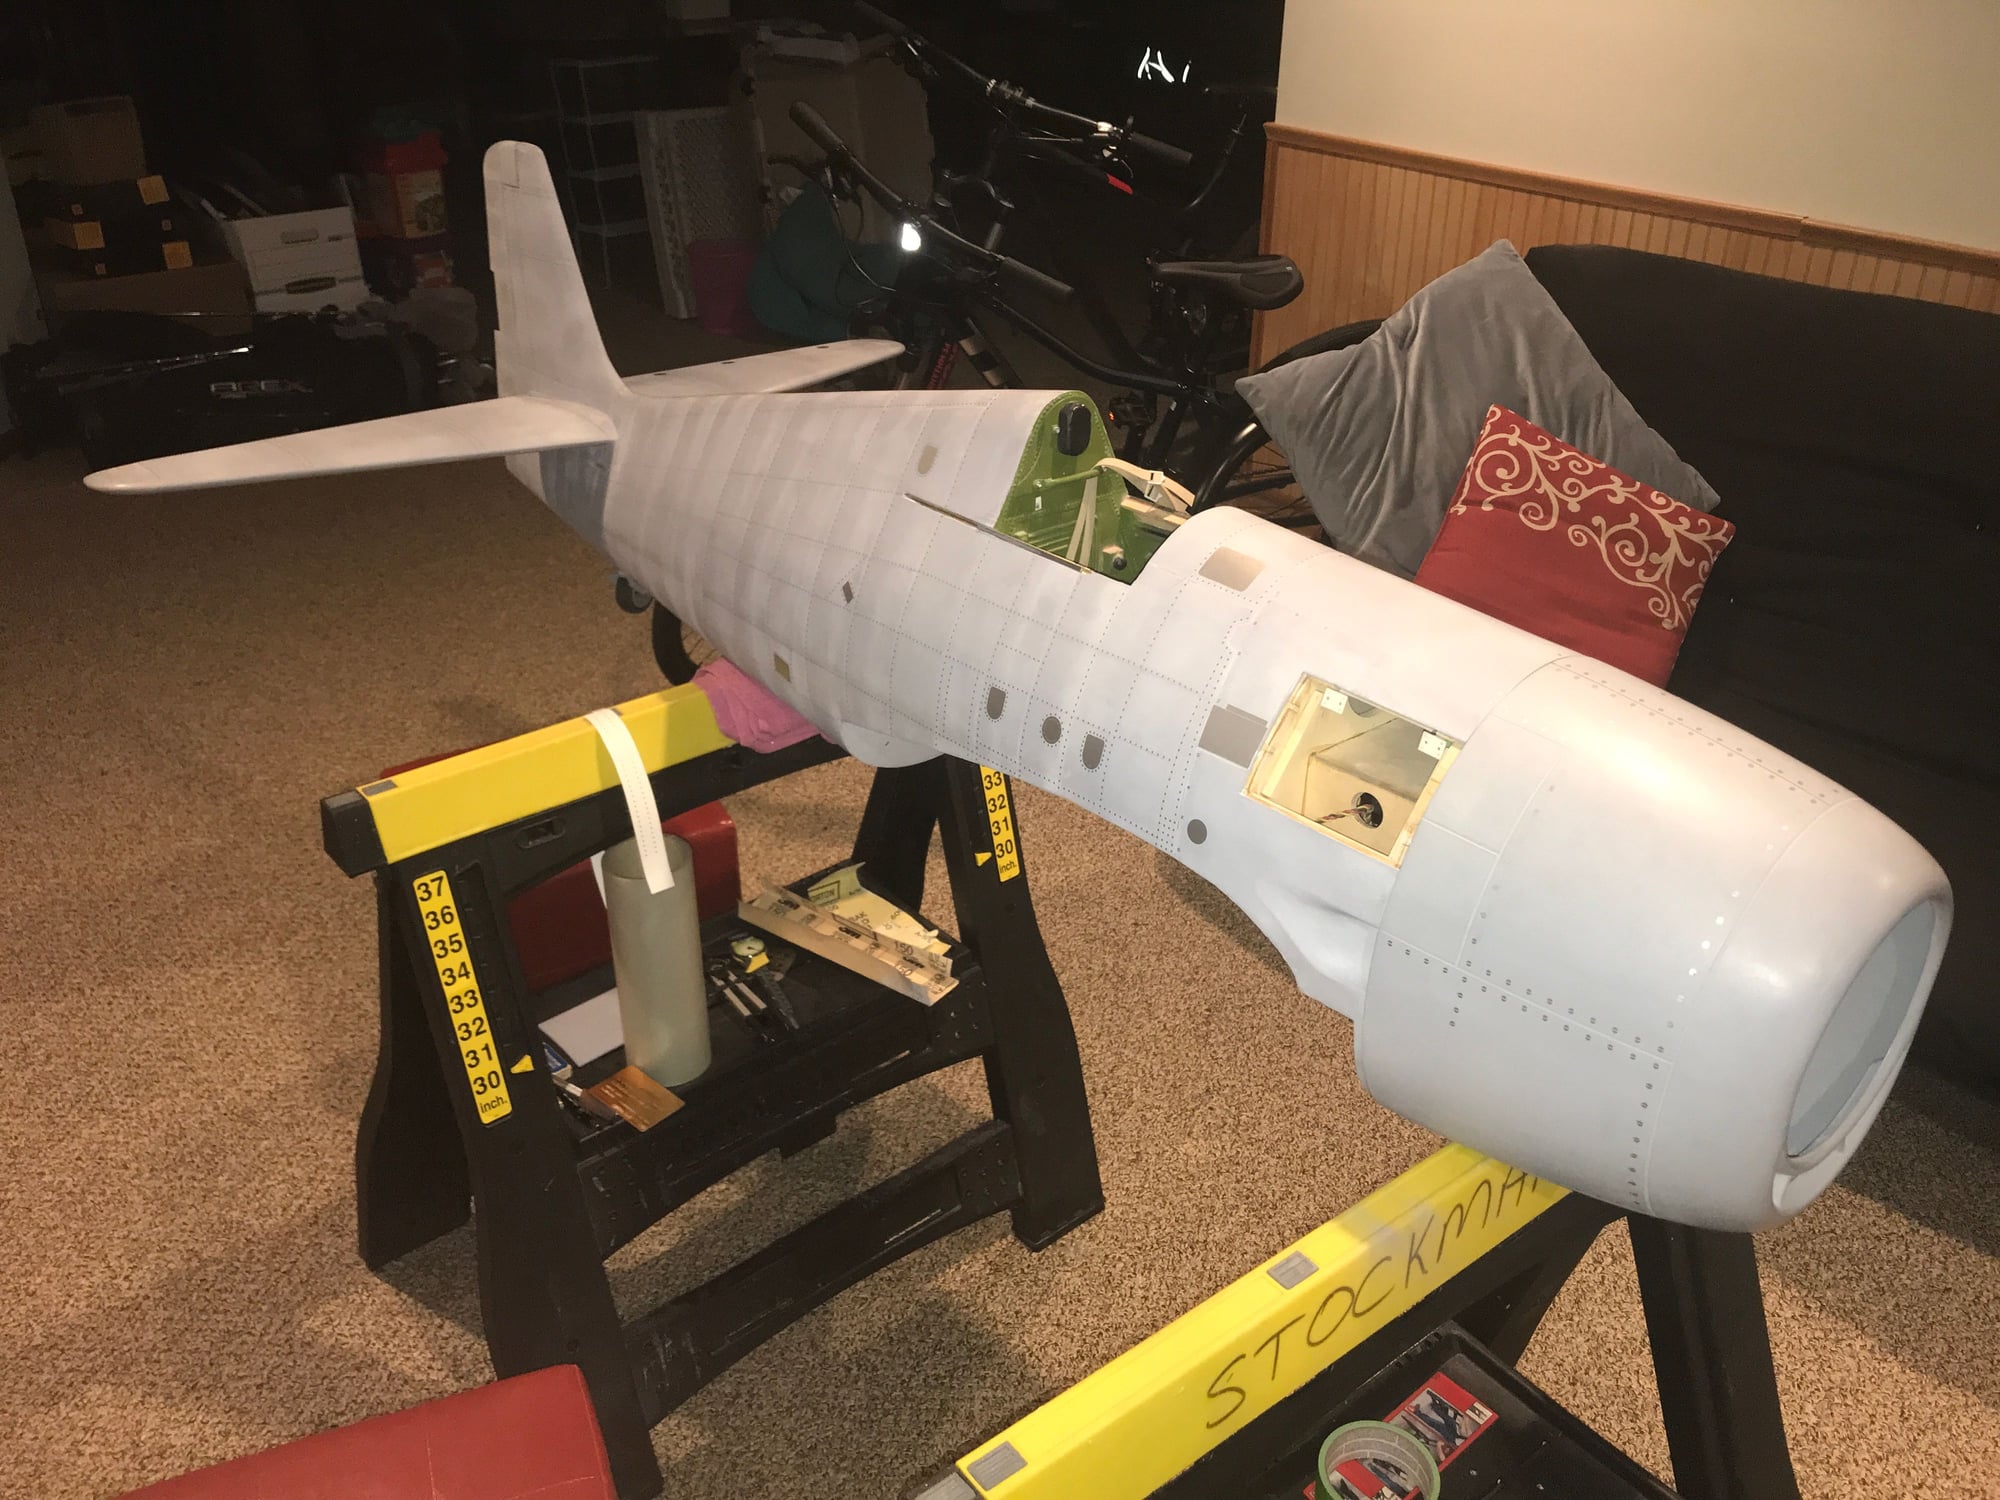
This aux hatch cover has been giving me fits. I wetted it and let it dry while clamped against the ribs. No good. I put a couple dozen parallel slices in the underside to relieve stresses, glassed the underside and held it in place against the ribs while the epoxy set. No good. In the picture below, left side, one can see how it still doesn't sit flush against the fuse ribs.
My next though was to make a couple new rib inserts, place them on the inside of the fuse against the existing ribs and then epoxy the cover to them - all while holding the cover in place while the epoxy sets. How long do I have to hold it? Can I come up with some way to clamp it all in place? What if something slips before the glue sets? What if I do everything right and it still doesn't work? Ahhhhh.....!
While looking, thinking, walking away, thinking, getting distracted by other things, thinking, going back and looking again... it hit me. I have made new ribs, they are sitting there in place - all I have to do is cut the cover into strips, epoxy them to the new ribs and then fill/sand to perfection! No stresses in the cover to bend it everywhere except where it needs to be. And, a low spot has developed which I can correct.
So, that's the plan
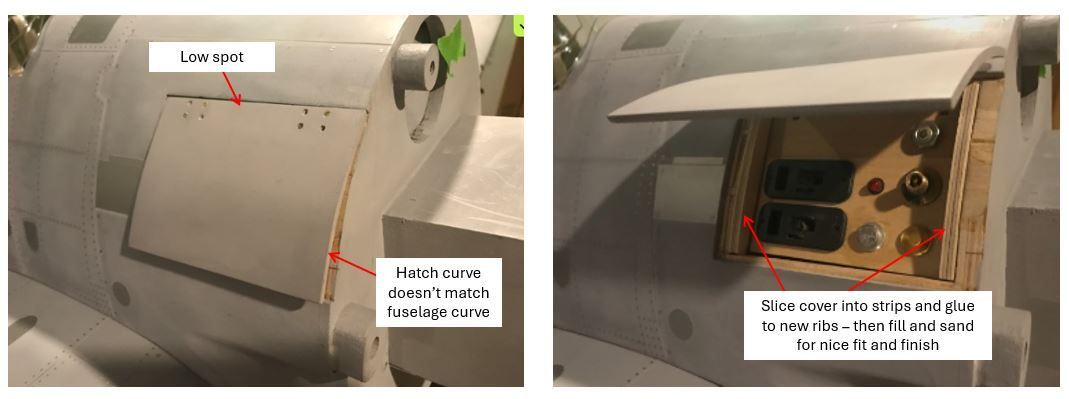
The new ribs are ply and a bit thick, but I don't want the cover to change shape and I expect any additional weight in the nose will help with balancing at the end. I will also try epoxying magnets to the bottom of each rib to see if they will hold the hatch closed well enough, contacting the screws that hold the control panel in place.
Hoping this is the last fitting this hatch has to go through!
My next though was to make a couple new rib inserts, place them on the inside of the fuse against the existing ribs and then epoxy the cover to them - all while holding the cover in place while the epoxy sets. How long do I have to hold it? Can I come up with some way to clamp it all in place? What if something slips before the glue sets? What if I do everything right and it still doesn't work? Ahhhhh.....!
While looking, thinking, walking away, thinking, getting distracted by other things, thinking, going back and looking again... it hit me. I have made new ribs, they are sitting there in place - all I have to do is cut the cover into strips, epoxy them to the new ribs and then fill/sand to perfection! No stresses in the cover to bend it everywhere except where it needs to be. And, a low spot has developed which I can correct.
So, that's the plan
The new ribs are ply and a bit thick, but I don't want the cover to change shape and I expect any additional weight in the nose will help with balancing at the end. I will also try epoxying magnets to the bottom of each rib to see if they will hold the hatch closed well enough, contacting the screws that hold the control panel in place.
Hoping this is the last fitting this hatch has to go through!
07-13-2024, 07:47 AM
#411
Thread Starter
Another 5,104 rivets rivets received! I may be able to finish using only a few hundred. If I go any farther, than I have to go much farther. For example, if I add one line to the hstab then I must add the other 35 or it won't look balanced, symmetrical or accurate. If I do add all 36 lines (9 lines - top, bottom, left and right for 36 total) to the hstab, will it look better or overdone? Once the fuselage is done, I'll review the overall look compared to the drawings. If there is a line of rivets that adds something meaningful to the appearance, I'll consider it. For instance, there are some places on the wing where rivet lines are doubled or tripled up in what appears to be high strength areas. Perhaps replicating this in part would be helpful?
Inclined to say 'enough is enough,' but will give it a good review before painting.
Inclined to say 'enough is enough,' but will give it a good review before painting.
The following users liked this post:
G.F. Reid (07-13-2024)
07-13-2024, 04:08 PM
#412
I'm kinda with you on "enough is enough". As a model scales down, to me,you get to the point where certain details are more "suggested" than literally placed on the plane's surface....Look at some good pictures of full size planes from this era. You'll never be able to pick out every single screw and rivet.
As far as the ones that you already have applied, they do look great I'll have to admit!
As far as the ones that you already have applied, they do look great I'll have to admit!
07-14-2024, 06:11 PM
#413
Thread Starter
Fuselage rivets are done!!! I should fix the hatch problem and then finish the few detail screws for the fuse. Also, I need to create another small cover detail for the rear tail cone. Kit came with one, but drawings and pics show two, one for each side.
I should order paint, next, and then start finishing up some of the details - perhaps starting with a checklist. The rest is mainly for me, but if anyone reads through and thinks of anything I may have missed, let me know. Sorry, no pictures tonight. It's late and events have been rather interesting the last couple days - a little distracted.. I think I'll finish the 'rivet reinforced' areas of the wing, detail the rudder trim flap and then take some new pictures.
Cheers!
That's not a short list and I've probably missed something. But it's a lot shorter than before. Ah, a pilot! Mine is still headless!
I should order paint, next, and then start finishing up some of the details - perhaps starting with a checklist. The rest is mainly for me, but if anyone reads through and thinks of anything I may have missed, let me know. Sorry, no pictures tonight. It's late and events have been rather interesting the last couple days - a little distracted.. I think I'll finish the 'rivet reinforced' areas of the wing, detail the rudder trim flap and then take some new pictures.
Cheers!
- Complete before Fall ends
- order paint
- order masks for insignias (can I find someone that will make masks/stencils for info/warning nomenclature; also, victory marks)
- fill, sand, paint trim tabs and add rivet details
- fix/complete accessory access hatch cover (including a means to keep it closed)
- construct/finish 4 hatches for the wing underside
- complete covers for lg mount wells
- construct some new antennae masts (I have some, but I want something sturdy, yet will break if necessary before damaging the fuse or vstab.)
- paint main color, insignia, weather, top coat
- mask, apply rivet details and paint canopy
- Winter projects
- figure out what I'm going to do to complete the cockpit
- mount canopy
- salvage the Byron lg covers and adopt to this aircraft, including the small forward lg doors that hinge off the wing
- complete drop tank
- paint drop tank, dummy bombs, finish assembly
- create carb intake baffle (I found the Precision Eagle 4.2 runs better with something to prevent the prop wash from just blowing past the intake)
- final assembly (mount control surfaces, install servos, install engine and air system, etc.)
- air, electrical, control testing (indoors, engine off and air pressure leak/auto gear extension)
- Order new transmitter, receiver
- Oh, almost forgot: Dummy engine, finish the kit I have or order a 3D printed version?
- Ah, create dummy coolers for cowling chin
- Prop....check options available - probably different from when I started....
- Spring
- Final testing, including engine run/performance (including repair of switches on my existing gas pump/container or get a new setup...)
- Final balance check (actually, will need to complete before inboard flaps are mounted, unless I can modify the balance rig with some webbing to fit between the flap and fuse - don't want weight of plane (it's heavy...) supported by the flaps).
That's not a short list and I've probably missed something. But it's a lot shorter than before. Ah, a pilot! Mine is still headless!
07-17-2024, 05:09 PM
#414
Thread Starter
I'm running out of places to put rivets! At 17,000. Was told that a complete rivet job would need about 30,000. There are a few things left to apply rivets to, for sure (control tabs, canopy, various covers), but I don't think I'll hit 18,000. It's looking good - enough!
I wasn't going to add the foot placement detail panels, as I was going to use some "road" material from the rail road section of the hobby store to simulate this area. In the next picture you'll see that I changed my mind and added the details and some rivets. I've seen some methods for replicating these walking surfaces in paint. The panels will be useful for masking and paint will let the rivet detail show through. I think this will look more realistic than my previous method (which was quick, easy and certainly stand-off scale realistic!).
The second picture shows a bit more detail of this area. Also, it shows the corrected location for the foot hold point in the fuselage. I don't know if it is meant to be a feature or not, but the material NSModelers uses for the panel details allows for easy correction of mistakes. Also, the materials come with some "extra" details intended just as instructions or separation barriers from one group of details to another - these can be used to cut some extra details found on the plane, but not in the detail kit. Very useful.
I really need to fix the aux. hatch shape and identify a closure mech. I can then finish the screw details in the nose area of the fuselage. It's time to order paint.
Dang. The rivet application process was rather meditative and rewarding. Now I have work to do!
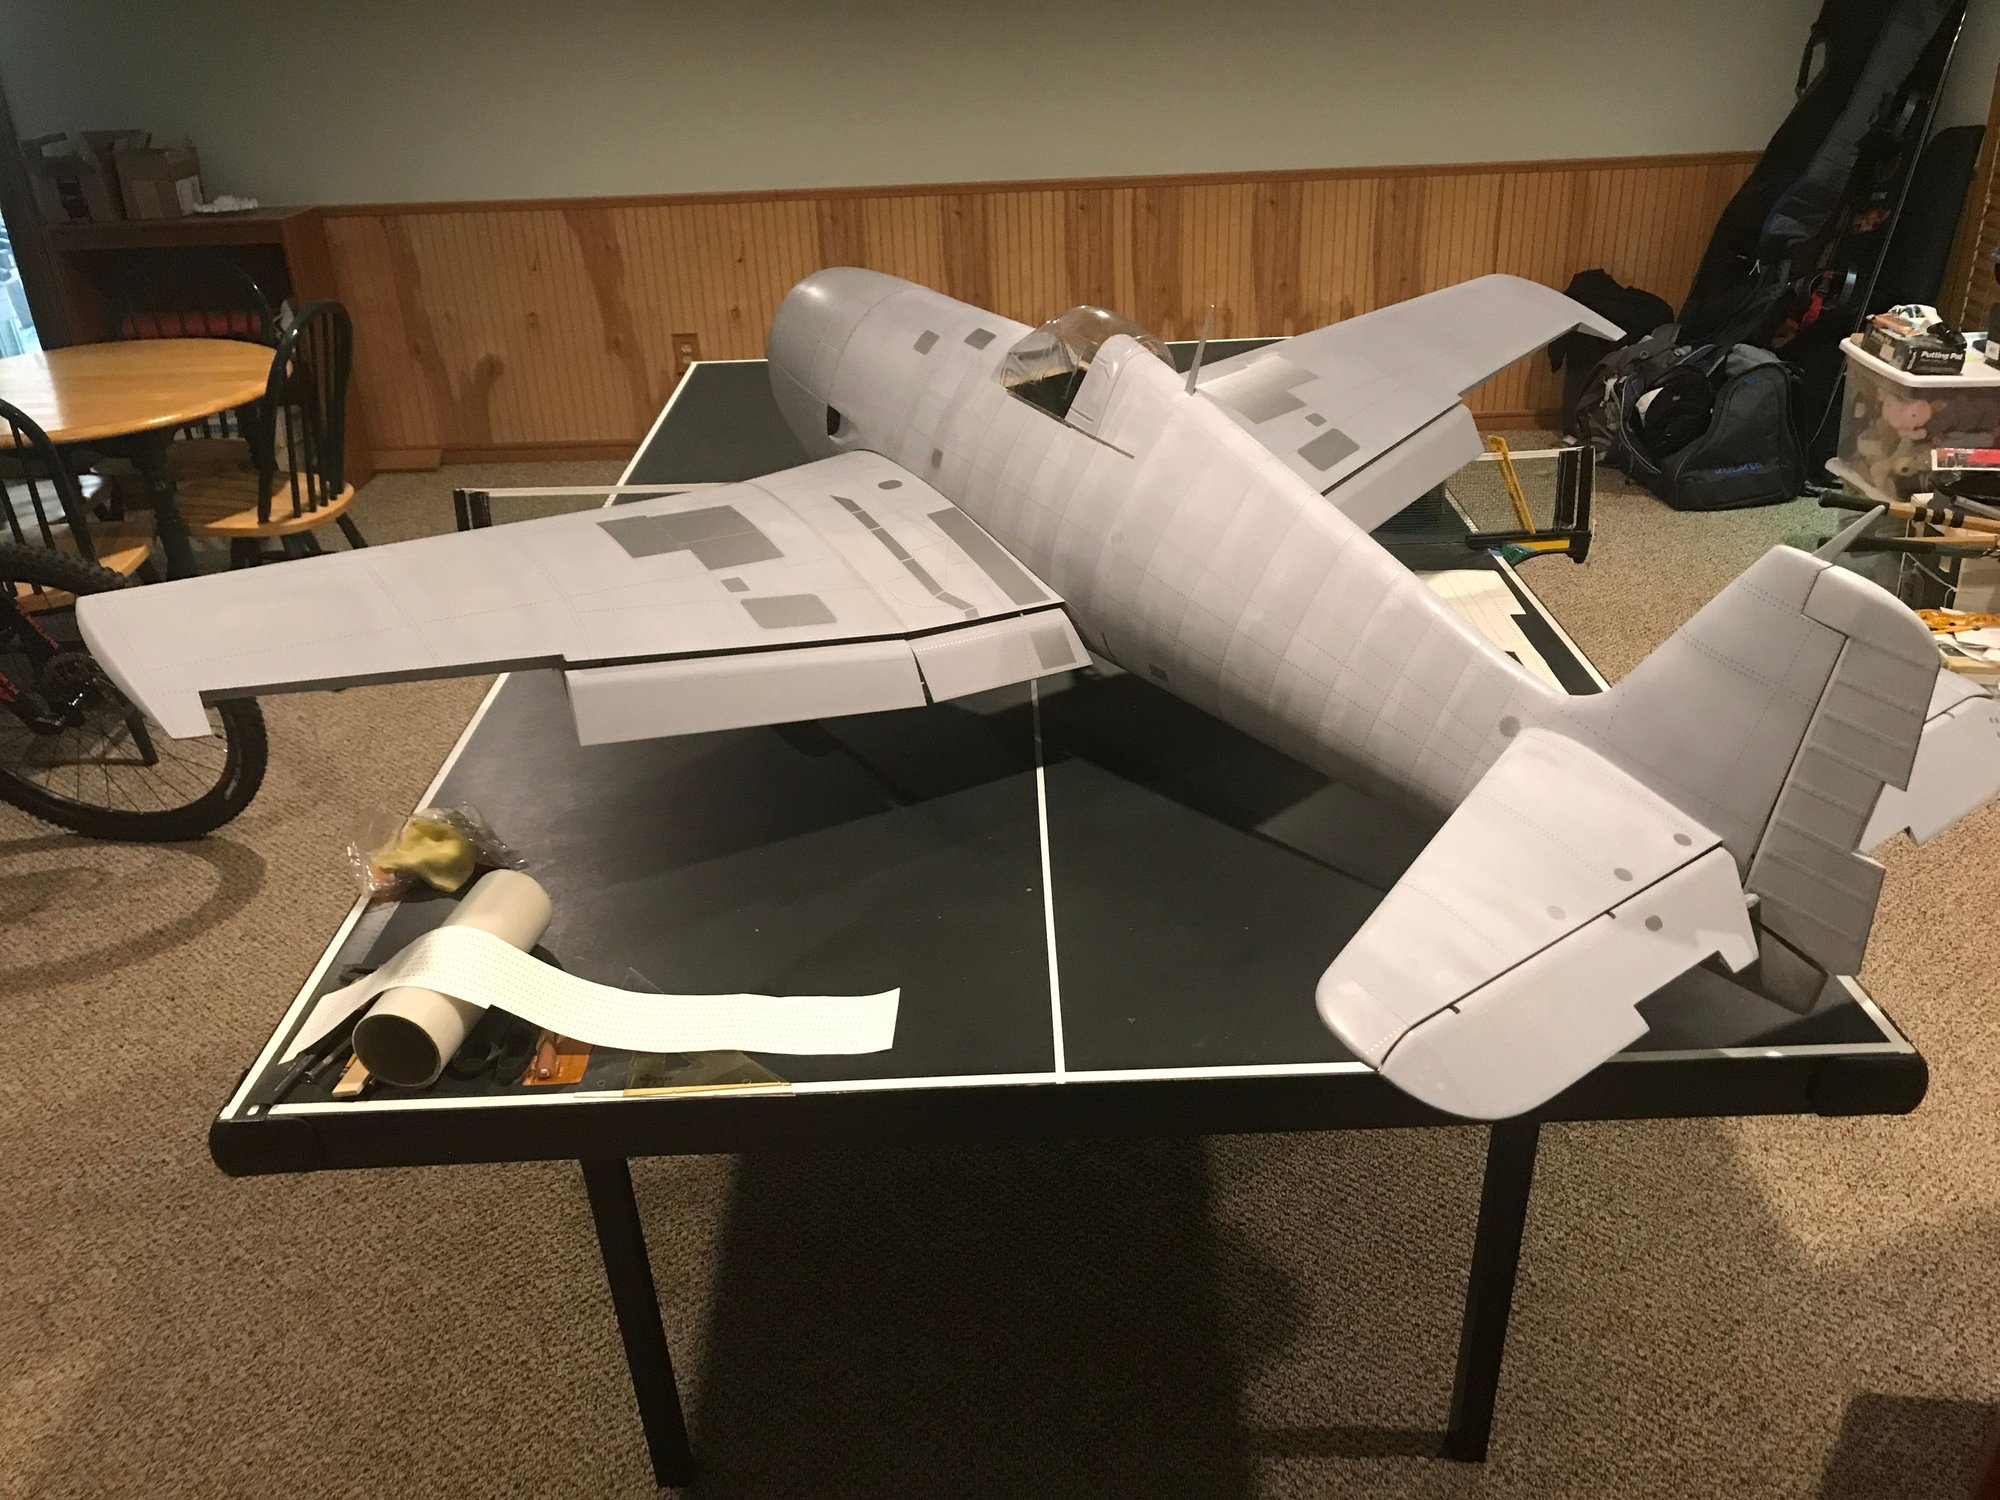
Overall view
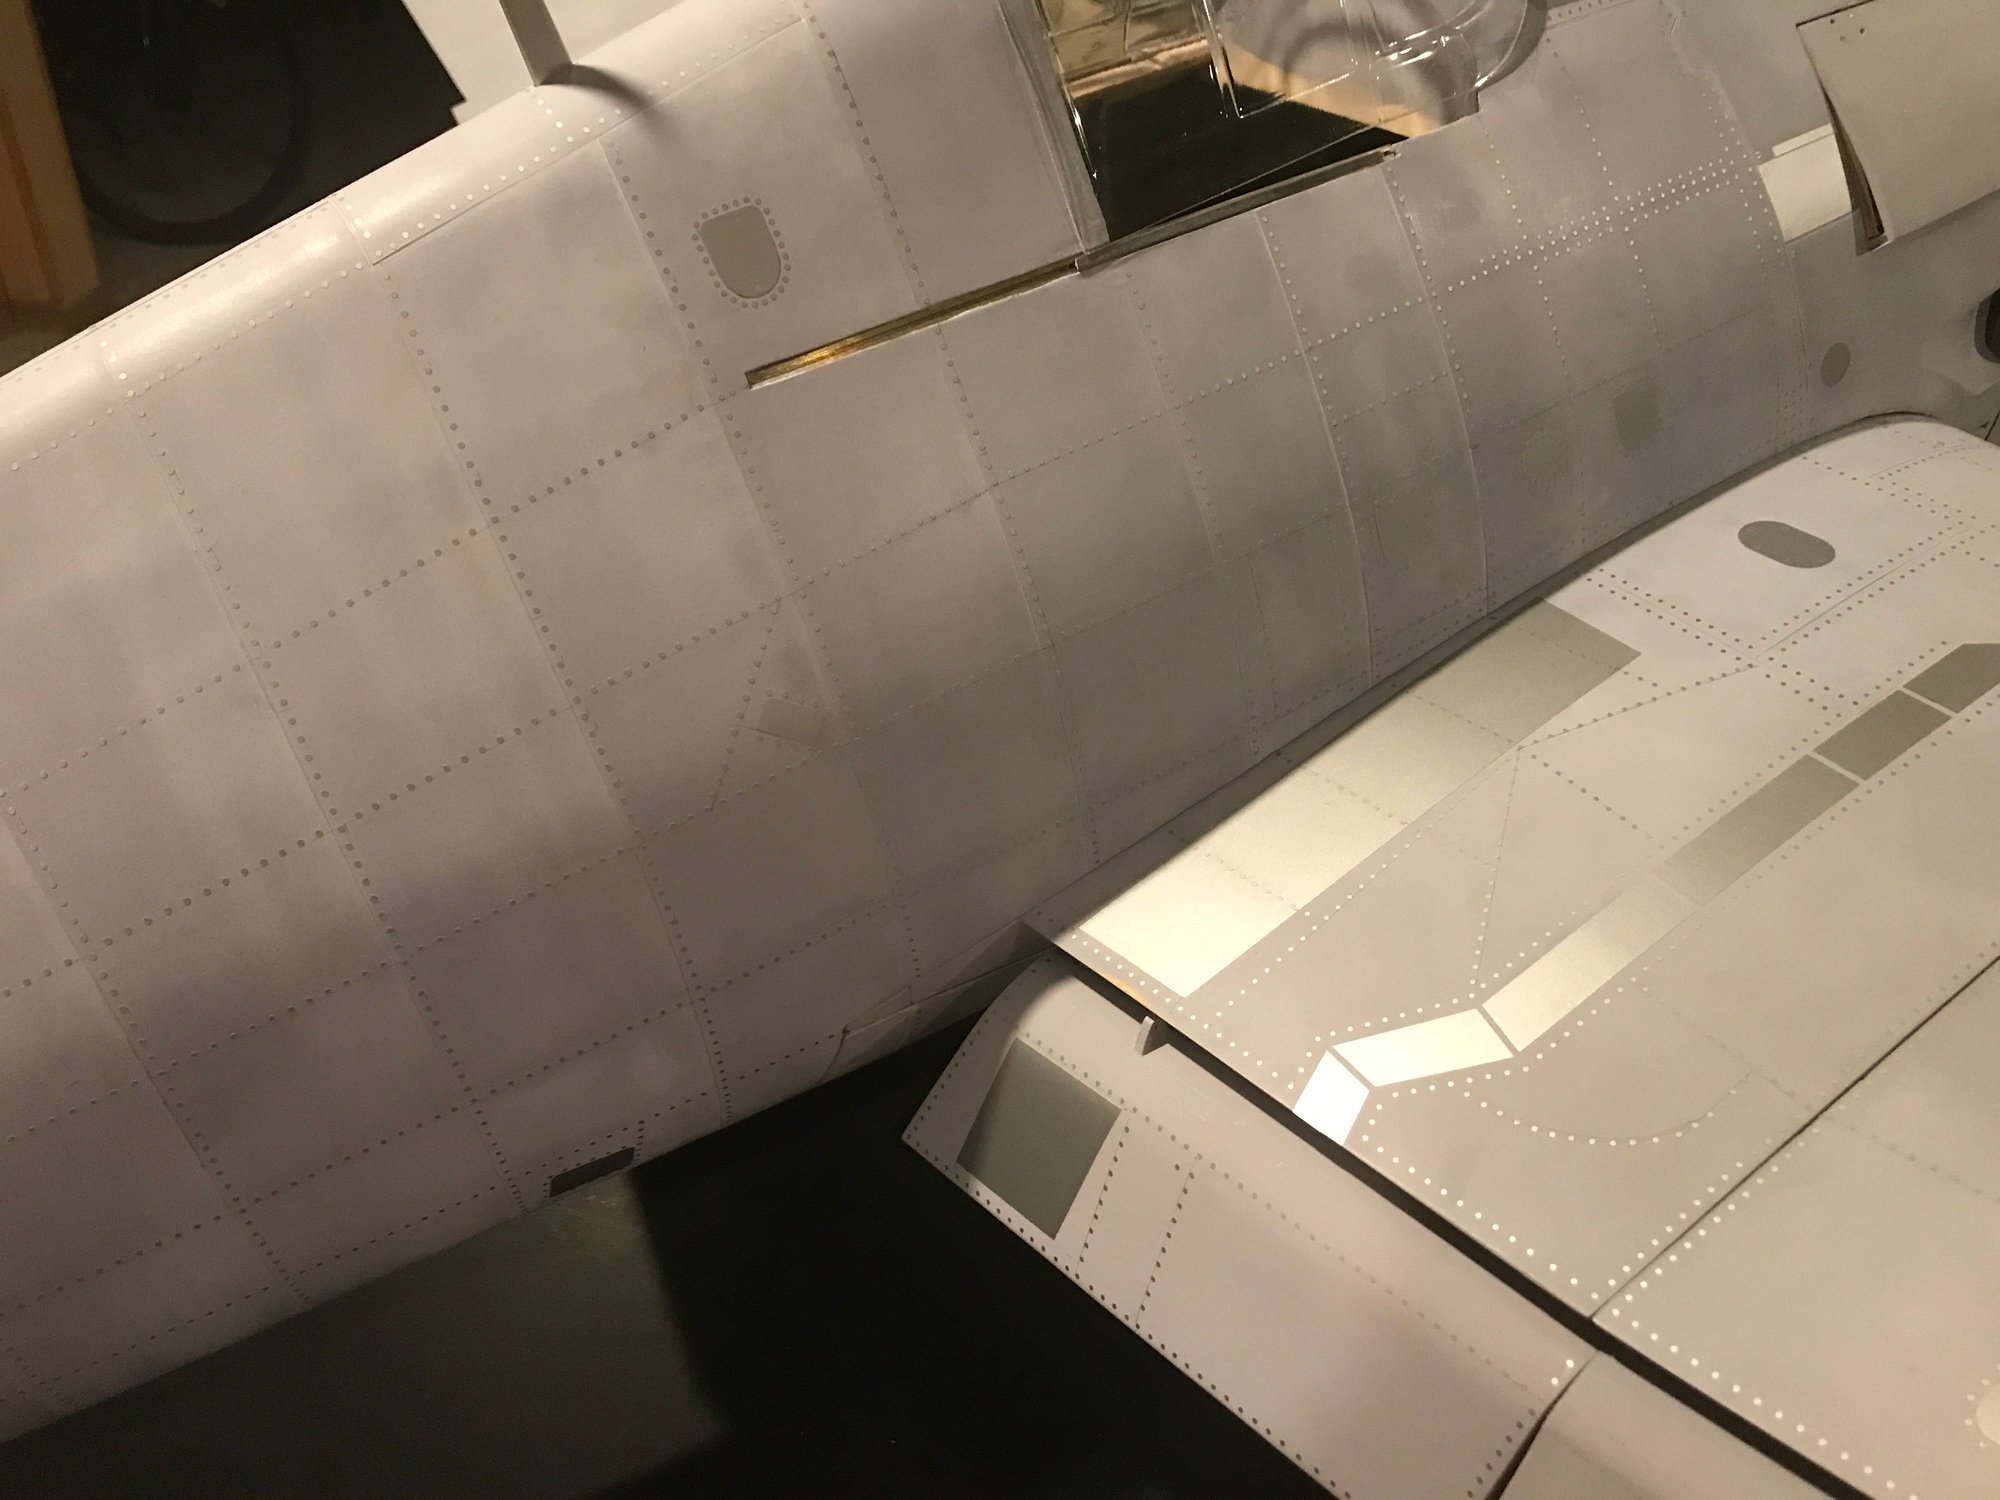
Inboard wing, cockpit area
I wasn't going to add the foot placement detail panels, as I was going to use some "road" material from the rail road section of the hobby store to simulate this area. In the next picture you'll see that I changed my mind and added the details and some rivets. I've seen some methods for replicating these walking surfaces in paint. The panels will be useful for masking and paint will let the rivet detail show through. I think this will look more realistic than my previous method (which was quick, easy and certainly stand-off scale realistic!).
The second picture shows a bit more detail of this area. Also, it shows the corrected location for the foot hold point in the fuselage. I don't know if it is meant to be a feature or not, but the material NSModelers uses for the panel details allows for easy correction of mistakes. Also, the materials come with some "extra" details intended just as instructions or separation barriers from one group of details to another - these can be used to cut some extra details found on the plane, but not in the detail kit. Very useful.
I really need to fix the aux. hatch shape and identify a closure mech. I can then finish the screw details in the nose area of the fuselage. It's time to order paint.
Dang. The rivet application process was rather meditative and rewarding. Now I have work to do!
Overall view
Inboard wing, cockpit area
07-24-2024, 02:37 PM
#415
Thread Starter
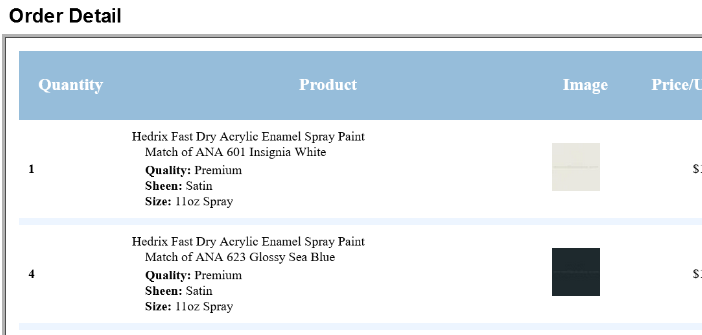
Paint ordered!!! I went with satin finish. This gives me the option to leave as is for an 'at sea' weathered look, or to go over it with a finish clear coat for "fresh from the factory" look. ANA colors were in use at the time, not FS. FS came after the war seeking to address issues such as fading.
My first time using My Perfect Paint, and I don't know anyone that has used this company before. Not cheap, especially with the $29.99/color batch fee. But then, nothing is cheap anymore. As they have a long list of industrial, aerospace, defense and commercial customers, I'm expecting this to work well.
We shall see...
Remaining underwing hatch covers are cut, glass and going through the prime/sand/repeat process. Filling in a few areas with rivet, screw details. Soon, I'll have to work on the aux. hatch cover and landing gear mounting bay covers - I've been postponing these last covers forever.
The following users liked this post:
G.F. Reid (07-25-2024)
07-25-2024, 09:09 AM
#416
Excellent.
Had a brain fart on my Jug but it seems to have corrected itself.
I used chart tape to make all the panel lines that I wanted to see, primed it on my deck and went back in the house for it to dry. This was only the wing, by the way. I promptly forgot about it and it rained at least 3 in that night. The wing looked like a beer barrel the next day. I then recalled that twice my hardwood floors have been damaged by long-term water exposure that I did not see. Once from the refrigerator and once from a Christmas tree. In both cases time was my friend and when it dried out it was flat. I left the wing alone and now it appears to be back to the way it started.
07-25-2024, 12:26 PM
#417
Thread Starter
Excellent.
Had a brain fart on my Jug but it seems to have corrected itself.
I used chart tape to make all the panel lines that I wanted to see, primed it on my deck and went back in the house for it to dry. This was only the wing, by the way. I promptly forgot about it and it rained at least 3 in that night. The wing looked like a beer barrel the next day. I then recalled that twice my hardwood floors have been damaged by long-term water exposure that I did not see. Once from the refrigerator and once from a Christmas tree. In both cases time was my friend and when it dried out it was flat. I left the wing alone and now it appears to be back to the way it started.
Had a brain fart on my Jug but it seems to have corrected itself.
I used chart tape to make all the panel lines that I wanted to see, primed it on my deck and went back in the house for it to dry. This was only the wing, by the way. I promptly forgot about it and it rained at least 3 in that night. The wing looked like a beer barrel the next day. I then recalled that twice my hardwood floors have been damaged by long-term water exposure that I did not see. Once from the refrigerator and once from a Christmas tree. In both cases time was my friend and when it dried out it was flat. I left the wing alone and now it appears to be back to the way it started.
The following users liked this post:
G.F. Reid (07-25-2024)
Today, 10:08 AM
#419
Thread Starter
Paint arrived! Yahoo! Cowling may have to be the first bit to get sprayed.
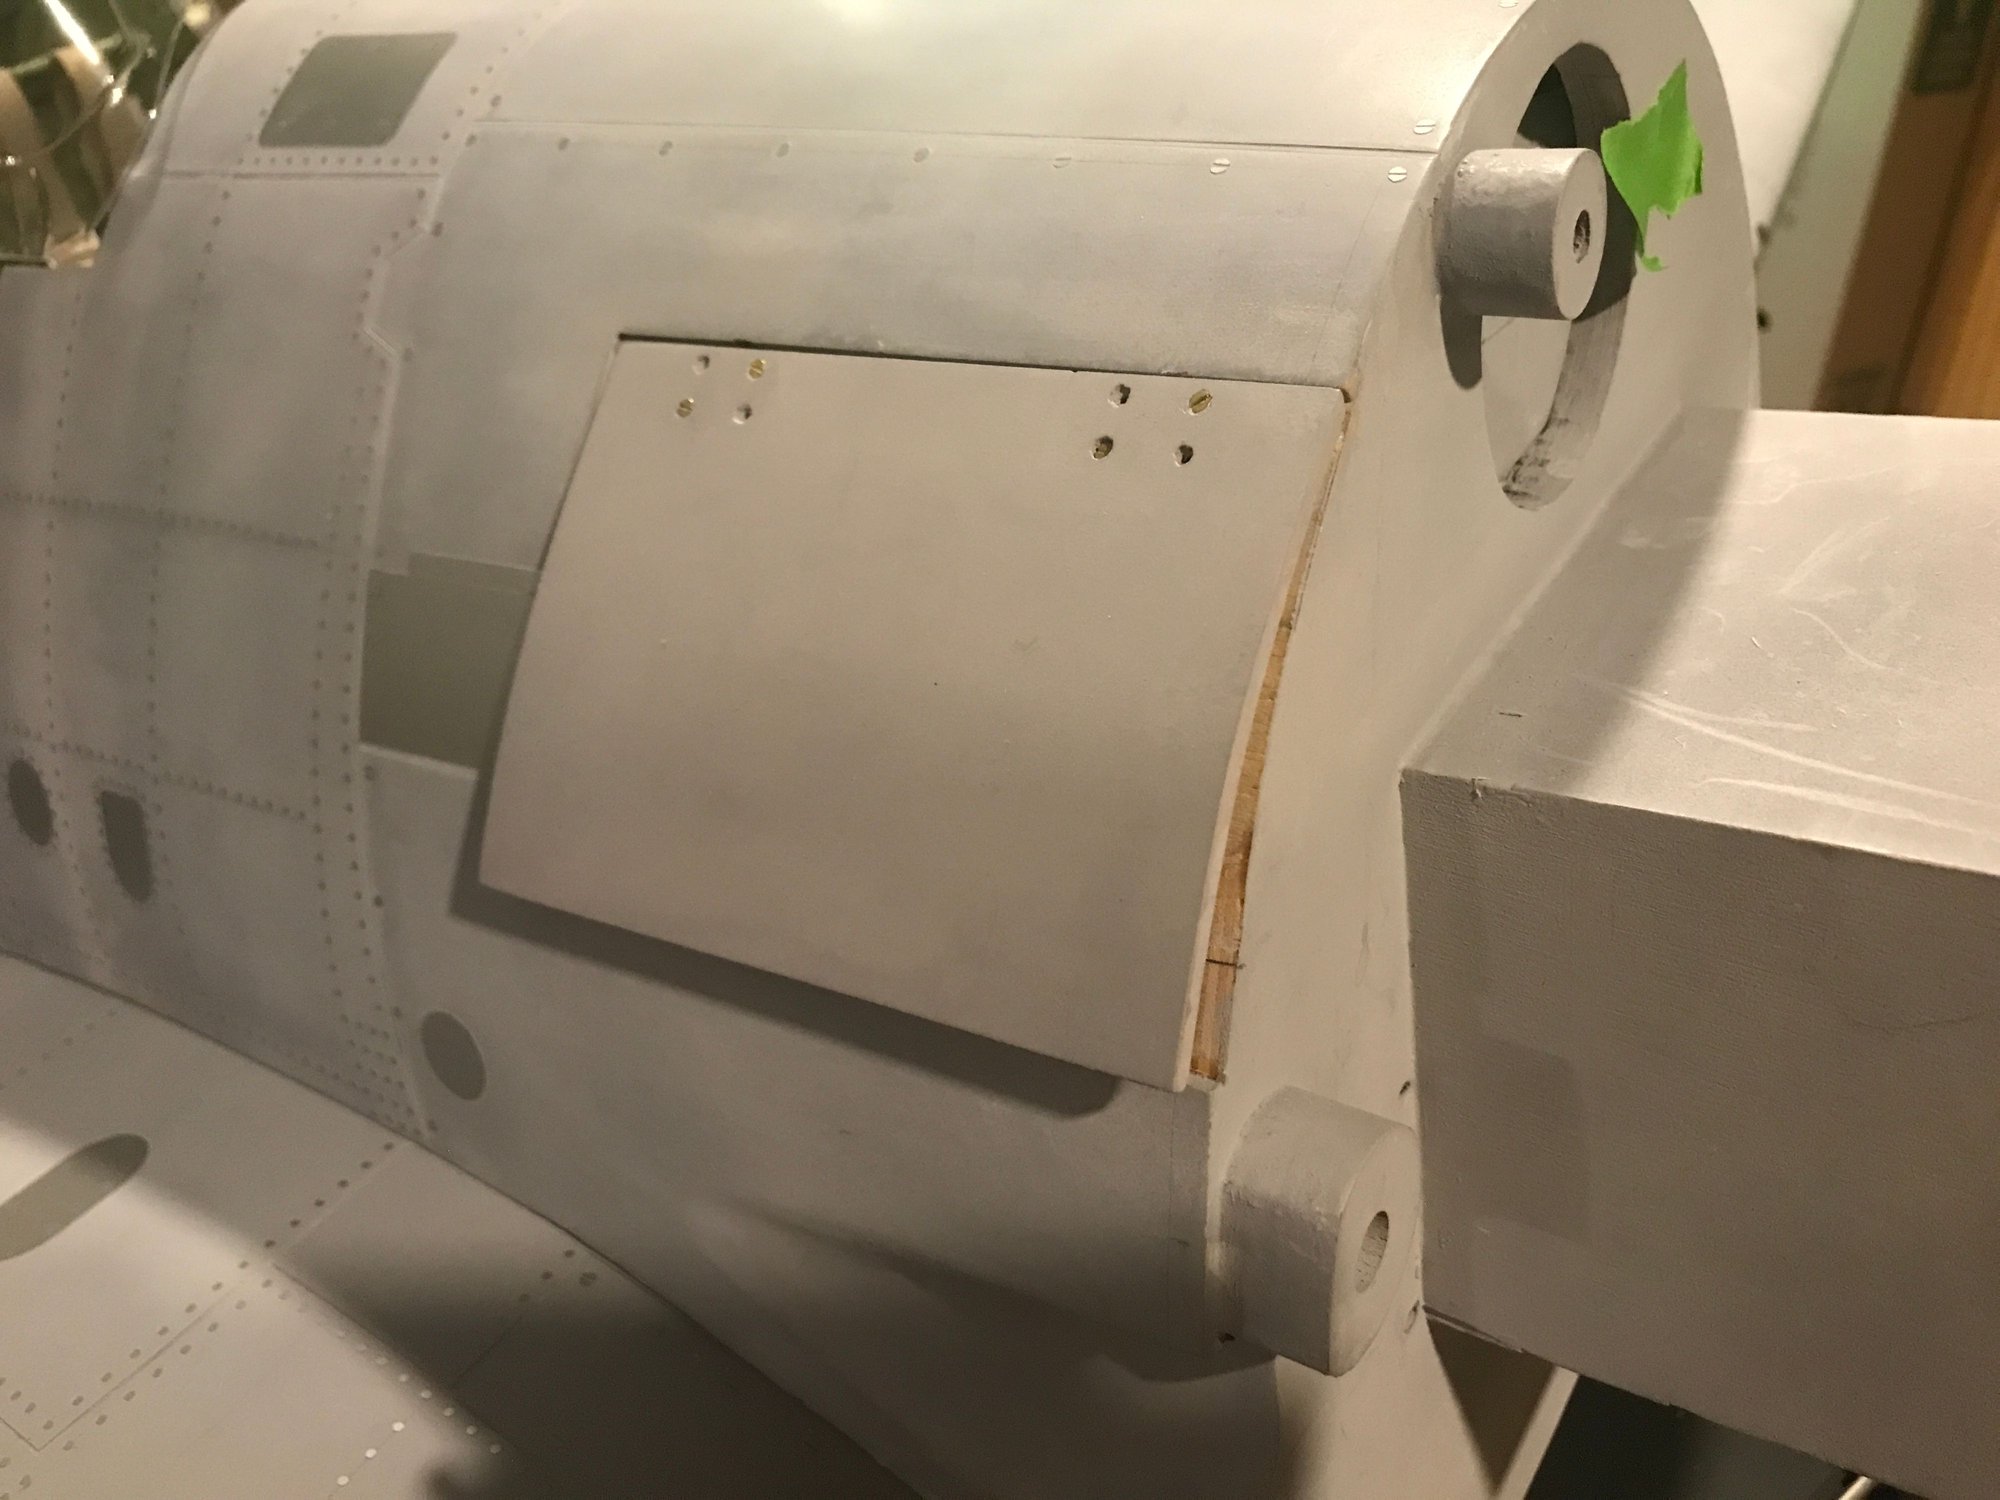
Regarding the aux. hatch: No more delays. Gotta fix this thing. I've mentioned before and the first photo shows that this cover doesn't lay correctly when closed. The first picture shows the cover in the closed position. There are hinge mounting issues and curvature issues.
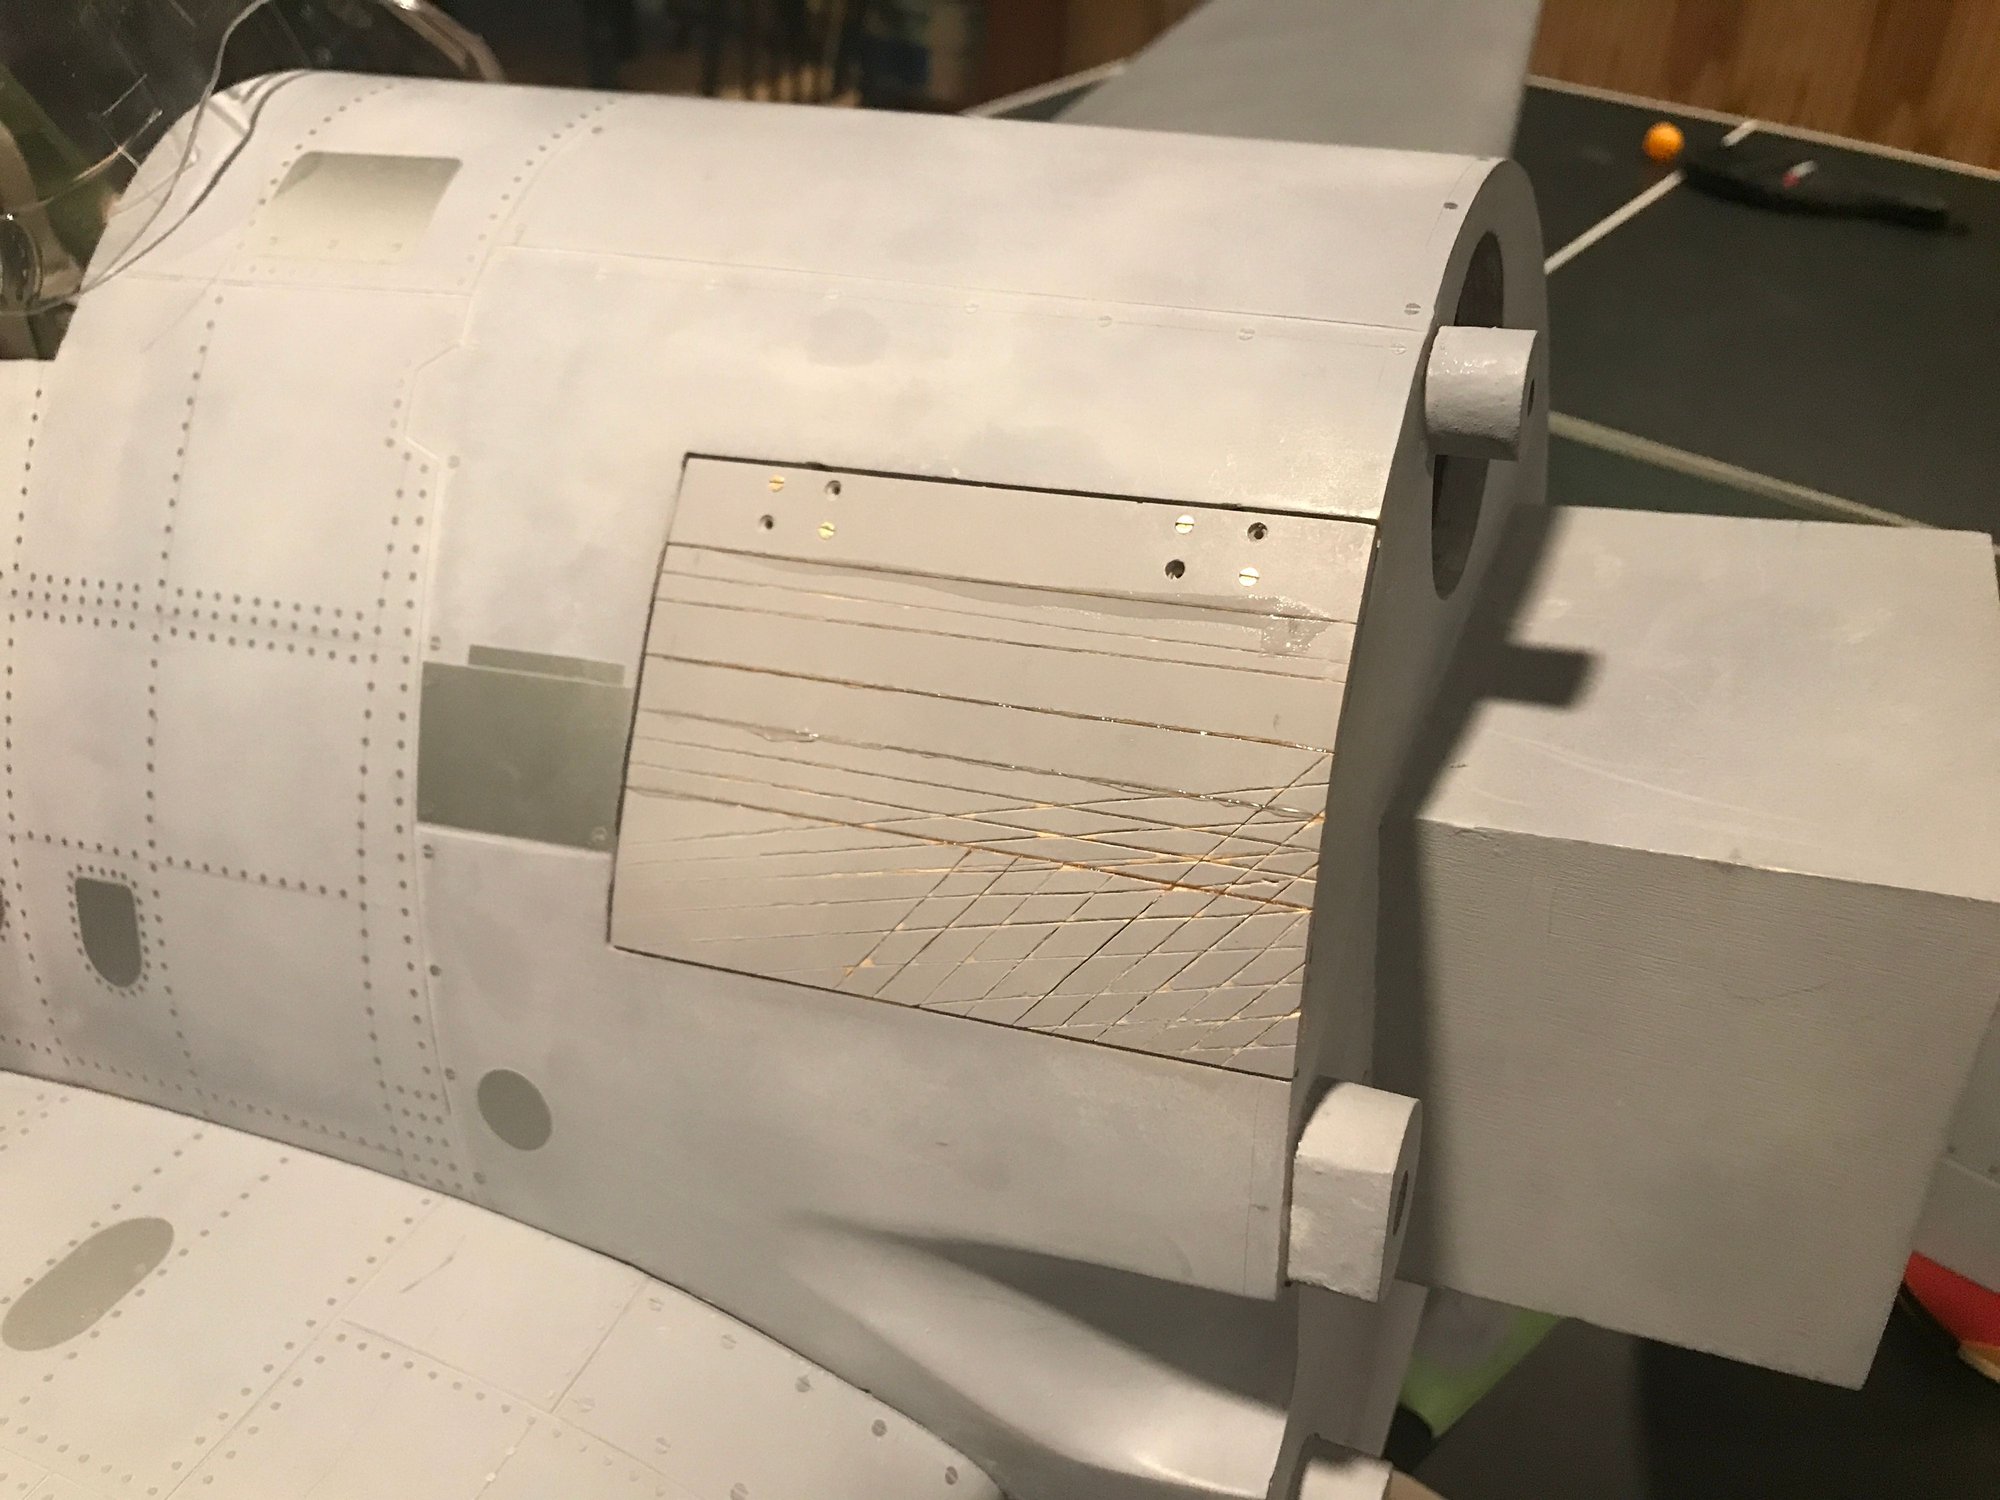
In the second picture, I show the results of multiple actions taken fit the hatch cover: I modified the forward hinge land location to better where the hinge wanted to be in it's closed location; I scored the cover in multiple locations in order to adjust it's curve; and, I ultimately split the cover into 5 pieces and reassembled them with epoxy.
The cover now closes fully and stays there with no external pressure applied. Hooray!
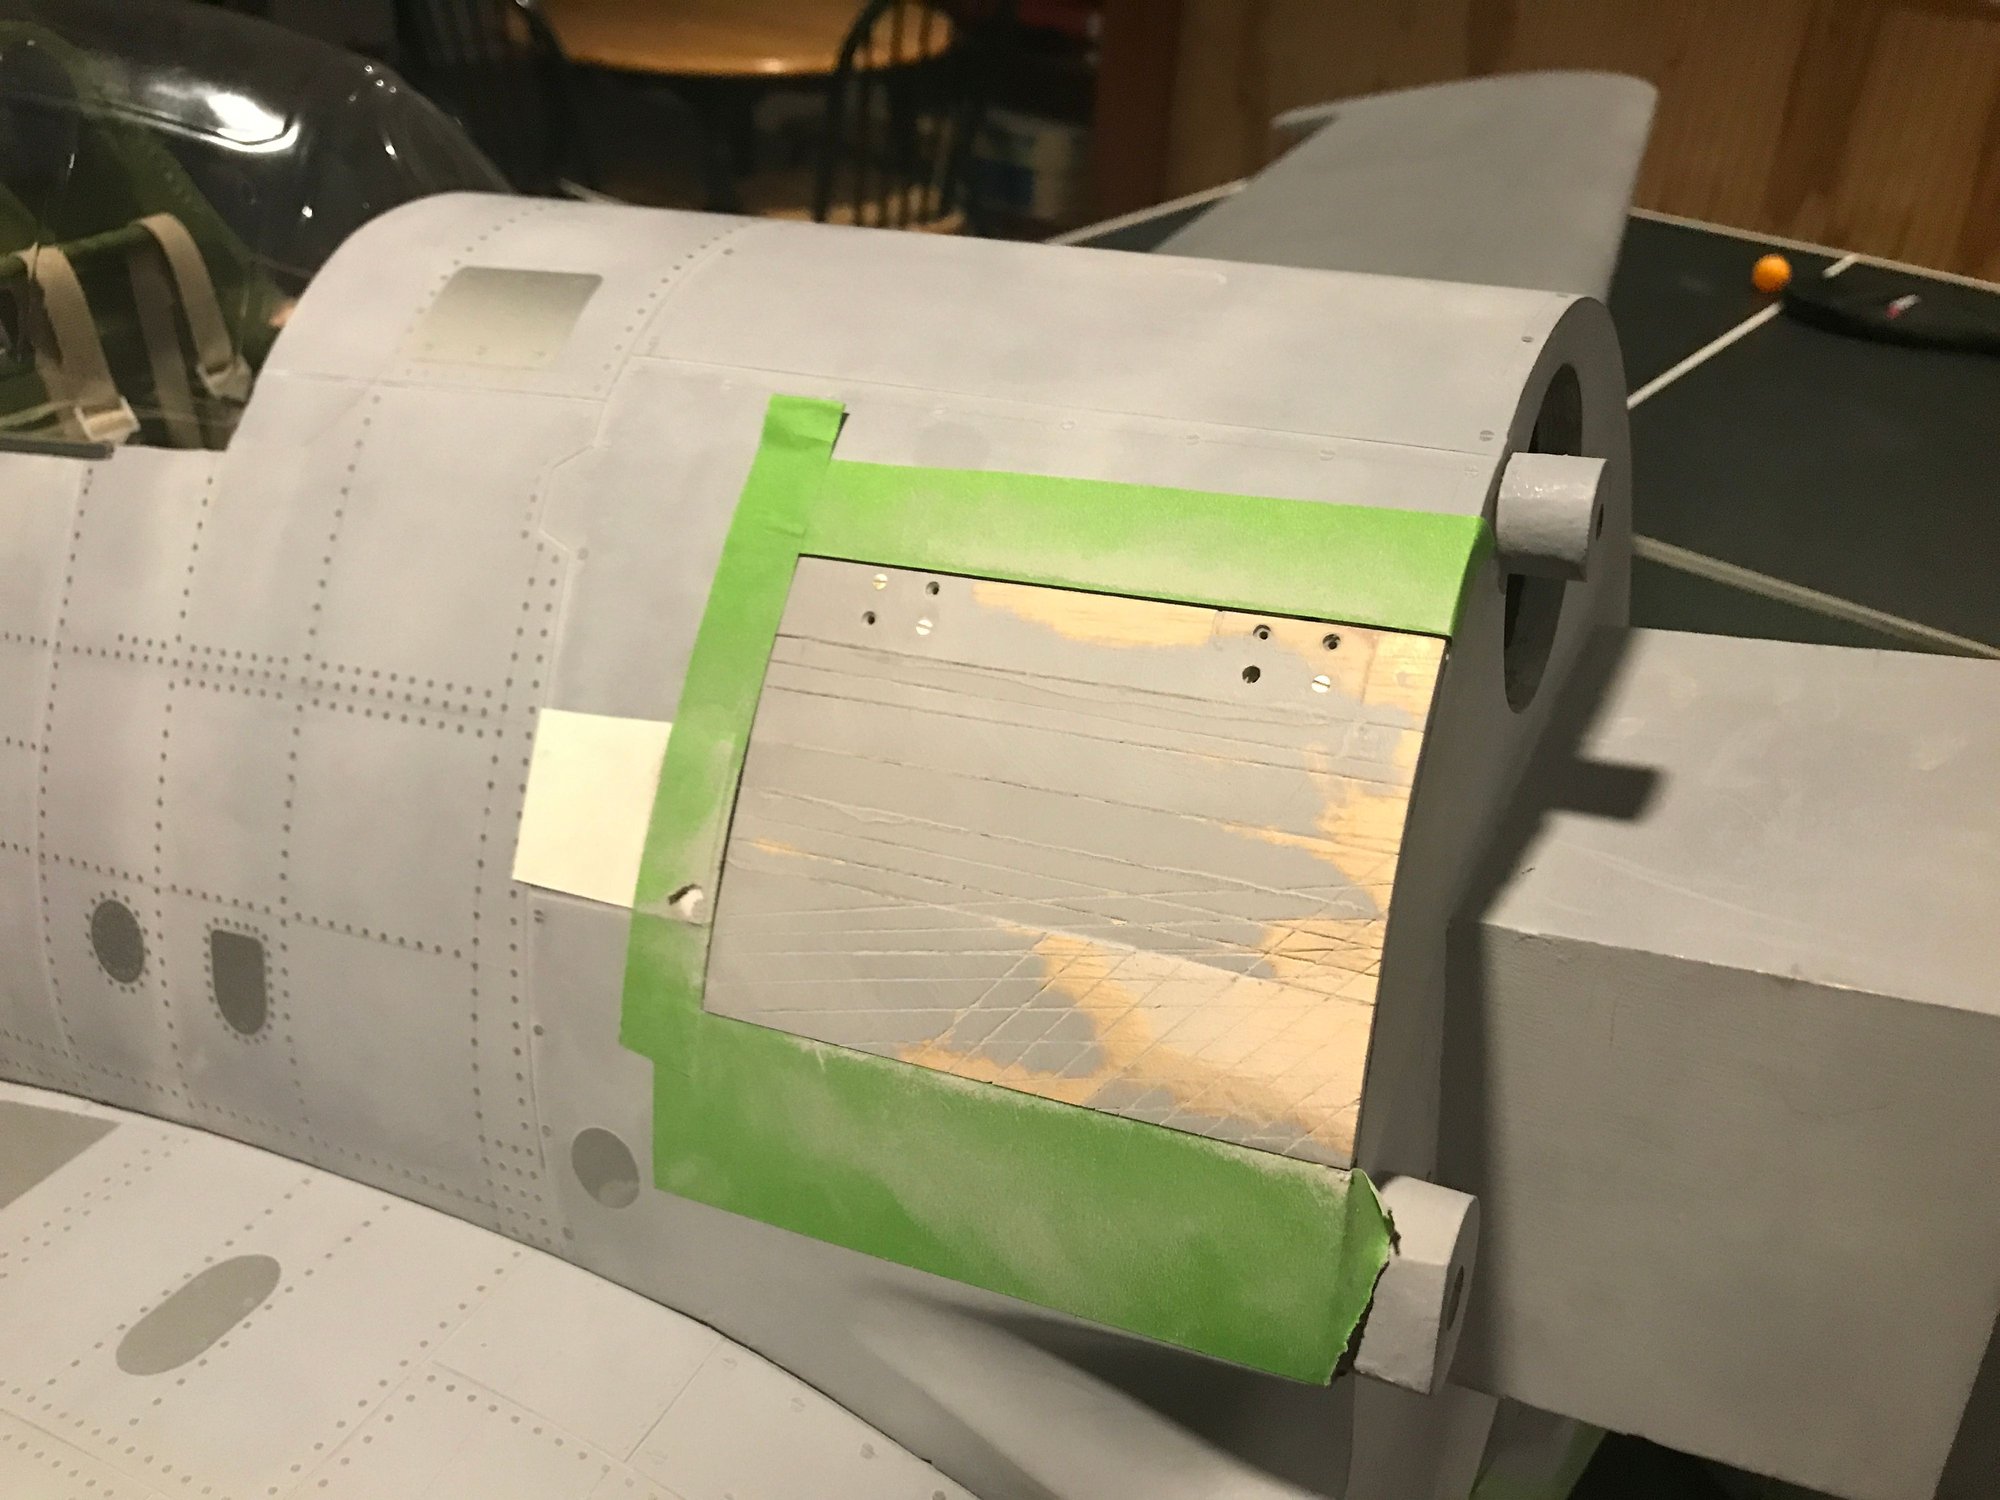
The third picture shows the start of the "sand, fill, sand and prime" process. I will also remove the cover and glass the backside of it.
I still need a means of latching. Since I haven't found anything that meets my requirements, yet, I'm still leaning toward magnets in each bottom corner with a small pull tab the lower edge. My requirements: Secure (doesn't open inflight) ; unobtrusive (trying to maintain look of the aircraft); functional (if remote shut-off doesn't work, need to access ignition battery switch quickly, easily).
That's all for now.
Cover won't lay flat
Score, split and epoxy back together
Start the "fill, sand and prime" process
Regarding the aux. hatch: No more delays. Gotta fix this thing. I've mentioned before and the first photo shows that this cover doesn't lay correctly when closed. The first picture shows the cover in the closed position. There are hinge mounting issues and curvature issues.
In the second picture, I show the results of multiple actions taken fit the hatch cover: I modified the forward hinge land location to better where the hinge wanted to be in it's closed location; I scored the cover in multiple locations in order to adjust it's curve; and, I ultimately split the cover into 5 pieces and reassembled them with epoxy.
The cover now closes fully and stays there with no external pressure applied. Hooray!
The third picture shows the start of the "sand, fill, sand and prime" process. I will also remove the cover and glass the backside of it.
I still need a means of latching. Since I haven't found anything that meets my requirements, yet, I'm still leaning toward magnets in each bottom corner with a small pull tab the lower edge. My requirements: Secure (doesn't open inflight) ; unobtrusive (trying to maintain look of the aircraft); functional (if remote shut-off doesn't work, need to access ignition battery switch quickly, easily).
That's all for now.
Cover won't lay flat
Score, split and epoxy back together
Start the "fill, sand and prime" process
