


CK AERO Alchemy Pro Builder's Kit Foam Cores

 07-17-2022, 05:14 PM
#77

LOL!!
oh not quite Yet Ricardo
I have not checked the weight yet. But I will and I will report back.
I was able to complete the mission, and this took all day.
Lots of fun, But I did it.
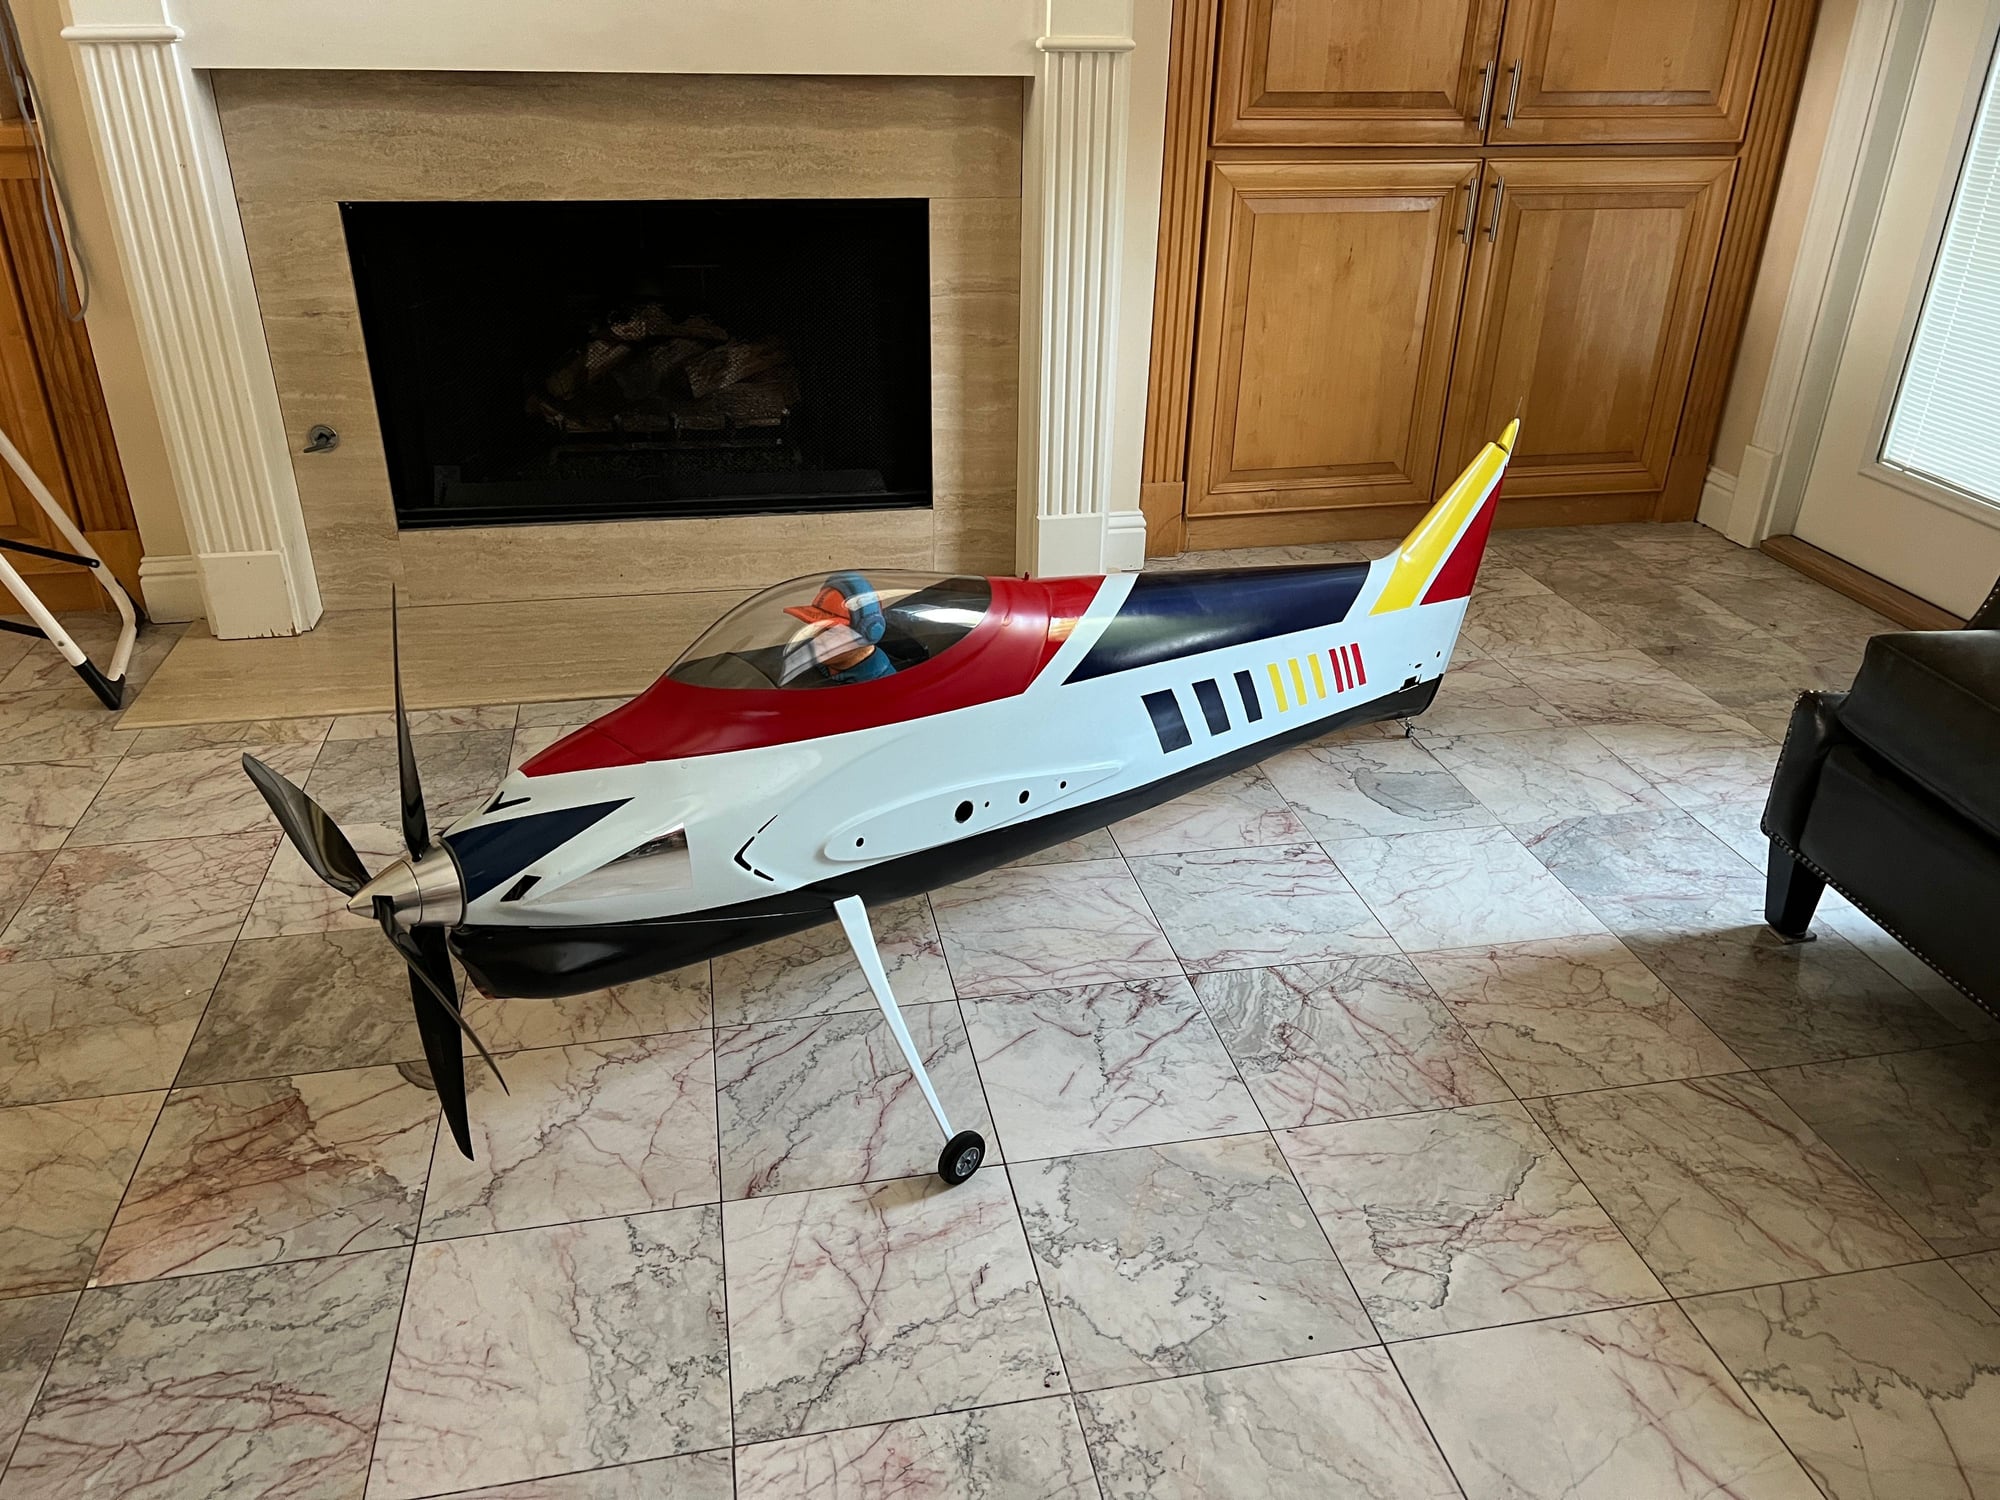
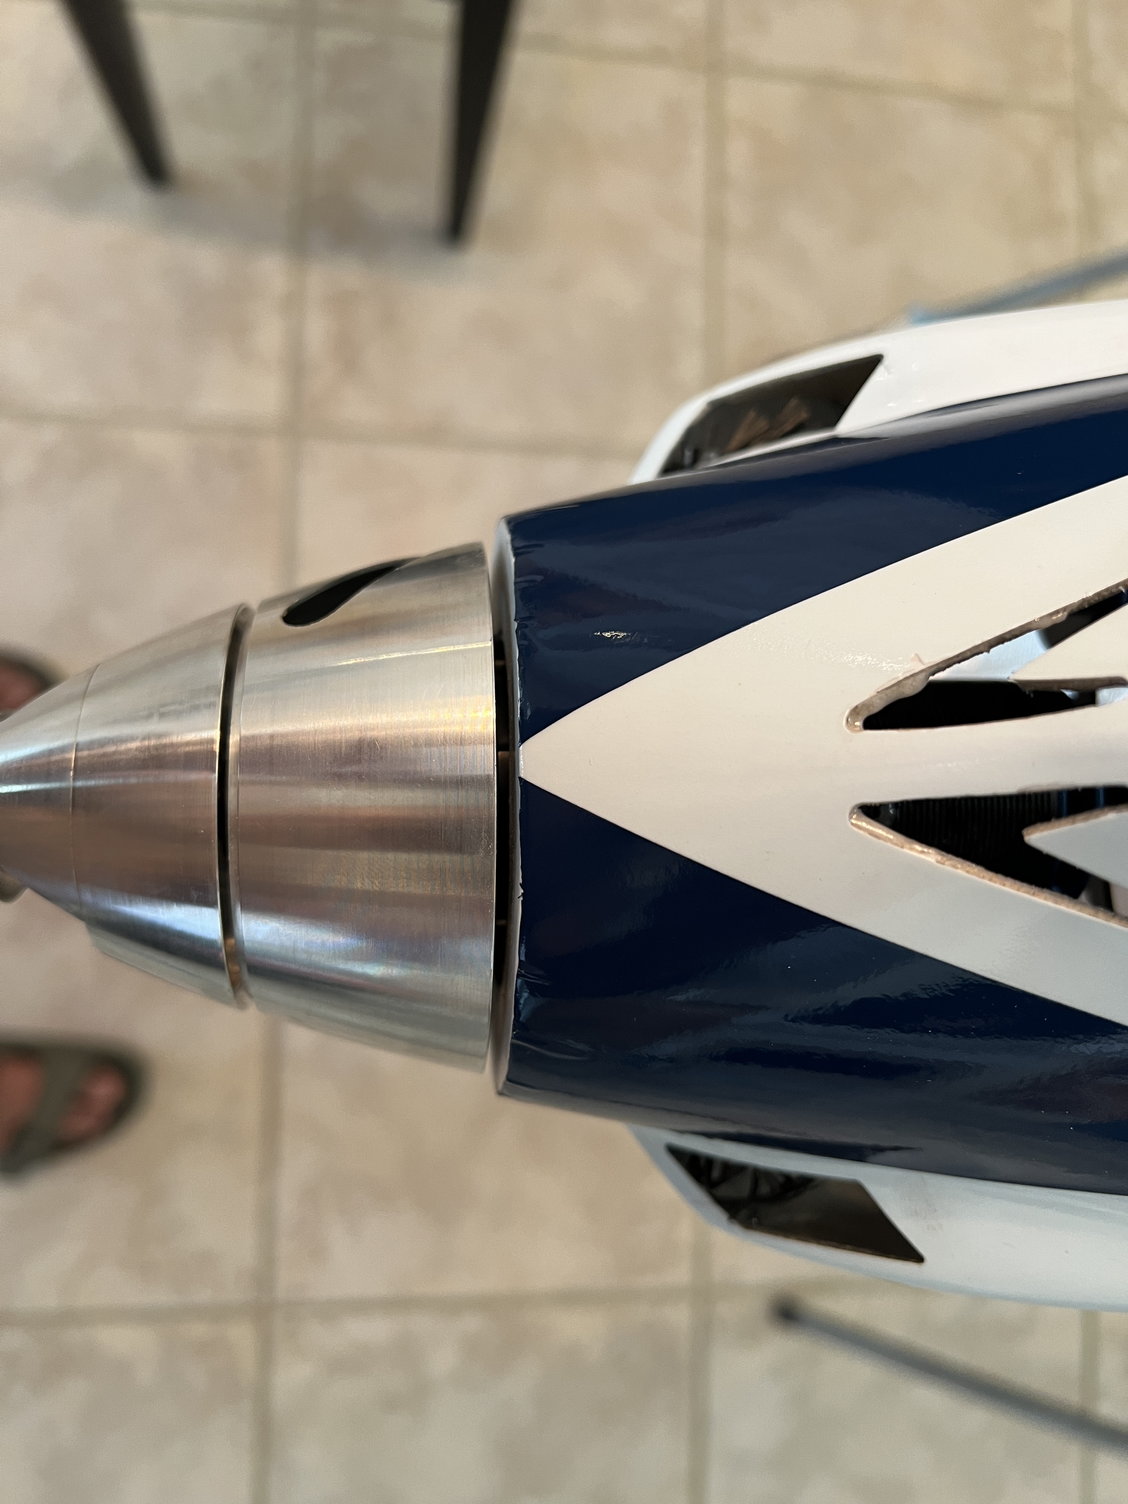
The 1st picture is the final result
but, I will go over all the steps.
these are the steps:
1. I identified the parts that I had, and was then able to know which is the front mount and which is the rear mount.
2. I then assembled as much of it as possible, to mock it up, and get an idea of how to fit the motor and mount thru the fuselage and out the nose.
3. Then, I knew which was the front mount and the rear mount. I then made a paper template, followed by a plywood template of the front mount.
4. Using the paper one 1st, I got an idea of how much to remove so that it would allow the motor to be moved forward enough so that the hub is out the front of the nose.
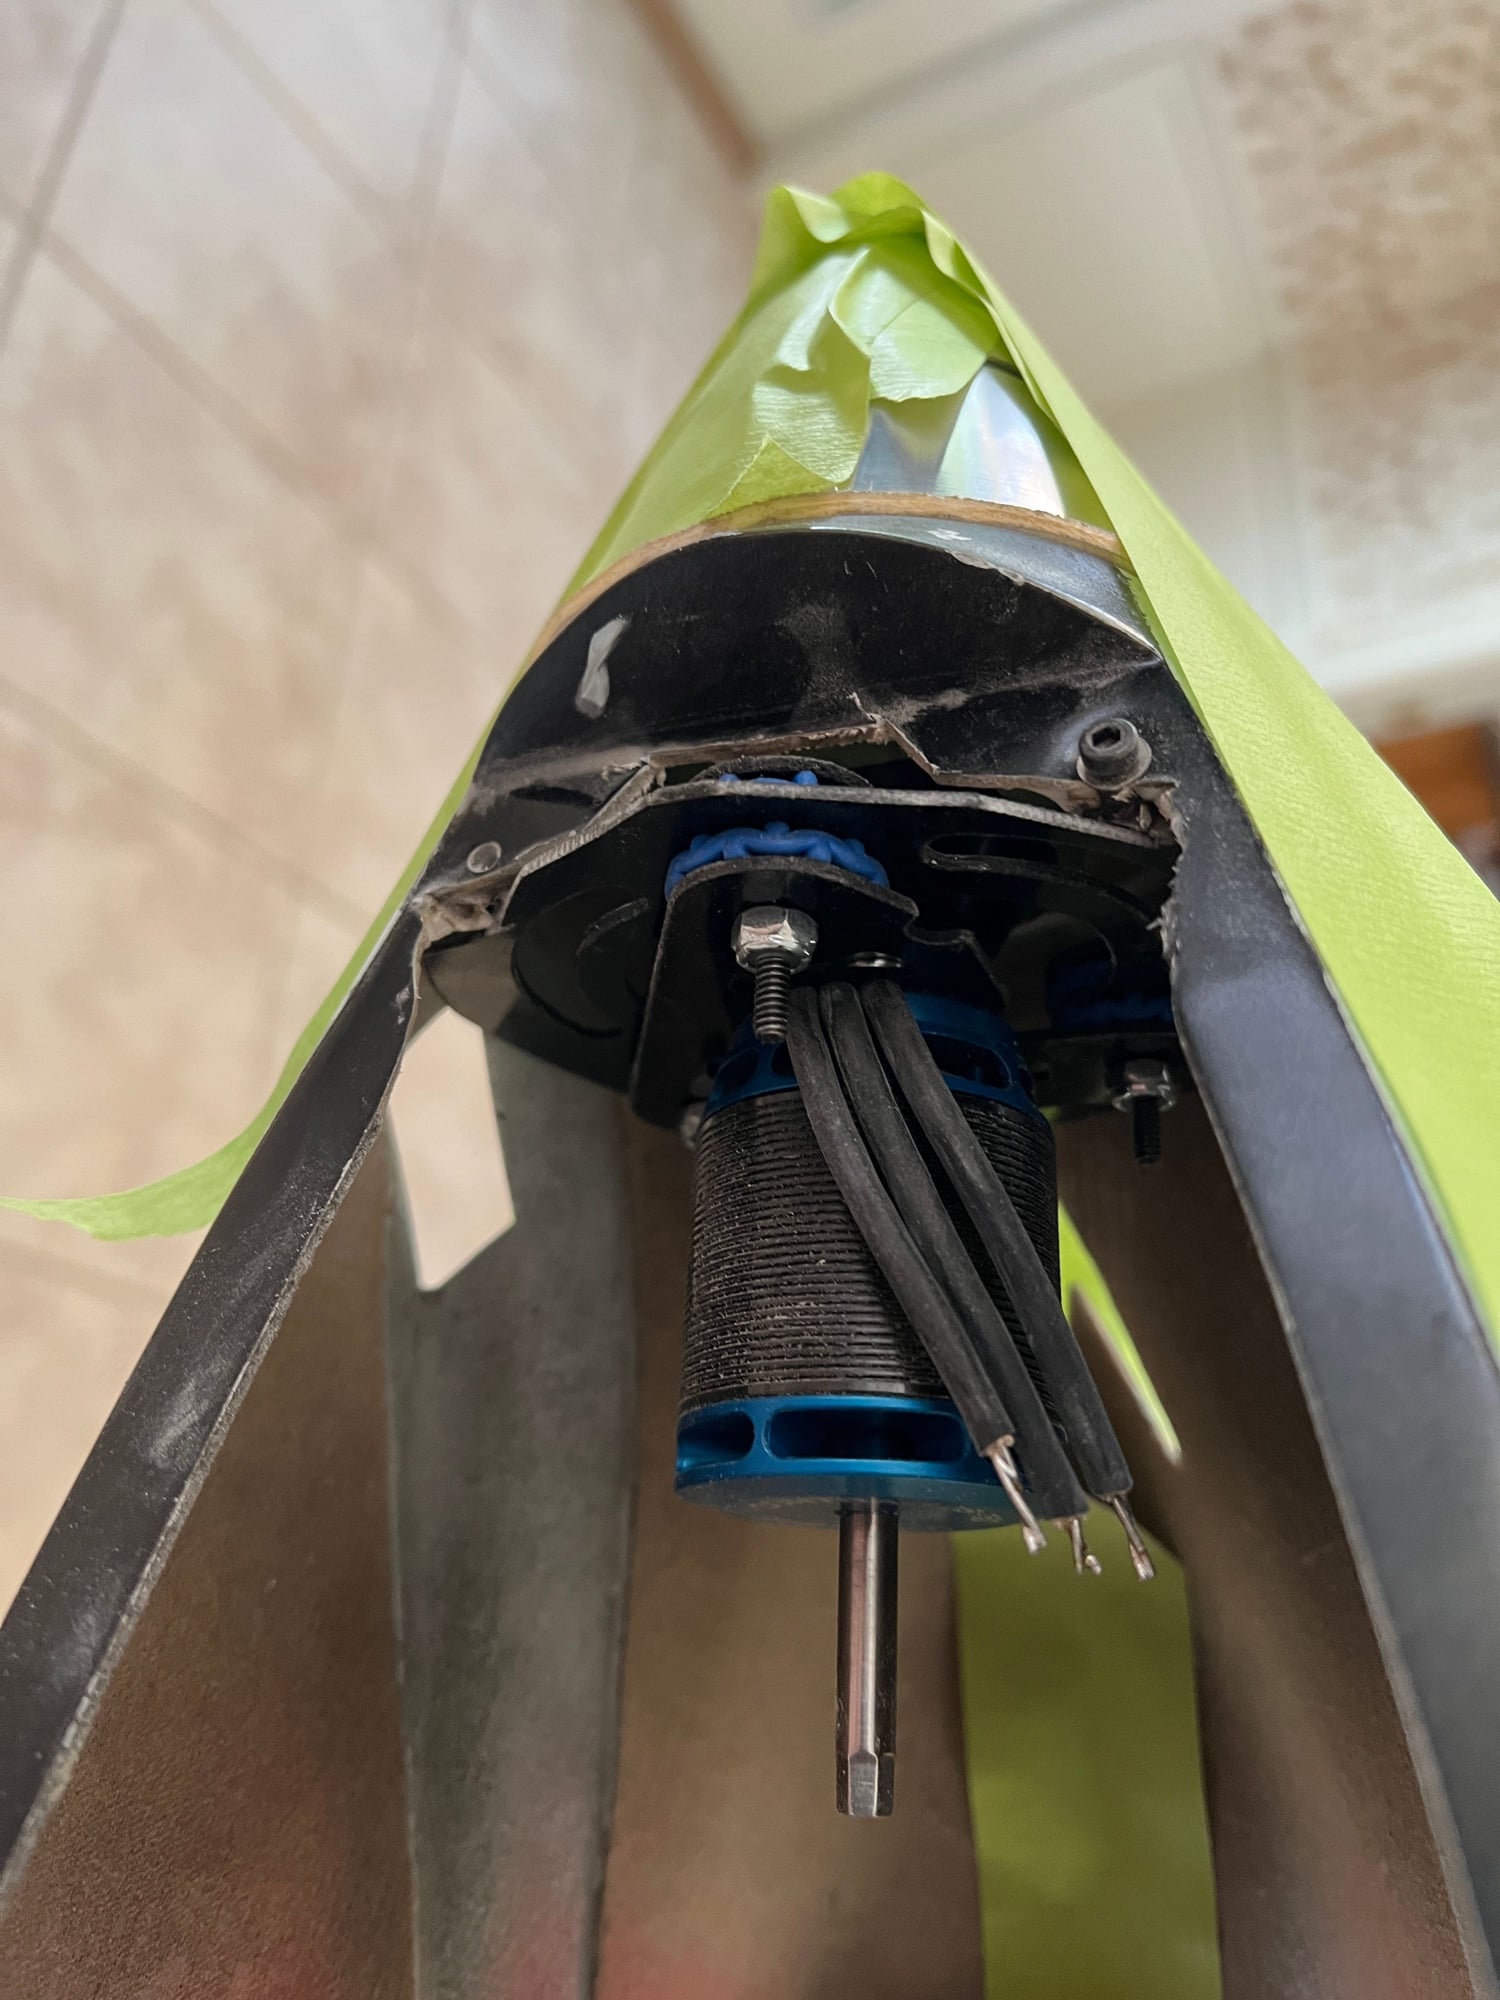
5. Then, I made the plywood template of the front mount, and began to wittle away, slowly, until the front mount allowed the front hub to stick out by 1/8"
6. then I proceeded to make the same cuts on the CF front mount. Then I put it all together, and installed it with the hub out the front of the nose. Then I assembled the contra cone and such, so that , with a 1/8" plywood ring I made, I pushed the cone back against the nose ring, and then taped it all together. Now, I can begin to glue the CF front mount to the fuselage sides. I also covered the small vent holes so as to not allow glue to get on the outer surface of the fuselage.
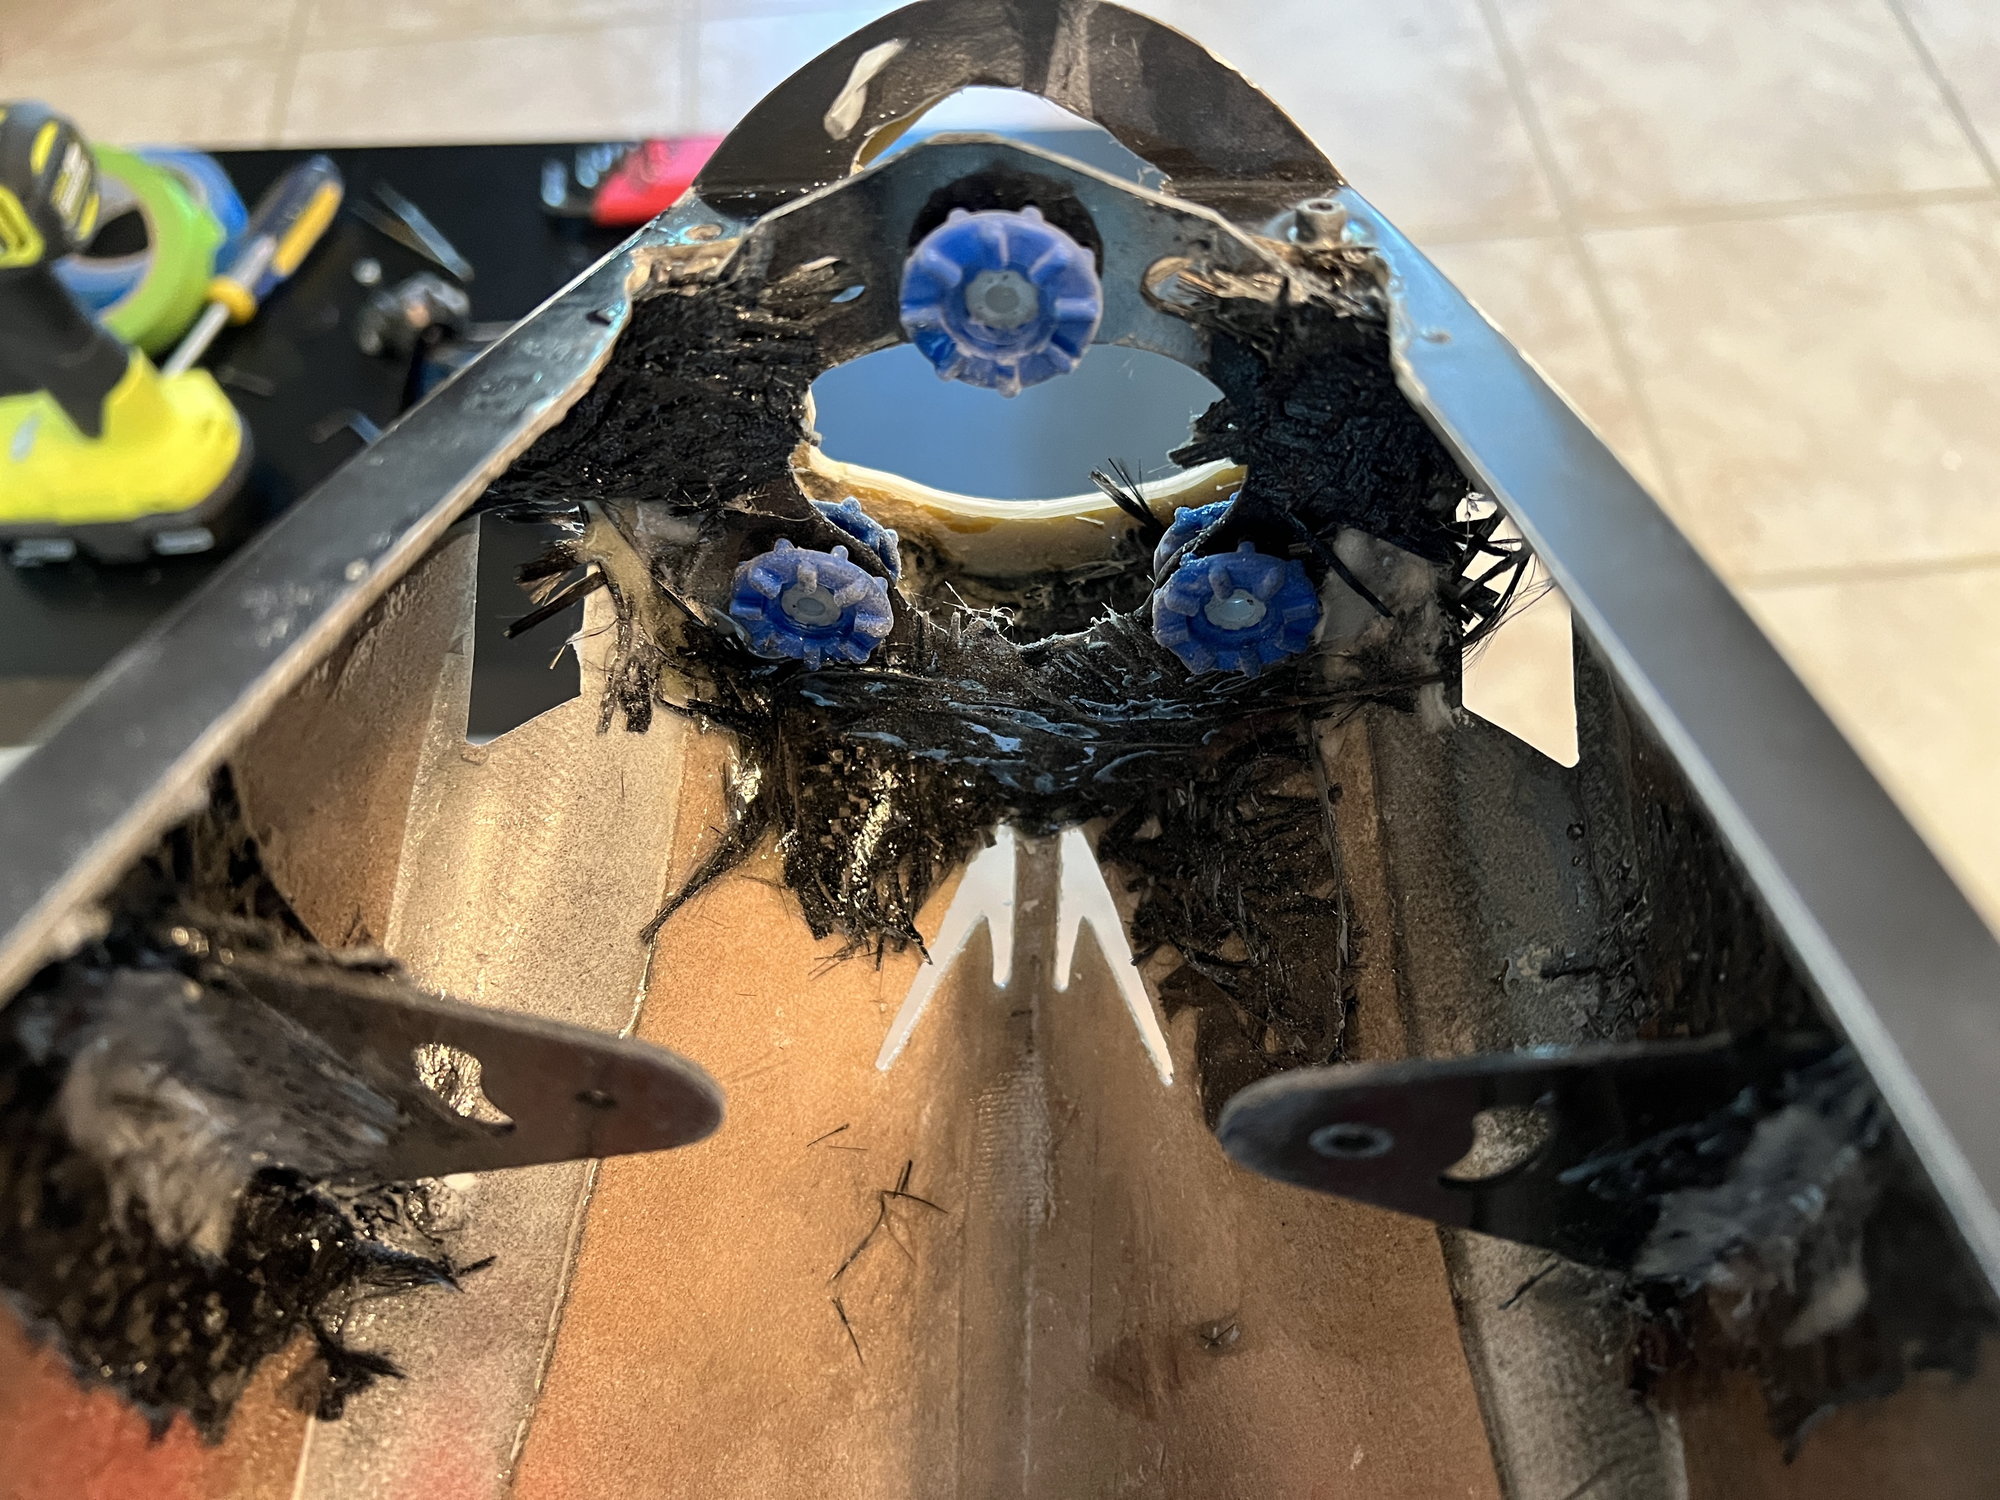
7. Once the front mount was glued and prepped, then I glued on CF cloth strips with resin on the fuselage side, then Installed the rear mount, and used resin with CF cloth in the front and the back of the tabs.
8. I let all this cure a good while, then I removed the motor and the contra unit, and this exposed other areas of the front ring. SO I was able to apply more CF cloth and resin to reinforce the ring in the front of it and in the back.
WIth regards to weight, I am being weight conscious, but two places to not be, is the motor instal and the gear plate. Both of which I did reinforce, this added 4 ounces to the frame, but a strong gear plate is well worth it. As well as making sure the motor is well installed, so that it does not come loose of the fuse at a contest. Seen that happen.
So that was it.
Now, some pictures:
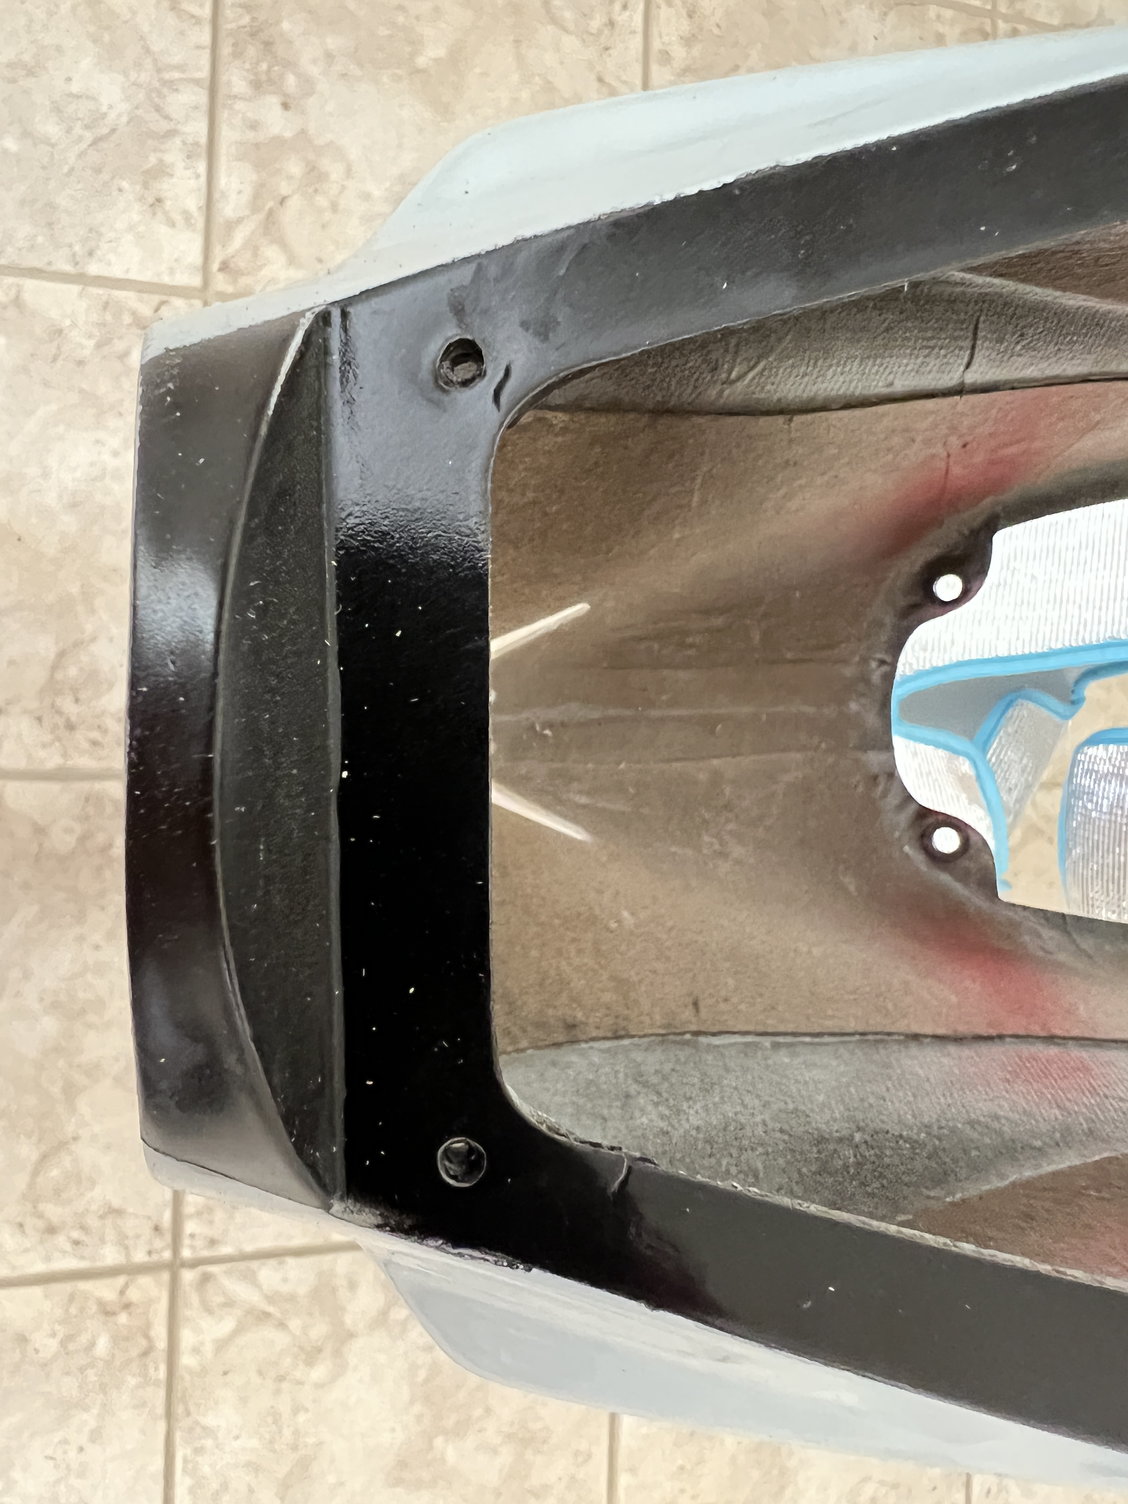
bottom of nose area, where chin cowl would be.
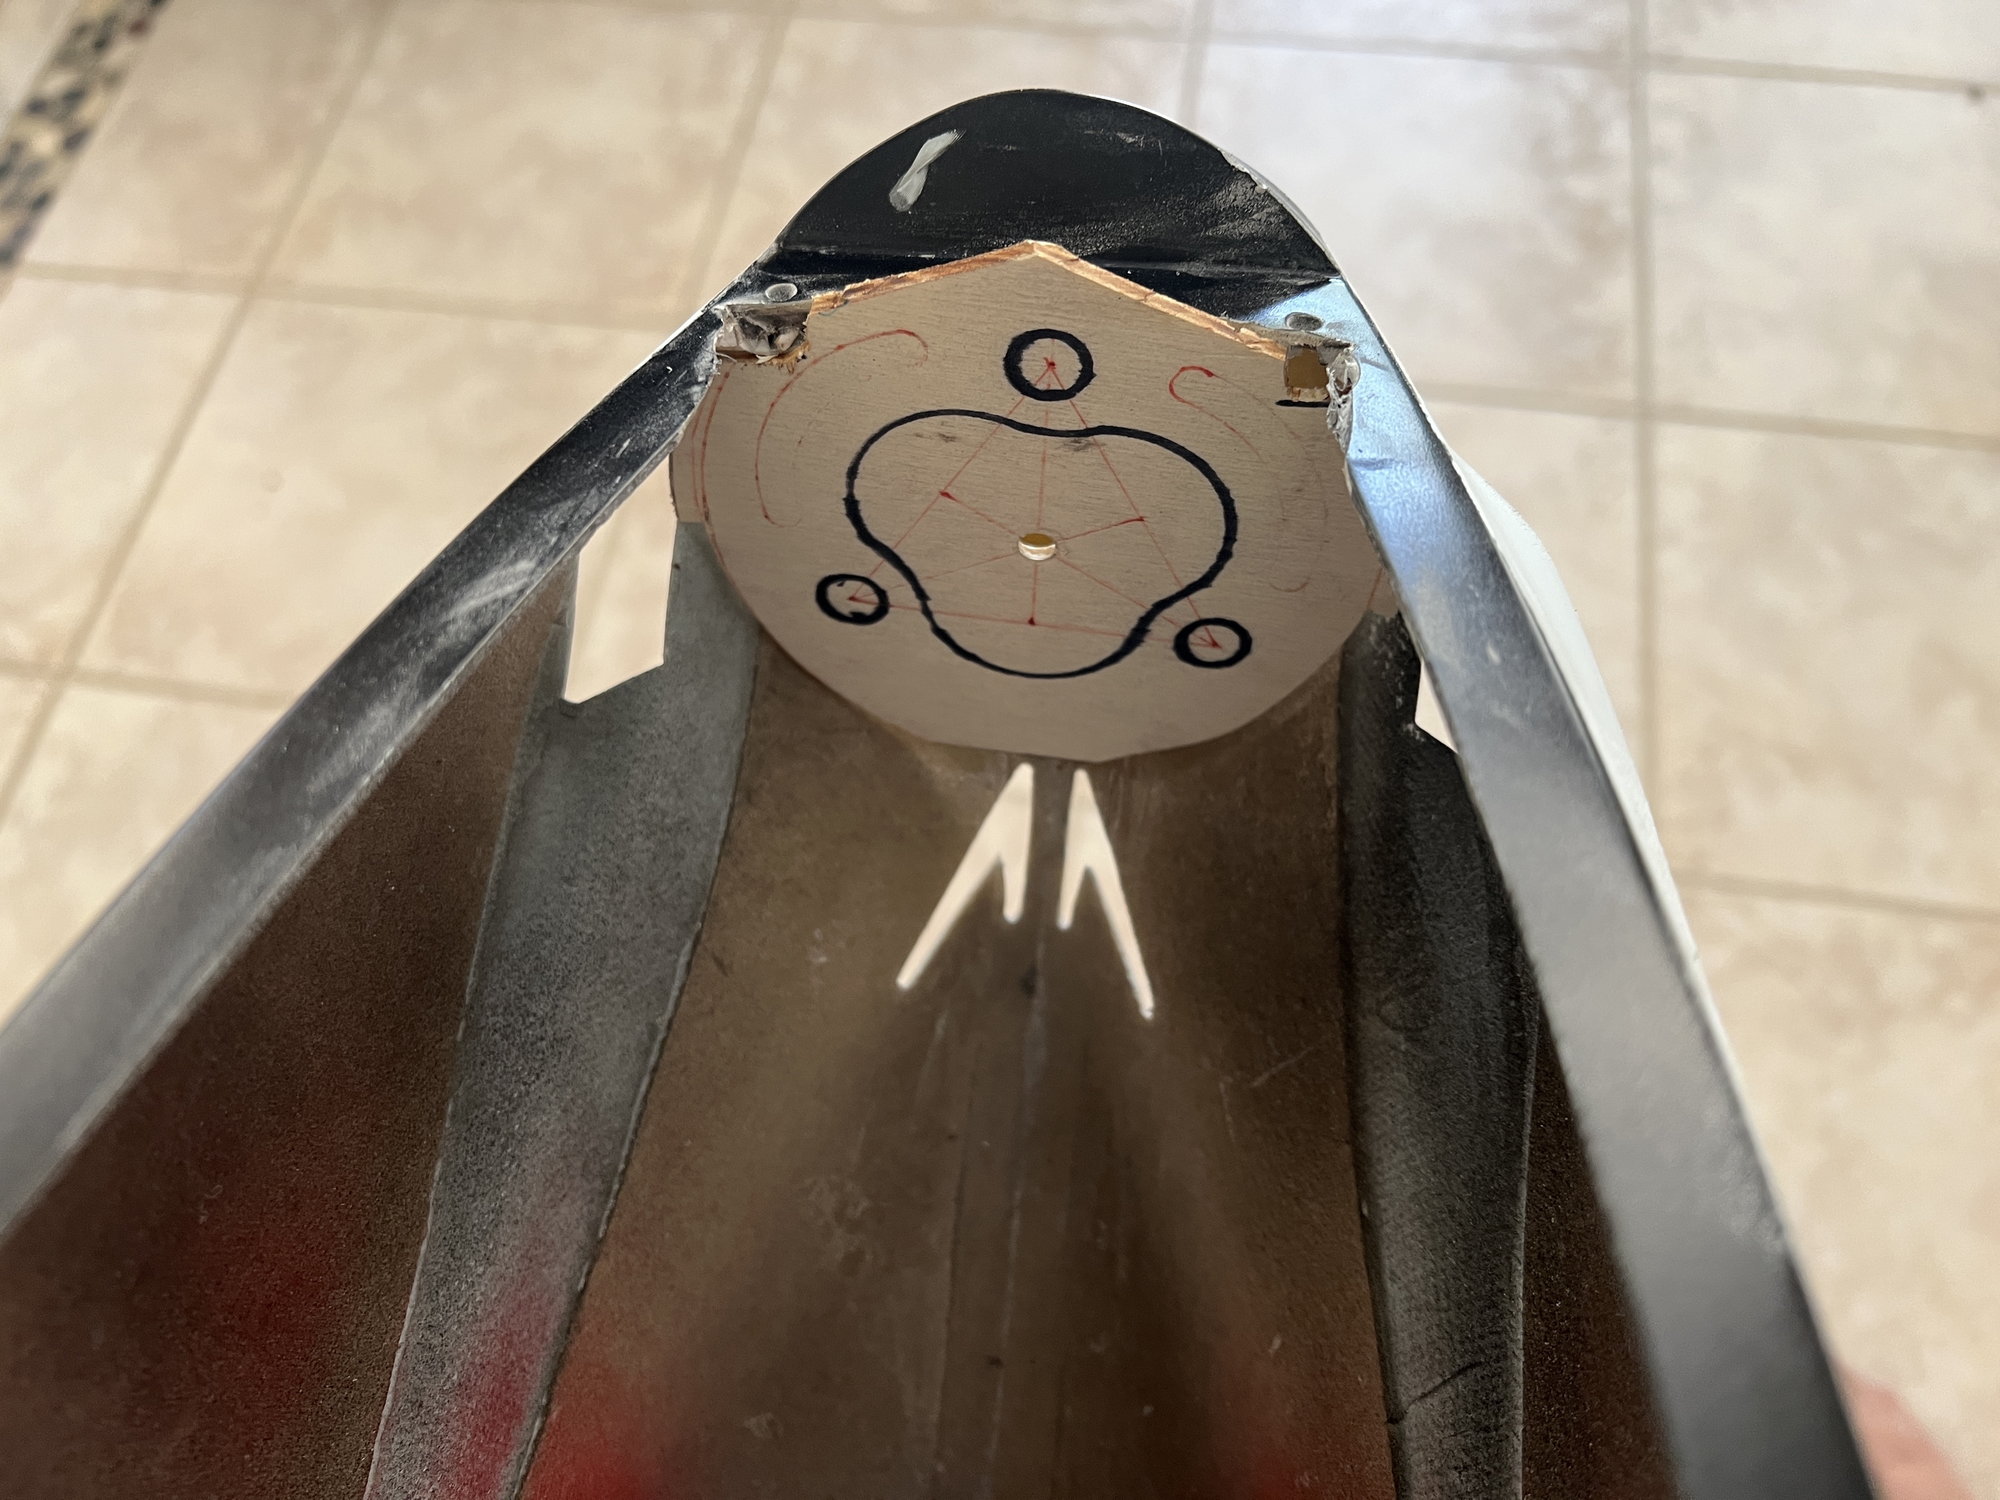
trialing the plywood ring.
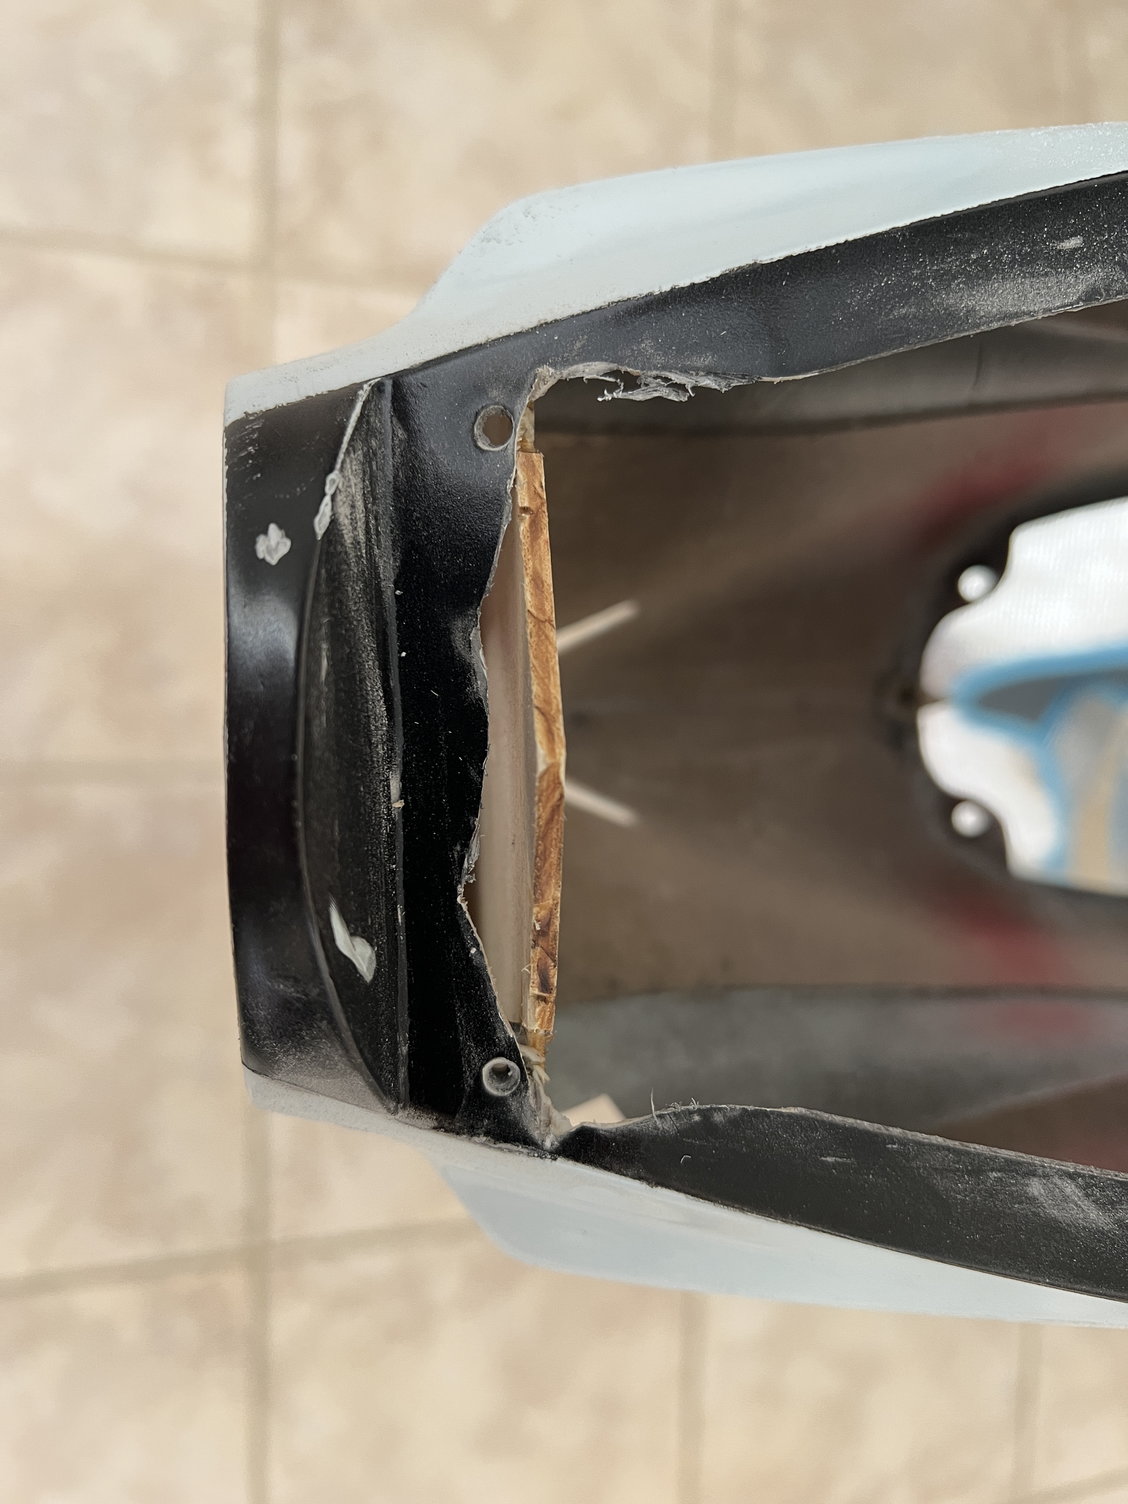
plywood ring getting reduced.
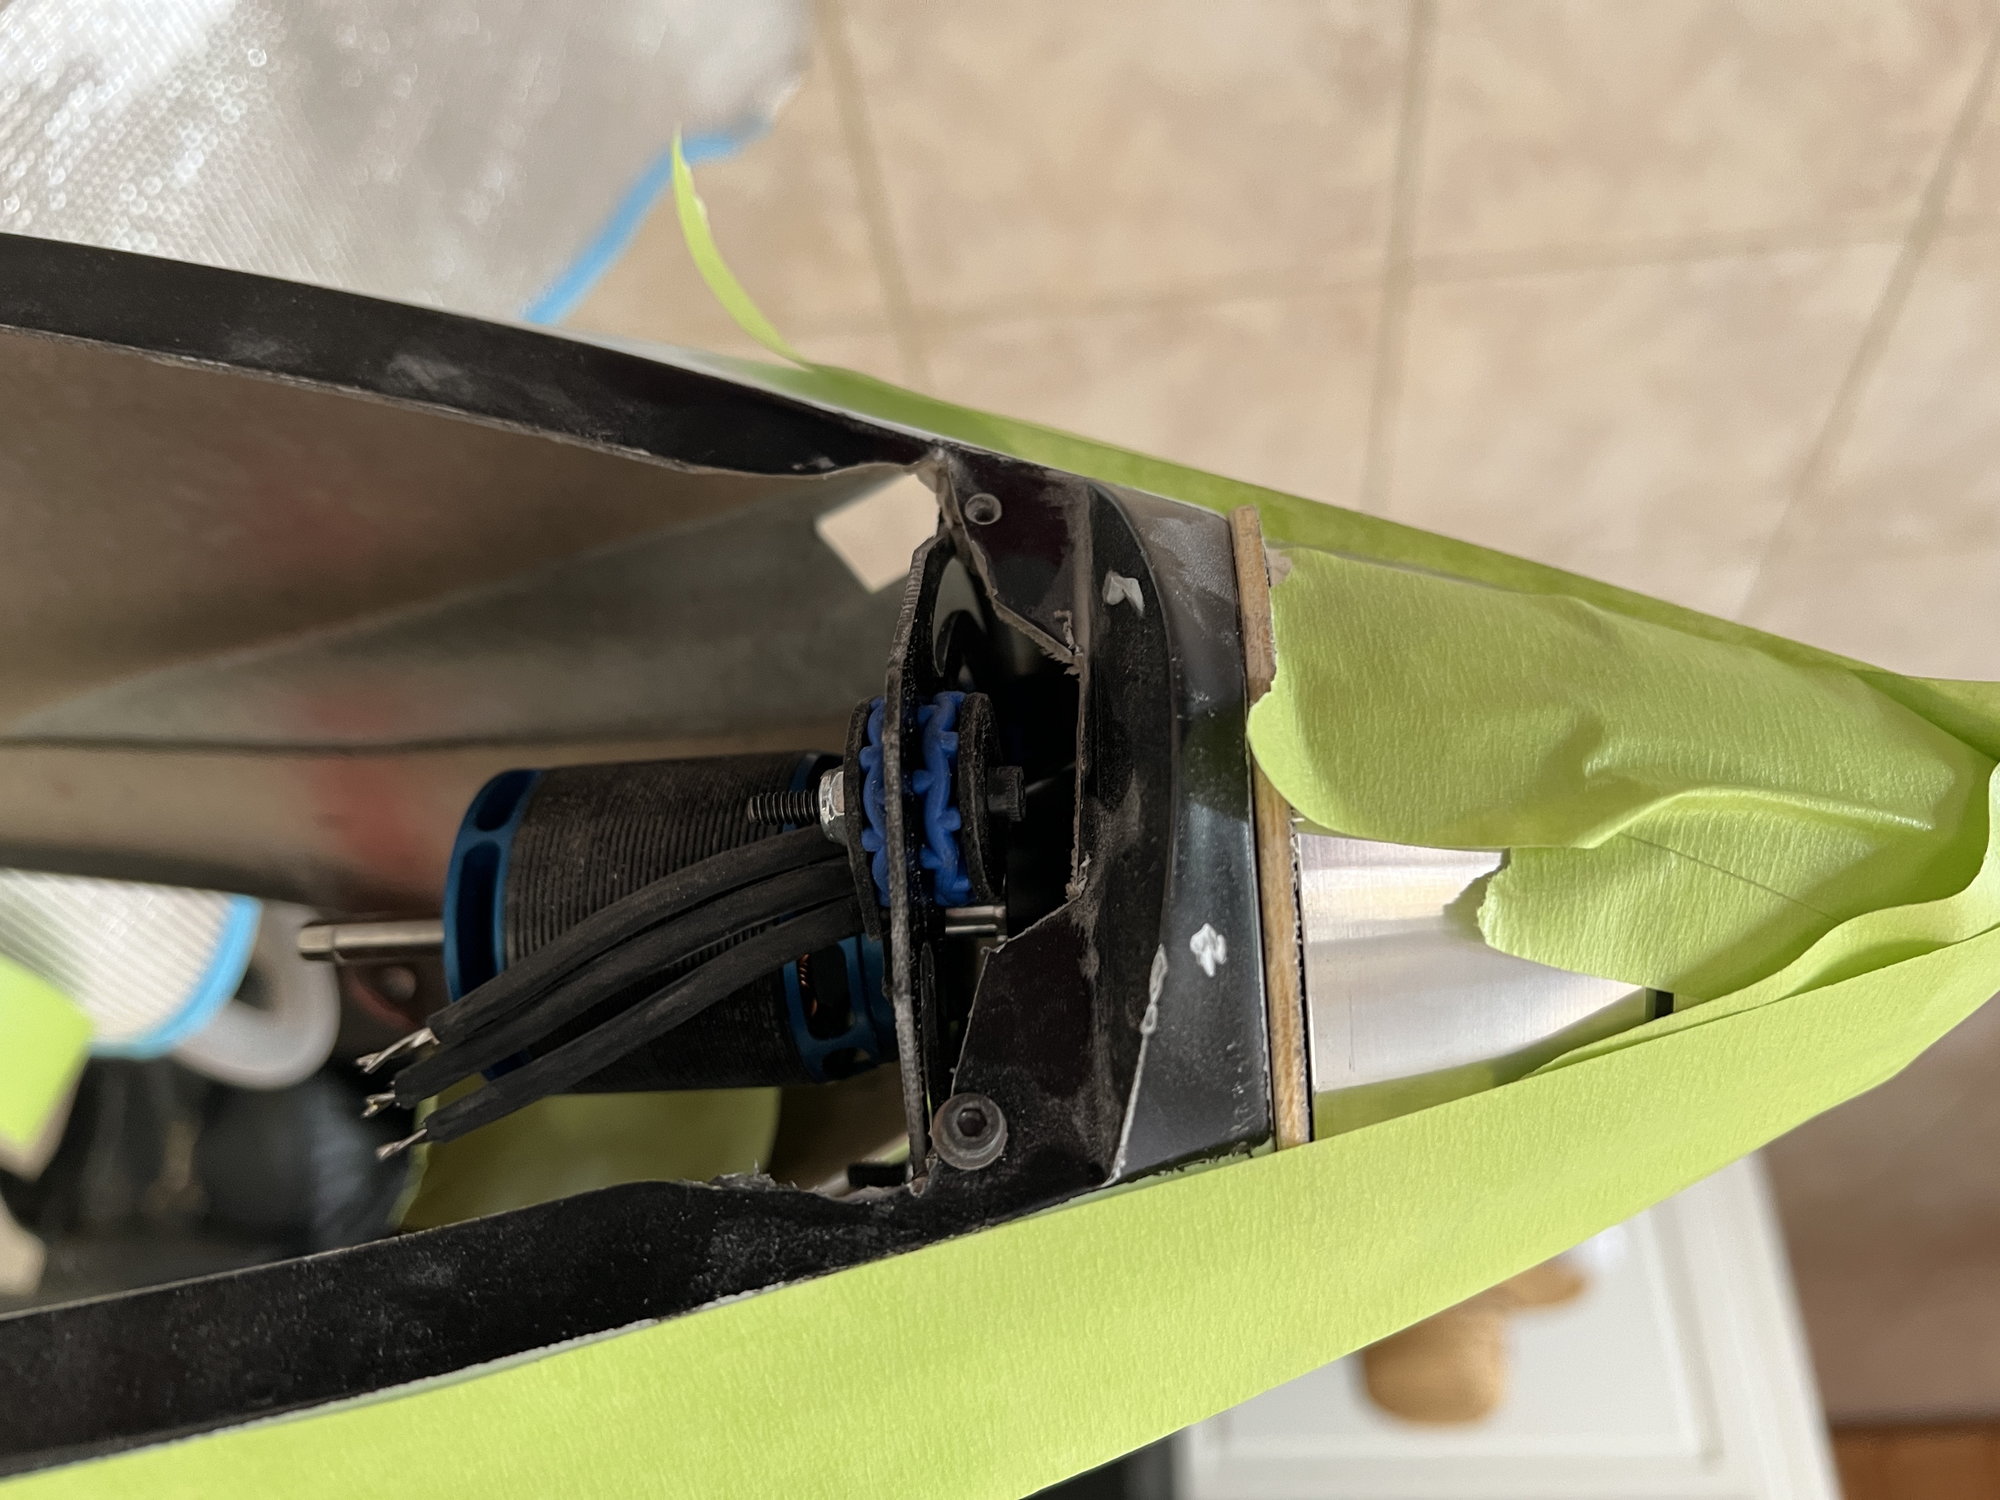
CF front mount in place and if you see the plywood spacer, 1/8" between the back of the spinner and the nose ring. Now, I push it all back and can begin the glueing of the front mount.
rear mount not in yet.
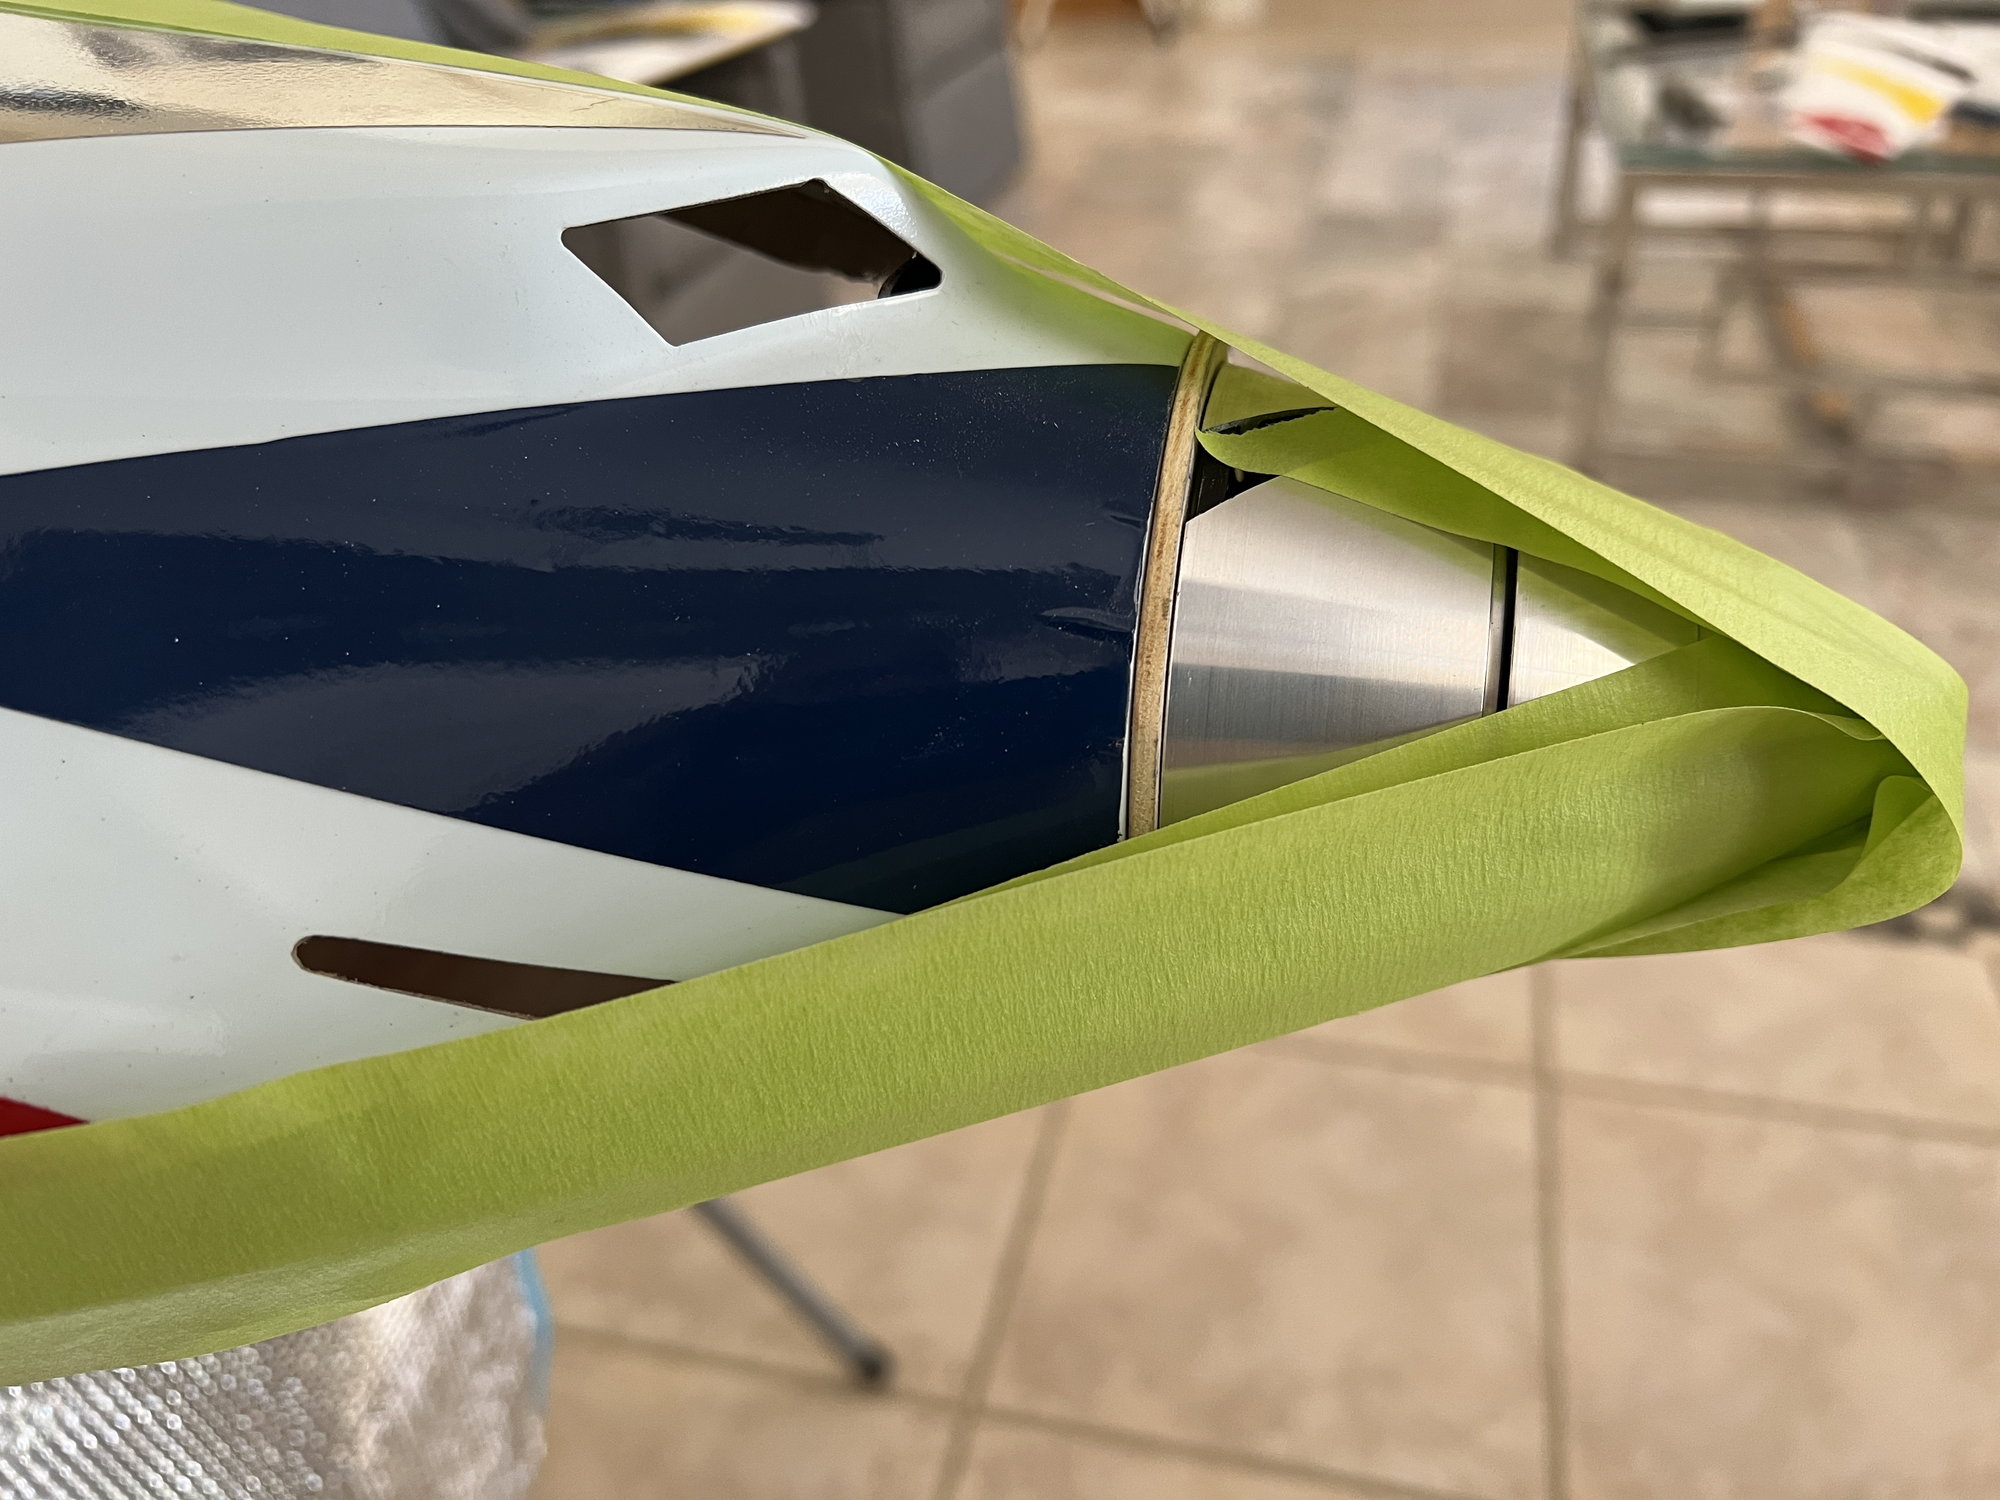
pushing back to make sure we have a nice spinner gap
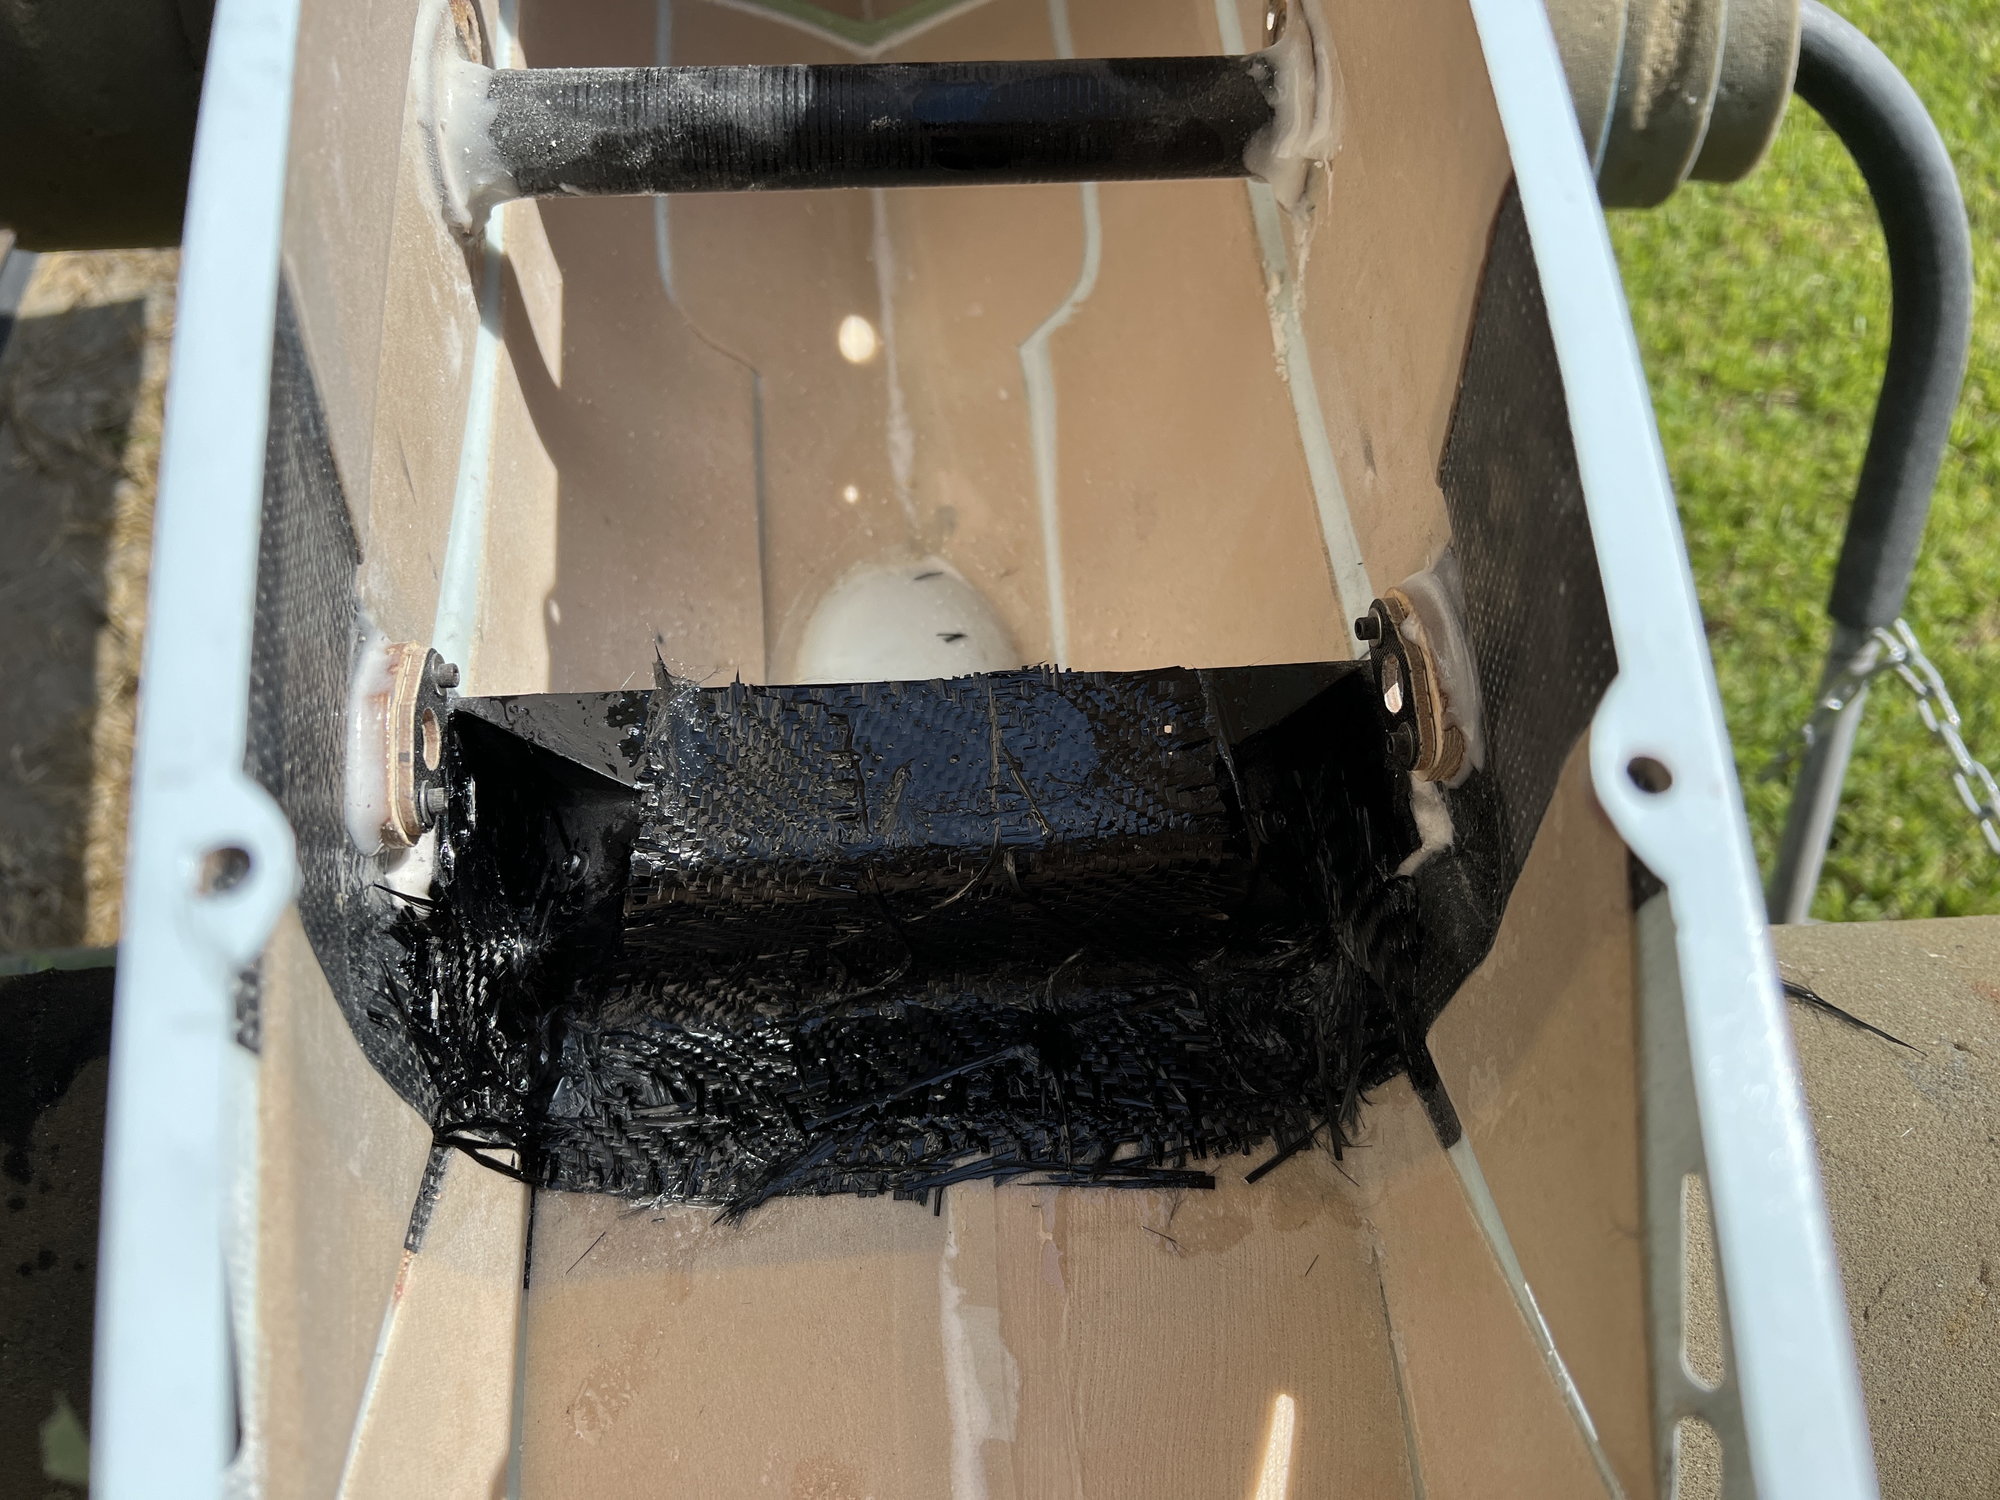
reinforcing the landing gear area.
spinner gap looks good to me.
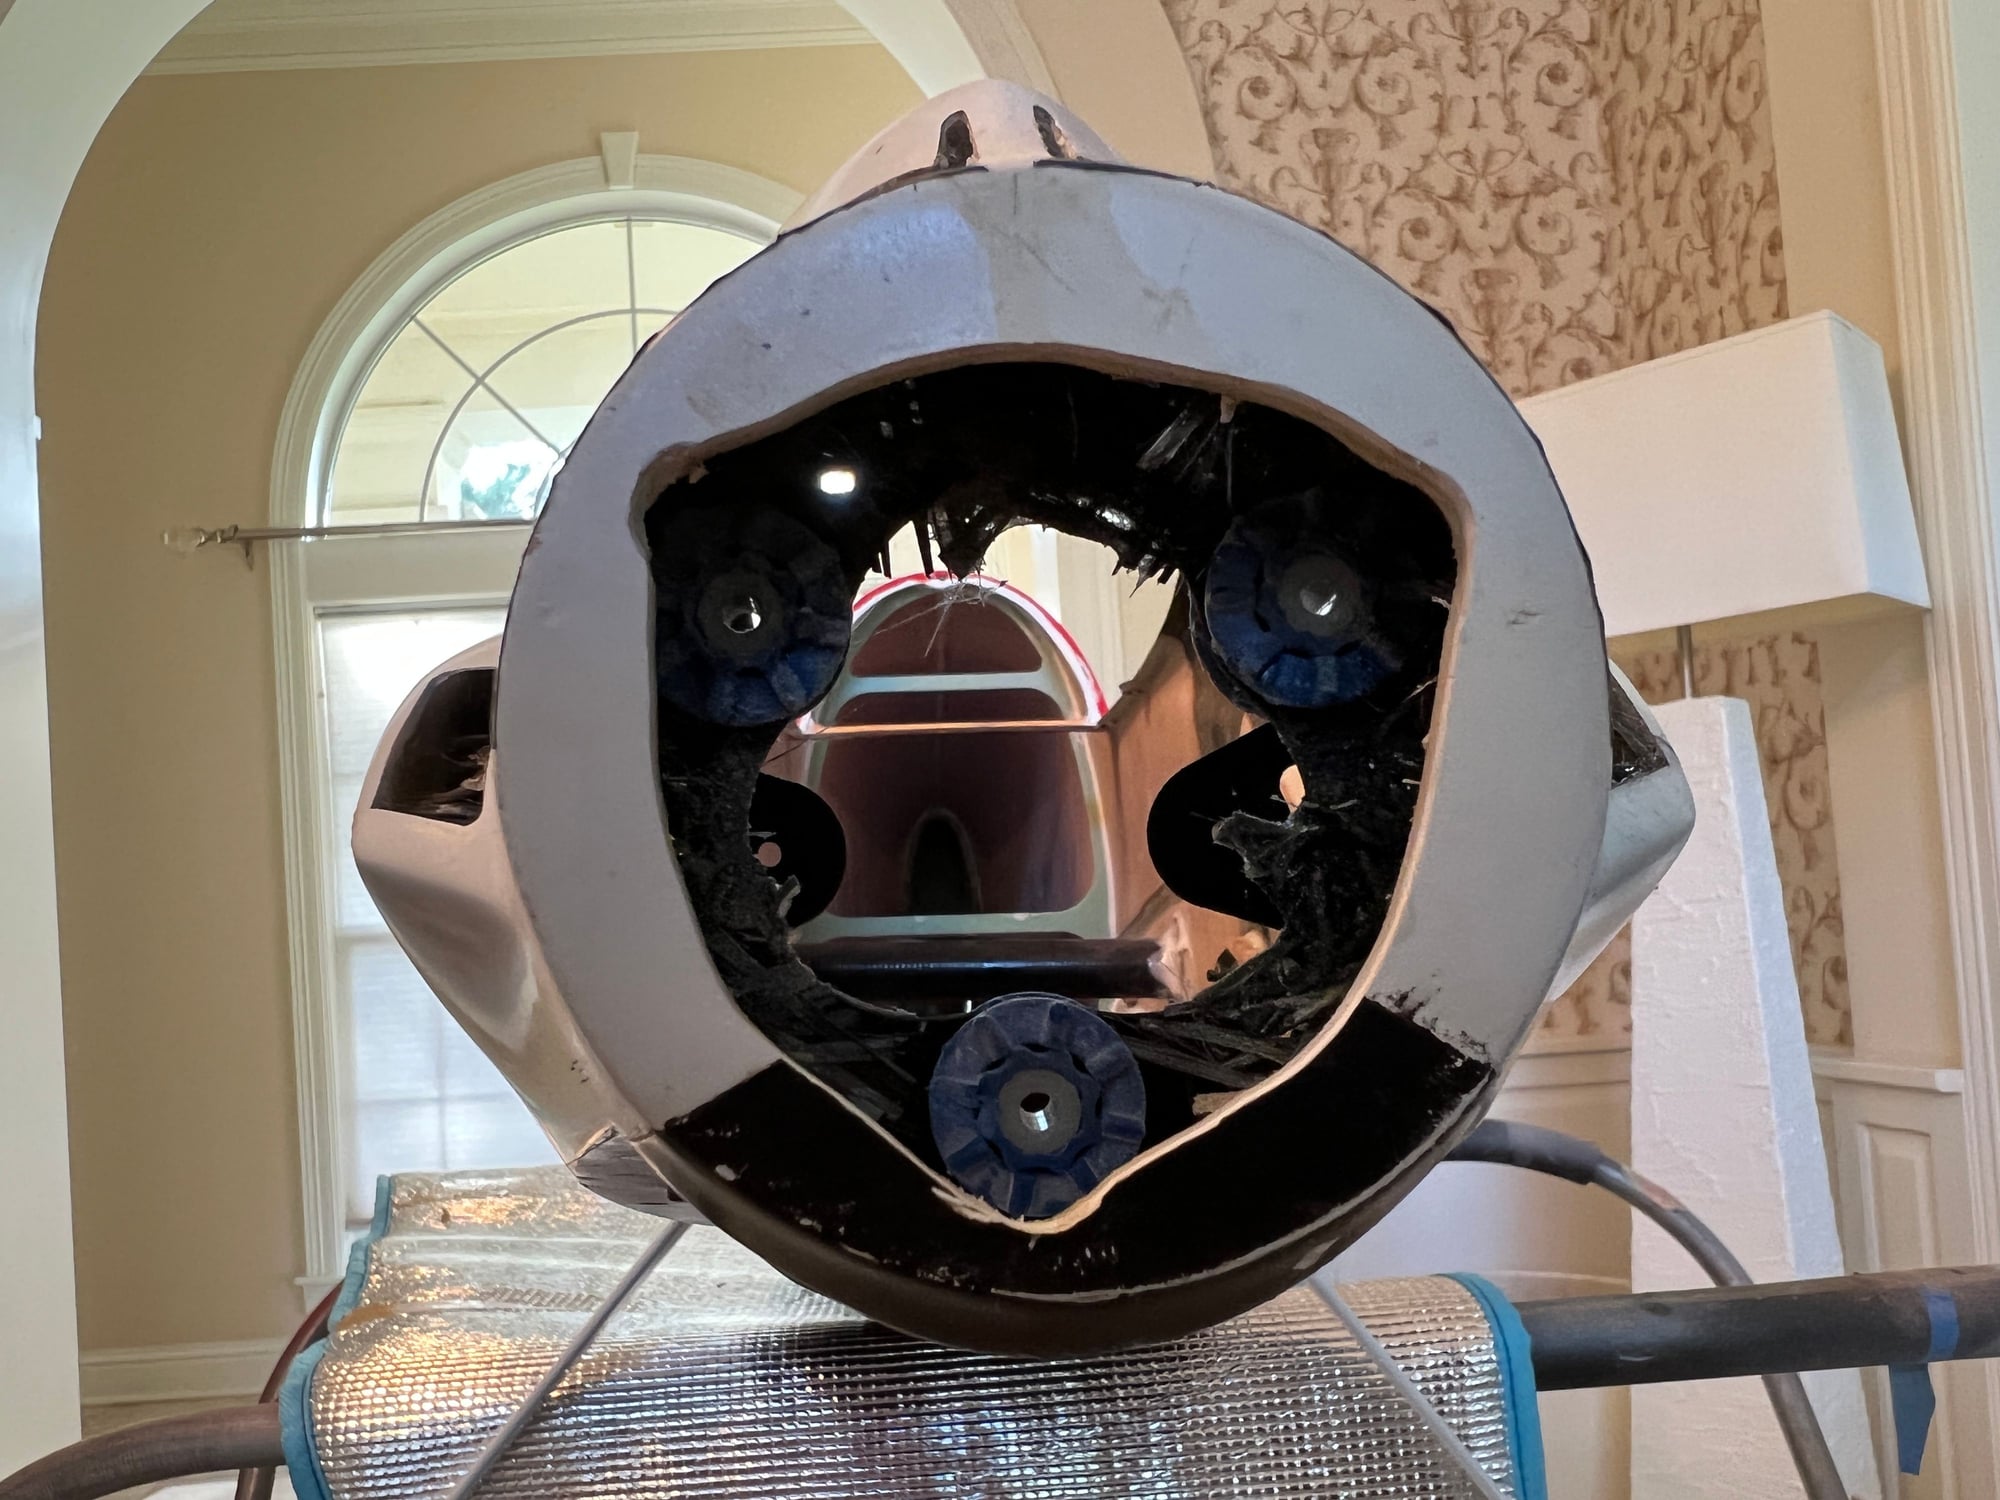
exposing the front area, for more air and to allow air in.
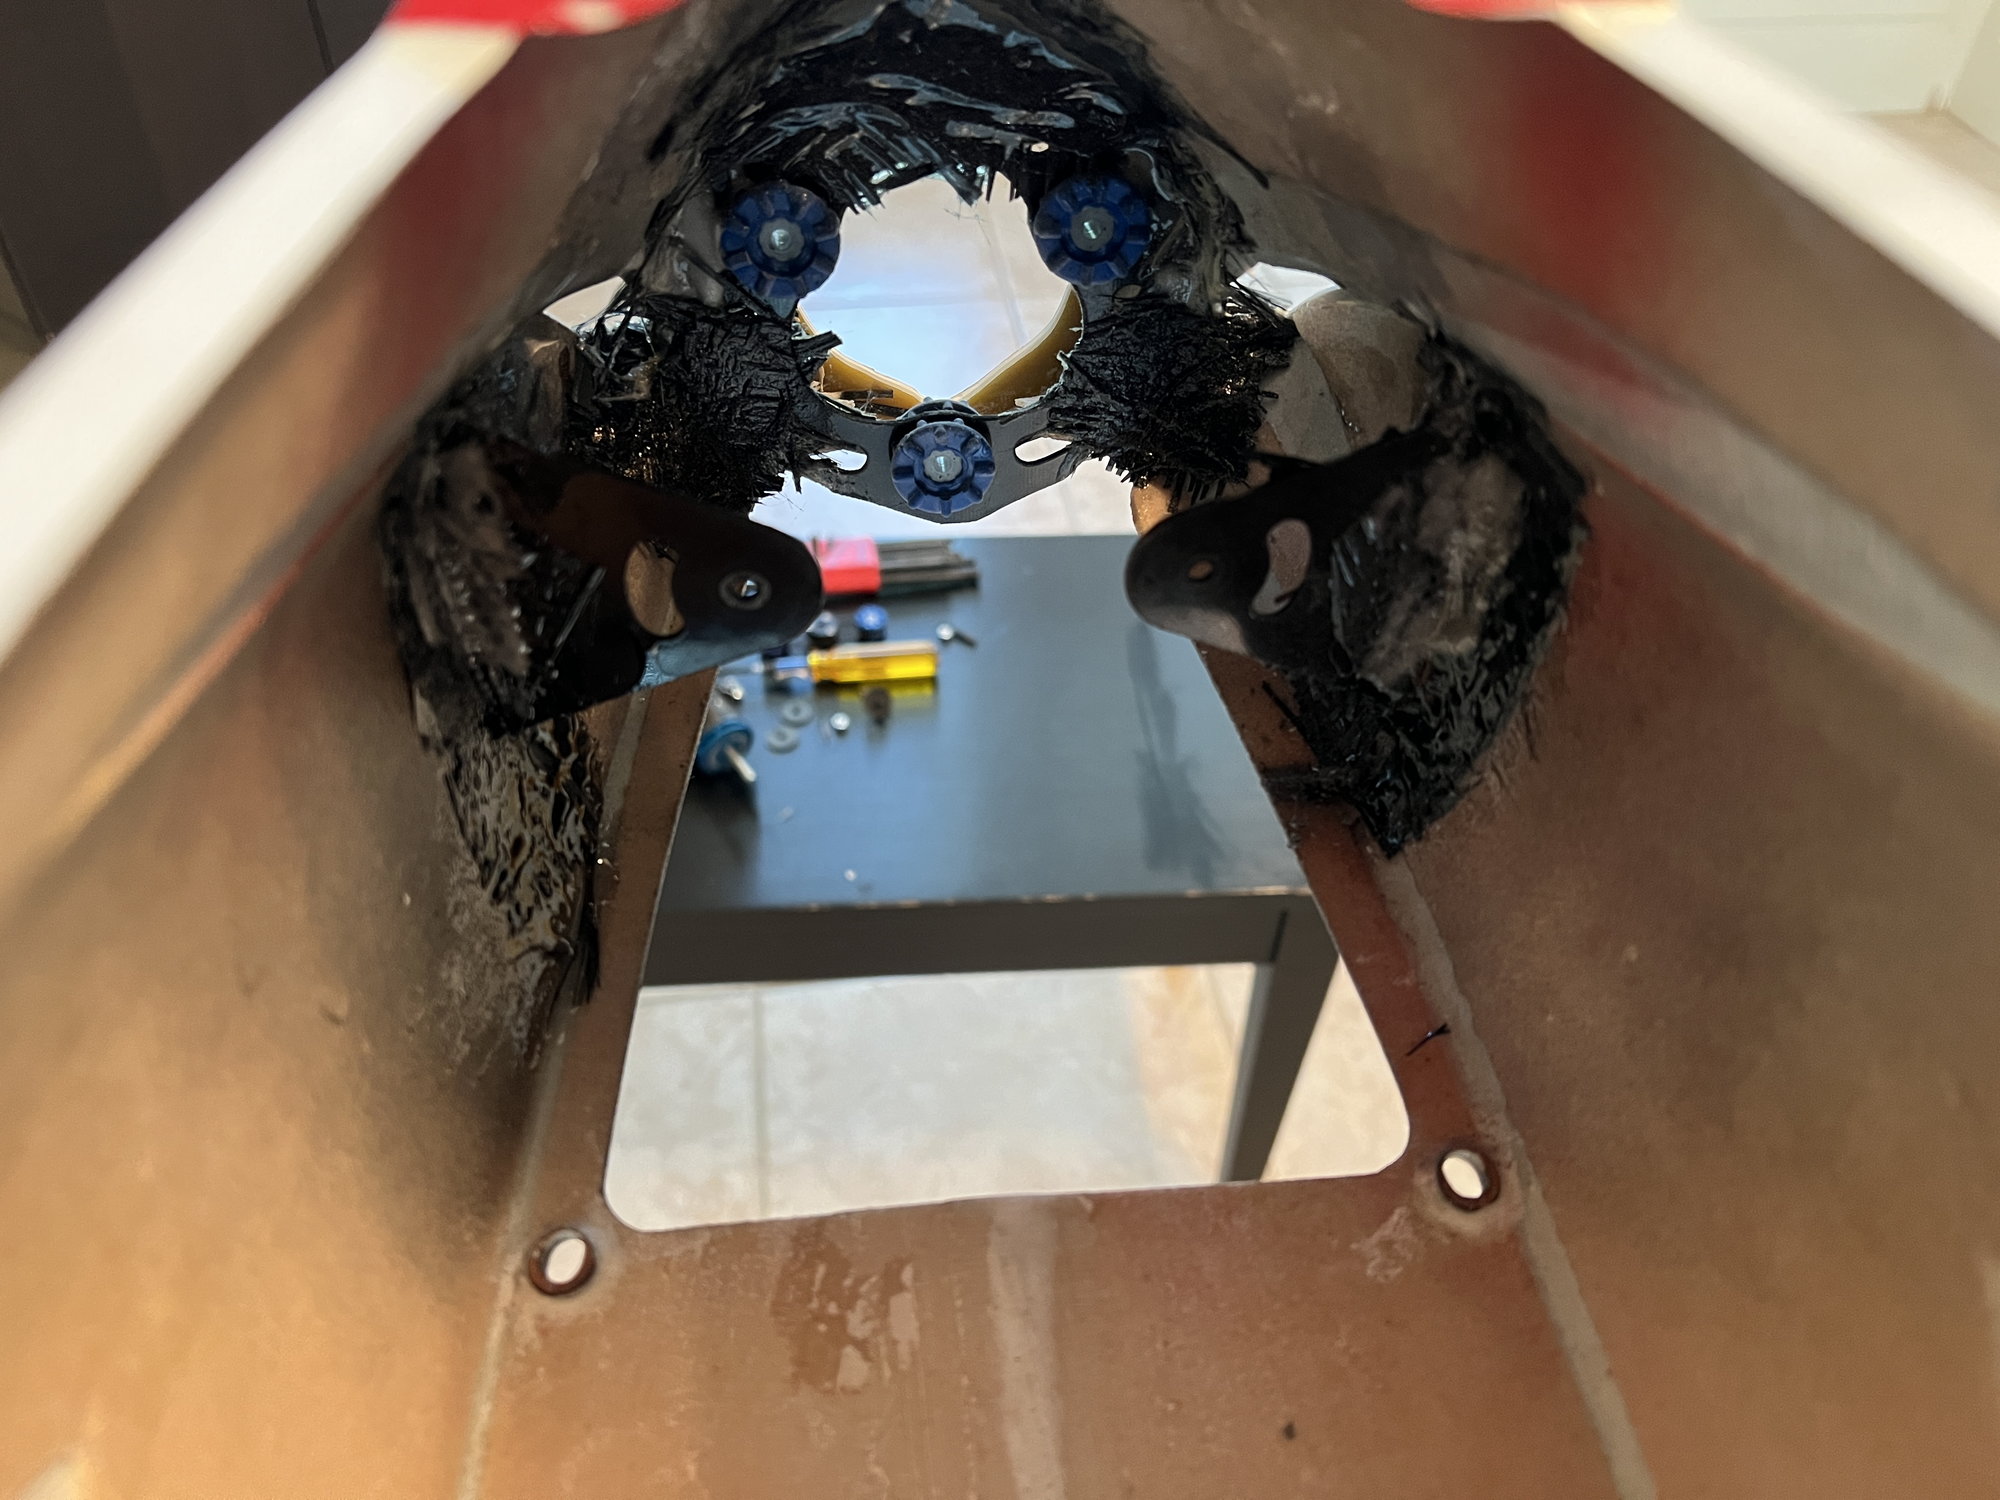
rear mount and front mount reinforced.
end result.
oh not quite Yet Ricardo
I have not checked the weight yet. But I will and I will report back.
I was able to complete the mission, and this took all day.
Lots of fun, But I did it.
The 1st picture is the final result
but, I will go over all the steps.
these are the steps:
1. I identified the parts that I had, and was then able to know which is the front mount and which is the rear mount.
2. I then assembled as much of it as possible, to mock it up, and get an idea of how to fit the motor and mount thru the fuselage and out the nose.
3. Then, I knew which was the front mount and the rear mount. I then made a paper template, followed by a plywood template of the front mount.
4. Using the paper one 1st, I got an idea of how much to remove so that it would allow the motor to be moved forward enough so that the hub is out the front of the nose.
5. Then, I made the plywood template of the front mount, and began to wittle away, slowly, until the front mount allowed the front hub to stick out by 1/8"
6. then I proceeded to make the same cuts on the CF front mount. Then I put it all together, and installed it with the hub out the front of the nose. Then I assembled the contra cone and such, so that , with a 1/8" plywood ring I made, I pushed the cone back against the nose ring, and then taped it all together. Now, I can begin to glue the CF front mount to the fuselage sides. I also covered the small vent holes so as to not allow glue to get on the outer surface of the fuselage.
7. Once the front mount was glued and prepped, then I glued on CF cloth strips with resin on the fuselage side, then Installed the rear mount, and used resin with CF cloth in the front and the back of the tabs.
8. I let all this cure a good while, then I removed the motor and the contra unit, and this exposed other areas of the front ring. SO I was able to apply more CF cloth and resin to reinforce the ring in the front of it and in the back.
WIth regards to weight, I am being weight conscious, but two places to not be, is the motor instal and the gear plate. Both of which I did reinforce, this added 4 ounces to the frame, but a strong gear plate is well worth it. As well as making sure the motor is well installed, so that it does not come loose of the fuse at a contest. Seen that happen.
So that was it.
Now, some pictures:
bottom of nose area, where chin cowl would be.
trialing the plywood ring.
plywood ring getting reduced.
CF front mount in place and if you see the plywood spacer, 1/8" between the back of the spinner and the nose ring. Now, I push it all back and can begin the glueing of the front mount.
rear mount not in yet.
pushing back to make sure we have a nice spinner gap
reinforcing the landing gear area.
spinner gap looks good to me.
exposing the front area, for more air and to allow air in.
rear mount and front mount reinforced.
end result.
The following users liked this post:
Ricardo M. (07-19-2022)
The following users liked this post:
orthobird (07-19-2022)
07-19-2022, 09:39 AM
#80
I believe the balsa sheeting I used was slightly more dense than what I should have used.
the sheets had been purchased like 6 years ago for a 40% model, that I never got to do
i should have gotten lower density balsa. Worse case scenario, I can redo wings and stabs and see if I can lighten her up. Each wing is about 50 grams more that what other wings weighed.
the sheets had been purchased like 6 years ago for a 40% model, that I never got to do
i should have gotten lower density balsa. Worse case scenario, I can redo wings and stabs and see if I can lighten her up. Each wing is about 50 grams more that what other wings weighed.
07-19-2022, 10:05 AM
#81
I would not make new wings, unless you want to. Weigh the canopy. Mine with pilot is about 235- 240 grams. very heavy. If you need to lose weight, use a stock canopy. Also, for Sportsman and Intermediate, you can opt for lighter (lower capacity) batteries. Really only important if you are Nats bound.
Gary
Gary
07-19-2022, 11:52 AM
#82

Ortho,
Wouldn't worry about weight too much - I'm sure you can get a set of 12S batteries below 1100g - for example 2x6S 4000's roaring top 25C weigh 1060g
https://www.roaringtopusa.com/index....product_id=107
If you are really concerned about the weight investigating canopy weight is a good suggestion.
Steve
07-19-2022, 04:25 PM
#83

Ortho,
Remember for AMA classes there is no weight maximum limit in Sportsman and Intermediate. In Advanced, there is a 115gr allowance over 5000grs. No need to rebuild new wings and stabs unless you really want to. Personally, a heavier-weight airplane has an advantage in windy conditions. That is one thing I miss about flying an 11.5->12lb glo-powered airplane laden with fuel. However, you may want to check the overall fuse length considering you are using a contra system that has a longer spinner vs a single prop system.
Wish you all the best in the maiden and subsequent trimming flights. Hope to see you compete with the new Alchemy in the near future.
Here's the AMA rule...
4.3. Weight and Size In Sportsman and Intermediate Classes, there is no weight limit, the 2-meter wingspan and total length limits are in effect for all classes. For all other classes, no model may weigh more than 5000 grams gross, excluding fuel, ready for takeoff. Electric models are weighed with batteries. In Advanced an allowance of 115 grams is permitted. No model may have a wingspan or total length longer than two (2) meters (78.74 inches).
Last edited by rcprecision; 07-19-2022 at 09:31 PM.
The following users liked this post:
orthobird (07-19-2022)
07-19-2022, 07:32 PM
#84
thank you all very much! makes me feel better. I am not worried. And, i am a pattern flier only to be out and do something and of course, the camaraderie. I will never be competitive. I do like to fly precision and really appreciate an airplane that can fly true and track well. That would be my goal. Not so much for competition purposes but mostly for the satisfaction of seeing the airplane fly straight.
If it flies true and straight, I will be happy.
If it flies true and straight, I will be happy.
The following users liked this post:
DRC1 (07-20-2022)
07-23-2022, 01:44 PM
#85
ESC is installed
The programming for the Mezon ESC are the following
normal mode
1 second acceleration
Brake 15%\20%\1second
frequency 16khz
start power: Auto
motor timing: 24 degrees
motor poles: 10
receiver is installed.
still need to do a few more things.
The CG point is 1/4" to 1/2" behind the wing tube, this will be the goal.
Still have not set the CG.
WIll keep you all updated.
The following users liked this post:
wattsup (07-23-2022)
07-25-2022, 02:33 AM
#87
I was able to clean the shop up a bit
then threw out about 2 loads of collected junk , I did two trips after loading the back of my truck all the way!
Still need to do more cleaning out
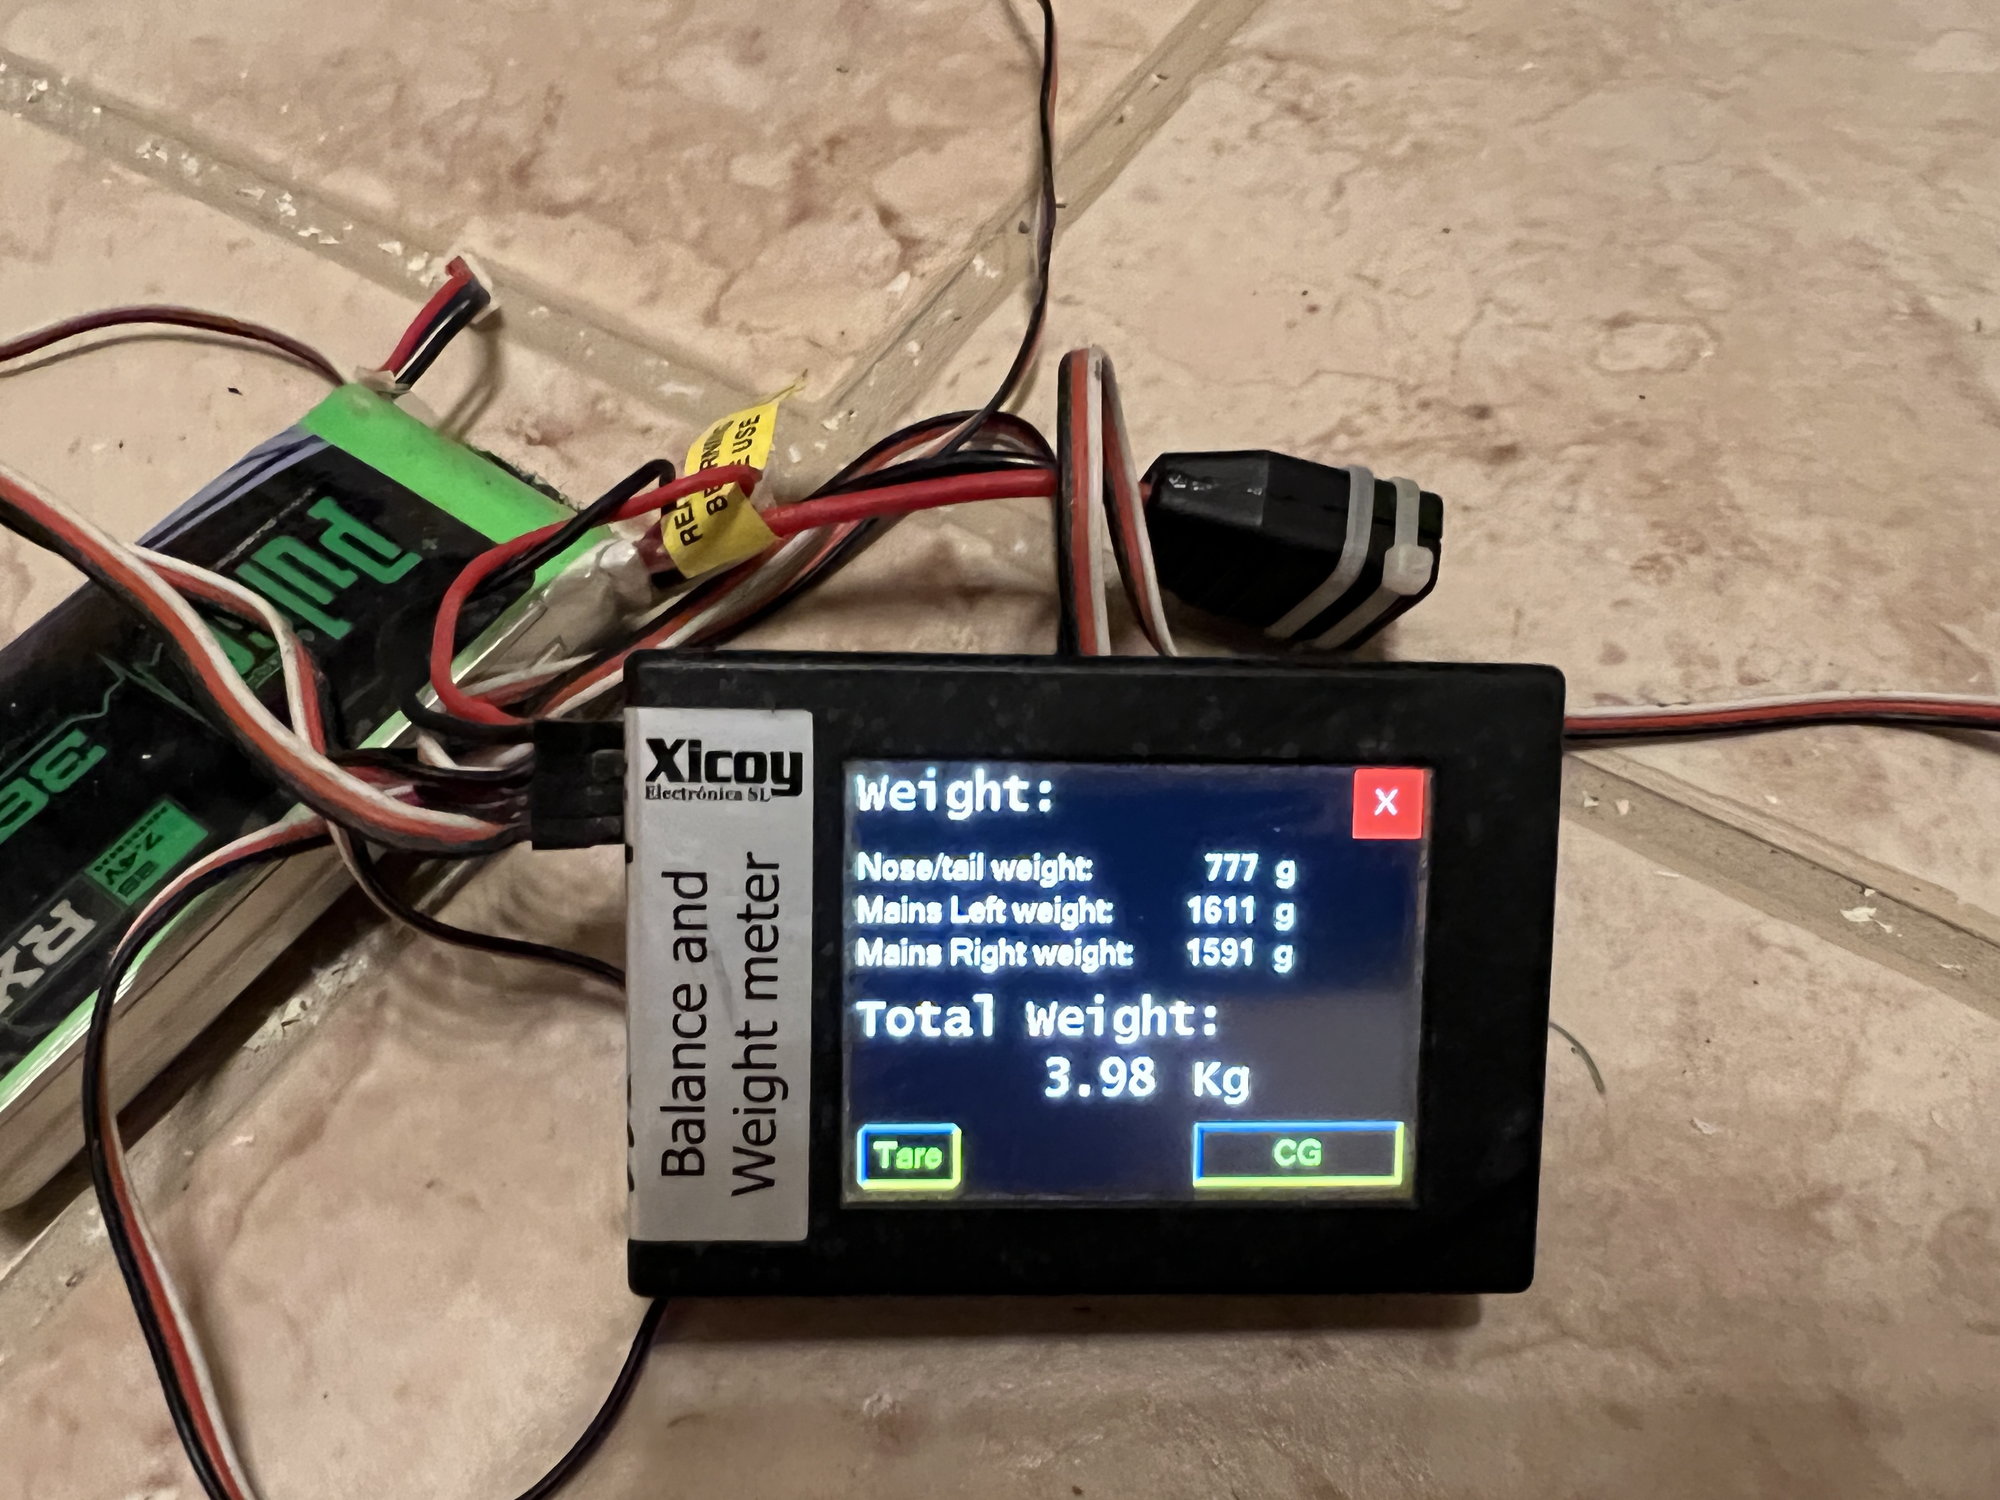
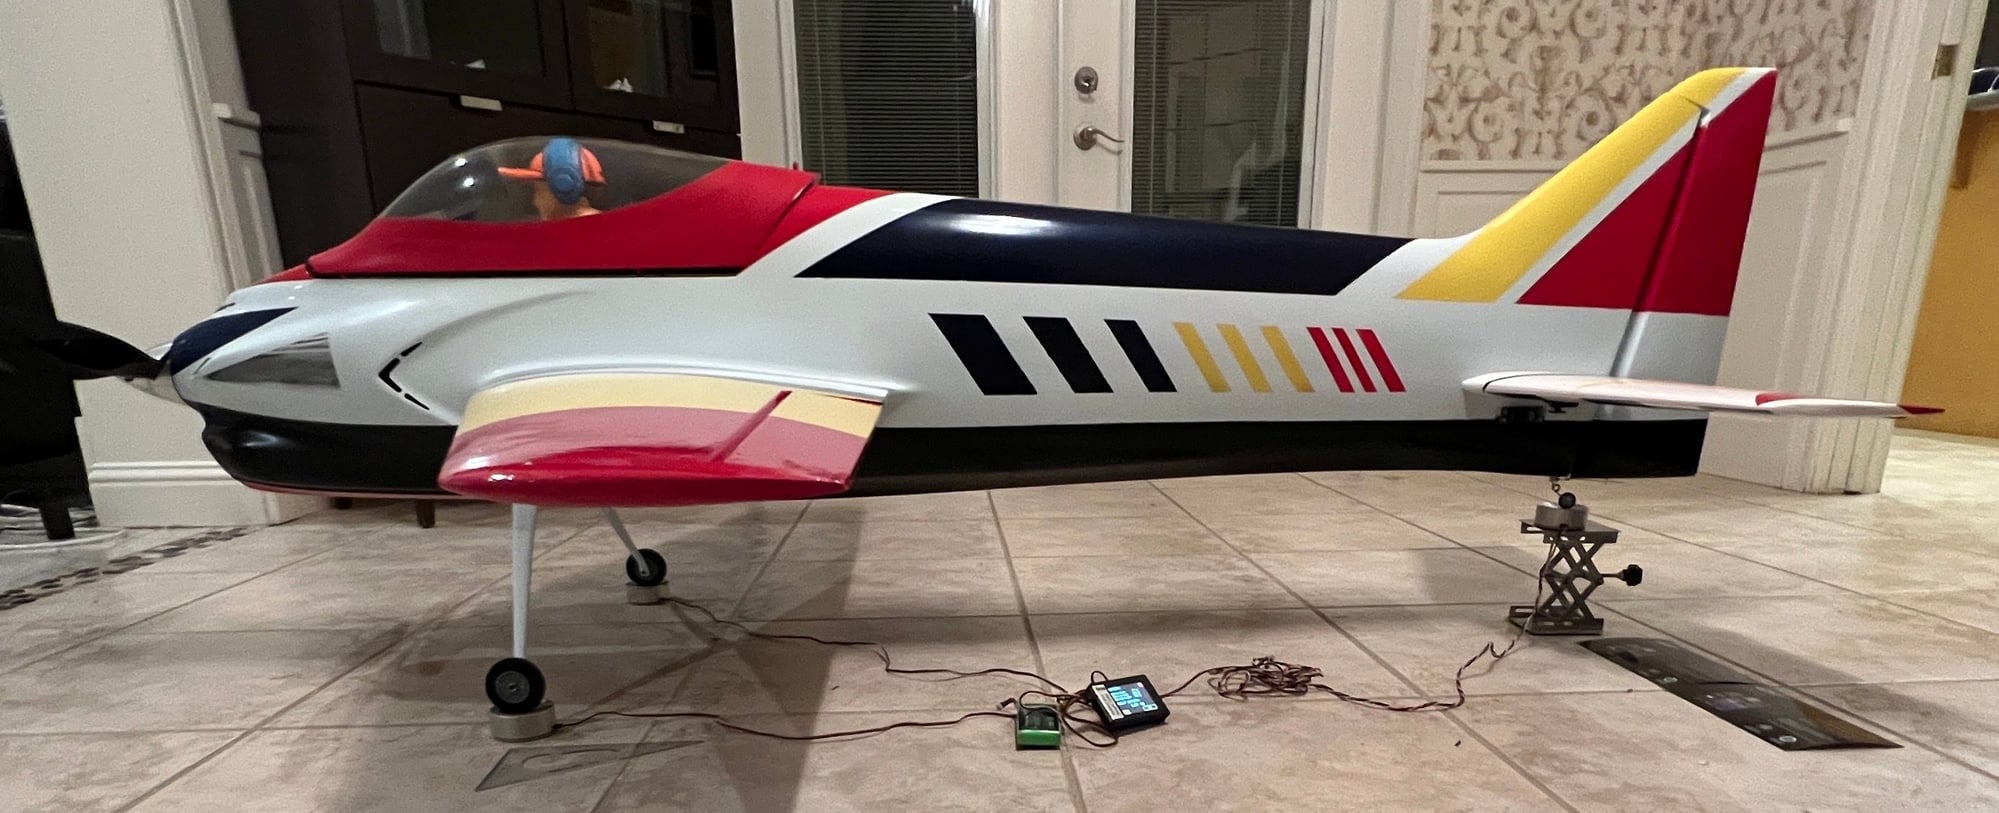
but, then I was able to get the balancer and placed the ariplane at the 1/4" back from the back edge of the wing tube
this is what I have:
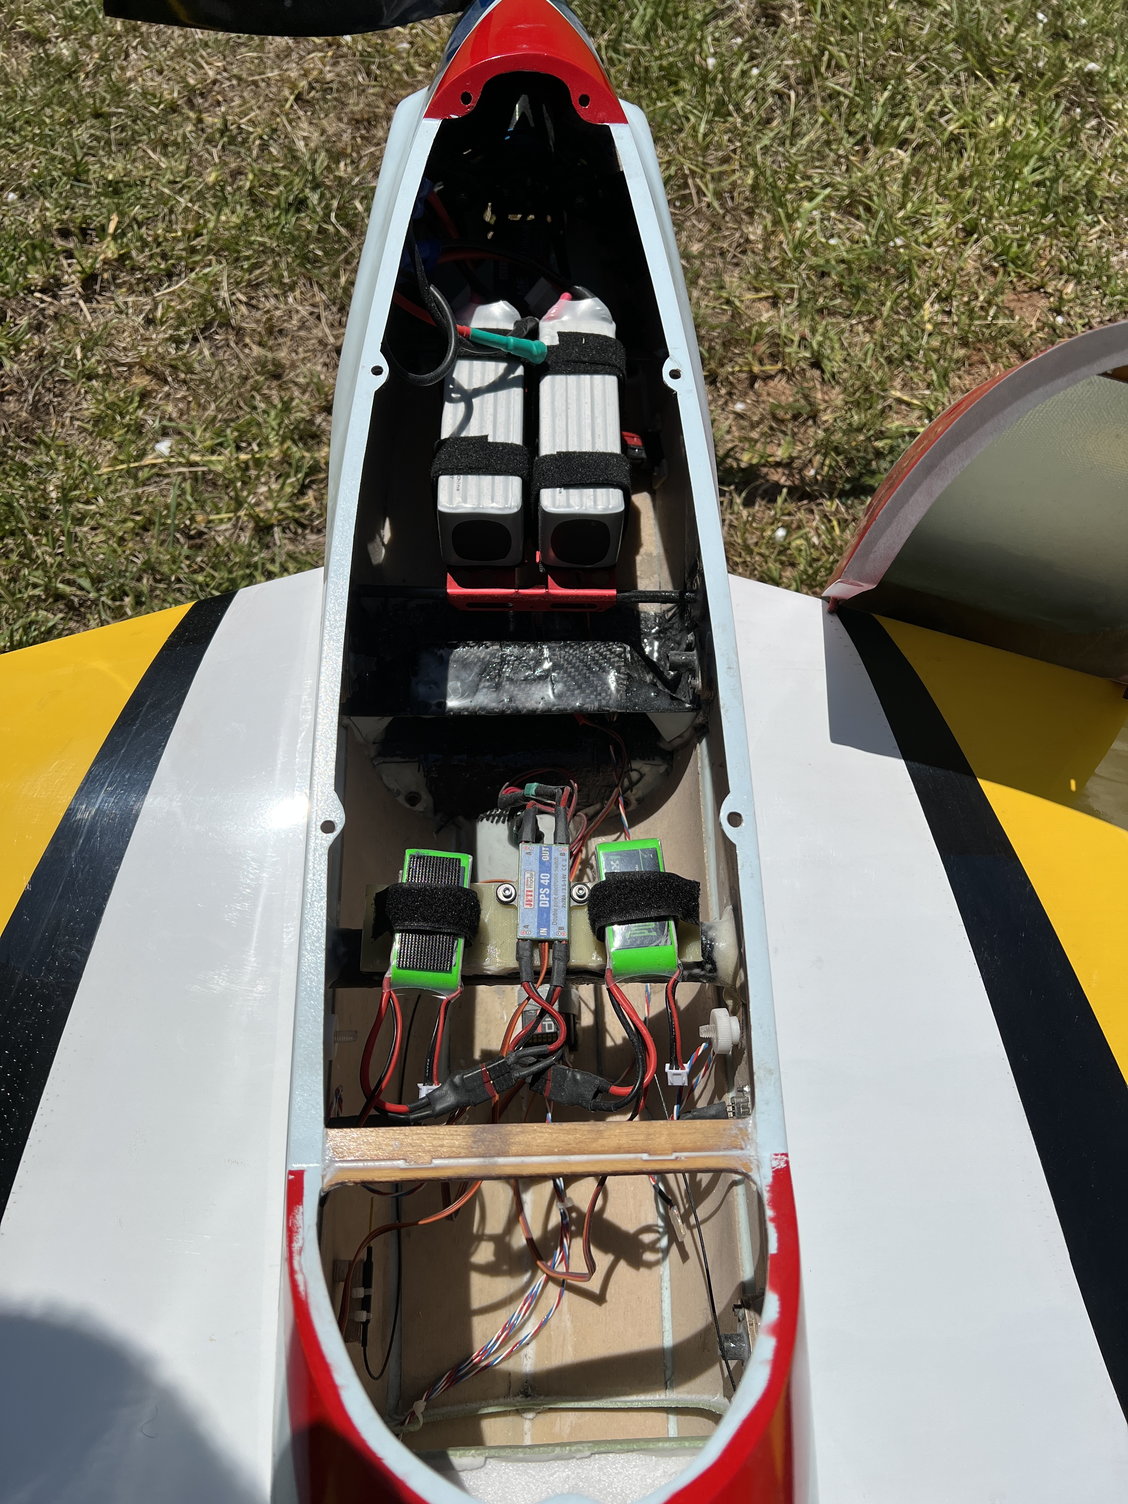
this is the position of the batteries.
Once I get the battery trays, I will install them slightly forward to this area. Maybe by 1/2" more forward
then threw out about 2 loads of collected junk , I did two trips after loading the back of my truck all the way!
Still need to do more cleaning out
but, then I was able to get the balancer and placed the ariplane at the 1/4" back from the back edge of the wing tube
this is what I have:
this is the position of the batteries.
Once I get the battery trays, I will install them slightly forward to this area. Maybe by 1/2" more forward
07-29-2022, 11:37 AM
#88
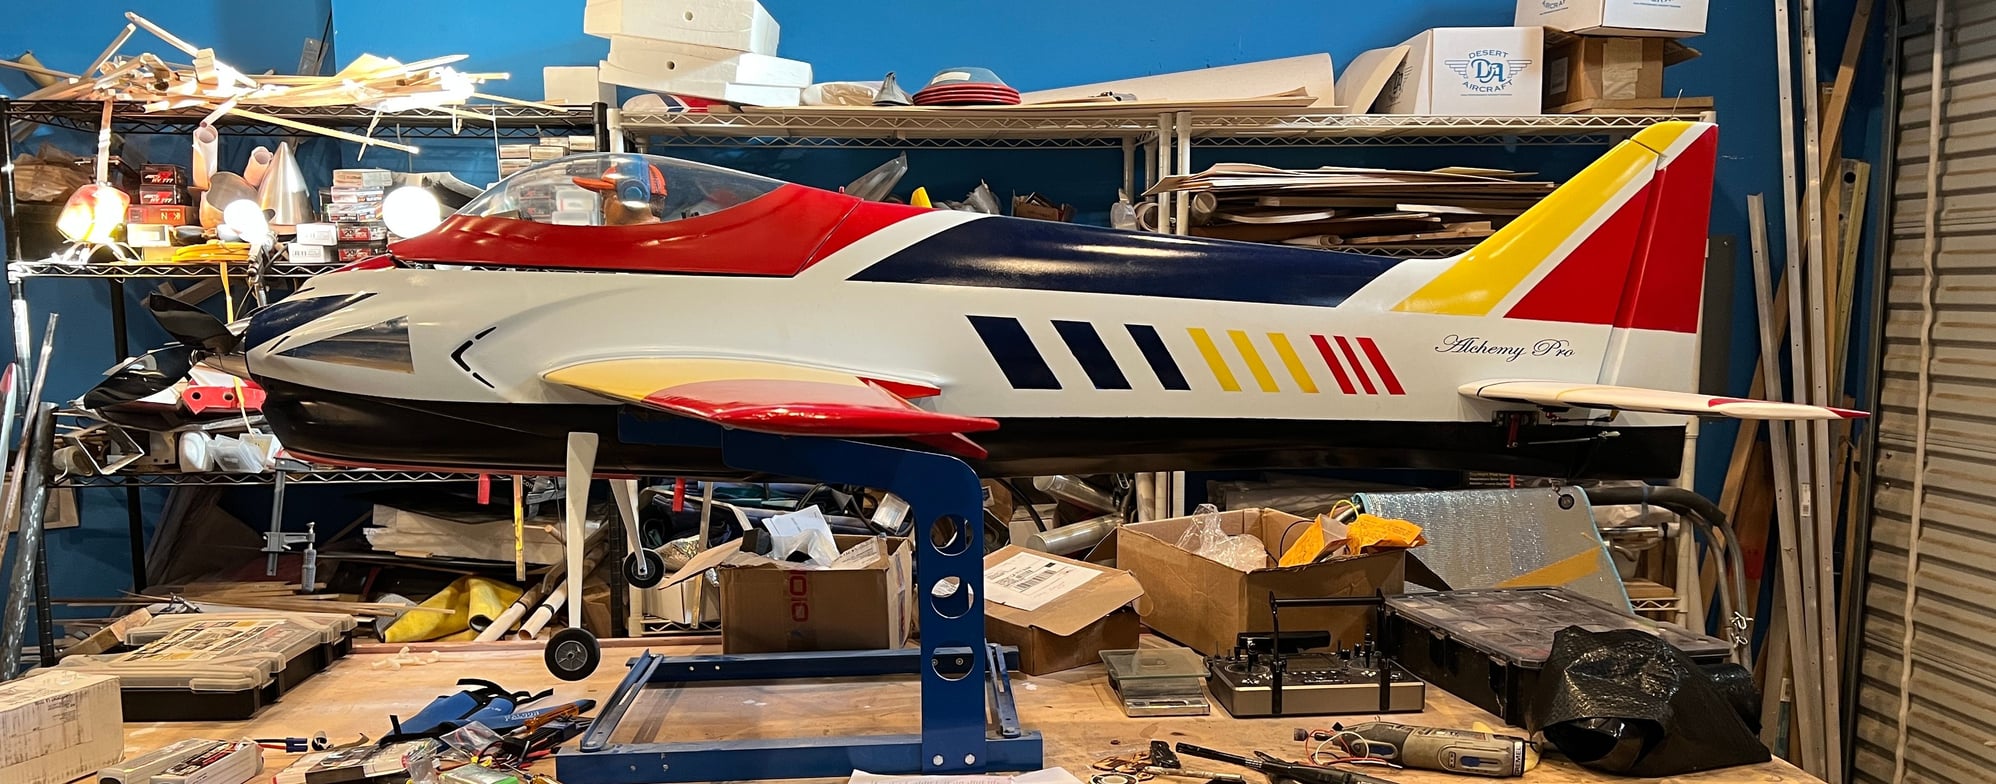
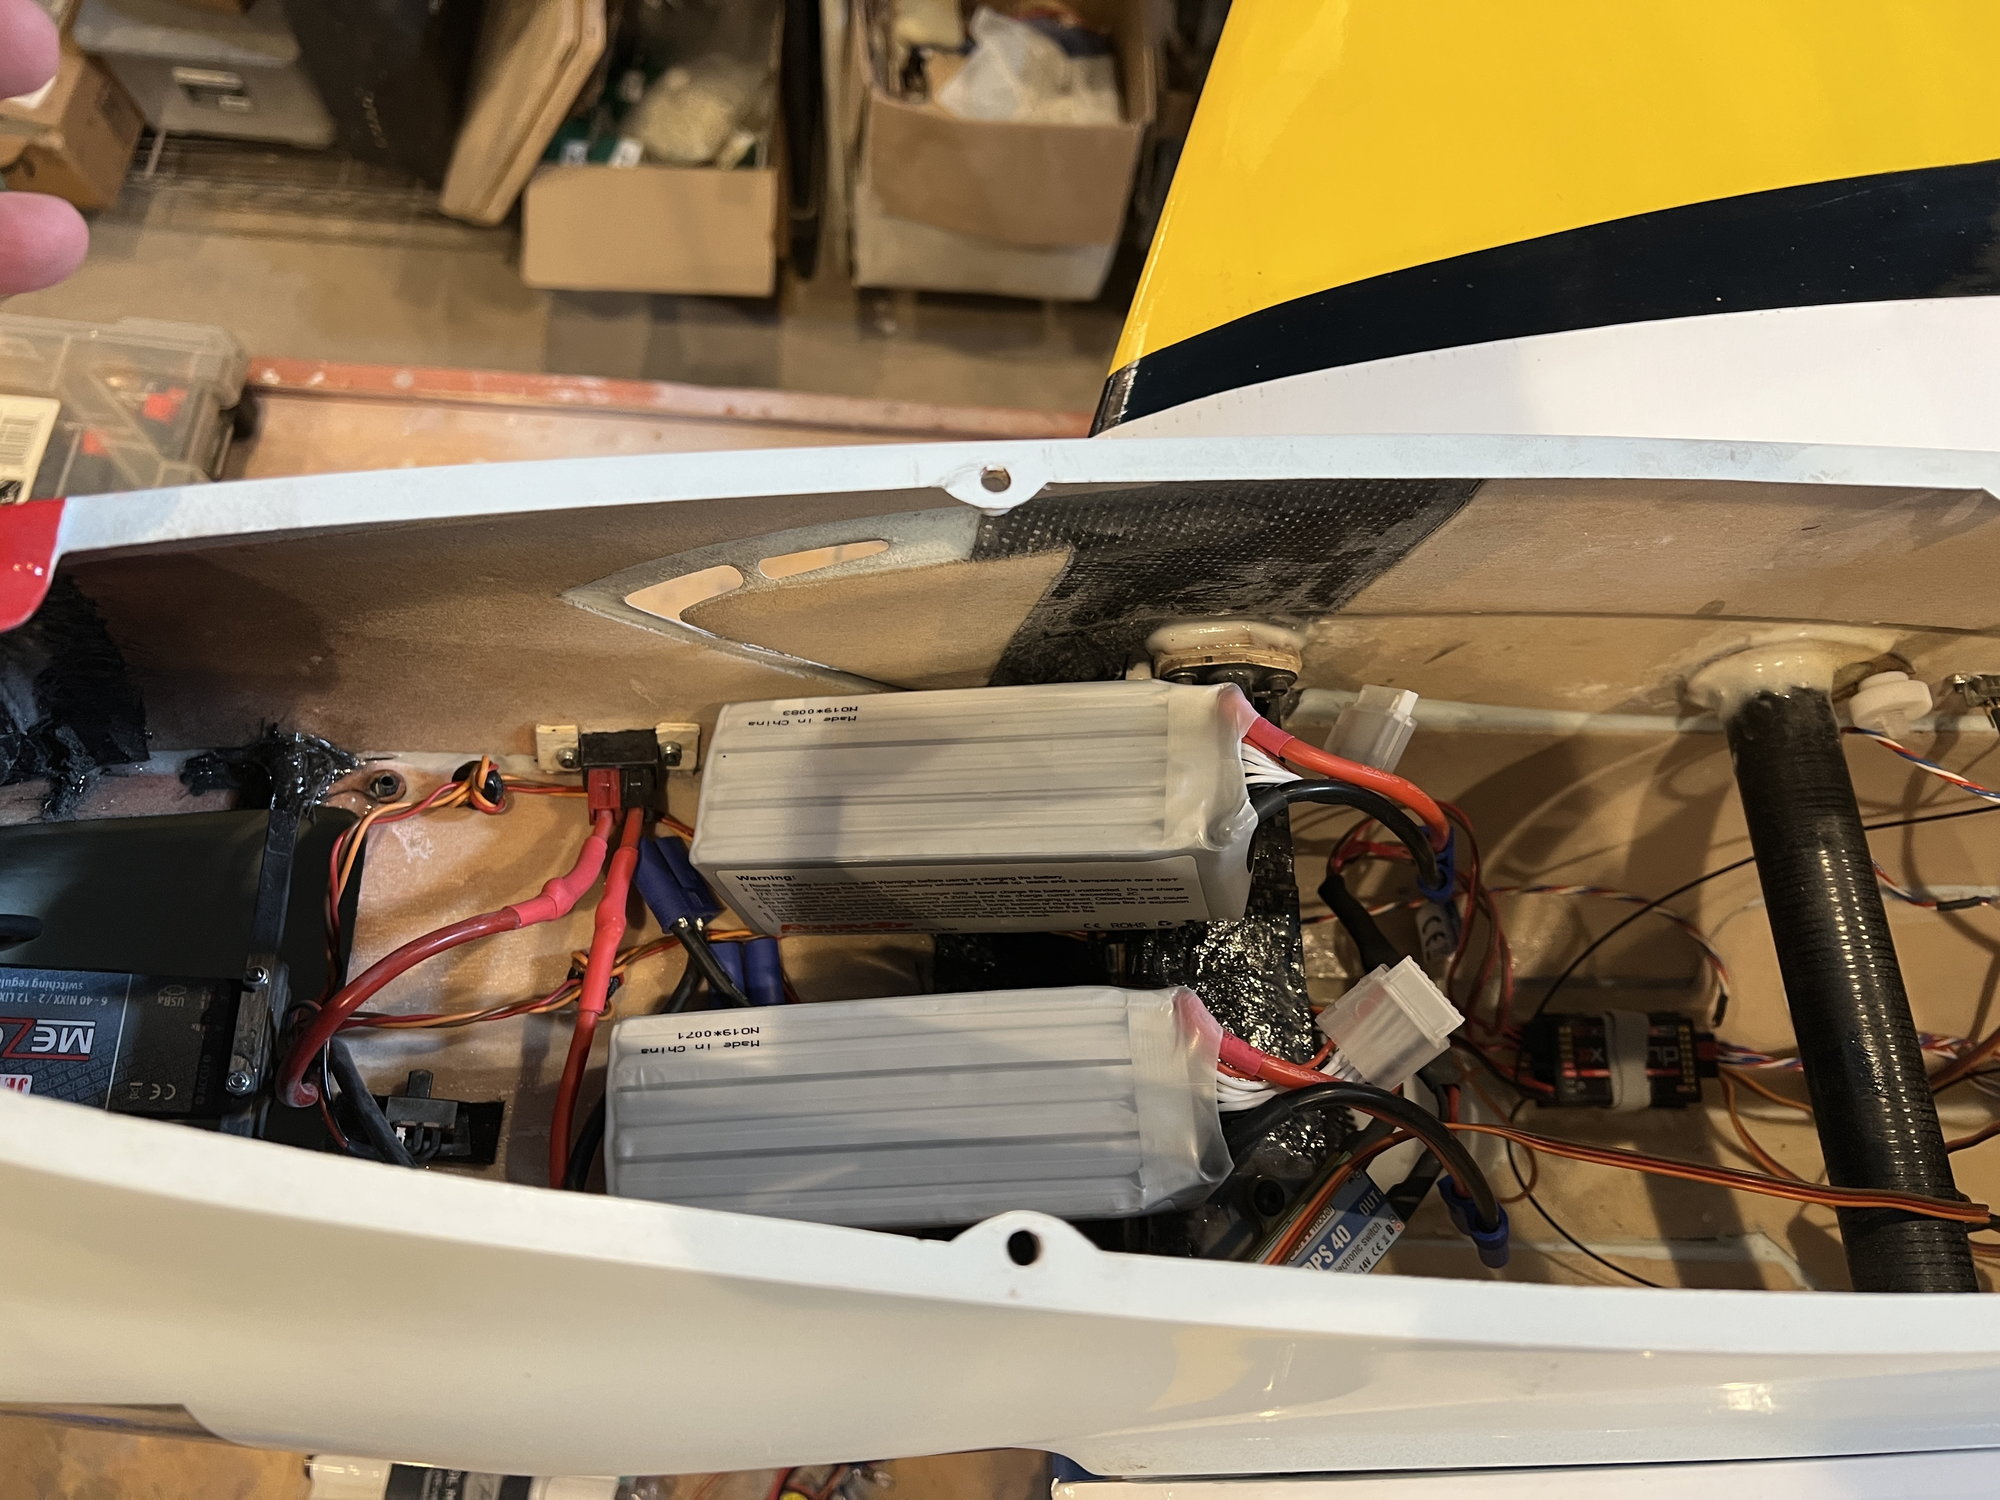
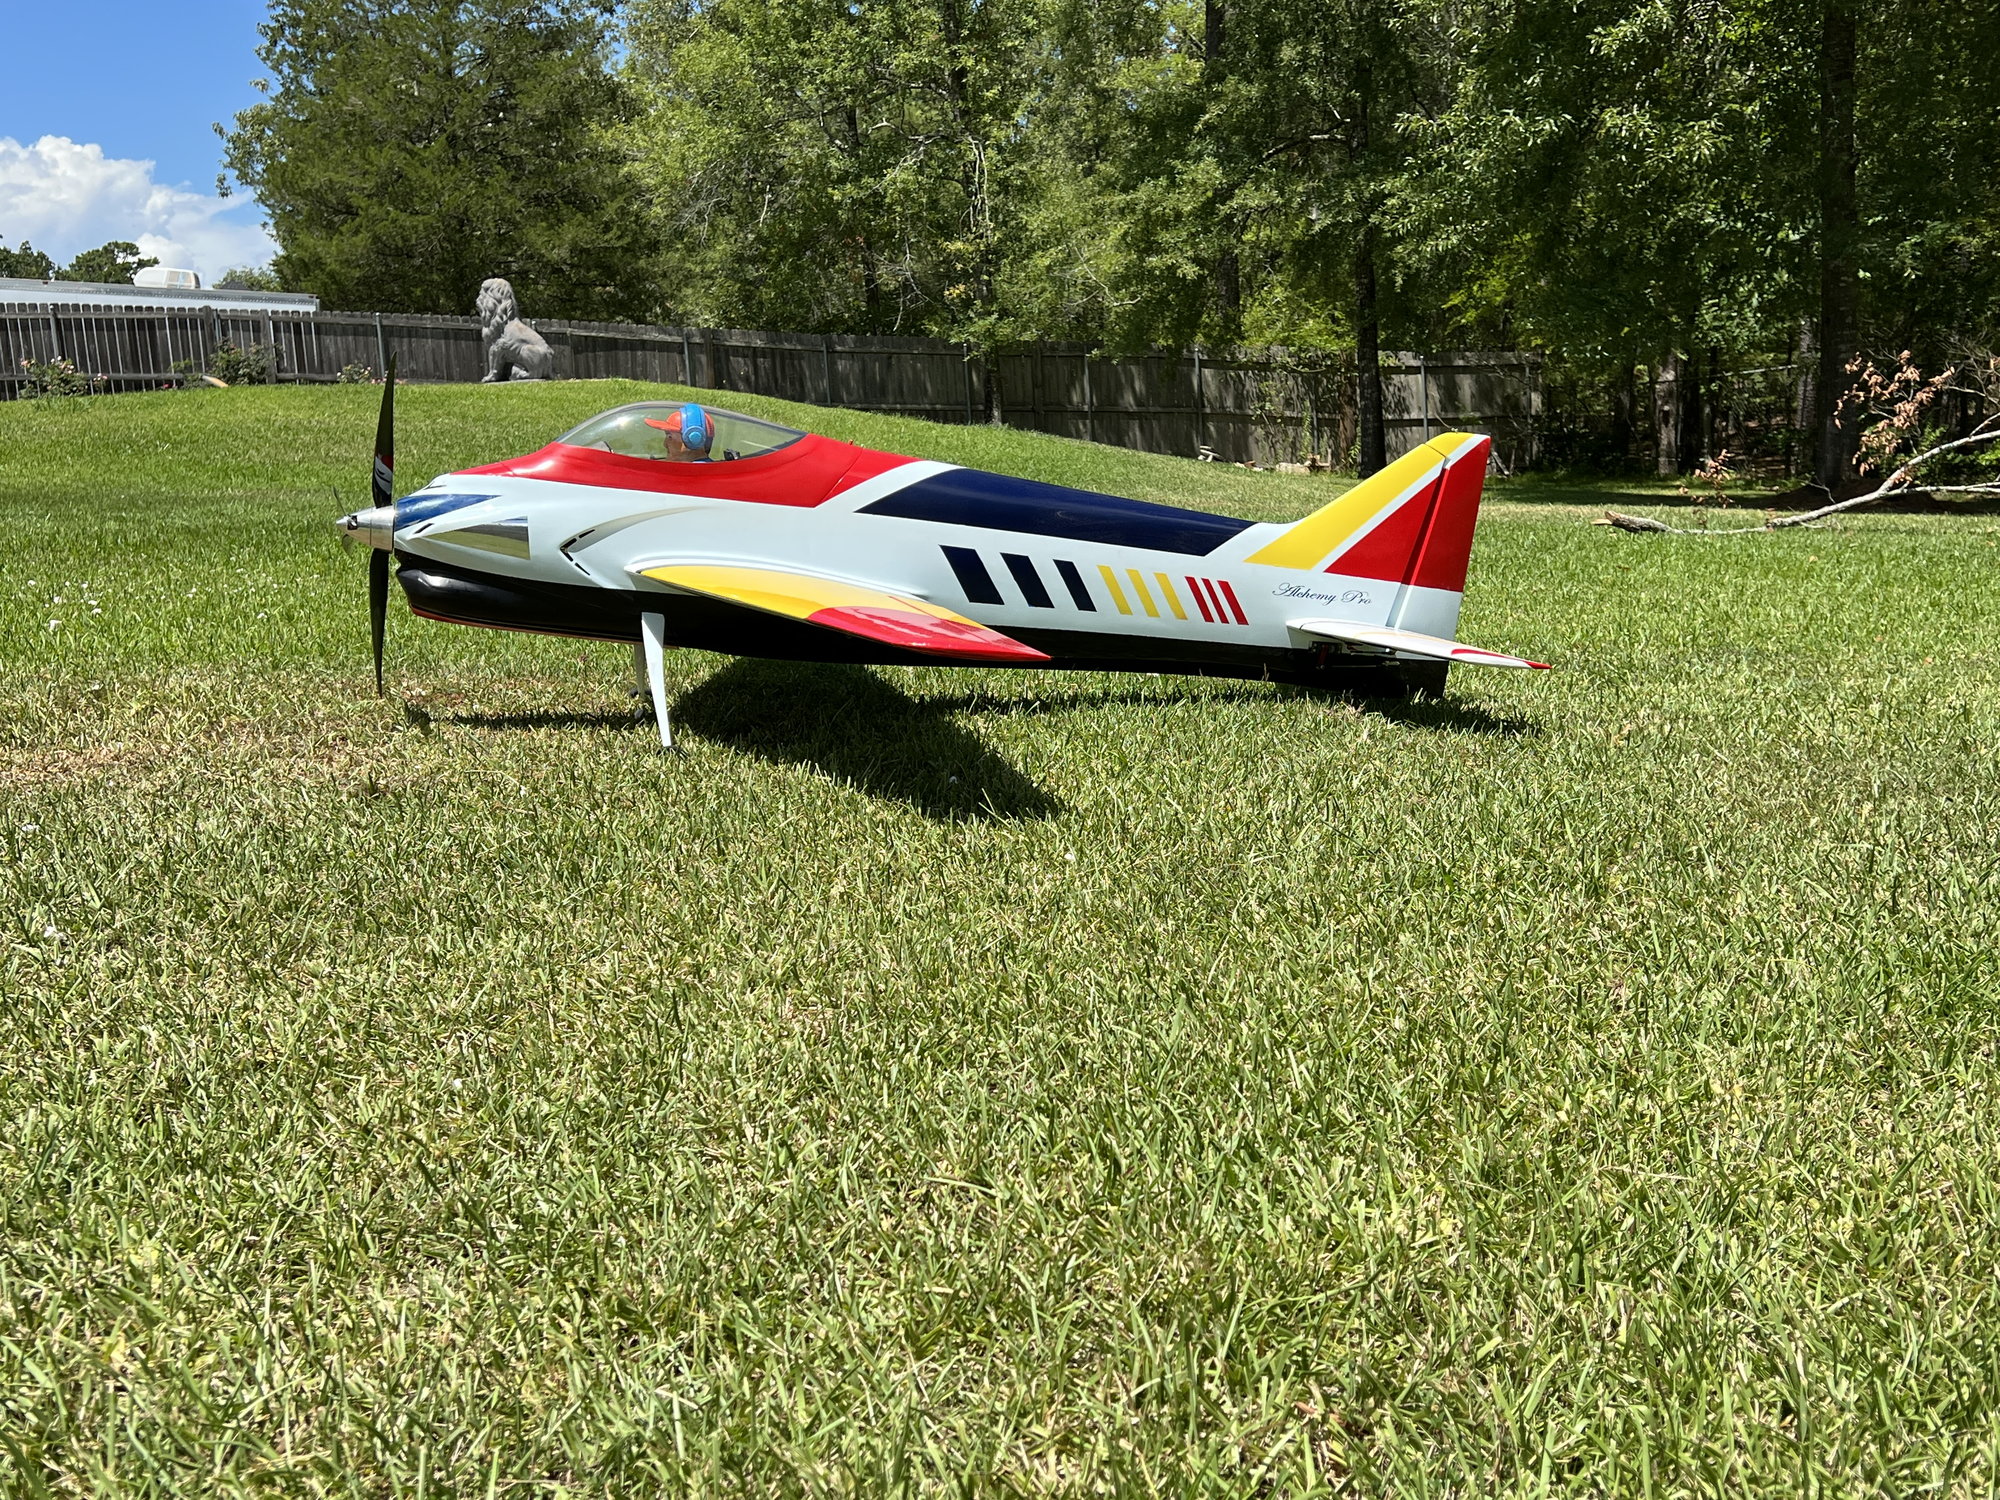
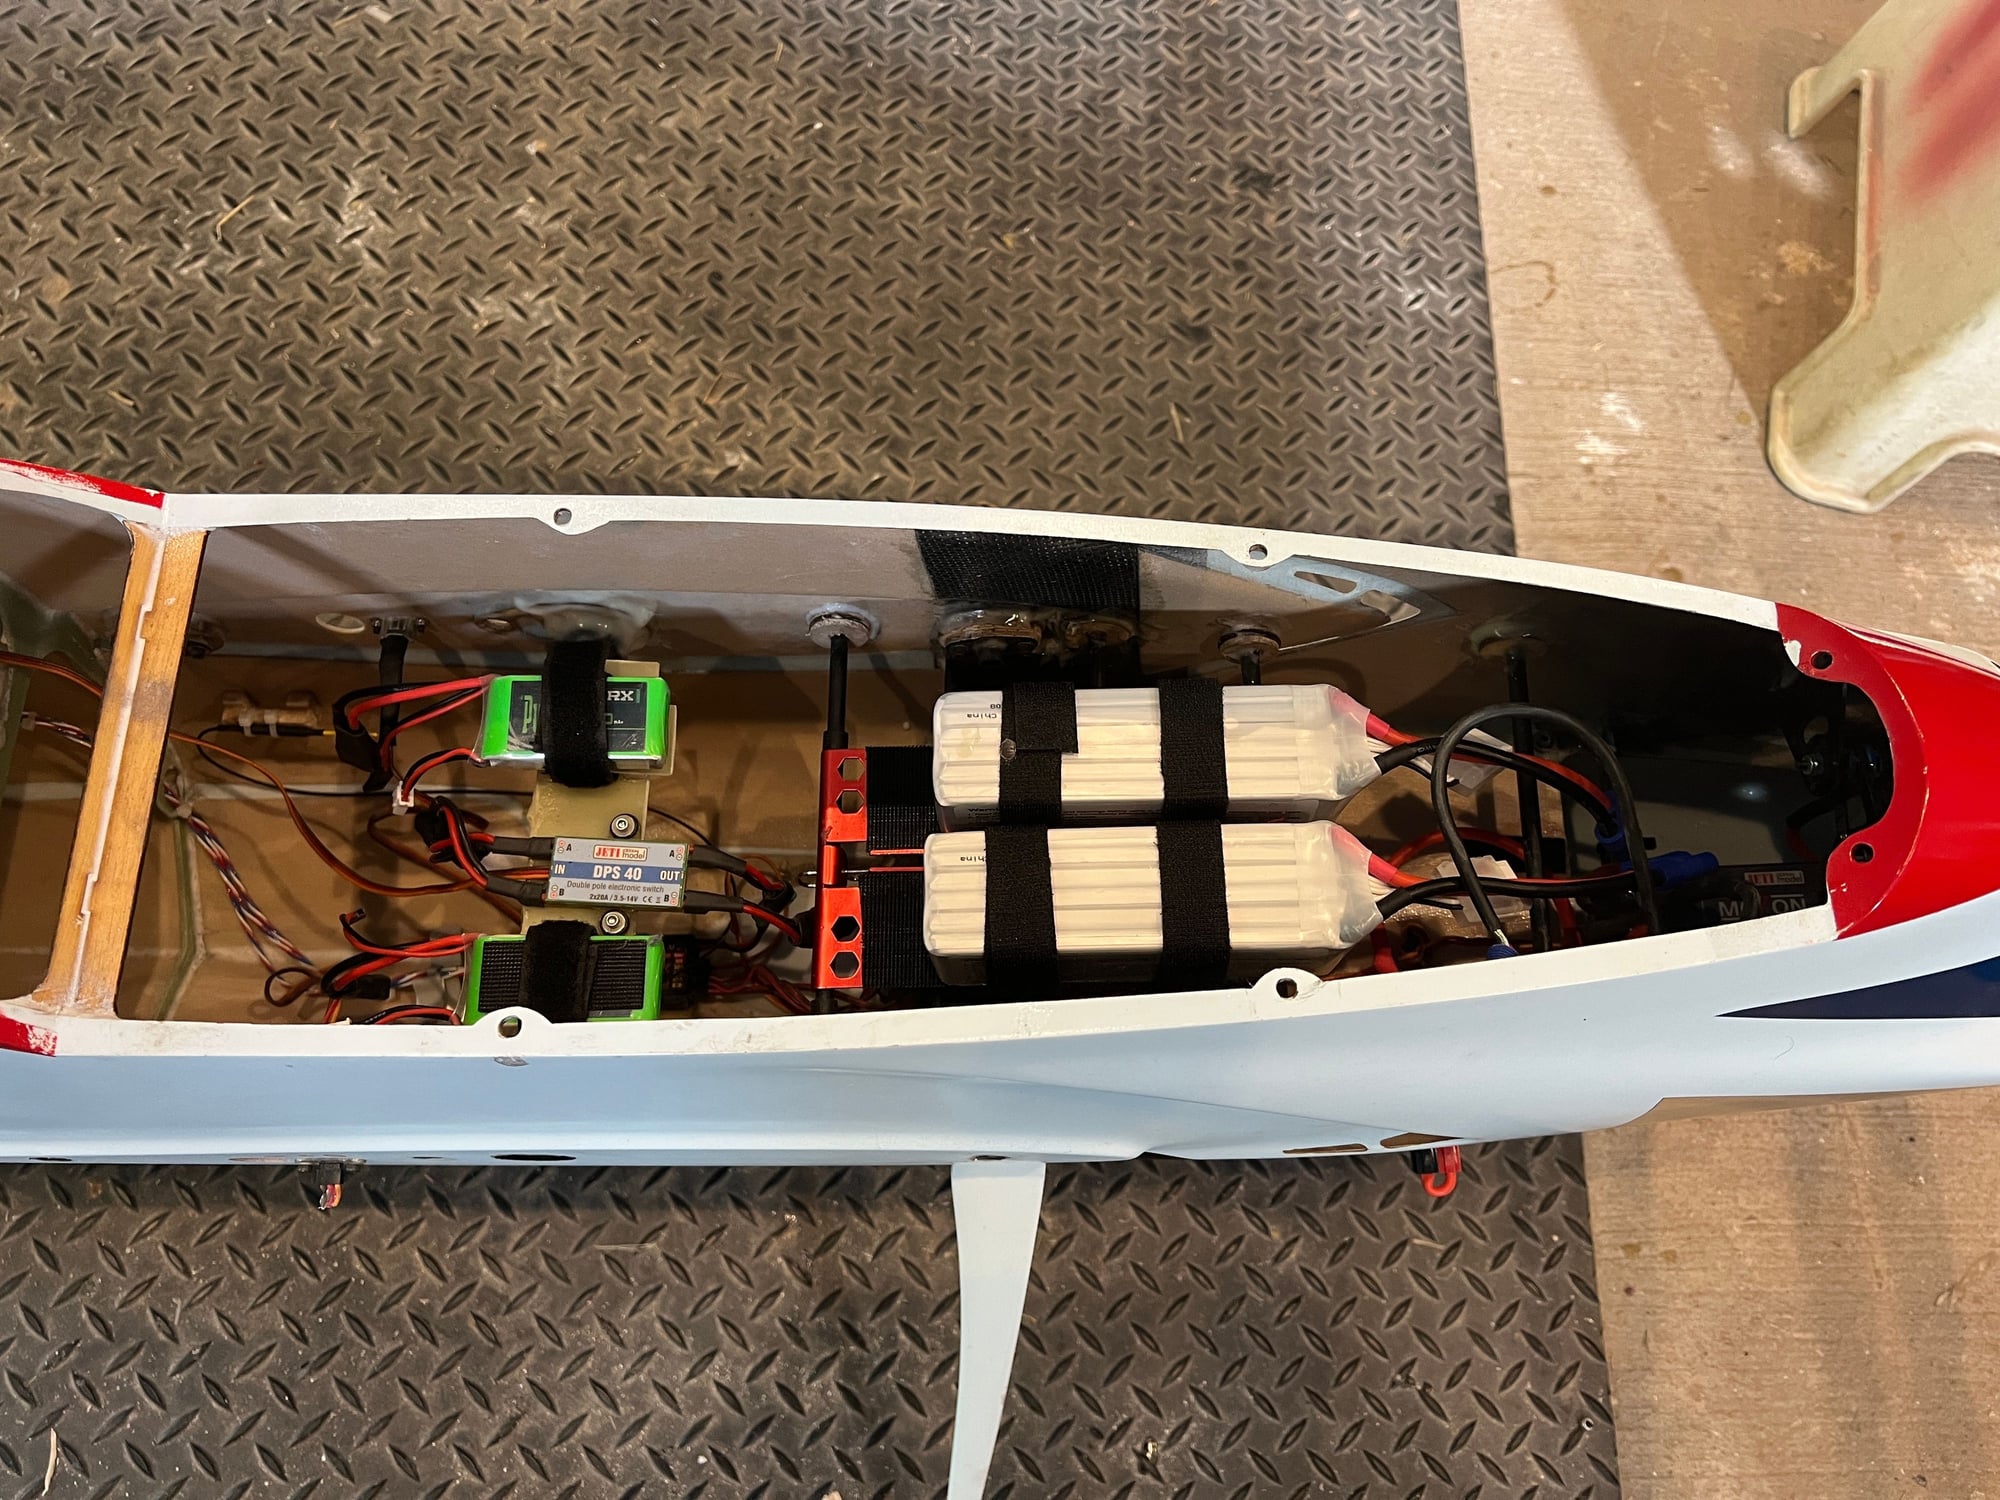
Airplane is officially ready:
this is the inside of the fuselage:
Now, all that is left is for me to drive down to Baton Rouge when Bryan and RIch are available, and we can tune it prior to the maiden.
I believe they are departing tomorrow to the NATS.
this is the inside of the fuselage:
Now, all that is left is for me to drive down to Baton Rouge when Bryan and RIch are available, and we can tune it prior to the maiden.
I believe they are departing tomorrow to the NATS.
The following users liked this post:
wattsup (07-29-2022)
08-24-2022, 06:07 PM
#90
hello Gary, still no maiden
we are getting daily rain here in Shreveport. Unheard of in August. highs in 80's which usually does not happen til late september, so yes, I am enjoying the lower energy bills.
Question for you?
what did you set your wing incidence and your stab incidence to?
we are getting daily rain here in Shreveport. Unheard of in August. highs in 80's which usually does not happen til late september, so yes, I am enjoying the lower energy bills.
Question for you?
what did you set your wing incidence and your stab incidence to?
08-25-2022, 07:34 AM
#91
hello Gary, still no maiden
we are getting daily rain here in Shreveport. Unheard of in August. highs in 80's which usually does not happen til late september, so yes, I am enjoying the lower energy bills.
Question for you?
what did you set your wing incidence and your stab incidence to?
we are getting daily rain here in Shreveport. Unheard of in August. highs in 80's which usually does not happen til late september, so yes, I am enjoying the lower energy bills.
Question for you?
what did you set your wing incidence and your stab incidence to?
Gary
08-29-2022, 02:32 AM
#92
ok, perfect. thank you
SO yesterday, I did several things:
I found the trim guide I purchased from Bryan. SO, I decided to follow his instructions!! LOL
1st thing: I set the stabs at Zero relative to the top of the fuselage canopy hatch area.
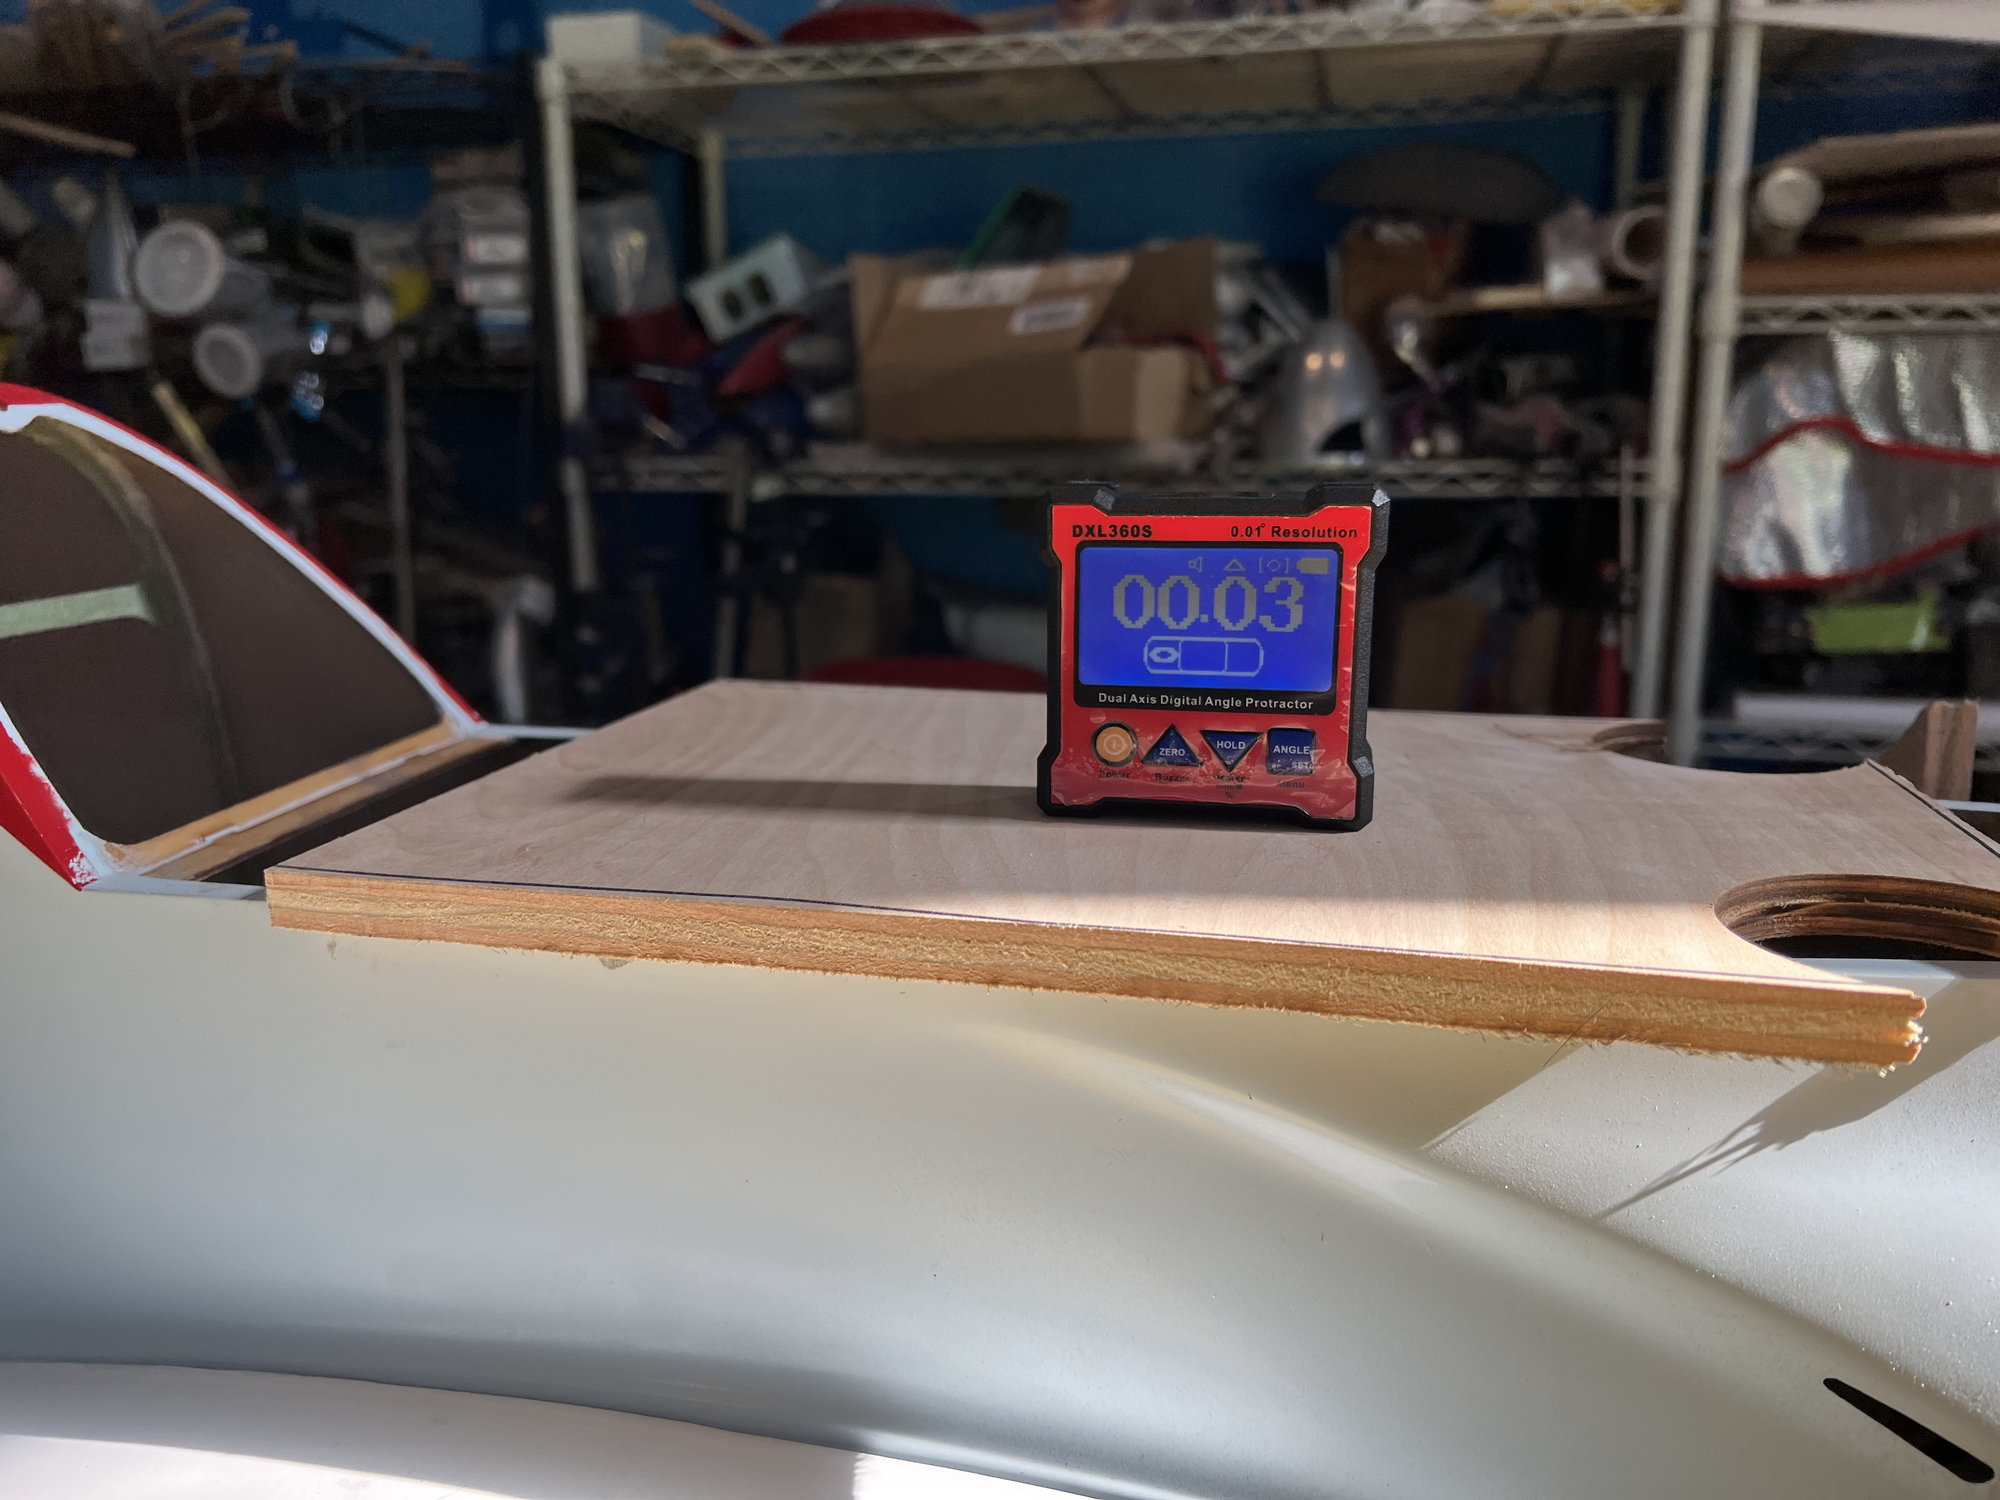
i checked the top of the fuselage and made a special mount, like a craddle, to hold the airplane so that this area was ZERO and ZERO in pitch and ROLL.
then I did my adjustors and set the stabs as close to ZERO as possible.,
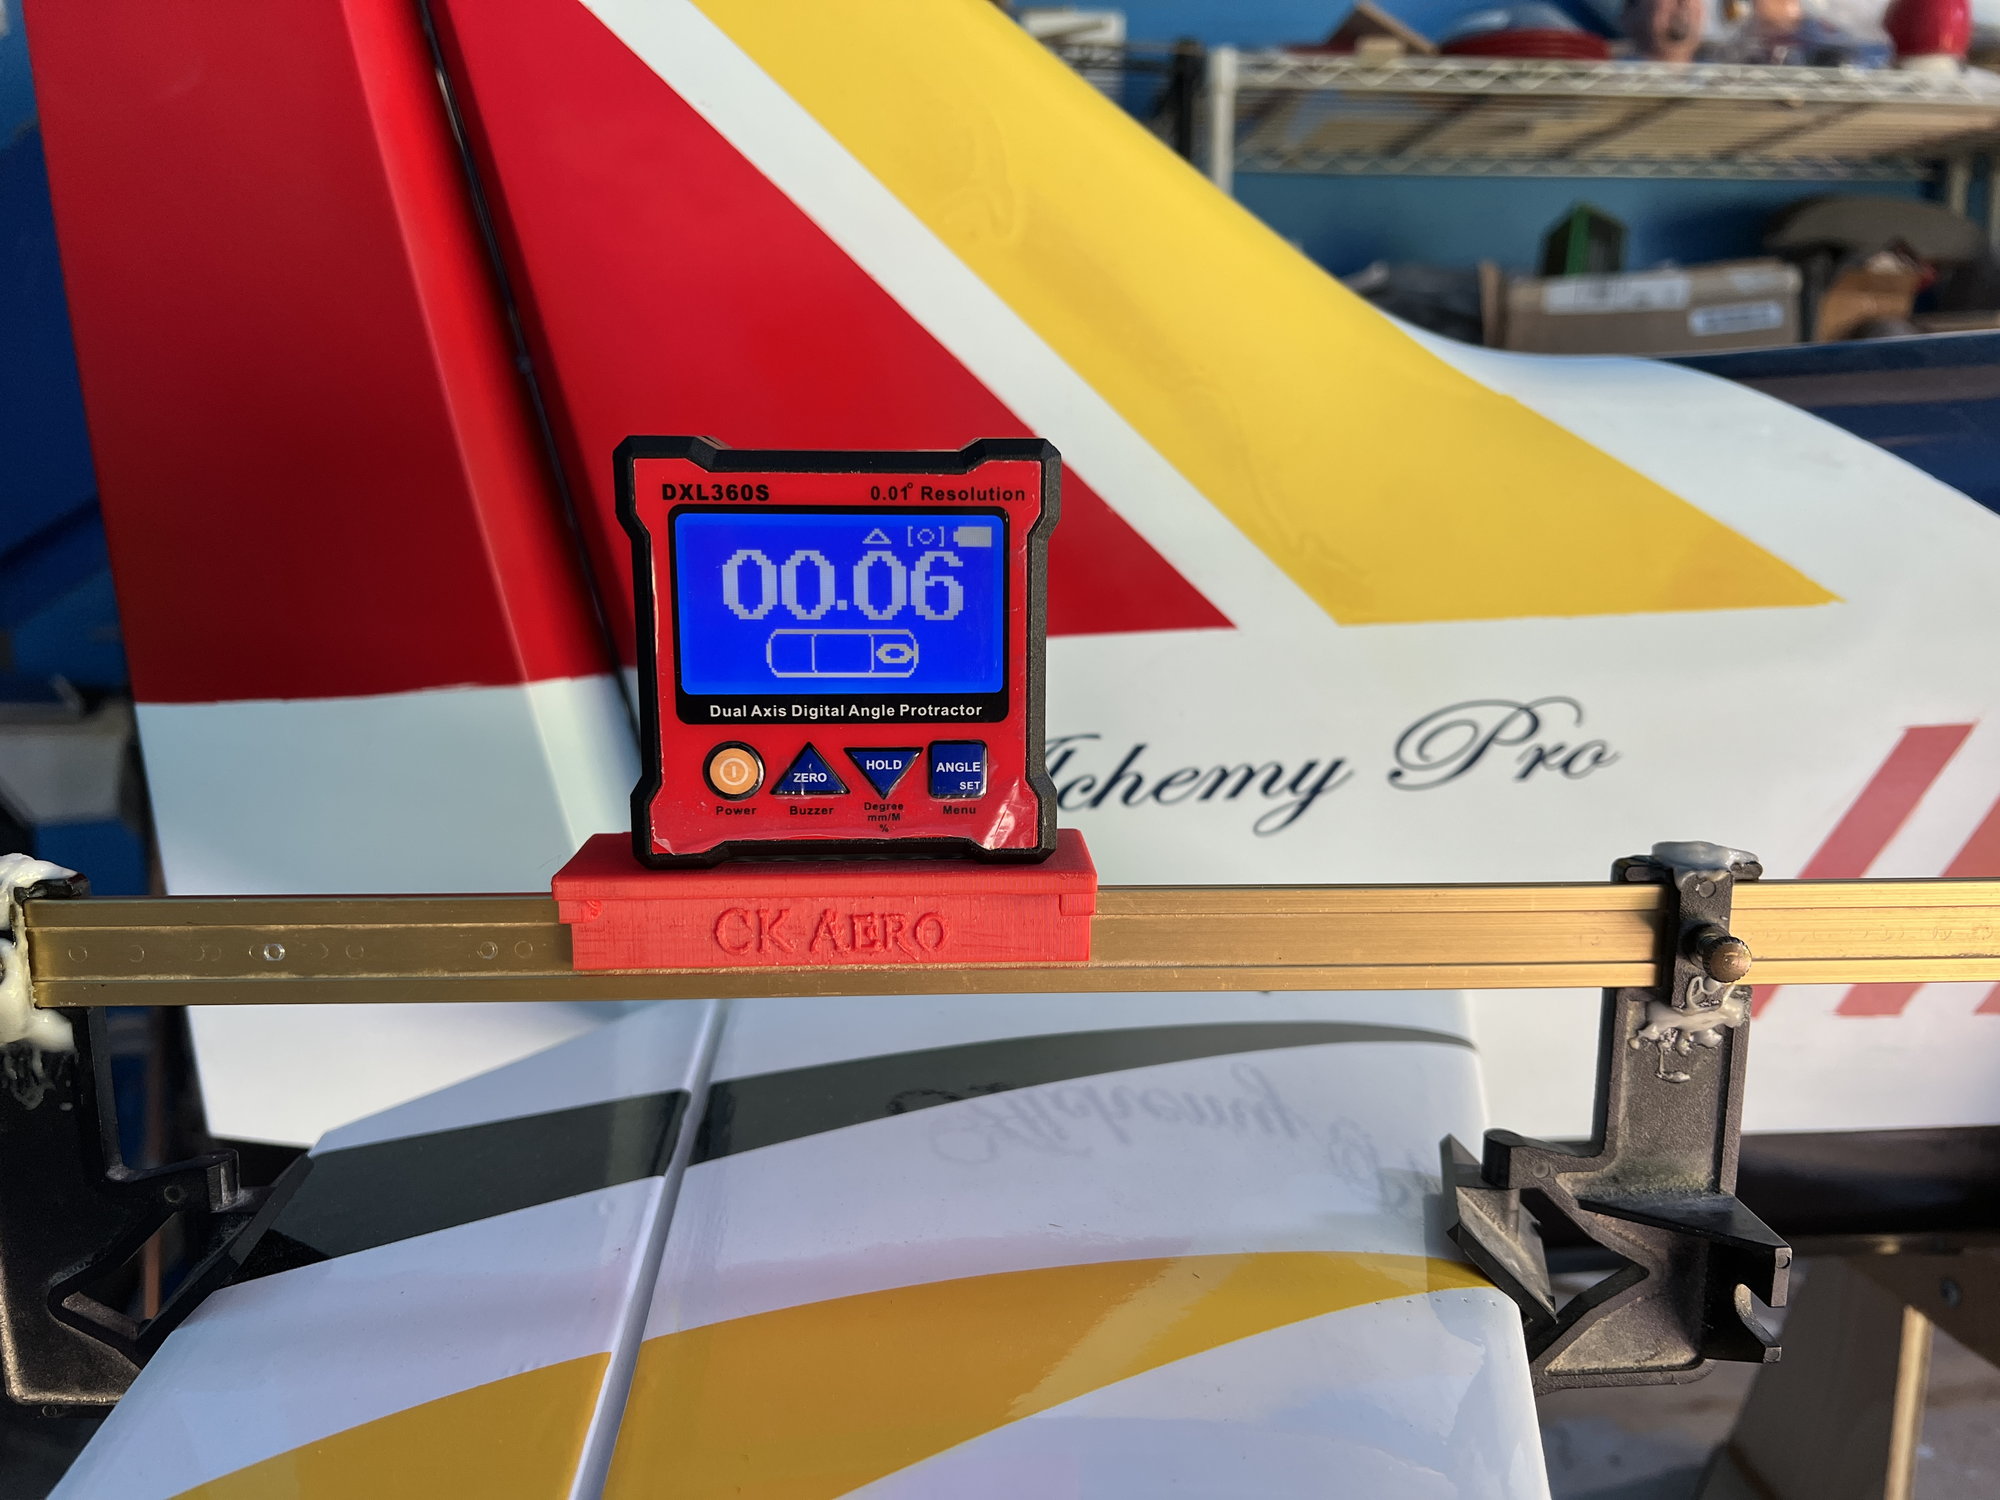
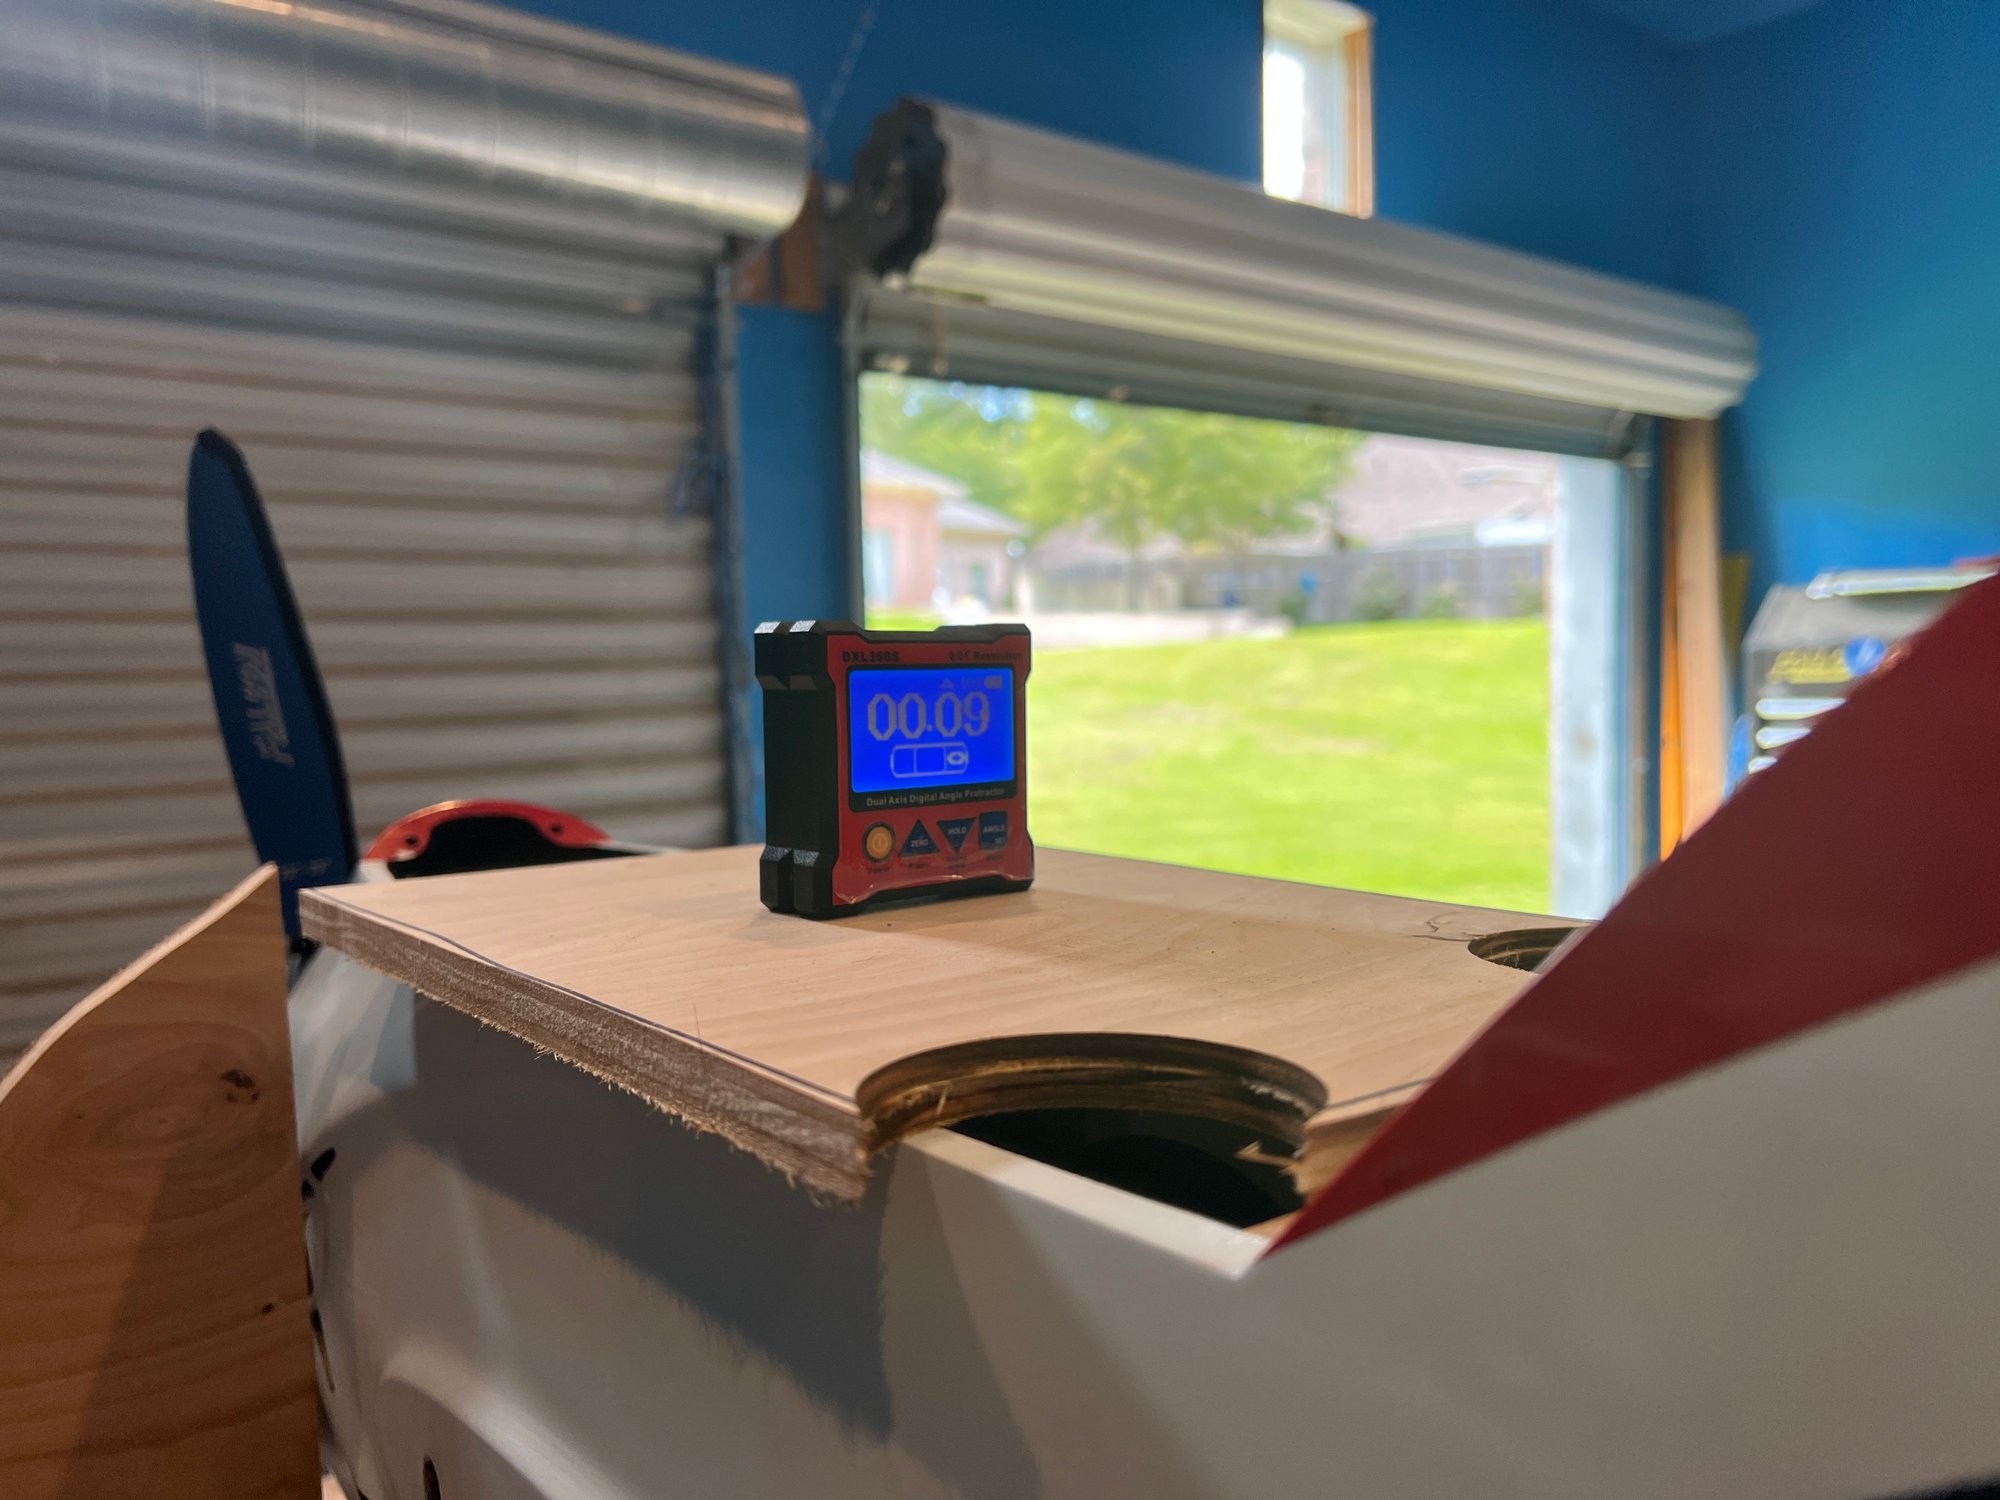
then, I set my wings to as close to 0.5 positive as possible.

I did not take any pictures, but then i used the elevator sticks that Bryan sells, and i adjusted my elevators so they are both centered and so that deflection each way is 10 degrees.
then I did the deflection meter, and made sure both ailerons deflected same degrees both up and down, with 80% differential, meaning, the aileron travel up is 100% and down is 80%.
Gary, do you know how many degrees of aileron deflection you have set on yours?
SO yesterday, I did several things:
I found the trim guide I purchased from Bryan. SO, I decided to follow his instructions!! LOL
1st thing: I set the stabs at Zero relative to the top of the fuselage canopy hatch area.
i checked the top of the fuselage and made a special mount, like a craddle, to hold the airplane so that this area was ZERO and ZERO in pitch and ROLL.
then I did my adjustors and set the stabs as close to ZERO as possible.,
then, I set my wings to as close to 0.5 positive as possible.
I did not take any pictures, but then i used the elevator sticks that Bryan sells, and i adjusted my elevators so they are both centered and so that deflection each way is 10 degrees.
then I did the deflection meter, and made sure both ailerons deflected same degrees both up and down, with 80% differential, meaning, the aileron travel up is 100% and down is 80%.
Gary, do you know how many degrees of aileron deflection you have set on yours?
08-29-2022, 05:32 AM
#93
ok, perfect. thank you
SO yesterday, I did several things:
I found the trim guide I purchased from Bryan. SO, I decided to follow his instructions!! LOL
1st thing: I set the stabs at Zero relative to the top of the fuselage canopy hatch area.
i checked the top of the fuselage and made a special mount, like a craddle, to hold the airplane so that this area was ZERO and ZERO in pitch and ROLL.
then I did my adjustors and set the stabs as close to ZERO as possible.,
then, I set my wings to as close to 0.5 positive as possible.
I did not take any pictures, but then i used the elevator sticks that Bryan sells, and i adjusted my elevators so they are both centered and so that deflection each way is 10 degrees.
then I did the deflection meter, and made sure both ailerons deflected same degrees both up and down, with 80% differential, meaning, the aileron travel up is 100% and down is 80%.
Gary, do you know how many degrees of aileron deflection you have set on yours?
Gary
09-12-2022, 02:56 AM
#94
As an update, maiden was this past Friday at the Fort bend Contest.
SOme observations:
With the rudder servo in the tail and push pull set up in the tail, and the 1st flight, I noticed the airplane was significantly nose heavy. Then I recalled, with my hatch, which has a pilot figure and clear plastic canopy, this adds weight to the nose.
SO I moved the batteries as far as I could, and flew her again. still quite nose heavy.
then, gary provided me with 1/2 ounce of tail weight in the form of lead. And what a huge difference. Still nose heavy. but way better. Amazingly, initially, I had added a downline mix and the 1st flight, but after the 5th flight and making some modifications, I noted it was tucking to gear now on downlines.
SO i definitely can go to maybe removing the downline mix.
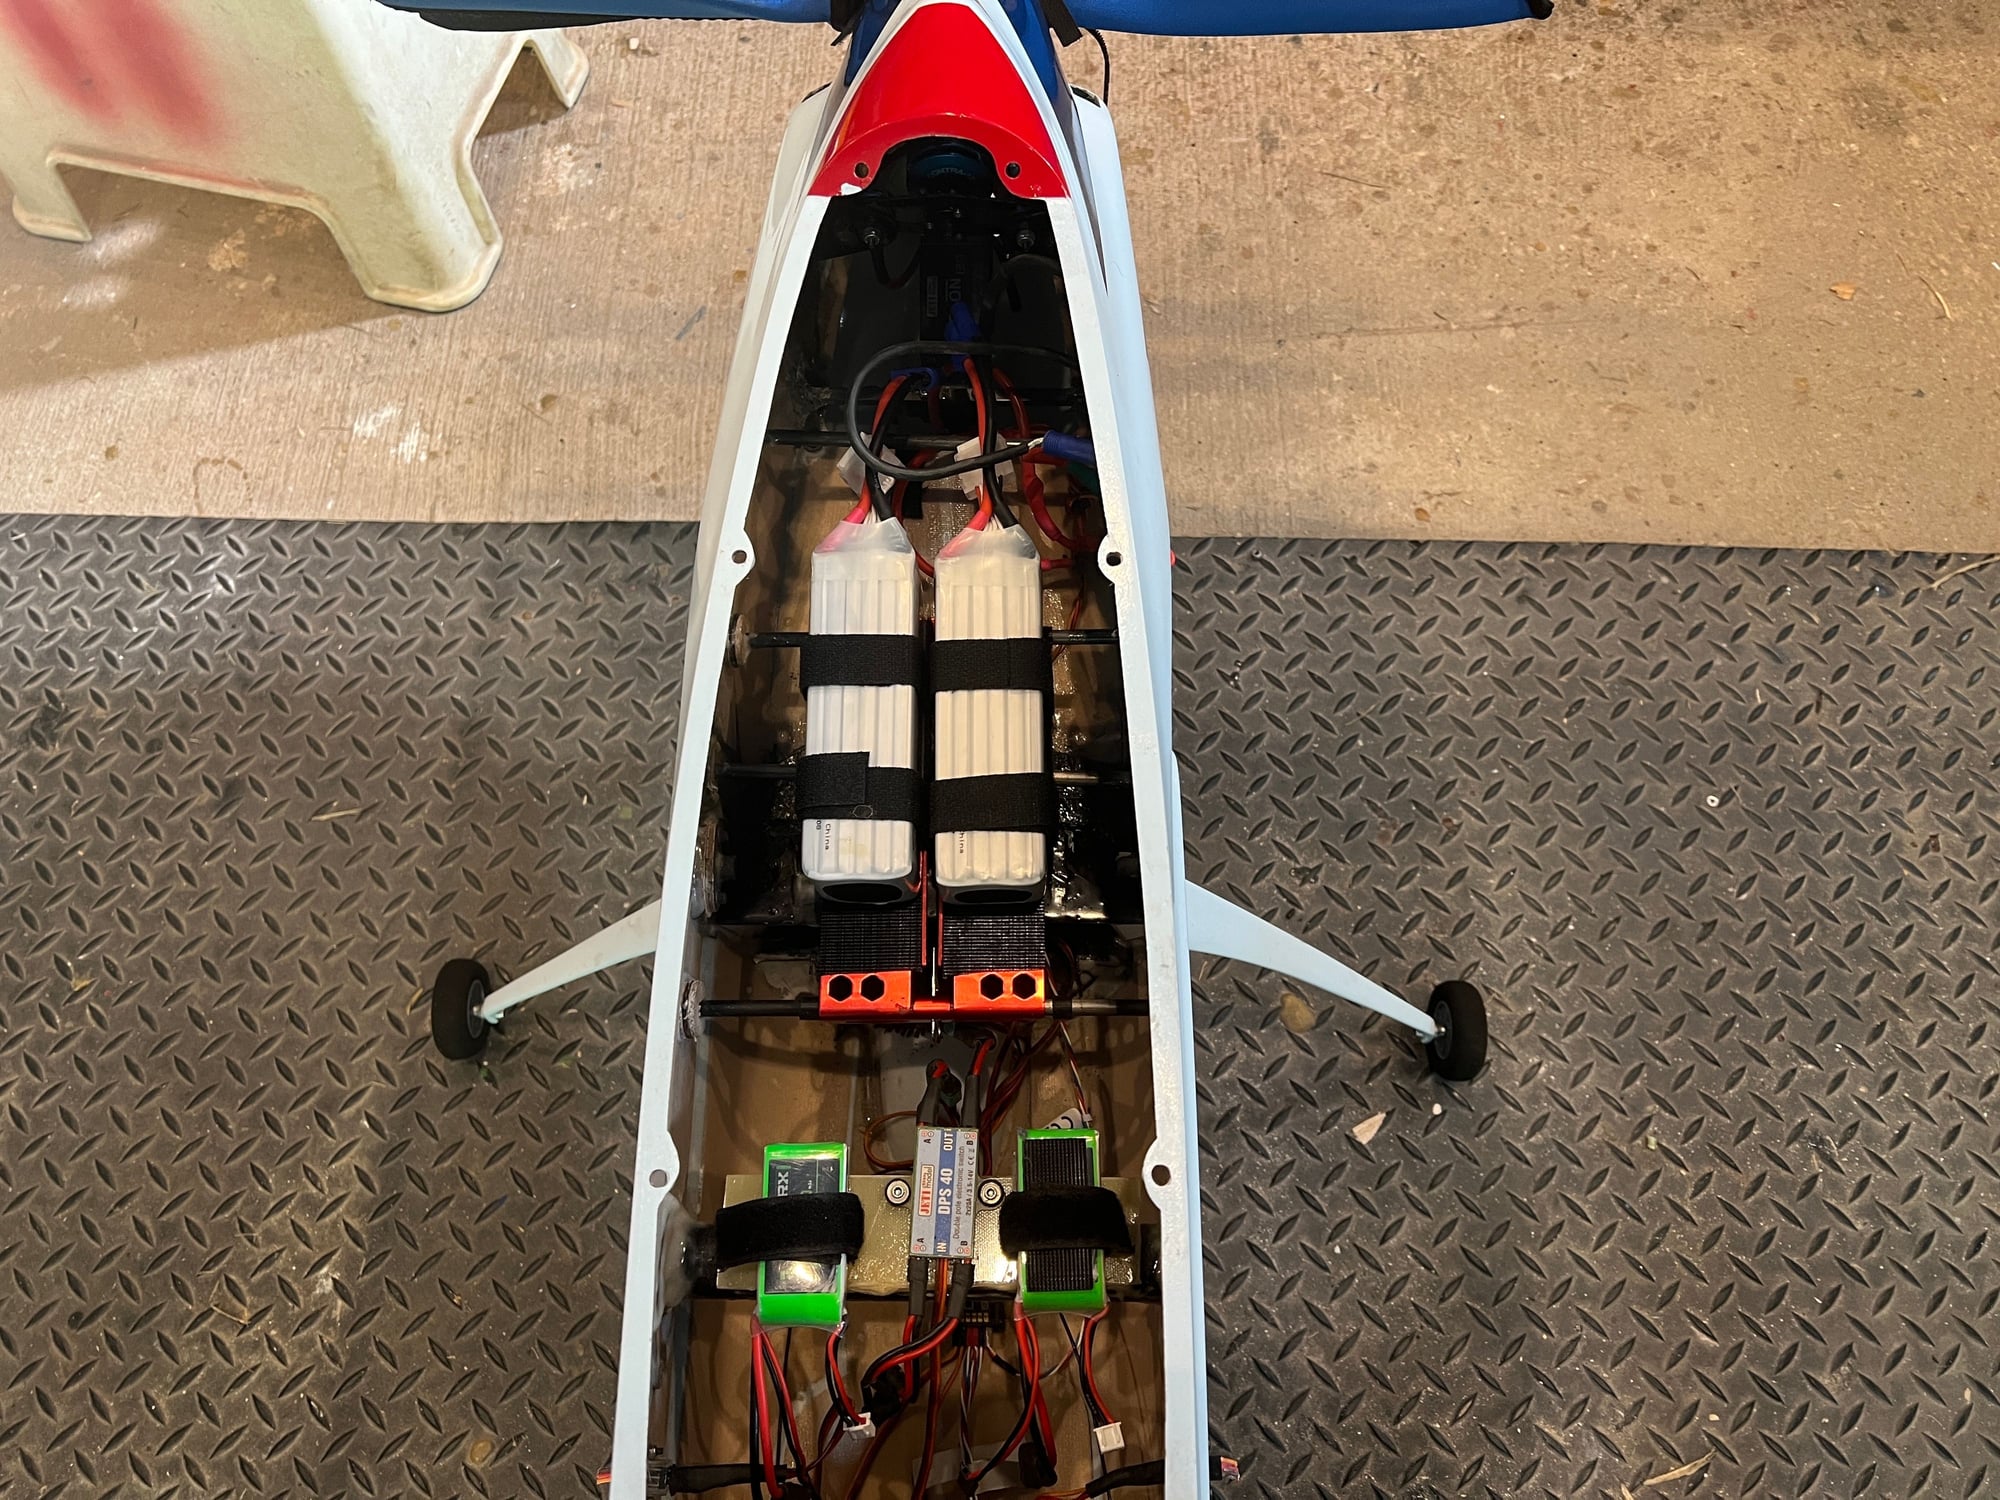
Yesterday evening, I moved the battery tray mounts back 2.5 inches, and I removed the lead from the tail.
SO maybe this week, with the batteries way forward on the tray, I will redo the flights and gradually adjust the CG.
Here is where the batteries are at now:
SOme observations:
With the rudder servo in the tail and push pull set up in the tail, and the 1st flight, I noticed the airplane was significantly nose heavy. Then I recalled, with my hatch, which has a pilot figure and clear plastic canopy, this adds weight to the nose.
SO I moved the batteries as far as I could, and flew her again. still quite nose heavy.
then, gary provided me with 1/2 ounce of tail weight in the form of lead. And what a huge difference. Still nose heavy. but way better. Amazingly, initially, I had added a downline mix and the 1st flight, but after the 5th flight and making some modifications, I noted it was tucking to gear now on downlines.
SO i definitely can go to maybe removing the downline mix.
Yesterday evening, I moved the battery tray mounts back 2.5 inches, and I removed the lead from the tail.
SO maybe this week, with the batteries way forward on the tray, I will redo the flights and gradually adjust the CG.
Here is where the batteries are at now:
