


How to learn 3D flying
 09-12-2022, 09:47 AM
#1
Junior Member
Thread Starter
Hello,
I would like to learn how to fly 3D, I fly in mode 1, can you advise me either a book, or youtube videos, or anything that can help me.
For ease of 3D flying would it be better to change to mode 2 ?
Thank you in advance
Angelo
I would like to learn how to fly 3D, I fly in mode 1, can you advise me either a book, or youtube videos, or anything that can help me.
For ease of 3D flying would it be better to change to mode 2 ?
Thank you in advance
Angelo
 09-12-2022, 02:07 PM
#2

Check out this thread on Flying Giants. Both at the beginning, and in the body, you'll find videos by "Bonedoc" and "Wamsey" that should get you on the path...
https://www.flyinggiants.com/grounds...aerobatics-76/
https://www.flyinggiants.com/grounds...aerobatics-76/
 09-12-2022, 05:15 PM
#3


Idon't believe mode matters so much. It depends what you learn(ed) on. I have heard that Mode 1 has an advantage for left-handed pilots.
If you are going to have the opportunity for a Buddy-box then it may matter to your instructor.
I would recommend a flight-simulator. Helps with "cheap" mistakes while picking up the techniques.
I would also recommend a varl light, small, profile - possibly even indoor - 3D model. Something you can use in a small area.
The following users liked this post:
curtthedirt (05-18-2023)
09-12-2022, 11:52 PM
#4
Junior Member
Thread Starter
Thanks you, I will take your advice.
I already use the simulator and am trying to learn as much as possible at zero cost. At the Club those who fly 3D fly in mode 2 and before I change I would still like to fly in mode 1.
The real problem is that everything I've seen I have to play it as if I were in the mirror and that even in the simulator.
I built an FT Edge 540 at 120% in depron. It flies very well a lot of power and it is slow to learn but my 3D flying is random .
.
Is there a reason why most pilots fly in mode 2?
I already use the simulator and am trying to learn as much as possible at zero cost. At the Club those who fly 3D fly in mode 2 and before I change I would still like to fly in mode 1.
The real problem is that everything I've seen I have to play it as if I were in the mirror and that even in the simulator.
I built an FT Edge 540 at 120% in depron. It flies very well a lot of power and it is slow to learn but my 3D flying is random
.Is there a reason why most pilots fly in mode 2?
09-13-2022, 07:36 AM
#5
Thanks you, I will take your advice.
I already use the simulator and am trying to learn as much as possible at zero cost. At the Club those who fly 3D fly in mode 2 and before I change I would still like to fly in mode 1.
The real problem is that everything I've seen I have to play it as if I were in the mirror and that even in the simulator.
I built an FT Edge 540 at 120% in depron. It flies very well a lot of power and it is slow to learn but my 3D flying is random.
Is there a reason why most pilots fly in mode 2?
I already use the simulator and am trying to learn as much as possible at zero cost. At the Club those who fly 3D fly in mode 2 and before I change I would still like to fly in mode 1.
The real problem is that everything I've seen I have to play it as if I were in the mirror and that even in the simulator.
I built an FT Edge 540 at 120% in depron. It flies very well a lot of power and it is slow to learn but my 3D flying is random
.Is there a reason why most pilots fly in mode 2?
Way back in the day there were grand debates about what was better, with lots of justifications. But it seemed to end up with "it's what I fly".
In the one video by "Wamsey" I recently watched in the thread link (above), he makes a point of showing the "Funnel Hover" in both Mode 2 and Mode 1. He might do the same in his other video's.
It really depends on how easily you think you can make the transition. I'd never have the patience to climb the relearning curve - same as when I try to fly using the "pinch" method rather than thumbs. But others seem to be able to make the change rather easily.
The following users liked this post:
Folgore88 (09-13-2022)
09-15-2022, 03:38 AM
#6

Thanks you, I will take your advice.
I already use the simulator and am trying to learn as much as possible at zero cost. At the Club those who fly 3D fly in mode 2 and before I change I would still like to fly in mode 1.
The real problem is that everything I've seen I have to play it as if I were in the mirror and that even in the simulator.
I built an FT Edge 540 at 120% in depron. It flies very well a lot of power and it is slow to learn but my 3D flying is random.
Is there a reason why most pilots fly in mode 2?
I already use the simulator and am trying to learn as much as possible at zero cost. At the Club those who fly 3D fly in mode 2 and before I change I would still like to fly in mode 1.
The real problem is that everything I've seen I have to play it as if I were in the mirror and that even in the simulator.
I built an FT Edge 540 at 120% in depron. It flies very well a lot of power and it is slow to learn but my 3D flying is random
.Is there a reason why most pilots fly in mode 2?
Bob
The following users liked this post:
Folgore88 (09-16-2022)
09-16-2022, 02:07 AM
#7
Join Date: Nov 2010
Location: Coffs Harbour NSW, AUSTRALIA
Posts: 1,650
Likes: 0
Received 72 Likes
on
68 Posts
To master 3/D takes years and years of hard work, and some guts,
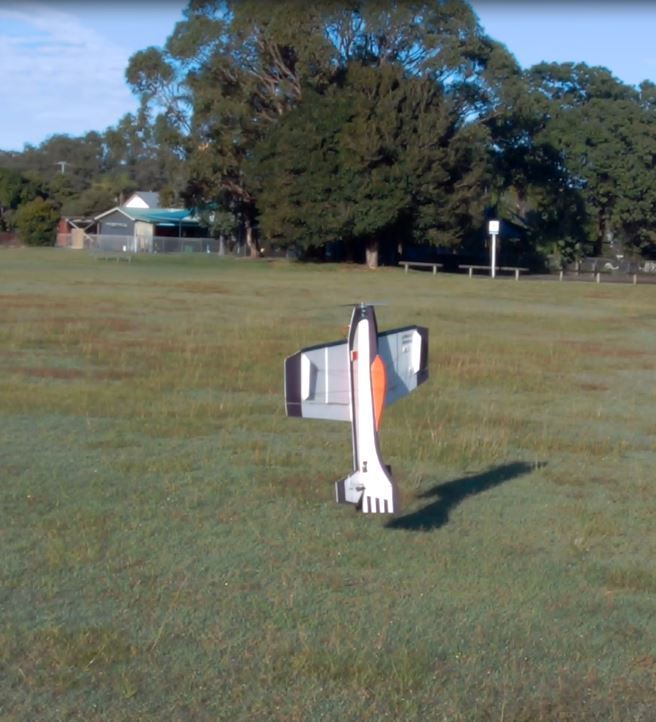
Starting with something like this, light&slow and plenty of power helps.
but then again, there are a 3/D and 3/D standards. The best way to start is with the lightest model and 2 to 1power ratio, so even if you prang it there is a minimal damage. (hope not crashing it at full bore into the gate!, LOL)
Forget about books and video theory, that won't help you, get a plane out to the field, practice and more practice, it's all about co-ordination and muscle memory.
Naturally, the talent plays a part, some people just can't do it, same as some pilots I know off flying basic trainers for 50 years and still can't land it with out nosing over or sommersaults, LOL.
If you are young you will master it lot quicker than an old man.
The following 2 users liked this post by Joseph Frost:
curtthedirt (05-18-2023),
Folgore88 (06-19-2023)
09-16-2022, 02:20 AM
#8
Join Date: Nov 2010
Location: Coffs Harbour NSW, AUSTRALIA
Posts: 1,650
Likes: 0
Received 72 Likes
on
68 Posts
Q-Is there a reason why most pilots fly in mode 2?
Nonsense, maybe in US, or Belgique? Down here most fly M1. Forget about the crap some say about the stick on the full size, we fly models, not sitting on the ass where right is right and left is left!
Nonsense, maybe in US, or Belgique? Down here most fly M1. Forget about the crap some say about the stick on the full size, we fly models, not sitting on the ass where right is right and left is left!
09-16-2022, 06:55 AM
#9
Junior Member
Thread Starter
Cambiare la modalit� se voli gi� "1" � la cosa peggiore a cui pensare!!! Pessima idea quanto cercare di cambiare lo swing a cui sei abituato! Pensa a "Ian Baker Finch" LOL.
Per padroneggiare il 3/D ci vogliono anni e anni di duro lavoro, e un po' di coraggio,
iniziare con qualcosa del genere, luce e lentezza e molta potenza aiutano.
ma poi di nuovo, ci sono standard 3/D e 3/D. Il modo migliore per iniziare � con il modello pi� leggero e un rapporto di potenza di 2 a 1, quindi anche se lo pratichi c'� un danno minimo. (sperando di non schiantarlo a tutta velocit� contro il cancello!, LOL)
Dimentica i libri e la teoria dei video, che non ti aiuteranno, porta un aereo sul campo, pratica e ancora pratica, � tutta una questione di coordinazione e muscoli memoria.
Naturalmente, il talento gioca un ruolo, alcune persone semplicemente non possono farlo, cos� come alcuni piloti che conosco da 50 anni in volo con addestratori di base e ancora non riesco a farlo atterrare senza ficcanasare o fare salti mortali, LOL.
Se sei giovane lo padroneggerai molto pi� velocemente di un vecchio.
I have found some tutorials in mode 1 and will start flying with the simulator.
09-16-2022, 02:44 PM
#10
Join Date: Nov 2010
Location: Coffs Harbour NSW, AUSTRALIA
Posts: 1,650
Likes: 0
Received 72 Likes
on
68 Posts
Mate, there's a difference to fly sim and the real thing as 3/D. Practice makes it perfect. BTW, no shplechanzy dojche, despite spent 8 month in French Club Meds, forgot all I learned, LOL.

More prax.
More prax.
The following users liked this post:
Folgore88 (06-19-2023)
09-20-2022, 11:43 AM
#11


I learned on a SPAD3D. Put junk servos on it, a cheap .45 glow and a handfull of 12x4 props. They fly terrible but you will learn how to control your ALT with the engine.
https://spadtothebone.org/plans.html
David
https://spadtothebone.org/plans.html
David
09-20-2022, 04:44 PM
#12
Join Date: Nov 2010
Location: Coffs Harbour NSW, AUSTRALIA
Posts: 1,650
Likes: 0
Received 72 Likes
on
68 Posts
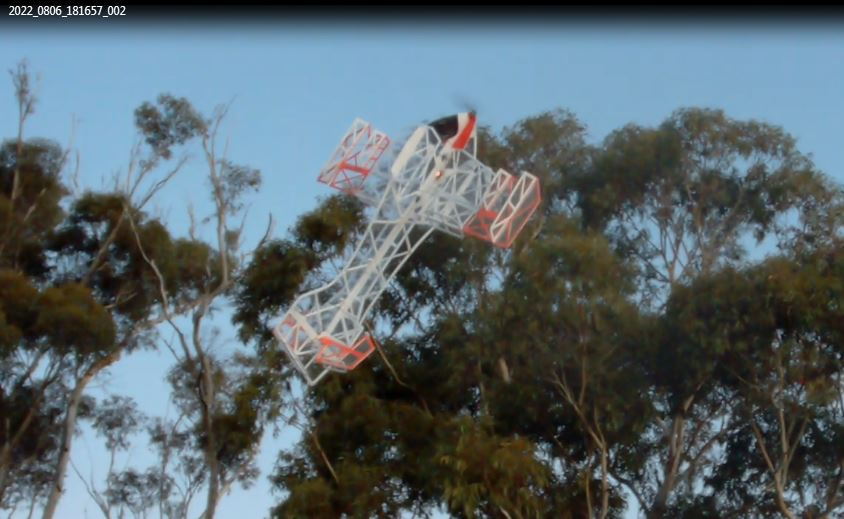
Great way to learn 3/D for very 'low-slow and close' is if you build something like this, (pics) super light and slow, it gives you plenty of time to think before screwing up, LOL.

The following users liked this post:
Folgore88 (06-19-2023)
09-20-2022, 10:10 PM
#14
Join Date: Nov 2010
Location: Coffs Harbour NSW, AUSTRALIA
Posts: 1,650
Likes: 0
Received 72 Likes
on
68 Posts
Hi, each of my build is fully documented in numerous Threads bellow in Electric models and Park/backyard fliers.
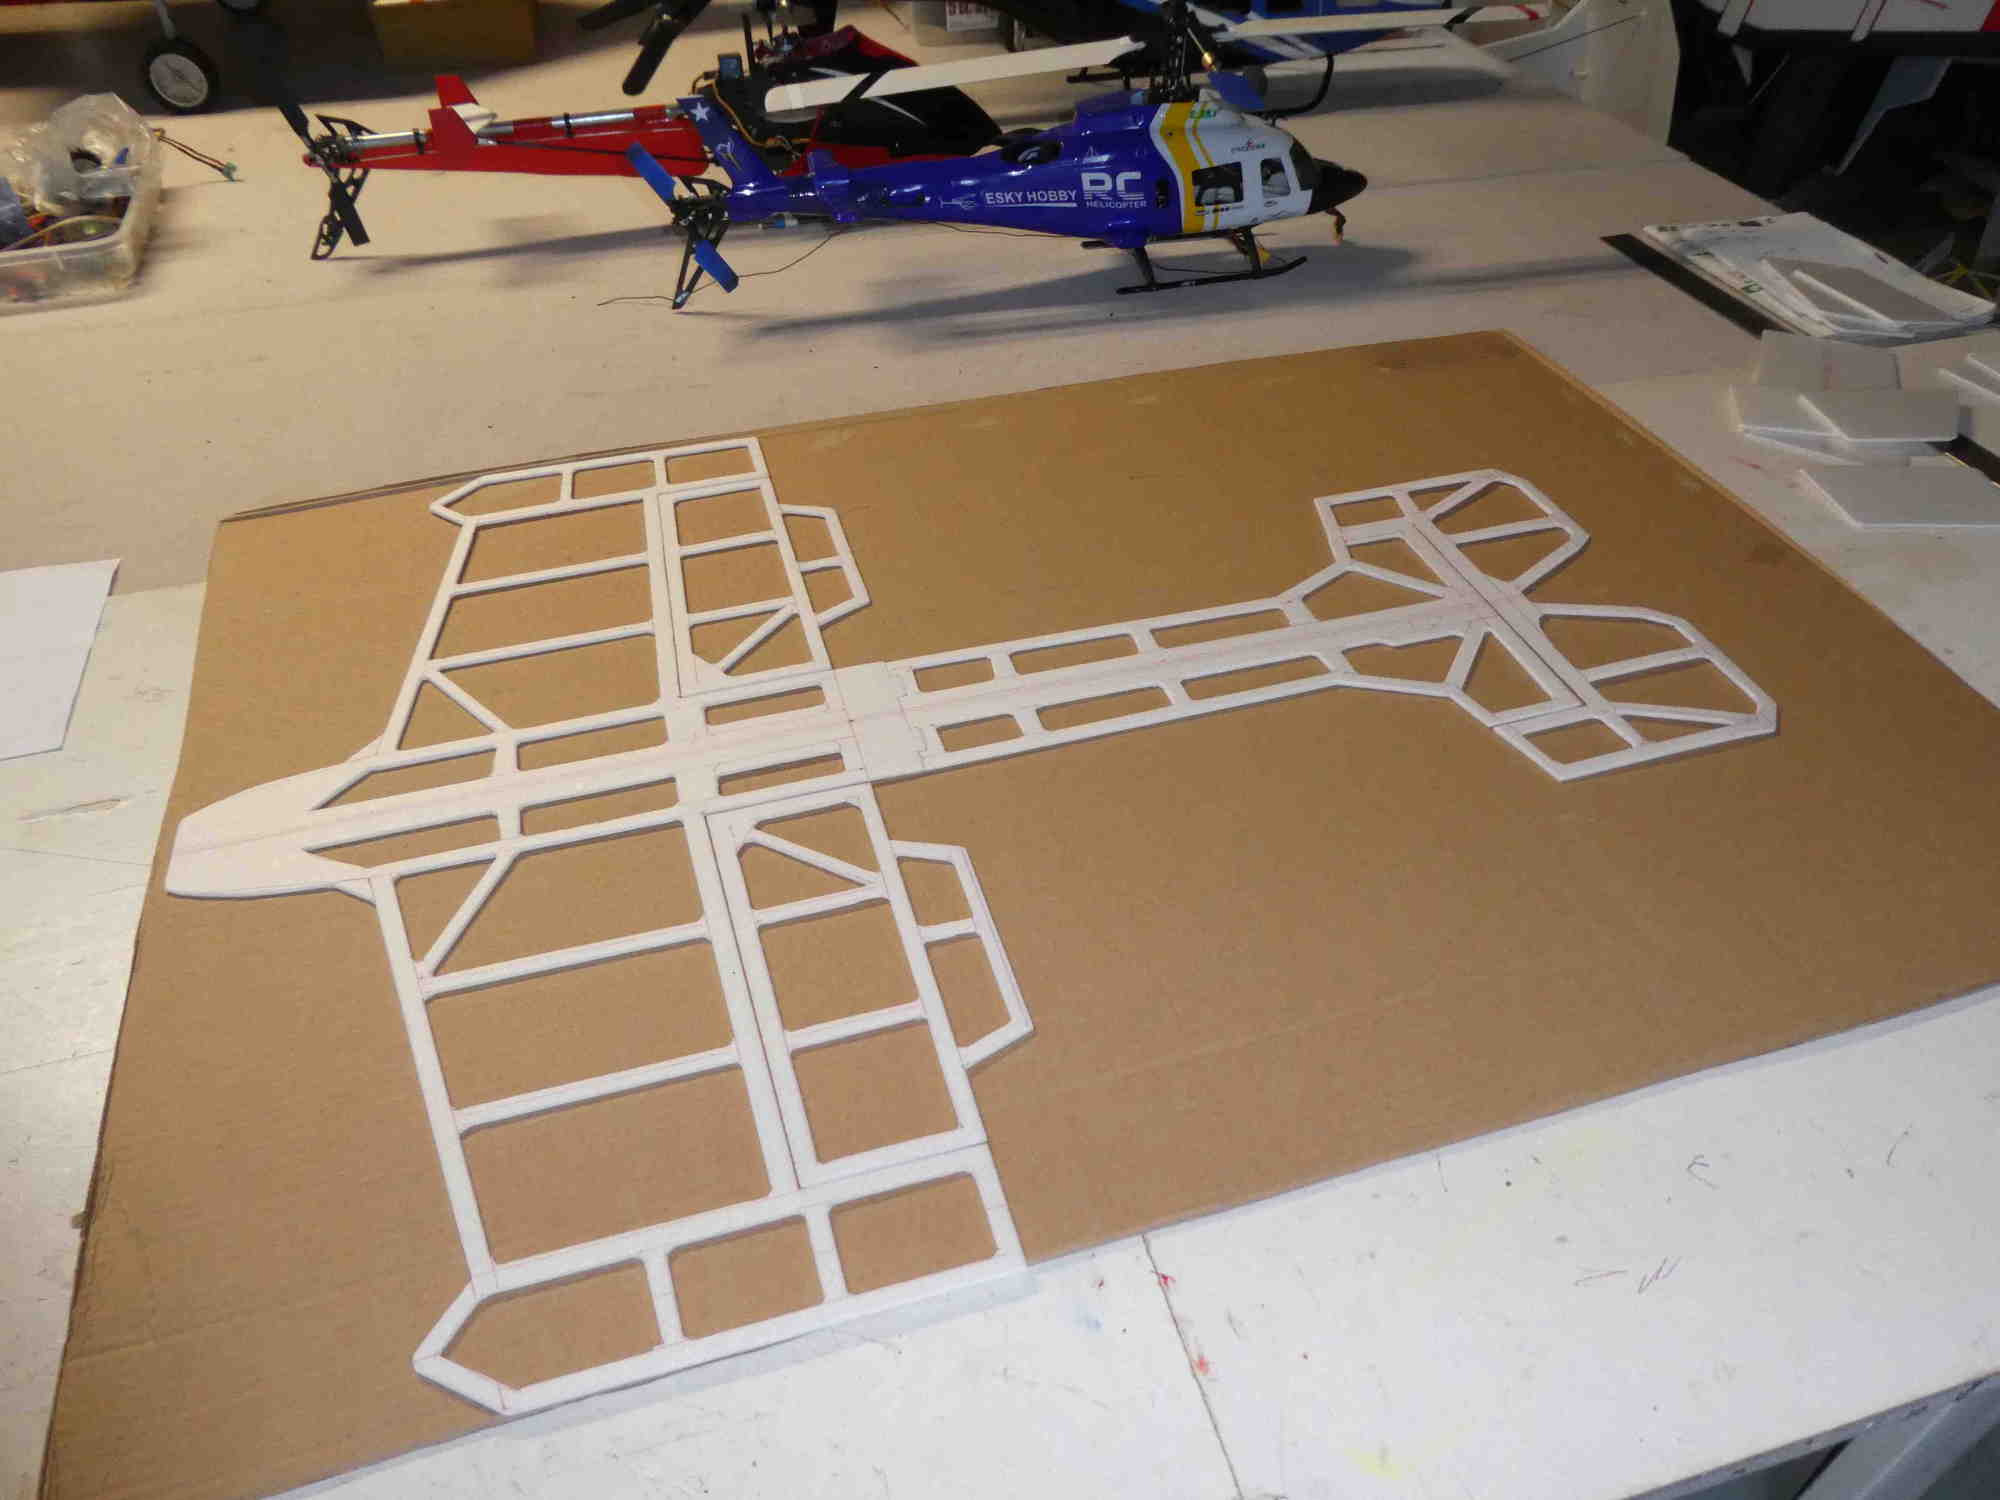
The basic frame cut out.
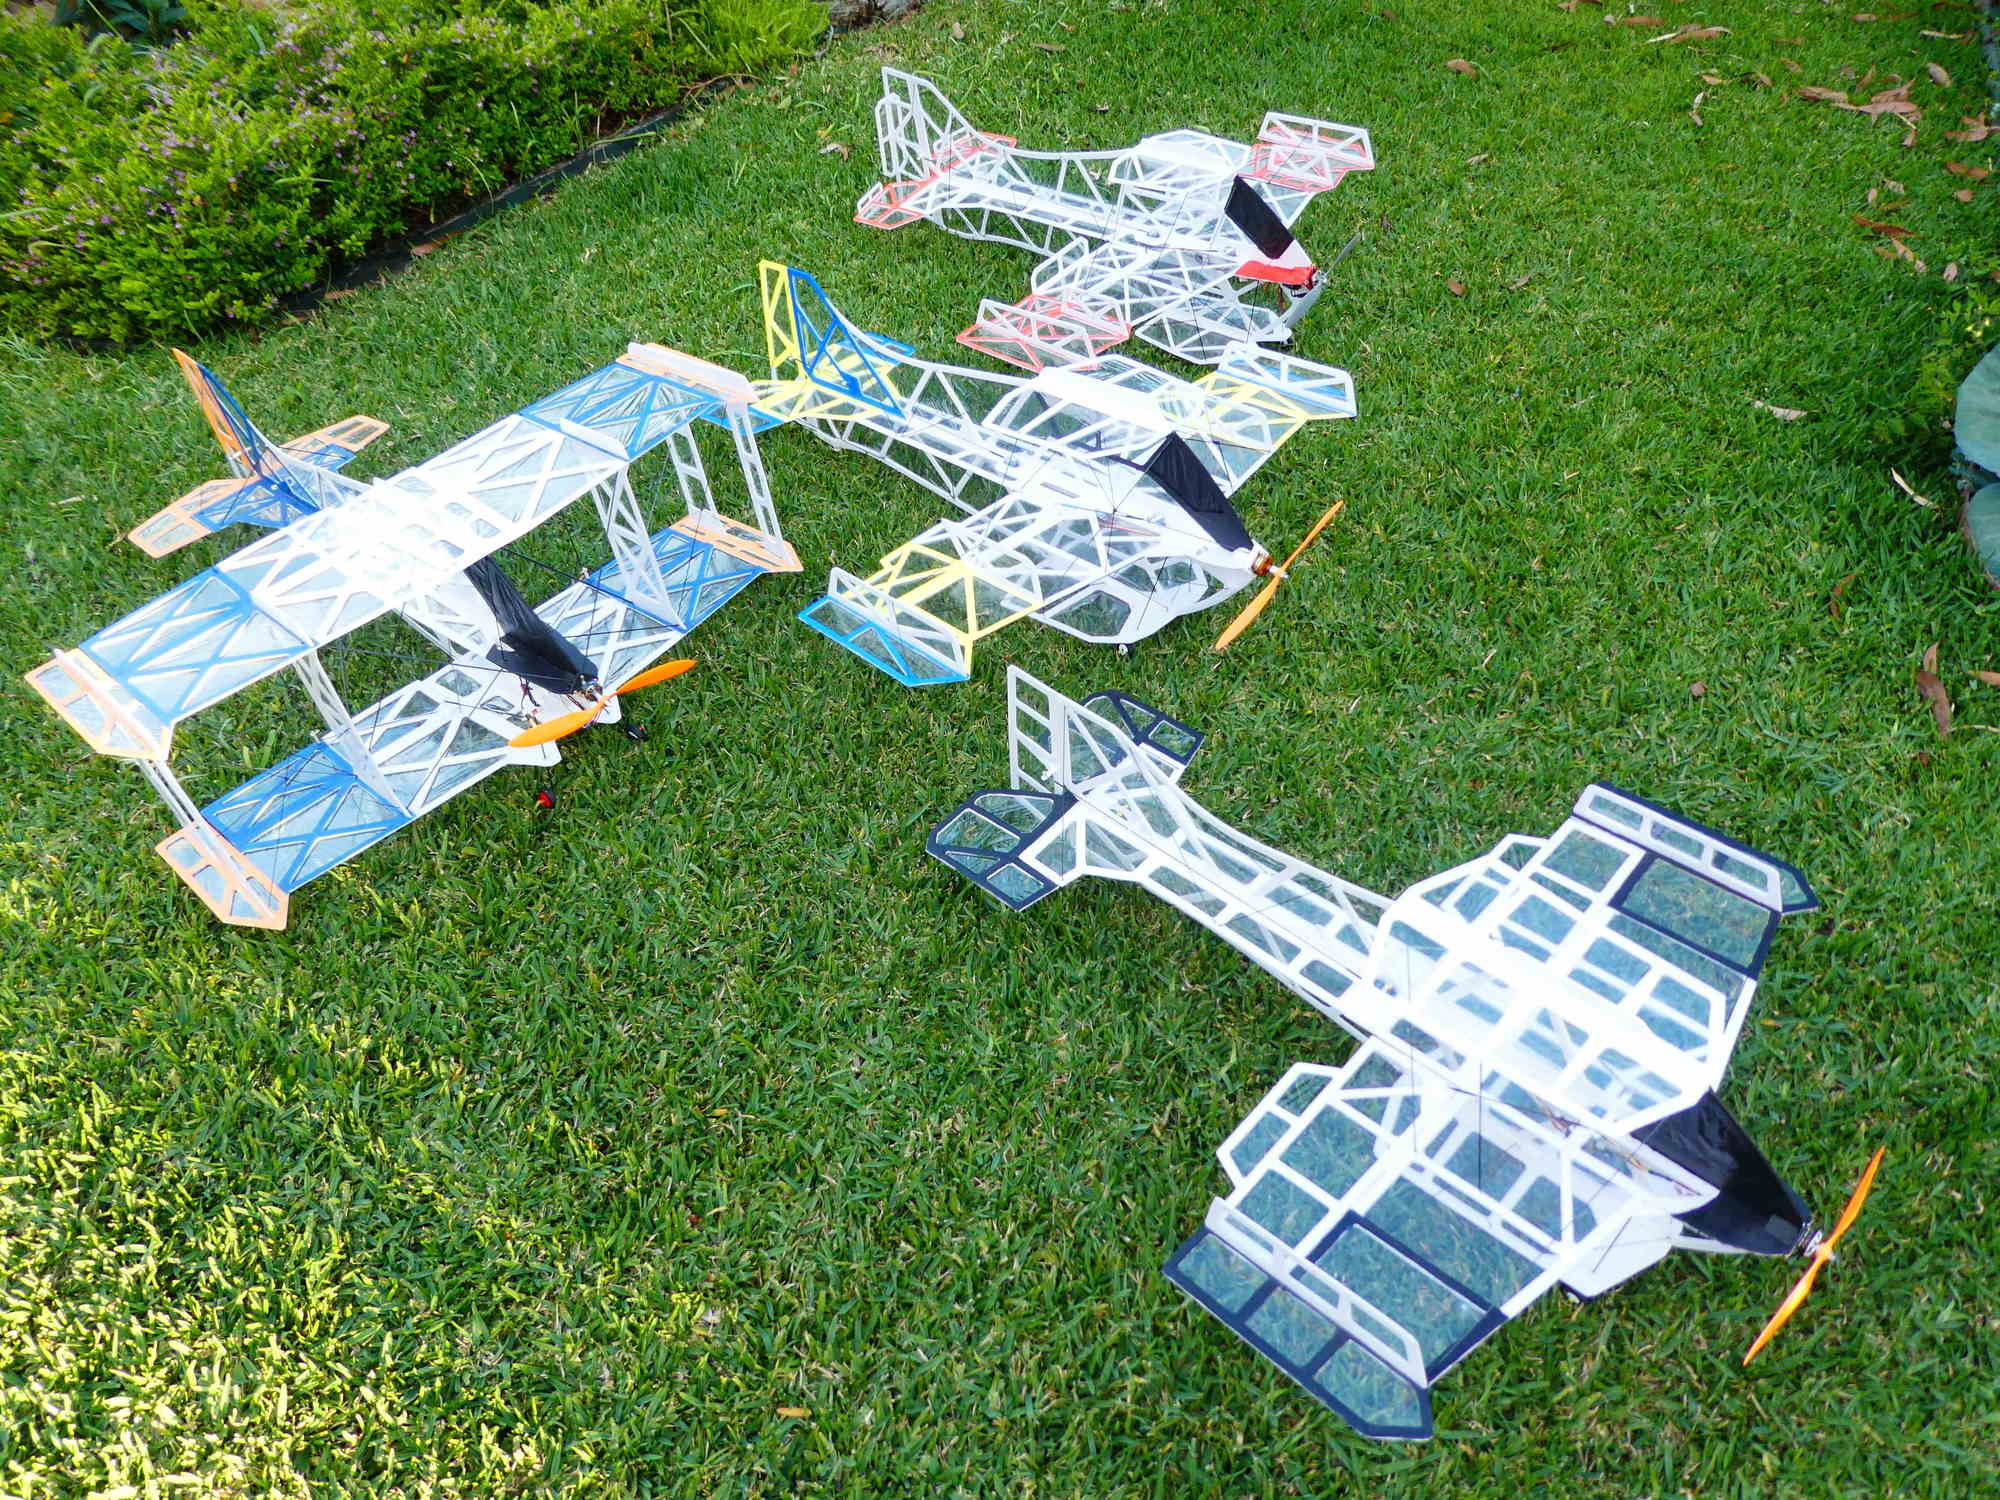
Some 400 loving hours in four of these.
With the coldest Winter in my memory, this year starting already early May it certainly slowed down to some degree my flying activity last few months, but, resulting in scratch building 4 new micro models to enhance my 3/D fleet.
Averaging one hundred hours on each build kept me pretty occupied throughout this depressing time of the year. I absolutely hate it, and just can't understand how cold it can get while living in the Sub-tropics!
However, the times are moving pretty fast with the shortest days of the year when you are busy, especially while creating something you love doing and totally new, as some of these extremely light and delicate micro structures are built from 3mm modeling foam, without any internal strength.
As I have mentioned in last month's July NL article on the micro model subjects, my first attempt ended up below 150 grams AUW including a small 2s/300mA/60C rated battery pack. Three times the weight of some unique "F3P '' models they build in Europe for indoors flying gave me some good idea how critical is the use of every single gram of added weight. My initial target was 120 grams or below, but it was simply wishful thinking with the materials I had on hand or available to buy locally.
However, a bit of extra weight comes handy with these types of models for outdoor flying activities I do, as a 50 gram model would most likely fall apart even while walking with it outside, 100 meters to the flying site. While enjoying my new creation tremendously, mainly during evening twilight 'dead calm' hours, it still isn't as slow as I would like at some 5.5 grams per decimeter loading, so after a dozen or so flights I have decided to build 2nd. model hoping to bring the weight further down and also enlarge the whole frame flying surface area.
My first build was a great learning curve so the next project I have cut the slightly larger frame even more delicate, creating even more handling issues while rounding off with finest sandpaper all sharp cut out edges and corners taking hours and hours of extreme care while doing it. Unfortunately, despite saving some weight the frame became much weaker so more carbon fiber had to be used at a later stage to keep the whole structure sturdy enough, so I was back at square one. LOL.
Obtaining the lightest gauge of carbon rods, (0.3 to 0.5 mm) also prohibitive cost wise with the amount required for these builds is also problematic so much heavier 0.8 to 1 and plus millimeter had to be used adding more weight than hoped for. I have used 6 to 10 meters of it on average for each model build so far, to make it airworthy
.
While experimenting, I even started to cut my own strips from very thin flat CF strips but not always practical for use. Another weight killer are the servos, 4.6 to 6 gram ones I had whole stuck off are too heavy, 1.5 to 2.5 grams would be an ideal but again pretty hard to get my hands on these days. Micro light receivers, ESC's, connector plugs, linkage hook-up and the motor/adaptor/prop weight are other items to minimize the AUW that can make a target winner.
When I looked really into it, building one of these 50-60 gram models, you are looking easily at one grand, a pretty large sum for a little indoor piddle compared to what you can get for the same amount in a pretty large 90mm powered scale looking EDF jet. But that's another story, so I have used the best I could find available without breaking my packets.
Finding the right hardware such as control horns, guides and push rods at minimal weight but strong enough for maximum control deflections is another story especially if you like to make it for an easy, practical adjustments, so rather than scratching my scalp wondering where to get it I have scratch build all these parts using whatever I could find with more hours of creativity.
Virtually zero weight landing gear wheels were cut out from 6 or 9mm Depron, shaped, painted and looked just as good as any wheels you can buy handling micro models at ease.
Propellers are another problem! I can never get the ones I need in this country and ordering them from the OS is not an answer these days, so some modification of what's available is another alternative. I often see in Europe or the US, modellers using large props made of CF at mere 2-3 grams to suit these types of models, but in Australia it is simply non-exist! My personal preference is use of largest diameter with minimum pitch for slow 3/D aerobatics so I have managed to re-shape some very old, not available GWS larger slow-fly ones, to practical use without overloading the tiny outrunner motors.
Trying to get a hand on a counter rotation coaxial micro motor is just another impossibility after further look into it, so I have managed to purchase a few lightest outrunners under 20 grams with great difficulty, as hardly anyone handles these items anymore in this country after wide search. The good old local HobbyKing warehouse was full of them for a few bux only a few years back, but now, after closing most of RC shops in this country they are also going bust themselves, and closing down as I speak! Tough luck to them, LOL.
So what the hack is happening to this hobby? The old school is all dying off, with the new generation hardly knowing what it's like to scratch building RC models, and with all the new regulations creeping in day by day, I personally can't see many rosy days ahead in this wonderful hobby some of us still love so much. Well, if they really close us down I can always pull out one of these micro lights and laugh all the way while having fun flying them in my backyard.
So back to building, the larger #2 Dead Calmer fitted this time with a different motor, tiny Dualsky outrunner, '2203TY16 at 1650kv' came up without any prop adaptor option, but this rather inferior prop saver rubber O-ring type of attachment. I have never used this type of prop mount before on any electric model and rather reluctant doing so, but before deciding to do something about it, I thought might have a go after learning what a pain in the neck it is just to fit the prop to the delicate model while static test running various props to get the best out of it. Removing the motor while doing so was much safer to avoid possible damage to the whole fragile structure, but just another hassle.
Maiden and following flying sessions went extremely well, with wingload reduction from 5.5 of the first build, down to some 4.5 grams per decimeter allowing me for slower, lower and closer fun as my main objective with these builds, but bit of a nuisance while loading up the battery and just gently bumping into the prop, and off it went! Lost O-ring in the grass, back in the studio to replace it for further flying during late twilight dead calm hours to make the most of it. Few days later, while picking up the model from the bench for another eve flying session the prop flew off even without touching it, while finding the O-ring on the floor split-broken!
A, WARNING! This had to be dealt with, no more flying, risking my 100 hour creation for a lousy piece of rubber that the whole model relied on. Next day, I decided to look closer into it hoping to replace the shaft for a longer one and use a small prop adapter. After dissmental of motor the cold pressed tiny shaft couldn't be removed after attempt doing so, but being hollow with 2mm internal cavity I have installed a short 2mm OD hardened steel one and machined alloy mini adaptor to suit the prop, secured with couple of grab screws inside threaded 3mm hole right through the prop and adaptor, against the new extended shaft. Perfect job, with a few grams of extra weight, but more reliable set up for the piece of mind, worth spending a few hours doing.
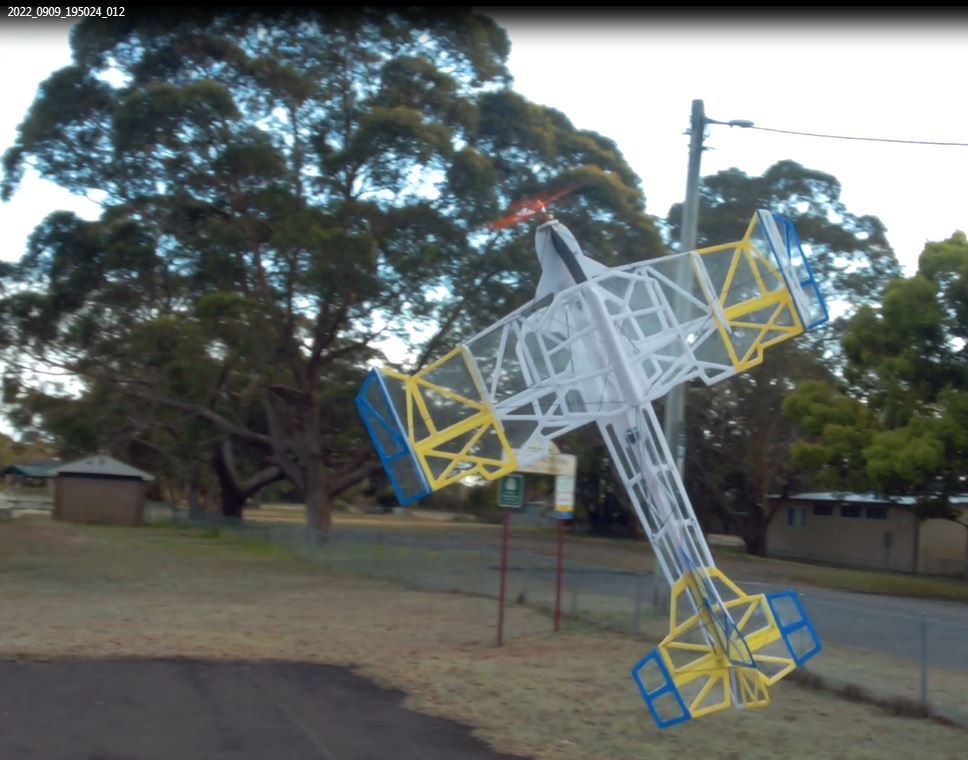
It didn't take long after daily flying sessions with both models, I got a new idea: why not build a 'double dekker', hoping to slow it down even further? Back on the work bench with a few more sheets of 3mm modeling foam, sharp set of hobby knives, more delicate cutting, sanding and application of glad wrap, a cheaper alternative to a few micron thick Mylar.
With the hope to minimize the wing load I enlarged the flying surfaces further, but soon realized how flimsy the whole frame was becoming while test fitting the cut out slots and started to have doubts if this thing will ever be solid enough to keep its shape. While waiting for more CF to finish it off, the new colour scheme was brushed on by thinned down water based paint to give it some livery and orientation during flying. All the hardware was prepared with the new more powerful AXI, 2203/40/2000kv micro motor ready for installation. After delivery of CF it was getting stiffer day by day, but unfortunately adding on more weight at the same time. Well over 10 meters of carbon in various gauge was fitted to the frame to make it stiff enough for what I thought might be good enough.
After hook up of all servos, 6 gram ones on Elev. and Rudd. the double winger huge Ail. tabs had to be run on more torque, so I have used 9 gram plastic gear one, which was a mistake, because after full hook up and test operation I have found there was a stripped gear at the max. deflection on one side. What a pain in the neck, it worked fine prior without the load, I had an intention to fit metal gear one at first, but the extra weight changed my mind, bugger!
It was a bit of a nightmare to replace it with all the carbon braces fitted in place but had to be done. Doubling the weight to 19 grams, but more reliable controls of four large Ail. tabs joined by hinged adjustable CF connector rods. My initial hope to finish the whole build at some 175 grams AUW, with its new title "DC175" came again to a wishful thinking, ending up over 200 grams dry, plus 2S/300-550mA high C pack.
Well, slightly over my target but being a 'double dekker' I thought I get away with it. Ready for an excitement of maiden flight after a few nasty, windy days break from flying, the premier flight while taking off the carpeted strip in perfect late twilight conditions ended up almost in total disaster! Fully confident, expecting another slow slug performer, but as soon as it rotated there was some control slugginess, getting out of hand as I added more power to get slightly higher to safety! After a few nasty unexpected rolls it took only a few seconds and I didn't know if I'm "fenny or penny"! LOL.
The panic in semi-twilight darkness took over and all I can say now was only a miracle luck. I have managed to slam it down in grass, flat-level onto its landing gear with a minor damage to it, absorbing the nasty impact after only some 8 seconds of the most stressful drama!
Thank you, 10+ meters of carbon fiber saved the model and 120 hours of loving labor! Problem with these models is, if you prang it even slightly out of control, they become more-less unrepairable, just about good enough for some spares and the trash bin. Tremendously lucky, at least I can say, the landing gear structure created some shock absorption, easily fixed soon after with only a few grams of added glue, bits of foam and even gave it more strength using very light balsa reinforcement.
Rather disappointed I didn't use my cap video camcorder to analyze the problem due to rushing into it late evening but after close check of things there was a considerable flexing of my large Aileron tabs, and too much too powerful MG servo twisting in its 3mm foam base. Slightly more powerful motor also created too much torque-twist of its nose section so more carbon fiber had to be added to these crucial areas. Simple and easy fix, because my initial thought was that I have created another Bi-Bye doggy, as some of my earlier Bi planes are a bit off the handle.
Nevertheless, more weight added but problem solved after the next re-maiden a few days later and the model running smoothly as hoped for, more like a fully tamed *****cat and LOL again after another success. Despite at some 235grams AUW, the larger flying surface reduced the loading to some 4.5 grams so it performs similar to my mono builds, but due to its larger size it's even more fun to fly it slow-low and very close past my nose. Just love flying it in an area of less than a volley fied as slow as possible in 3/D aspects.
The next project was a decision to de-commission my smaller #1 micro build I have found slightly too heavy for its size after more success with the two new creations, so laid down another sheet of modeling foam and drawn next slightly larger design for the AXI power unit to be too good for a small 25dm2 flying surface. After enlargement I have ended up at 37dm and despite a fraction heavier model the loading dropped down again for slower stunt flying.
Hoping in the near future I will get my hands on one of those unique coaxial power unit, lighter gauge carbon fiber rods and electronics to create my new goal, "DC100" gramer, as the lightest RC model in my entire fleet. Time will tell.
Happy and safe flying, Frosty.
The basic frame cut out.
Some 400 loving hours in four of these.
With the coldest Winter in my memory, this year starting already early May it certainly slowed down to some degree my flying activity last few months, but, resulting in scratch building 4 new micro models to enhance my 3/D fleet.
Averaging one hundred hours on each build kept me pretty occupied throughout this depressing time of the year. I absolutely hate it, and just can't understand how cold it can get while living in the Sub-tropics!
However, the times are moving pretty fast with the shortest days of the year when you are busy, especially while creating something you love doing and totally new, as some of these extremely light and delicate micro structures are built from 3mm modeling foam, without any internal strength.
As I have mentioned in last month's July NL article on the micro model subjects, my first attempt ended up below 150 grams AUW including a small 2s/300mA/60C rated battery pack. Three times the weight of some unique "F3P '' models they build in Europe for indoors flying gave me some good idea how critical is the use of every single gram of added weight. My initial target was 120 grams or below, but it was simply wishful thinking with the materials I had on hand or available to buy locally.
However, a bit of extra weight comes handy with these types of models for outdoor flying activities I do, as a 50 gram model would most likely fall apart even while walking with it outside, 100 meters to the flying site. While enjoying my new creation tremendously, mainly during evening twilight 'dead calm' hours, it still isn't as slow as I would like at some 5.5 grams per decimeter loading, so after a dozen or so flights I have decided to build 2nd. model hoping to bring the weight further down and also enlarge the whole frame flying surface area.
My first build was a great learning curve so the next project I have cut the slightly larger frame even more delicate, creating even more handling issues while rounding off with finest sandpaper all sharp cut out edges and corners taking hours and hours of extreme care while doing it. Unfortunately, despite saving some weight the frame became much weaker so more carbon fiber had to be used at a later stage to keep the whole structure sturdy enough, so I was back at square one. LOL.
Obtaining the lightest gauge of carbon rods, (0.3 to 0.5 mm) also prohibitive cost wise with the amount required for these builds is also problematic so much heavier 0.8 to 1 and plus millimeter had to be used adding more weight than hoped for. I have used 6 to 10 meters of it on average for each model build so far, to make it airworthy
.
While experimenting, I even started to cut my own strips from very thin flat CF strips but not always practical for use. Another weight killer are the servos, 4.6 to 6 gram ones I had whole stuck off are too heavy, 1.5 to 2.5 grams would be an ideal but again pretty hard to get my hands on these days. Micro light receivers, ESC's, connector plugs, linkage hook-up and the motor/adaptor/prop weight are other items to minimize the AUW that can make a target winner.
When I looked really into it, building one of these 50-60 gram models, you are looking easily at one grand, a pretty large sum for a little indoor piddle compared to what you can get for the same amount in a pretty large 90mm powered scale looking EDF jet. But that's another story, so I have used the best I could find available without breaking my packets.
Finding the right hardware such as control horns, guides and push rods at minimal weight but strong enough for maximum control deflections is another story especially if you like to make it for an easy, practical adjustments, so rather than scratching my scalp wondering where to get it I have scratch build all these parts using whatever I could find with more hours of creativity.
Virtually zero weight landing gear wheels were cut out from 6 or 9mm Depron, shaped, painted and looked just as good as any wheels you can buy handling micro models at ease.
Propellers are another problem! I can never get the ones I need in this country and ordering them from the OS is not an answer these days, so some modification of what's available is another alternative. I often see in Europe or the US, modellers using large props made of CF at mere 2-3 grams to suit these types of models, but in Australia it is simply non-exist! My personal preference is use of largest diameter with minimum pitch for slow 3/D aerobatics so I have managed to re-shape some very old, not available GWS larger slow-fly ones, to practical use without overloading the tiny outrunner motors.
Trying to get a hand on a counter rotation coaxial micro motor is just another impossibility after further look into it, so I have managed to purchase a few lightest outrunners under 20 grams with great difficulty, as hardly anyone handles these items anymore in this country after wide search. The good old local HobbyKing warehouse was full of them for a few bux only a few years back, but now, after closing most of RC shops in this country they are also going bust themselves, and closing down as I speak! Tough luck to them, LOL.
So what the hack is happening to this hobby? The old school is all dying off, with the new generation hardly knowing what it's like to scratch building RC models, and with all the new regulations creeping in day by day, I personally can't see many rosy days ahead in this wonderful hobby some of us still love so much. Well, if they really close us down I can always pull out one of these micro lights and laugh all the way while having fun flying them in my backyard.
So back to building, the larger #2 Dead Calmer fitted this time with a different motor, tiny Dualsky outrunner, '2203TY16 at 1650kv' came up without any prop adaptor option, but this rather inferior prop saver rubber O-ring type of attachment. I have never used this type of prop mount before on any electric model and rather reluctant doing so, but before deciding to do something about it, I thought might have a go after learning what a pain in the neck it is just to fit the prop to the delicate model while static test running various props to get the best out of it. Removing the motor while doing so was much safer to avoid possible damage to the whole fragile structure, but just another hassle.
Maiden and following flying sessions went extremely well, with wingload reduction from 5.5 of the first build, down to some 4.5 grams per decimeter allowing me for slower, lower and closer fun as my main objective with these builds, but bit of a nuisance while loading up the battery and just gently bumping into the prop, and off it went! Lost O-ring in the grass, back in the studio to replace it for further flying during late twilight dead calm hours to make the most of it. Few days later, while picking up the model from the bench for another eve flying session the prop flew off even without touching it, while finding the O-ring on the floor split-broken!
A, WARNING! This had to be dealt with, no more flying, risking my 100 hour creation for a lousy piece of rubber that the whole model relied on. Next day, I decided to look closer into it hoping to replace the shaft for a longer one and use a small prop adapter. After dissmental of motor the cold pressed tiny shaft couldn't be removed after attempt doing so, but being hollow with 2mm internal cavity I have installed a short 2mm OD hardened steel one and machined alloy mini adaptor to suit the prop, secured with couple of grab screws inside threaded 3mm hole right through the prop and adaptor, against the new extended shaft. Perfect job, with a few grams of extra weight, but more reliable set up for the piece of mind, worth spending a few hours doing.
It didn't take long after daily flying sessions with both models, I got a new idea: why not build a 'double dekker', hoping to slow it down even further? Back on the work bench with a few more sheets of 3mm modeling foam, sharp set of hobby knives, more delicate cutting, sanding and application of glad wrap, a cheaper alternative to a few micron thick Mylar.
With the hope to minimize the wing load I enlarged the flying surfaces further, but soon realized how flimsy the whole frame was becoming while test fitting the cut out slots and started to have doubts if this thing will ever be solid enough to keep its shape. While waiting for more CF to finish it off, the new colour scheme was brushed on by thinned down water based paint to give it some livery and orientation during flying. All the hardware was prepared with the new more powerful AXI, 2203/40/2000kv micro motor ready for installation. After delivery of CF it was getting stiffer day by day, but unfortunately adding on more weight at the same time. Well over 10 meters of carbon in various gauge was fitted to the frame to make it stiff enough for what I thought might be good enough.
After hook up of all servos, 6 gram ones on Elev. and Rudd. the double winger huge Ail. tabs had to be run on more torque, so I have used 9 gram plastic gear one, which was a mistake, because after full hook up and test operation I have found there was a stripped gear at the max. deflection on one side. What a pain in the neck, it worked fine prior without the load, I had an intention to fit metal gear one at first, but the extra weight changed my mind, bugger!
It was a bit of a nightmare to replace it with all the carbon braces fitted in place but had to be done. Doubling the weight to 19 grams, but more reliable controls of four large Ail. tabs joined by hinged adjustable CF connector rods. My initial hope to finish the whole build at some 175 grams AUW, with its new title "DC175" came again to a wishful thinking, ending up over 200 grams dry, plus 2S/300-550mA high C pack.
Well, slightly over my target but being a 'double dekker' I thought I get away with it. Ready for an excitement of maiden flight after a few nasty, windy days break from flying, the premier flight while taking off the carpeted strip in perfect late twilight conditions ended up almost in total disaster! Fully confident, expecting another slow slug performer, but as soon as it rotated there was some control slugginess, getting out of hand as I added more power to get slightly higher to safety! After a few nasty unexpected rolls it took only a few seconds and I didn't know if I'm "fenny or penny"! LOL.
The panic in semi-twilight darkness took over and all I can say now was only a miracle luck. I have managed to slam it down in grass, flat-level onto its landing gear with a minor damage to it, absorbing the nasty impact after only some 8 seconds of the most stressful drama!
Thank you, 10+ meters of carbon fiber saved the model and 120 hours of loving labor! Problem with these models is, if you prang it even slightly out of control, they become more-less unrepairable, just about good enough for some spares and the trash bin. Tremendously lucky, at least I can say, the landing gear structure created some shock absorption, easily fixed soon after with only a few grams of added glue, bits of foam and even gave it more strength using very light balsa reinforcement.
Rather disappointed I didn't use my cap video camcorder to analyze the problem due to rushing into it late evening but after close check of things there was a considerable flexing of my large Aileron tabs, and too much too powerful MG servo twisting in its 3mm foam base. Slightly more powerful motor also created too much torque-twist of its nose section so more carbon fiber had to be added to these crucial areas. Simple and easy fix, because my initial thought was that I have created another Bi-Bye doggy, as some of my earlier Bi planes are a bit off the handle.
Nevertheless, more weight added but problem solved after the next re-maiden a few days later and the model running smoothly as hoped for, more like a fully tamed *****cat and LOL again after another success. Despite at some 235grams AUW, the larger flying surface reduced the loading to some 4.5 grams so it performs similar to my mono builds, but due to its larger size it's even more fun to fly it slow-low and very close past my nose. Just love flying it in an area of less than a volley fied as slow as possible in 3/D aspects.
The next project was a decision to de-commission my smaller #1 micro build I have found slightly too heavy for its size after more success with the two new creations, so laid down another sheet of modeling foam and drawn next slightly larger design for the AXI power unit to be too good for a small 25dm2 flying surface. After enlargement I have ended up at 37dm and despite a fraction heavier model the loading dropped down again for slower stunt flying.
Hoping in the near future I will get my hands on one of those unique coaxial power unit, lighter gauge carbon fiber rods and electronics to create my new goal, "DC100" gramer, as the lightest RC model in my entire fleet. Time will tell.
Happy and safe flying, Frosty.
Last edited by Joseph Frost; 09-20-2022 at 10:26 PM.
The following users liked this post:
Folgore88 (06-19-2023)
01-27-2023, 11:44 PM
#15
Join Date: Nov 2010
Location: Coffs Harbour NSW, AUSTRALIA
Posts: 1,650
Likes: 0
Received 72 Likes
on
68 Posts
Great way to learn 3/D with something light as this, but, you have to build it first. I had actually 3 motor quits this morn out of 4 flights, still sorting out the problem, but just fitted another motor/ESC combo to see how it goes next session.
(Predator on B/Day-short demo)

Just fitted another Eflite motor/ESC combo, the 3rd. set up so far.
Just fitted another Eflite motor/ESC combo, the 3rd. set up so far.
The following users liked this post:
Folgore88 (06-19-2023)
01-28-2023, 11:21 AM
#16
Junior Member
Started learning on mode 2 decades ago, switched to mode 1. I can fly both modes and like
mode 1 much better. Back in the day RC models like the Falcon 56 were mostly "yank and bank"
so the rudder was only used for takeoff. Separating elevator and ailerons on different sticks made
sense. Still makes sense for me. I did RC helicopters in Mode 2 and it make it much easier to have
pitch and roll on one stick. I think the shift to Mode 2 in the States came with all the ARF models
shipping with mode 2 transmitters. I'll stick with mode one and use what I feel is best for me. I have
no problems flying my friends mode 2 models, just feels like I lose some precision in that mode.
The following users liked this post:
curtthedirt (05-18-2023)
01-28-2023, 03:03 PM
#17
Join Date: Nov 2010
Location: Coffs Harbour NSW, AUSTRALIA
Posts: 1,650
Likes: 0
Received 72 Likes
on
68 Posts
Sounds like you are a genius to be able to fly both modes, I love to see your 3/D flying standard in each mode to compare. Please load up short footage of each mode in 3/D action to watch.
I personaly think it is the worst thing to get confused trying to handle both modes, unless you do it from an early age, full time or professionaly.
I personaly think it is the worst thing to get confused trying to handle both modes, unless you do it from an early age, full time or professionaly.
The following users liked this post:
curtthedirt (05-18-2023)
06-15-2023, 05:33 AM
#18
Senior Member
My Feedback: (2)
Join Date: Apr 2020
Location: Metro Atlanta GA, USA
Posts: 449
Likes: 0
Received 36 Likes
on
32 Posts
The simplest definition I can think of is: Keeping an aircraft airborne, normally below stall speed, using motor or engine thrust, while doing wild aerobatics that full scale aircraft are not usually capable of doing.
Side note: Some people apparently don't know the difference between engines and motors. Engines operate by internal combustion. Motors are electric. Silly people often call engines 'motors'.
Side note: Some people apparently don't know the difference between engines and motors. Engines operate by internal combustion. Motors are electric. Silly people often call engines 'motors'.
10-19-2023, 10:35 PM
#19
Join Date: Nov 2010
Location: Coffs Harbour NSW, AUSTRALIA
Posts: 1,650
Likes: 0
Received 72 Likes
on
68 Posts
Started learning on mode 2 decades ago, switched to mode 1. I can fly both modes and like
mode 1 much better. Back in the day RC models like the Falcon 56 were mostly "yank and bank"
so the rudder was only used for takeoff. Separating elevator and ailerons on different sticks made
sense. Still makes sense for me. I did RC helicopters in Mode 2 and it make it much easier to have
pitch and roll on one stick. I think the shift to Mode 2 in the States came with all the ARF models
shipping with mode 2 transmitters. I'll stick with mode one and use what I feel is best for me. I have
no problems flying my friends mode 2 models, just feels like I lose some precision in that mode.
mode 1 much better. Back in the day RC models like the Falcon 56 were mostly "yank and bank"
so the rudder was only used for takeoff. Separating elevator and ailerons on different sticks made
sense. Still makes sense for me. I did RC helicopters in Mode 2 and it make it much easier to have
pitch and roll on one stick. I think the shift to Mode 2 in the States came with all the ARF models
shipping with mode 2 transmitters. I'll stick with mode one and use what I feel is best for me. I have
no problems flying my friends mode 2 models, just feels like I lose some precision in that mode.
