Welcome to Club SAITO !
 07-20-2024, 07:59 PM

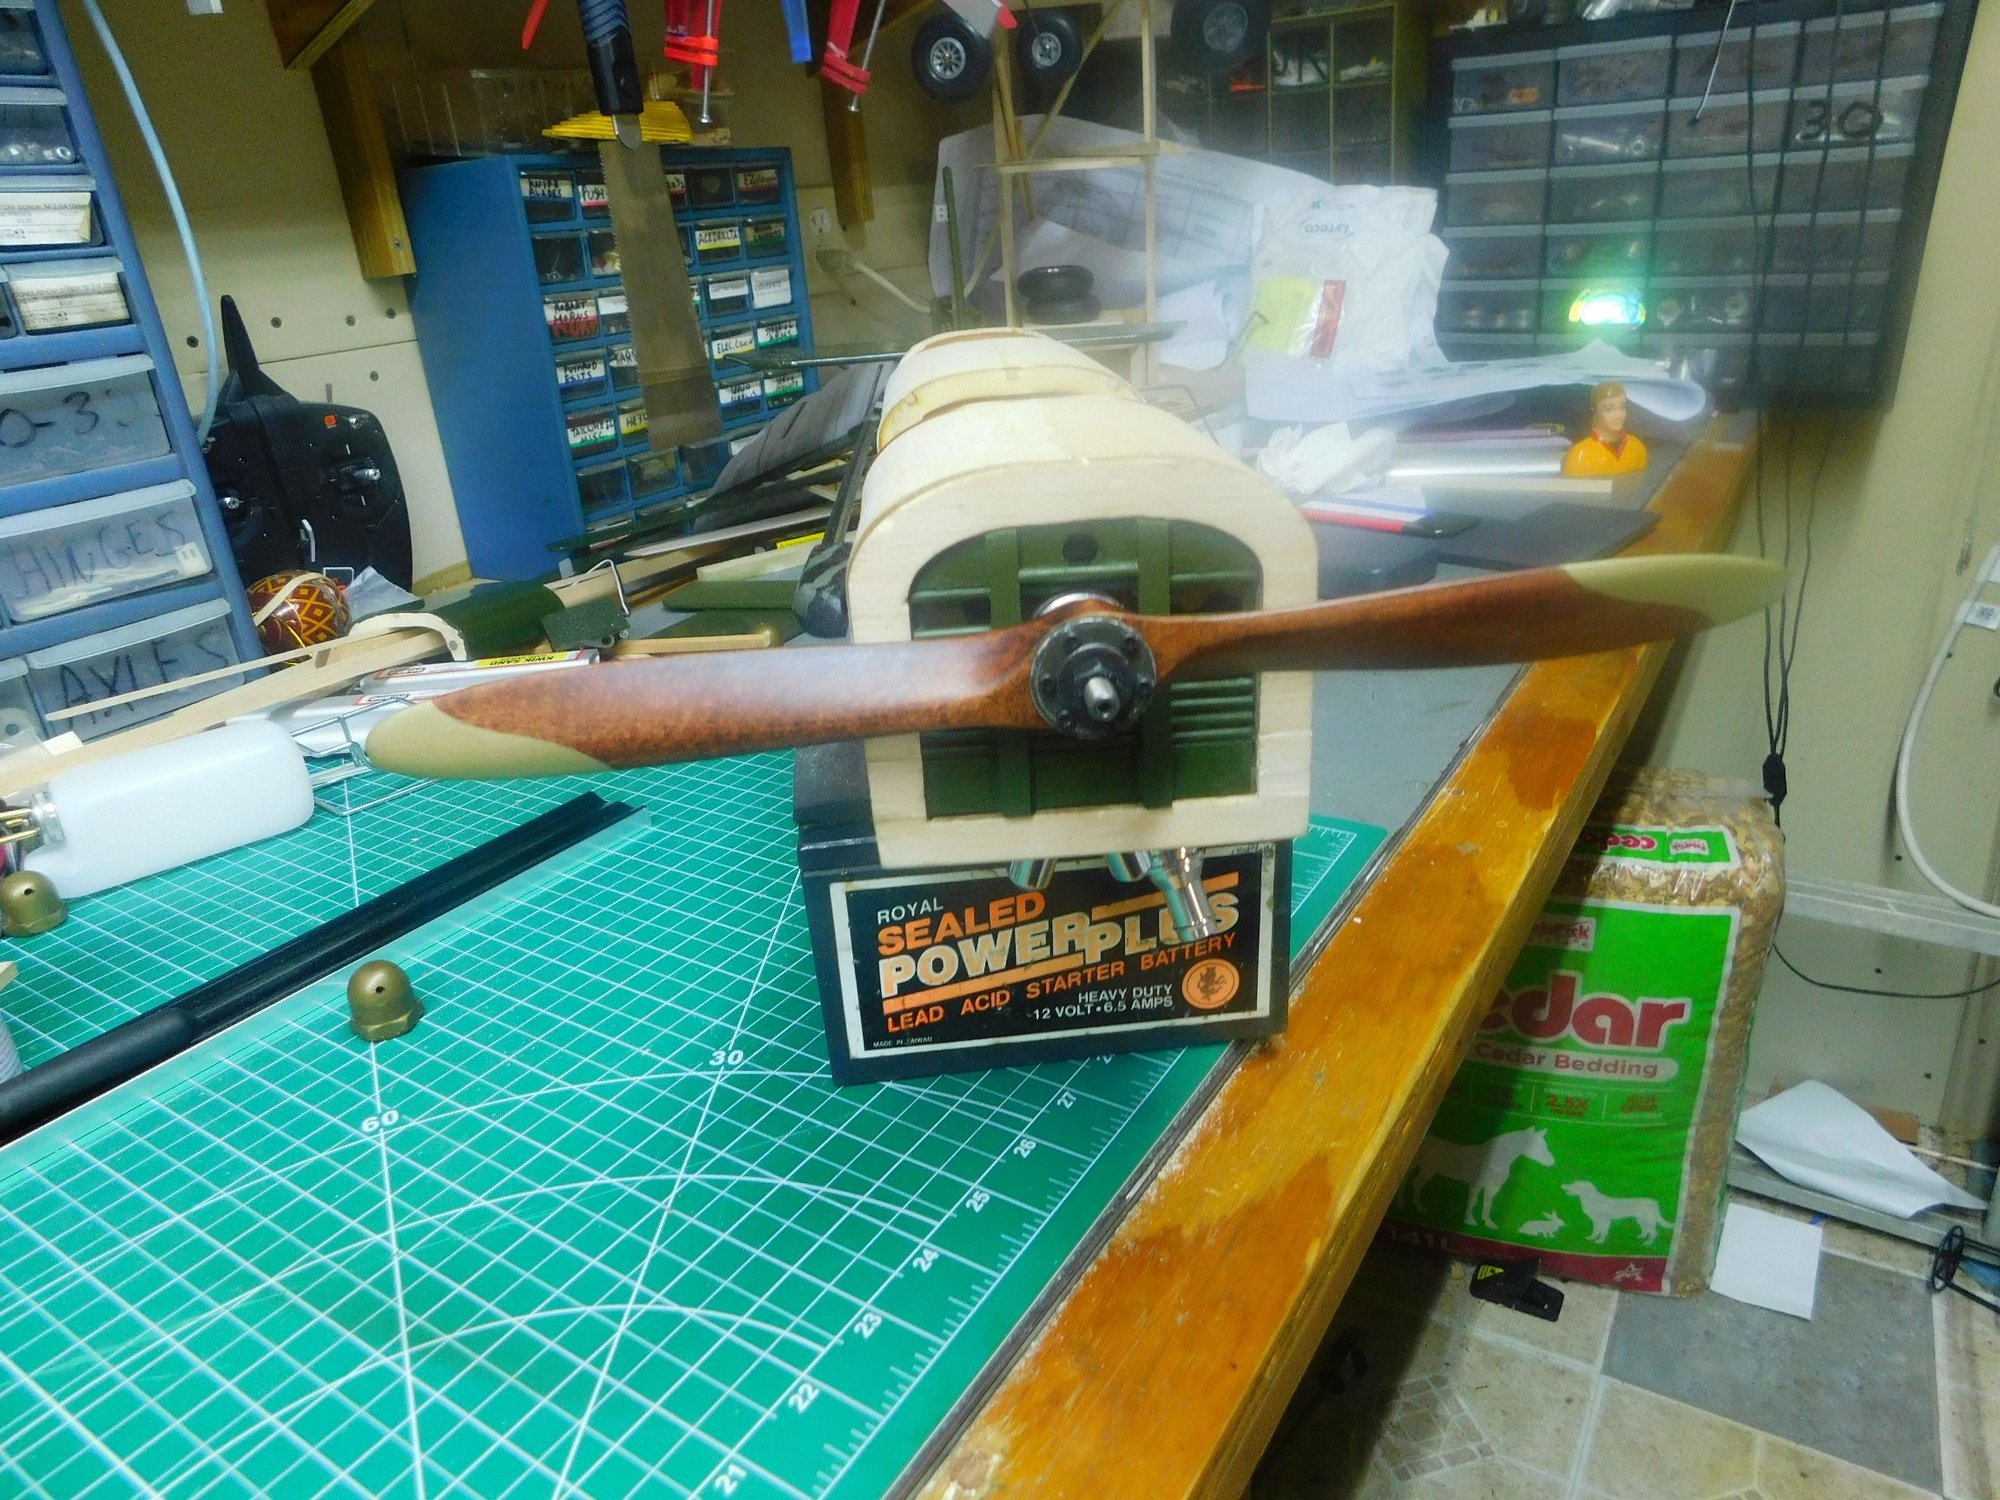
I ran across an image of an earlier version of the Bristol, I liked the grill and prop driver and I'll comment on my fuel tank choice. The .125" dowels for the grill are coming tomorrow from the almost everything comes tomorrow place.

Earlier Bristol
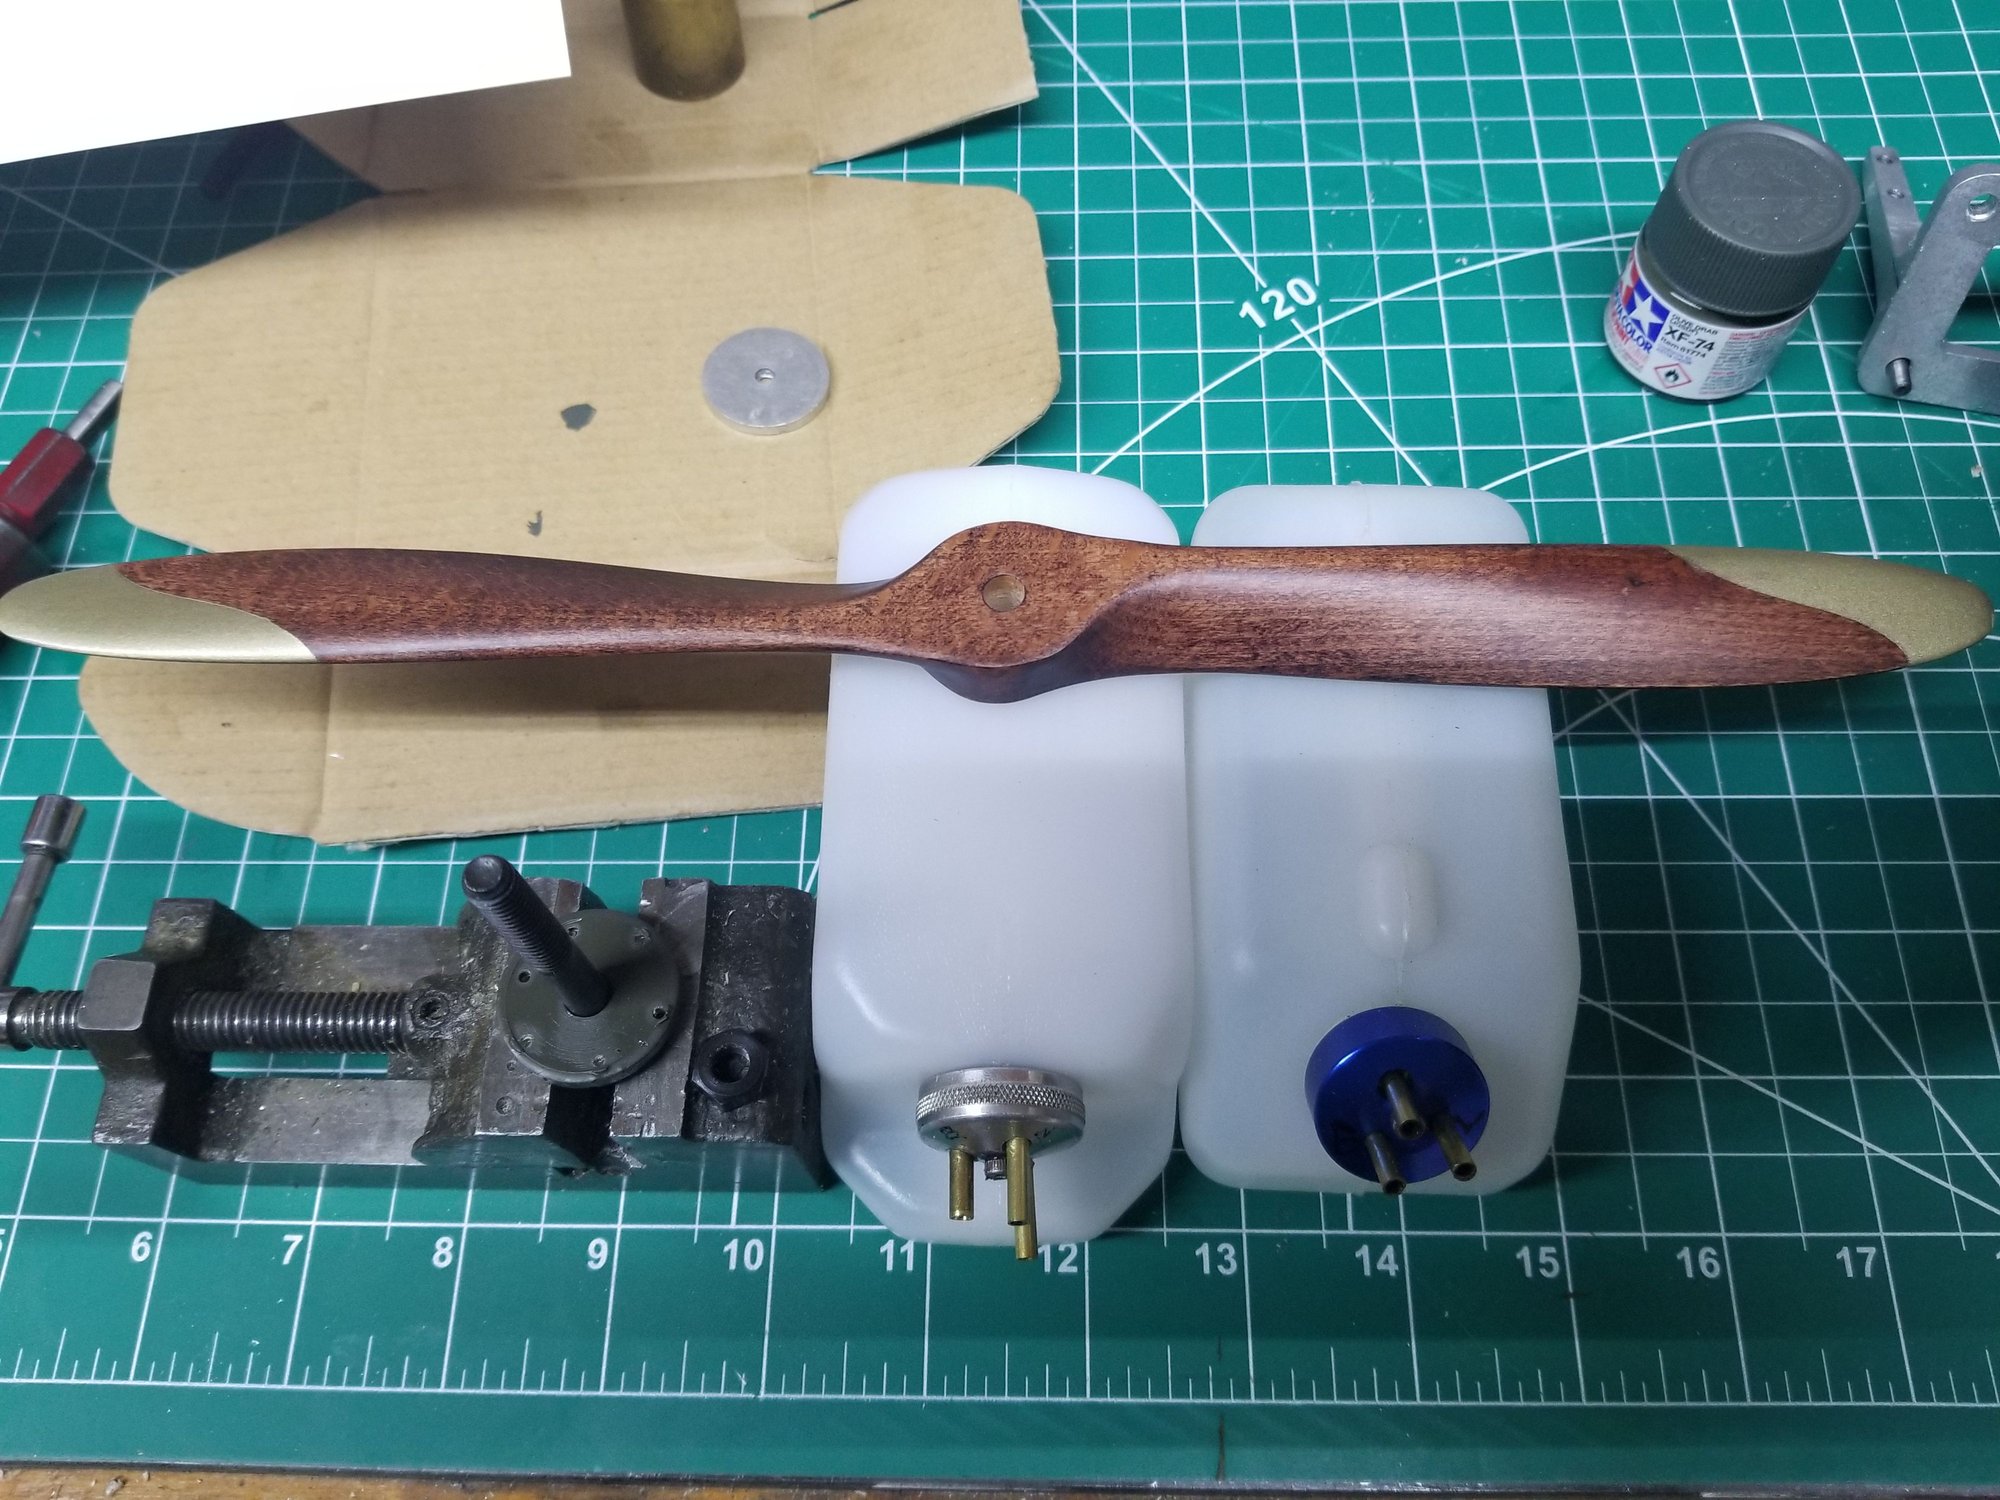
The olive drab washer will be the front of the more authentic looking prop hub, both tanks are 8oz. even though the Dubro,on the left is slightly taller and longer. The fuel line attachments line up perfectly with the hole in the firewall. The Sullivan's fuel line attachments are well above the firewall hole, they would have to bend sharply go to the engine compartment. Normally I'm a Sullivan guy all the way but not this time.
Earlier Bristol
The olive drab washer will be the front of the more authentic looking prop hub, both tanks are 8oz. even though the Dubro,on the left is slightly taller and longer. The fuel line attachments line up perfectly with the hole in the firewall. The Sullivan's fuel line attachments are well above the firewall hole, they would have to bend sharply go to the engine compartment. Normally I'm a Sullivan guy all the way but not this time.


 07-21-2024, 04:08 AM


Pete, that was used to eject case vented products into the muffler. Never really caught on.
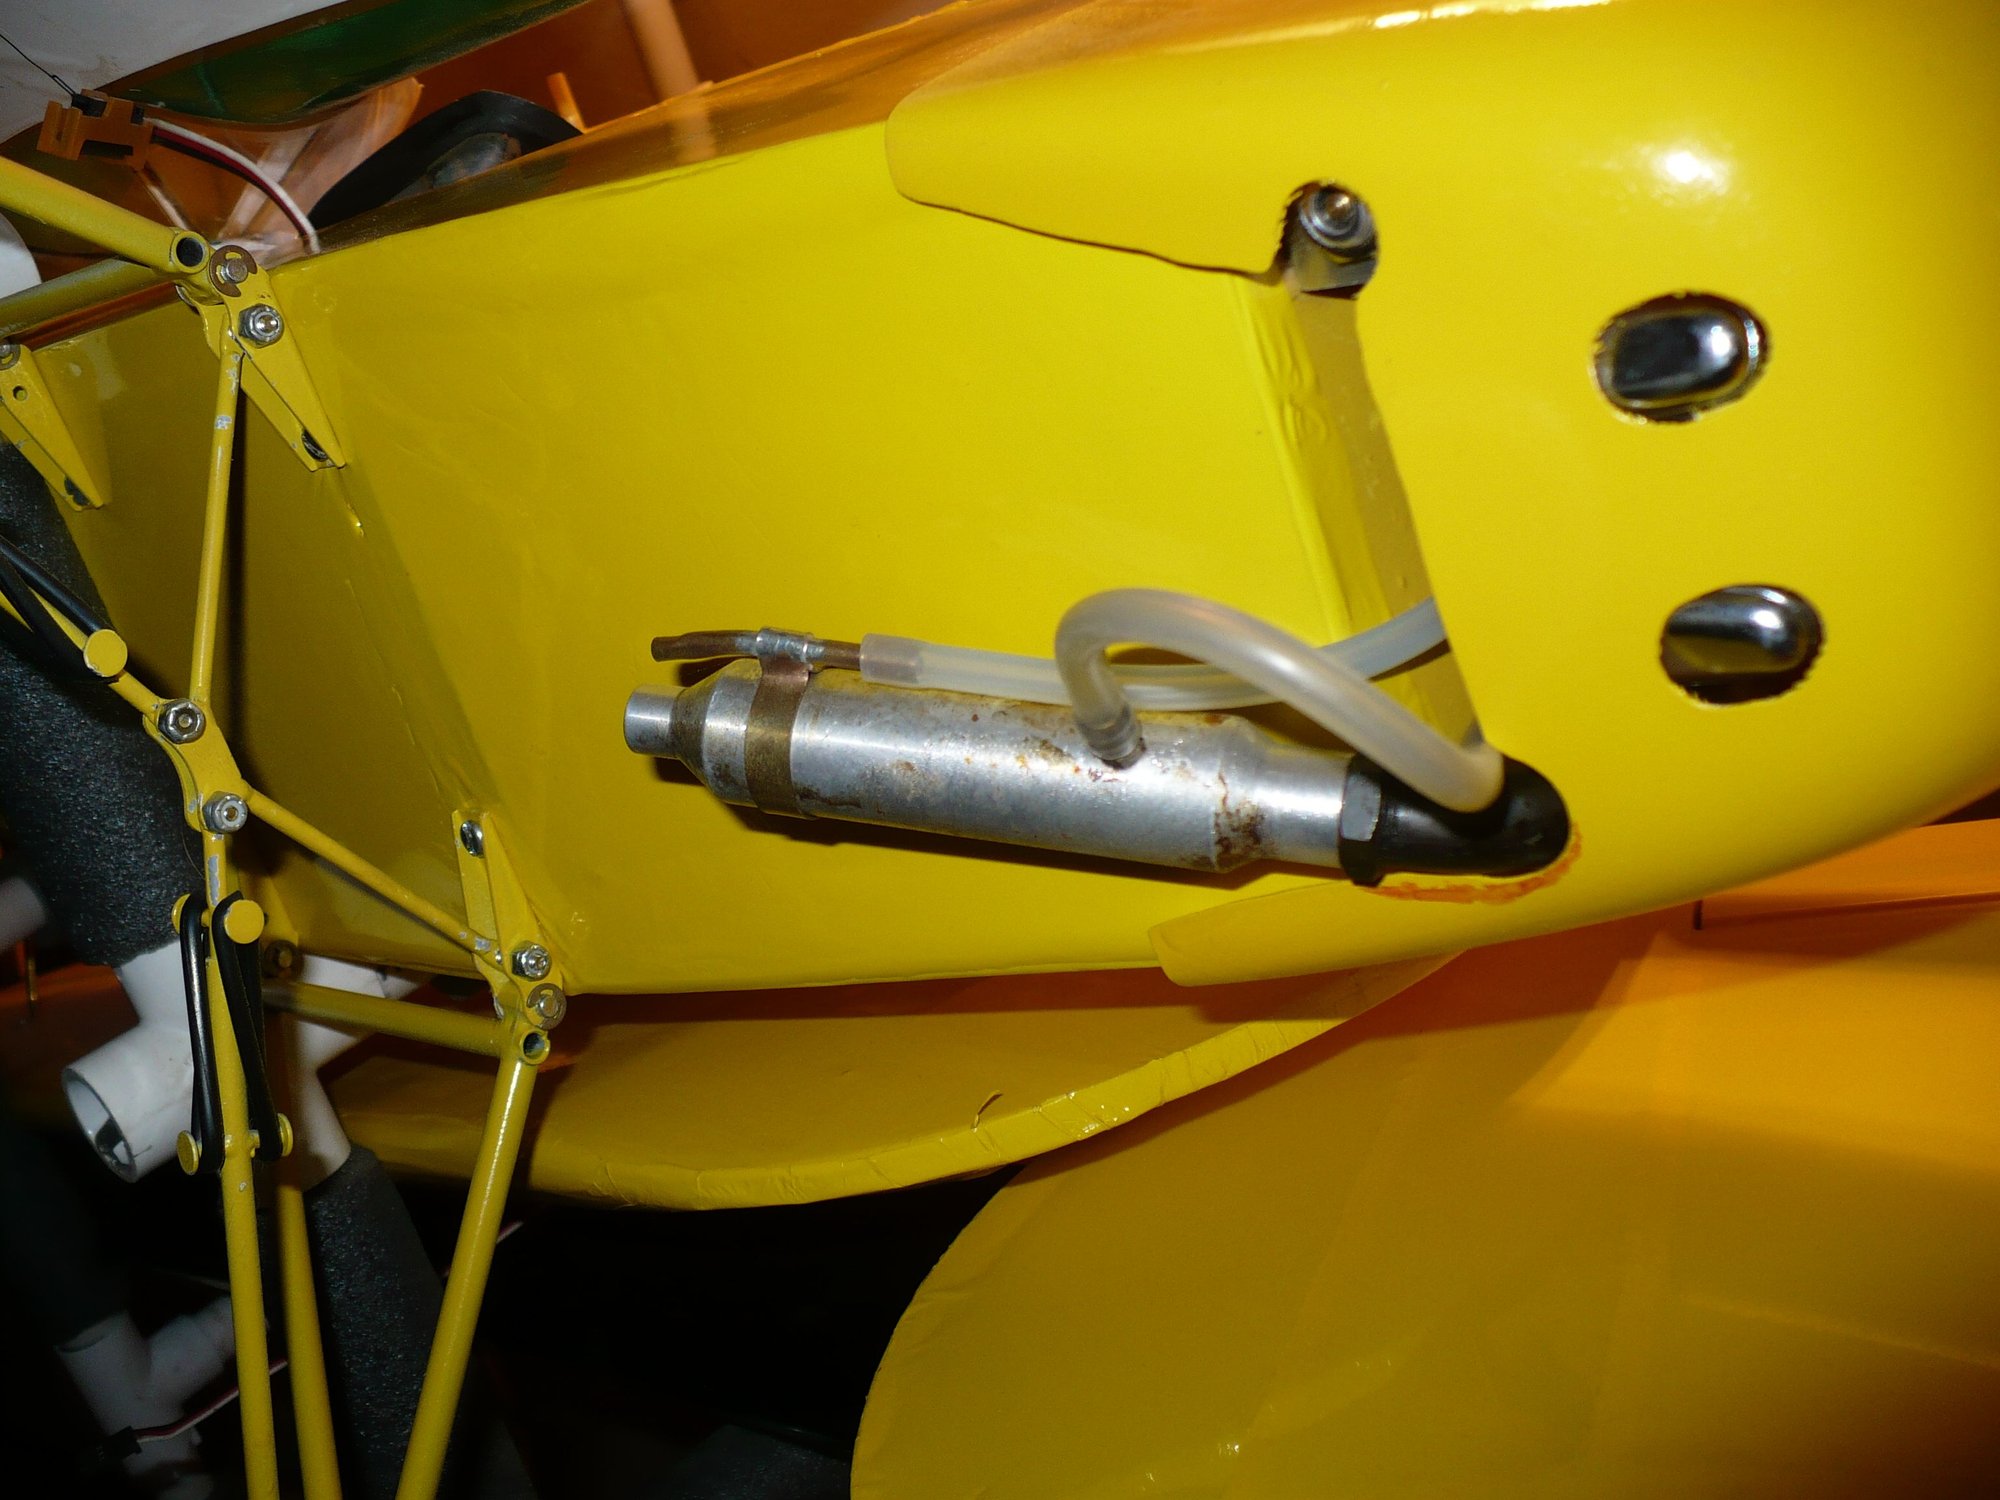
I am using a side tap on the velocity stack to handle case vent juice. Makes a huge difference.
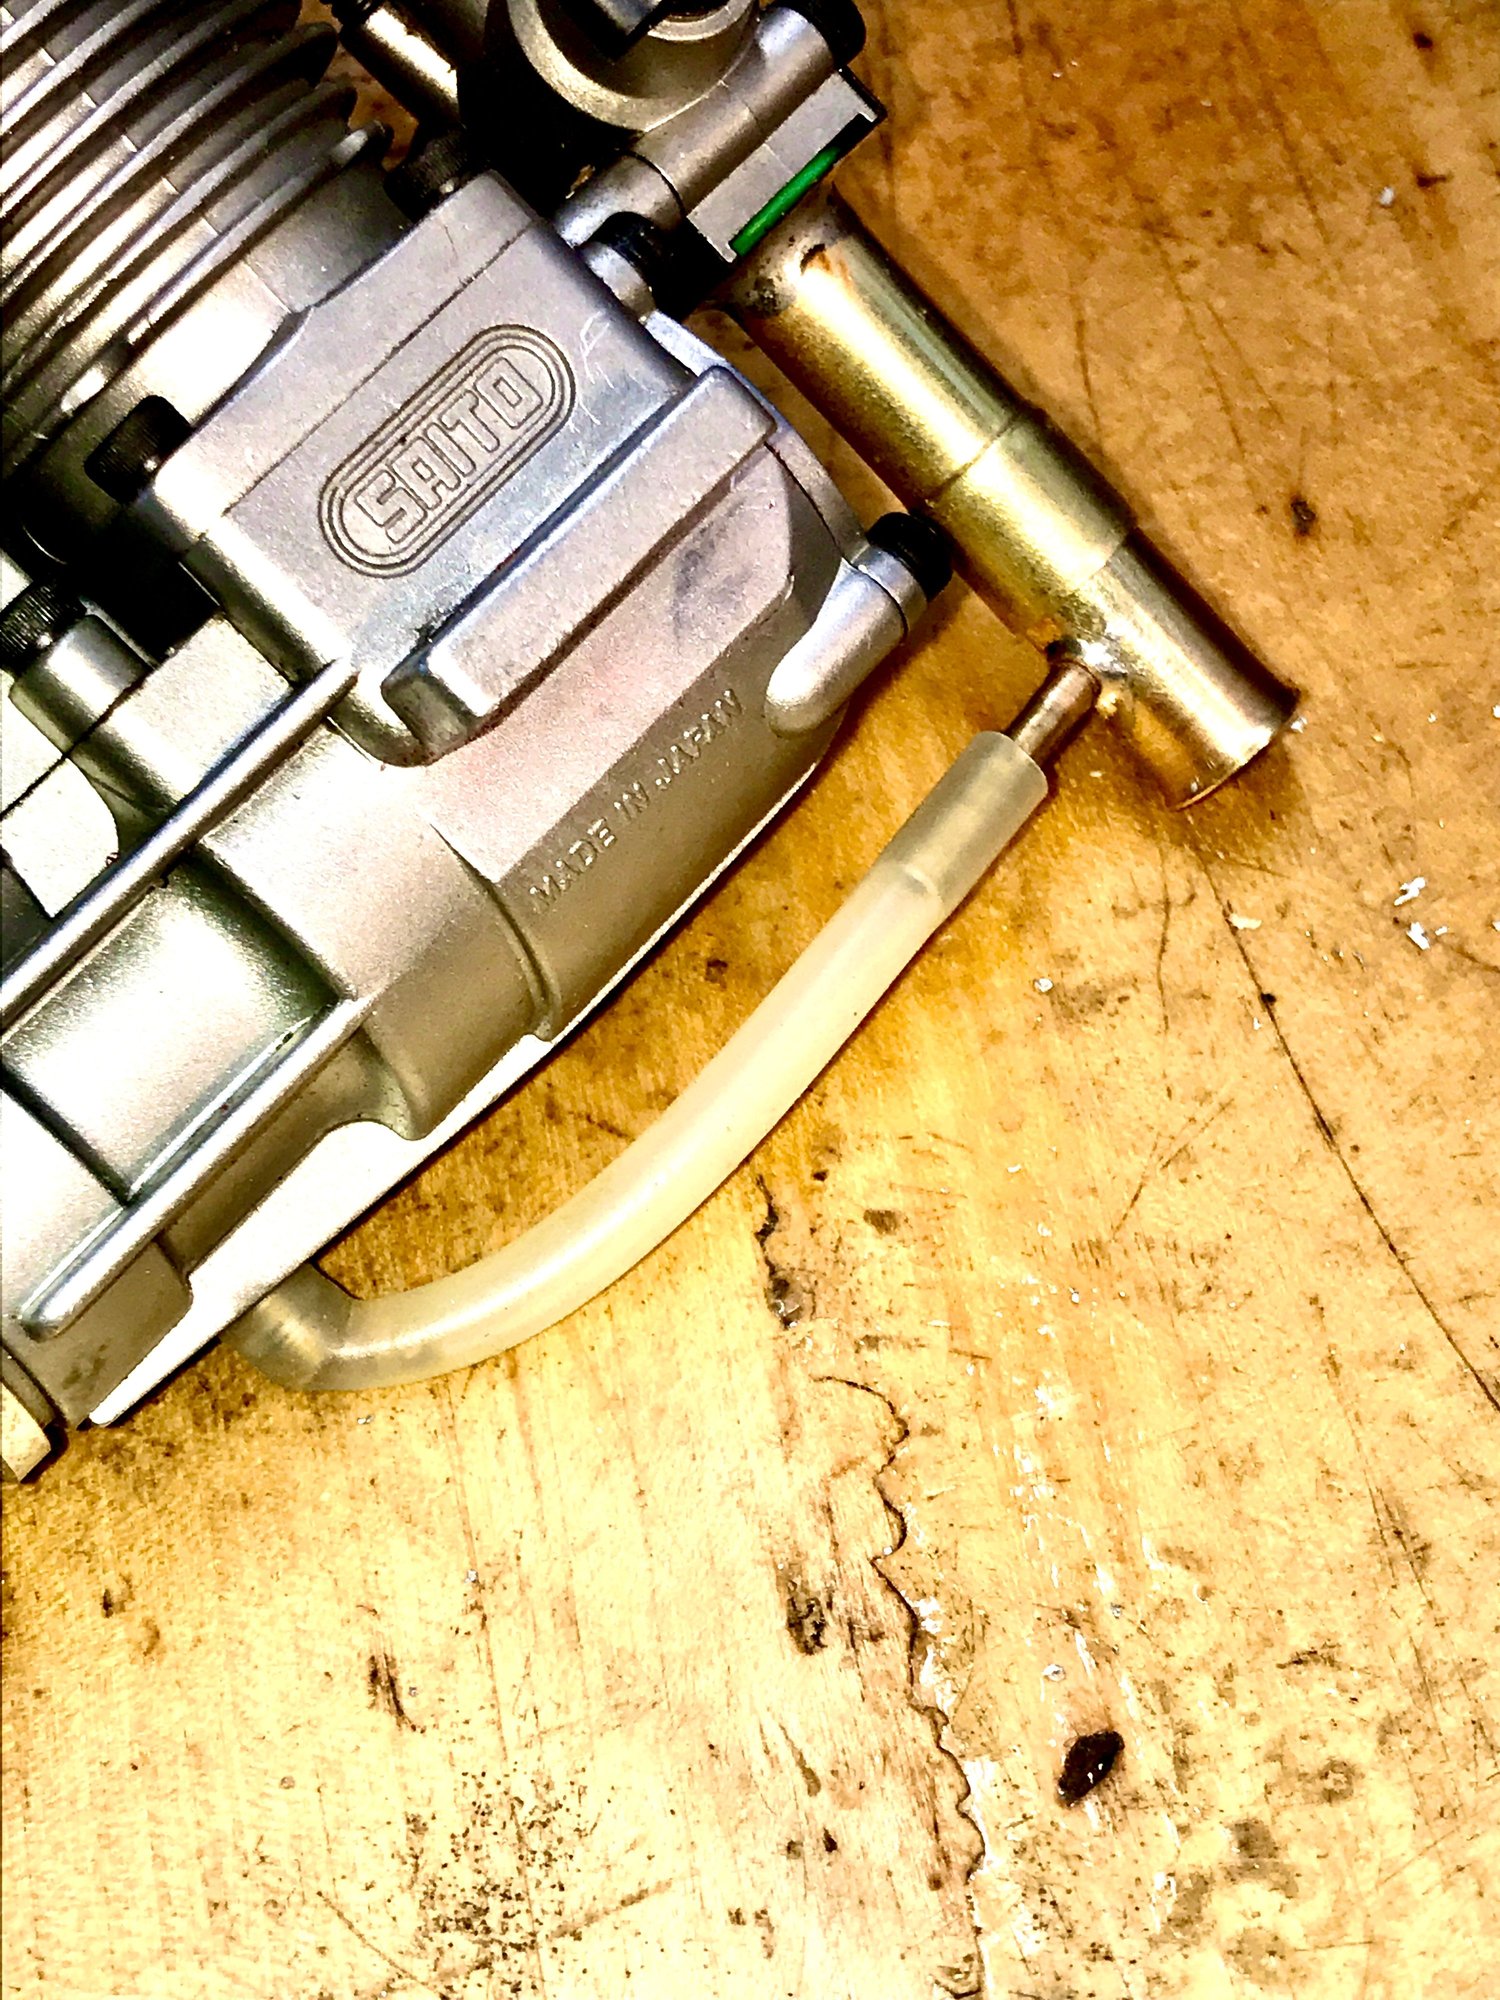
I am using a side tap on the velocity stack to handle case vent juice. Makes a huge difference.
07-21-2024, 05:08 AM
Yep, imo that's the best way to recycle the CC vent oil. The oil slugs get thoroughly remixed before entering the intake port.
Routing the CC vent to higher up on the intake manifold (OS style) works too but can cause some sporadic running behavior (transition from idle) as slugs of CC oil enter the intake port.
One day I'll do the mod to all my Saitos.
Routing the CC vent to higher up on the intake manifold (OS style) works too but can cause some sporadic running behavior (transition from idle) as slugs of CC oil enter the intake port.
One day I'll do the mod to all my Saitos.
 07-22-2024, 04:33 AM
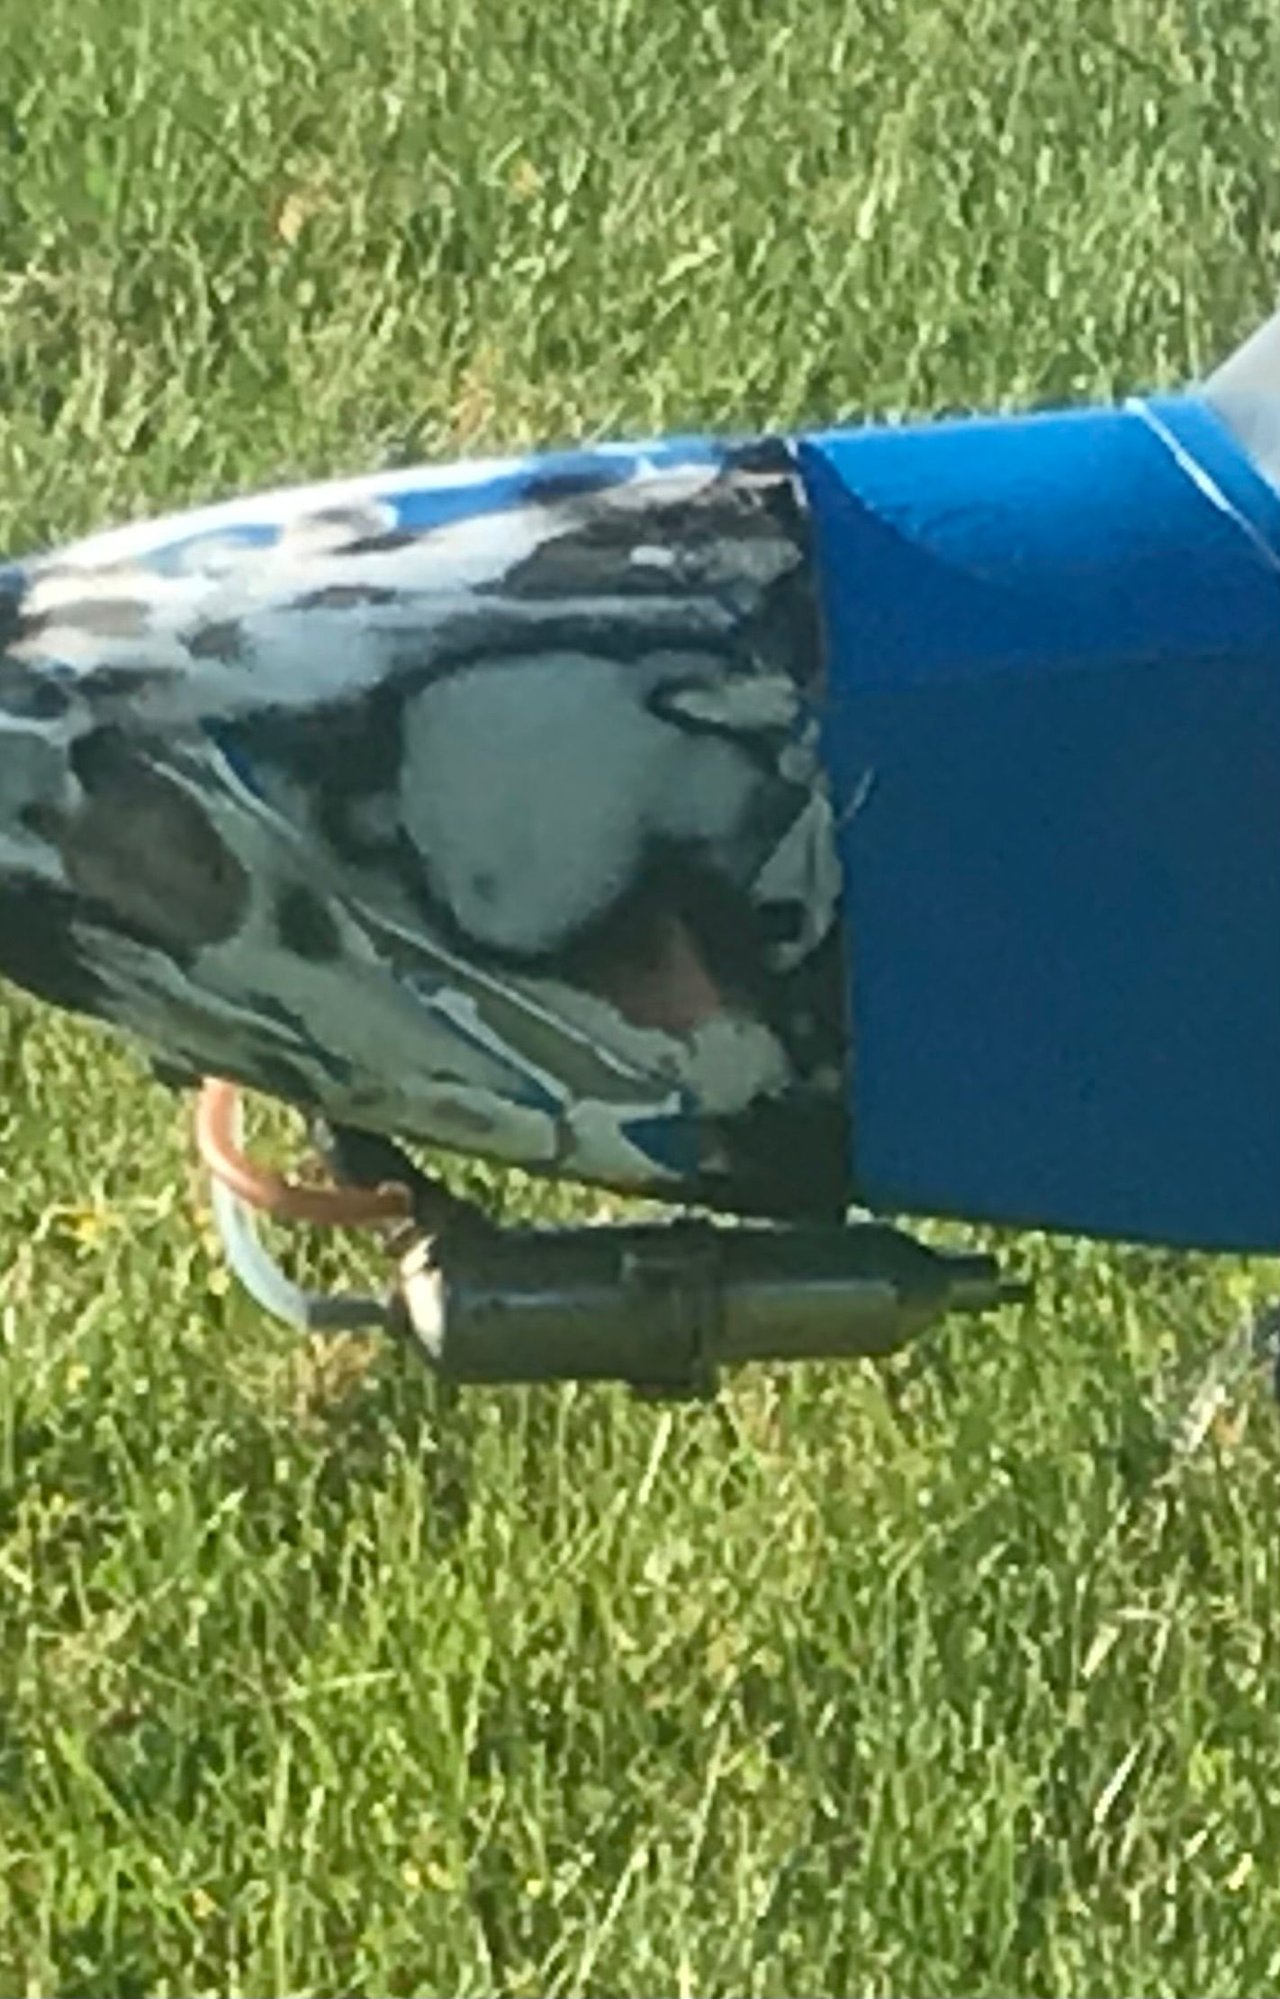
The FA-270T came with one packaged with the exhaust gaskets. If you look on Page 5 of the above manual it has the instructions for use. I guess I won't be using the nipple on the one muffler pipe to pressurize the tank. 
07-22-2024, 05:42 AM
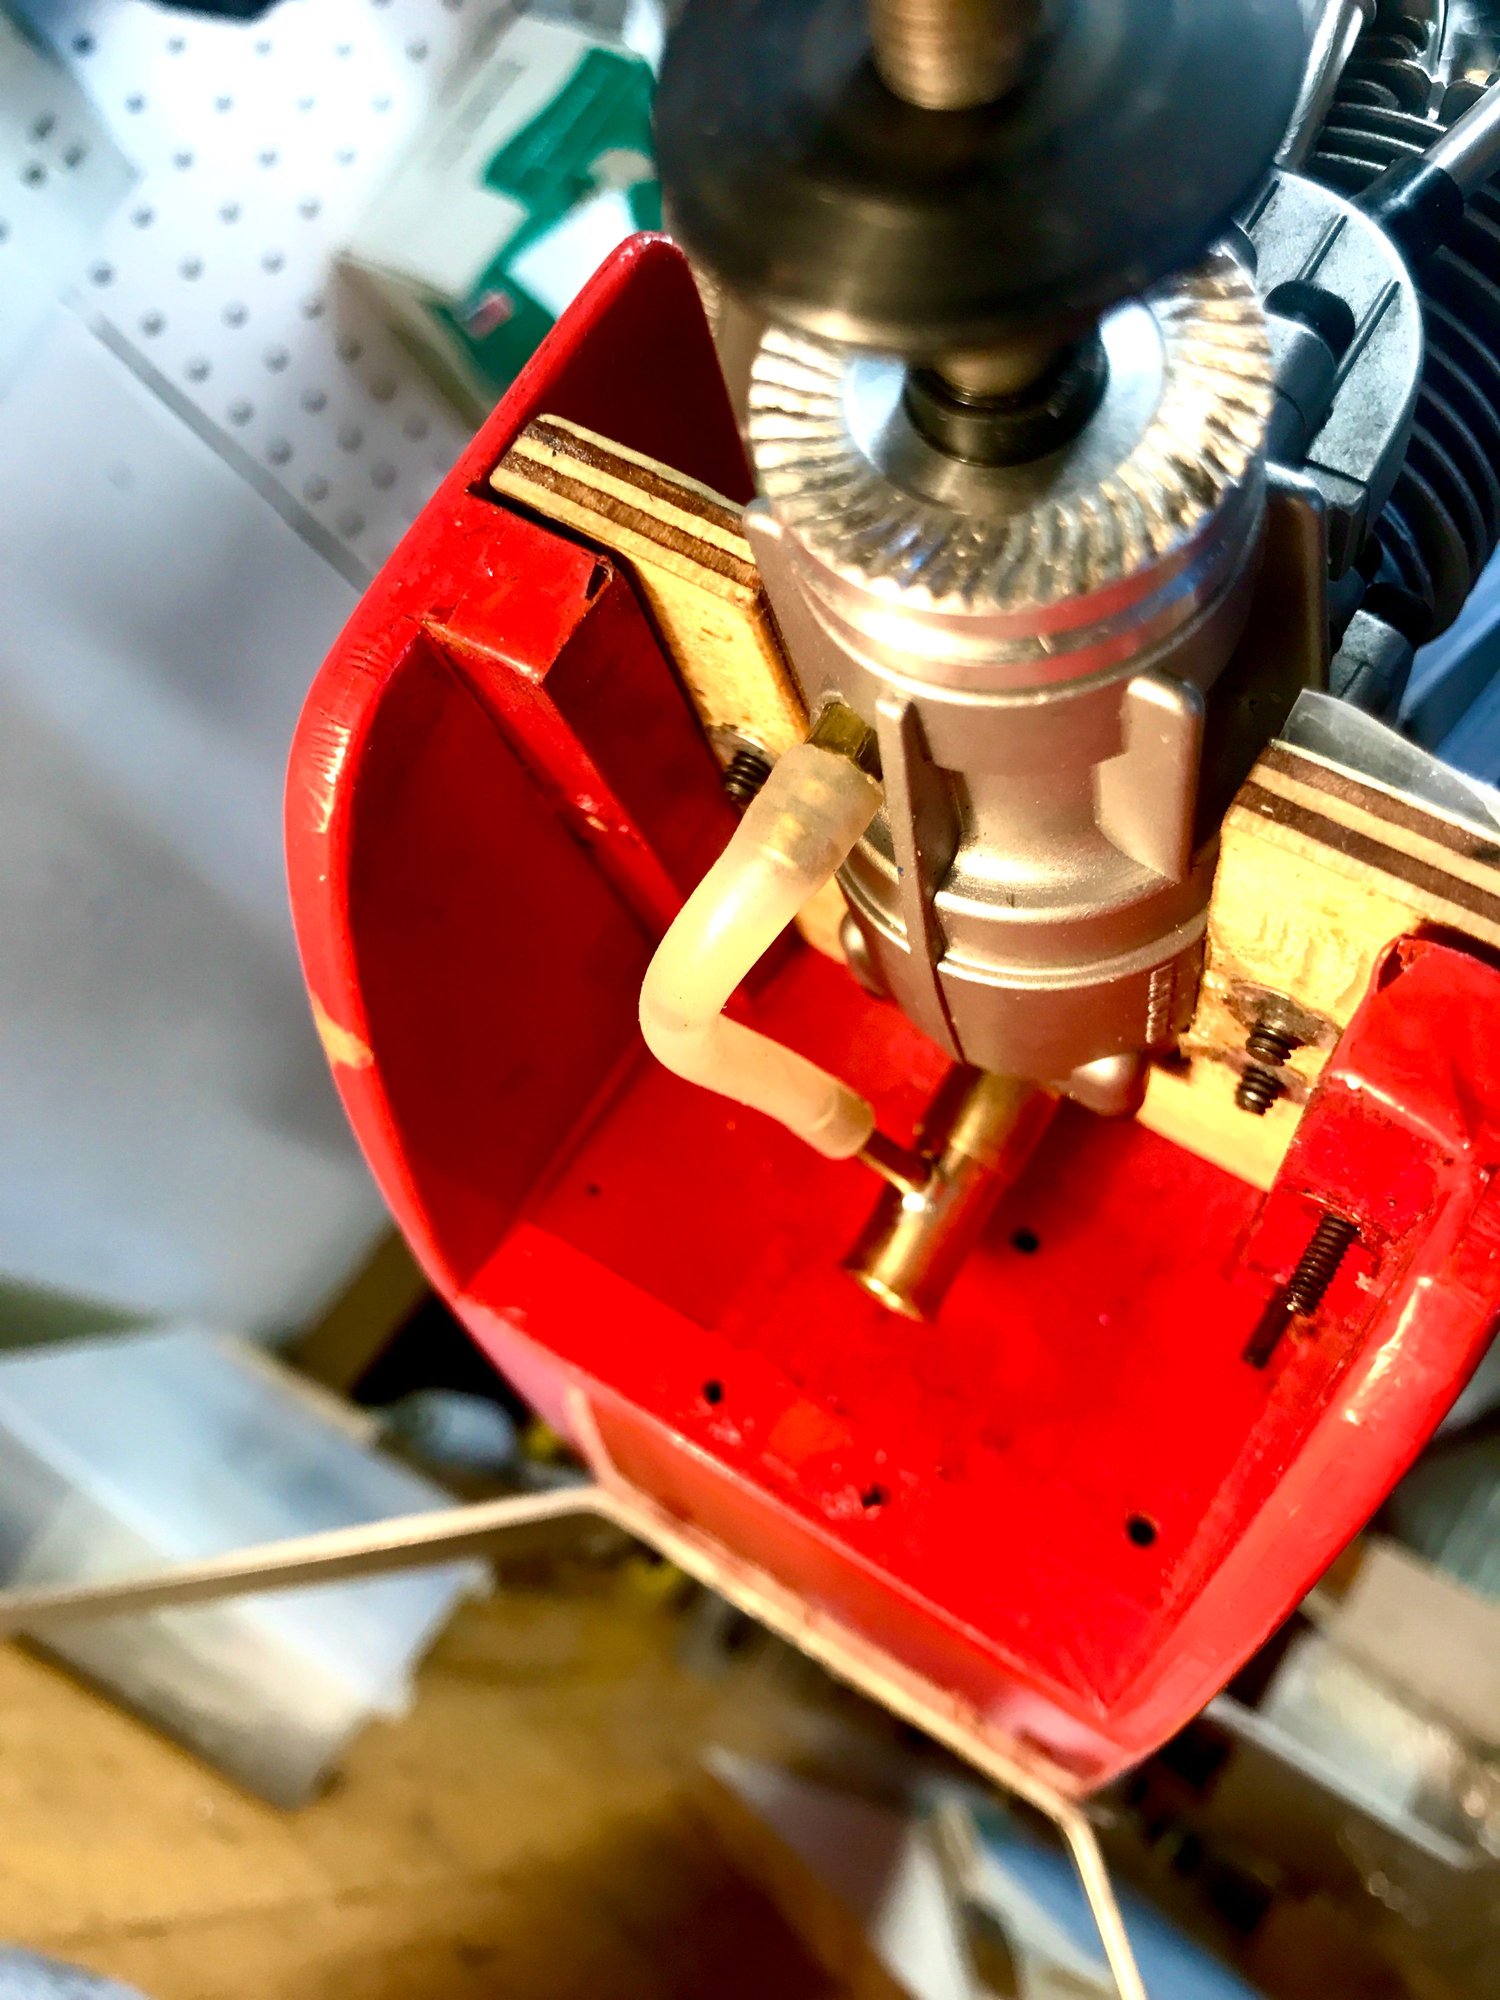
If you're wanting to keep the engine bay and the rest of the plane clean you can carefully drill and tap the velocity stack for a nipple, then JBweld the nipple in place and run your CC vent there.
Last edited by Glowgeek; 07-22-2024 at 05:56 AM.
07-22-2024, 06:27 AM
I would skip using that "thingy" and instead use the conventional muffer nipple to fuel tank setup. Having muffler pressure helps to compensate for varying levels of fuel in your tank. It also allows for easily priming the engine with your finger over the exhaust outlet. Win win.
If you're wanting to keep the engine bay and the rest of the plane clean you can carefully drill and tap the velocity stack for a nipple, then JBweld the nipple in place and run your CC vent there.
If you're wanting to keep the engine bay and the rest of the plane clean you can carefully drill and tap the velocity stack for a nipple, then JBweld the nipple in place and run your CC vent there.
 07-22-2024, 07:30 AM
Did that very early on. Also did it internally, ran the tube fhru the middle of the muffler.
The stack helps in two ways, contains most of, if notvall the fuel standoff as well as handling the vent oil. Considerably less plumbing work involved.
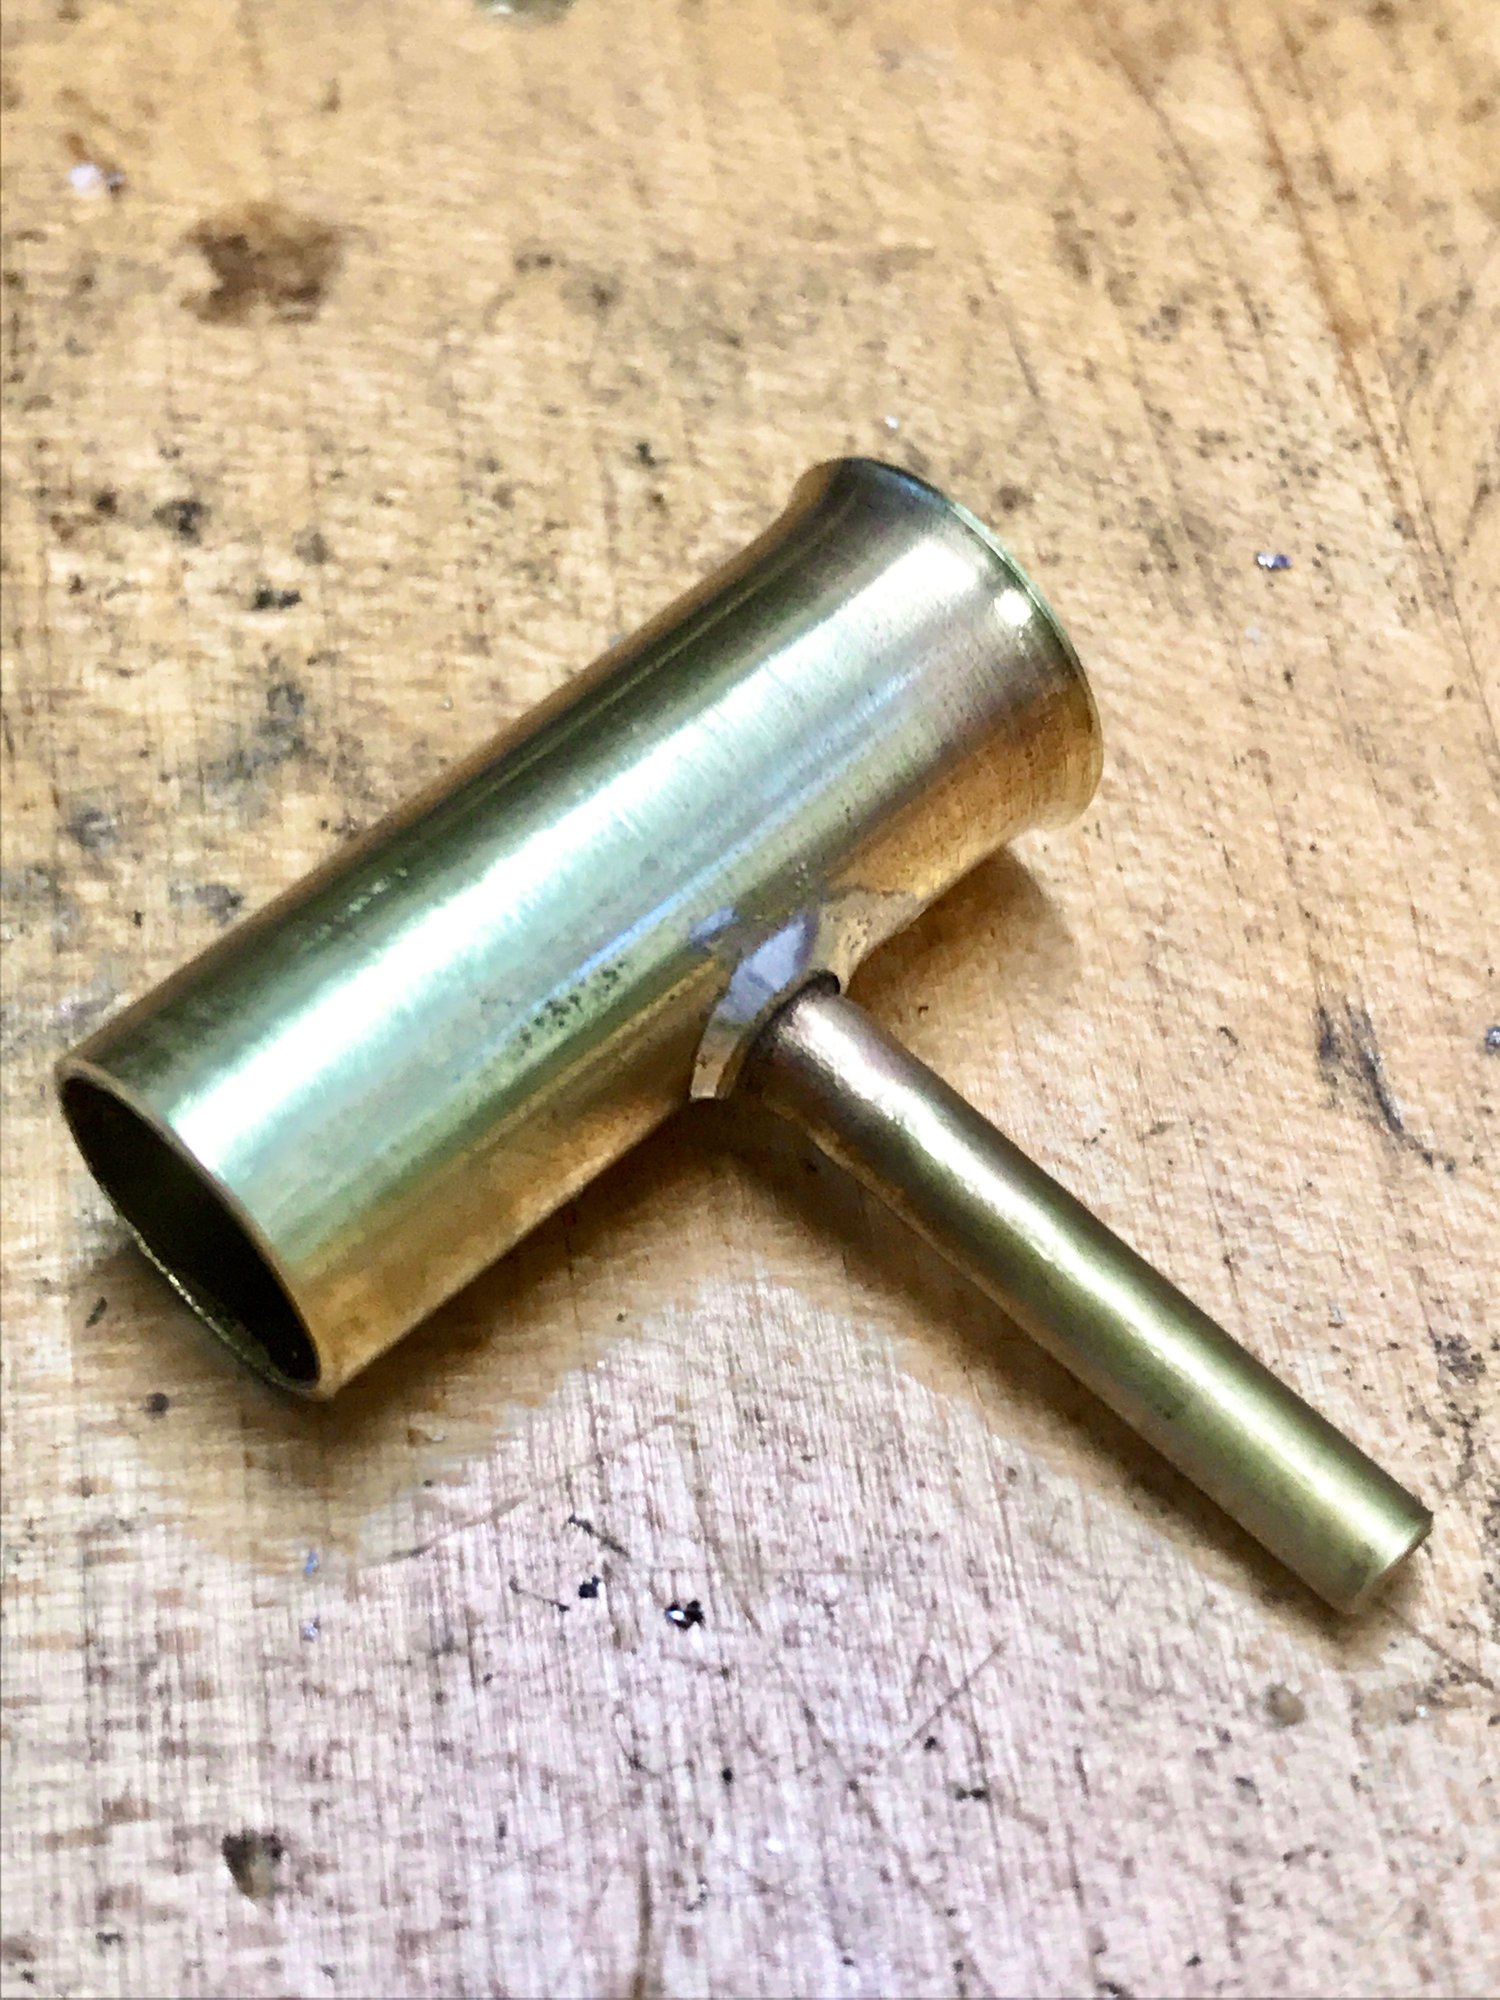
A simple, flanged tube, soldered cleanly in place. Solid and simple.
YS 53 magnesium muffler. Inlet bushed and threaded to fit Saito exhaust. New extended tailpiece made from aluminum bar. The case vent tube runs thru the muffler.

1/8\" flanged tube. The flange is contoured to closely fit, then sweat soldered in place On exhaust pipes, hard solder on intake stacks, soft solder is fine.
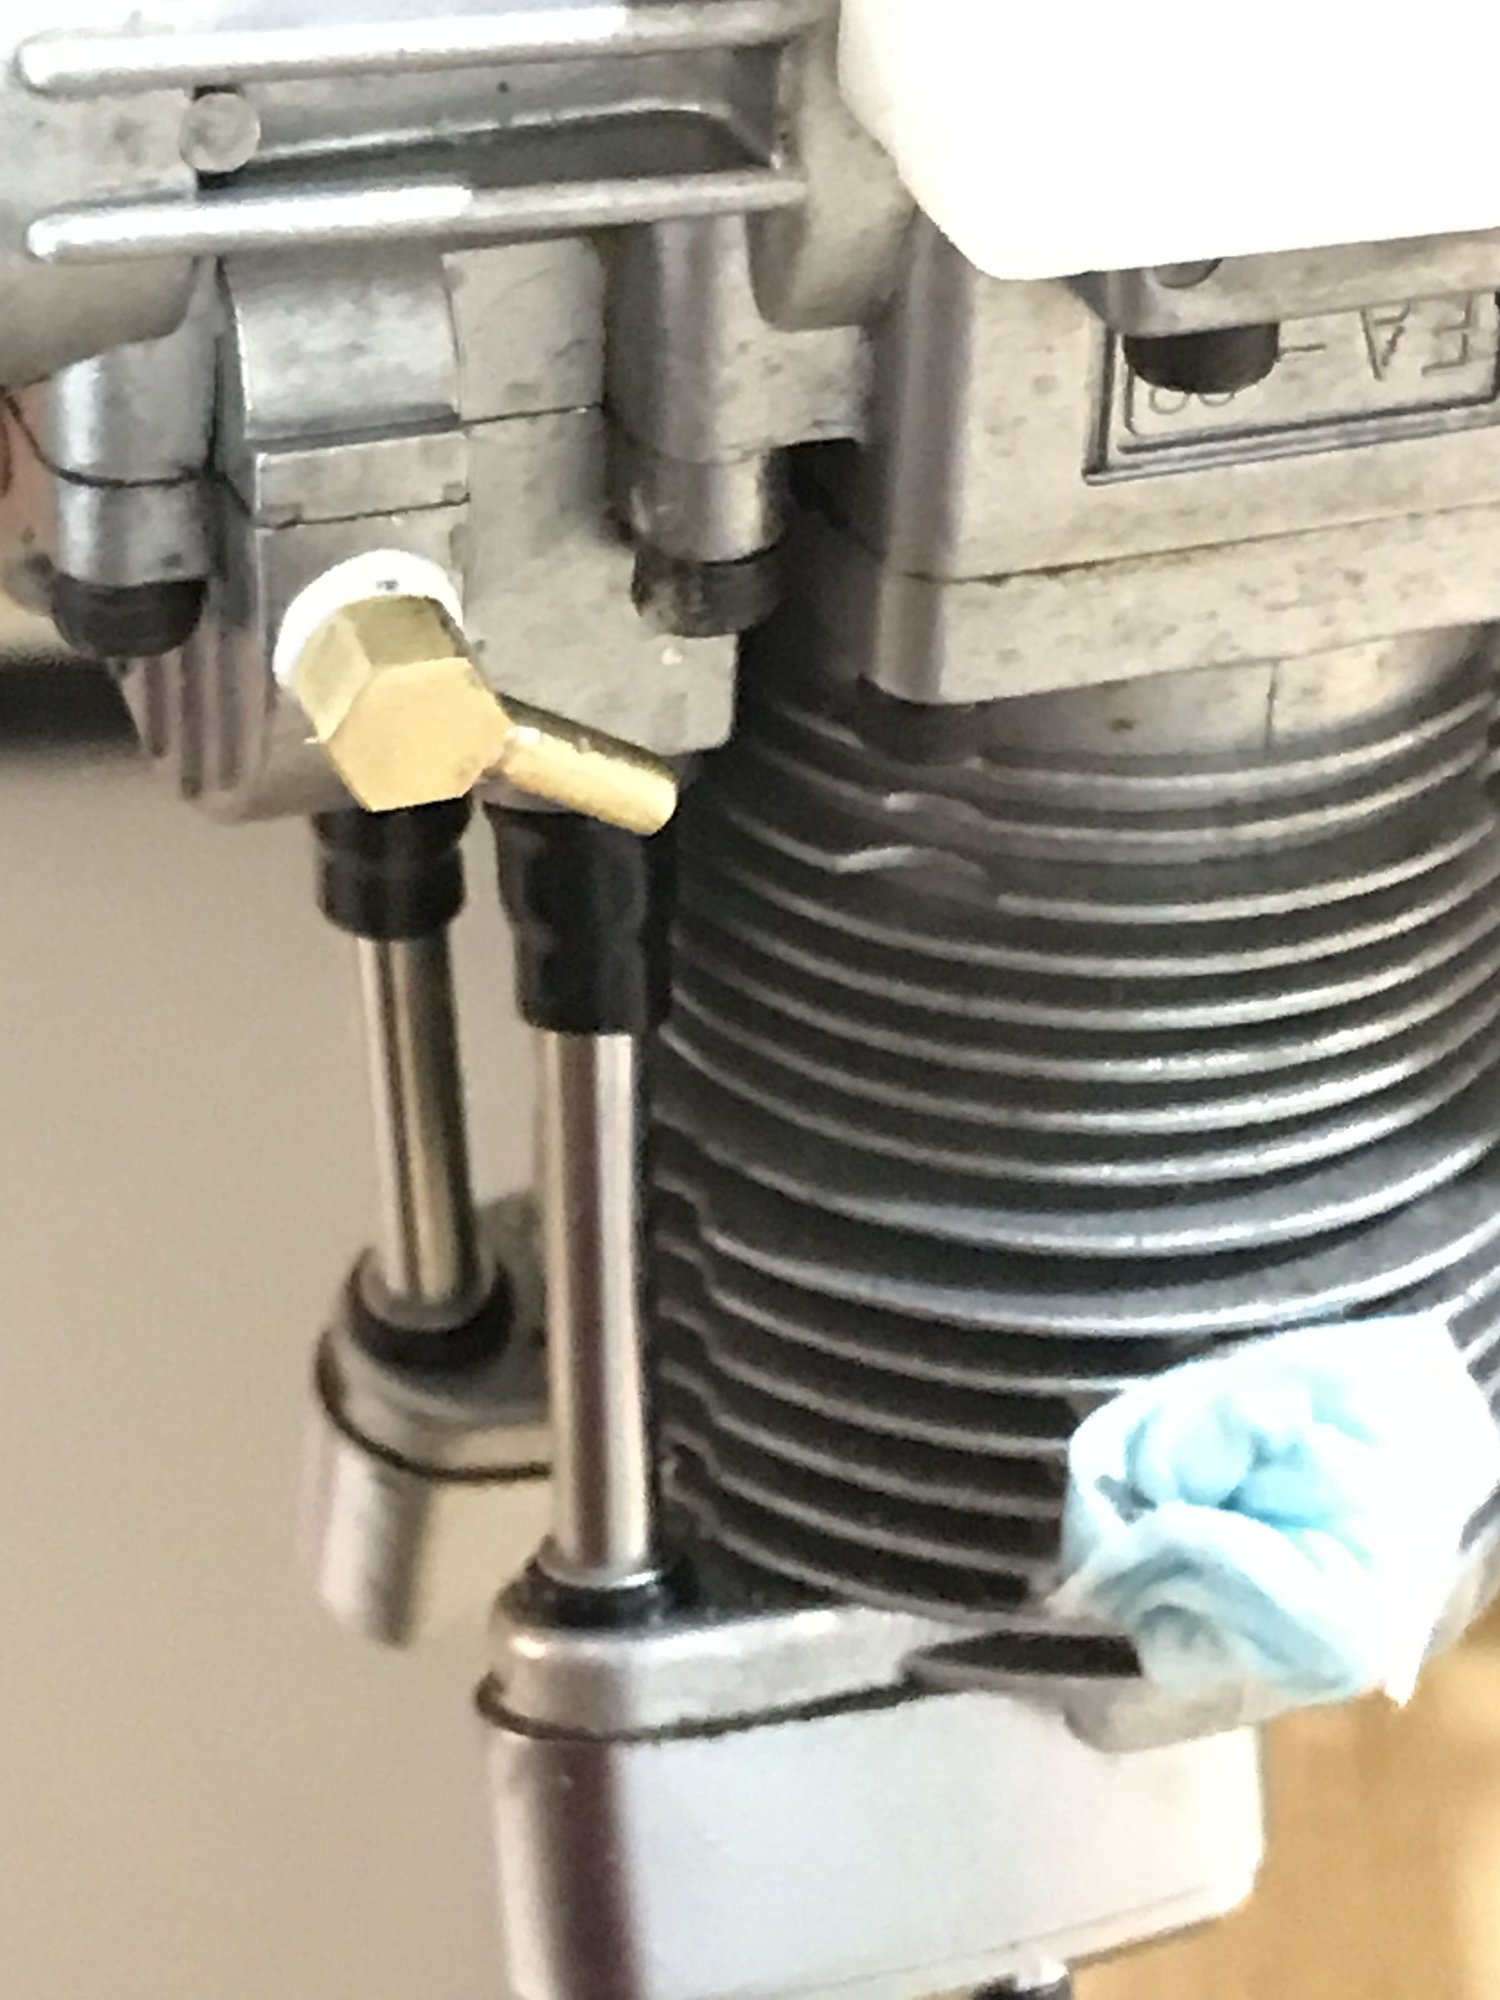
90 degree fittings work well to keep things close.
The stack helps in two ways, contains most of, if notvall the fuel standoff as well as handling the vent oil. Considerably less plumbing work involved.
A simple, flanged tube, soldered cleanly in place. Solid and simple.
YS 53 magnesium muffler. Inlet bushed and threaded to fit Saito exhaust. New extended tailpiece made from aluminum bar. The case vent tube runs thru the muffler.
1/8\" flanged tube. The flange is contoured to closely fit, then sweat soldered in place On exhaust pipes, hard solder on intake stacks, soft solder is fine.
90 degree fittings work well to keep things close.
Last edited by Jesse Open; 07-22-2024 at 08:01 AM.
07-22-2024, 08:21 AM
Hats of to you! I can't fault your designs, you have a great deal of skill and resources I don't have. My design is born out of a necessity of simplicity and a minimum of tools to complete.
07-22-2024, 11:17 AM
Not knocking, explaining the reasoning that affects decisions.
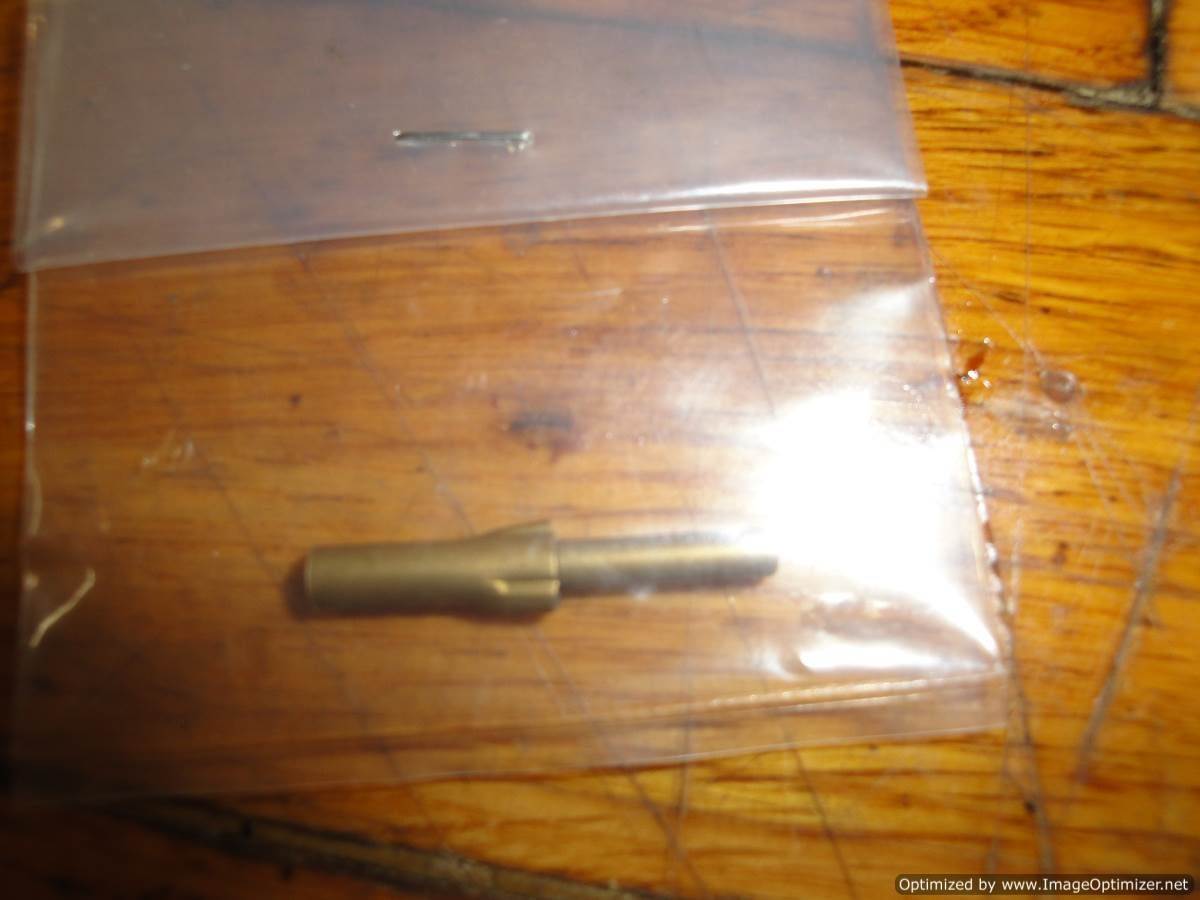
Most of the brass tube work uses very basic tools.
That is exactly why I show it. Meant as encouragement for people with limited access to machinery. Even then, with a little looking around, often a good lathe can be found for less than the price of some of the engines we buy.
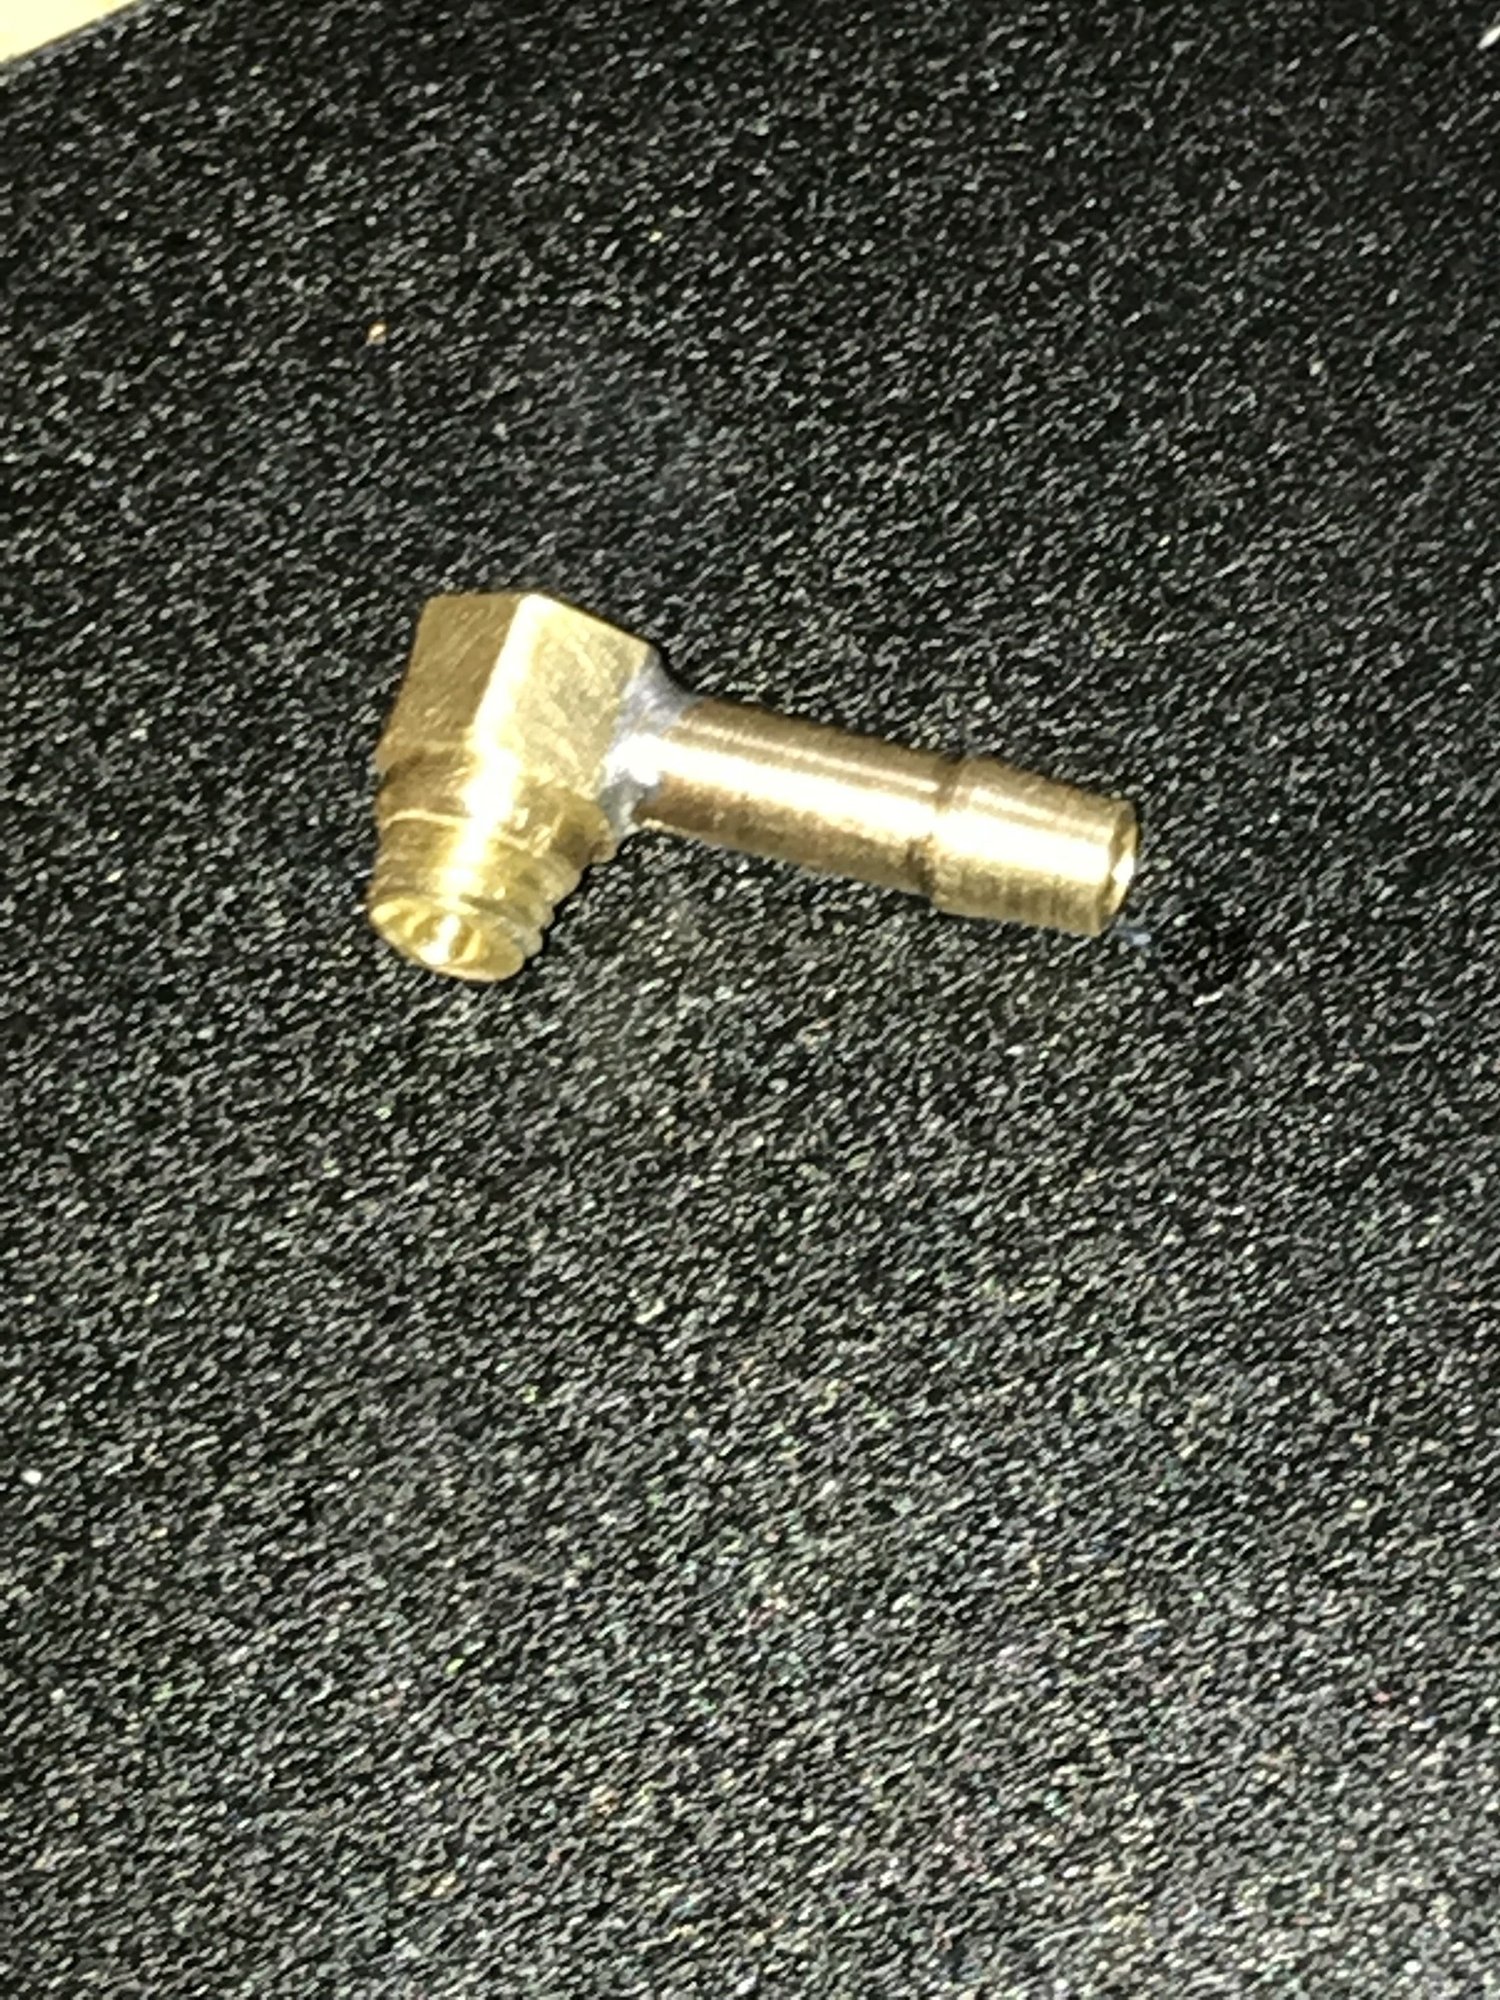
That first brass elbow was a store bought $.35 5mm brass plug. A side hole was drilled in the side with a $2 garage sale Black & Decker 1955 vintage power drill. The hose barb was hand formed from 1/8" brass tube and soldered in place with heat from a small butane torch.
Dad always said never blame tools or bemoan the tools you may not have.
Most of the brass tube work uses very basic tools.
That is exactly why I show it. Meant as encouragement for people with limited access to machinery. Even then, with a little looking around, often a good lathe can be found for less than the price of some of the engines we buy.
That first brass elbow was a store bought $.35 5mm brass plug. A side hole was drilled in the side with a $2 garage sale Black & Decker 1955 vintage power drill. The hose barb was hand formed from 1/8" brass tube and soldered in place with heat from a small butane torch.
Dad always said never blame tools or bemoan the tools you may not have.
Last edited by Jesse Open; 07-22-2024 at 11:31 AM.
07-22-2024, 11:18 AM
Saito rocker covers after 10 hours run time.
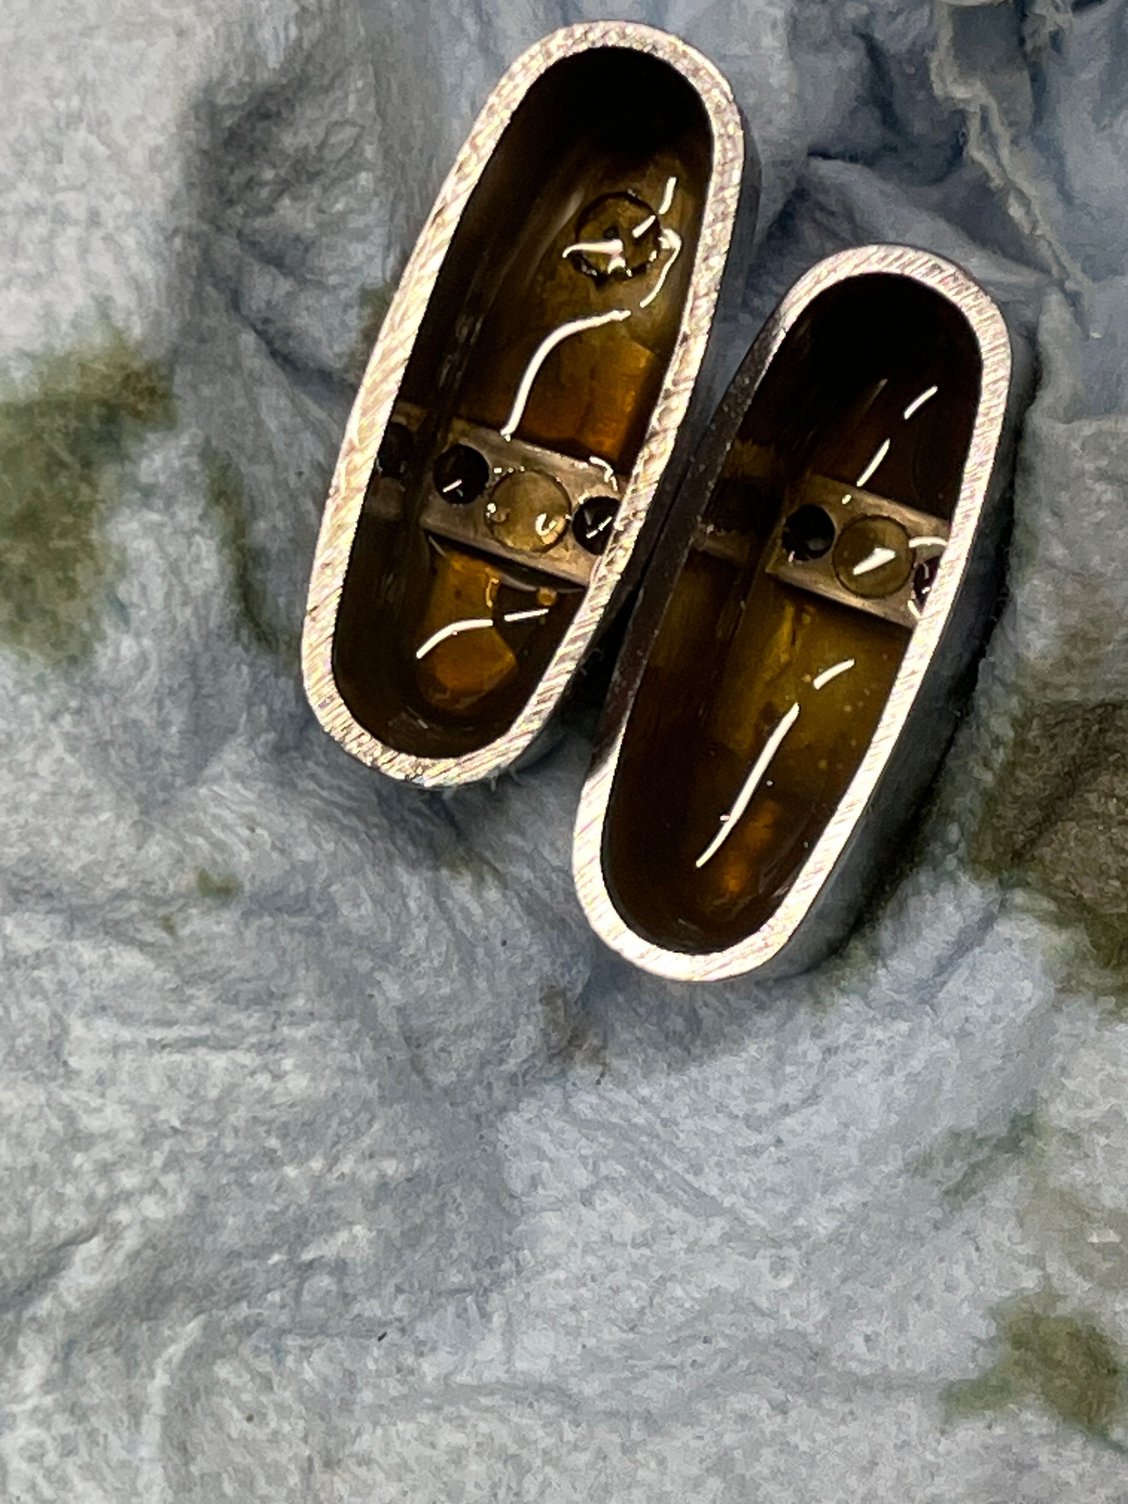
Cleaned out these covers and adjusted valves 10 hours run time ago. Home brew 14-14 methanol fuel, 30w non detergent motor oil used as ARO. Photo taken directly upon removal.
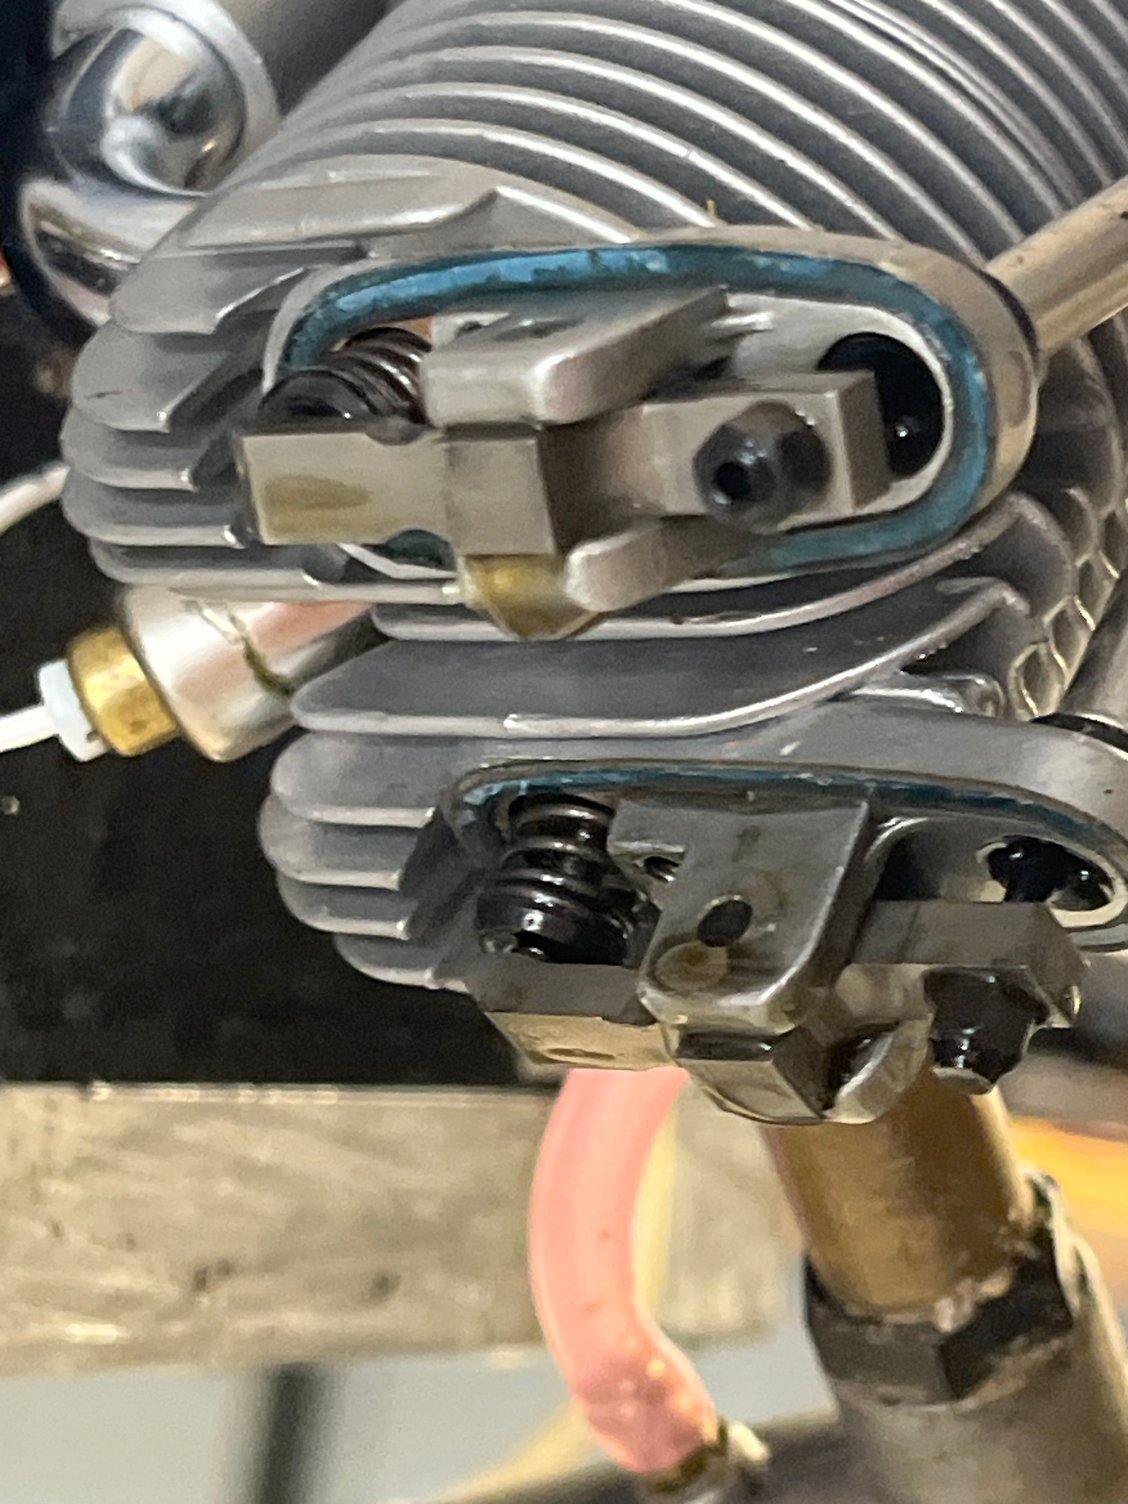
Cleaned out these covers and adjusted valves 10 hours run time ago. Home brew 14-14 methanol fuel, 30w non detergent motor oil used as ARO. Photo taken directly upon removal.
Last edited by Jesse Open; 07-22-2024 at 11:42 AM.
07-22-2024, 11:38 AM
Not knocking, explaining the reasoning that affects decisions.
Most of the brass tube work uses very basic tools.
That is exactly why I show it. Meant as encouragement for people with limited access to machinery. Even then, with a little looking around, often a good lathe can be found for less than the price of some of the engines we buy.
That first brass elbow was a store bought $.35 5mm brass plug. A side hole was drilled in the side with a $2 garage sale Black & Decker 1955 vintage power drill. The hose barb was hand formed from 1/8" brass tube and soldered in place with heat from a small butane torch.
Dad always said never blame tools or bemoan the tools you may not have.
07-22-2024, 12:28 PM
I didn't think you were I was just commenting on your superior craftsmanship! Though if I think about it I probably could add a tube to an existing velocity stack. Speaking of old tools I have an old 1940s Black & Decker drill with a drill press stand, it won't die. I had the replace the cord due to dry rot but she is still going!
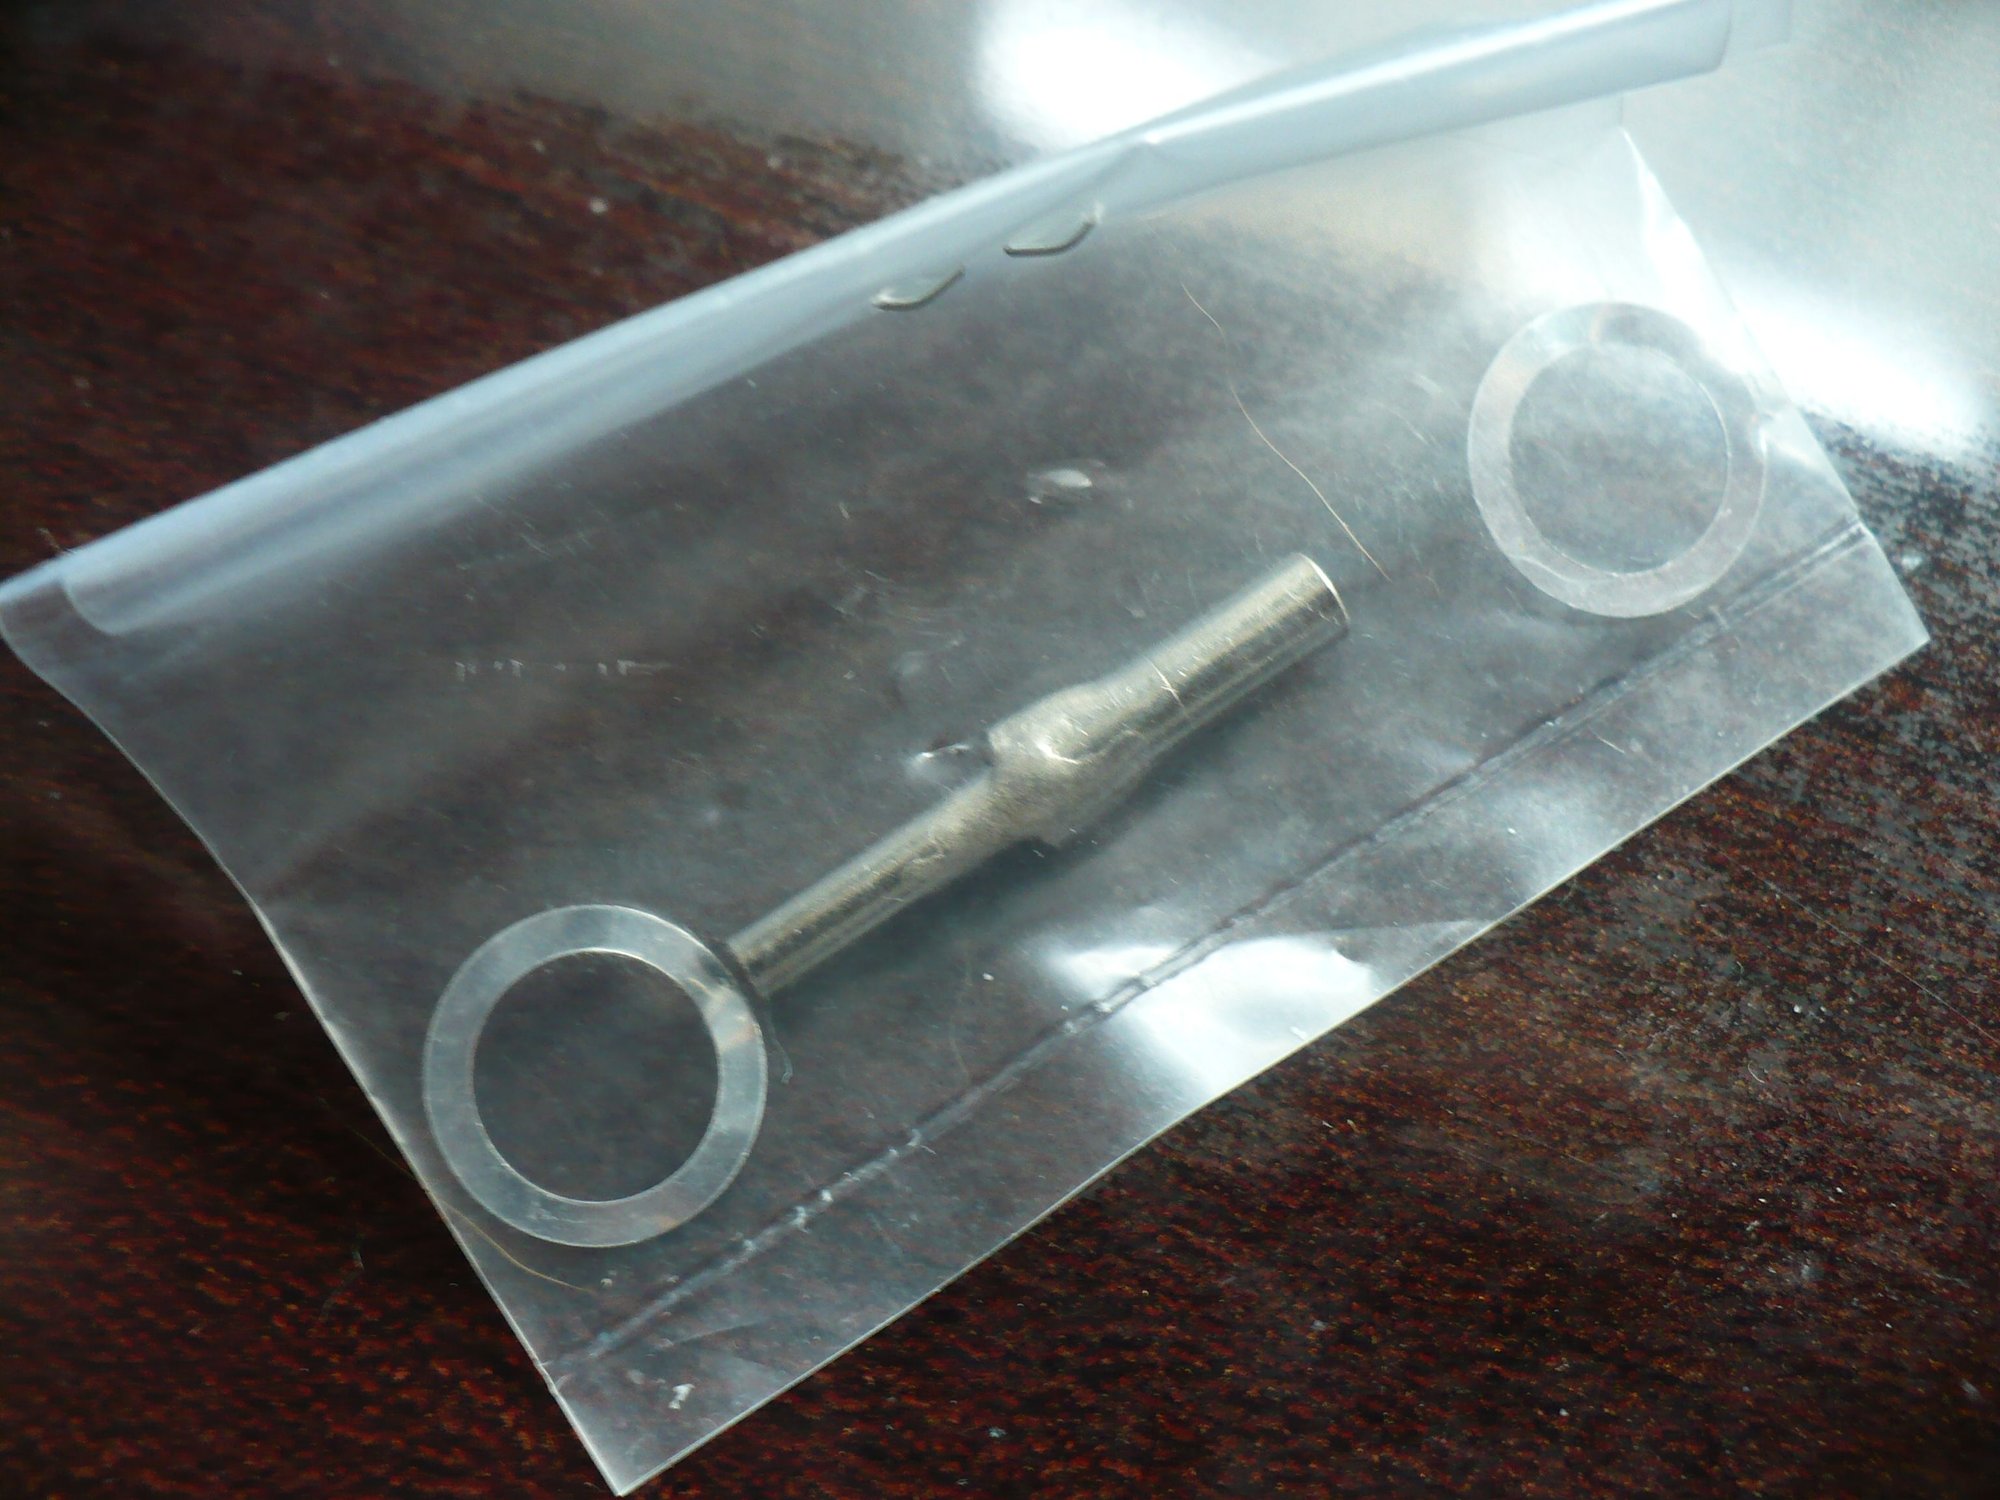
Tip: Don't drill the tube until after you solder the side tube in place. Then, select a drill that closely fits the ID of the side tube, using minimal pressure, and a bit of cutting oil, drill the hole carefully so as to avoid snagging and hogging through.
07-22-2024, 12:57 PM
Naw, I can see loads of true craft and art in many of your planes.
Tip: Don't drill the tube until after you solder the side tube in place. Then, select a drill that closely fits the ID of the side tube, using minimal pressure, and a bit of cutting oil, drill the hole carefully so as to avoid snagging and hogging through.
Tip: Don't drill the tube until after you solder the side tube in place. Then, select a drill that closely fits the ID of the side tube, using minimal pressure, and a bit of cutting oil, drill the hole carefully so as to avoid snagging and hogging through.
07-22-2024, 02:28 PM
Enjoy.
EDIT:
Just occured to me; I hope it was the jam nuts that you were looking for.

Last edited by Jesse Open; 07-23-2024 at 02:43 AM.
07-22-2024, 02:41 PM
Junior Member
Join Date: Aug 2021
Posts: 2
Likes: 0
Received 0 Likes
on
0 Posts
Please help me understand why my Saito engine uses 4oz fuel in just 30 seconds. I have checked valve adjustment .030. This is my second engine to consume very much fuel. Why?
Thanks
Thanks
07-23-2024, 03:06 AM
Saito never produced a glow engine that consumee 8 oz of fuel per minute when tuned properly......so
First think to check for is a leak in the fueling system. Next thing would be to start leaning the mixture screw (low speed needle) and high speed needles properly.
If you need help with tuning your best bet is to find someone locally that has 4 stroke tuning experience. If no one is available someone here can walk you through it.
Last edited by Glowgeek; 07-23-2024 at 03:10 AM.