Phenolic Bearing Drag
 08-06-2024, 12:40 PM
#1

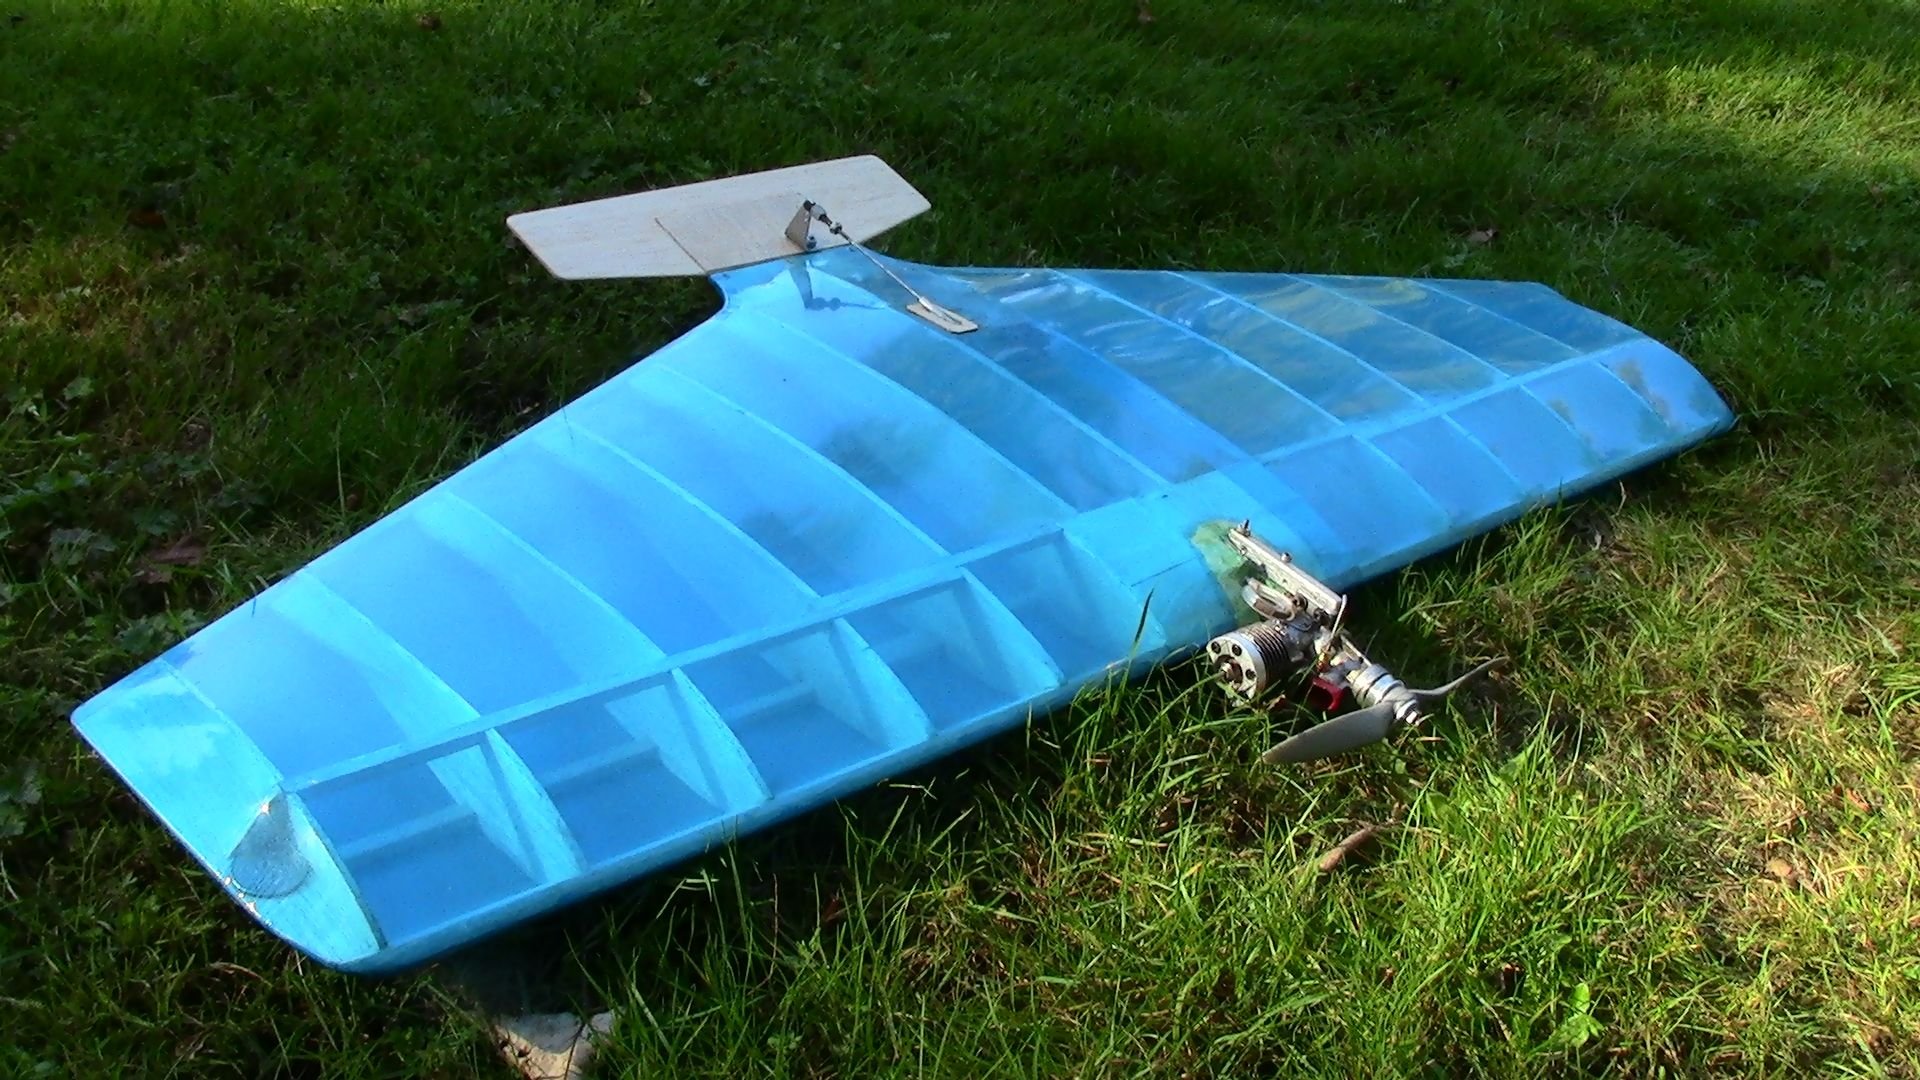
I'm restoring a Supertiger .15
I found a pair of new bearings with the phenolic rings on both sides.
After assembling the lower end of the engine there is simply too much resistance to turning.
Can the phenolic rings be pried away to relieve the drag...or are they holding the balls in place...?
If the plastic rings are just dust shields, then I will try removing them with the hope that this will reduce drag.
If I have to, I will convert these bearings to "full complement" style where no retainer for the balls is used...[but that is a PIA to do].

 08-07-2024, 01:26 PM
#5

If the rear bearing are the correct size...It is not seated enough! Warm the case again, slide in the crank in and tap slightly on the back of the crank so that the bearing sets! Then you heat the case again and put in the front bearing using a steal tub pushing on the outer bearing surface.
08-07-2024, 02:35 PM
#6


I should have also cautioned about the proper seating the outer race of the rear bearing;
One should not seat an outer race by tapping on the inner race.
08-07-2024, 03:02 PM
#7
I can tell that the bearing are fully seated in the case by comparing distance from backplate to crank pin and measuring the prop drive washer gap to the case.
Last edited by combatpigg; 08-07-2024 at 04:18 PM.
 08-08-2024, 08:19 AM
#9

Do you know the mfg of the bearings? If so you may be able to look up the specs on that bearing to find out if it is just a dust shield or part of the bearing retainer.
The following users liked this post:
combatpigg (08-09-2024)
08-08-2024, 08:42 AM
#10
If the balls are NOT visible AT ALL, they are dust shields.
The drag should dissapear within one or two runs, but if you insist, you can pry them out safely.
On the main bearing (the big one) shields are not desirable, on the front bearing (the small one) it is advisable to maintain the outer shield, the inner can be removed without issues.
The outer shield CAN be removed, but of course, then the balls and races are more susceptible for dust and dirt.

The following 2 users liked this post by 1967brutus:
combatpigg (08-09-2024),
L = (1/2) d v2 s CL (08-08-2024)
08-09-2024, 08:38 AM
#11

If the balls are (partly) visible, it's a ball cage or retainer.
If the balls are NOT visible AT ALL, they are dust shields.
The drag should dissapear within one or two runs, but if you insist, you can pry them out safely.
On the main bearing (the big one) shields are not desirable, on the front bearing (the small one) it is advisable to maintain the outer shield, the inner can be removed without issues.
The outer shield CAN be removed, but of course, then the balls and races are more susceptible for dust and dirt.
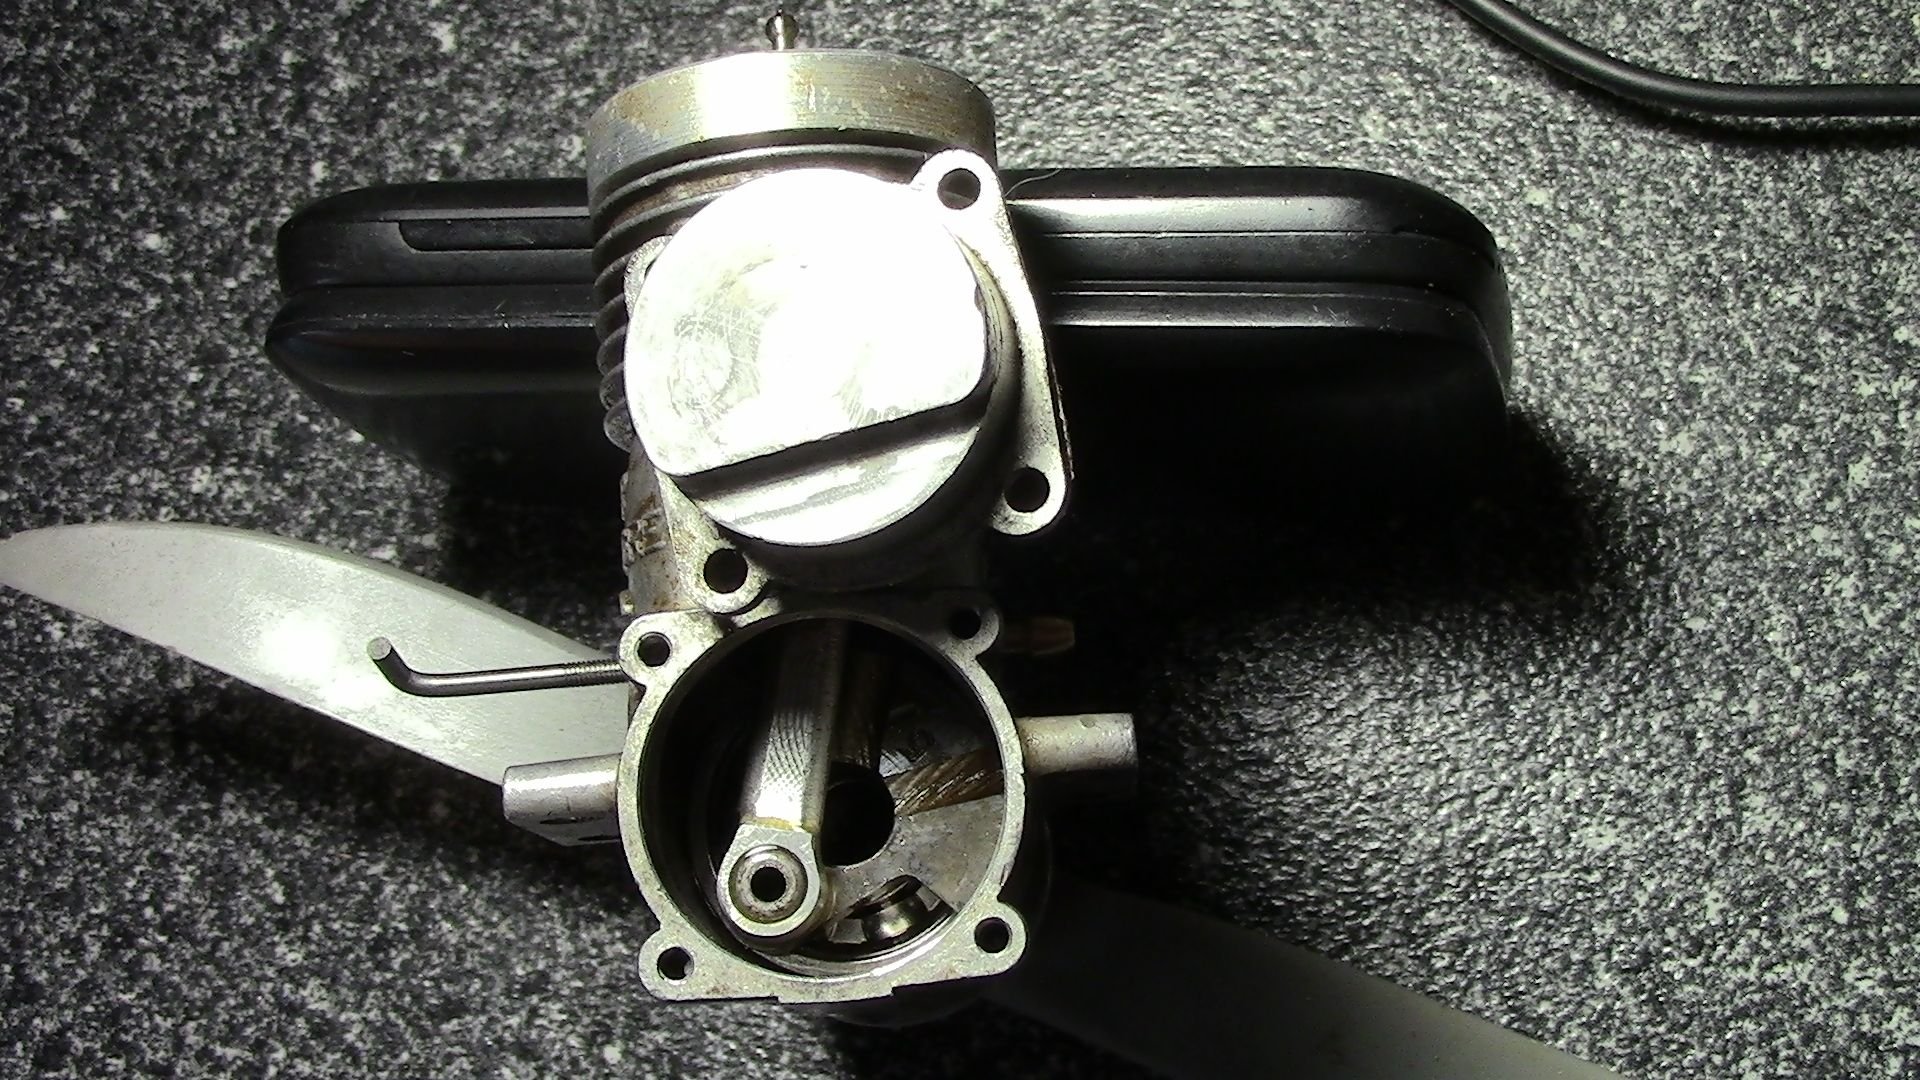
The bearings were packing with grease and after rinsing they spin with no effort
The bearing were supplied by a ebay seller that makes replacement parts for old engines.
I've bought gaskets, shims, needle valve assys, head buttons from them in the past and everything they have sold me was very good.
Since this is a SuperTiger .15 it uses a tapered collet as a seat for the prop drive. I set the gap between the collet and the face of the front bearing with a razor blade and now everything spins virtually friction free.
Next problem....the rear cover orientation and needing a gasket for the rear cover.
The original gasket is / was extremely thin. Probably the same thickness as a brown paper grocery sack.
It looks like SuperTiger had a goal to unshroud the transfer passage. The piston skirt is ground at an angle to provide easier flow for the transfer of fuel mixture to through that passage. I think the notch in the rear cover is supposed to be oriented to enhance this design objective...but I've never seen one of these engines NIB so I'm not sure.
Last edited by combatpigg; 08-09-2024 at 11:06 AM.
08-09-2024, 08:52 AM
#12
Howdy Matt....If I had taken the 1 hour round trip to my local family owned bearing supplier then there wouldn't be any question about the correct application..! I feel kind of guilty about not giving them my business...but my 10 mile per gallon car would make a trip like cost as much as the bearings..!
08-10-2024, 01:06 AM
#13
Next problem....the rear cover orientation and needing a gasket for the rear cover.
The original gasket is / was extremely thin. Probably the same thickness as a brown paper grocery sack.
It looks like SuperTiger had a goal to unshroud the transfer passage. The piston skirt is ground at an angle to provide easier flow for the transfer of fuel mixture to through that passage. I think the notch in the rear cover is supposed to be oriented to enhance this design objective...but I've never seen one of these engines NIB so I'm not sure.
For gaskets, look in the kitchen/cooking dept at the grocery store for "baking paper" or "oven paper" (no idea what it is called in your neck of the woods).
That is very thin, heat and oil resistant paper, easy to cut with a sharp knife.
Cut a square of about 2 x 2", use compasses to mark a circle the size of the rear opening of the crankcase.
Cut the circle, fit the paper between case and backplate, punch the boltholes and tighten up.
With a razorblade or lancet, carefully trim the excess paper, and presto, a near indistinguishable copy of the gasket...
If thicker paper is needed, some types of food wrapping paper also work well.
08-10-2024, 02:46 AM
#14
"Parchment" paper for baking in the cooking section.
Last edited by Jesse Open; 08-10-2024 at 10:43 AM.
08-11-2024, 10:37 PM
#15
As far as I can tell, orientation as you show it is correct: One recess for transfer and the larger recess to allow the piston some clearance.
For gaskets, look in the kitchen/cooking dept at the grocery store for "baking paper" or "oven paper" (no idea what it is called in your neck of the woods).
That is very thin, heat and oil resistant paper, easy to cut with a sharp knife.
Cut a square of about 2 x 2", use compasses to mark a circle the size of the rear opening of the crankcase.
Cut the circle, fit the paper between case and backplate, punch the boltholes and tighten up.
With a razorblade or lancet, carefully trim the excess paper, and presto, a near indistinguishable copy of the gasket...
If thicker paper is needed, some types of food wrapping paper also work well.
08-12-2024, 02:05 AM
#16
08-12-2024, 02:59 AM
#17
Copy and paste link
Do a web search for ICBIM Products in Michigan. These folks offer excellent, perfectly fitting gaskets for many small engines. Gaskets for loads of out of production RC engines. Super Tigre listed but not for the .15 yet. They are adding to the line daily.
Do a web search for ICBIM Products in Michigan. These folks offer excellent, perfectly fitting gaskets for many small engines. Gaskets for loads of out of production RC engines. Super Tigre listed but not for the .15 yet. They are adding to the line daily.
Last edited by Jesse Open; 08-12-2024 at 03:10 AM.
The following users liked this post:
combatpigg (08-12-2024)
08-23-2024, 03:28 AM
#18
Next problem
The split collet / prop driver is slipping when I tighten the propeller.
As soon as the engine starts up it throws the prop.
I'm tempted to use red Locktite between the tapered / split collet and the crankshaft snout...but I want to hear from you guys what the best way to handle this is.
The split collet / prop driver is slipping when I tighten the propeller.
As soon as the engine starts up it throws the prop.
I'm tempted to use red Locktite between the tapered / split collet and the crankshaft snout...but I want to hear from you guys what the best way to handle this is.
08-23-2024, 07:22 AM
#19
It sounds like the prop driver isn't seating firmly on the collet. Maybe a shim under the collet so that the driver can seat a little farther down on it.
The following users liked this post:
combatpigg (08-23-2024)
The following users liked this post:
combatpigg (08-23-2024)
08-23-2024, 08:29 AM
#21
My thinking is the original aluminum collet might have some wear and tear. I've got a brand new prop driver but no brand new collet to go with it.
Last edited by combatpigg; 08-23-2024 at 08:35 AM.
08-23-2024, 03:08 PM
#22
What I did today is cleaned everything real good to get rid of all traces of oil and varnish. I used a very tiny amount of red locktite on the crankshaft to grip the collet.
A used a pair of Xacto Blades to use as spacers between the collet and the face of the front bearing.
I found a brand new, original ST prop driver, threw on a prop and then tightened it up real good. I needed pliers to remove my Xacto blade spacers and now I think the lower end of this engine is good to go.
I ran it on a combat model today [with a 2 oz bladder tank] and the fuel consumption was horrible and the engine refused to hold a needle setting from full to empty.
The engine came with several used P/L sets..most likely all are toast.
Many years ago I made a new piston for one of these engines and a honing tool for the cylinder. I still have the drawings I did for the piston and still have the holding fixture I made for one of the machining operations. That project turned out real good but I lost that engine when the plane it was pulling stopped obeying my commands at the transmitter.
08-24-2024, 04:38 AM
#23

If I have a prop driver collet that slips on the crank, I clean the parts thoroughly with solvent first. I�ll then take some 320x or 400x and rough up the crankshaft such that the sanding scratches run parallel to the length of the crank. It�s not as easy to do this to the inside of the collet, so sometimes a tiny grinding stone in a Dremel is the only option. I would also scuff the outside of the collet and inside of the prop driver. A dry friction fit is ideal; if a chemical retaining compound is necessary, thread locker will not suffice. You should use medium strength retaining compound such as Loctite 609 or 620. I use the 620 at work, but 609 will probably work fine as well. Thread locker is not the same thing as retaining compound. I would use retaining compound as a last resort.
https://next.henkel-adhesives.com/us...compounds.html
https://next.henkel-adhesives.com/us...compounds.html
Last edited by 1QwkSport2.5r; 08-24-2024 at 04:53 AM.
The following users liked this post:
combatpigg (08-24-2024)
08-24-2024, 02:21 PM
#24
Thanks for the info about retaining compound...! I never heard of it.
I wish this engine would flip start for me so I wouldn't resort to using the electric starter.
I have it running now on crankcase pressure and it likes that much more than running on bladder.
With a APC 7x5 it puts out pretty good for an engine with maybe a few too many miles on it.
I wish this engine would flip start for me so I wouldn't resort to using the electric starter.
I have it running now on crankcase pressure and it likes that much more than running on bladder.
With a APC 7x5 it puts out pretty good for an engine with maybe a few too many miles on it.