


Boomerang Nano!!!
 05-15-2014, 11:17 AM
#1551


Join Date: Aug 2010
Location: , , UNITED KINGDOM
Posts: 305
Likes: 0
Received 0 Likes
on
0 Posts
Well after a bit of searching I went for it. Didn't have to remove as much material as I thought and plenty of strength left in the bearer.
Thought I'd post a picture just in case anyone else went down the same route. Think I'm going to look at fitting the front retract before glueing the centre wing in place. I think the model is easier to handle at the moment.
Cheers,
Simon
Thought I'd post a picture just in case anyone else went down the same route. Think I'm going to look at fitting the front retract before glueing the centre wing in place. I think the model is easier to handle at the moment.
Cheers,
Simon
Last edited by Si_B; 05-15-2014 at 11:19 AM.
 05-15-2014, 04:03 PM
#1552
My Feedback: (5)
Join Date: Dec 2011
Location: Holland Patent,
NY
Posts: 717
Likes: 0
Received 0 Likes
on
0 Posts
Simon,
I removed about the same amount of material from the retract bearer with BVM 3/16" wire struts with no problems-after 4 seasons of heavy flight use. I agree on fitting the nose retract unit before gluing the center wing section to the fuselage. This step took quite a bit of thought to work out properly. I chose to fit a belly mount Spring Air nose retract to some "packers" to achieve a favorable stance for takeoffs and landings and keep the retract unit internal to the fuselage. Also raked the nose strut rearward for some castering action with a small bend above the nose wheel. You'll truly enjoy flying this Nano when finally complete.
Rgrds,
Art ARRO
07-06-2014, 01:30 PM
#1553
Join Date: Aug 2010
Location: , , UNITED KINGDOM
Posts: 305
Likes: 0
Received 0 Likes
on
0 Posts
She is all done.


Just done the calcs and she needs 40g of lead in the nose which is not too bad. Got everything mounted forwards, but with the electric retracts there are not cyclinders or valves up the front. Hopefully get the motors fired up and checked in the week ready for her maiden.
Cheers,
Simon
Just done the calcs and she needs 40g of lead in the nose which is not too bad. Got everything mounted forwards, but with the electric retracts there are not cyclinders or valves up the front. Hopefully get the motors fired up and checked in the week ready for her maiden.
Cheers,
Simon
08-14-2019, 03:30 PM
#1555
My Feedback: (3)
they sell a set designed for the Nano.
or perhaps contact a ripmax dealer and see if they know which JP retracts they are using in the new Nano release.
Last edited by ltc; 08-14-2019 at 03:32 PM.
04-10-2021, 09:23 AM
#1561

My Feedback: (16)
Well, I've been checking for 8 months or so for new replacement actuators for my Prolink retracts supporting the Nano however I have not had any luck. Dreamworks indicated that they are not able to get the actuators from the manufacturer so I've been calling approximately every couple of months or so, however, I finally took the plunge in ordering the new retract and struts package from JP Hobby. Man, I really was hoping not to be the guinea pig on this one however since they arrived so quickly I really thought I'd be flying this weekend however the tires are 65mm and the struts are too long and I would have to pull the wheel wells, repatch the holes, and recut the new areas for the wheel wells to accommodate the length. Has anyone else purchased these new units? I will try smaller wheels first since the new ones are 65mm and see where I am prior to surgery.
06-07-2024, 08:45 PM
#1562
Late to the party as per usual.
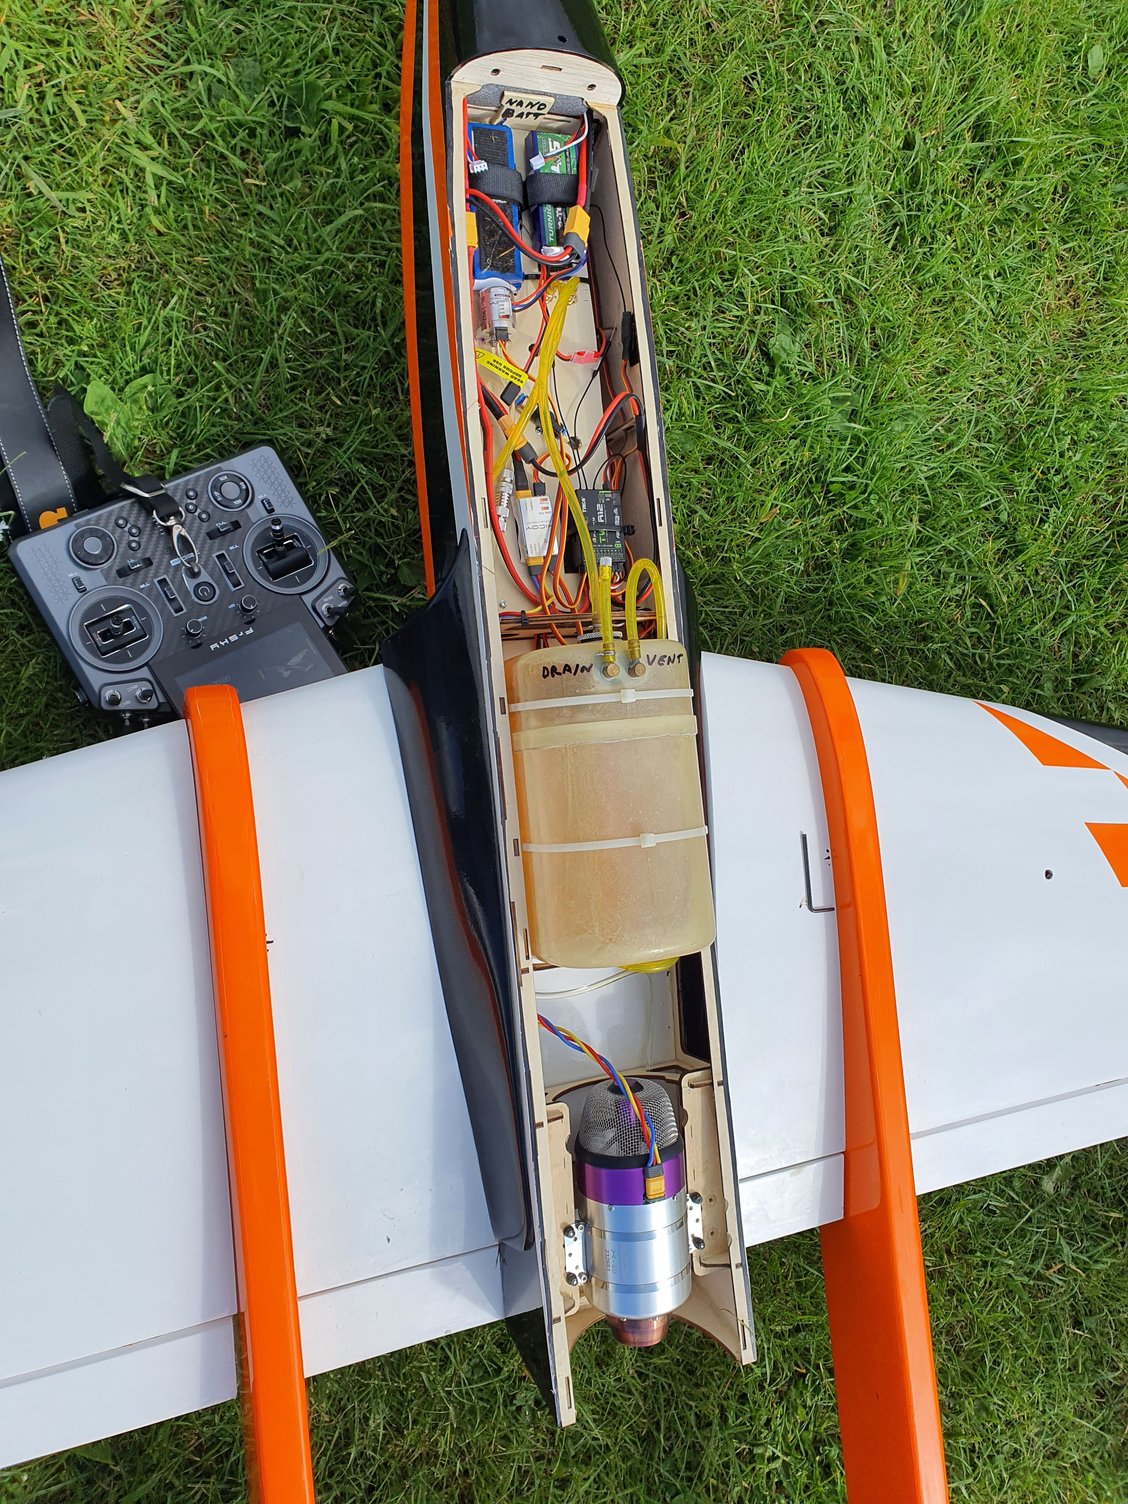
Picked up a Nano NIB and built it with modern equipment, ended up about 6kg dry. Could have been a couple hundred grams lighter but nose weight was still required even with a 472g turbine.
Xicoy X60 for power which seems to be the perfect engine for keeping the Nano light but sporty, JP electric gear, all HV servo's with midi Magregor on rudders and savox standard size on other surfaces.
Flys quite light even with the big stock tank filled which must be pushing this jet into the 7.5kg area wet.
Climbs a bit on power, my flap is neutral, CG feels if anything "sporty" on stock CG with plenty elevator authority. Added 3% down elevator curve with throttle starting 1/3 of throttle to compensate, may need a little more. Easy to fly.
Last edited by raydar; 06-07-2024 at 08:50 PM.
08-29-2024, 02:17 AM
#1565
https://www.jphobby.eu/en/landing-ge...ontroller.html
These are the ones, they fit fine with no major modifications though are pull/pull on steering which requires a little thought to get the wires not to snag on operation.
They work well with my Nano which is prob about 16lbs loaded, the model has only had about two outings and 6 flights in total.
Wish I had flown more this season but wind and weather in UK this season has been relentless, still waiting for summer to arrive and it's near september
Last edited by raydar; 08-29-2024 at 02:20 AM.
The following users liked this post:
extra 300 (08-29-2024)
08-29-2024, 08:02 AM
#1567
Junior Member
Join Date: Aug 2024
Posts: 2
Likes: 0
Received 0 Likes
on
0 Posts
Picked up a Nano v1 airframe and in the process of fitting everything into it. Using the JP electric retracts and brakes (have them mounted already - nose was a pain!). Using a Swiwin 80b as the power source. I can't find the v1 manual or the manual for the Nano using the 2 silver rods on each wing to center it. Does anyone have a copy or can you tell me where to find it? Google keeps turning up the latest version.
In regards to CG, you measure this at the leading edge of the center wing part right where it's intersecting the fuse? What is the recommend CG range for the v1 and where is it measured from?
I'm assuming this is a v1 because of the 2 silver rods to center the wing on each side.
In regards to mounting the turbine do you mount it so output nozzle is flush with back or is their a specified distance from the back or ??
Last edited by thedarkwraith; 08-29-2024 at 05:13 PM.
