Hawker Hunter 1/6th scale ARF from Flying Legends

 03-16-2023, 02:32 AM
#902

My Feedback: (3)
[QUOTE=Not good about the condition of that Hunter you have got to refurb. I am always dubious of buying other peoples models as you are never sure what you are actually getting.[/QUOTE]
For your info, this hunter was ordered as a project and custom painted especially for this customer from a very reputable person in the UK and client was billed more than twice the price he should have paid to get a decent jet....
For your info, this hunter was ordered as a project and custom painted especially for this customer from a very reputable person in the UK and client was billed more than twice the price he should have paid to get a decent jet....
 07-24-2023, 02:26 AM
#903
My Feedback: (3)
Progress on the refurbishment of the Hunter is moving slowly. i have 2 concerns for which i would like to have some advice:
A) Although the recommended elevators servos (Futaba S9650) are installed, the specs show that torque is 4.5Kg!!! Did anyone have any issue with that especially that weight of the Hunter is around 17kgs wet.
B) Fuel tanks were heavily glued inside fuselage and there is no way i can remove them. Even worse i am unable to reach the stoppers of the saddle tanks to remove them. What can i do to make sure that the fuel system is safe to use as is?
Thanks in advance


The following users liked this post:
DenisFerrari (07-29-2023)
07-25-2023, 05:02 PM
#909
My Feedback: (20)
This would be a show stopper for me. As you know a good fuel system is essential to keeping the turbine running. I would not fly it without inspecting and or rebuilding the fuel system inside the tanks. I don't know what options you have but blindly trusting a fuel system that I can not inspect or rebuild would be a no go for me. This is one reason I NEVER glue in a fuel tank. Hopefully you can figure out a solution.
07-25-2023, 11:37 PM
#911
My Feedback: (3)
This would be a show stopper for me. As you know a good fuel system is essential to keeping the turbine running. I would not fly it without inspecting and or rebuilding the fuel system inside the tanks. I don't know what options you have but blindly trusting a fuel system that I can not inspect or rebuild would be a no go for me. This is one reason I NEVER glue in a fuel tank. Hopefully you can figure out a solution.
Cannot agree with you more... i have never glued a tank on my installs and always make sure to have easy access to all components to make servicing easy.
In this case i am really stuck, forcing the tanks out may create more damage and worsen situation by cracking a tank or even fuselage... external leaks can eventually be handled but i need to make sure that the inside fuel line and clunk are ok....
The following users liked this post:
Viper1GJ (07-26-2023)
07-26-2023, 04:04 AM
#912
The following users liked this post:
DenisFerrari (07-29-2023)
09-20-2023, 11:23 AM
#914
I have made a start finally on the Hunter! Only had it 8 months!
I ordered some more proskin from Mick Reeves models to allow me to build the larger tanks.
I also used the measurements that Dave Wilshere put in this thread way back about how to locate the aluminium plates to mount the tank pylons to.
One wing has been drilled and tapped and the basic frame of the pylons fitted to check for alignment and to make sure there is clearance on the gear doors and flap.
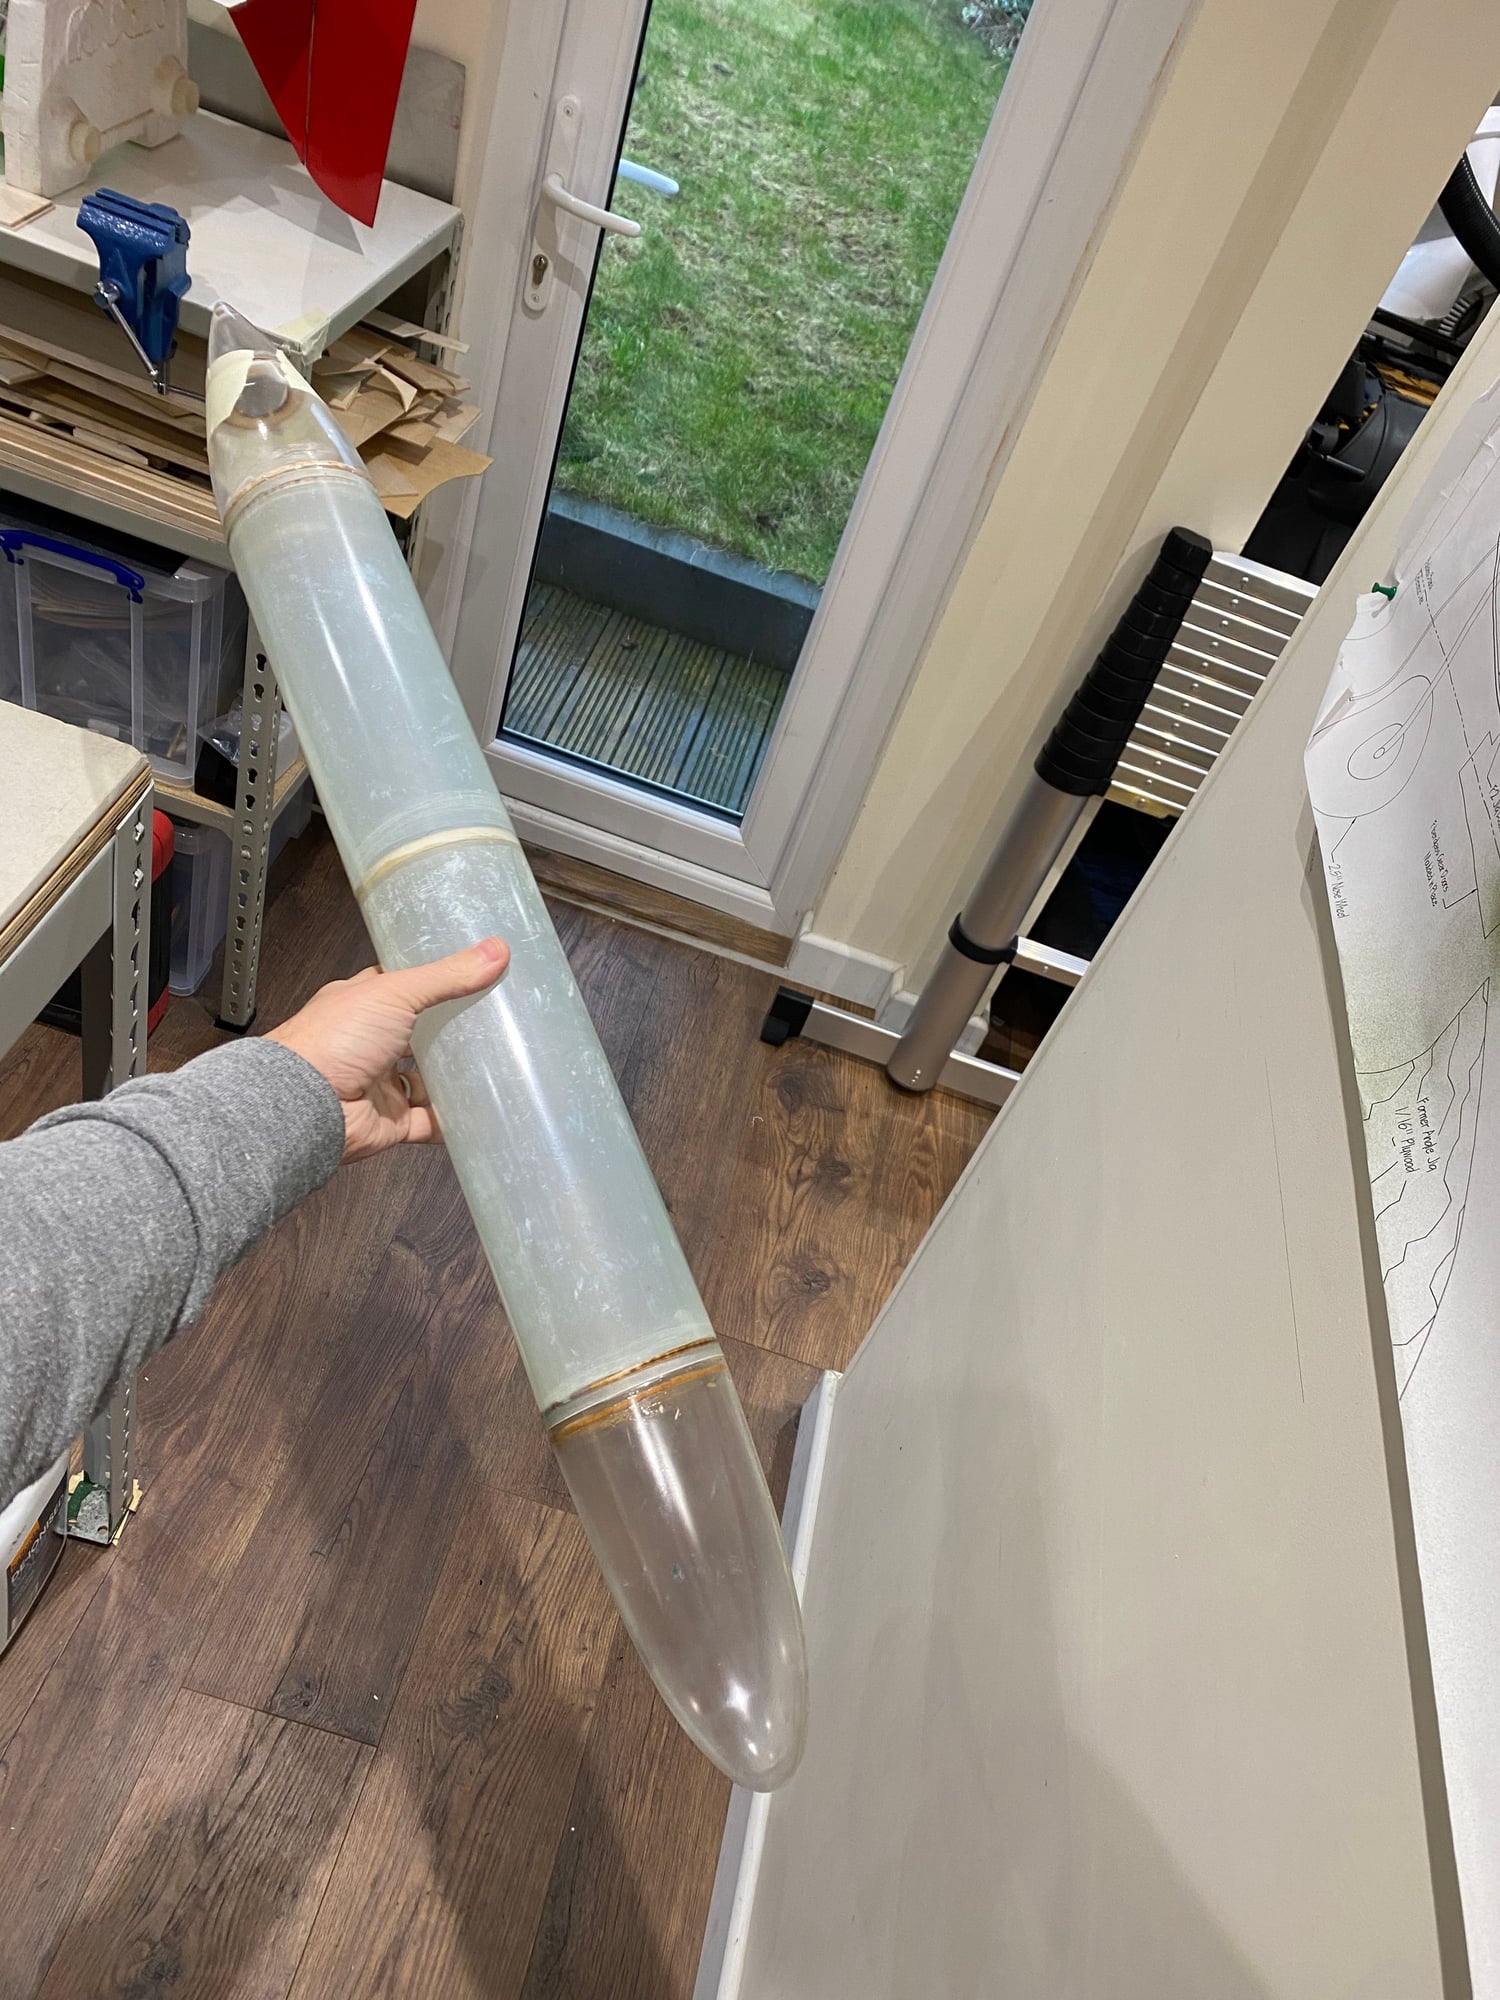
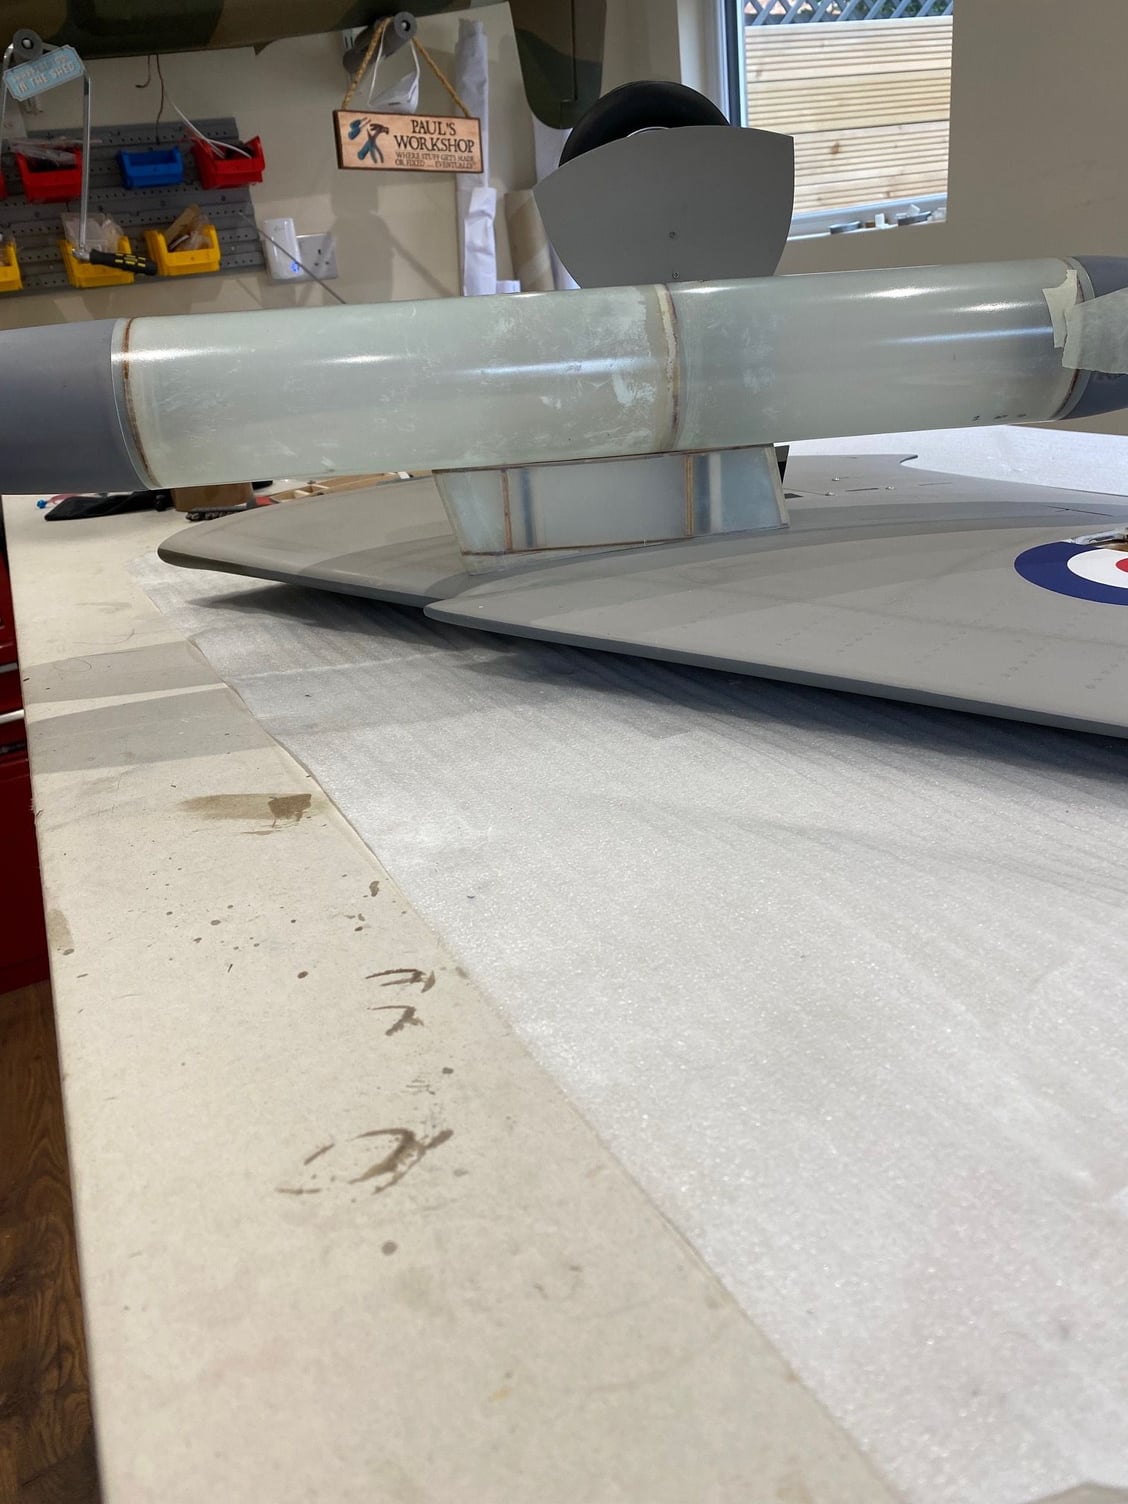
I am currently working on the front and rear sections of the tanks. They are made of some sort of plastic and they are not a great fit so they are taking a lot of extra effort to make them usable.
Extended tank centre section to represent the longer 230 Gallon tanks
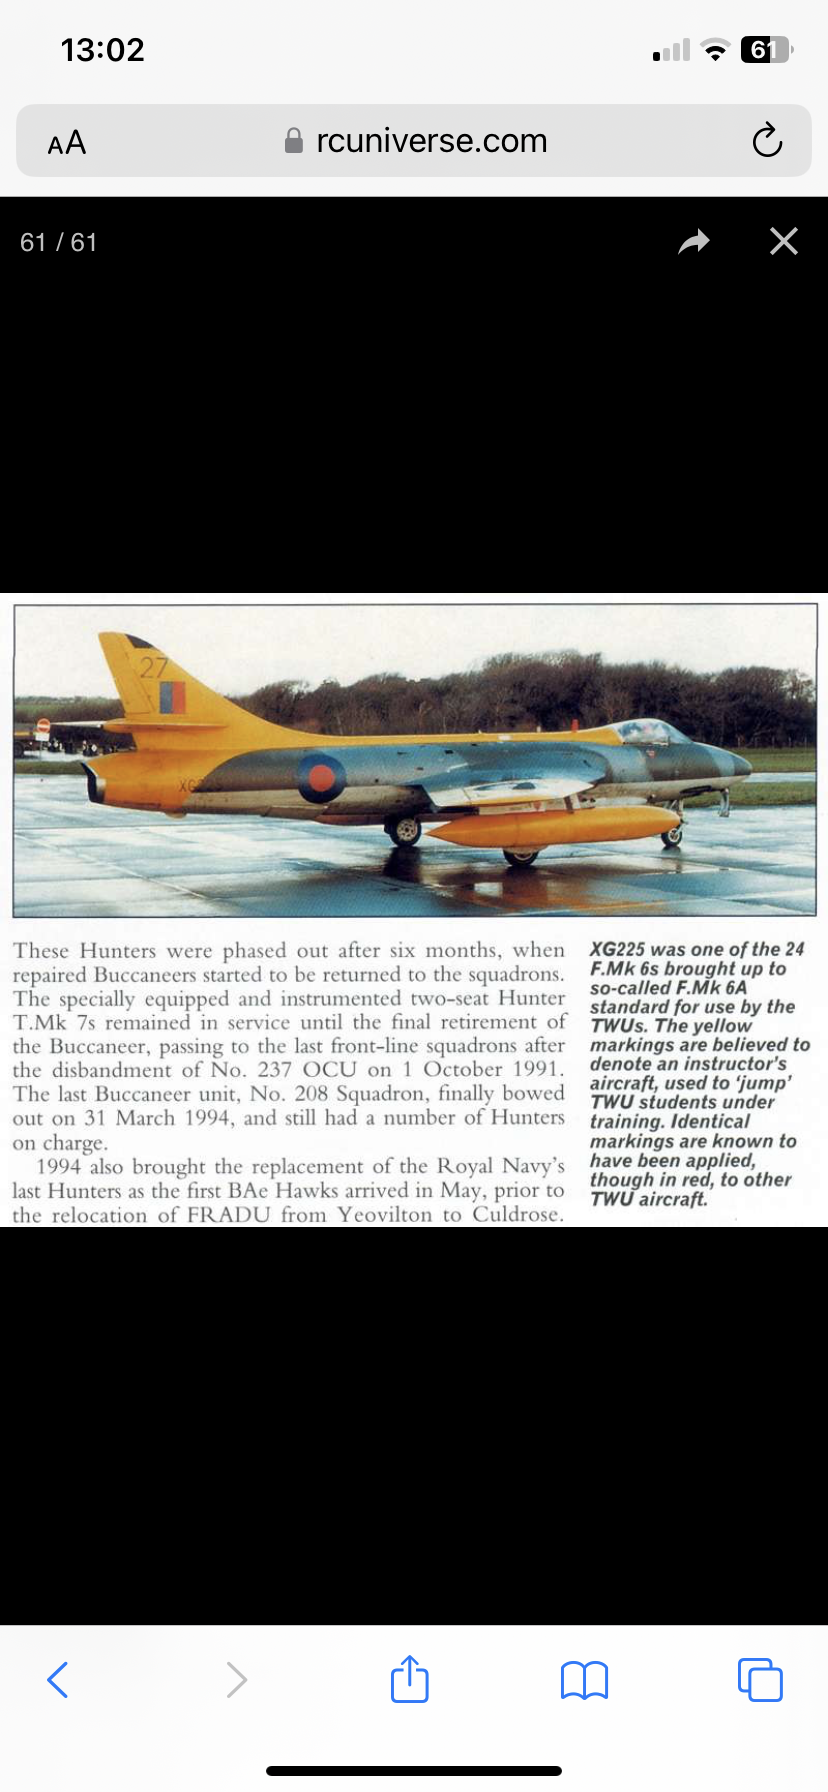
I found another picture of the Hunter I am modelling. It�s quite an illusive aircraft to find any pictures of.
Note the longer drop tanks fitted which don�t have fins like the smaller 100 Gallon tanks do.
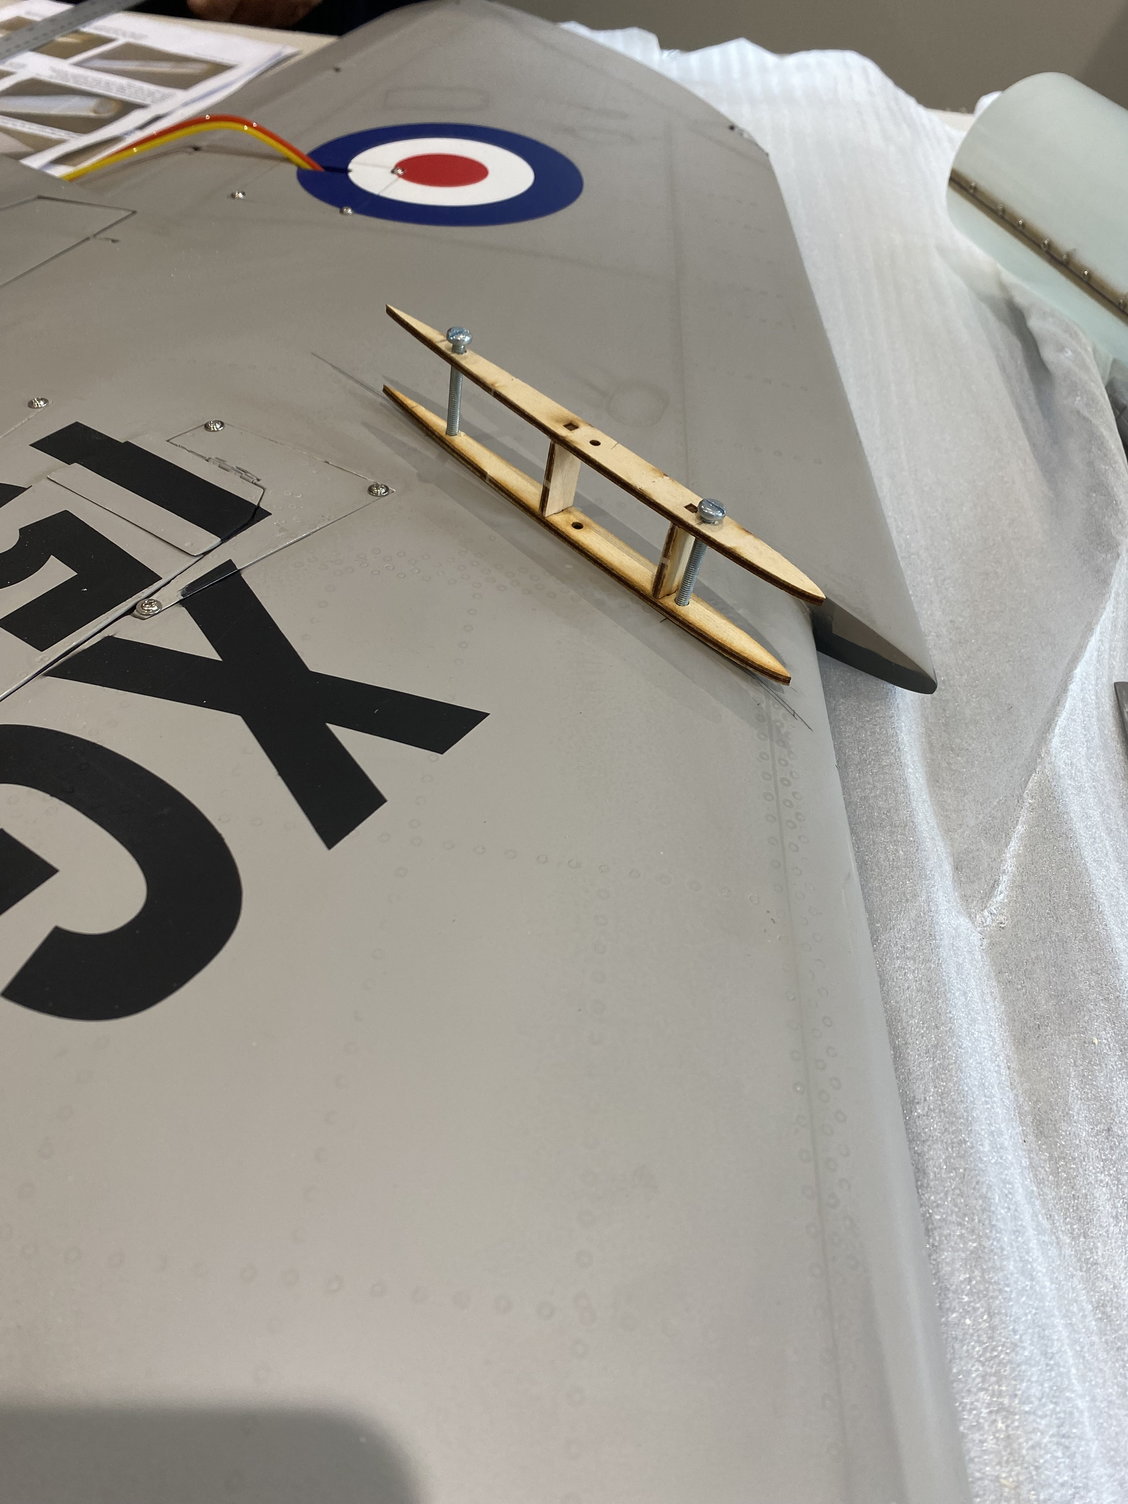
Pylon framework screwed to freshly drilled and tapped holes.
I ordered some more proskin from Mick Reeves models to allow me to build the larger tanks.
I also used the measurements that Dave Wilshere put in this thread way back about how to locate the aluminium plates to mount the tank pylons to.
One wing has been drilled and tapped and the basic frame of the pylons fitted to check for alignment and to make sure there is clearance on the gear doors and flap.
I am currently working on the front and rear sections of the tanks. They are made of some sort of plastic and they are not a great fit so they are taking a lot of extra effort to make them usable.
Extended tank centre section to represent the longer 230 Gallon tanks
I found another picture of the Hunter I am modelling. It�s quite an illusive aircraft to find any pictures of.
Note the longer drop tanks fitted which don�t have fins like the smaller 100 Gallon tanks do.
Pylon framework screwed to freshly drilled and tapped holes.
Last edited by paul_h300; 09-20-2023 at 11:28 AM.
09-23-2023, 12:30 PM
#915
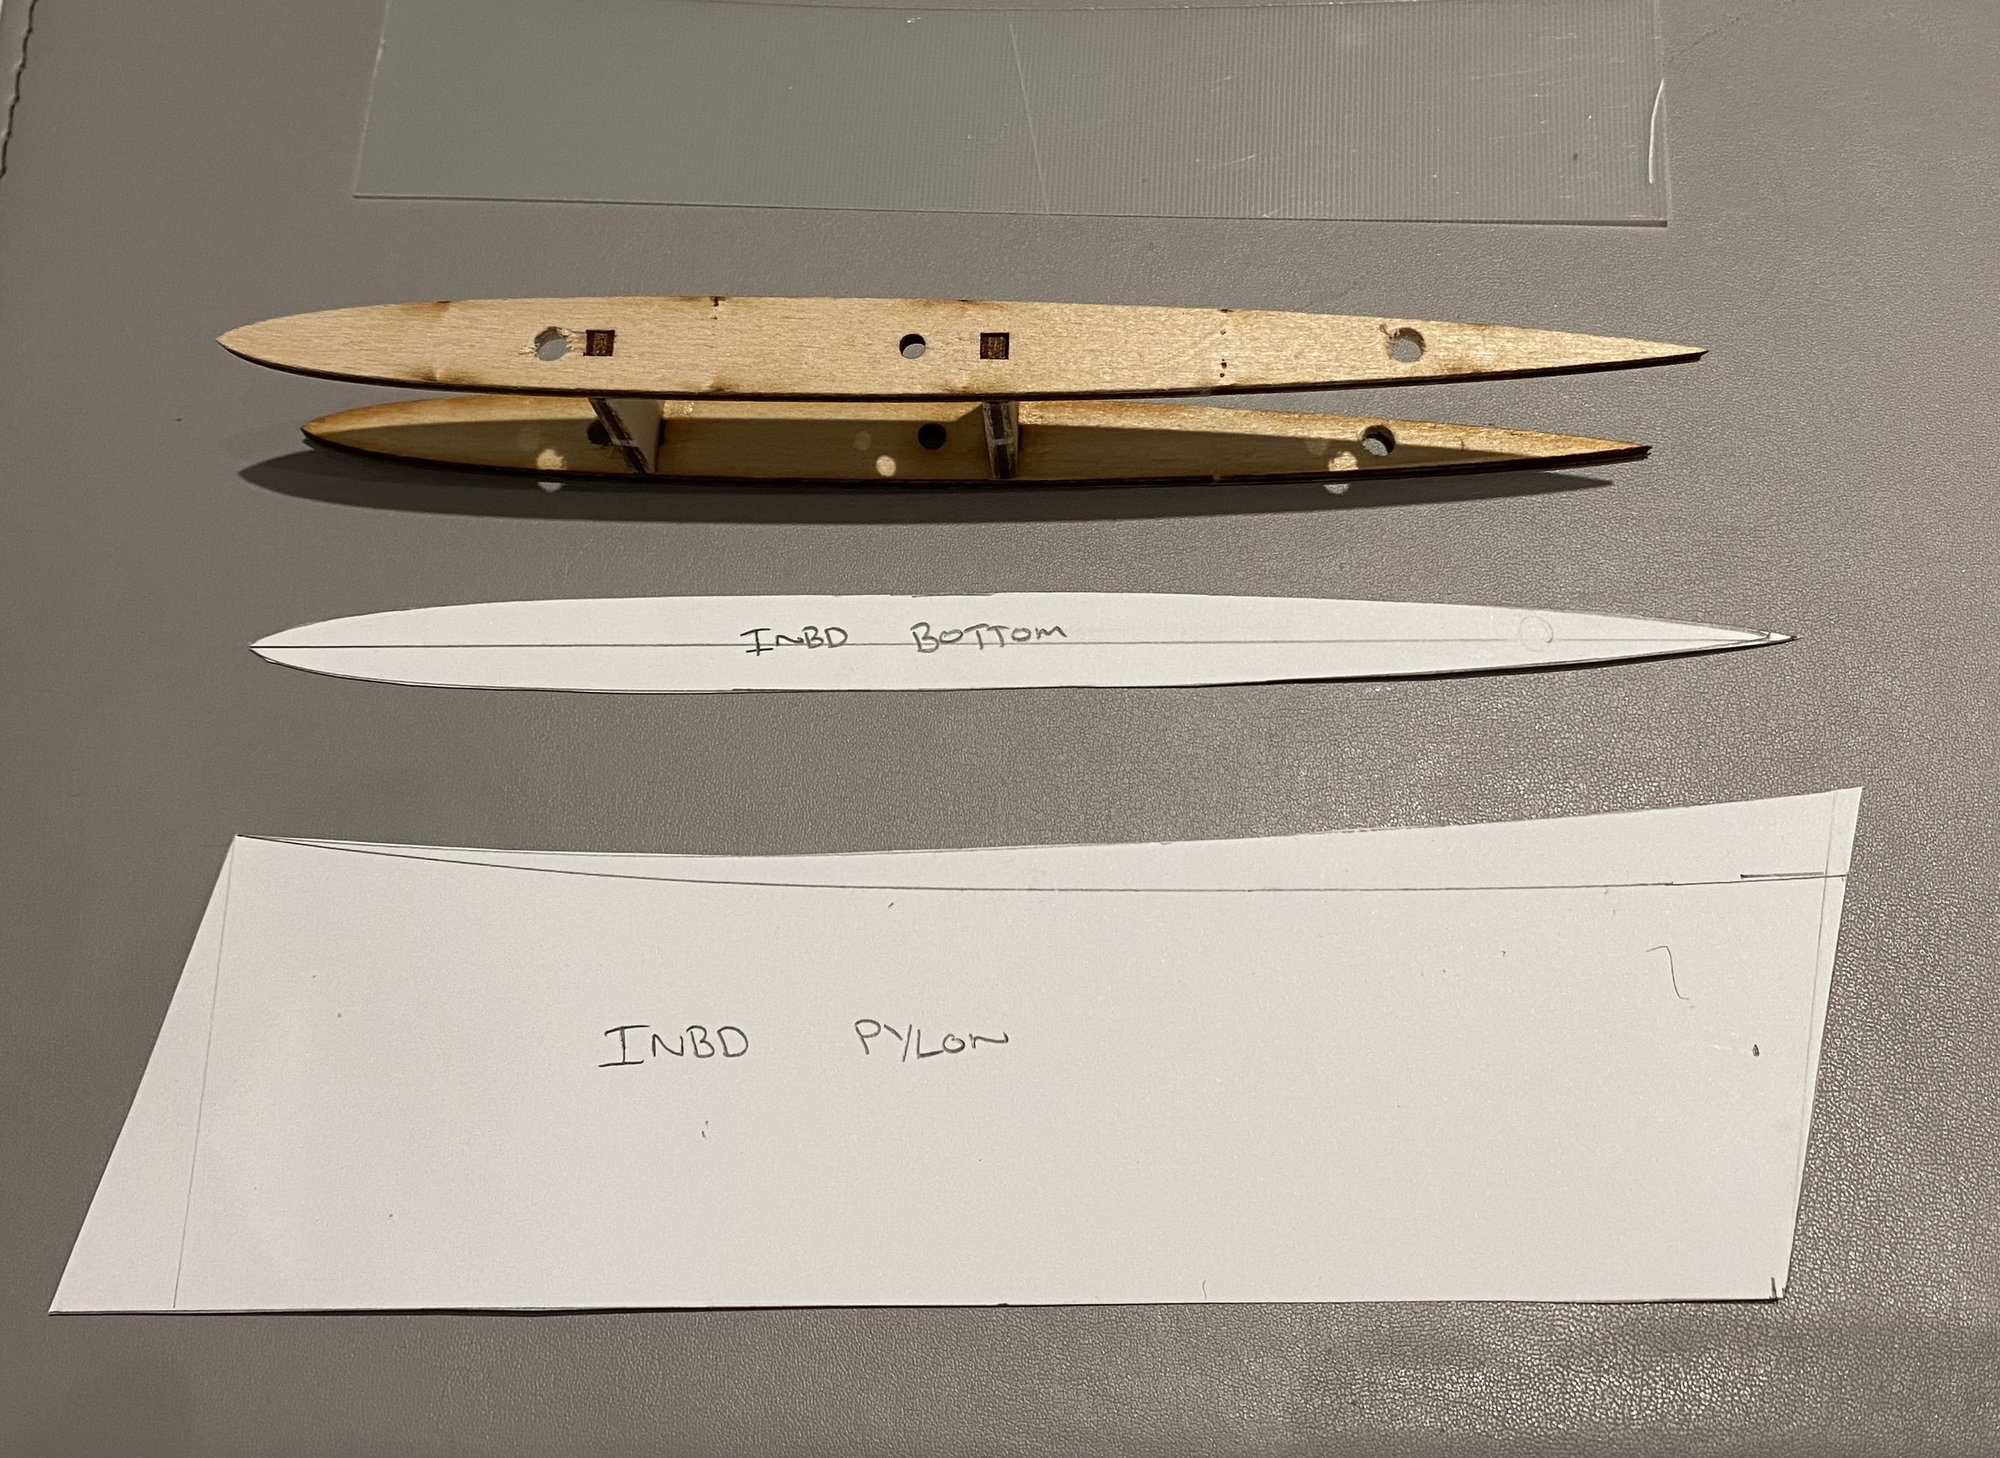
After some more research, the MR pylons are not correct for an F6 carrying the 230 Gal tank.
They are however correct for the outboard position so once they are finished, they will be getting mounted in the correct outboard position minus a drop tank.
I have drawn up the templates for the correct shape and size inboard pylons this evening and I had a trip over to the local model shop earlier to pick up some fresh superglue and epoxy to allow me to carry on with the build.
Next week I will cut the bits from proskin and make up the internal frame.
01-03-2024, 07:12 AM
#916
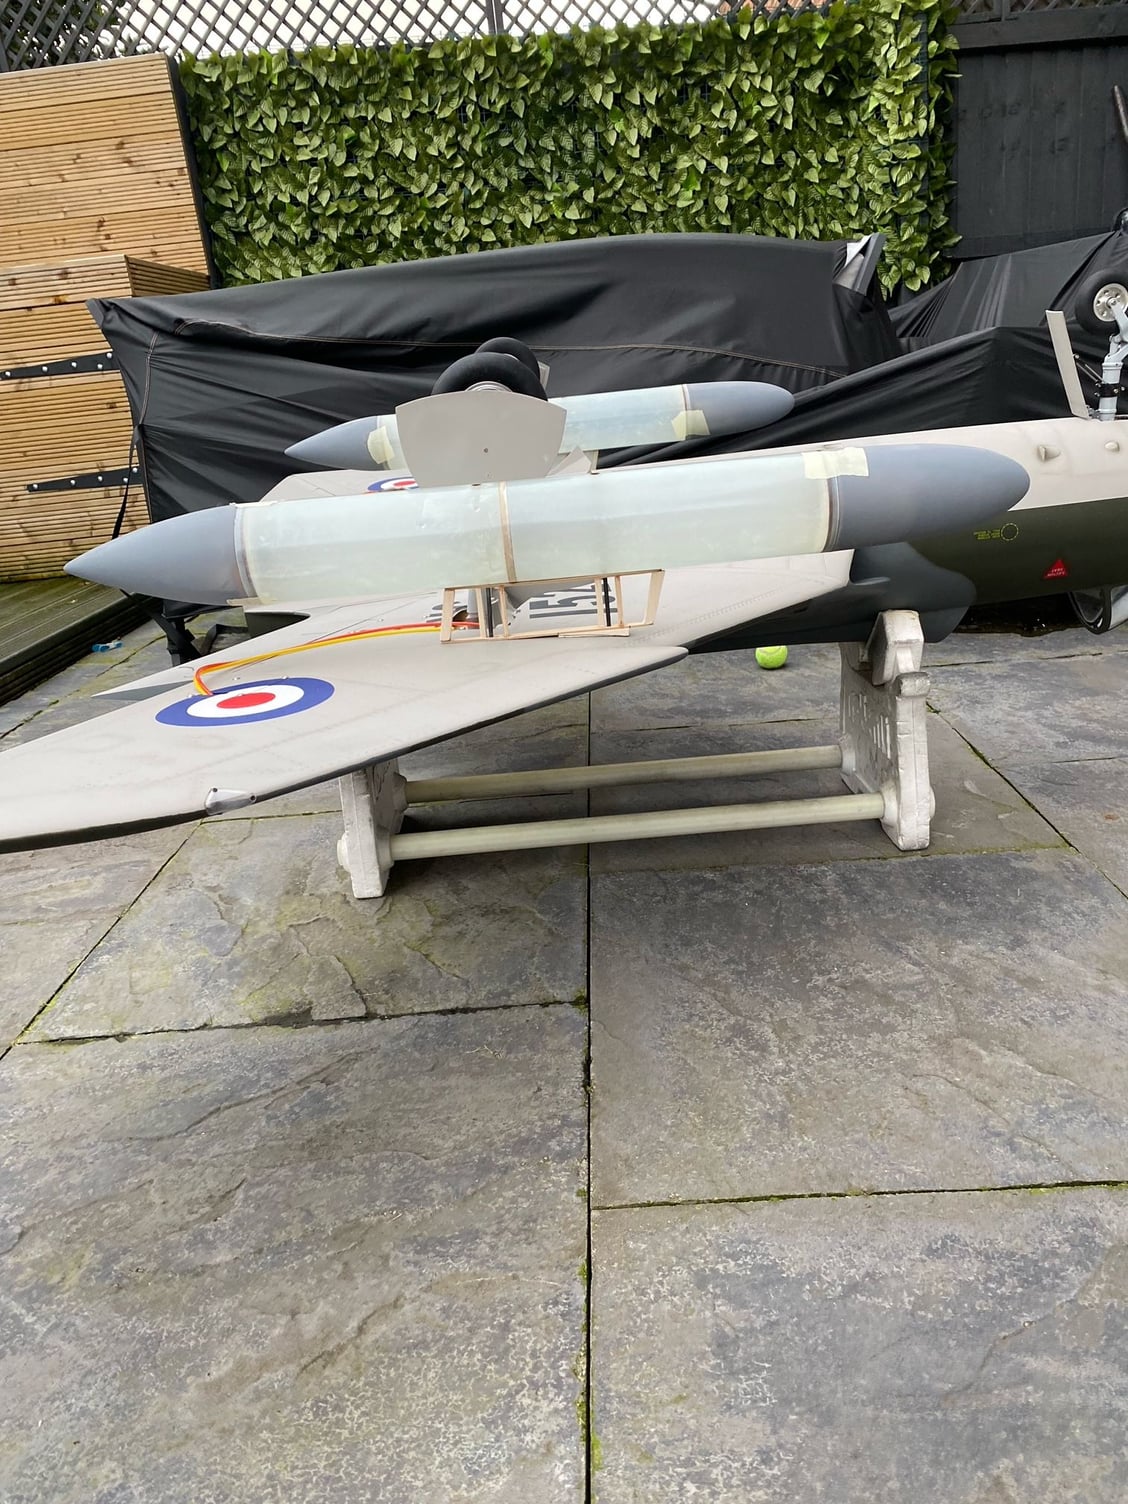
Nearly a year since I bought my Hunter and I'm sad I haven't got it ready to fly but I did finish off my Supermarine Swift, refurbed an Acro Wot and done some work on the big 230g drop tanks and pylons.
The MR drop tank kit isn't the easiest to put together but they do produce the correct shape tank and they are fairly lightweight. It doesn't help that I have changed the length of the tanks and also changed the inboard pylon to the correct size.
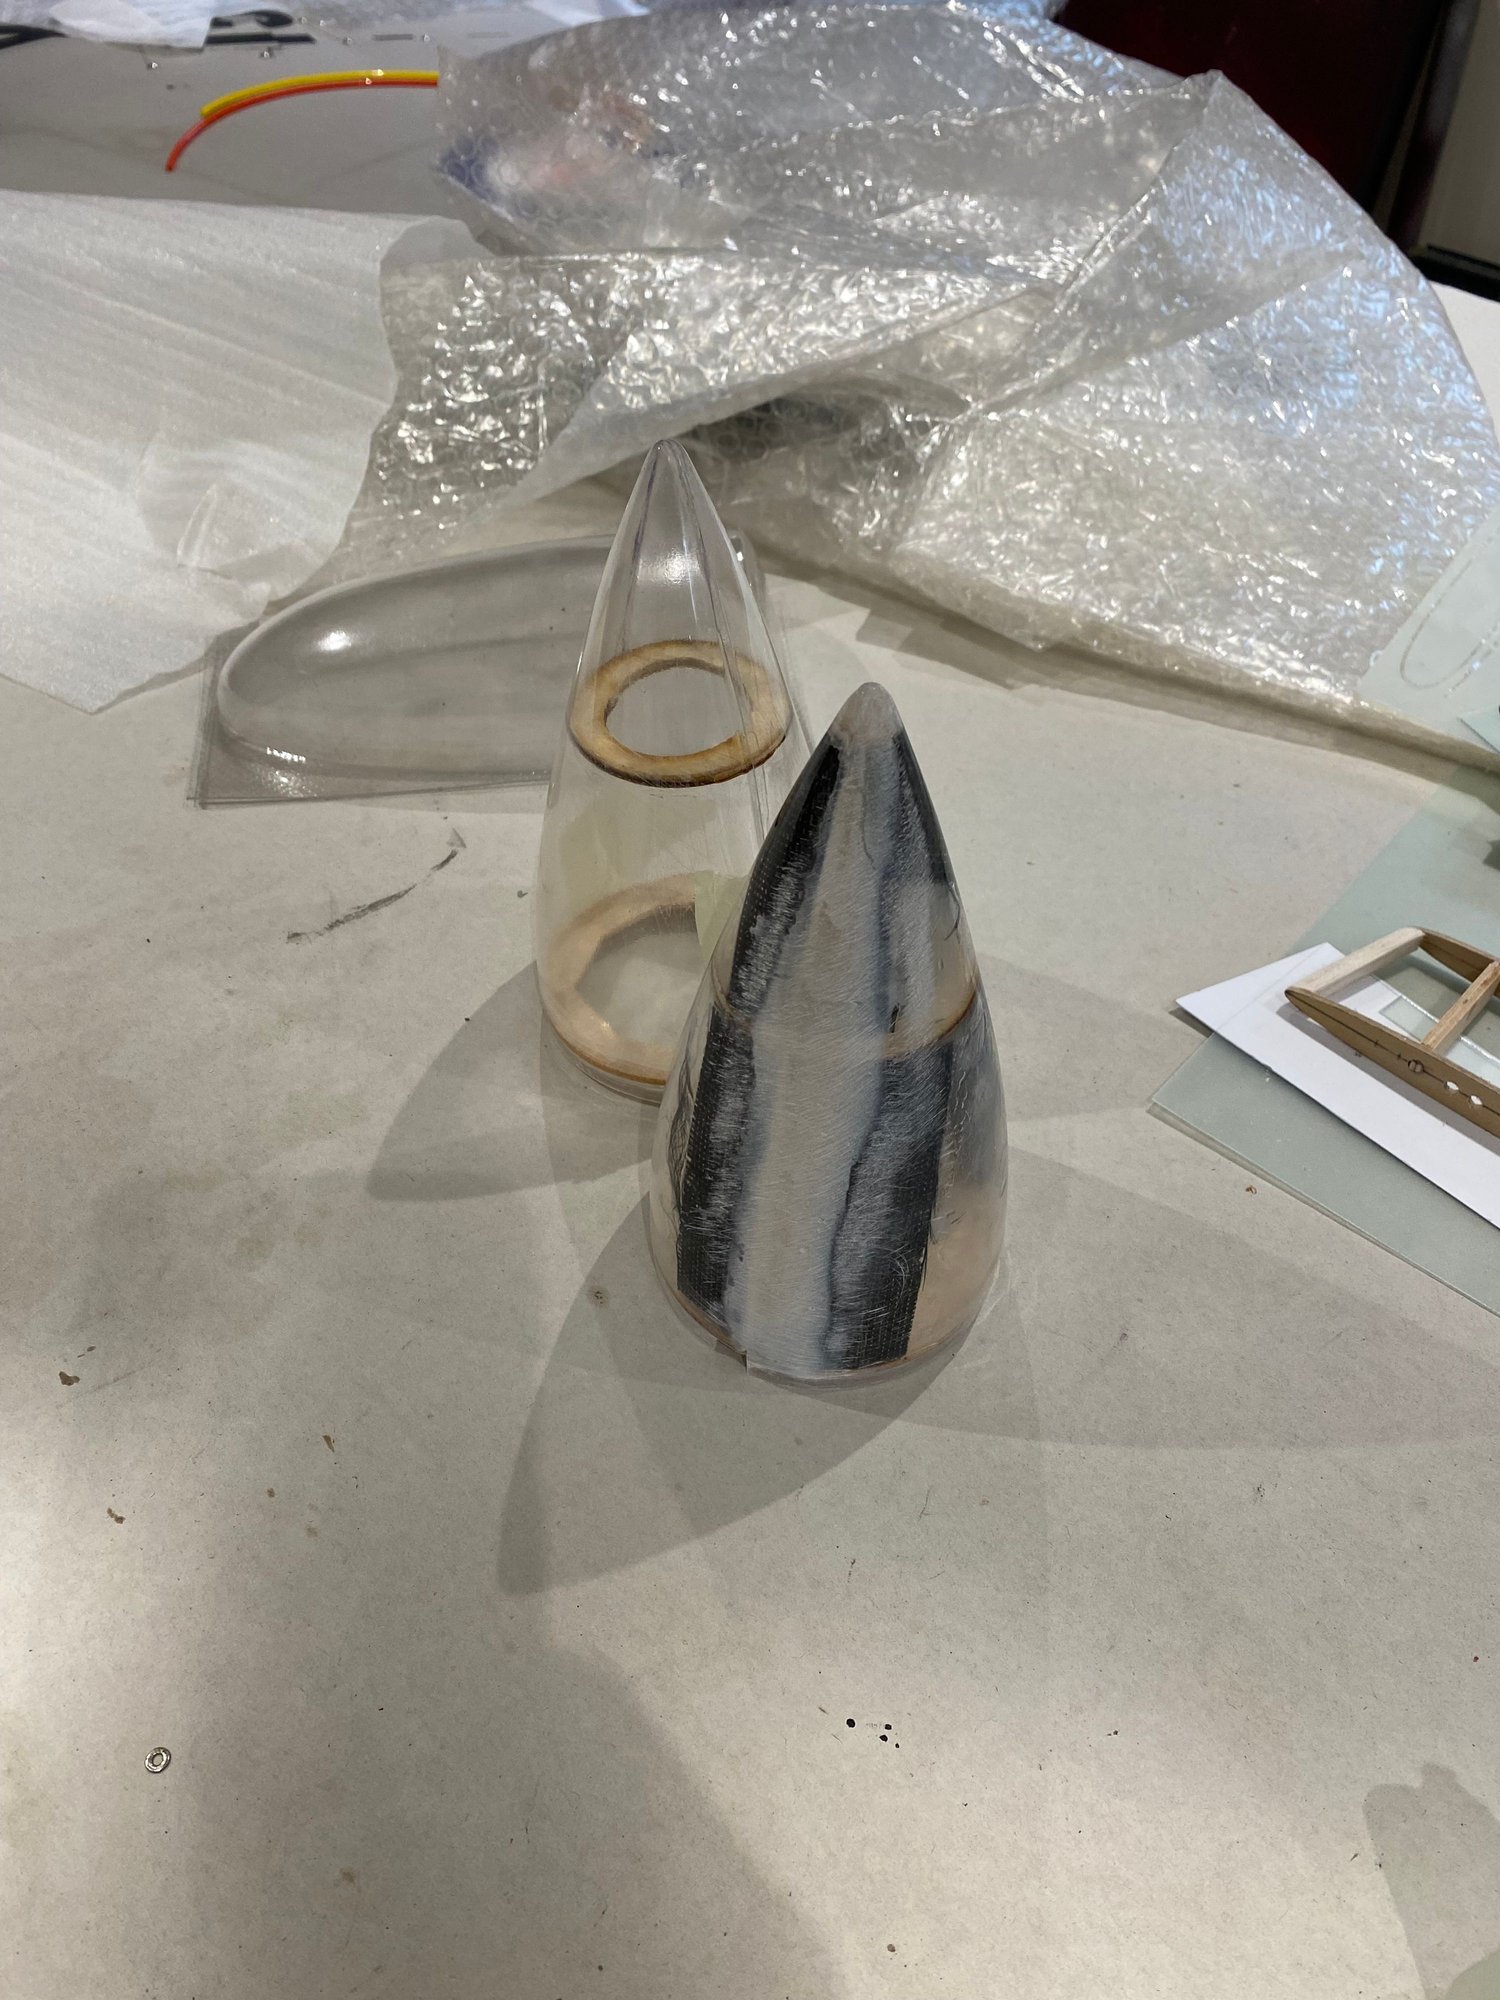
Below are the pictures of where I am unto with the tanks. I added some carbon across the internal joint on the front and rear sections and then I used some P38 body filler to smooth the external joint. Some work to do yet on them but they will look great when finished.
Supermarine Swift FR5 powered by an X60
Test fitted together prior to adding the carbon fibre
The MR drop tank kit isn't the easiest to put together but they do produce the correct shape tank and they are fairly lightweight. It doesn't help that I have changed the length of the tanks and also changed the inboard pylon to the correct size.
Below are the pictures of where I am unto with the tanks. I added some carbon across the internal joint on the front and rear sections and then I used some P38 body filler to smooth the external joint. Some work to do yet on them but they will look great when finished.
Supermarine Swift FR5 powered by an X60
Test fitted together prior to adding the carbon fibre
01-18-2024, 11:37 AM
#917
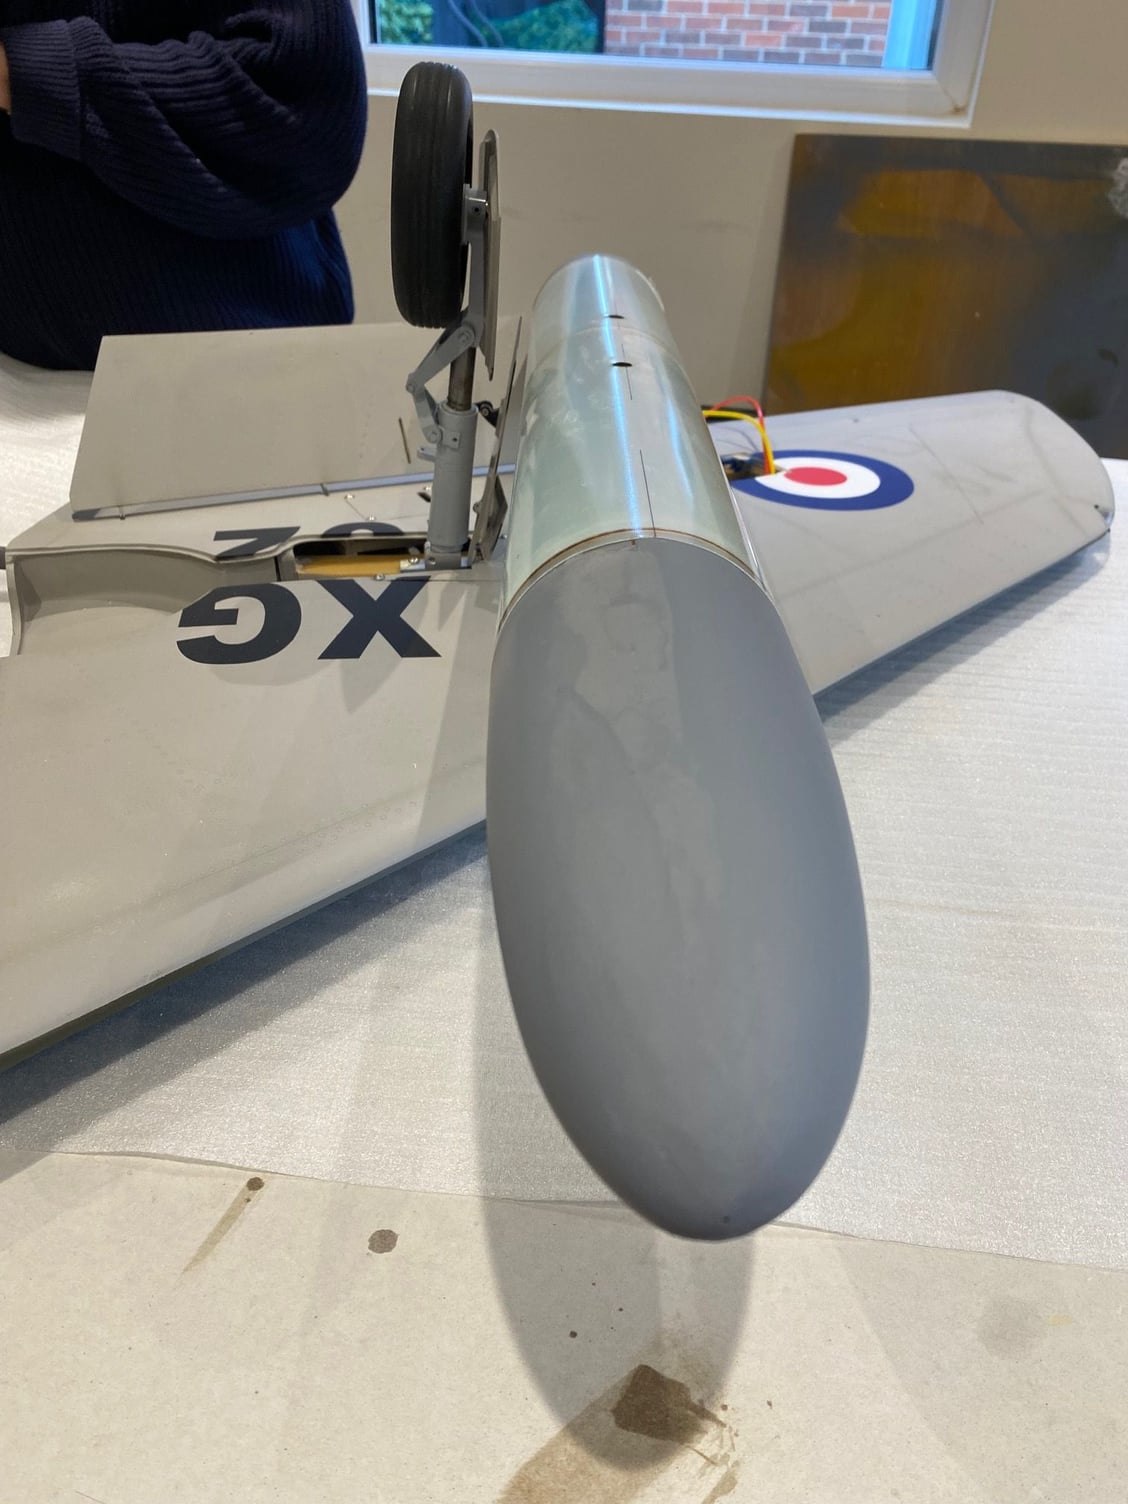
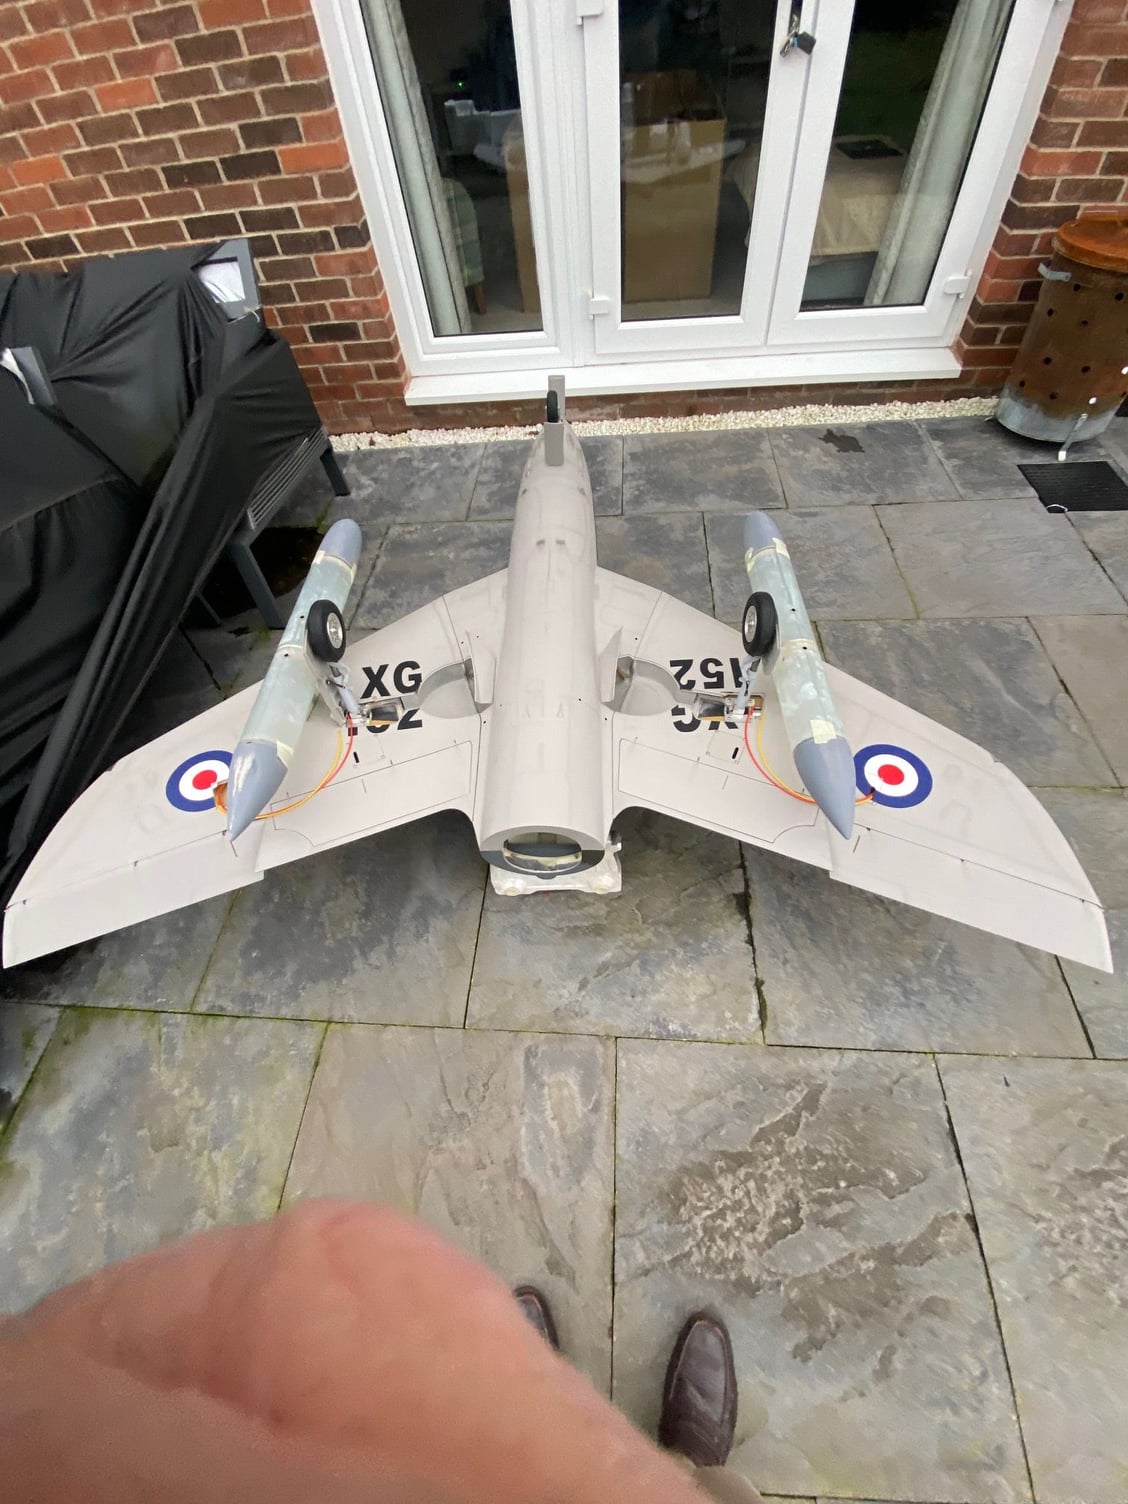
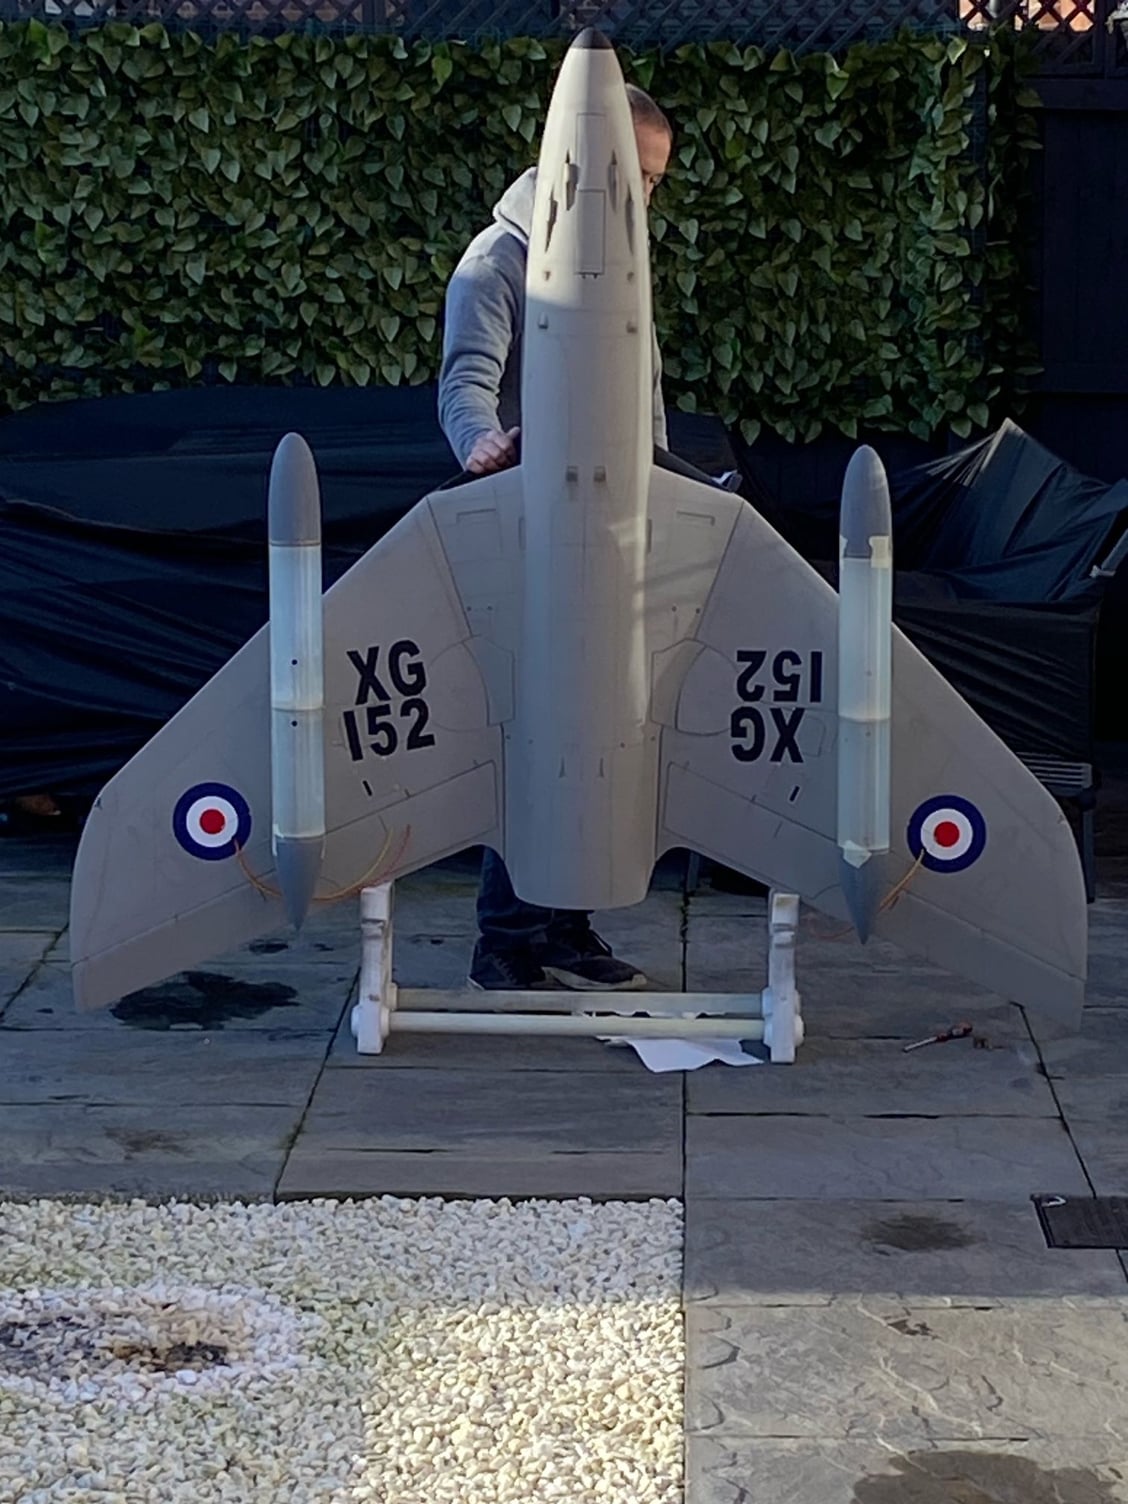
Finally got the tanks fitted to the model. It took me quite a while to be happy with the alignment (photo of the model vertical does show the left tank still slightly off)
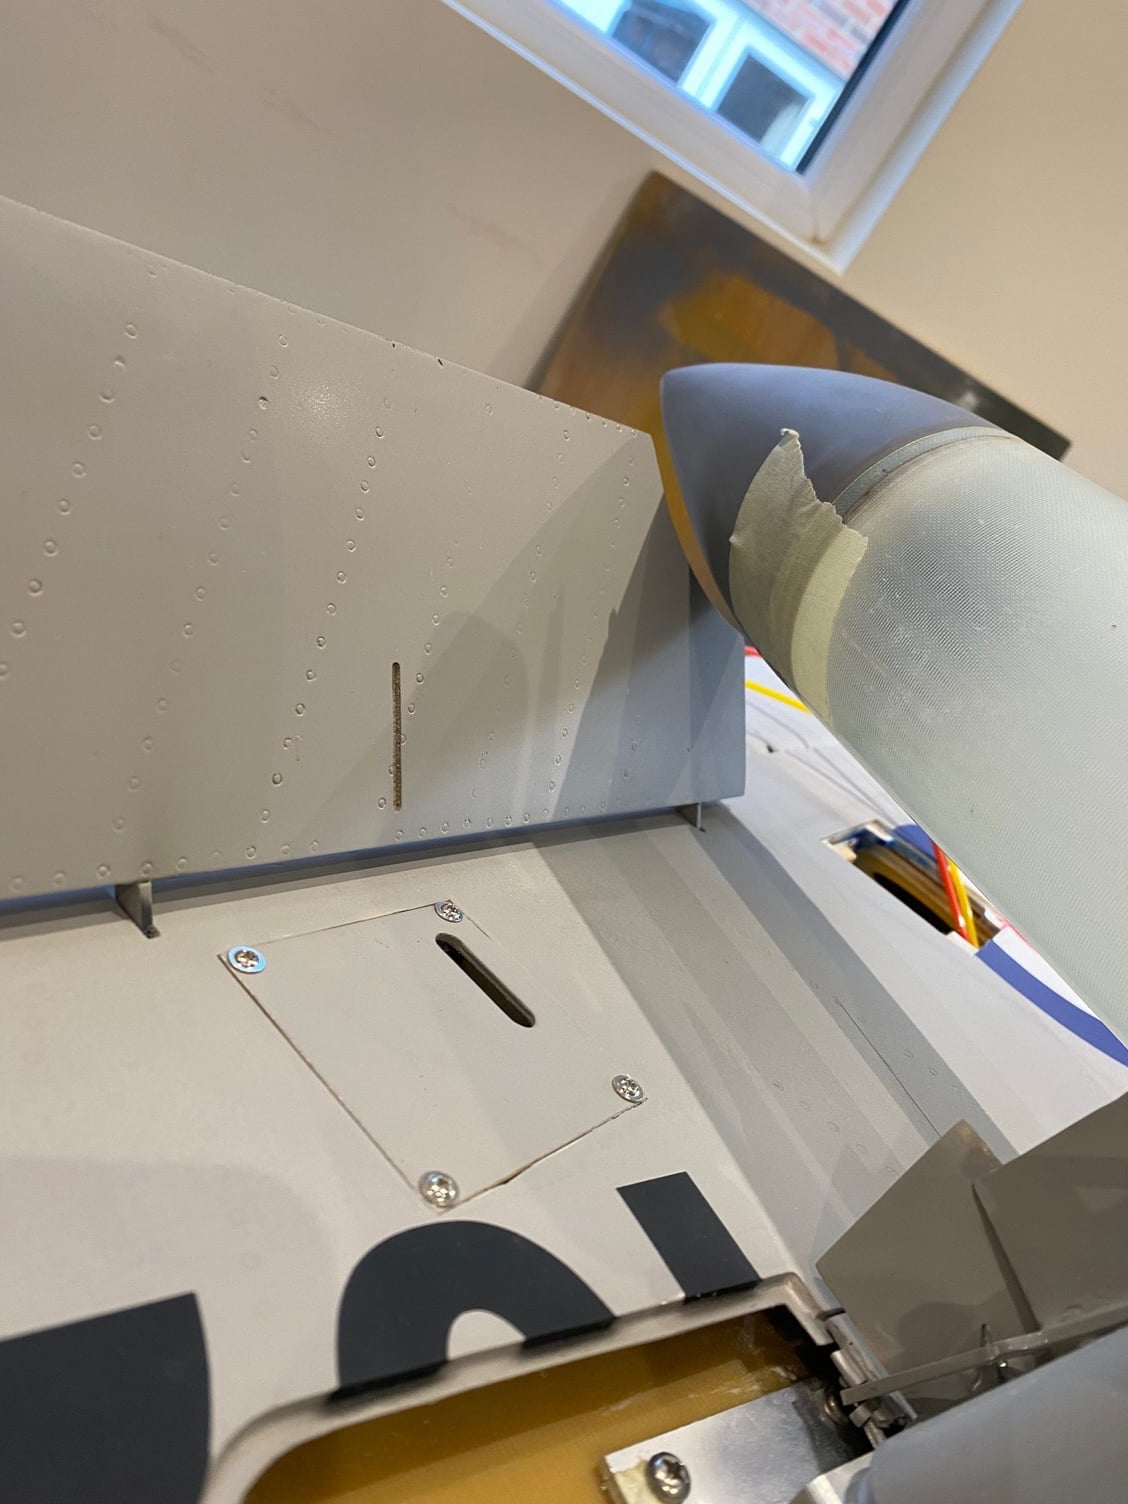
The last job is to work out how to make the sway brace for the tanks removable and then I will be able to start the repaint.
I must admit that I'm looking forward to removing the wrong font used on the codes and to also correct the alignment of the underwing codes.
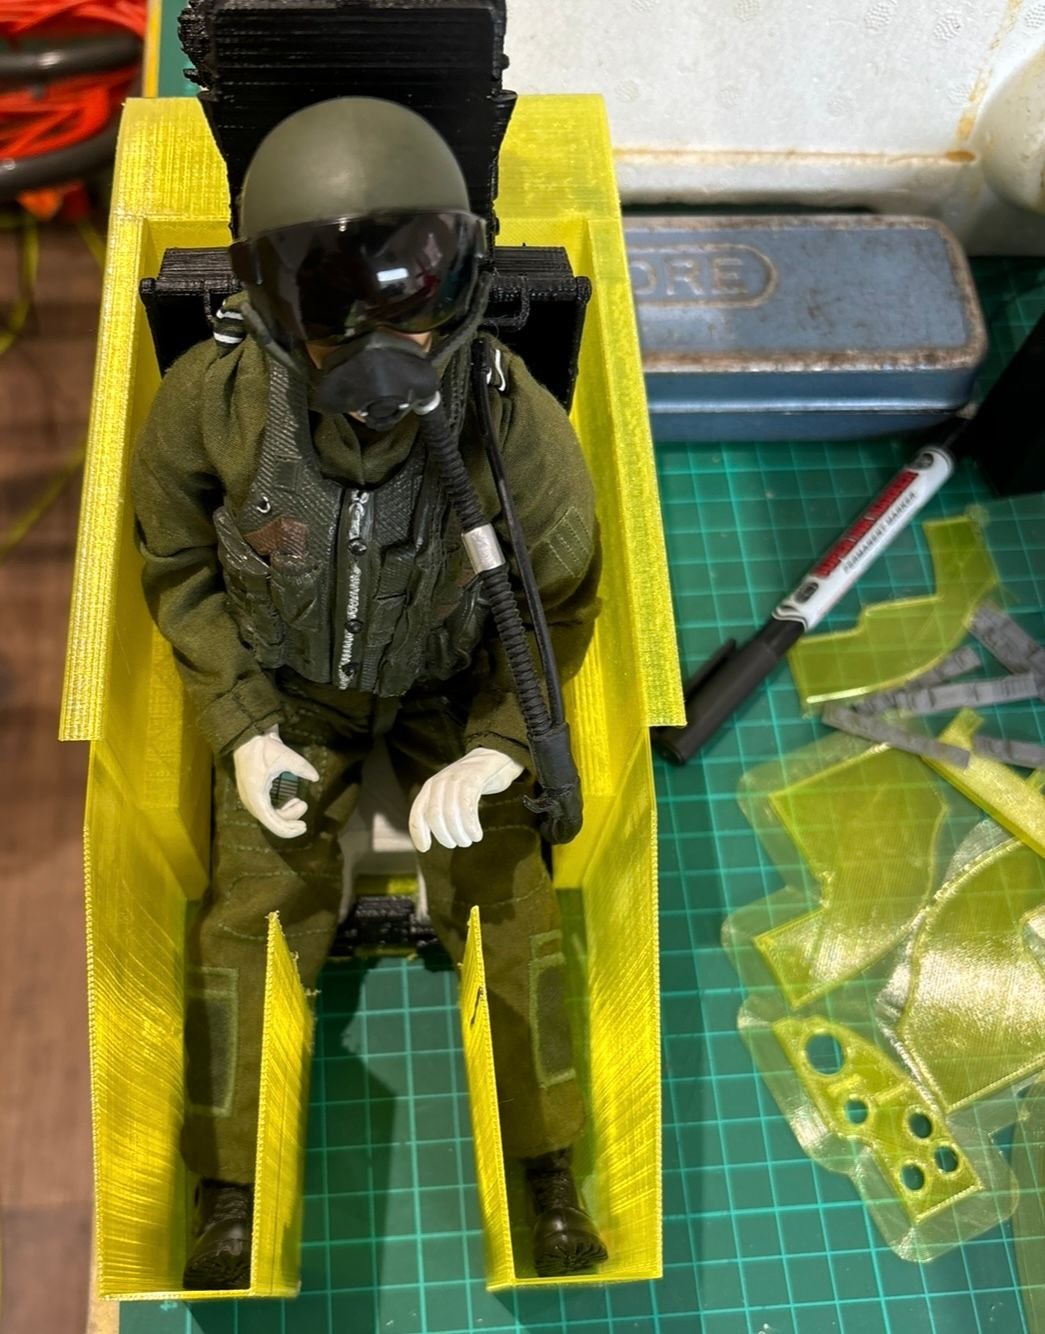
Anyway I have moved onto servo fitting and found out my kit has no black plastic 'L' servo mounts so I am making my own out of alloy that will tap and drill. I have also found 50% of the screws holding the servo covers in place all chewed up, I have had to resort to using a drill and removing the heads.
It's not progressing as quickly as I would have liked but I am still hopeful for it flying in April.
The last job is to work out how to make the sway brace for the tanks removable and then I will be able to start the repaint.
I must admit that I'm looking forward to removing the wrong font used on the codes and to also correct the alignment of the underwing codes.
Anyway I have moved onto servo fitting and found out my kit has no black plastic 'L' servo mounts so I am making my own out of alloy that will tap and drill. I have also found 50% of the screws holding the servo covers in place all chewed up, I have had to resort to using a drill and removing the heads.
It's not progressing as quickly as I would have liked but I am still hopeful for it flying in April.
Last edited by paul_h300; 01-18-2024 at 01:45 PM.
The following 2 users liked this post by paul_h300:
DenisFerrari (01-27-2024),
yeahbaby (01-18-2024)
03-26-2024, 12:46 PM
#918
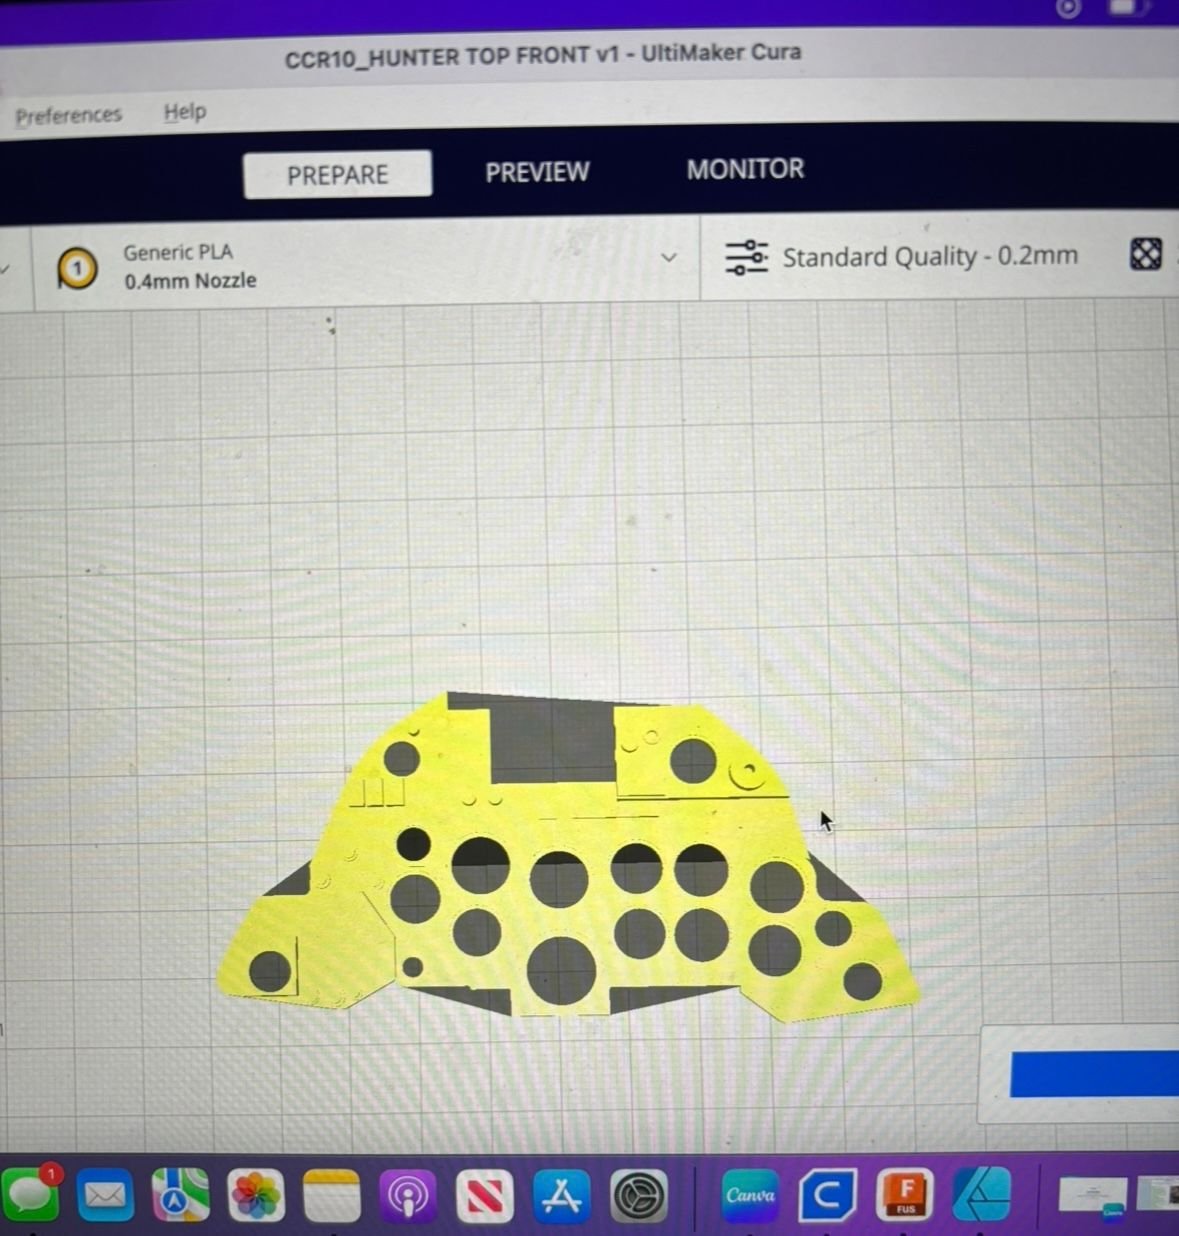
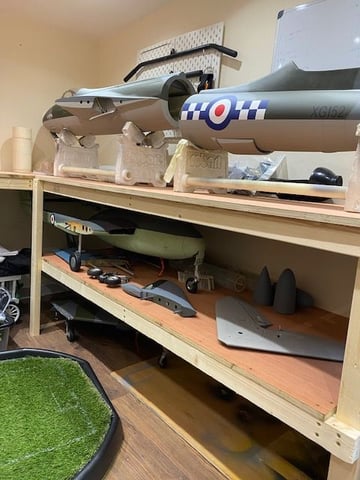
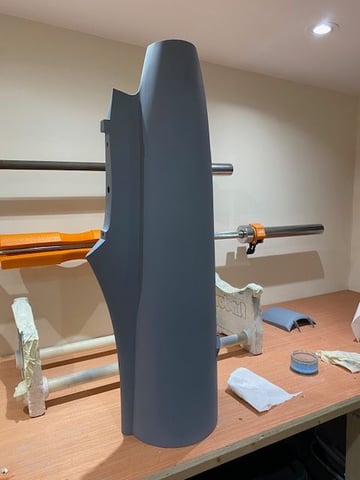
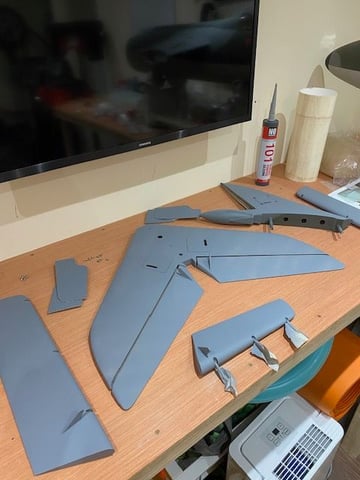
Back to work on the Hunter after building some new workbenches in the shed to help with storage space.
Servo's are all fitted and both wings are complete and ready to have the insignia rubbed down and then a coat of primer.
I removed the air brake as I wasn't happy with the screws holding it in place, this also gave me the opportunity to paint the rear fuselage section properly.
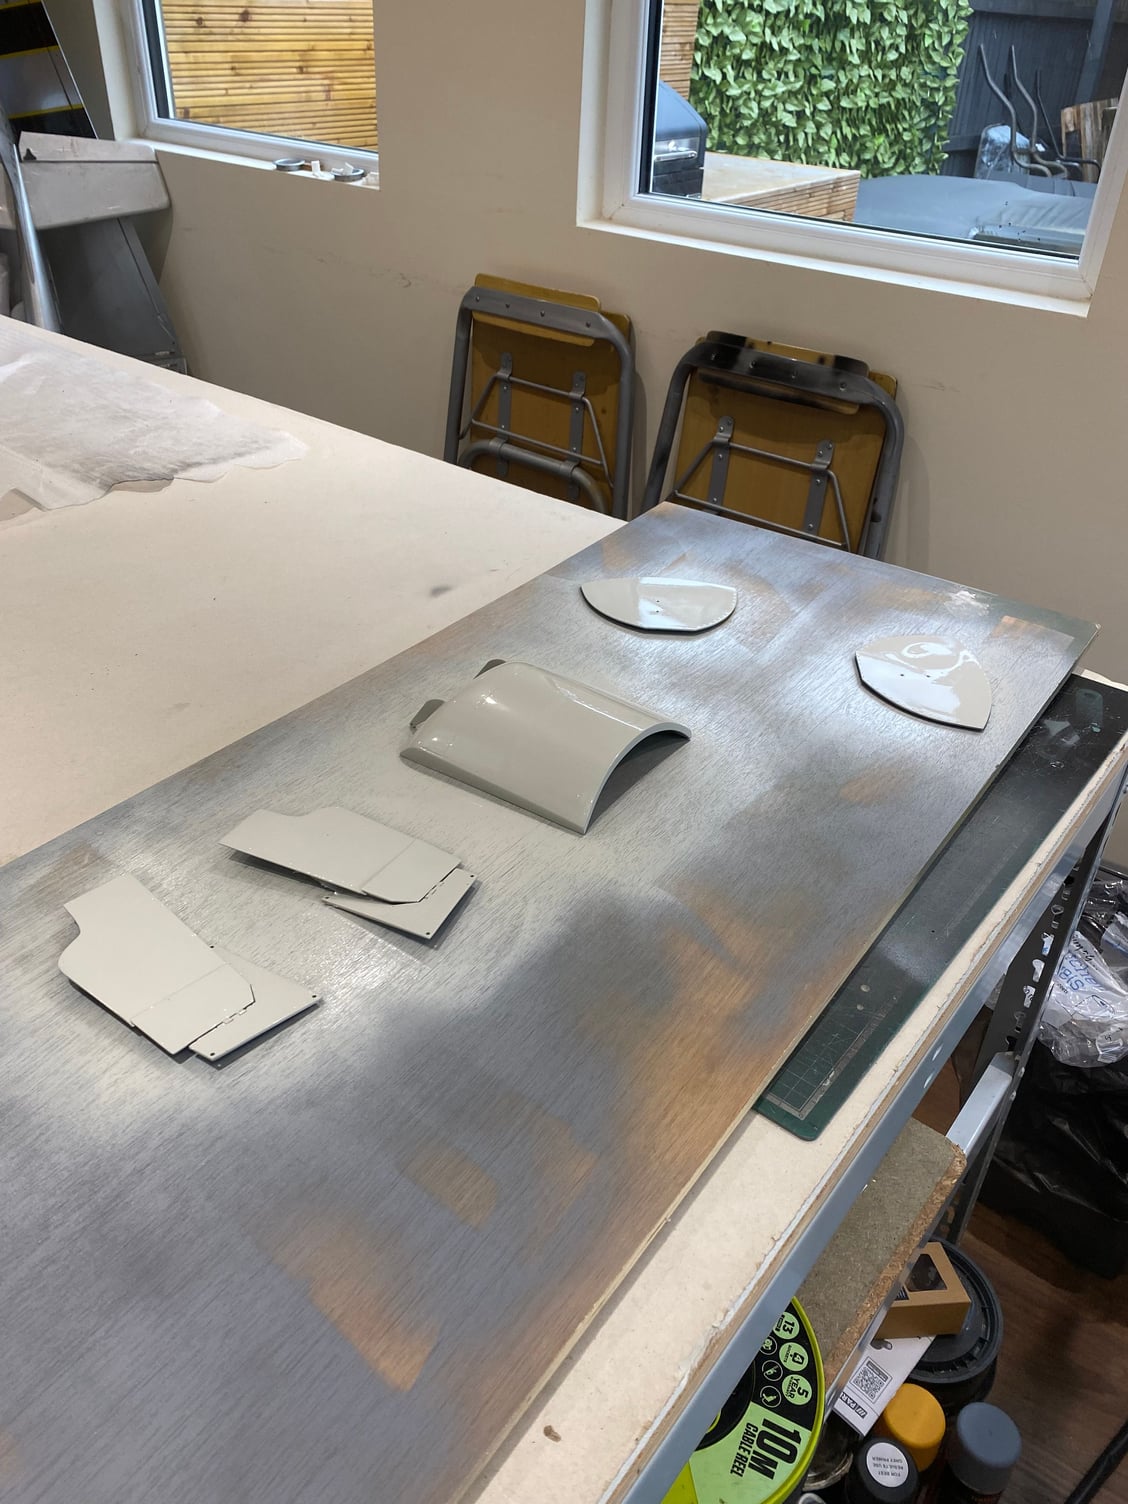
First picture is the new workbenches with the Hunter waiting to be worked on
The other two pictures are the first bits that have been sprayed in primer (made the most of a few hours of sunshine)
Next job is to start planning the equipment installation in the nose section.
Servo's are all fitted and both wings are complete and ready to have the insignia rubbed down and then a coat of primer.
I removed the air brake as I wasn't happy with the screws holding it in place, this also gave me the opportunity to paint the rear fuselage section properly.
First picture is the new workbenches with the Hunter waiting to be worked on
The other two pictures are the first bits that have been sprayed in primer (made the most of a few hours of sunshine)
Next job is to start planning the equipment installation in the nose section.
04-10-2024, 11:56 AM
#919
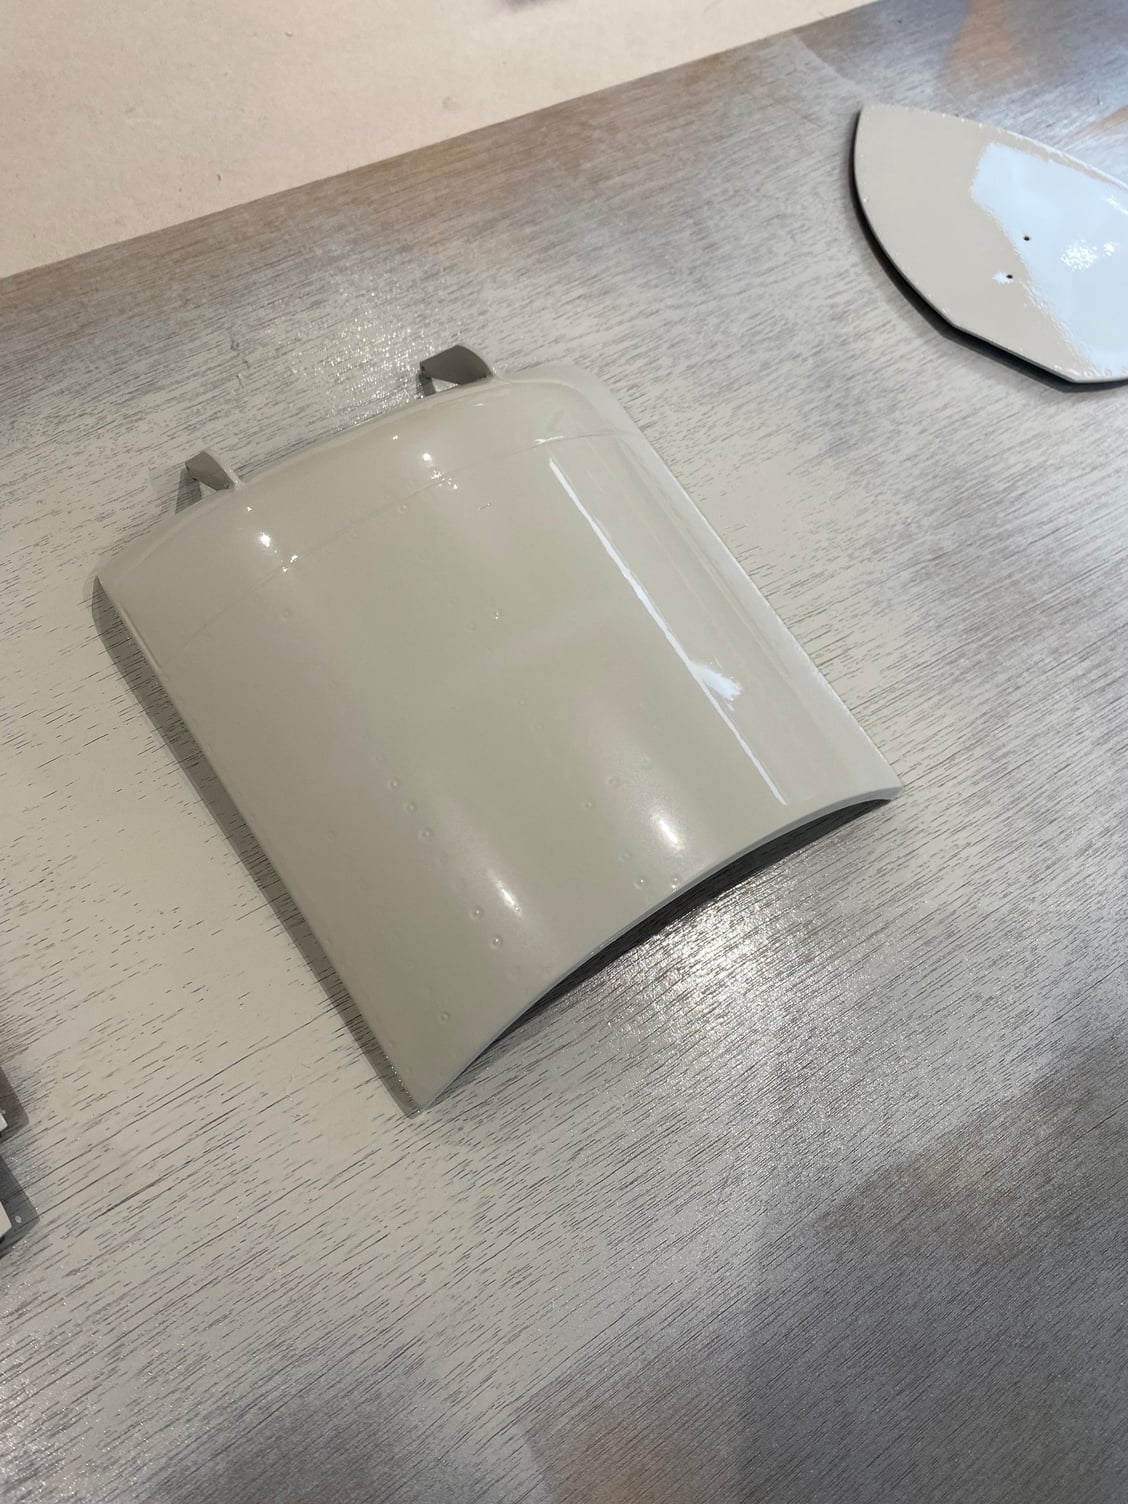
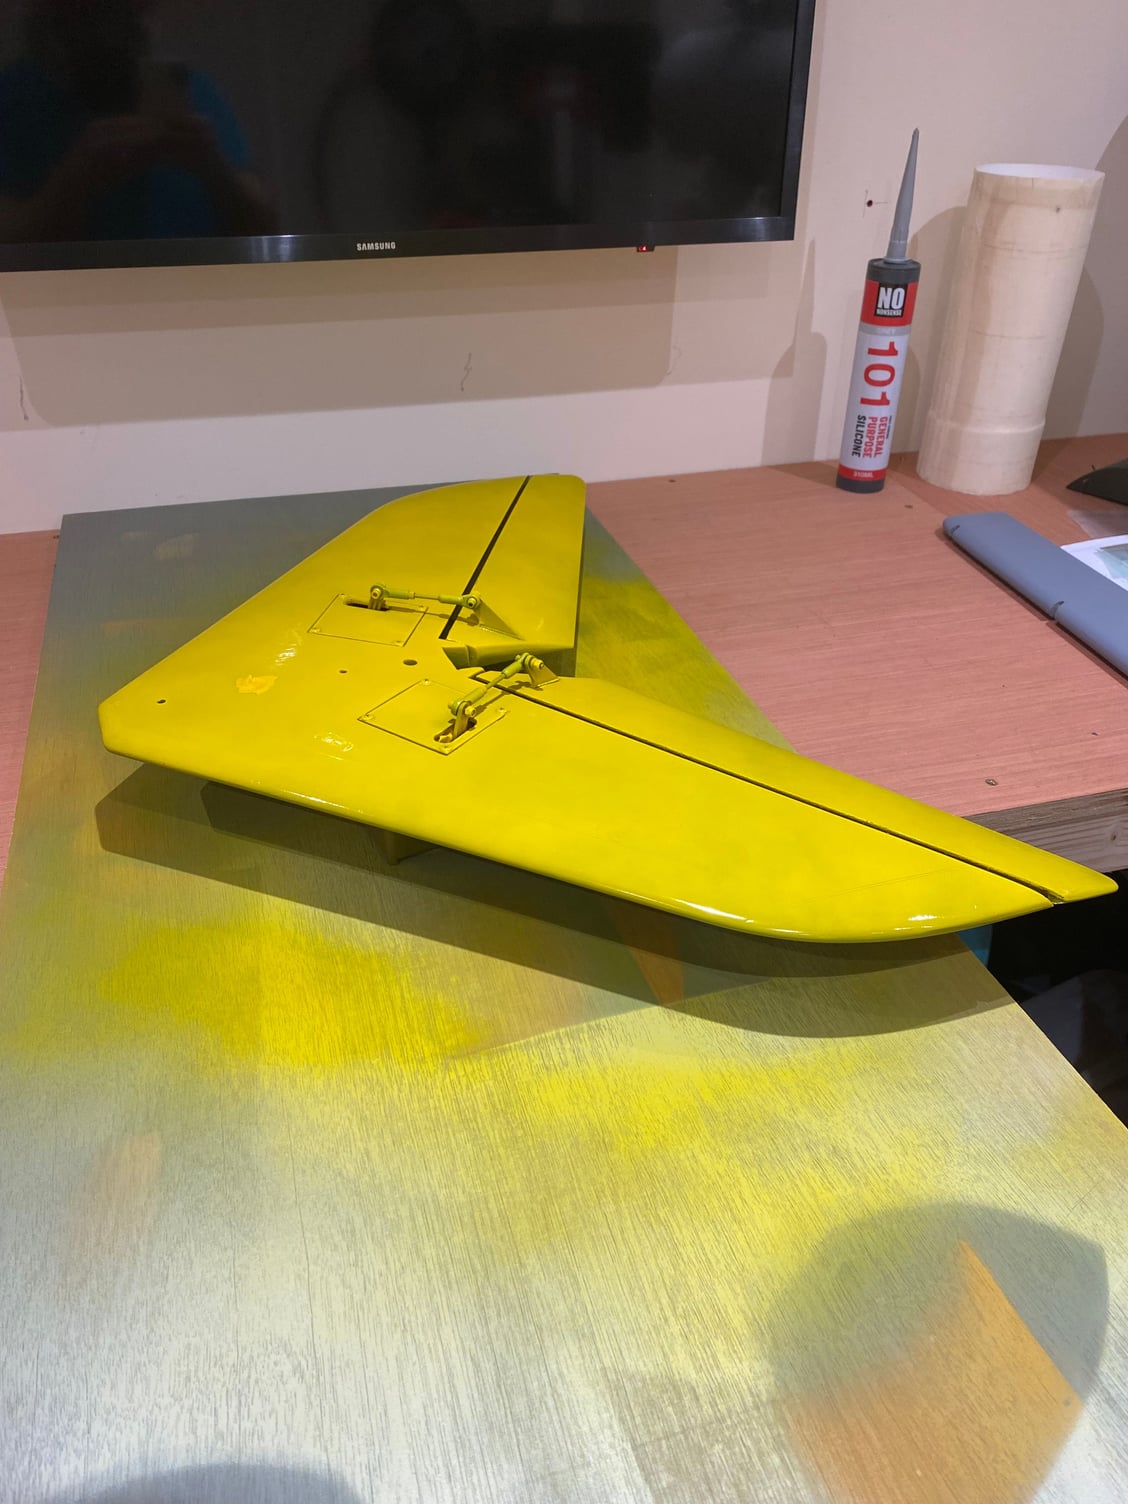
Been plodding on slowly with the Hunter. I have started painting some bits in the correct colour light grey and also got some yellow on the tail plane and rudder. The yellow is going to need another coat as it has dried slightly patchy.
I am waiting on some intairco fuel fittings to arrive and then I can crack on with plumbing the tanks and start routing the air lines through the fuselage.
I am waiting on some intairco fuel fittings to arrive and then I can crack on with plumbing the tanks and start routing the air lines through the fuselage.
05-28-2024, 08:45 AM
#920
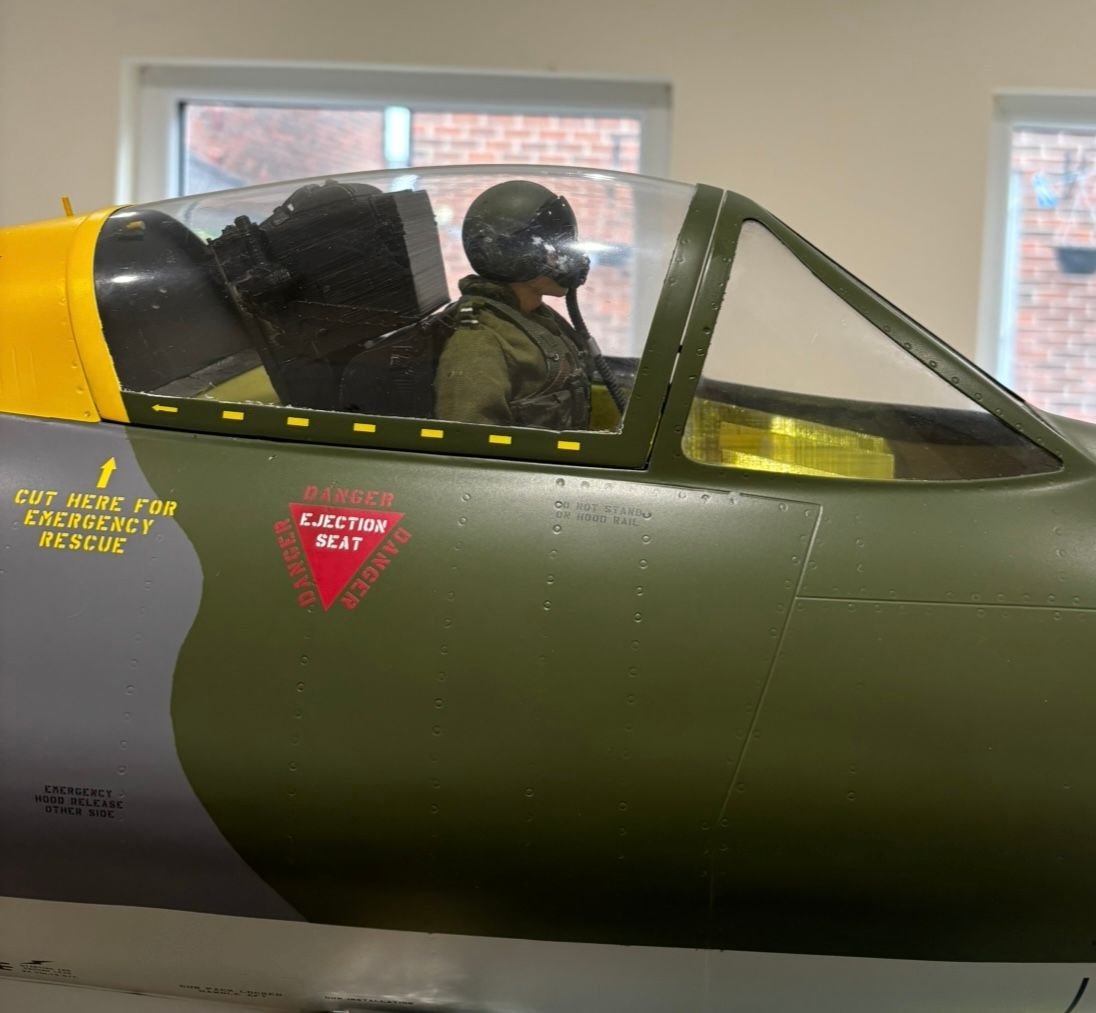
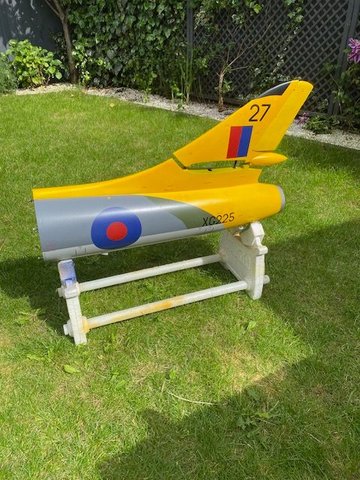
I have been making progress with the Hunter. Fuselage is now painted and clear coated in satin.
Paint maks and service stencil dry rubs were produced by Fliteline Graphics here in the UK. As usual they are excellent and really finish off the model.
Next task is to start fitting the fuselage out and paint the wings.
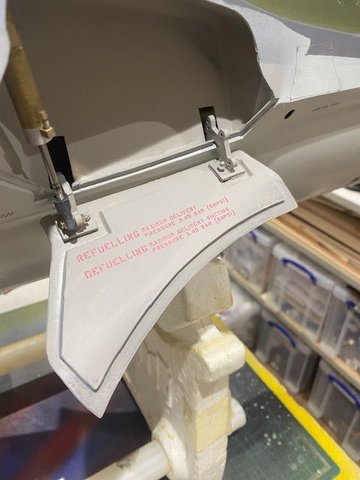

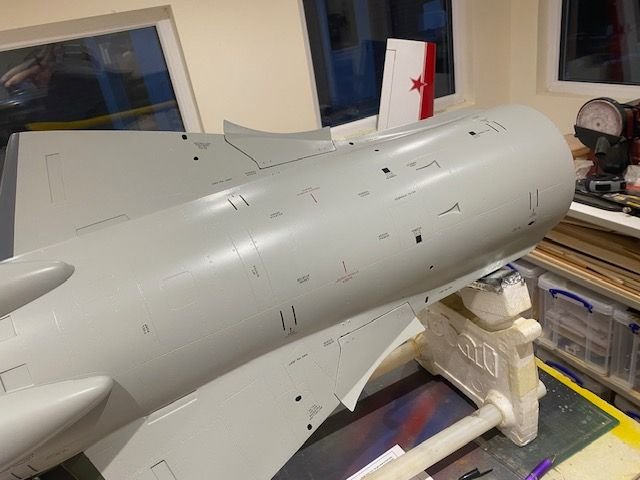
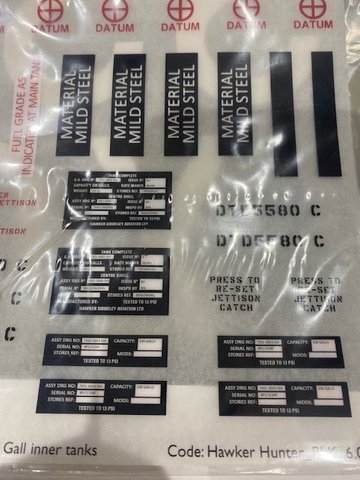
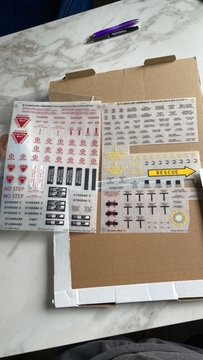
Paint maks and service stencil dry rubs were produced by Fliteline Graphics here in the UK. As usual they are excellent and really finish off the model.
Next task is to start fitting the fuselage out and paint the wings.
07-10-2024, 08:39 AM
#923
Been plodding away slowly on the Hunter as and when I can.
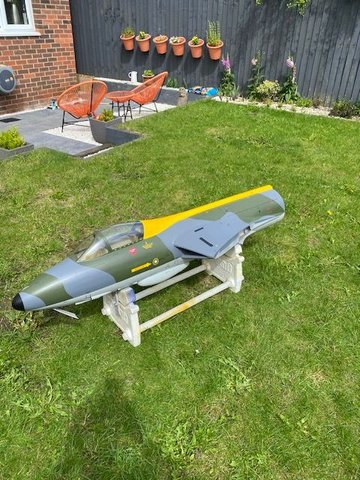
Got the turbine and bypass installed so I decided to put the wings on and check the air system over.
I am stuck now as I am waiting on a new lead for the turbine as the supplied cable is too short for the run in the fuzz.
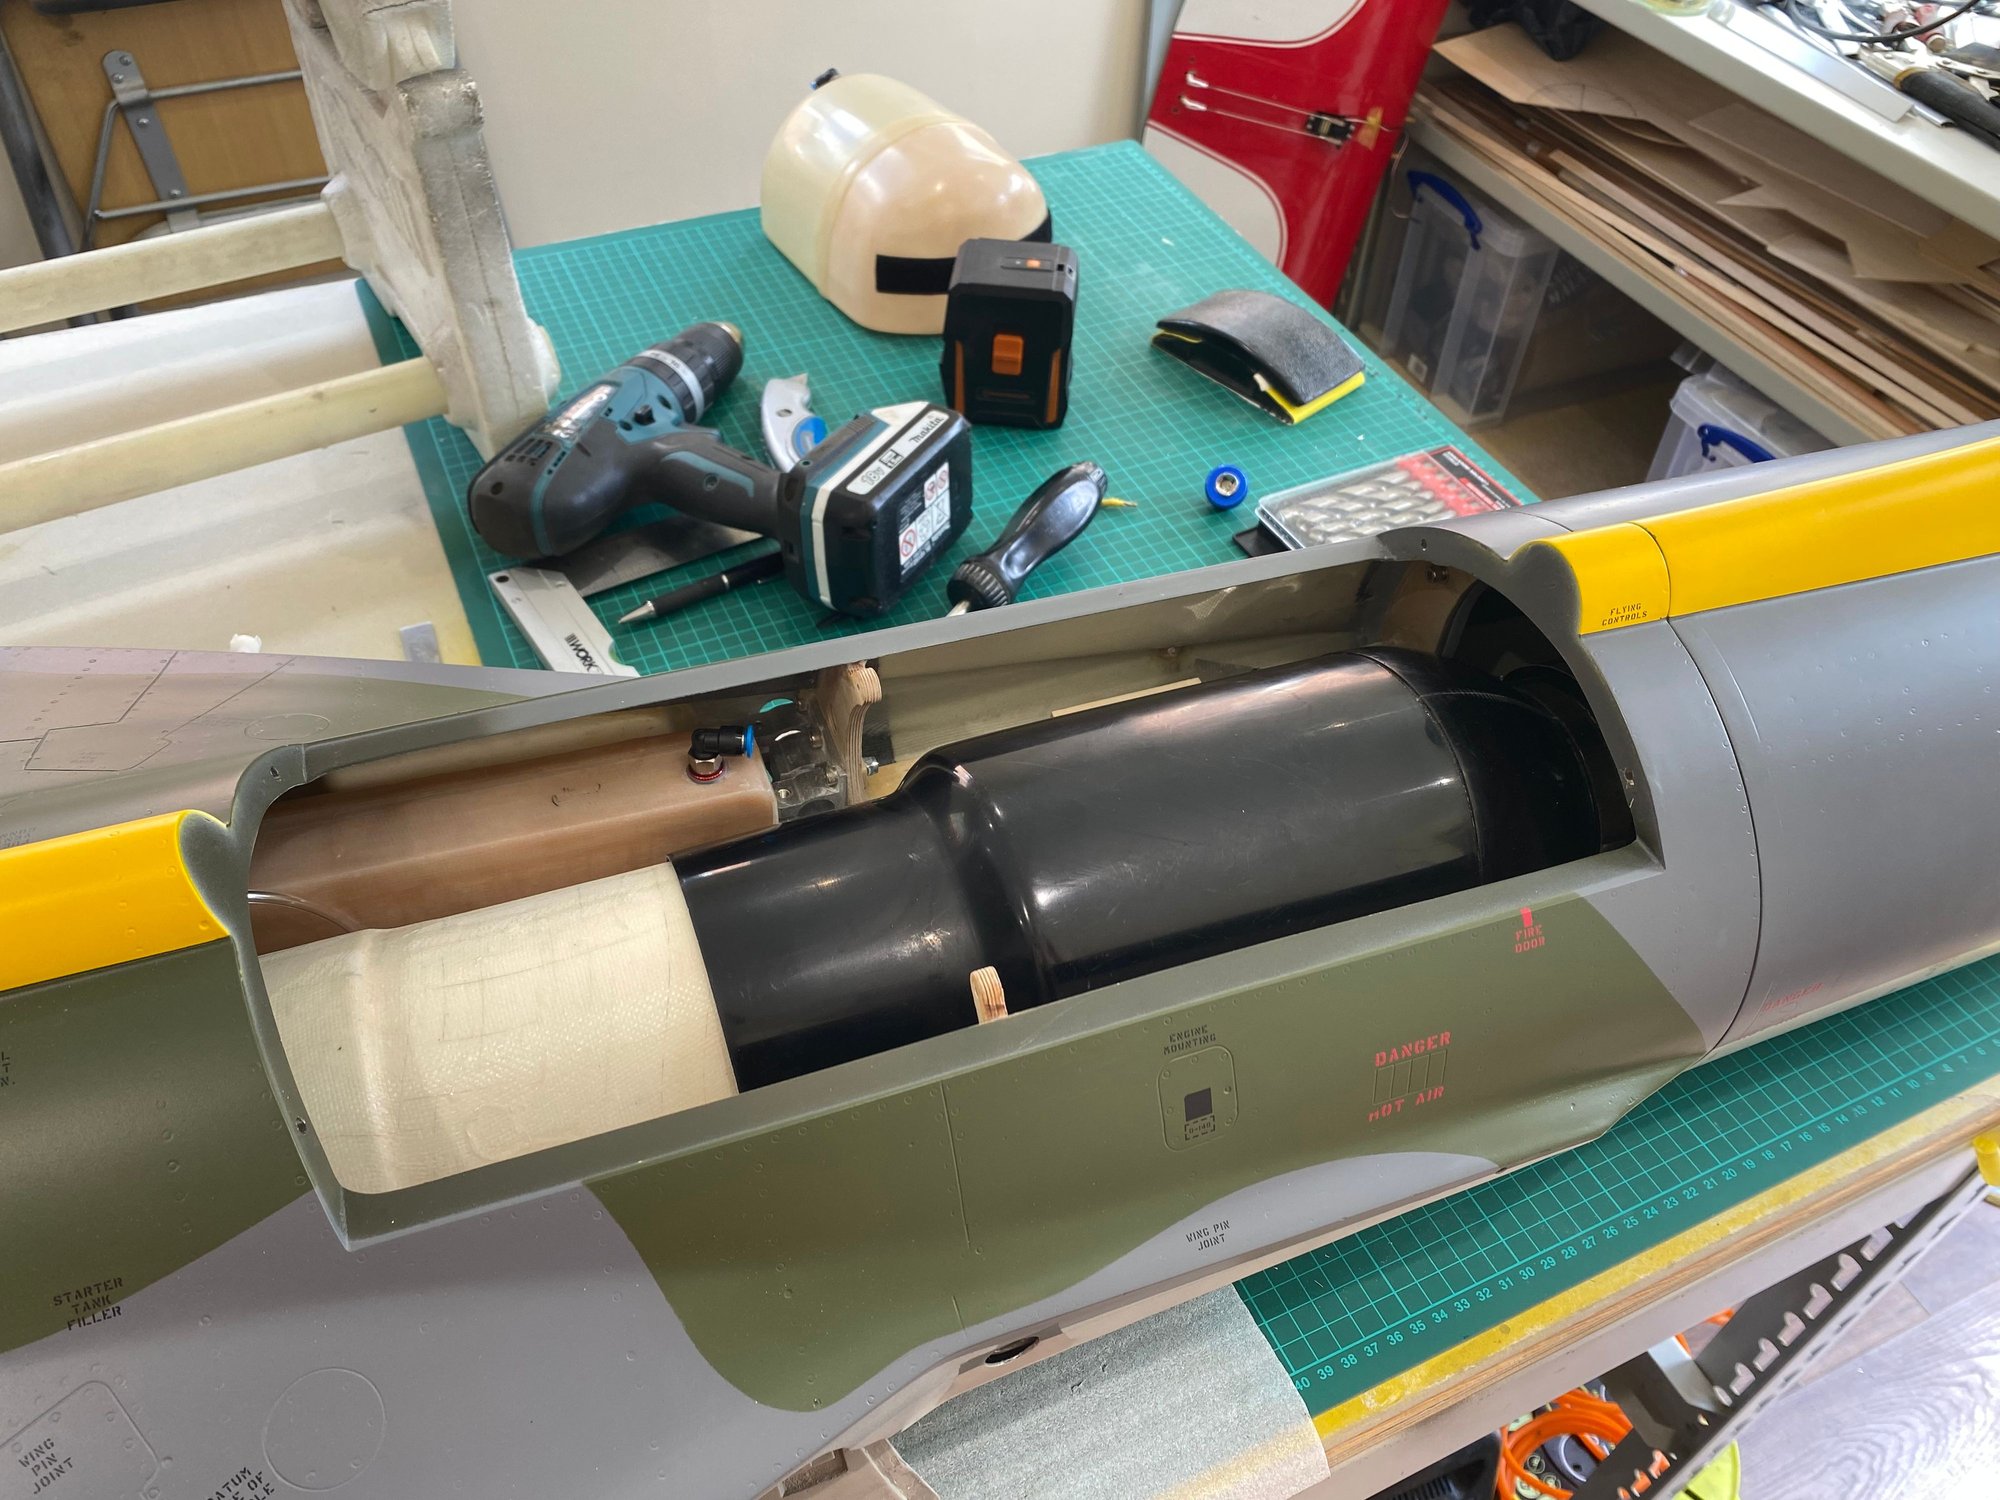
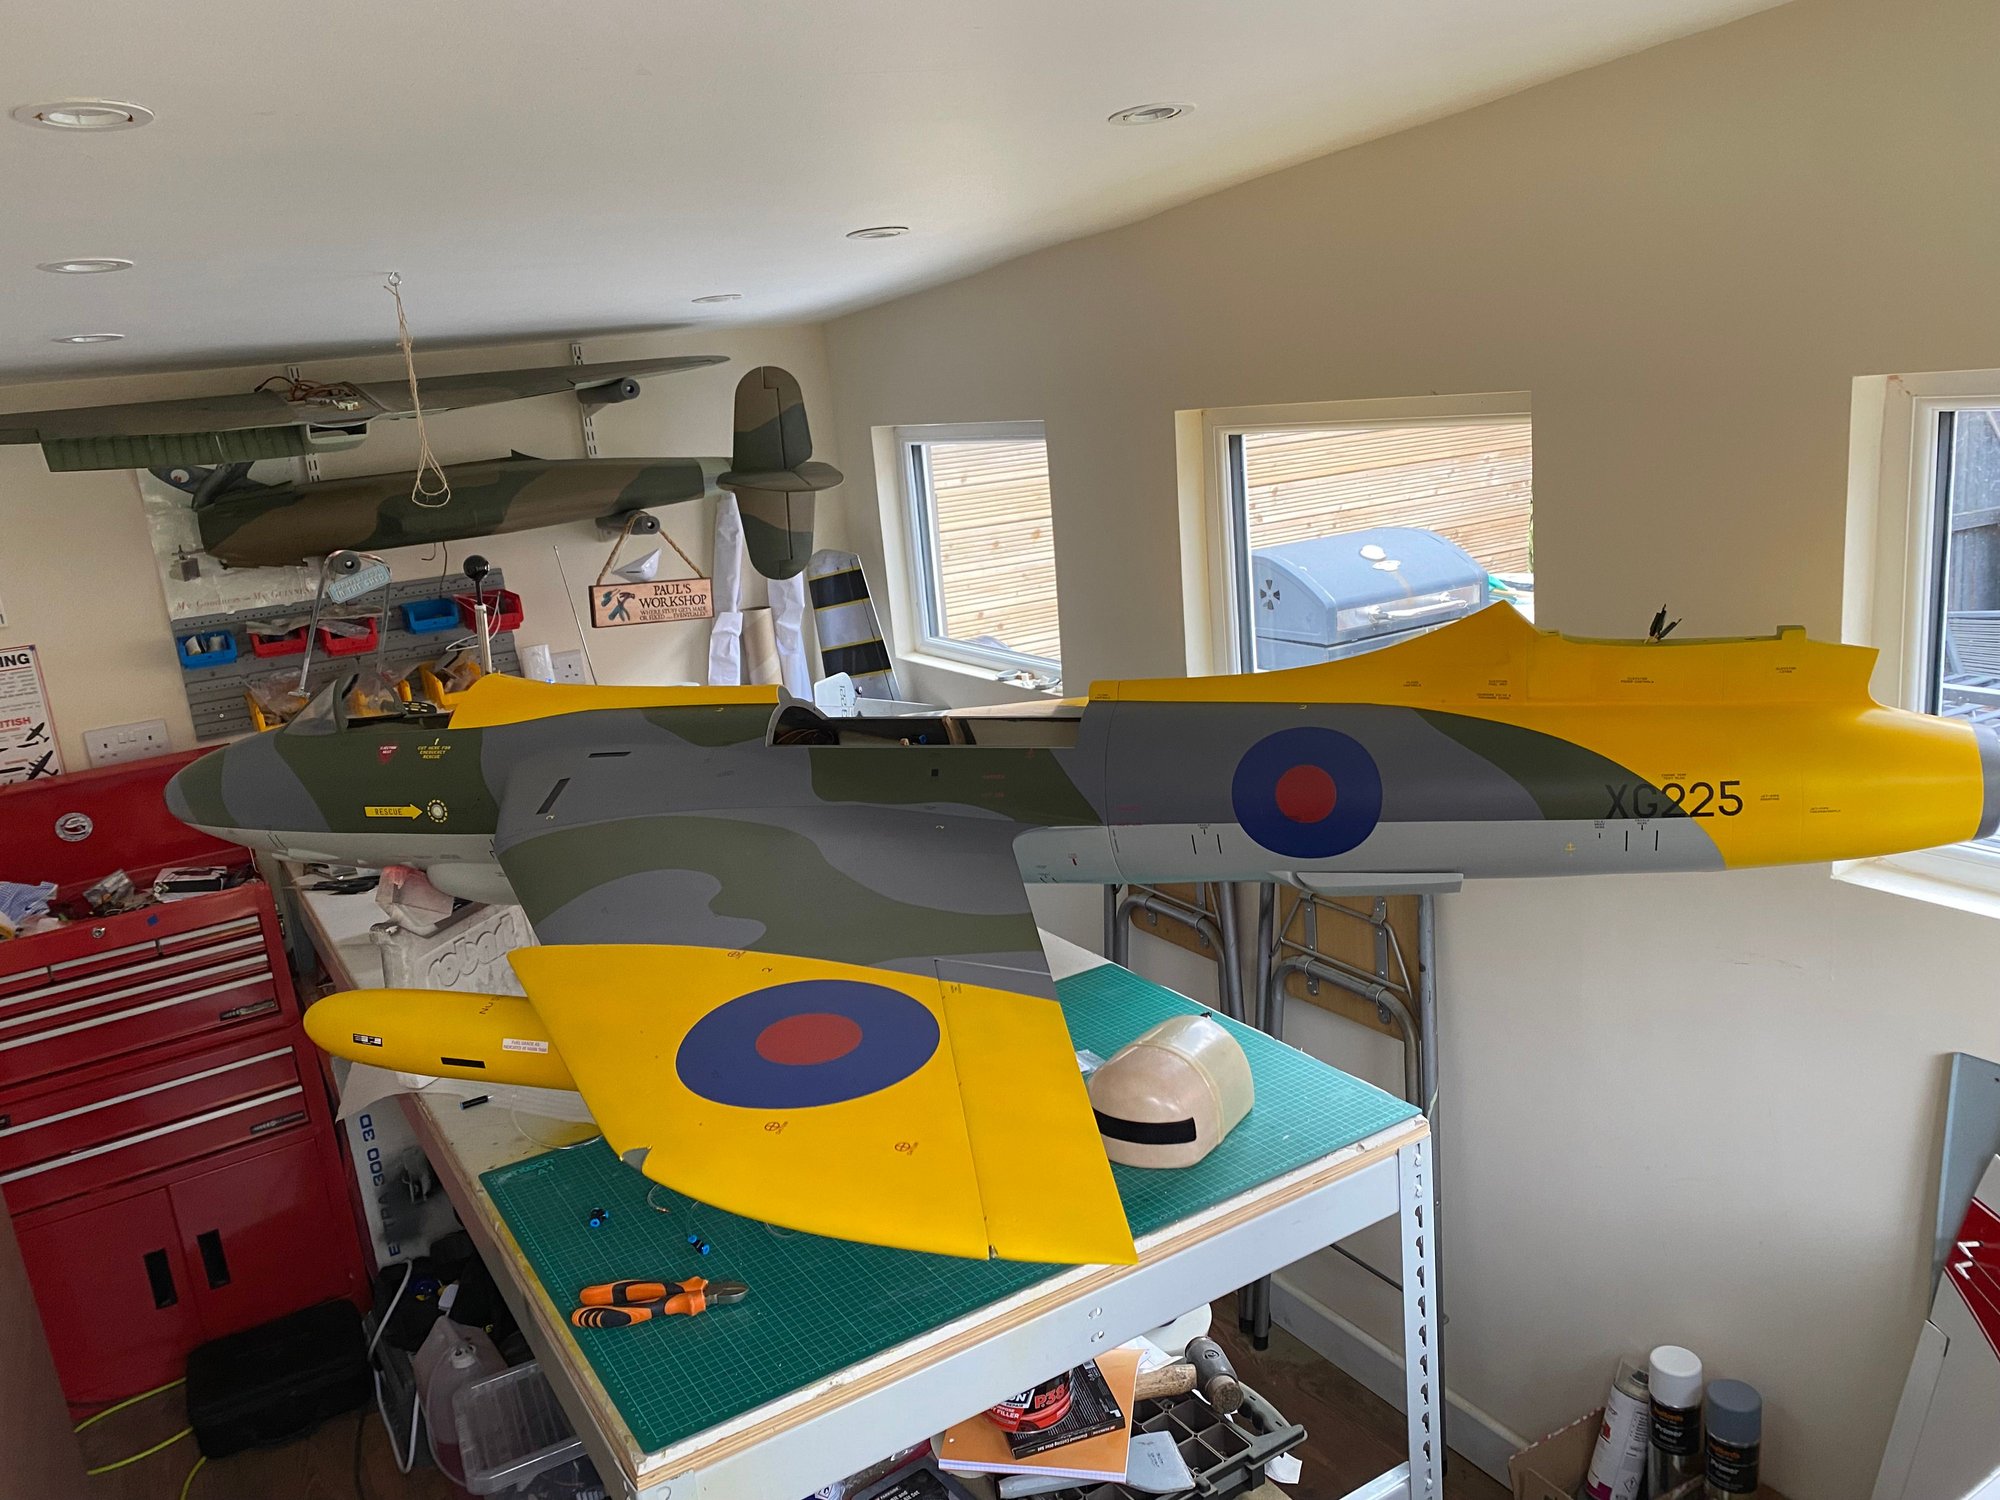
Got the turbine and bypass installed so I decided to put the wings on and check the air system over.
I am stuck now as I am waiting on a new lead for the turbine as the supplied cable is too short for the run in the fuzz.
The following users liked this post:
DenisFerrari (07-13-2024)