


BJ Craft Ultimate Biside Build
 07-23-2024, 11:52 AM
#1

Hello Everyone!
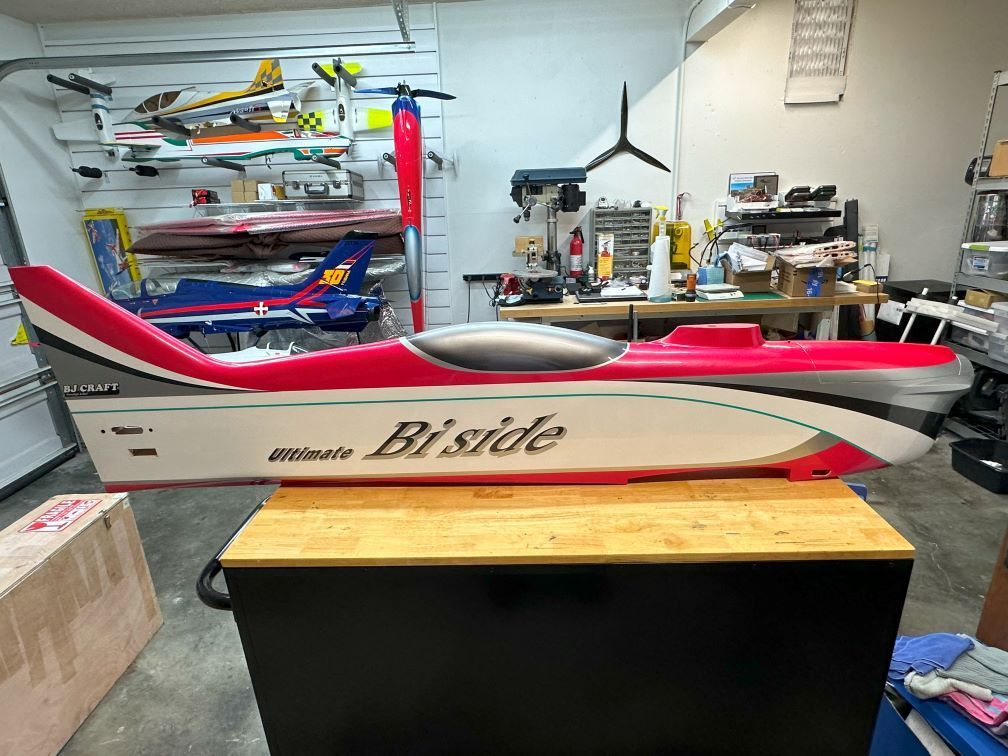
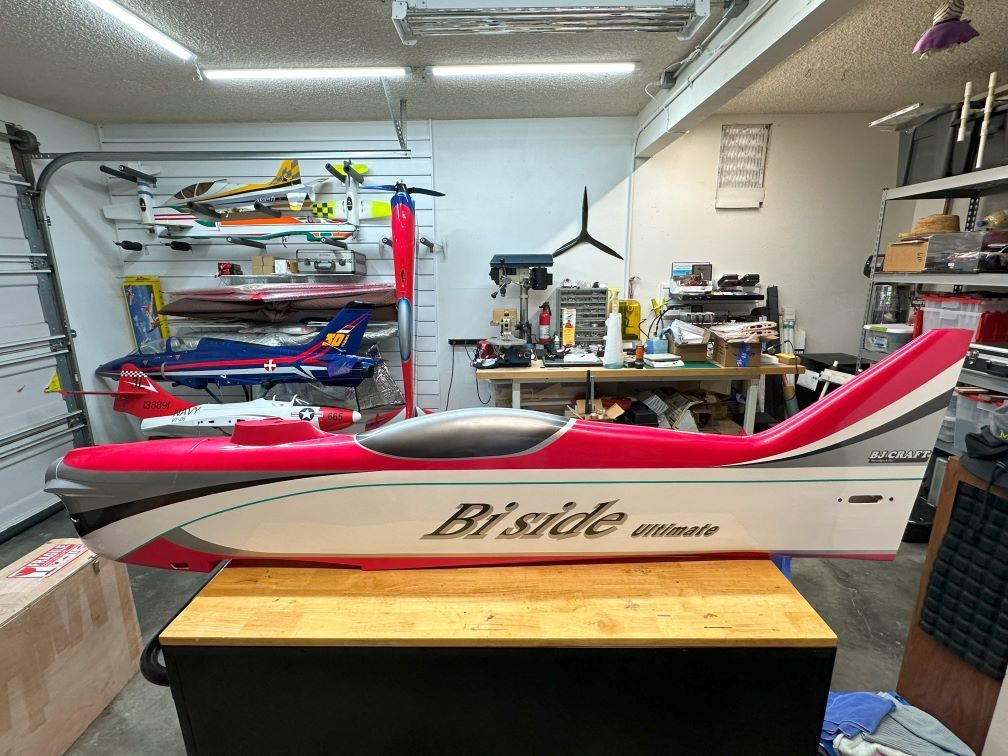
It has been a while since I have posted a build thread on RCU. I am really excited about this one. It is the latest generation Biplane from BJ Craft. The Ultimate Biside!
I've been anxiously awaiting this one. I have been flying the BJ Craft Eternity since my build in 2018 and have been testing it with BJ Craft's X-drive contradrive. Folks out here in California, NSRCA District 7 have seen this combo for some time and it truly seems like I have been flying the Eternity for an eternity.
Anyway, I am going to also post the build on a FB page titled "BJ Craft Ultimate Biside Build" so you can follow along there as well. I'll do this build like my previous threads so you can see how I chose to construct the plane.
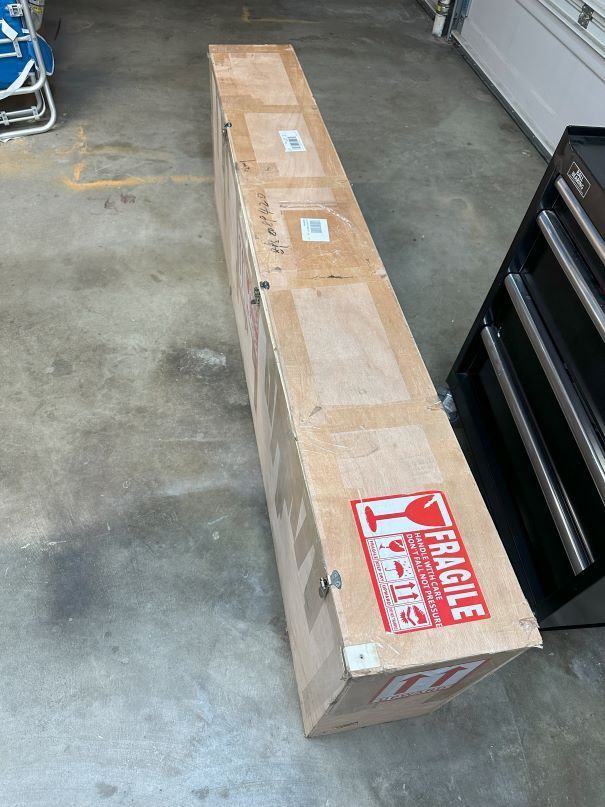
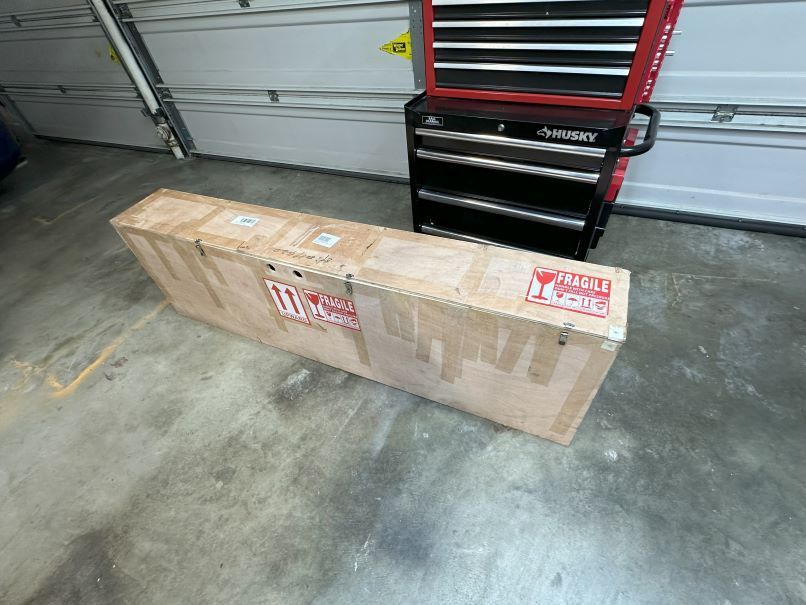
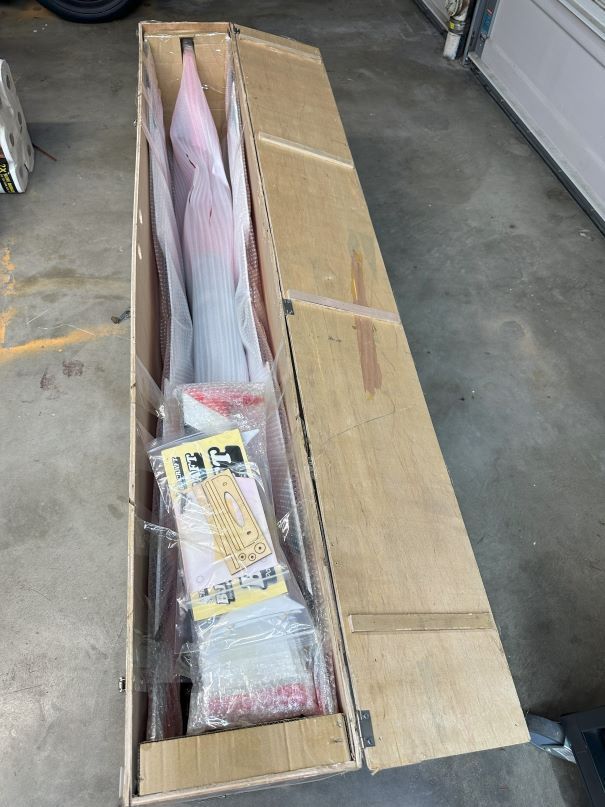
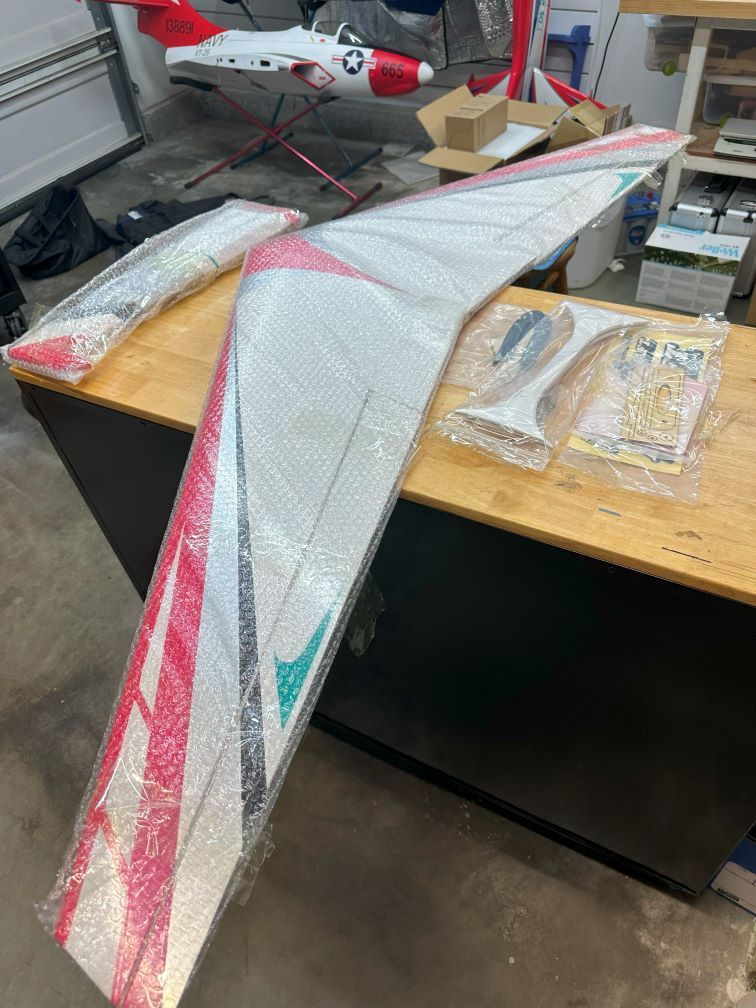
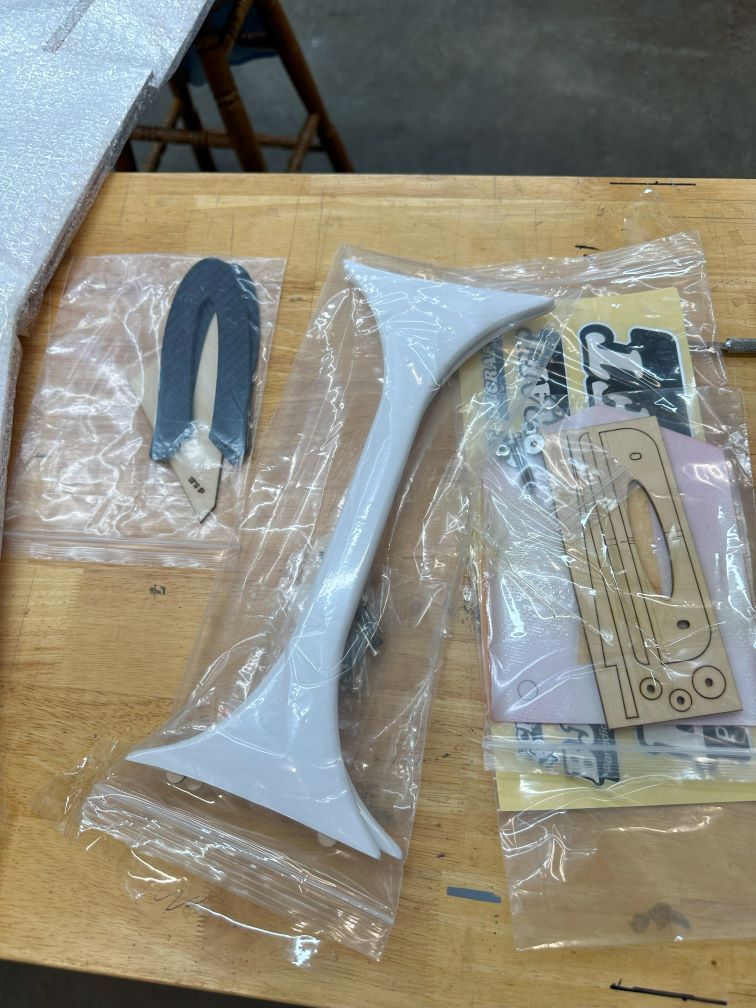
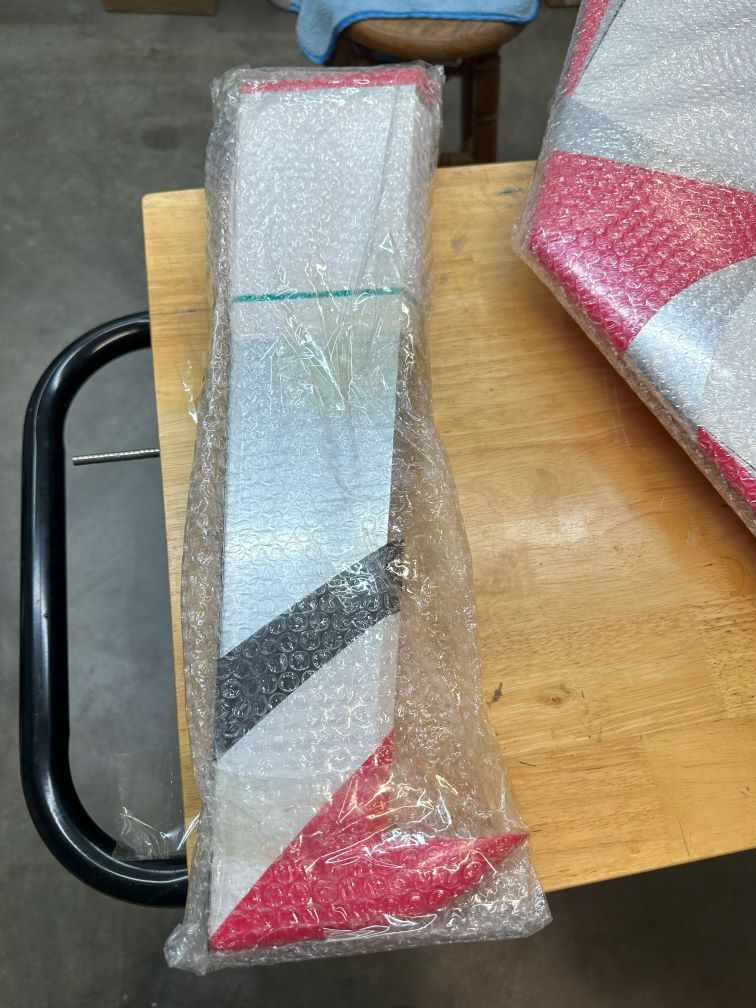
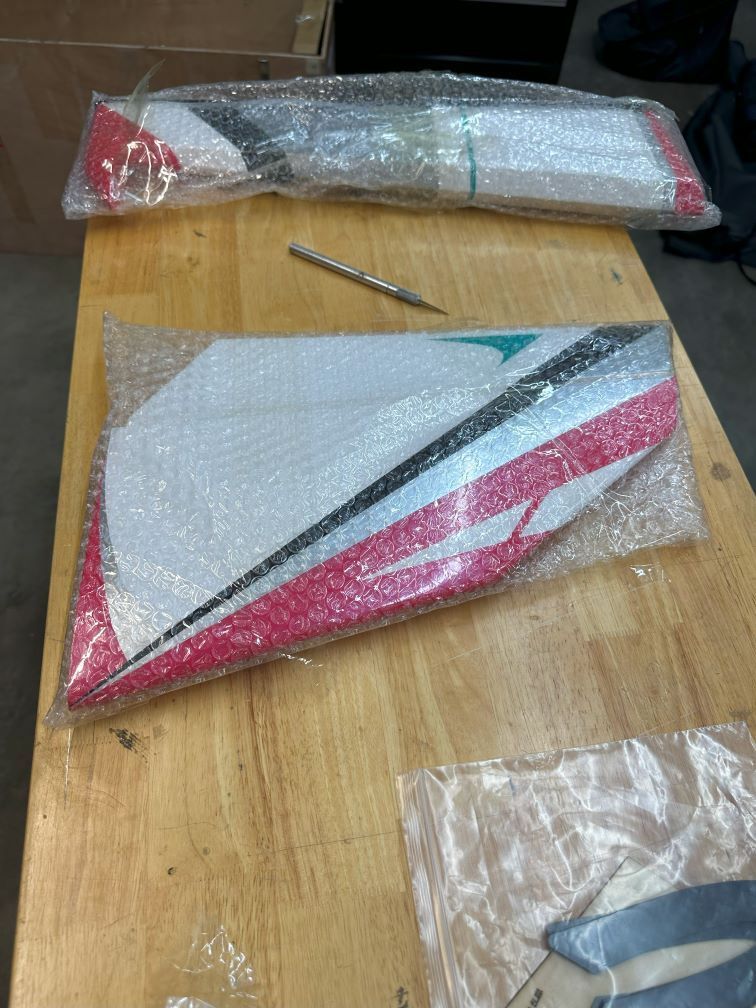
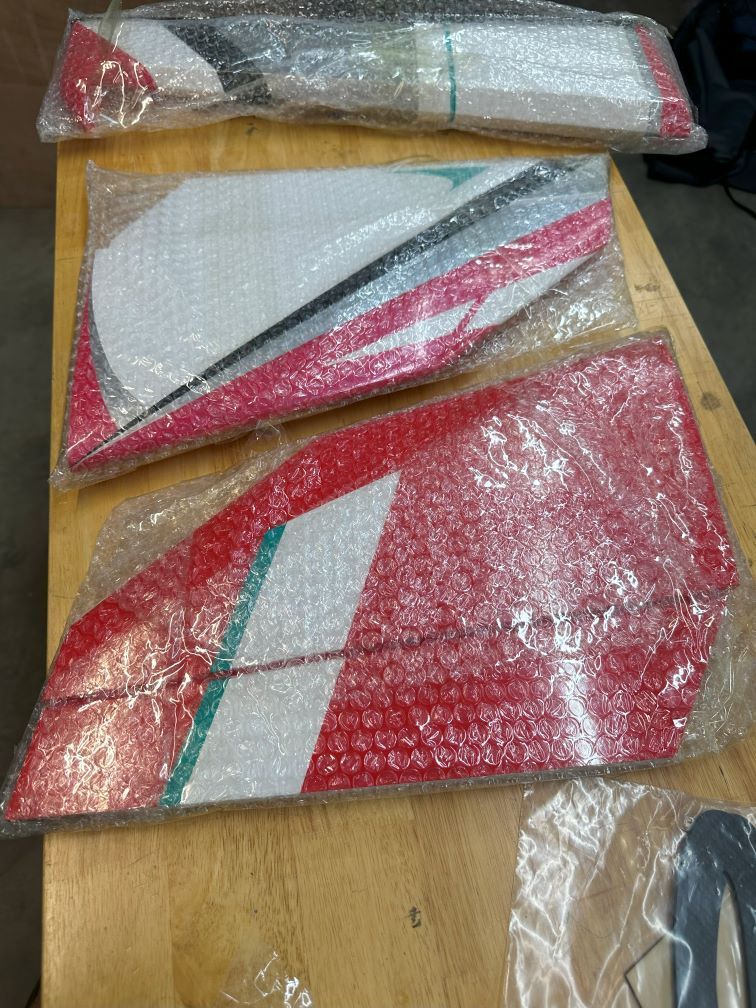
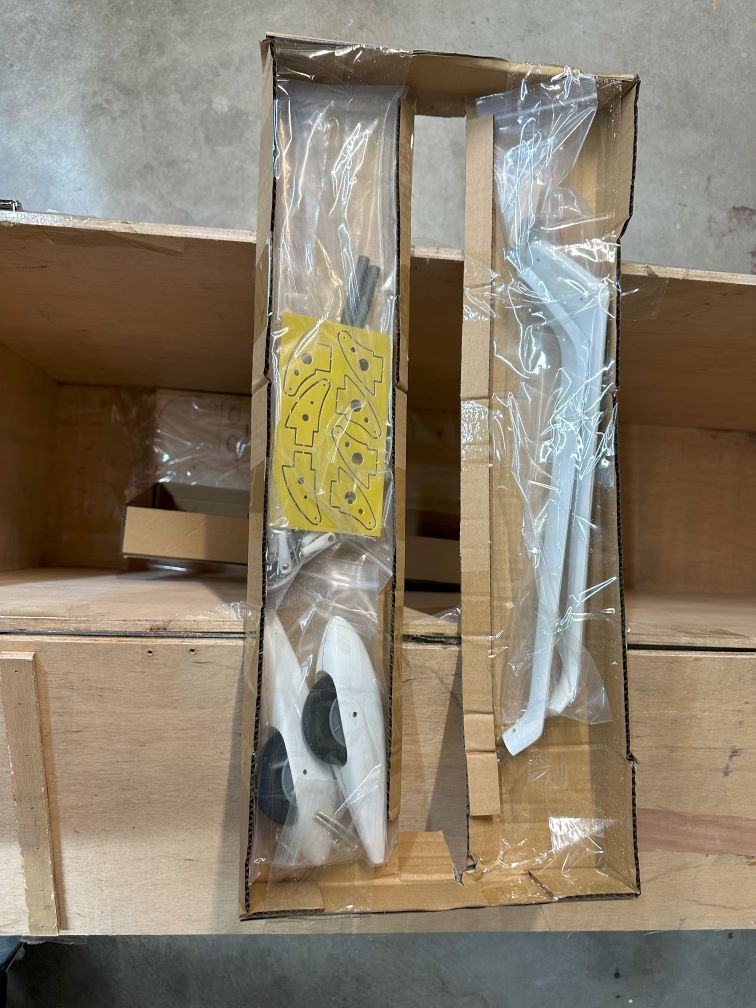
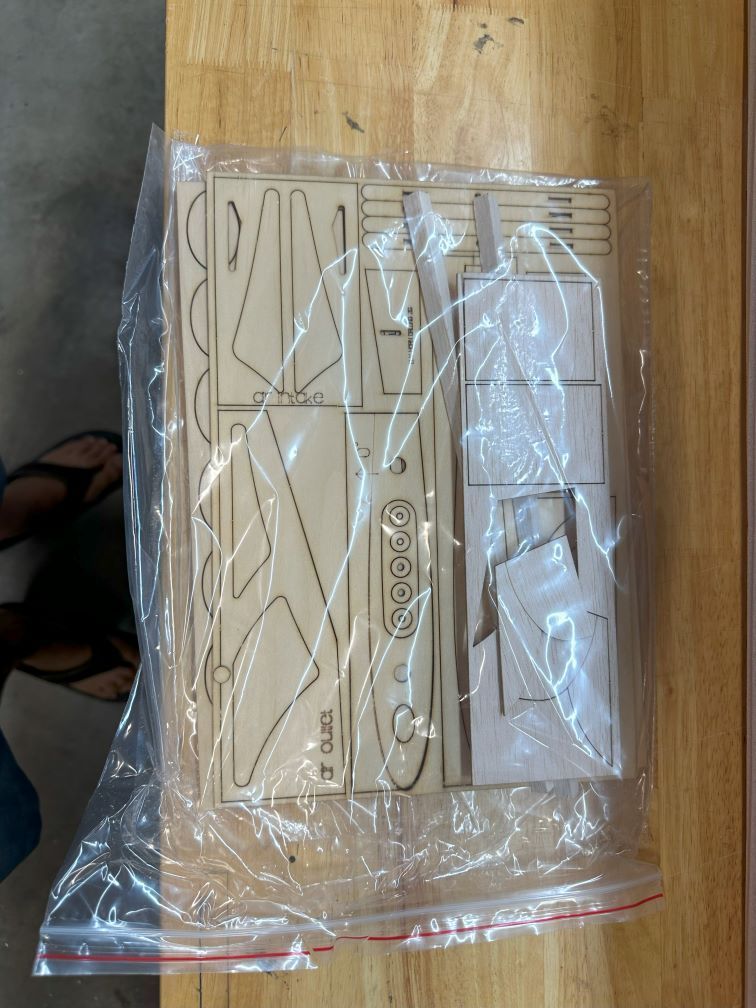
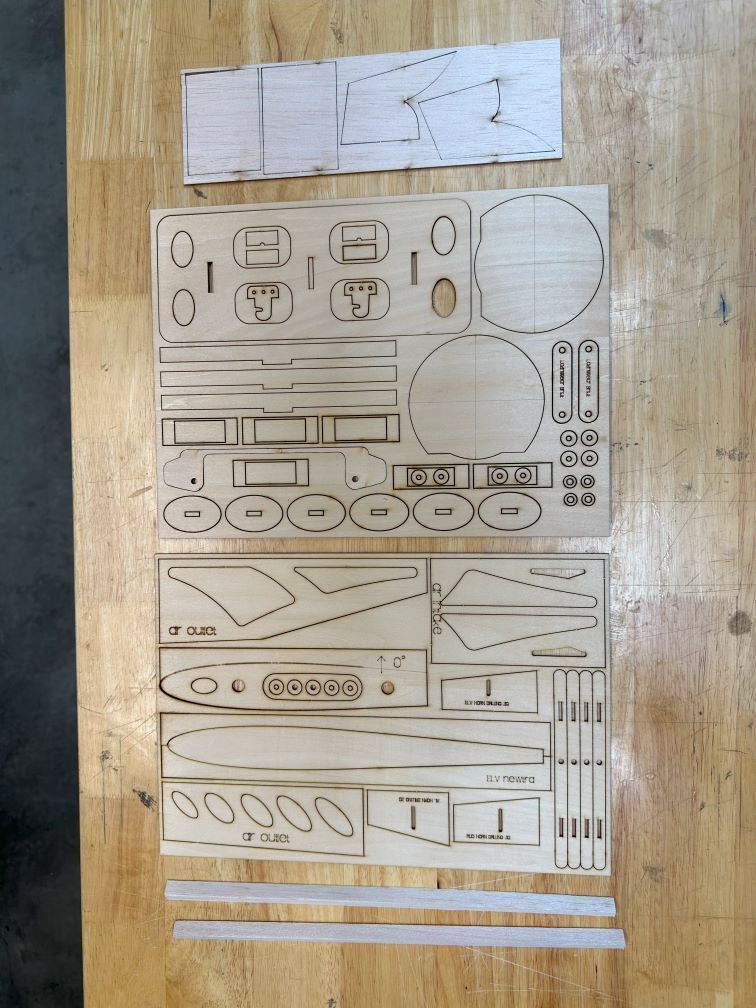
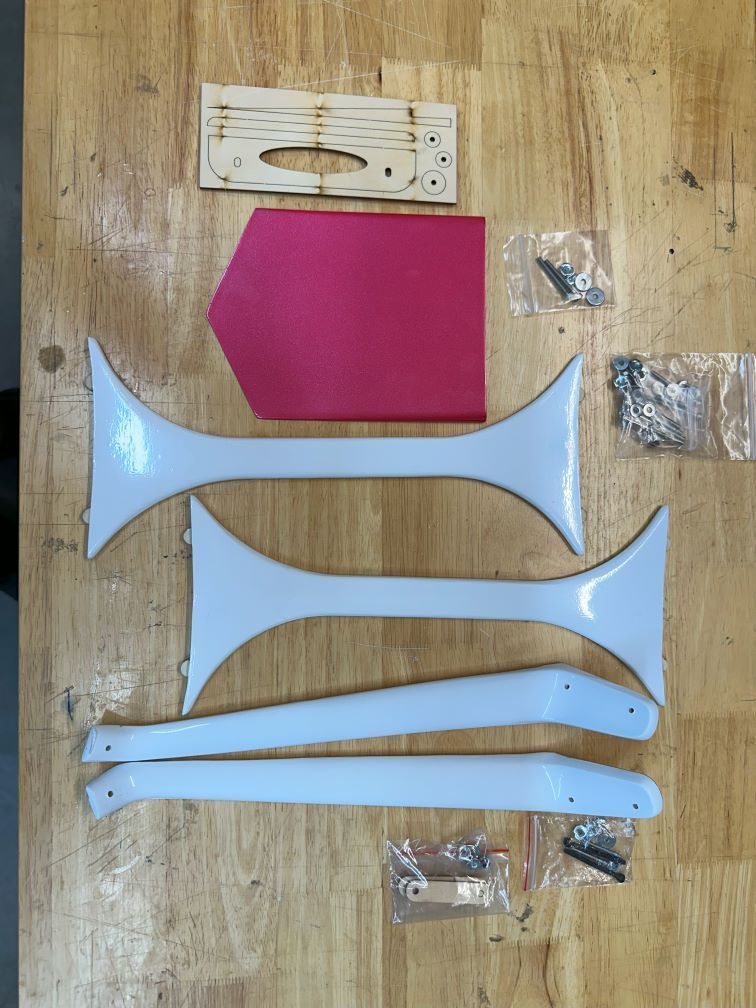
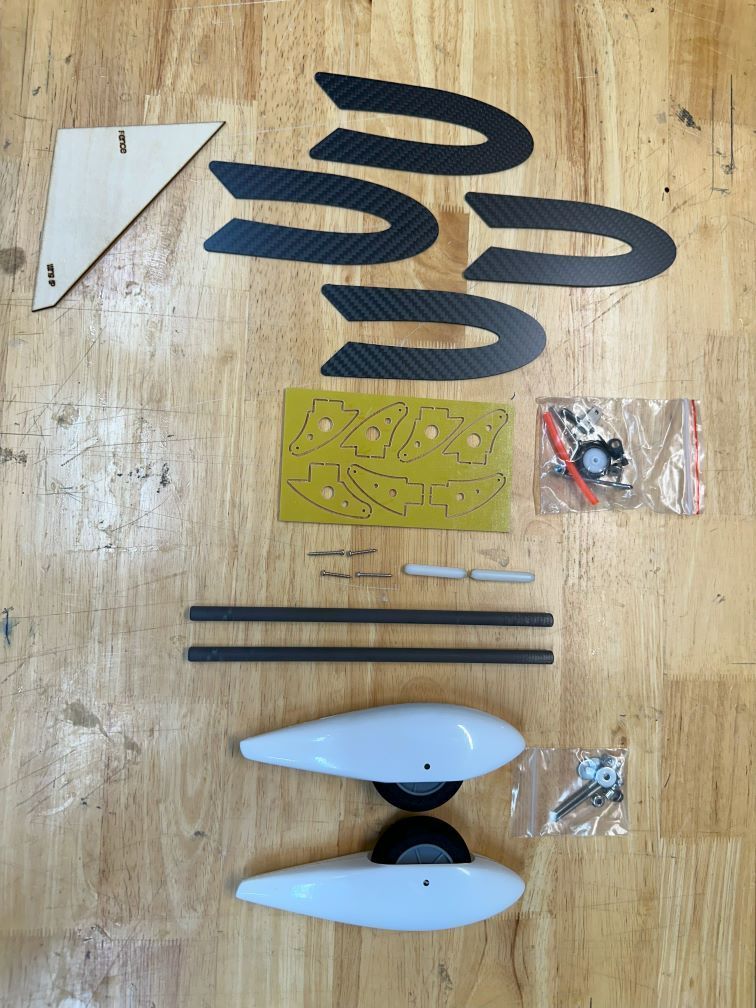
For starters, here's the arrival of the crate. I was nervous about the safe arrival via international UPS but it came through in flying colors. BJ packed this in a very sturdy case with a latched and hinged top. That made it much easier for the customs folks to inspect the contents without prying the crate open.
It has been a while since I have posted a build thread on RCU. I am really excited about this one. It is the latest generation Biplane from BJ Craft. The Ultimate Biside!
I've been anxiously awaiting this one. I have been flying the BJ Craft Eternity since my build in 2018 and have been testing it with BJ Craft's X-drive contradrive. Folks out here in California, NSRCA District 7 have seen this combo for some time and it truly seems like I have been flying the Eternity for an eternity.
Anyway, I am going to also post the build on a FB page titled "BJ Craft Ultimate Biside Build" so you can follow along there as well. I'll do this build like my previous threads so you can see how I chose to construct the plane.
For starters, here's the arrival of the crate. I was nervous about the safe arrival via international UPS but it came through in flying colors. BJ packed this in a very sturdy case with a latched and hinged top. That made it much easier for the customs folks to inspect the contents without prying the crate open.

The following 5 users liked this post by shannah:
DRC1 (07-23-2024),
rcprecision (07-23-2024),
Ricardo M. (07-24-2024),
SpeKopuZ (07-23-2024),
wattsup (07-23-2024)
The following 3 users liked this post by shannah:
07-26-2024, 06:08 AM
#4
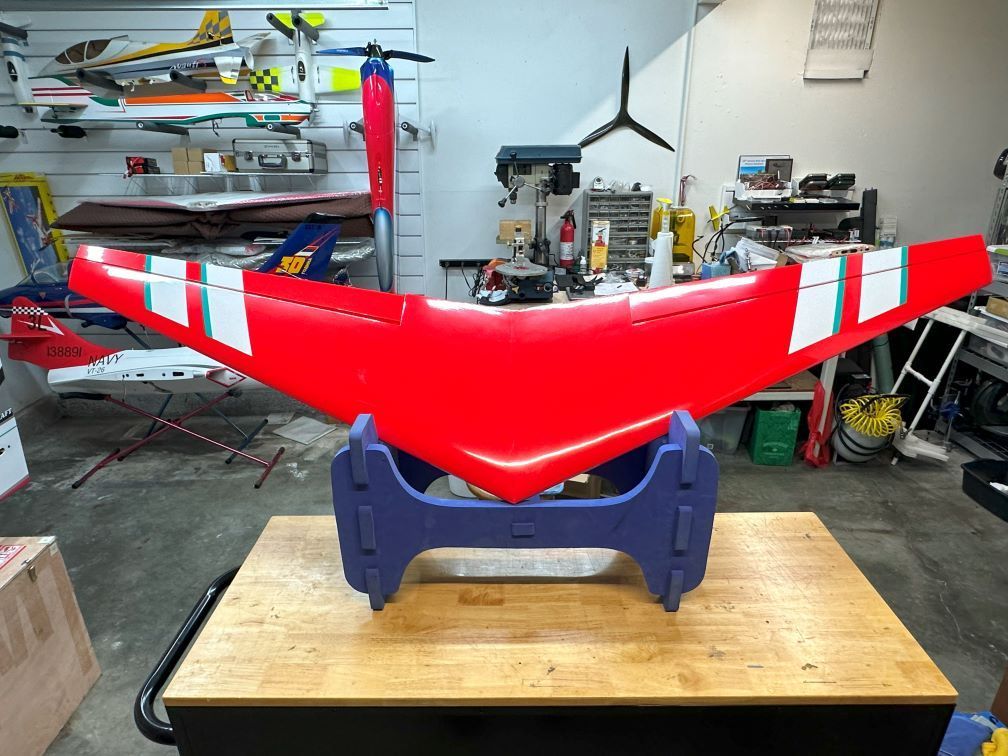
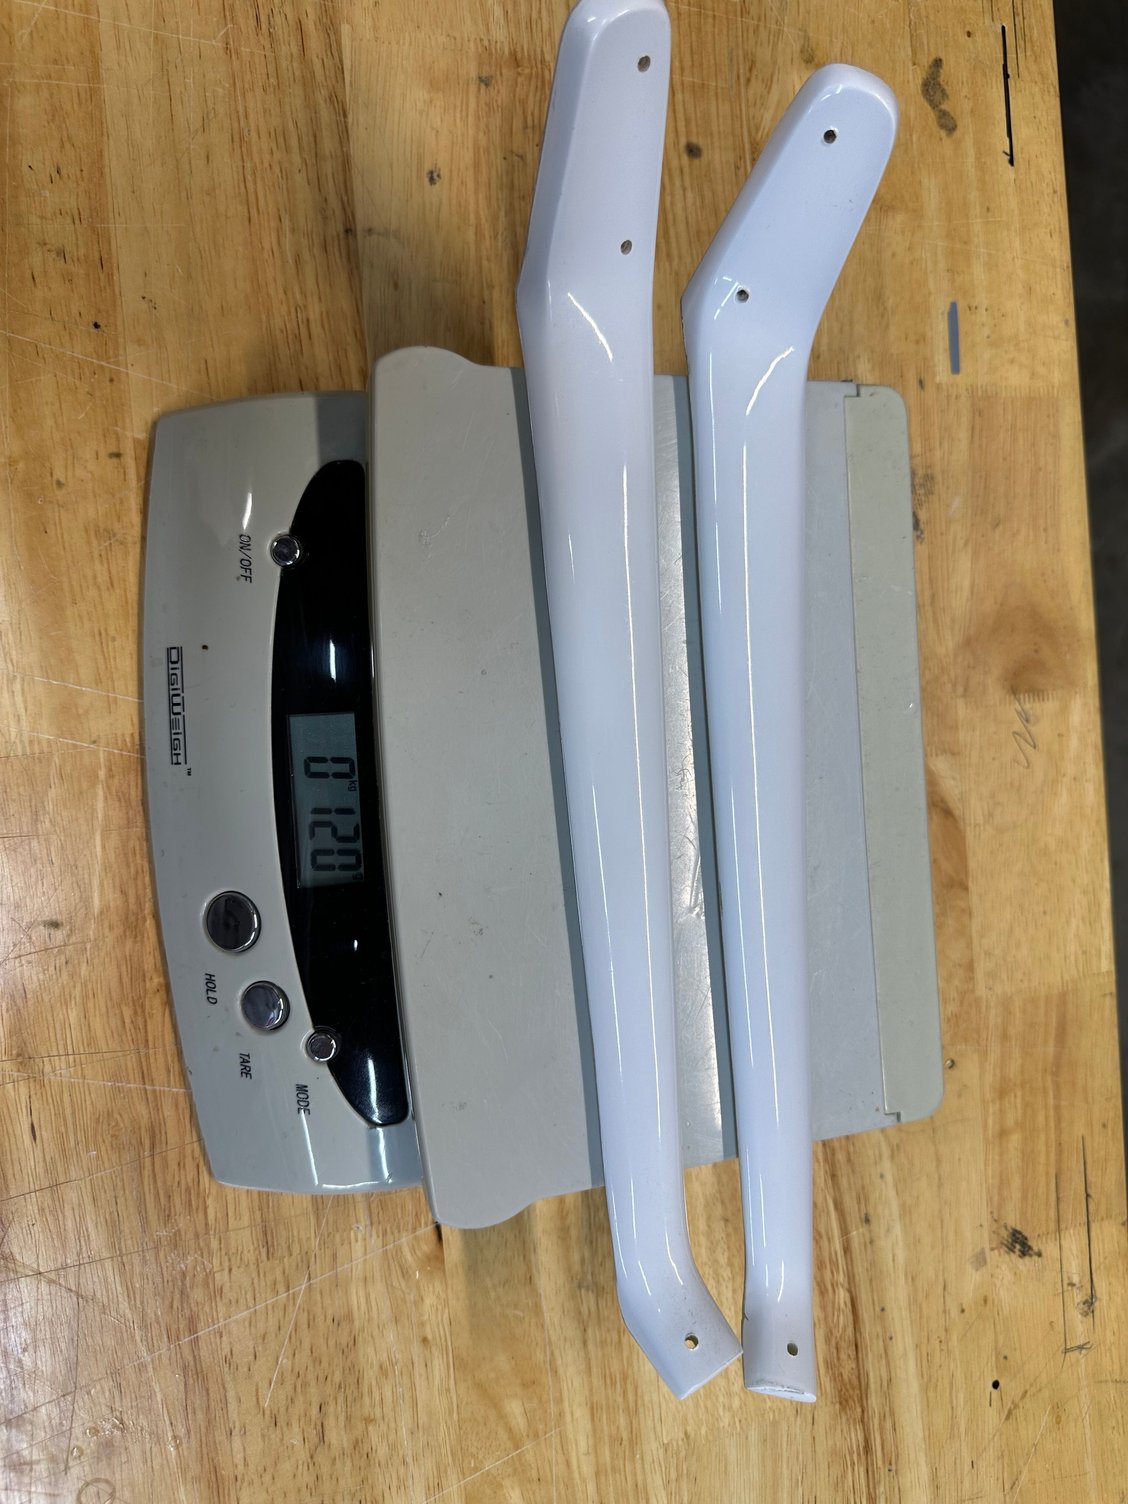
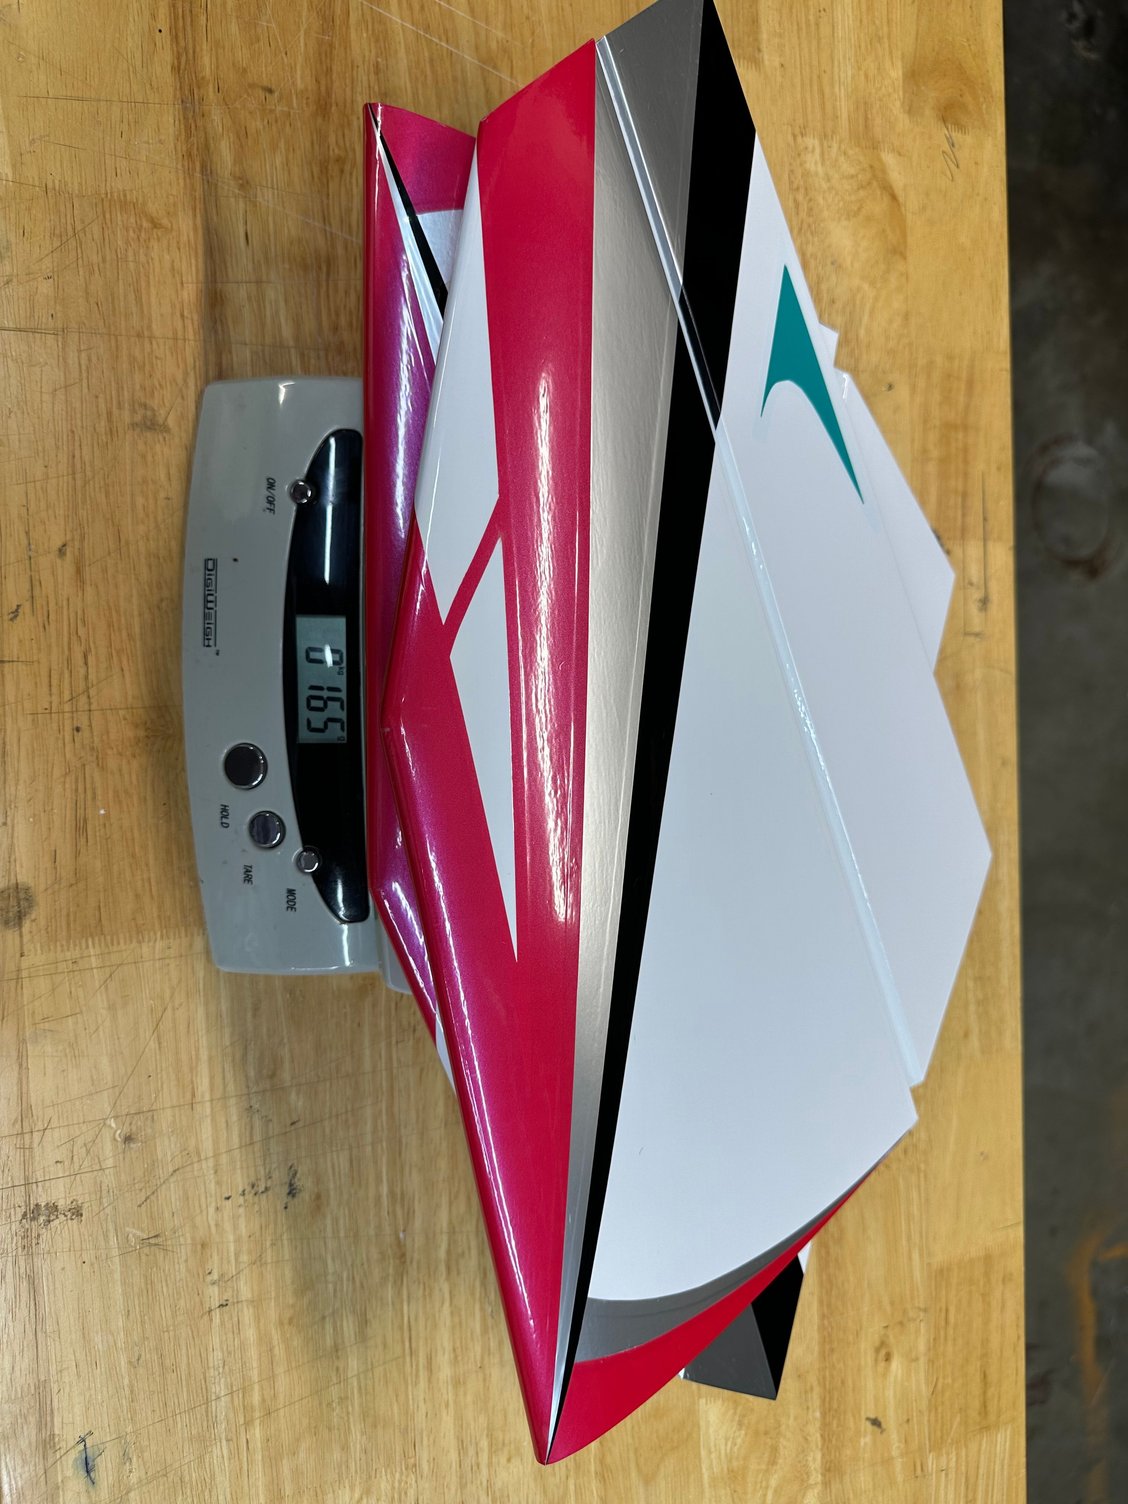
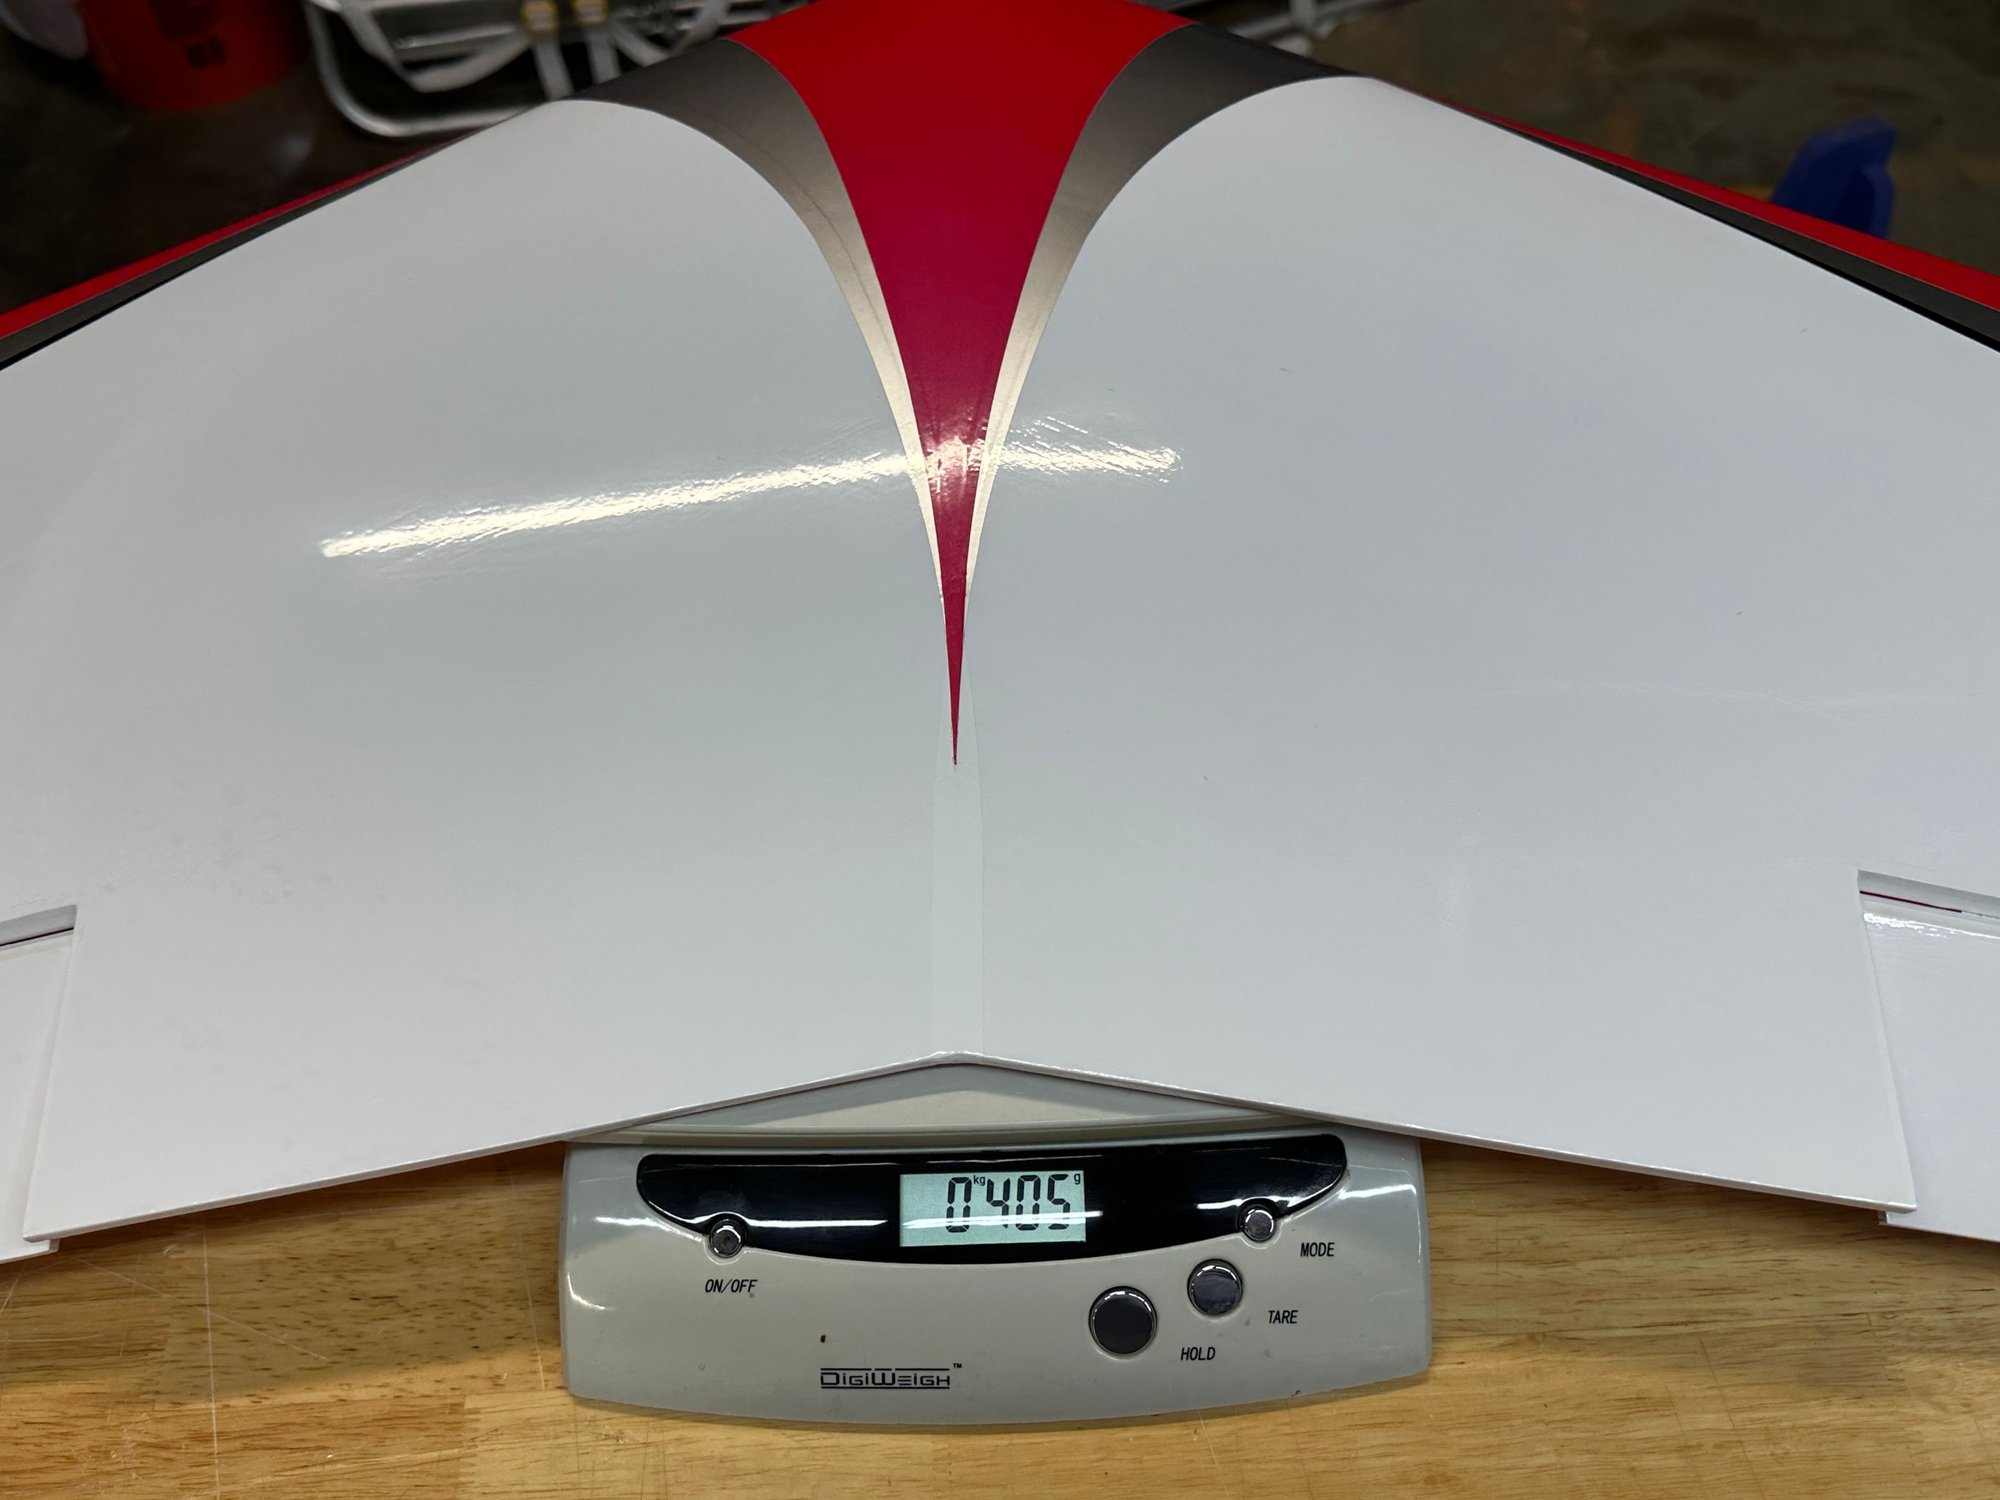
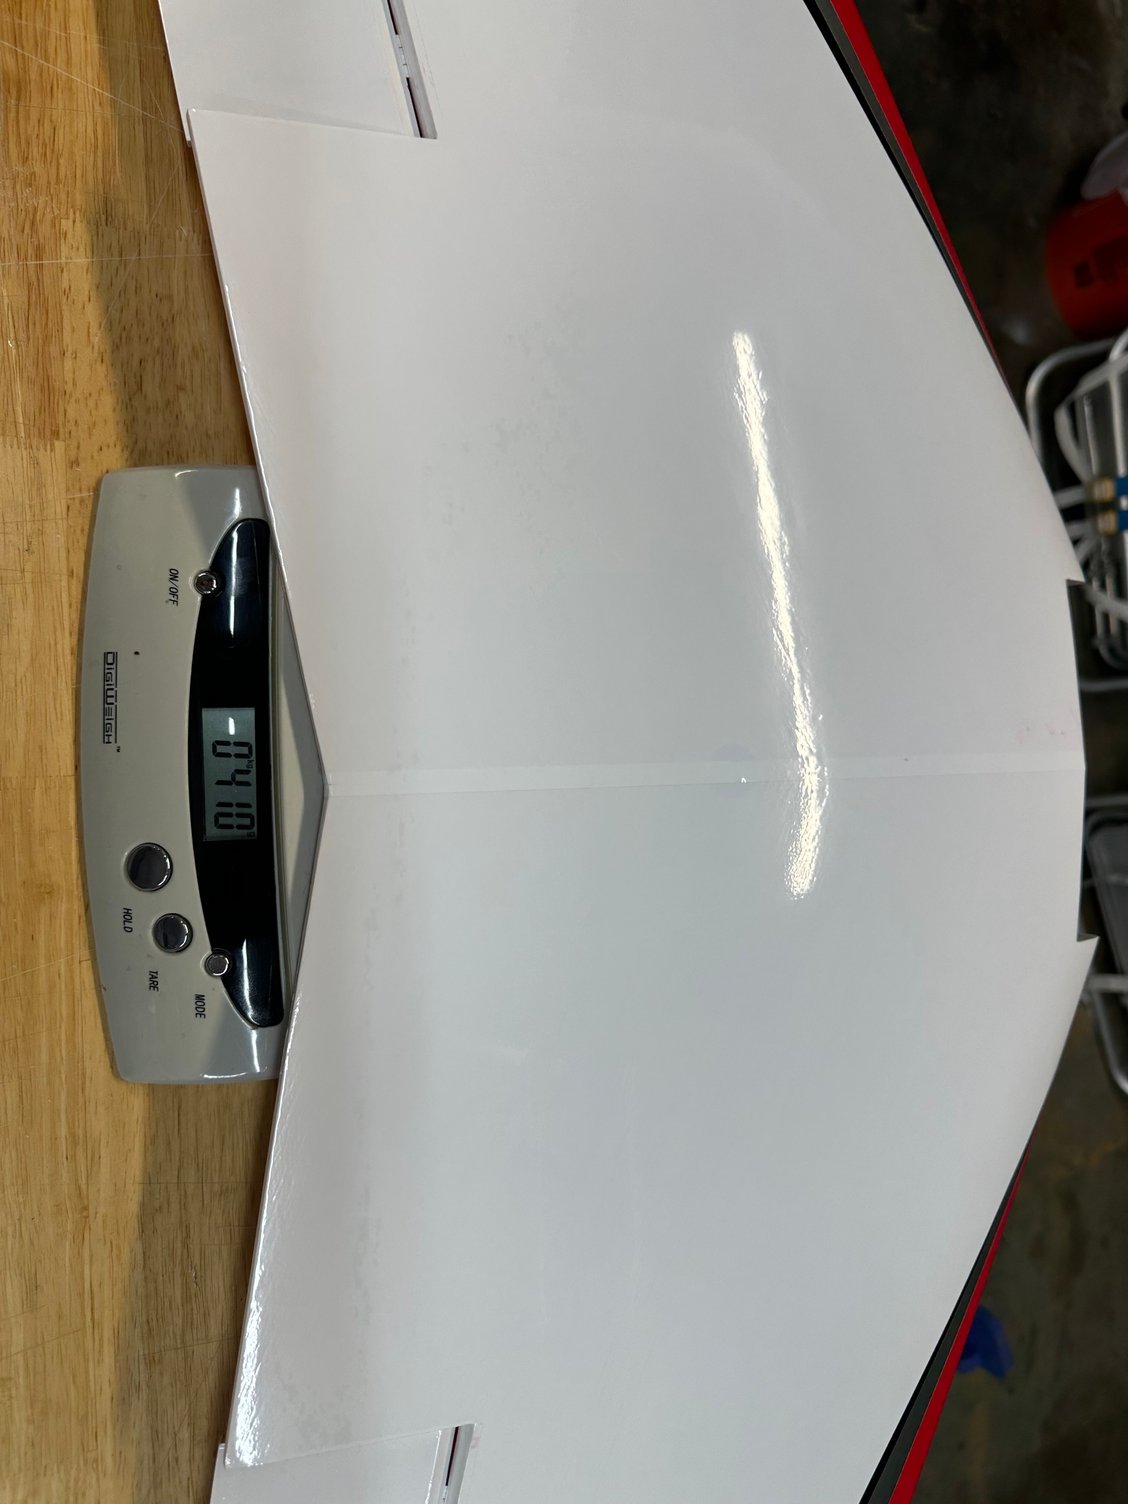
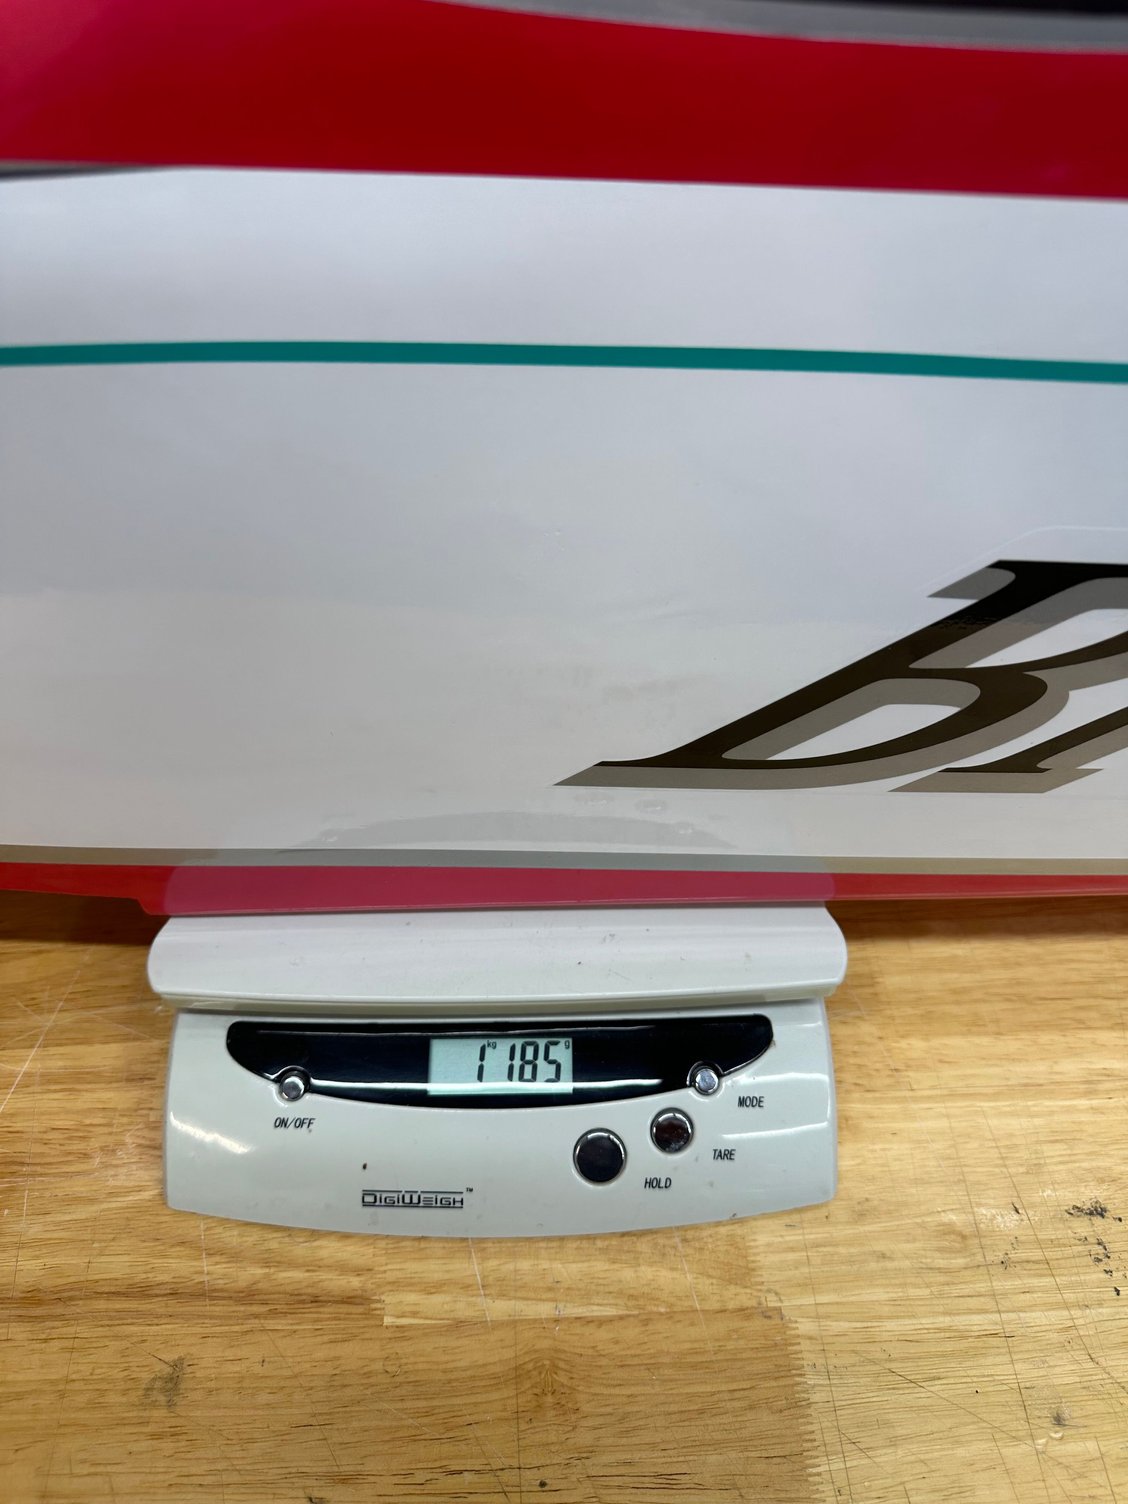
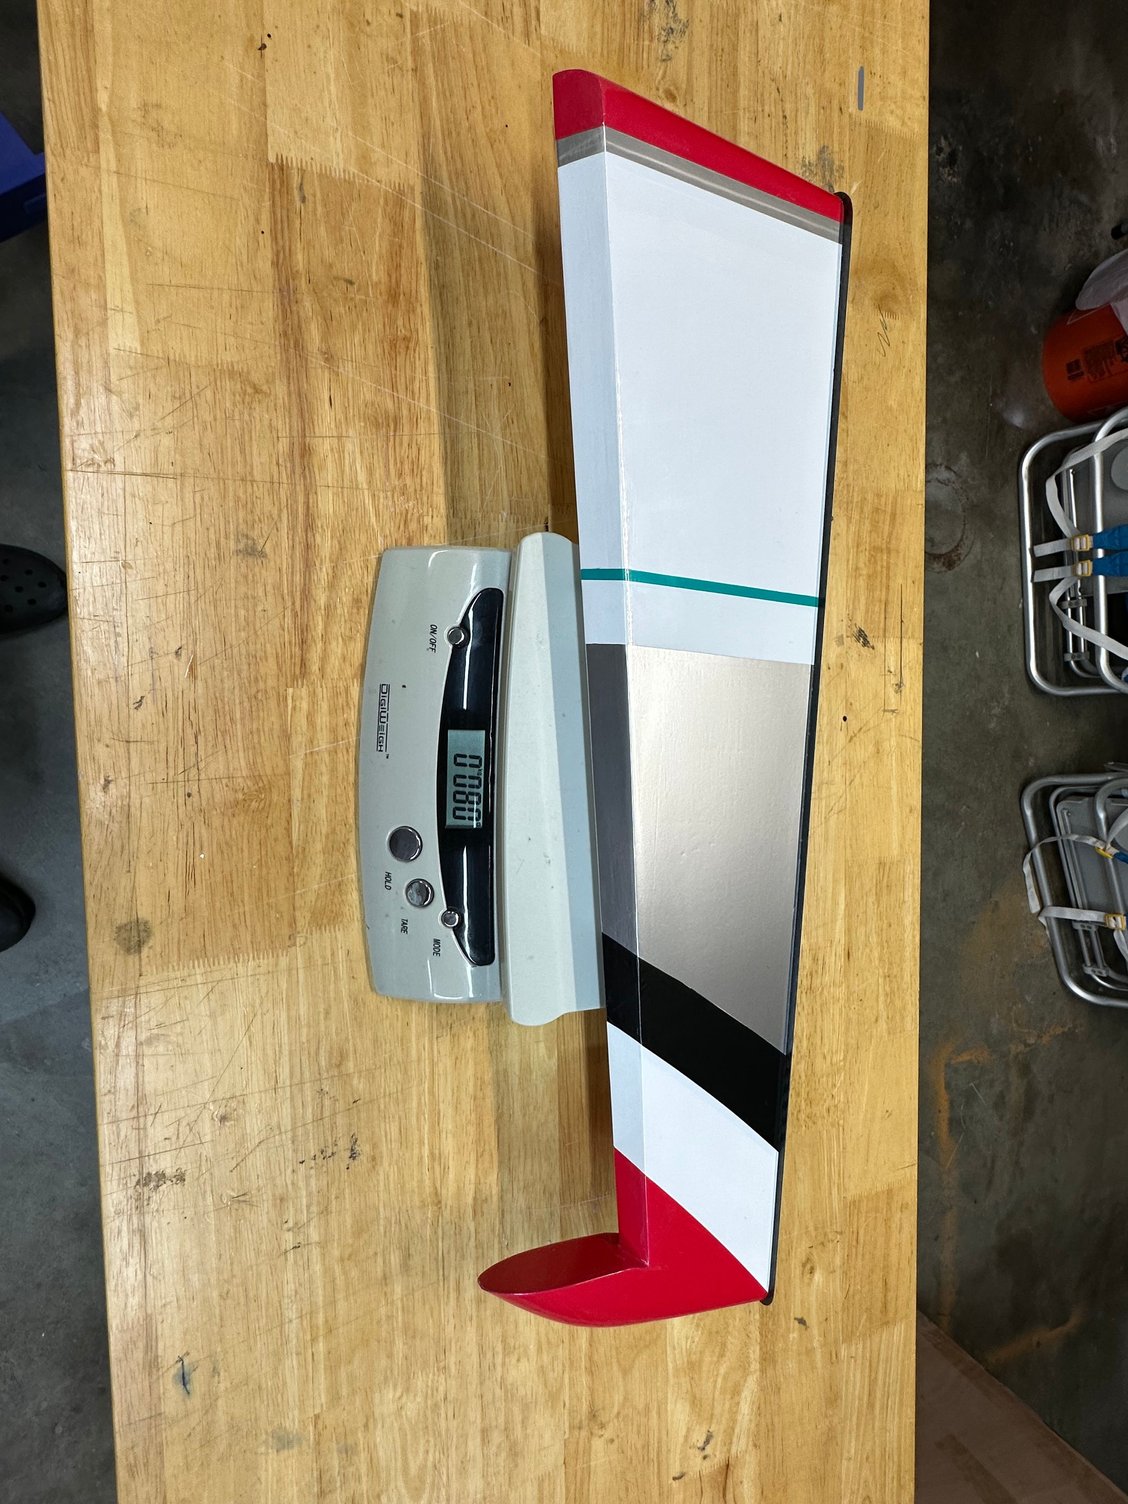
Here are some weight pics and structure pics. Overall, weights are similar to the Eternity bipe with the exception of the fuselage. The Eternity fuselage was 990g whereas the Ultimate Biside is 1185. The new fuselage feels a lot stiffer and more sturdy than the Eternity. With the new F3A weight limit it is good to see that BJ beefed up certain areas such as the landing gear mount and overall stiffness.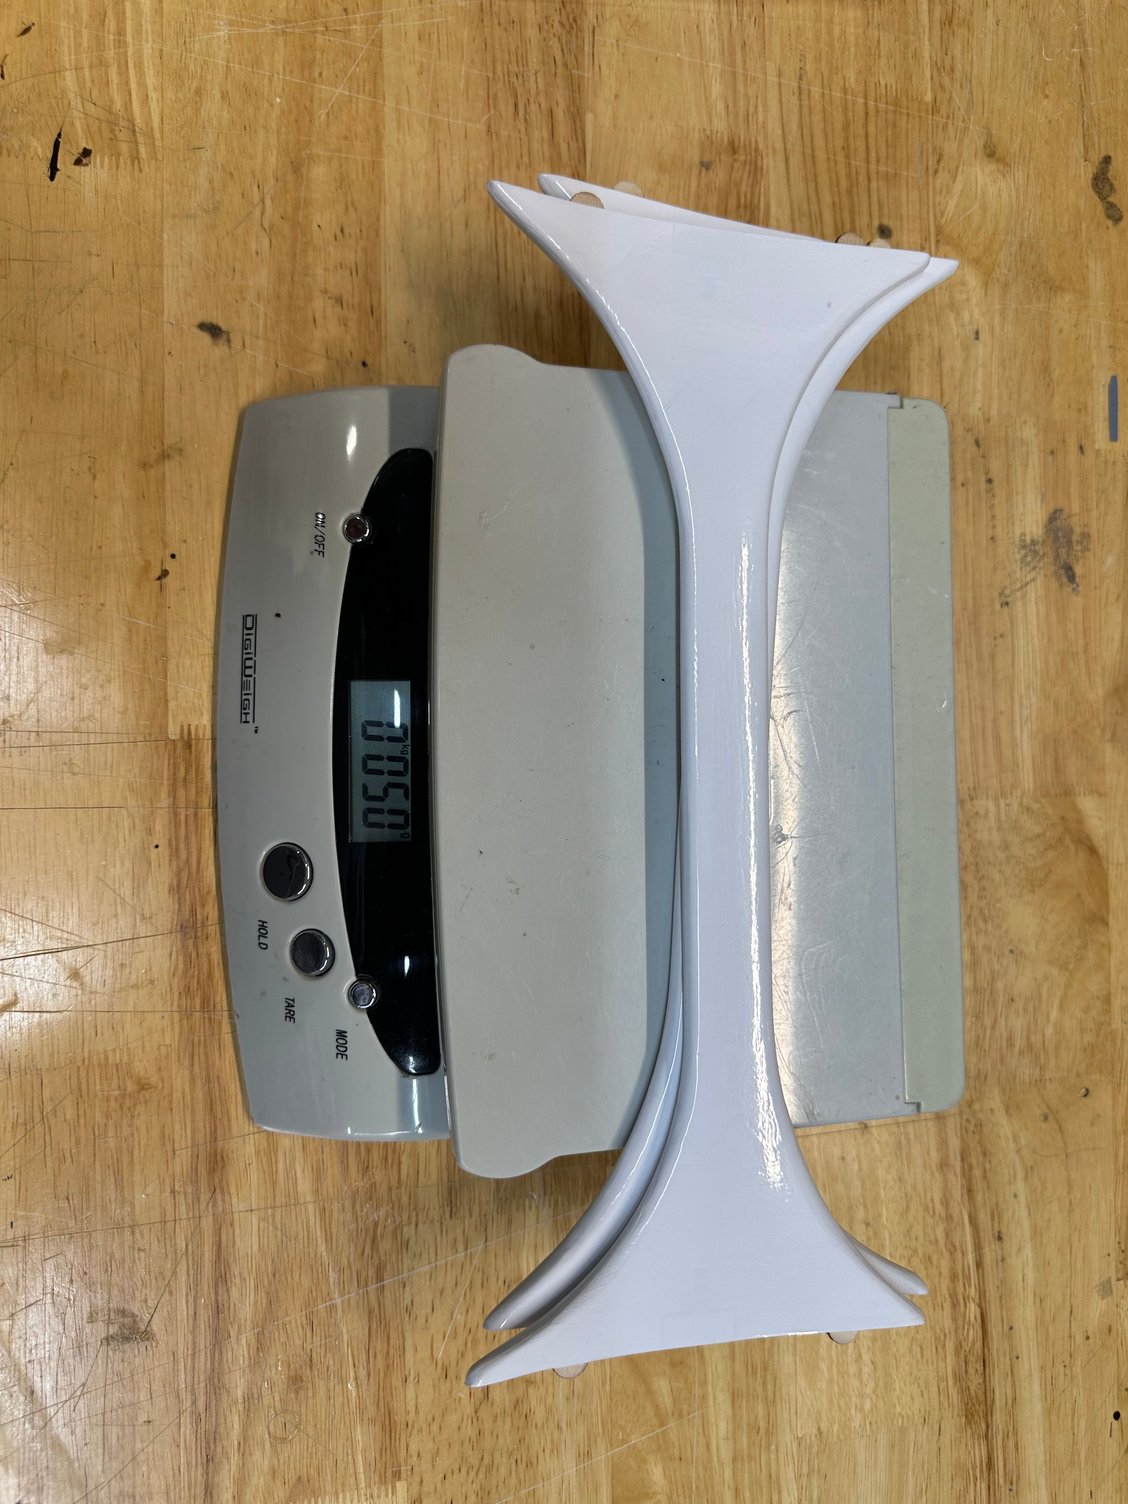
The following 3 users liked this post by shannah:
07-29-2024, 08:13 AM
#5
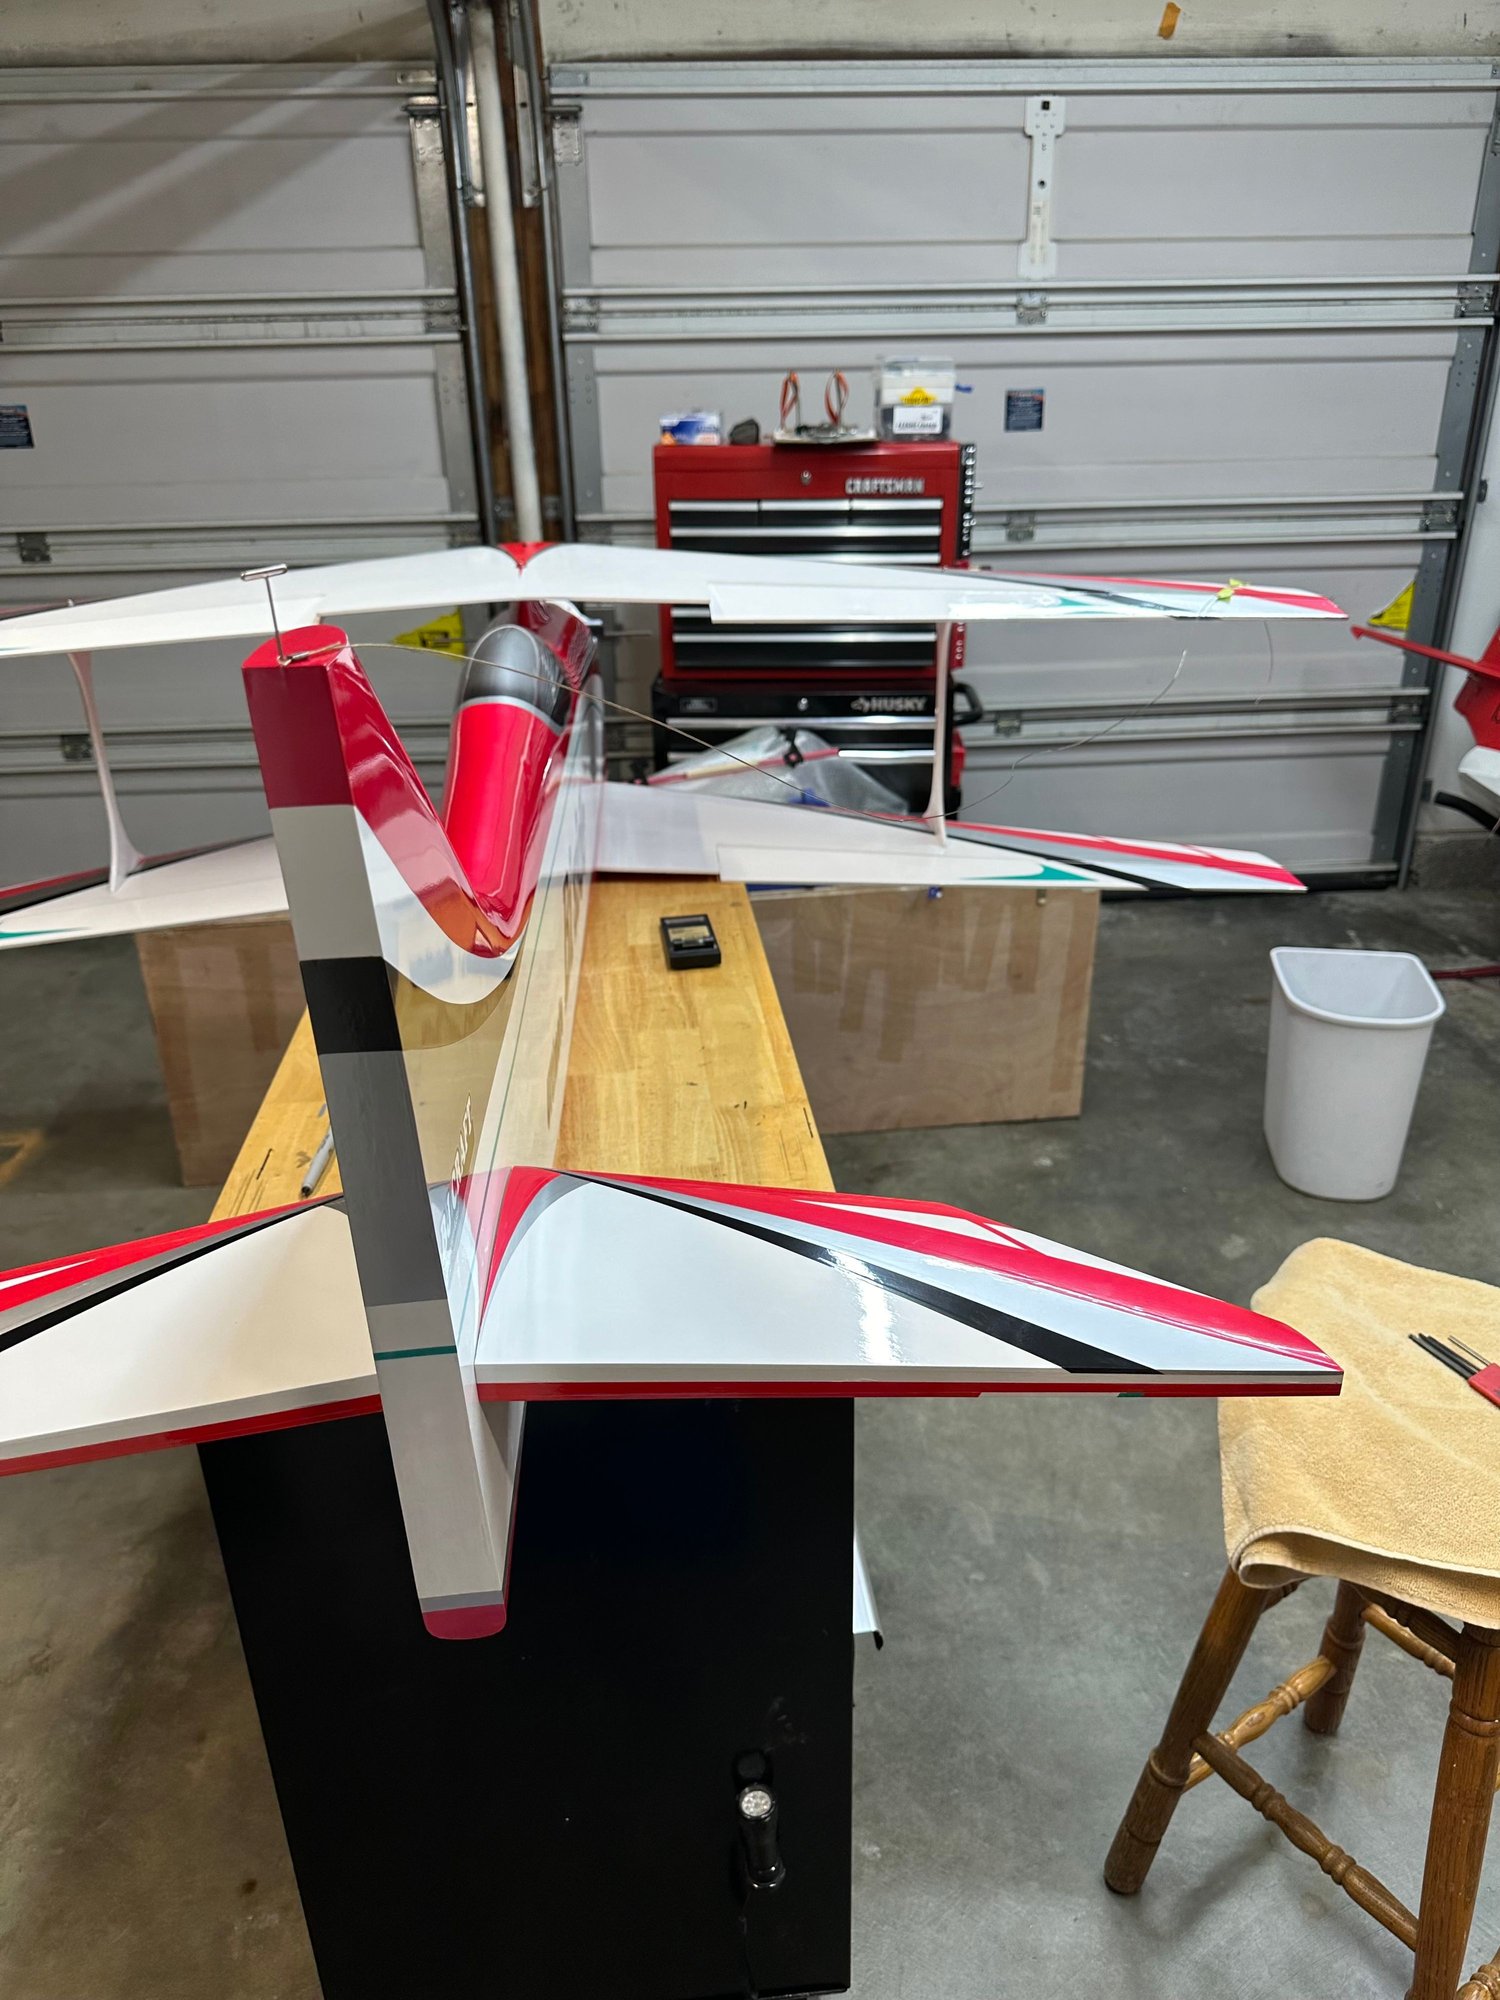
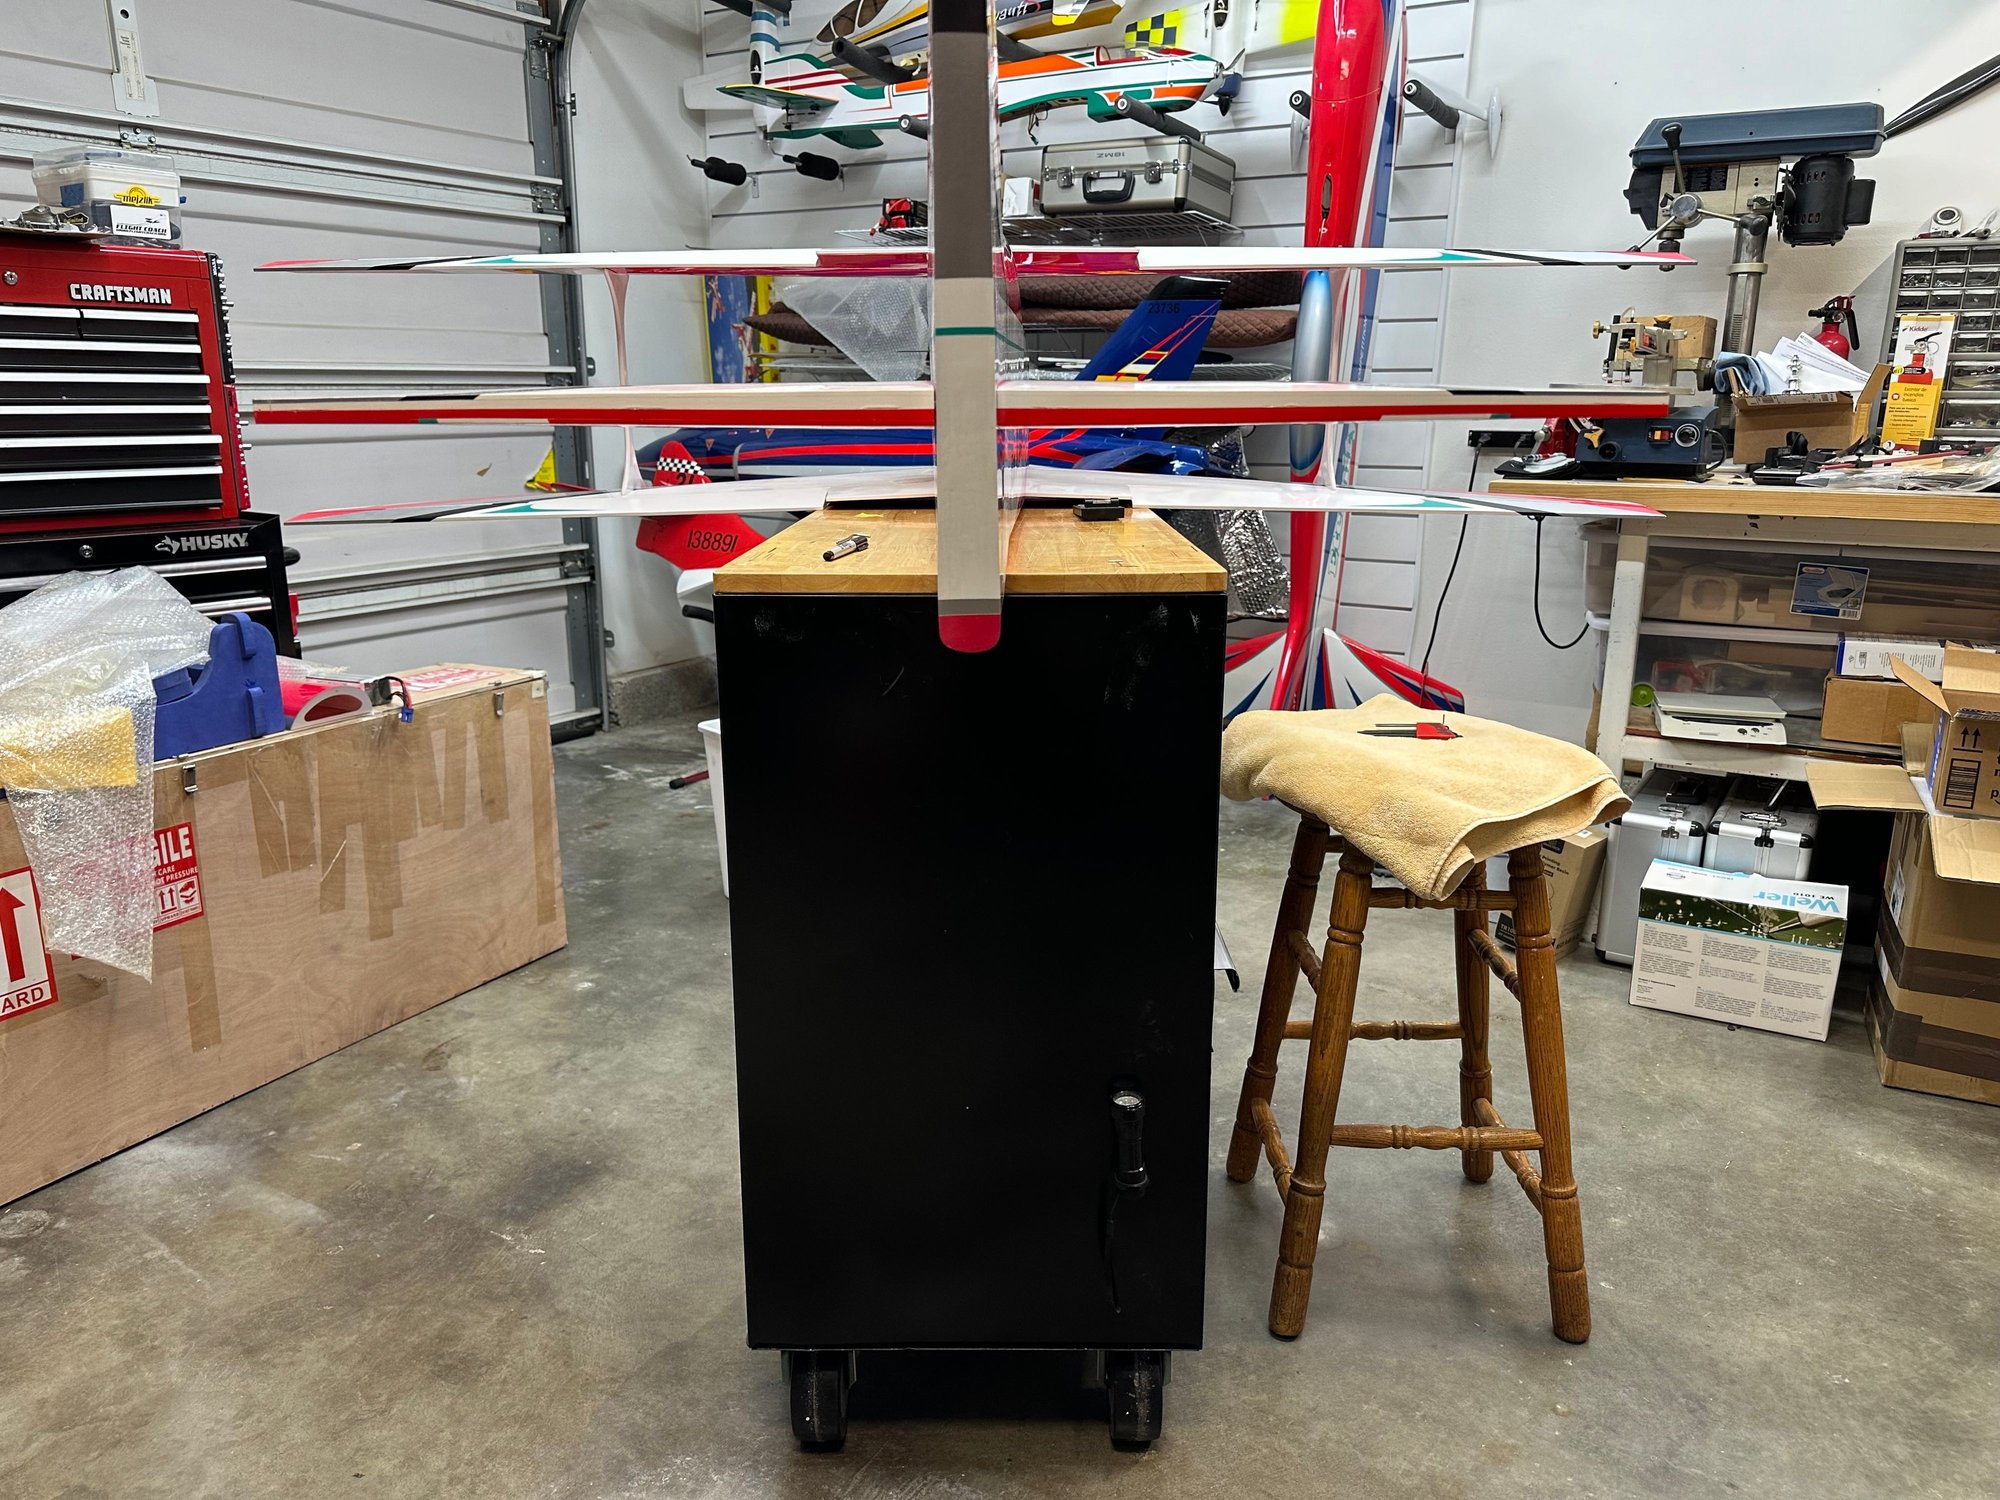
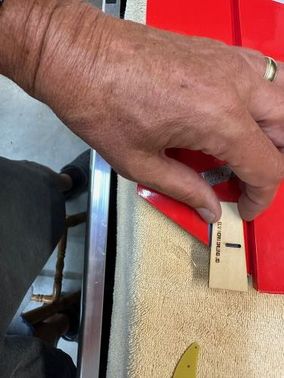
I finished the basic alignment and fit checks. I wanted to check the overall incidence settings, first crack at trammeling the wing alignment, top wing/bottom wing fitment, and overall "squareness". In a nutshell, it is very straight and true. As usual, I checked in with BJ Park to see what the factory incidence settings are supposed to be and where the zero reference points are on the plane.
- Stab tubes are at zero degrees (he includes a jig to measure that and it is right on)
- Battery hatch frame on the fuselage is also at zero degrees.
These form easy to access zero points when measuring everything.
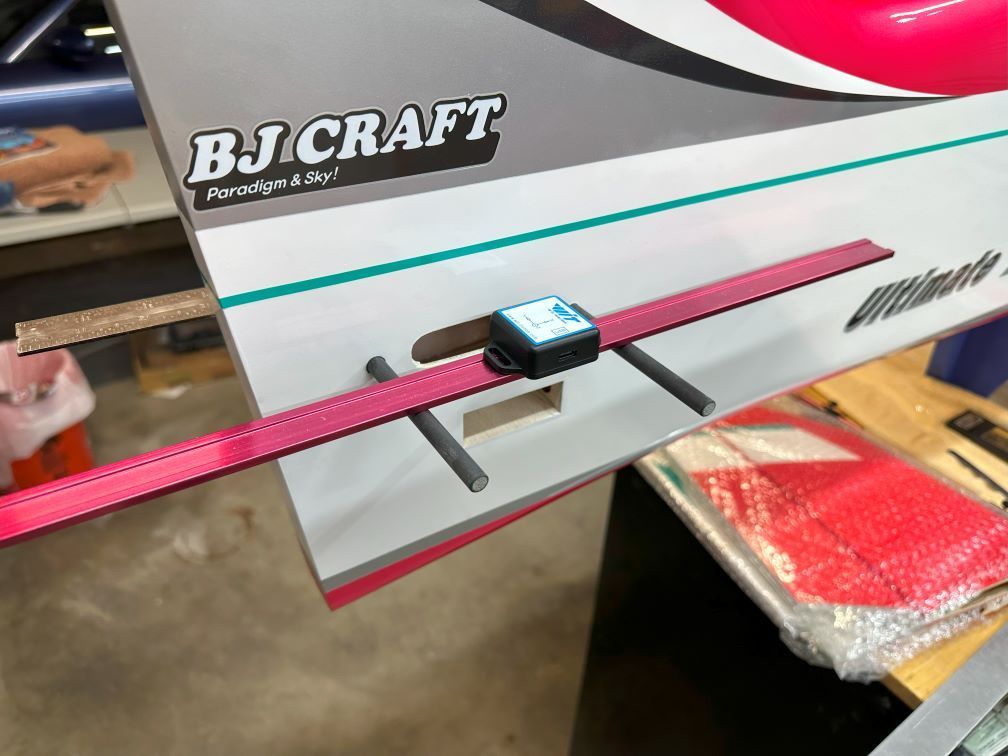
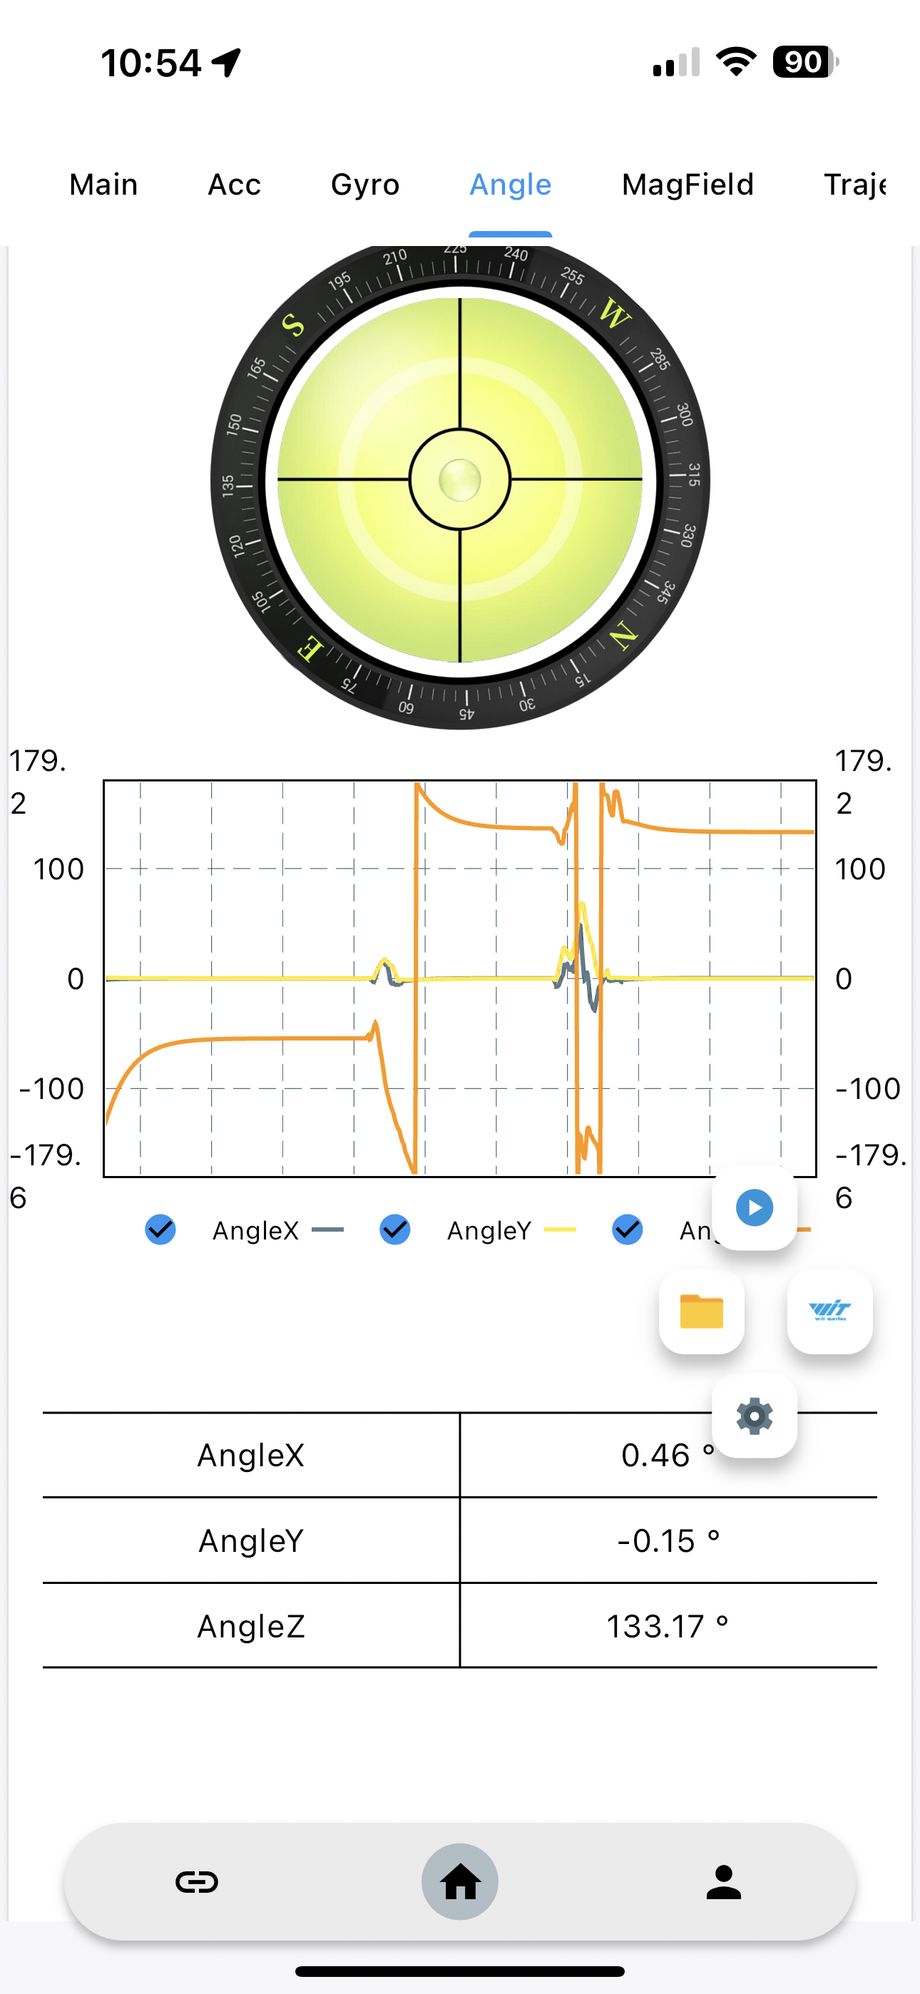
I am doing a test on this build to compare the trusty old Robart Incidence Meter to the Witmotion WT901BLECL5.0 and the smaller WT9011DCL. So far, I have been pretty impressed with these units. The handheld app makes it easy to see the measurements vs squatting and squinting to see the Robart gauge (LOL).
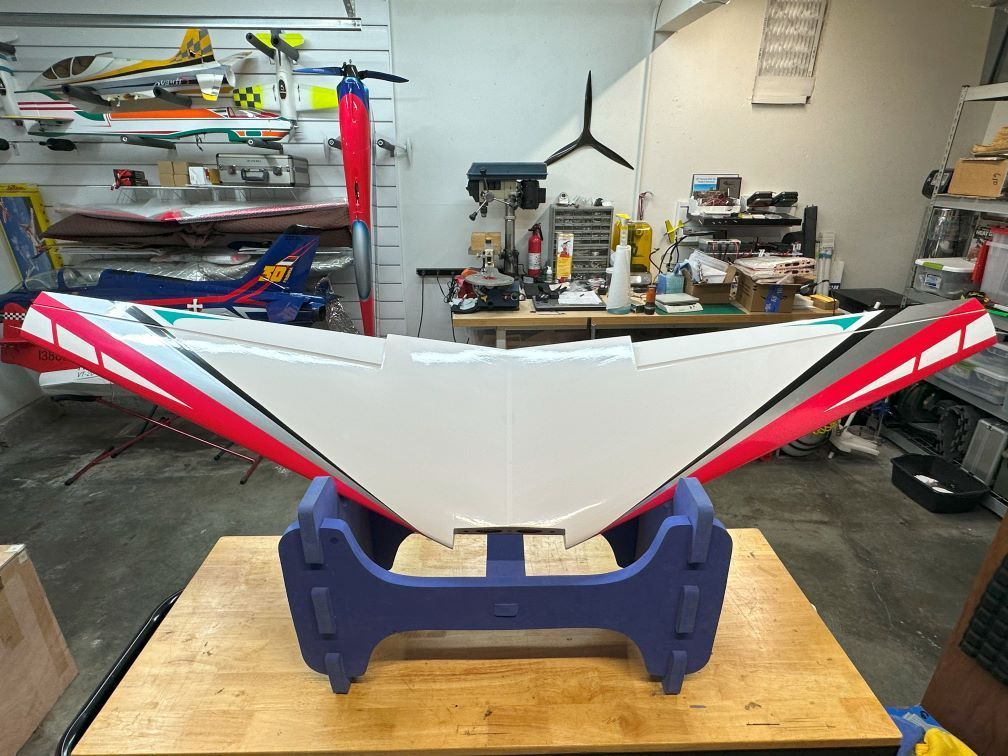
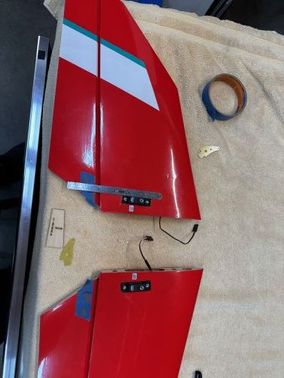
The thing that jumped out at me when I first put it together, and required a double take from me, was that the wings have no dihedral nor anhedral. They are flat. I checked in with BJ Park on this and he says this is due to the double swept wing ("most swept wing"). The top and bottom wings are identical. He also states that the battery center line needs to be on the thrust line. According to BJ, these two factors are really key to the performance of a double swept wing design.
Bottom line: Things are square so I am going to move on to final build and assembly. It all looks pretty straightforward from here.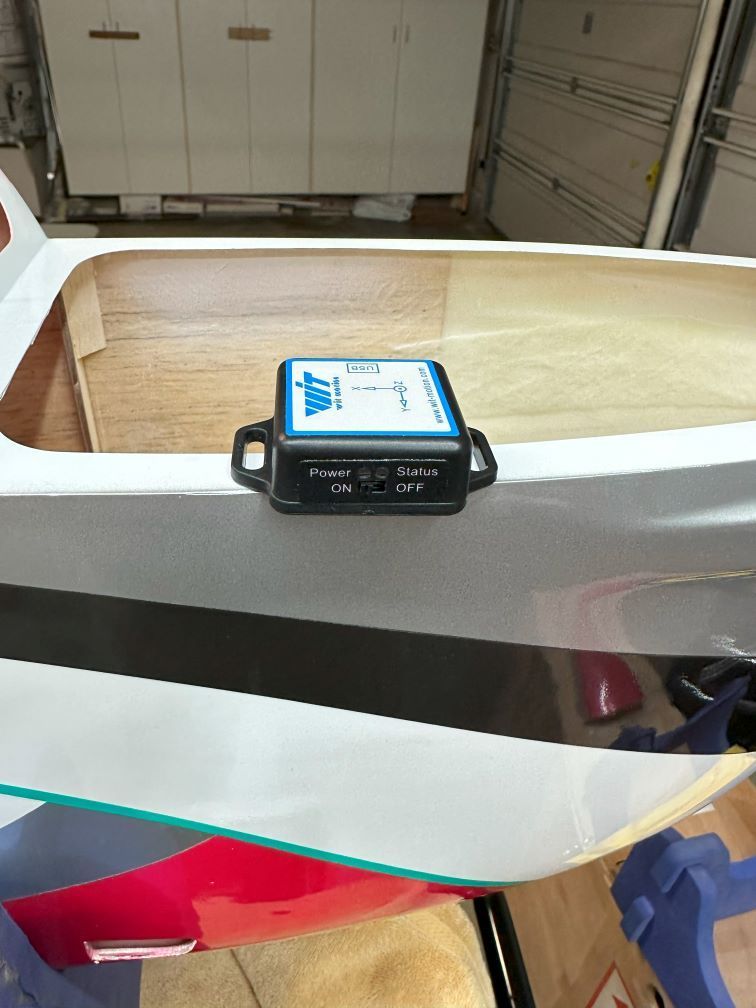
Witmotion sensor compared favorably with the Robart
Stab tubes are a reference for zero degrees incidence

Battery hatch mount is a reference for zero degrees
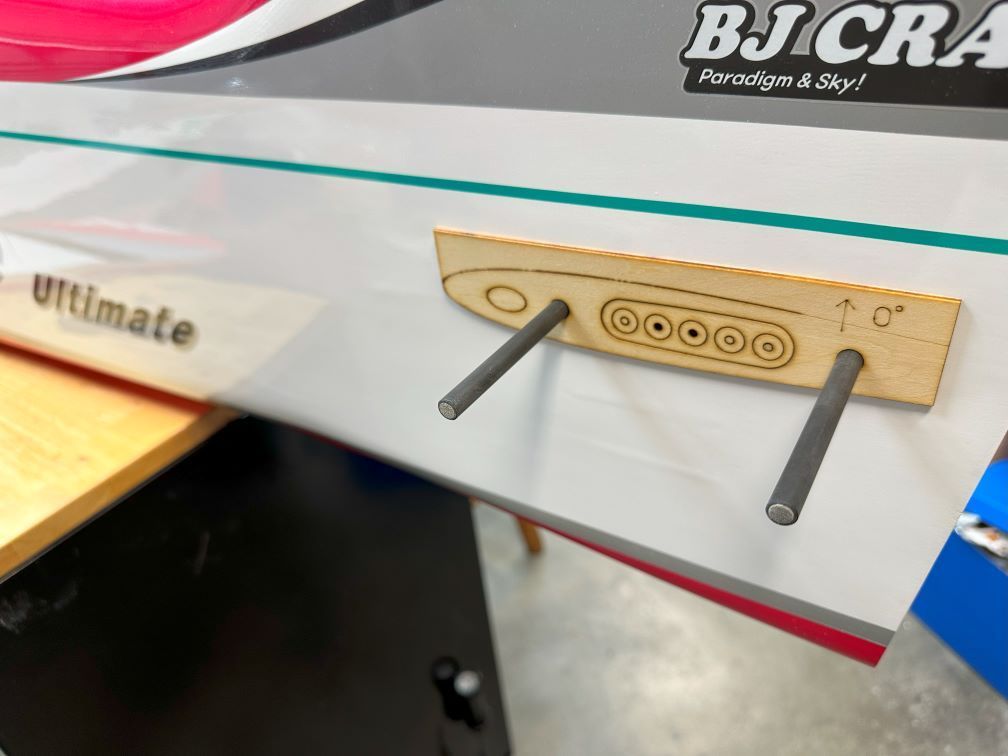
The jig for checking stab incidence


Right at zero
Zero dihedral

Things look to be aligned well, so now it is on to final build
- Stab tubes are at zero degrees (he includes a jig to measure that and it is right on)
- Battery hatch frame on the fuselage is also at zero degrees.
These form easy to access zero points when measuring everything.
I am doing a test on this build to compare the trusty old Robart Incidence Meter to the Witmotion WT901BLECL5.0 and the smaller WT9011DCL. So far, I have been pretty impressed with these units. The handheld app makes it easy to see the measurements vs squatting and squinting to see the Robart gauge (LOL).
The thing that jumped out at me when I first put it together, and required a double take from me, was that the wings have no dihedral nor anhedral. They are flat. I checked in with BJ Park on this and he says this is due to the double swept wing ("most swept wing"). The top and bottom wings are identical. He also states that the battery center line needs to be on the thrust line. According to BJ, these two factors are really key to the performance of a double swept wing design.
Bottom line: Things are square so I am going to move on to final build and assembly. It all looks pretty straightforward from here.
Witmotion sensor compared favorably with the Robart
Stab tubes are a reference for zero degrees incidence
Battery hatch mount is a reference for zero degrees
The jig for checking stab incidence
Right at zero
Zero dihedral
Things look to be aligned well, so now it is on to final build
Last edited by shannah; 07-29-2024 at 08:15 AM.
The following 2 users liked this post by shannah:
rcprecision (07-29-2024),
wattsup (07-29-2024)
07-30-2024, 07:47 PM
#6
I am using the Futaba S3174HV Micro Servos for the elevators per BJ’s recommendation. He also likes the HV69’s but I want to stay SBus. He provided laser cut servo mounts which fit perfectly. I broke one so I laminated 0.25mm CF on both. Set up the center position on the servos using Futaba CIU-3
The only downside is the Futaba servos use a single bolt and grommet and I am getting some side to side wobble. Any ideas as to how to securely mount single bolt micro servos would be appreciated.

The only downside is the Futaba servos use a single bolt and grommet and I am getting some side to side wobble. Any ideas as to how to securely mount single bolt micro servos would be appreciated.
The following users liked this post:
wattsup (08-20-2024)
The following users liked this post:
RuneG (07-31-2024)
 08-04-2024, 09:43 AM
#10
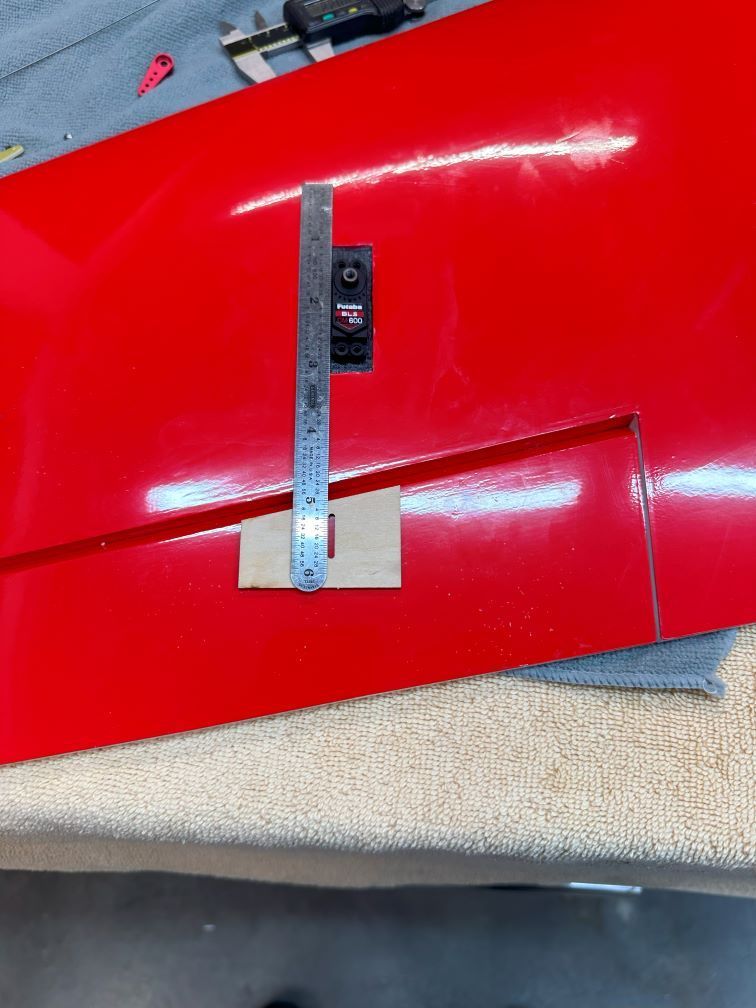
Following a similar process, I installed the servo mounts in the wings. I thought I'd highlight a couple things to help clarify the process. First, BJ includes a jig to cut the slot for the control horns. They are all at the correct angle to the hinge line and will aid in getting the horns installed square.
I used a makeshift depth gauge to install the servo mounts. I trial fit the trays to find out the desired depth then marked a gauge to make sure it was repeatable from mount to mount. I tacked some small tabs in place with CA to help hold the tray as I installed them with Hysol. The tabs help to keep the servo mounting tray from falling/dropping or tilting and makes lining them up much quicker.
I use a ruler placed on the side of the servo to locate the horn. This will be the same method for the wings
The jig will give you the correct angle on the hinge line once you find the horn location
Don't forget, when opening the servo bays, use a hot iron to seal the edges
I made a depth gauge to accurately locate some tabs for the servo tray to rest on while I epoxied the tray in place
The following 3 users liked this post by shannah:
08-14-2024, 03:56 PM
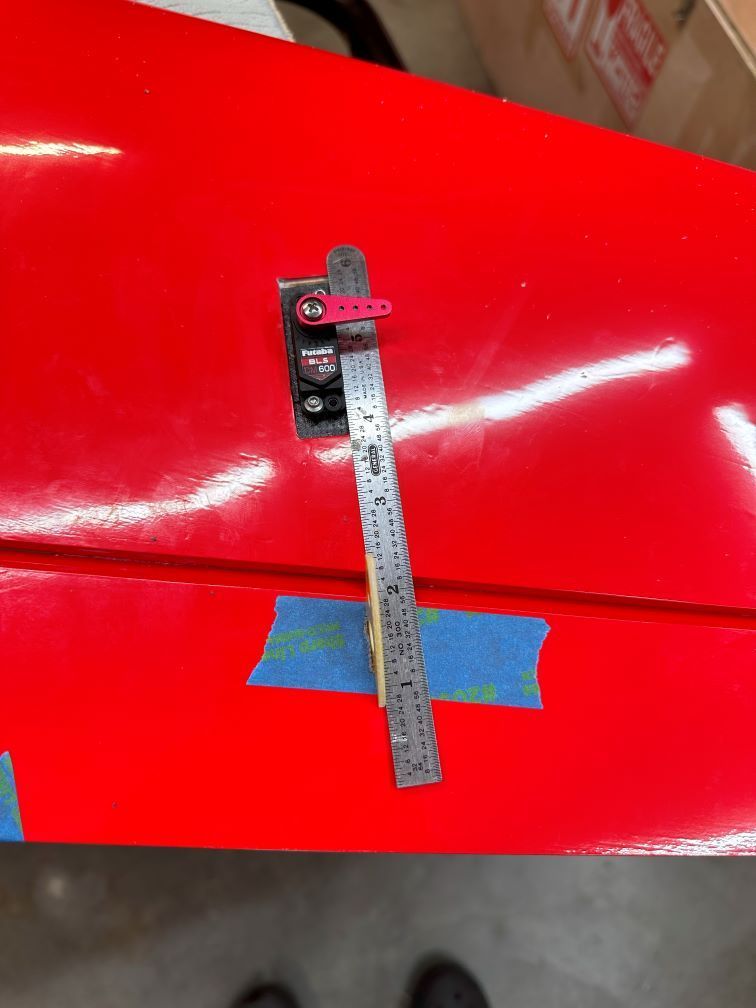
#11
I mounted the BLSCM600 servos. They are all connected via SBUS which is a real labor savor for Bipes. The servos connect via a single Y-connector so you will never get the wrong side hooked up. To pull the wires through the wings I used a very thin music wire and ran it back to the servo bay at the angle shown in the picture. It was very easy to snag the wire.
I installed the aileron hinges. I used my last stock of Great Planes CA Hinges. I couldn't find them on the Tower Hobbies website so I'll have to hunt down another batch. They are thick, lots of fiber, won't break etc. I hope they are still making them.
I used the same method to install the control horns as with the elevator. Use the supplied jig to align the horn to the hinge line. I used a 2mm drill to cut the slot and they came out very nice and fit great.
I followed that up with the rudder horn and glued everything in place and let things cure.

run the wire through the wing at this angle to easily snag the servo wire
servo horn alignment using the supplied jig to locate the slot
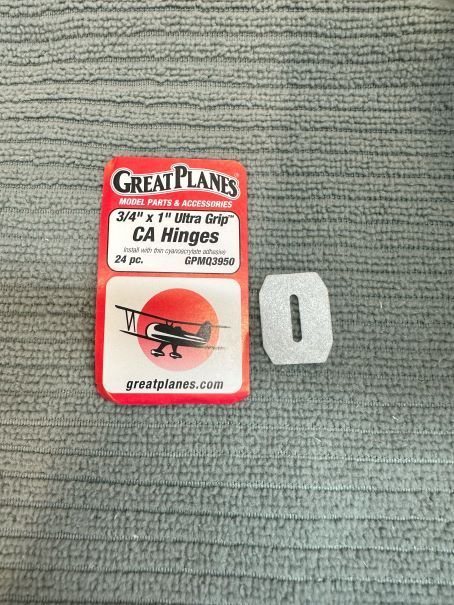
Love these hinges.
I installed the aileron hinges. I used my last stock of Great Planes CA Hinges. I couldn't find them on the Tower Hobbies website so I'll have to hunt down another batch. They are thick, lots of fiber, won't break etc. I hope they are still making them.
I used the same method to install the control horns as with the elevator. Use the supplied jig to align the horn to the hinge line. I used a 2mm drill to cut the slot and they came out very nice and fit great.
I followed that up with the rudder horn and glued everything in place and let things cure.
run the wire through the wing at this angle to easily snag the servo wire
servo horn alignment using the supplied jig to locate the slot
Love these hinges.
08-14-2024, 04:03 PM
#12
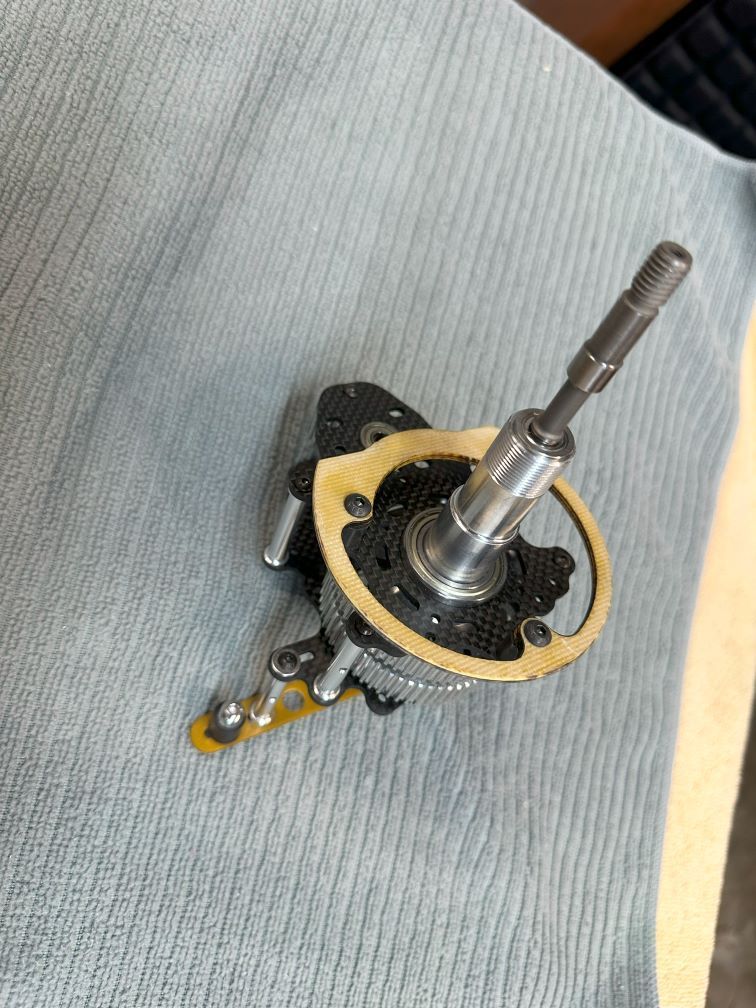
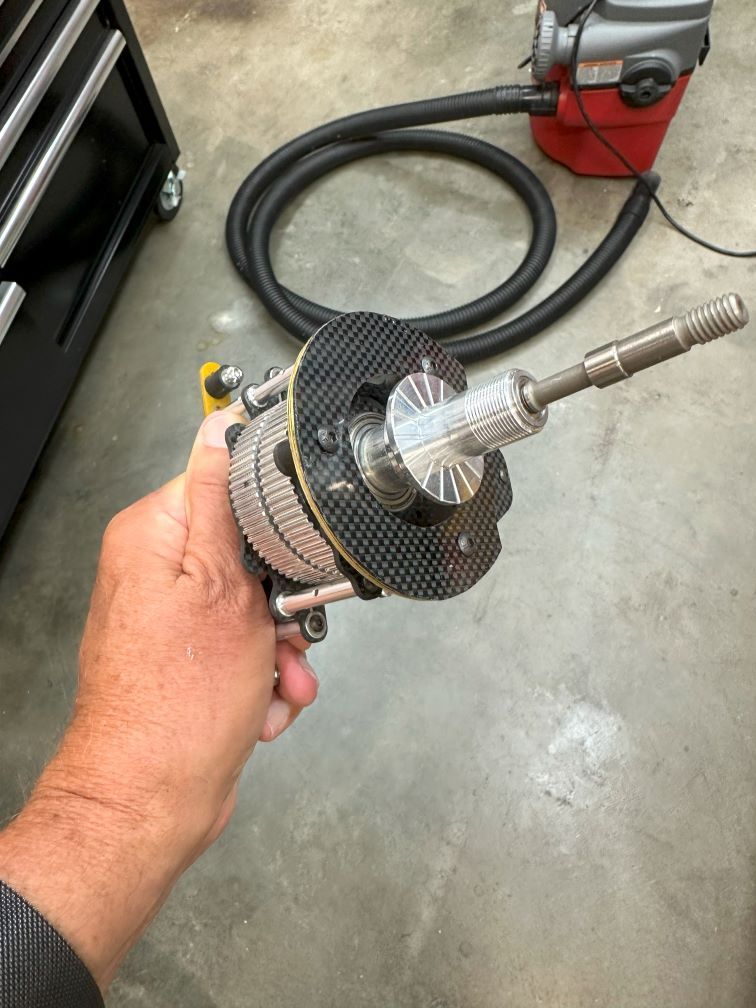
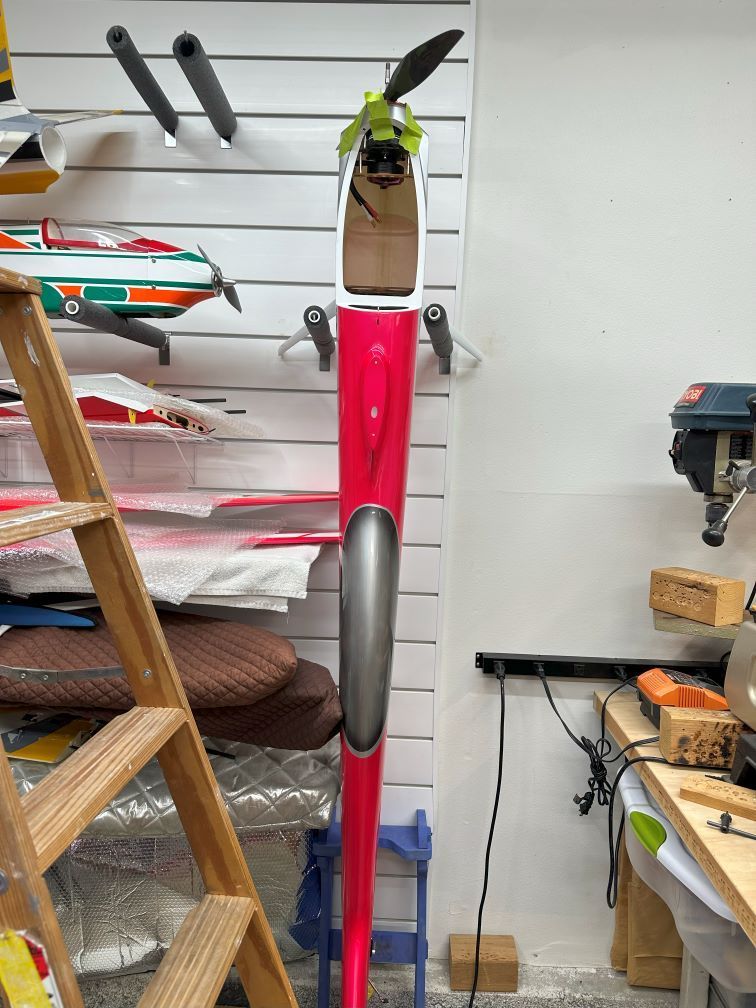
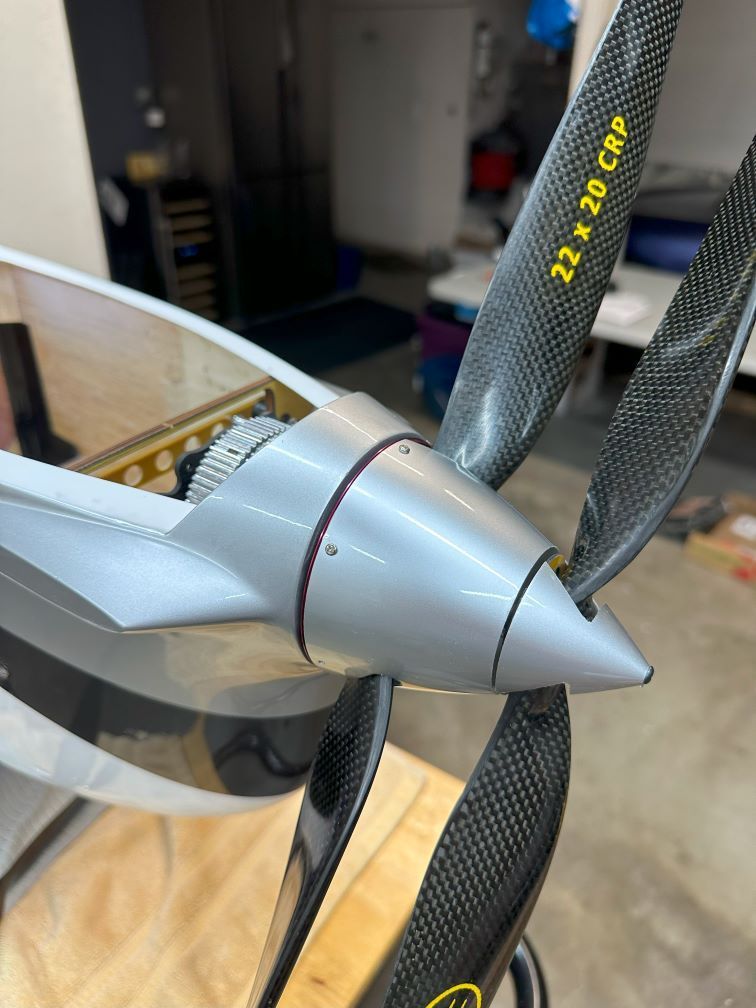
Next, I moved on to the motor installation. If you are following my X-Drive thread on RCUniverse you will know that I have been using the X-Drive contradrive system from BJ Craft for several years in my Eternity. It is a great unit, very robust, great power band with lots of useful low end torque. I am installing another one in the Biside. BJ supplied me with a new prop shaft which is 15mm shorter. That is good because these large-tail biplanes need to have the weight as far forward as possible. He also supplied me with an ESC for the X-Drive which I will be testing and using. It is a governor type ESC so this will be new for me. I haven't used the D3 in the past so I get to learn that along with the new airframe.
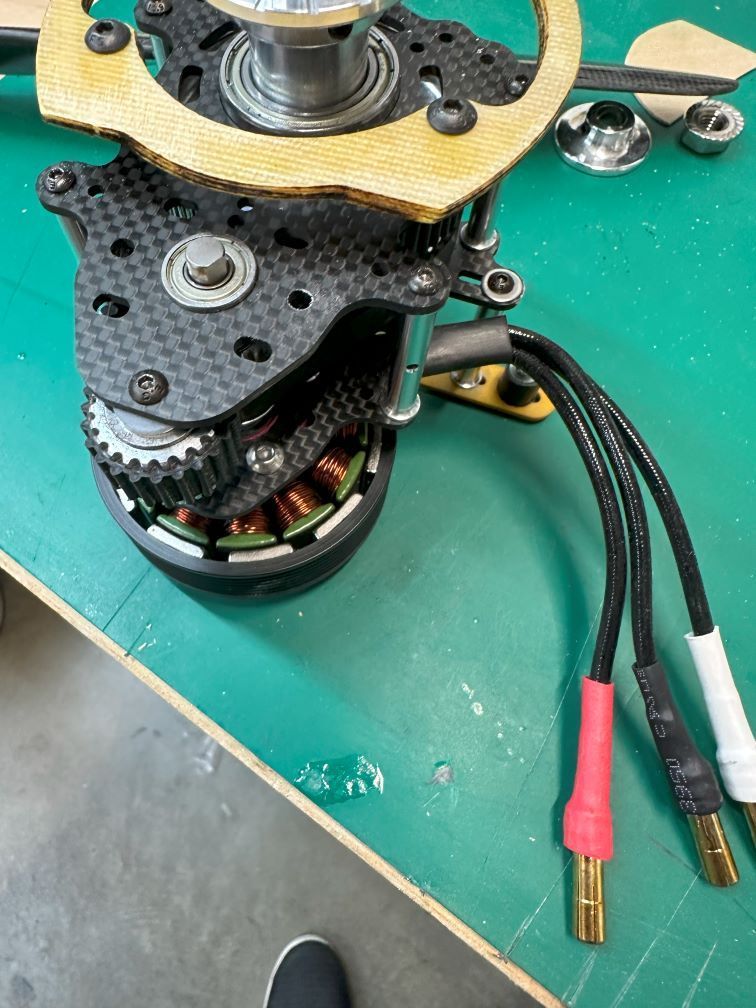
He also supplied me with some fiberglass parts for the nose ring mount and for the rear mount. I went ahead and laminated another thin layer of CF to increase the stiffness.
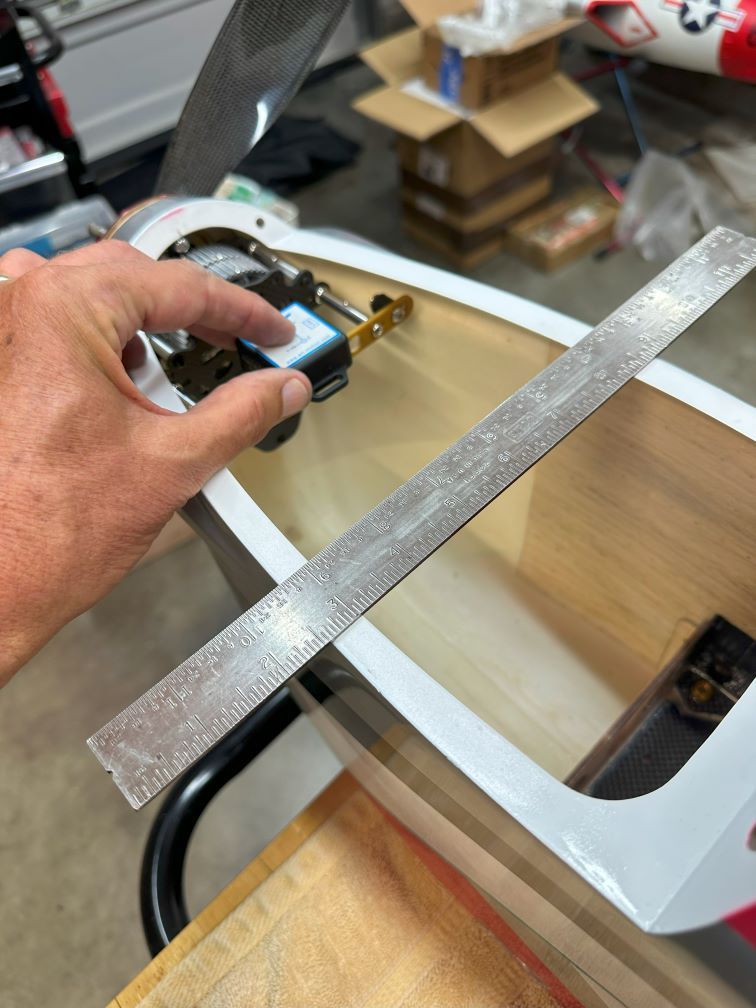
For mounting everything and checking alignment, I removed the motor so the assembly was light and easy to handle. I checked alignment with the WIT motion sensor and double checked the thrust line on the nose to make sure all was at zero. For fun, I even checked the propshaft alignment by just holding the WIT onto the prop shaft and checking the angle. It matched my more detailed nose thrust measurement.
Lastly, I tweaked the fit of the firewall nose ring by fine tuning with sandpaper. Once I felt that it was all square then I reinstalled the motor so it would have all the stresses on the mount as I glued it in place. It's hanging up to cure now so we'll see how it turned out.
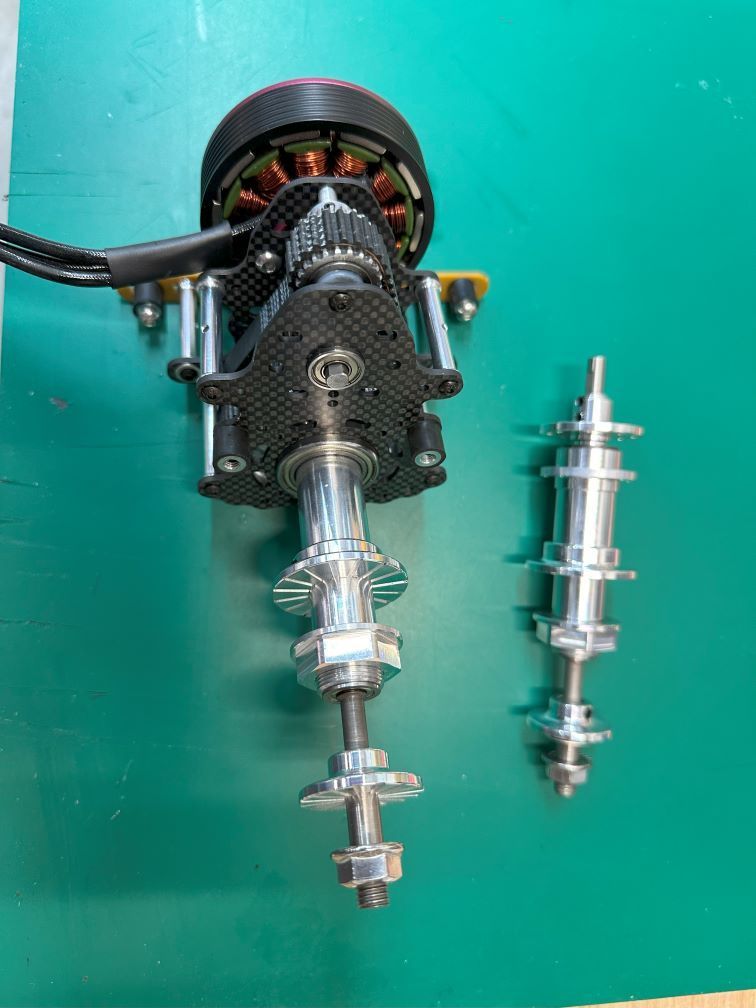
BJ Craft X-Drive with shorter shaft
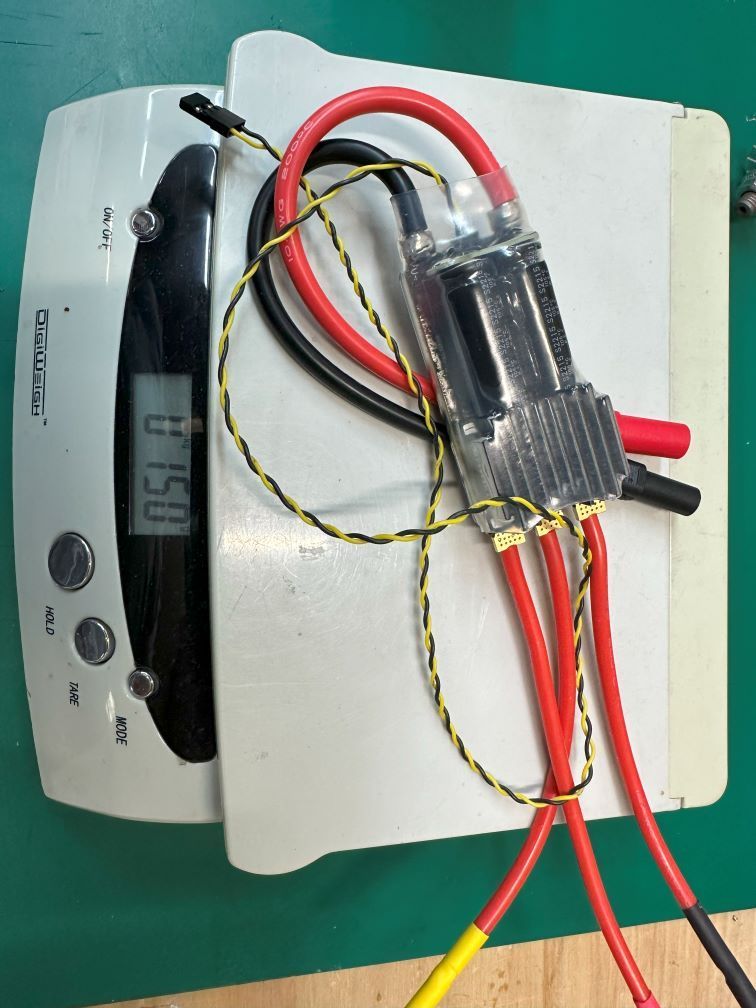
Governor-type ESC for the X-Drive
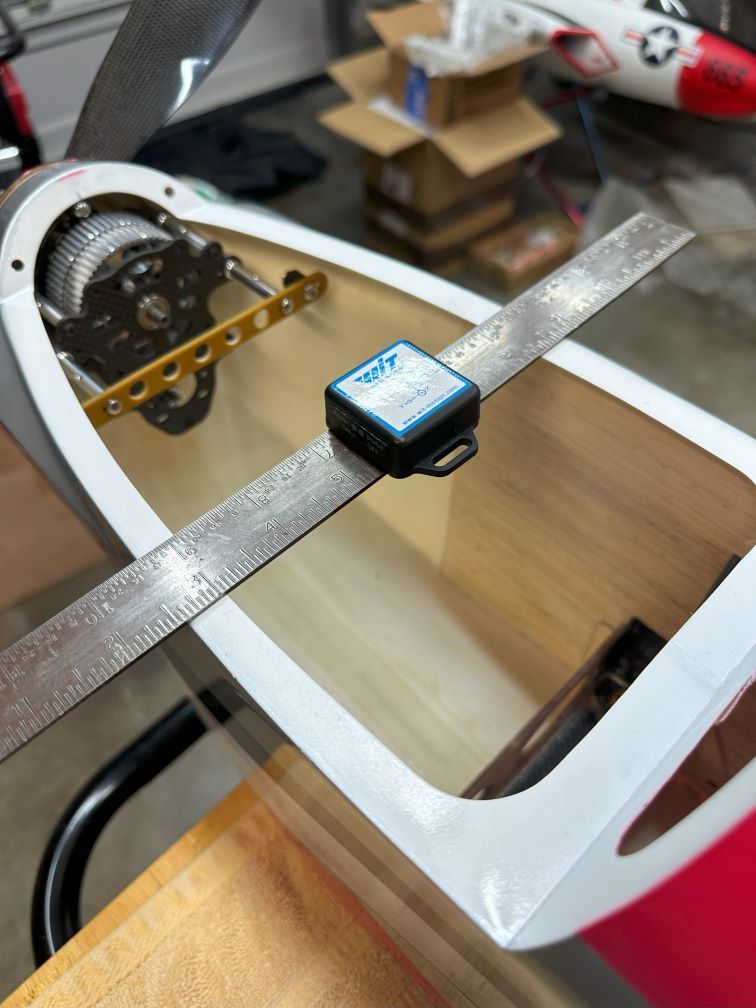
I used the WIT Motion sensor to double check alignment. First, I made my reference with the battery hatch so that could be used to align the rear mount
I laminated CF onto the fiberglass nose ring mount.
hanging to cure.
He also supplied me with some fiberglass parts for the nose ring mount and for the rear mount. I went ahead and laminated another thin layer of CF to increase the stiffness.
For mounting everything and checking alignment, I removed the motor so the assembly was light and easy to handle. I checked alignment with the WIT motion sensor and double checked the thrust line on the nose to make sure all was at zero. For fun, I even checked the propshaft alignment by just holding the WIT onto the prop shaft and checking the angle. It matched my more detailed nose thrust measurement.
Lastly, I tweaked the fit of the firewall nose ring by fine tuning with sandpaper. Once I felt that it was all square then I reinstalled the motor so it would have all the stresses on the mount as I glued it in place. It's hanging up to cure now so we'll see how it turned out.
BJ Craft X-Drive with shorter shaft
Governor-type ESC for the X-Drive
I used the WIT Motion sensor to double check alignment. First, I made my reference with the battery hatch so that could be used to align the rear mount
I laminated CF onto the fiberglass nose ring mount.
hanging to cure.
The following users liked this post:
wattsup (08-14-2024)
The following 2 users liked this post by shannah:
Ricardo M. (08-19-2024),
wattsup (08-15-2024)
08-19-2024, 02:22 PM
#14
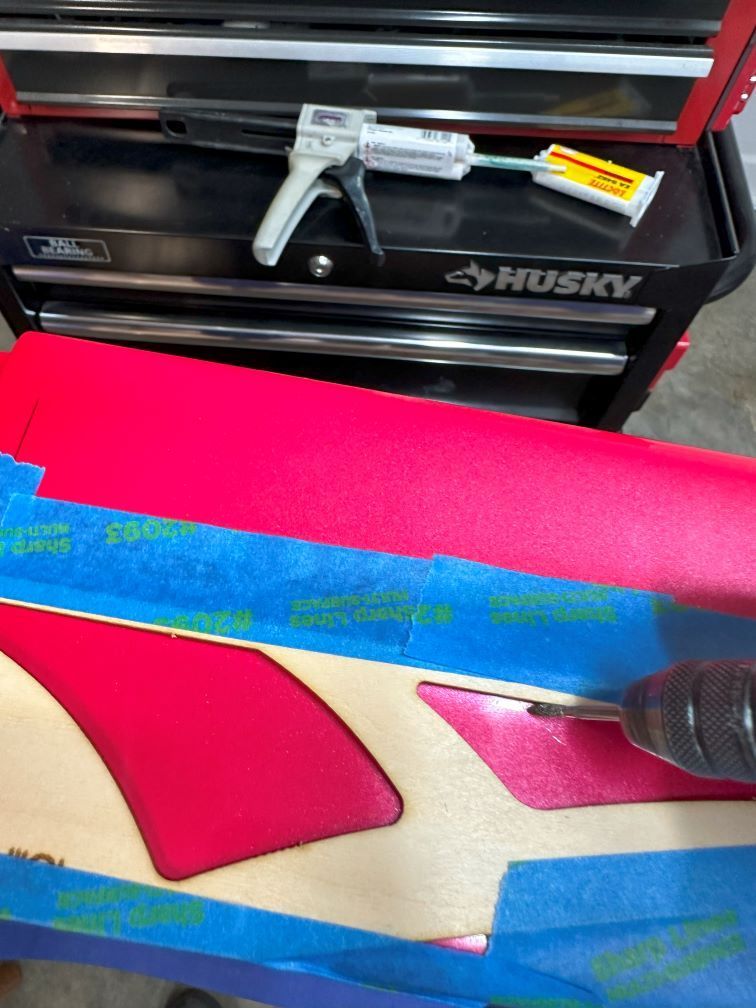
I completed my least favorite task which is cutting the air intake and air outlet holes. I used the supplied templates to make the cutouts.
For the air outlet, I simply taped the template in place and used my Dremel with a scribe type bit and followed the template contour with the bit. It cut out quickly and fairly cleanly.
For the air intake, the template won't conform to the curve of the nose so you have to do your best to mark out the shape. I applied blue painter's tape and marked the cutout pattern onto the tape. Then I cut it out with a cutout wheel, various sanding cylinders, and hand files. Tedious. I still have to clean it up and widen the left side just slightly so they are truly symmetrical. But, for the first pass it is OK.
The following 2 users liked this post by shannah:
Ricardo M. (08-27-2024),
wattsup (08-20-2024)
08-20-2024, 04:03 PM
#17
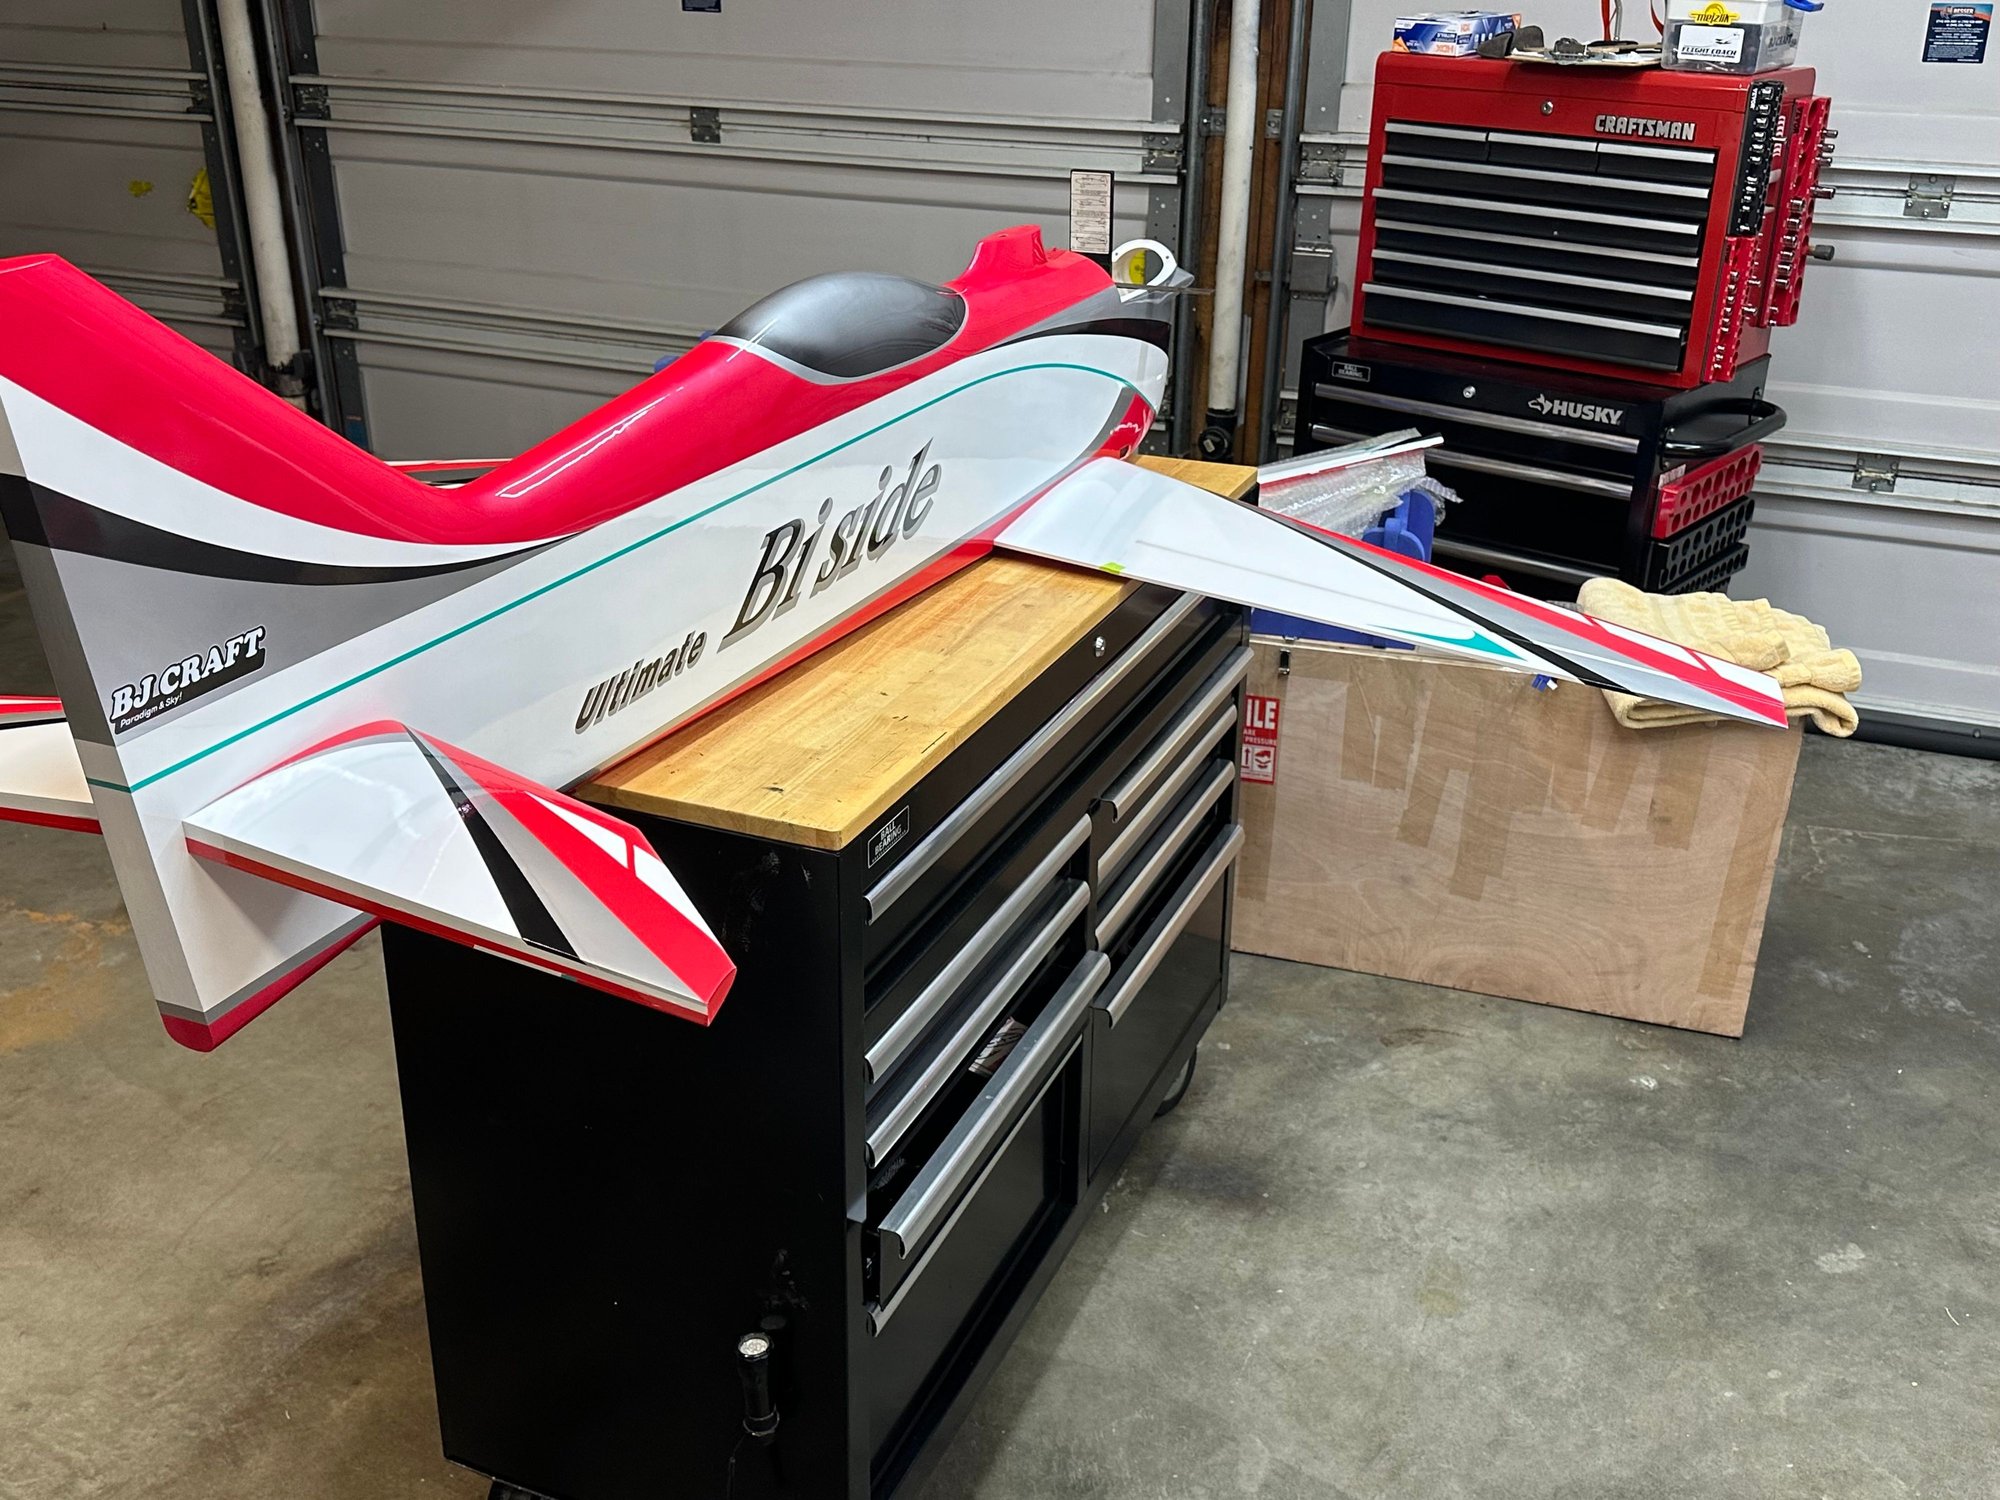
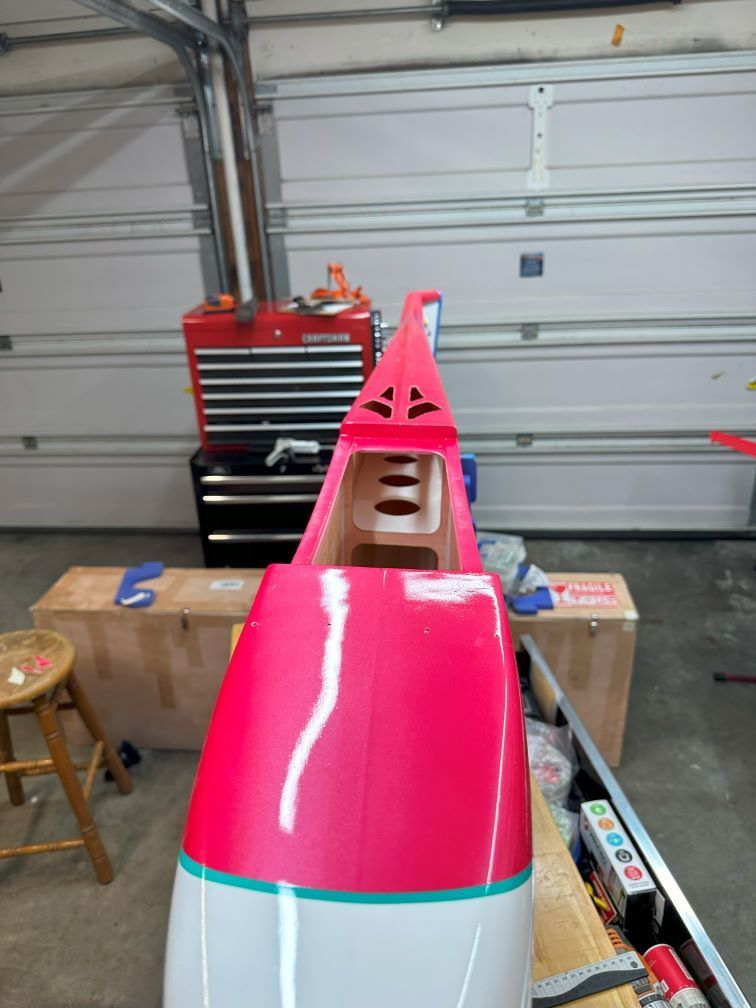
I assembled the Biside and temporarily installed the battery so I could check the CG and find out where the battery tray needs to be installed. It will be at about the same location as my Eternity. I'll update the build when I fab the tray and install it. That is about all I have left to do. It really looks great.
The following 2 users liked this post by shannah:
rcprecision (08-20-2024),
wattsup (08-20-2024)
08-20-2024, 04:37 PM
#18
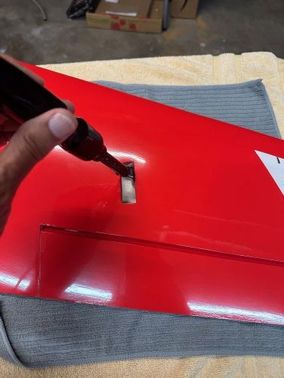
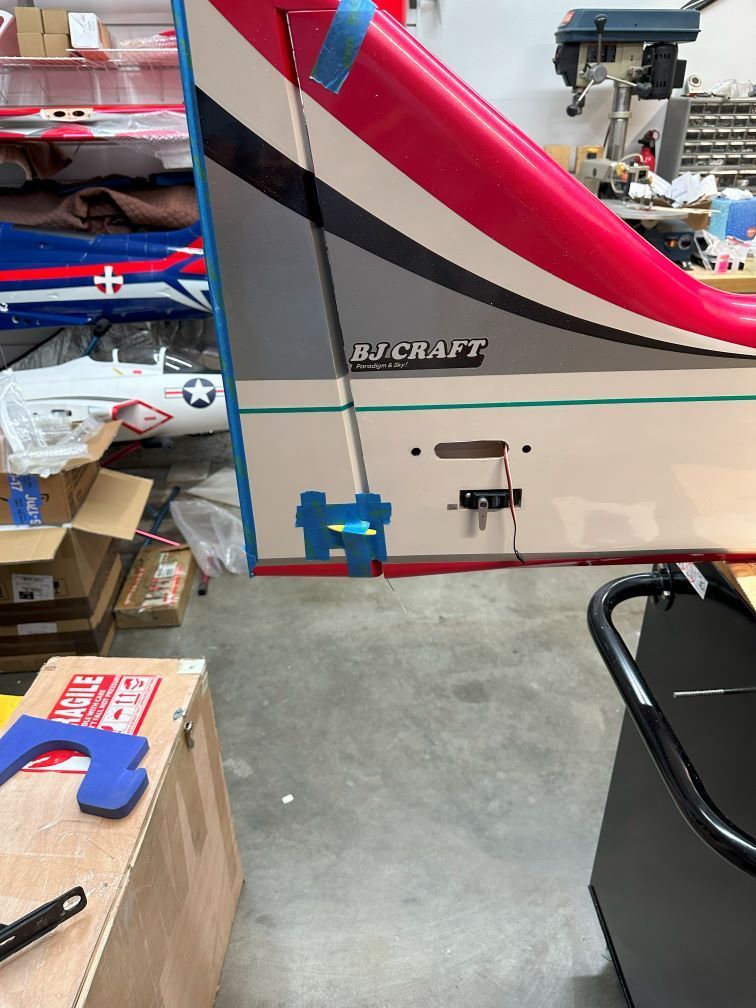
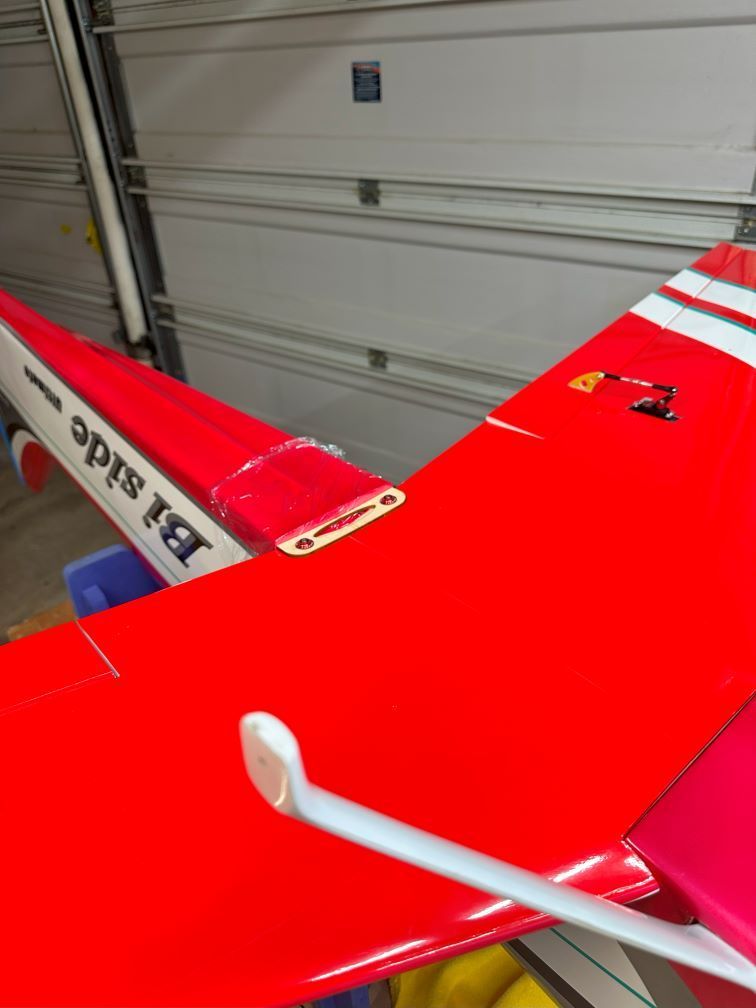
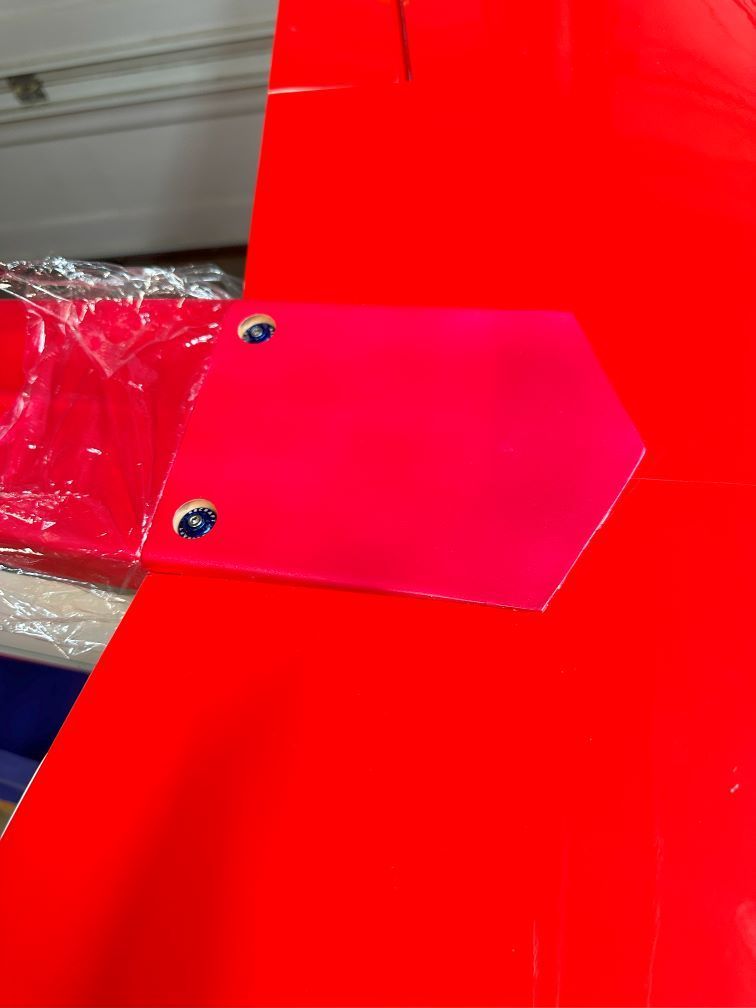
I was reviewing the build thread and realized I did not post anything about the lower wing mount and fairing. The lower wing bolts to the fuselage with the standard 3mm bolts. But, unlike the original Biside and Eternity he supplied an optional mount with a fiberglass fairing.
I test fit the basic mounting plate, which would work fine, but I decided to install the fiberglass fairing and mount.
The installation was pretty straightforward and no trimming or fitting was required.
First, I installed the plywood mount which is the interface for the wing bolts. I marked out the location on the wing and removed the covering material.
Next, I epoxied the mount in place while the wing was bolted to the fuselage
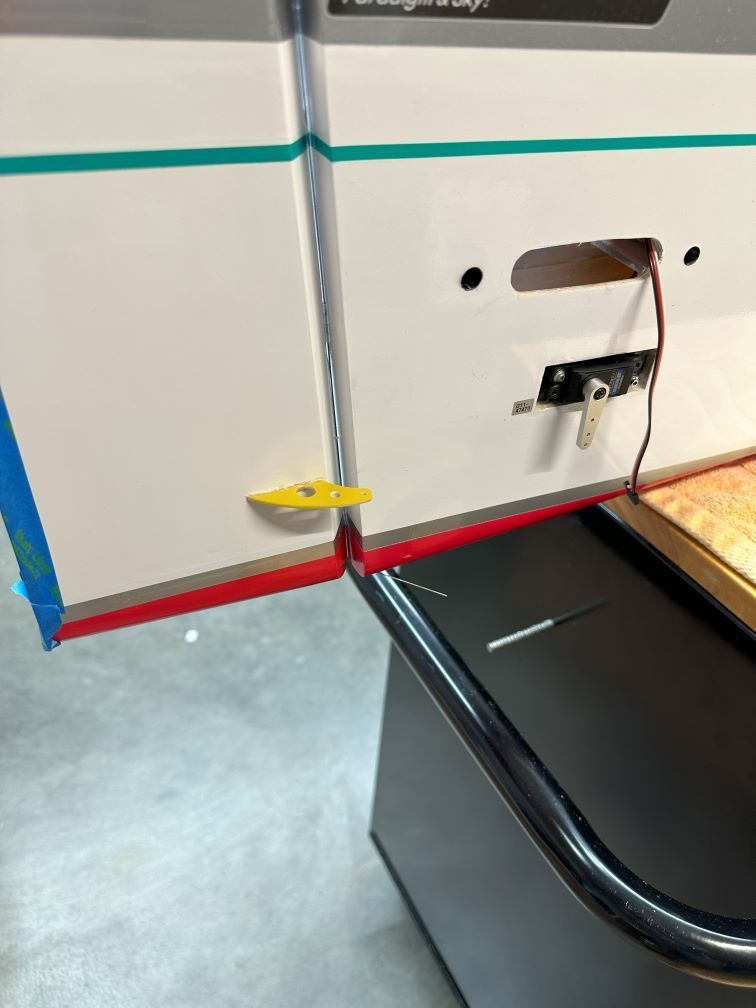
Then I put the fairing together. I installed the mount parts onto the fairing with CA. Next, I put down some thin clear tape onto the wing covering and I epoxied the fairing to the tape. This is how I have always mounted BJ Craft wing and stab fences. It makes it easy and clean.
This is the basic wing mounting plate. It is OK to use but not as cool as the fairing mount.
Mark the outline of the plywood mounting plate and remove the covering
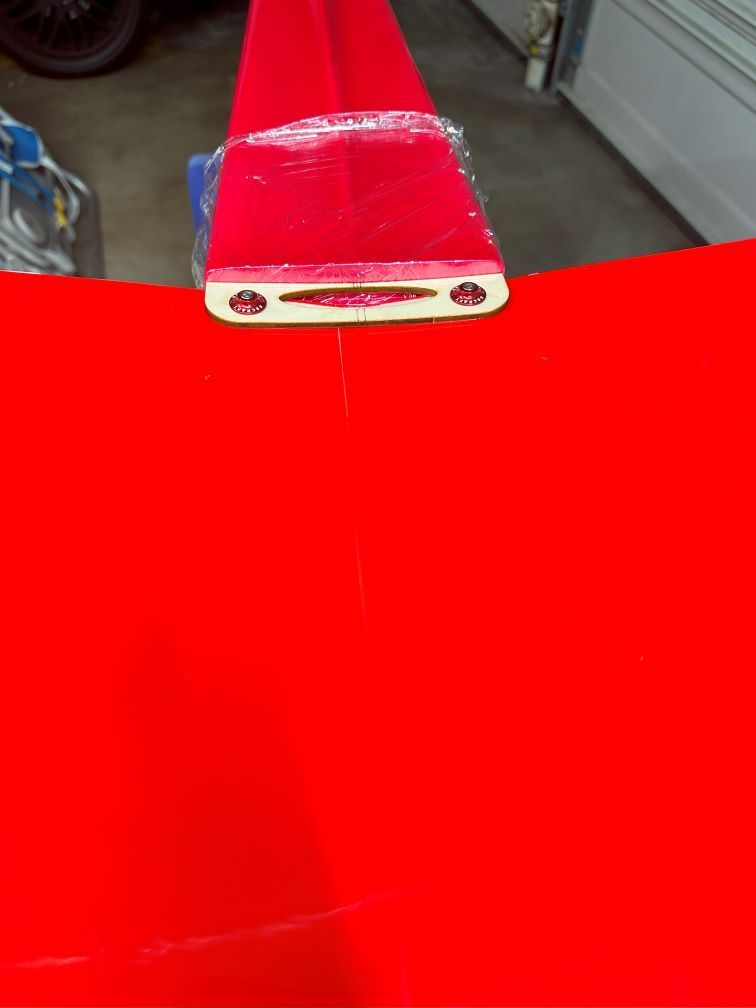
Epoxy the plywood mounting plate in place
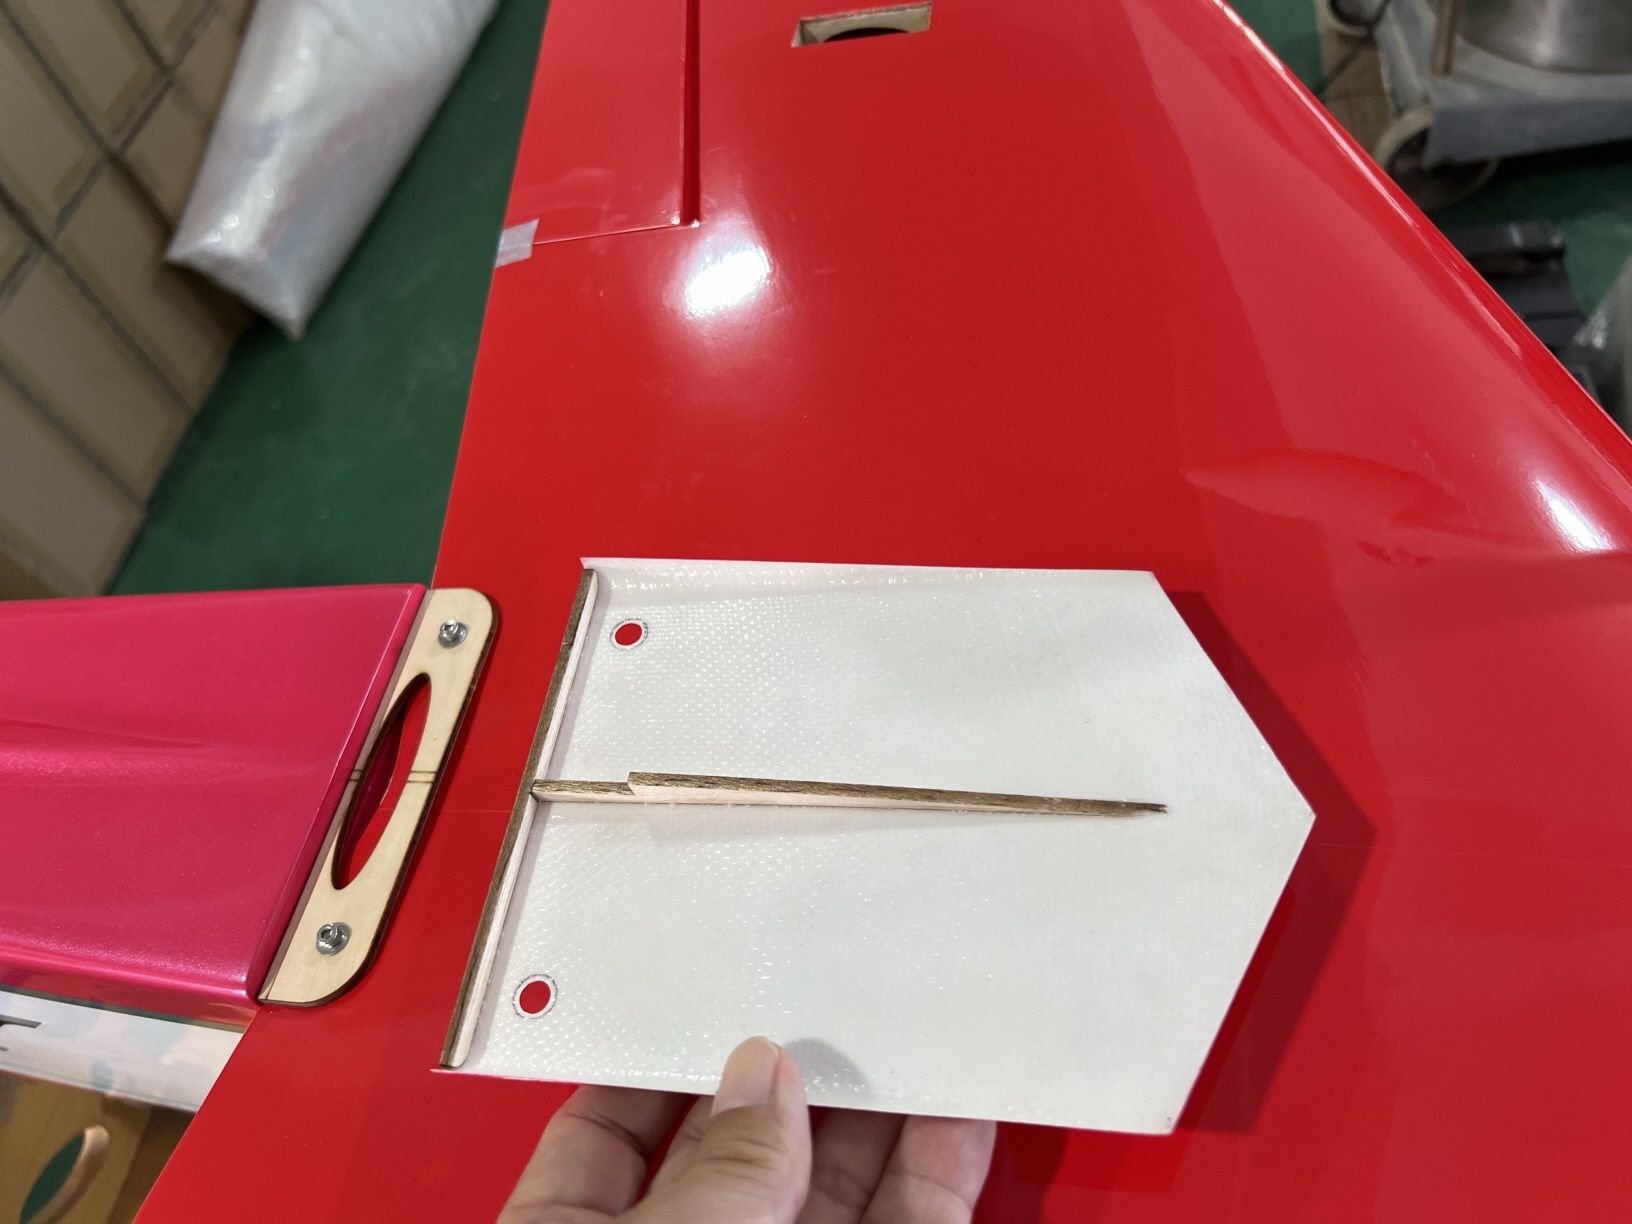
Assemble the fairing by putting the ribs in place with CA
I glued the fairing to the wing with epoxy. I first laid down some thin clear tape and the fairing is glued to the tape.
I test fit the basic mounting plate, which would work fine, but I decided to install the fiberglass fairing and mount.
The installation was pretty straightforward and no trimming or fitting was required.
First, I installed the plywood mount which is the interface for the wing bolts. I marked out the location on the wing and removed the covering material.
Next, I epoxied the mount in place while the wing was bolted to the fuselage
Then I put the fairing together. I installed the mount parts onto the fairing with CA. Next, I put down some thin clear tape onto the wing covering and I epoxied the fairing to the tape. This is how I have always mounted BJ Craft wing and stab fences. It makes it easy and clean.
This is the basic wing mounting plate. It is OK to use but not as cool as the fairing mount.
Mark the outline of the plywood mounting plate and remove the covering
Epoxy the plywood mounting plate in place
Assemble the fairing by putting the ribs in place with CA
I glued the fairing to the wing with epoxy. I first laid down some thin clear tape and the fairing is glued to the tape.
The following 2 users liked this post by shannah:
Ricardo M. (08-21-2024),
wattsup (08-25-2024)
08-25-2024, 03:39 PM
#19
I installed the radio gear and have been chewing up time fine tuning servo setup and linkages. I did a last CG check so I should be good for my battery tray install. I still think I�ll make the tray removable so I�ll show what I come up with.
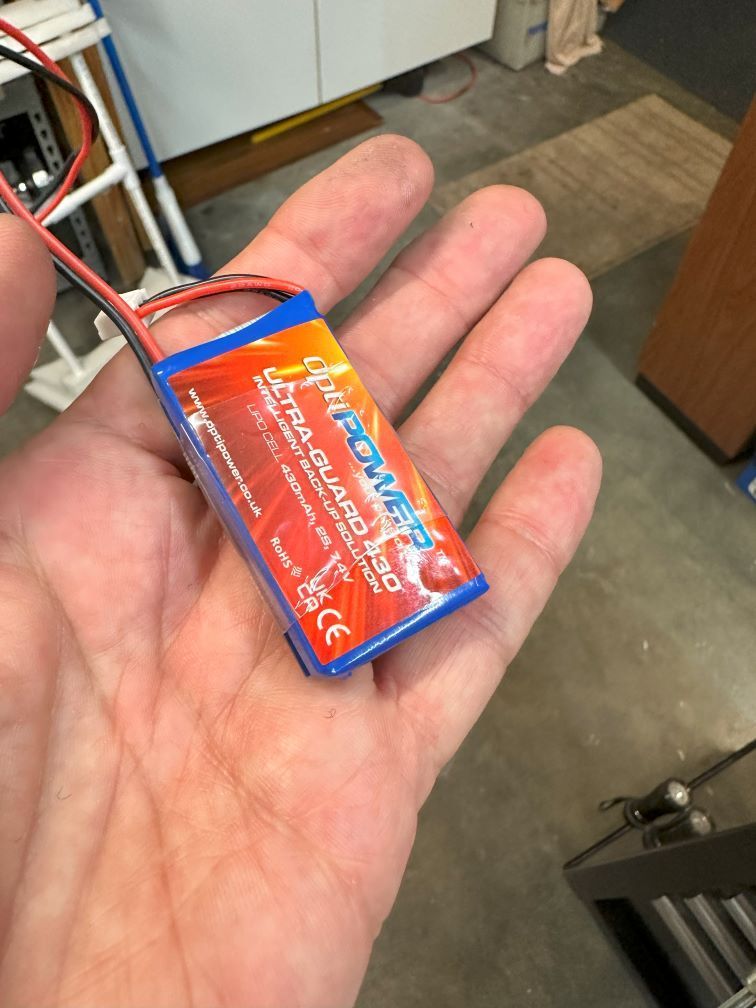
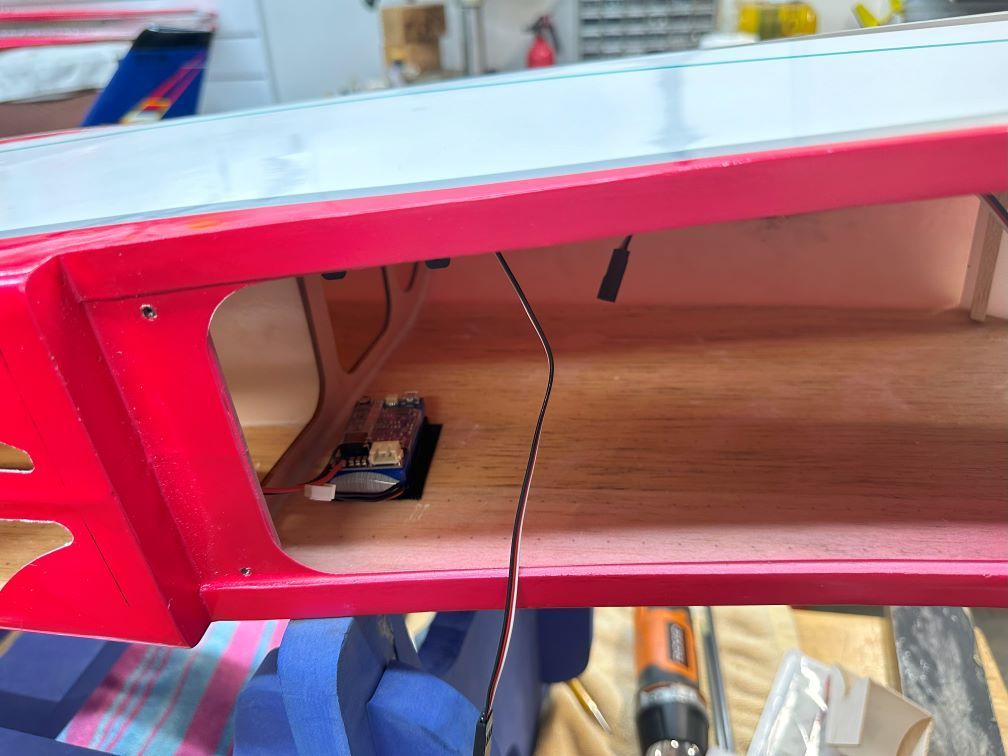
I am going to try the Optipower Ultraguard 430 as my battery backup. Since the ESC does not have a BEC I want to have some sort of redundancy for power. So the primary will be a 1300Mah lipo connected to a Powerbox Digiswitch V2 and backup will be the Ultraguard. It is a neat unit which stays connected all the time and keeps the 430Mah battery topped off. It auto senses the voltage and kicks in when there�s a problem with the primary. I haven't seen anyone in my area using this but I read a few posts from folks in the UK that seem to like the unit. If anyone has any experience with it then let me know.

The Optipower Ultraguard 430 looks like a good solution for a backup battery when using and ESC without a BEC
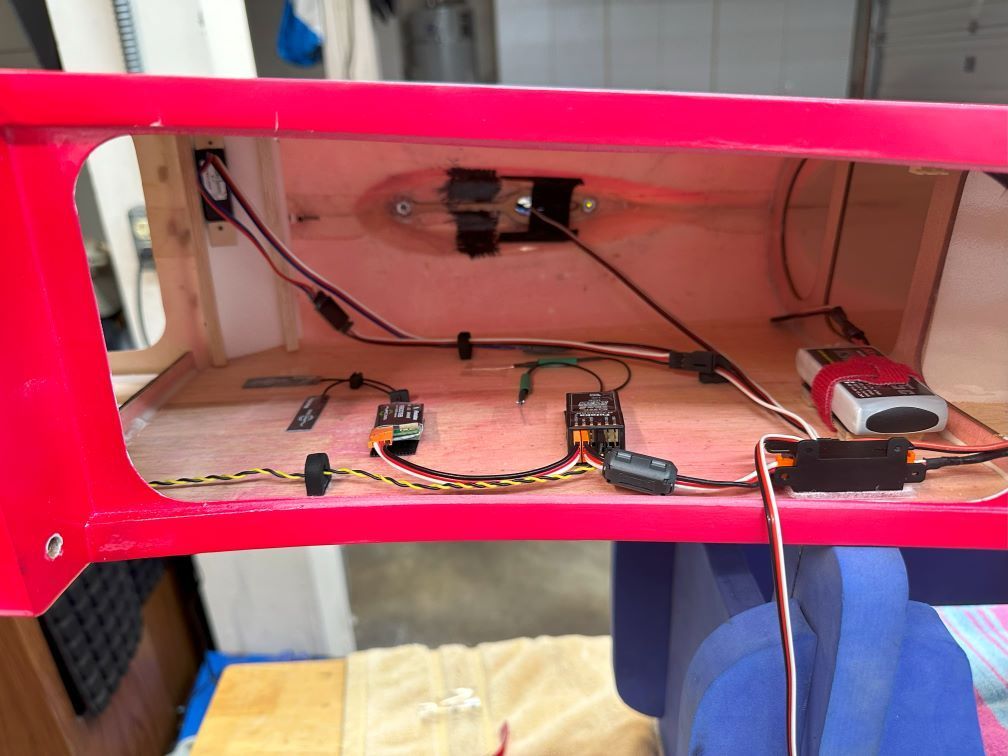
Radio Gear is in!
Battery location after CG check
I am going to try the Optipower Ultraguard 430 as my battery backup. Since the ESC does not have a BEC I want to have some sort of redundancy for power. So the primary will be a 1300Mah lipo connected to a Powerbox Digiswitch V2 and backup will be the Ultraguard. It is a neat unit which stays connected all the time and keeps the 430Mah battery topped off. It auto senses the voltage and kicks in when there�s a problem with the primary. I haven't seen anyone in my area using this but I read a few posts from folks in the UK that seem to like the unit. If anyone has any experience with it then let me know.
The Optipower Ultraguard 430 looks like a good solution for a backup battery when using and ESC without a BEC
Radio Gear is in!
Battery location after CG check
The following users liked this post:
Ricardo M. (08-27-2024)
08-25-2024, 03:40 PM
#20
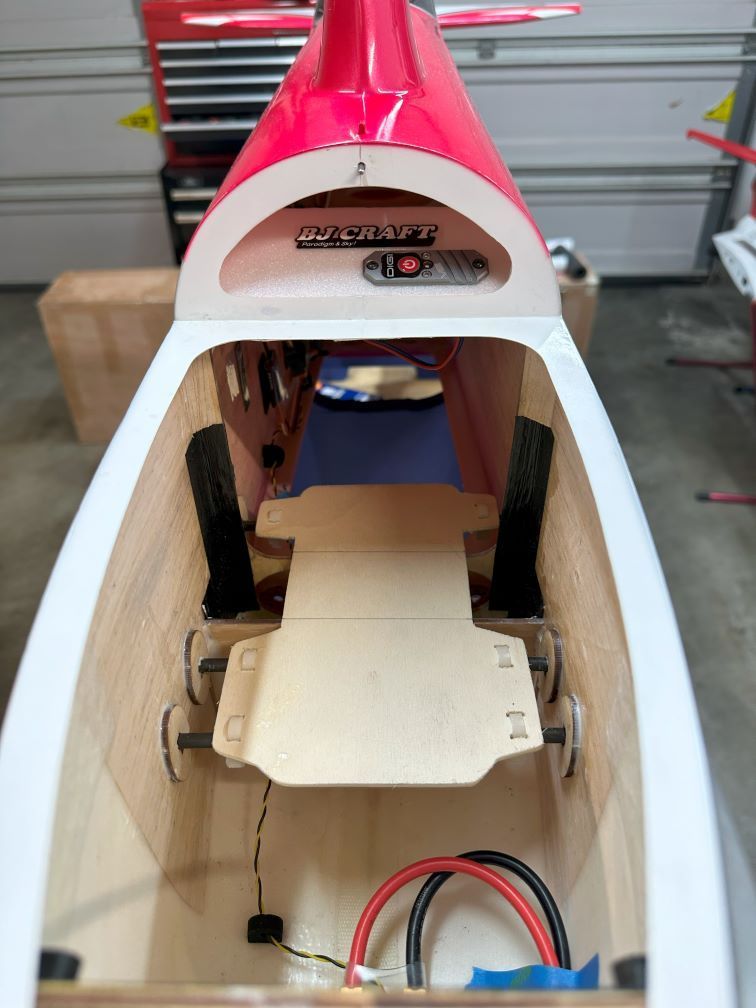
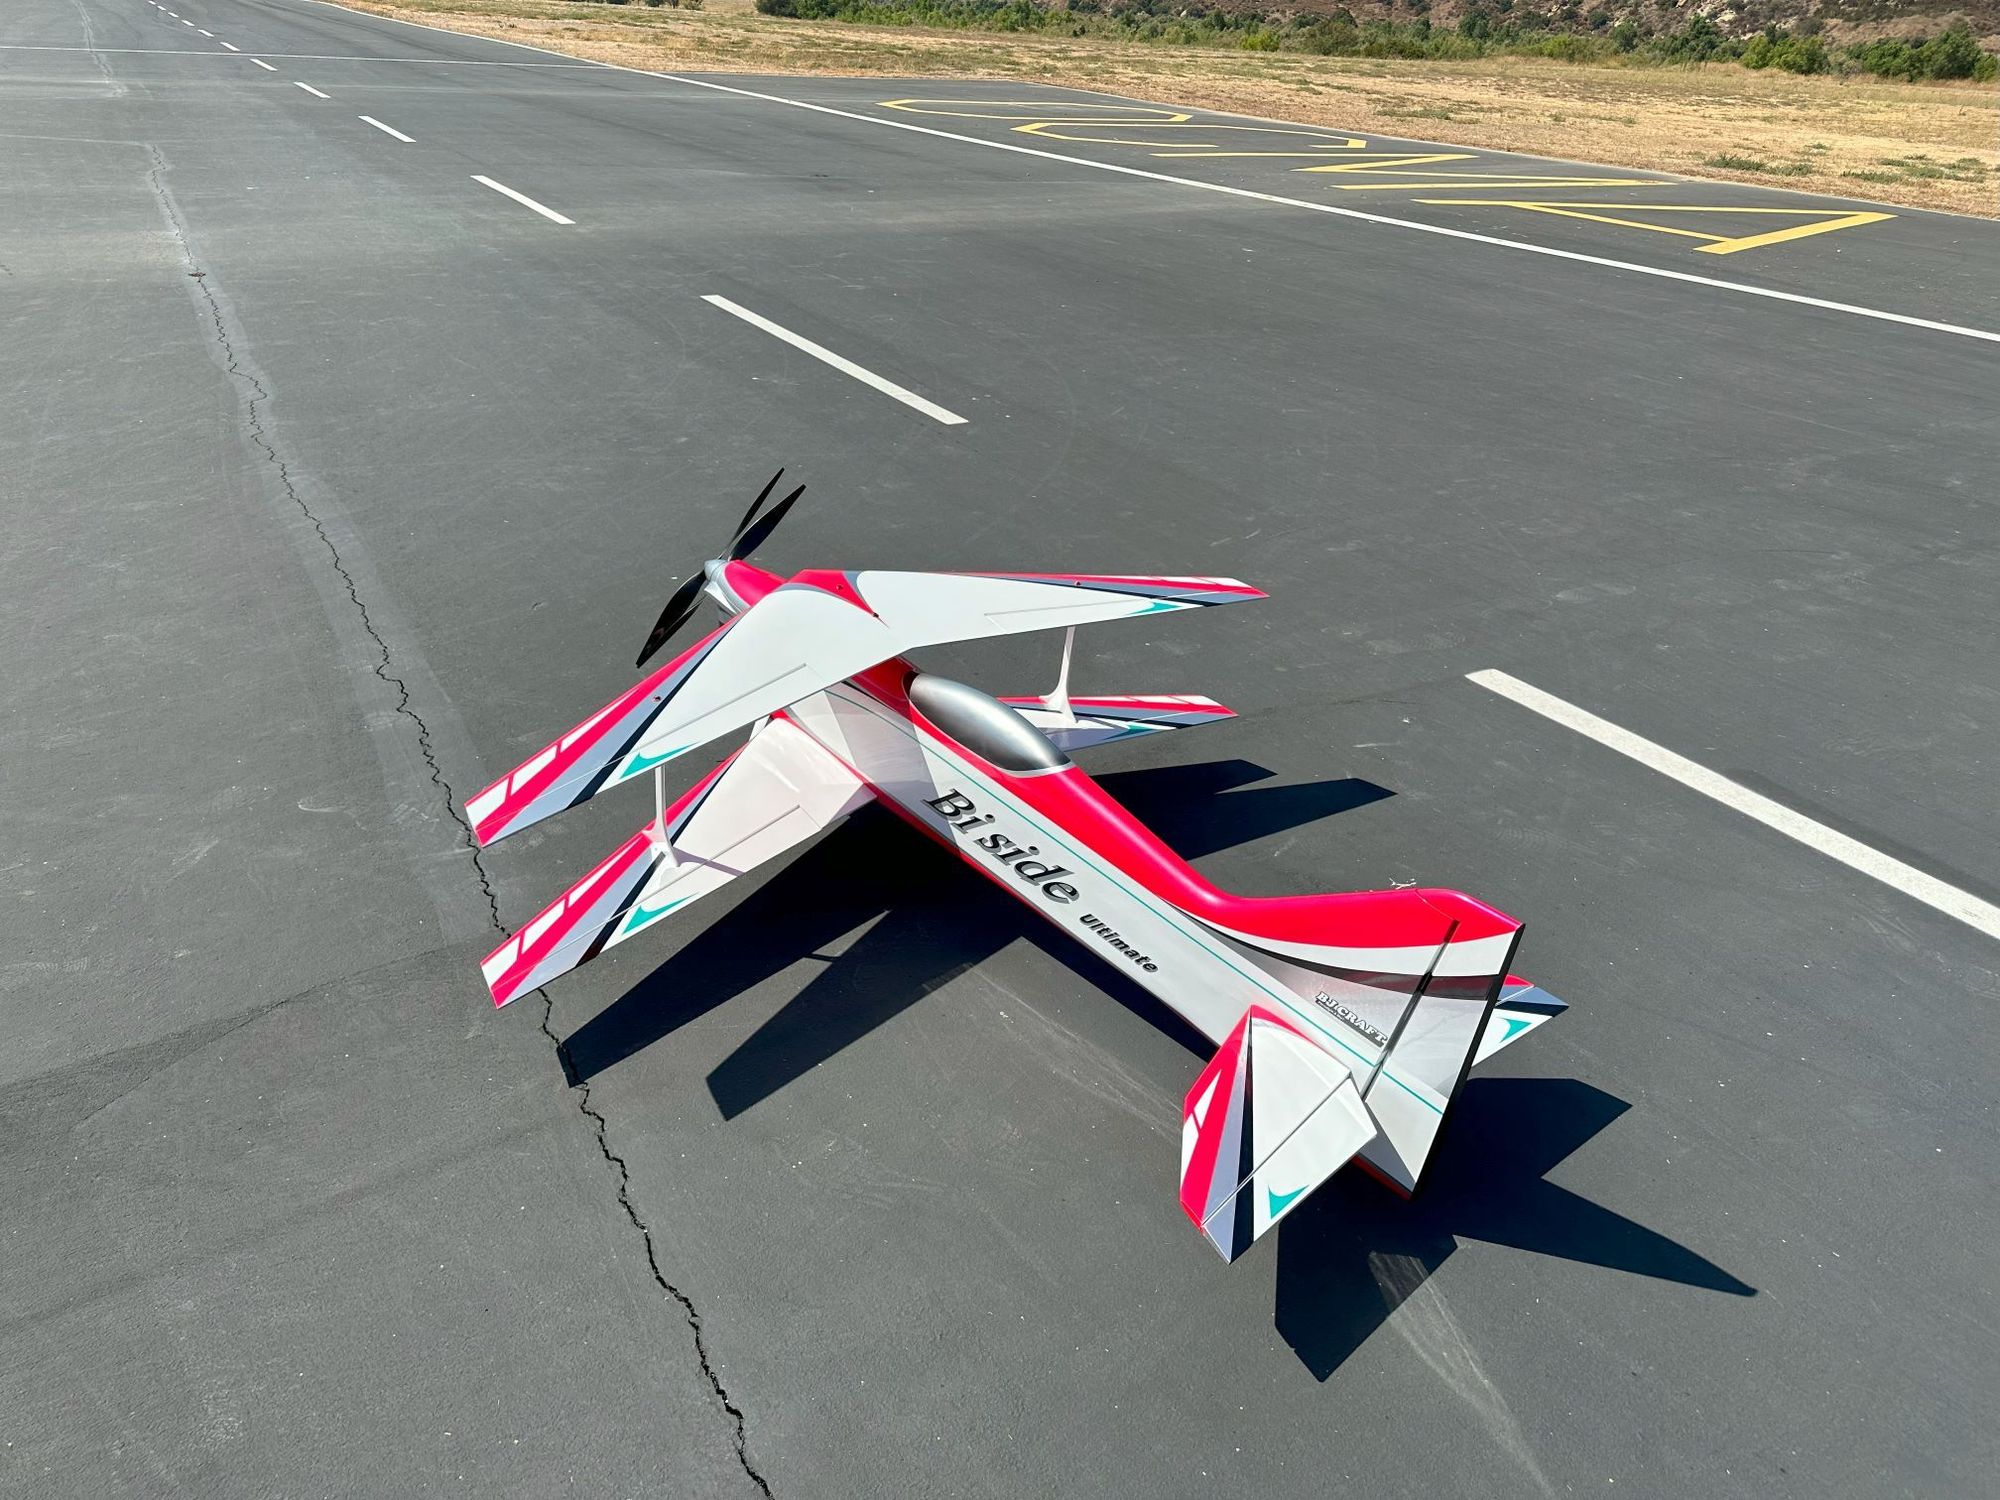
OK, the build is complete!
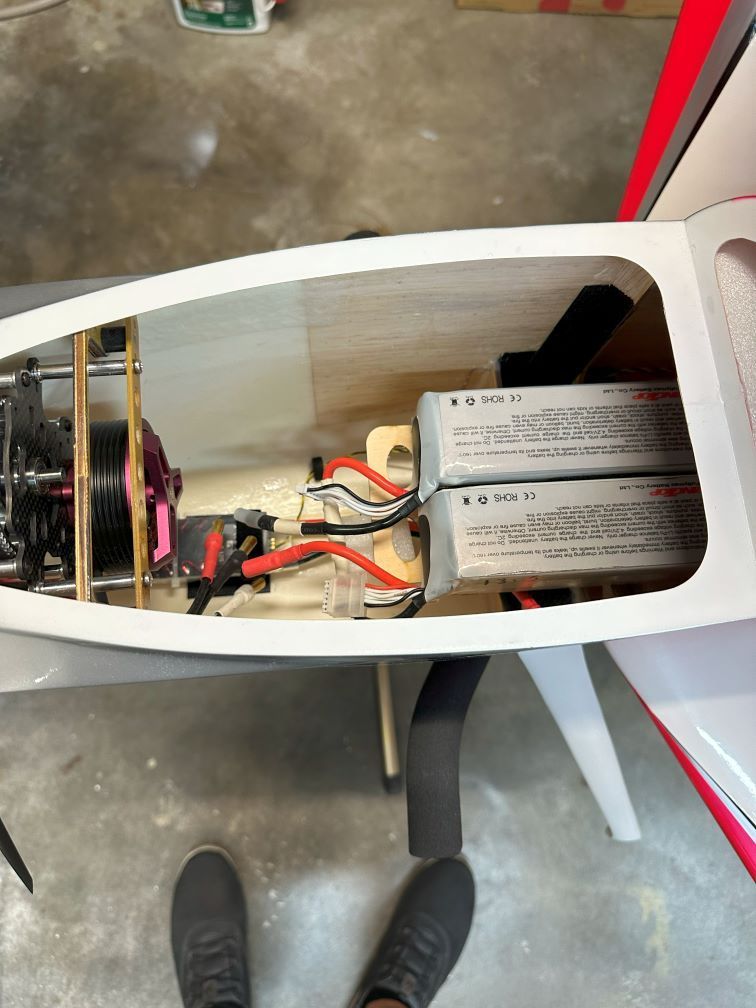
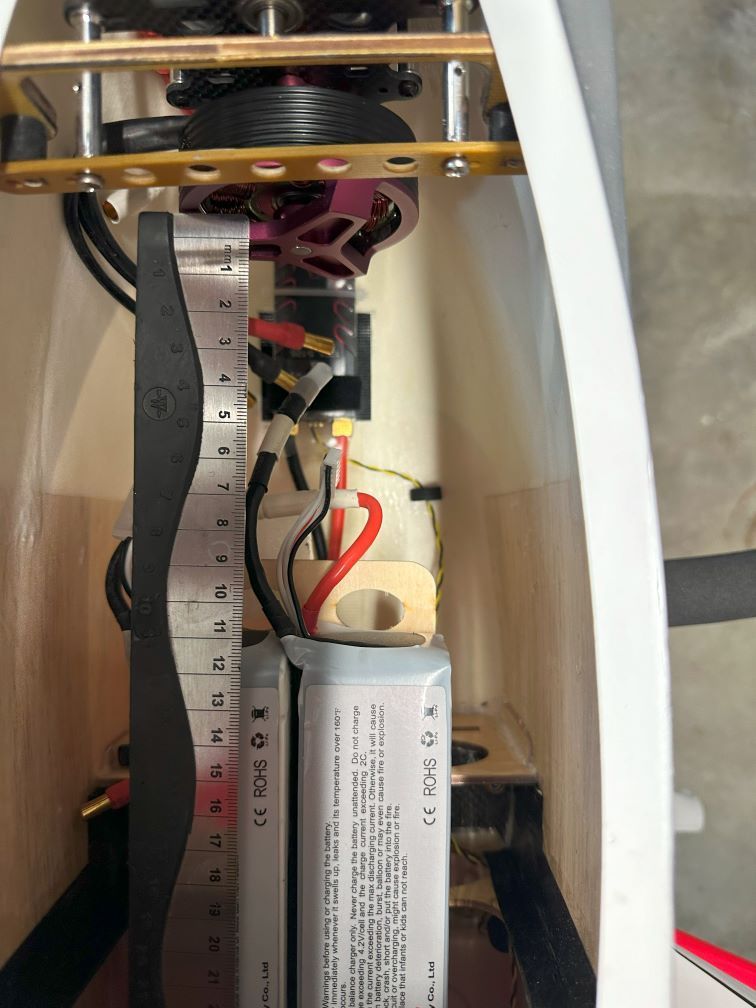
I figured out where to place the batteries after my last CG check with the electronics installed. It came out to about 110mm behind the back of the motor (RoaringTop 5800 10s). Keep in mind that the XDrive is heavier than other drives due to its dual belt drive with aluminum gears. So, others may need to place the battery tray further forward.
As I said in my last post, I decided to make the tray removable so I could have access to the landing gear mounts and also make it more serviceable overall. I made an initial lite ply tray which I will probably swap out with a Glass/Nomex tray once I have proven everything out. I made a template, checked the fit, located where the carbon fiber support tubes would go and then glued it in place.
I'm glad the build is complete. Overall, it went together really well. Next I'll do my final setup before flying which will include setting up the governor ESC conditions. Hopefully I can get it in the Tuesday or Wednesday.
Next pics will be from the flying field!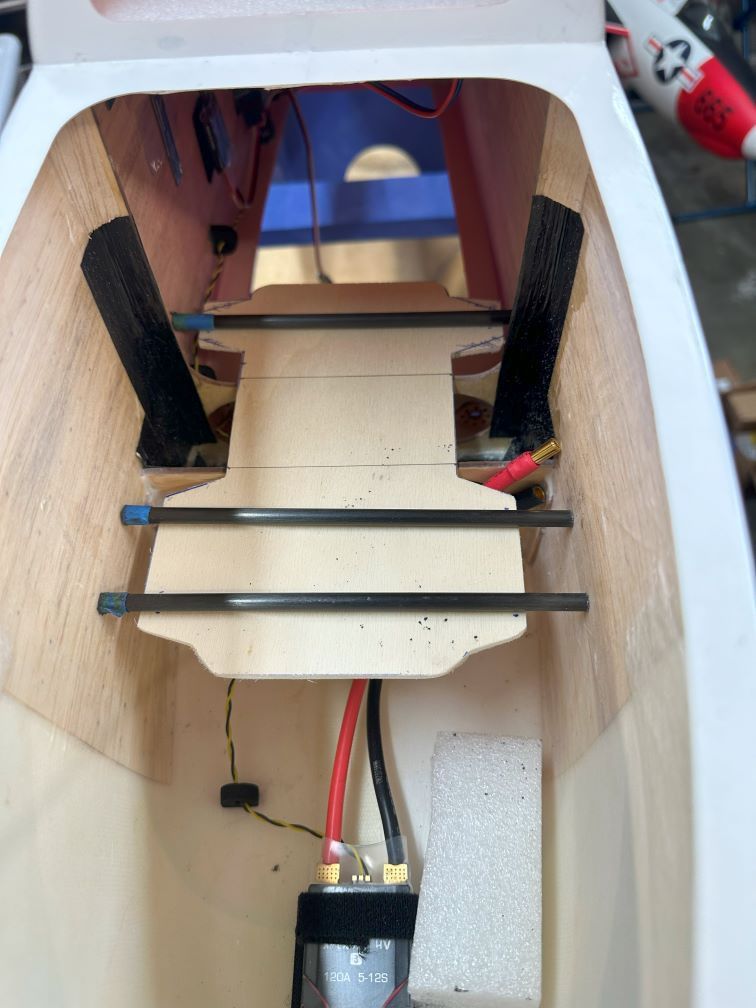
The following 2 users liked this post by shannah:
rcprecision (08-25-2024),
wattsup (08-25-2024)
08-28-2024, 09:05 AM
#21
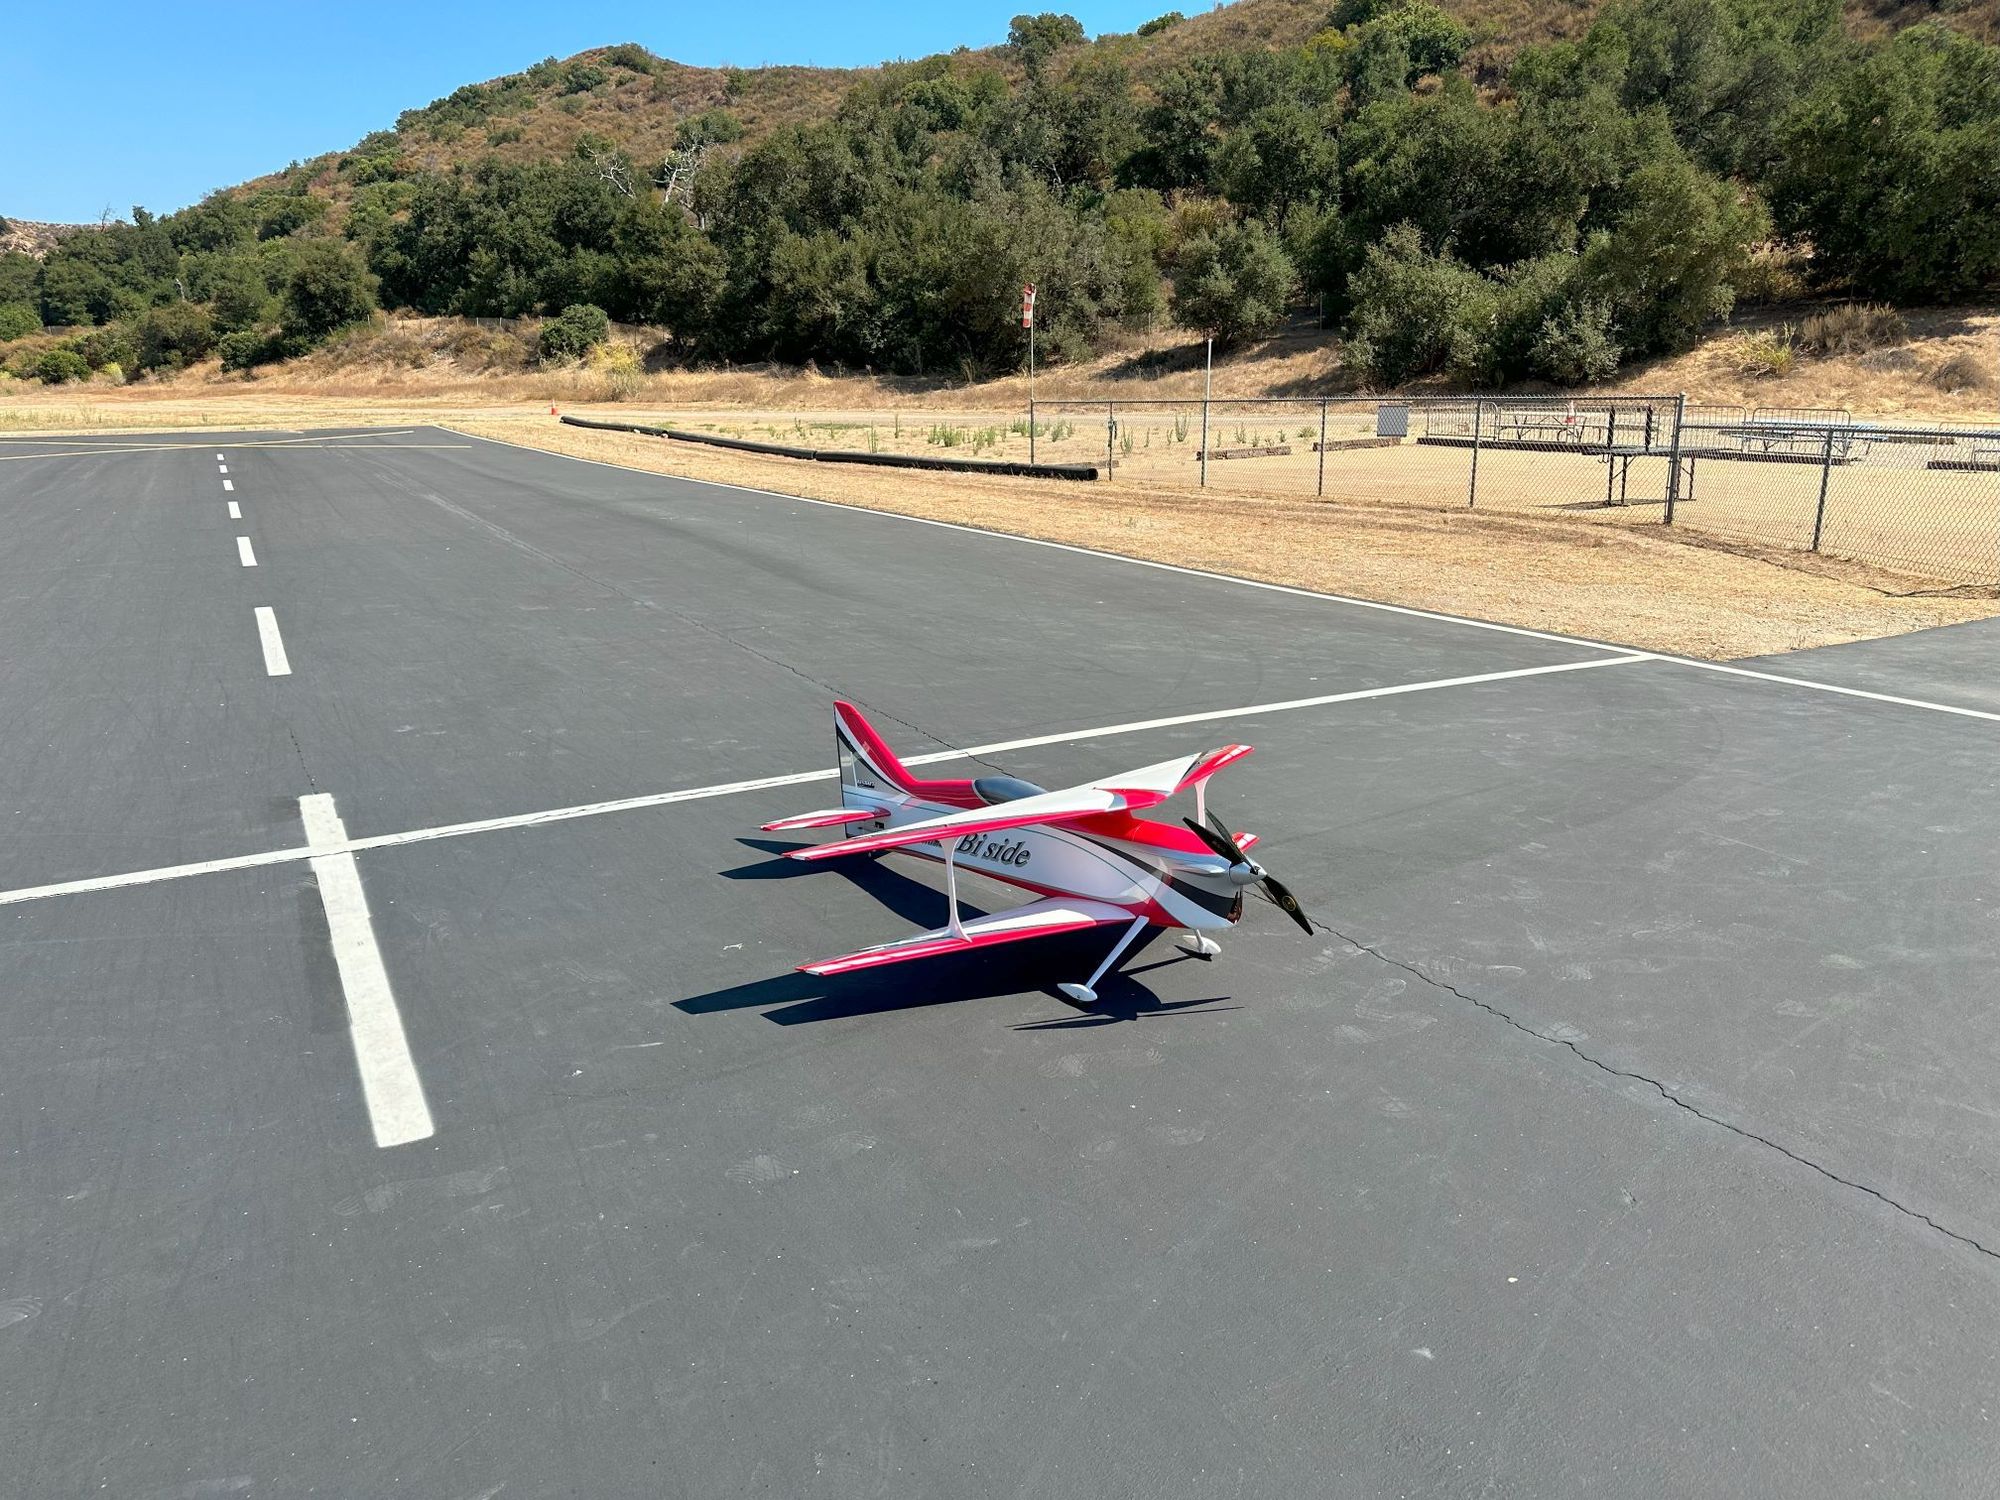
Maiden flight went great. Minor trim and a bit of throttle/down elevator mix and it was right in the game. I moved the CG back about 5mm. No issues in Vertical uplines.
Comparing the flight characteristics to my Eternity, The Bi Side feels much lighter and has great tracking. It looks very promising. I spent most of my time focusing on the governor ESC. I think I have the basic conditions set.
More to come!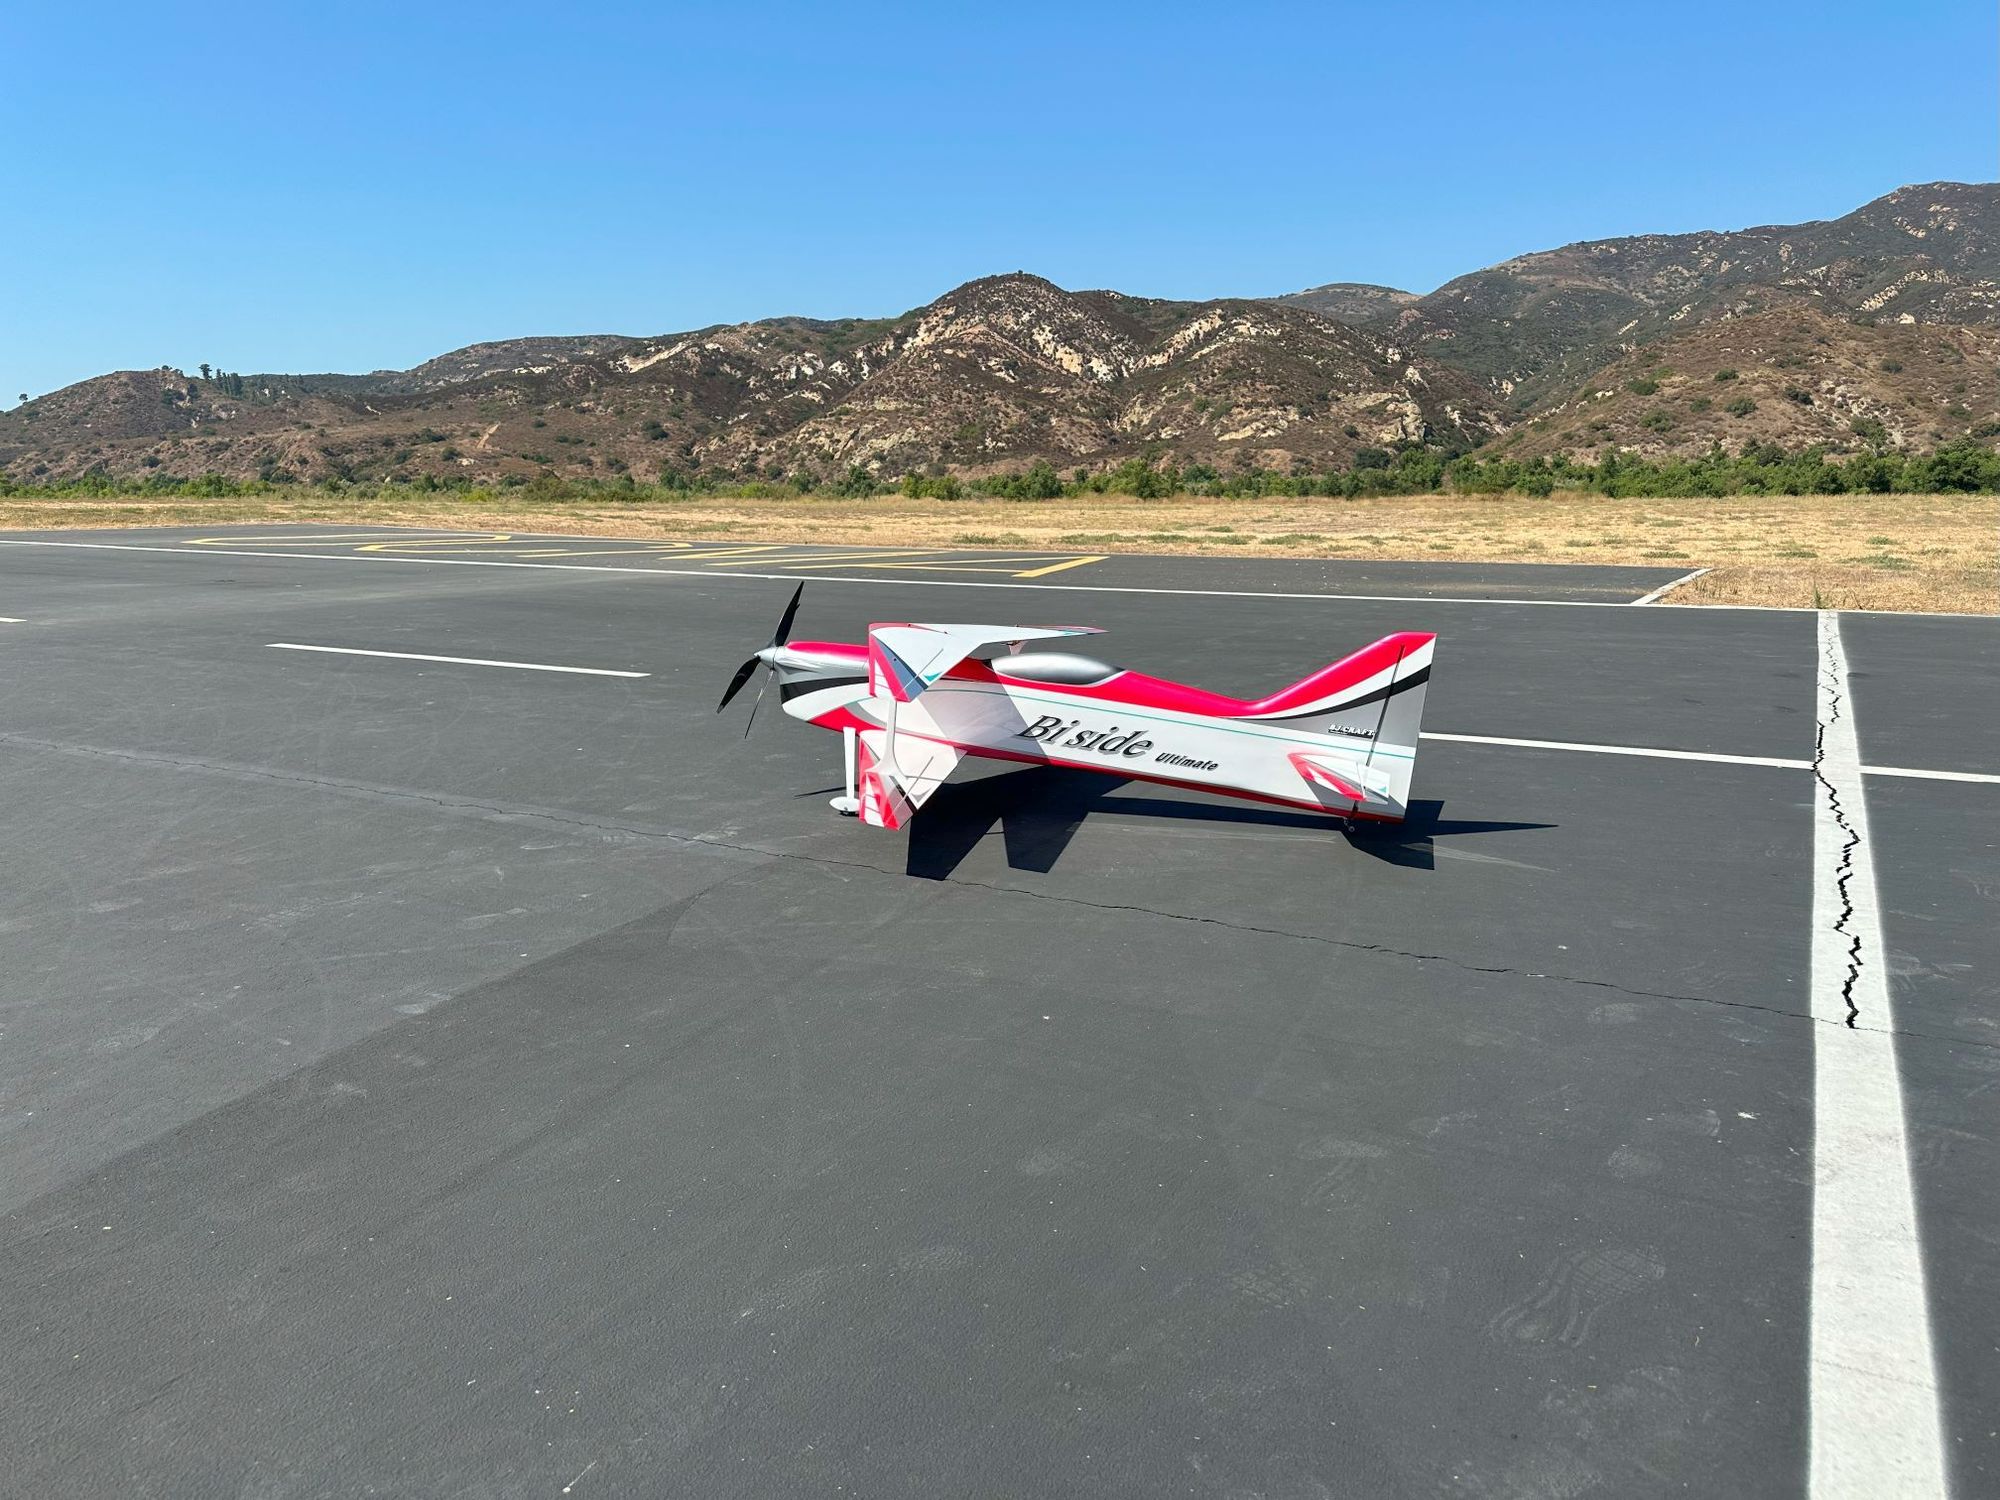
Comparing the flight characteristics to my Eternity, The Bi Side feels much lighter and has great tracking. It looks very promising. I spent most of my time focusing on the governor ESC. I think I have the basic conditions set.
More to come!
The following 3 users liked this post by shannah:
 08-31-2024, 11:46 AM
#23
Thanks,
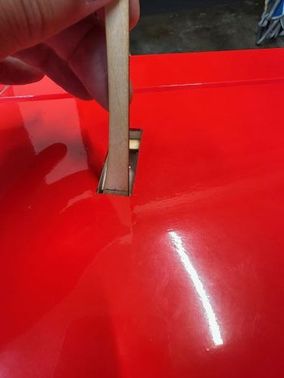
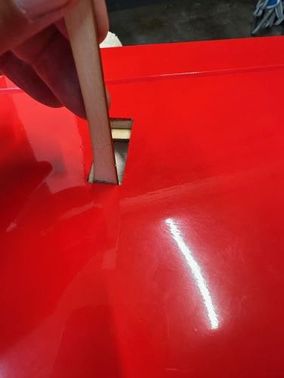
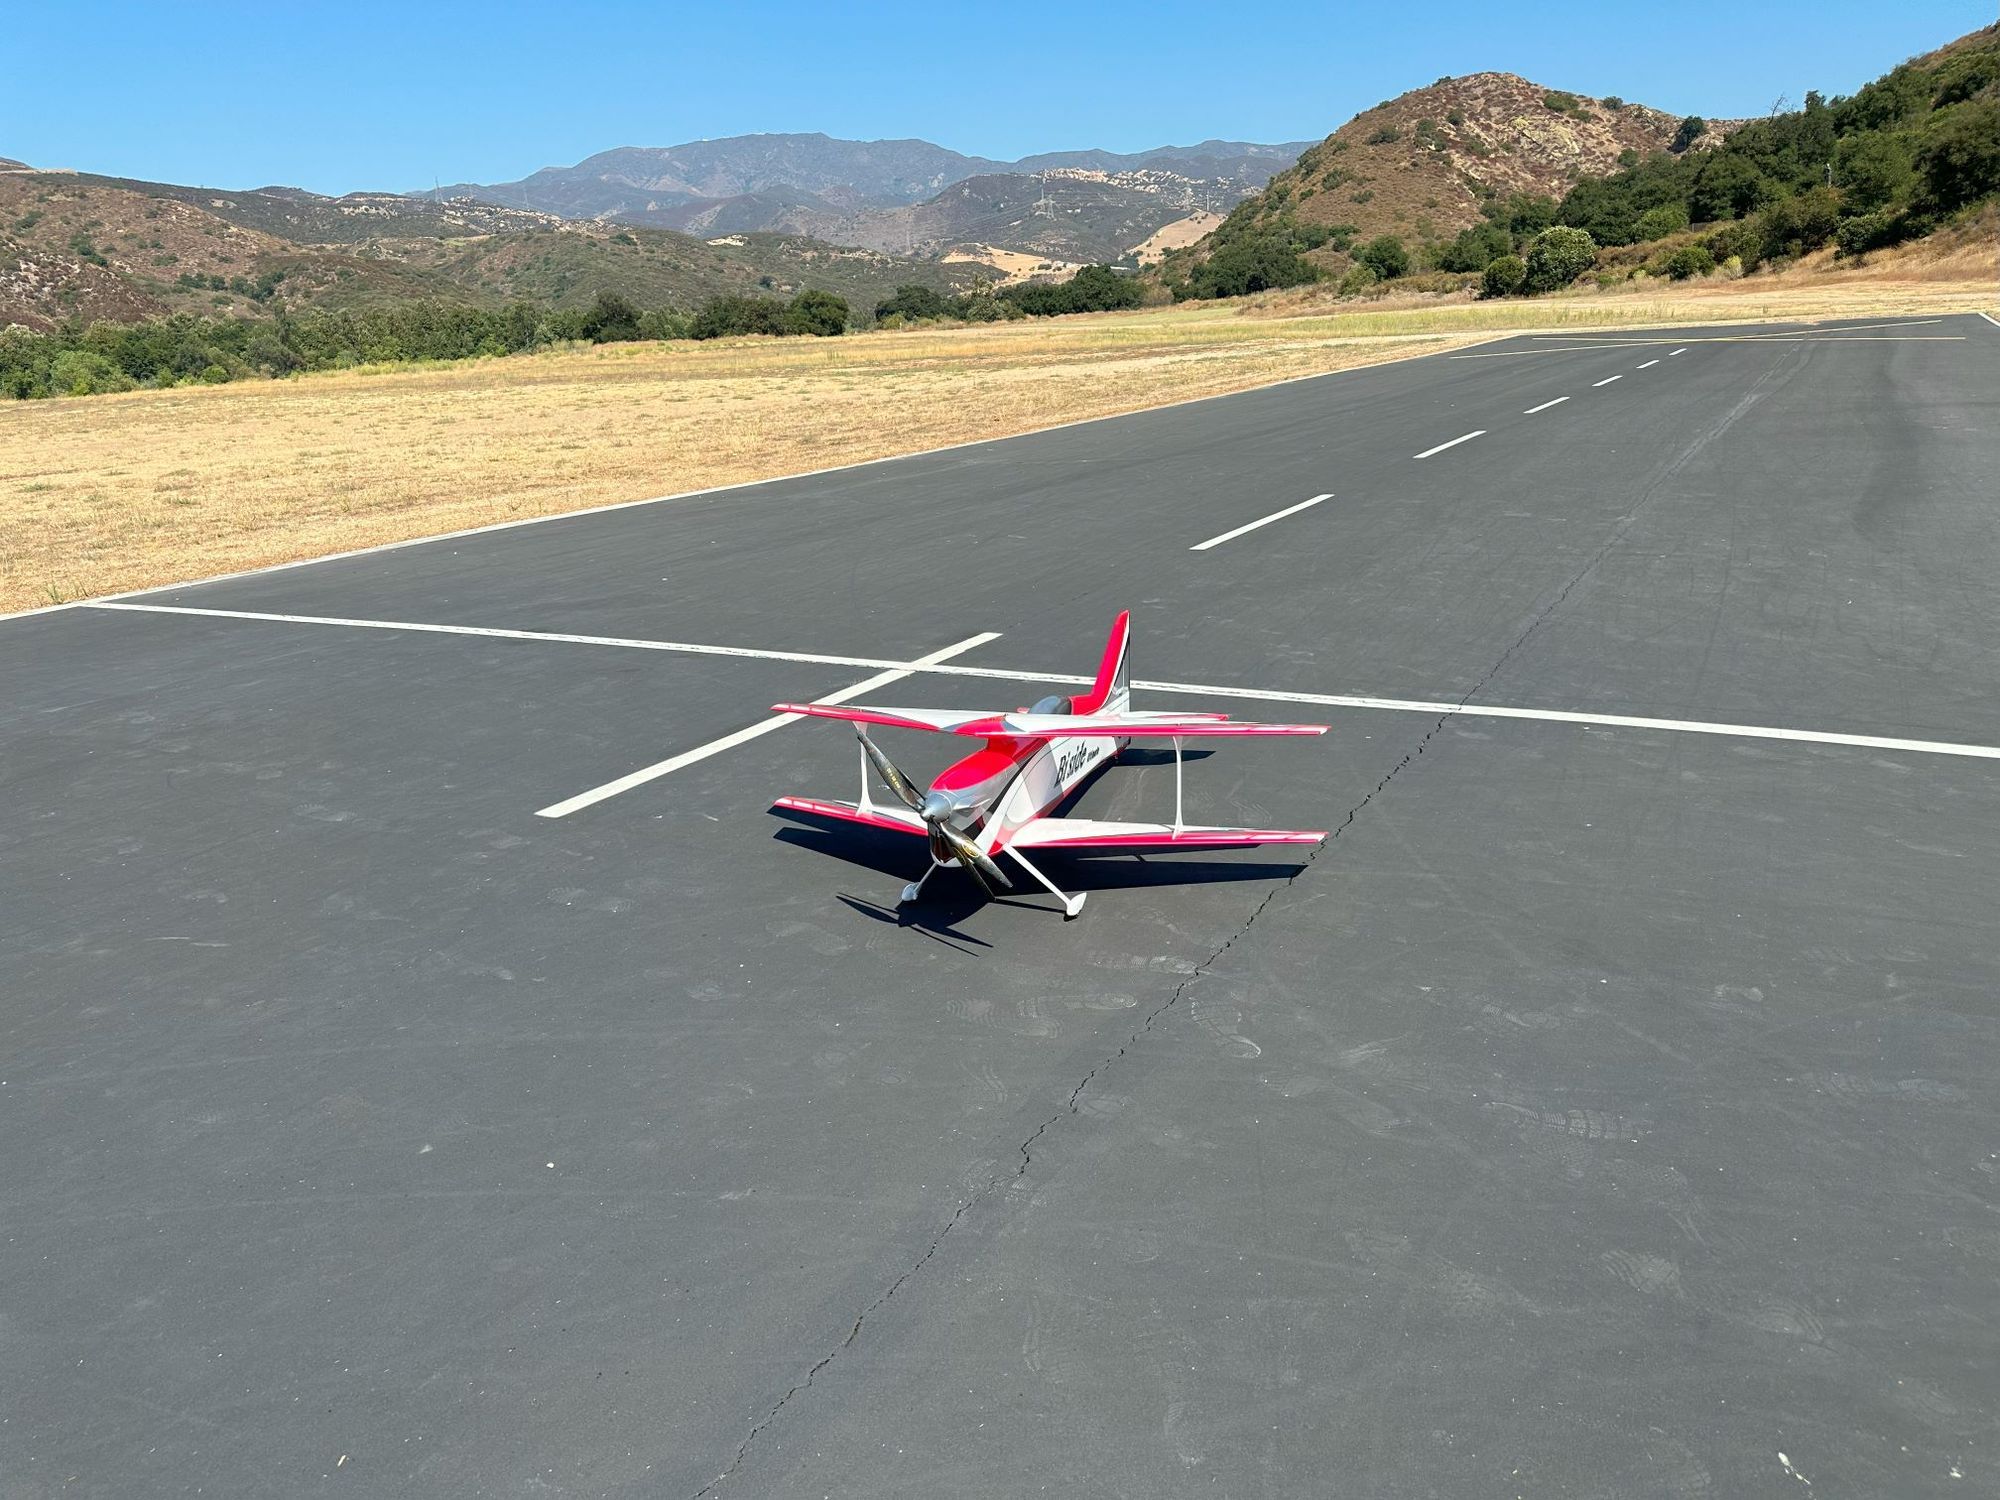
I flew more yesterday. I moved the CG back further and it corrected the pull to canopy on downline and eliminated most of the need for rudder/elevator mix on knife edge. I re-checked my elevator neutral position and I was slightly off. I didn't use the elevator-neutral jig provided in the kit (I misplaced it) and after flying yesterday I decided to look for the jig and found it. My setting was off. So, I re-zeroed my elevators and will try again.
The elevator setting is crucial to getting the correct angle of attack. The CG should then be set so there is no climb nor drop on an inverted 45 upline. If the AoA is correct and the CG is correct then everything falls in line.
I may re-do my battery tray because I had to move my battery further back and it is a bit difficult to strap in with my current mounting setup.
So far, it is a very good flying airplane with no bad habits. I will probably add the carbon fiber wing fences. I asked BJ what they were supposed to help with and he stated that they help with spin entry and exit. I can see how that would be helpful as I noted some inconsistencies in spin entry. I'll mount those after I finish with my AoA and CG final checks.
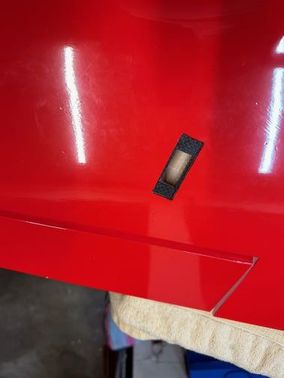
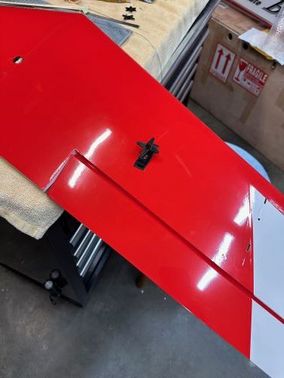
the jig is similar to the ones used on other BJ Craft airplanes.

Make sure the elevator is set so there is no gap on the upper or lower side of the jig.
I flew more yesterday. I moved the CG back further and it corrected the pull to canopy on downline and eliminated most of the need for rudder/elevator mix on knife edge. I re-checked my elevator neutral position and I was slightly off. I didn't use the elevator-neutral jig provided in the kit (I misplaced it) and after flying yesterday I decided to look for the jig and found it. My setting was off. So, I re-zeroed my elevators and will try again.
The elevator setting is crucial to getting the correct angle of attack. The CG should then be set so there is no climb nor drop on an inverted 45 upline. If the AoA is correct and the CG is correct then everything falls in line.
I may re-do my battery tray because I had to move my battery further back and it is a bit difficult to strap in with my current mounting setup.
So far, it is a very good flying airplane with no bad habits. I will probably add the carbon fiber wing fences. I asked BJ what they were supposed to help with and he stated that they help with spin entry and exit. I can see how that would be helpful as I noted some inconsistencies in spin entry. I'll mount those after I finish with my AoA and CG final checks.
the jig is similar to the ones used on other BJ Craft airplanes.
Make sure the elevator is set so there is no gap on the upper or lower side of the jig.
