


Post pics of your custom work
 06-01-2008, 07:29 PM
#1
Senior Member
Thread Starter

Join Date: Jun 2007
Location: Brandon, SD
Posts: 1,684
Likes: 0
Received 0 Likes
on
0 Posts
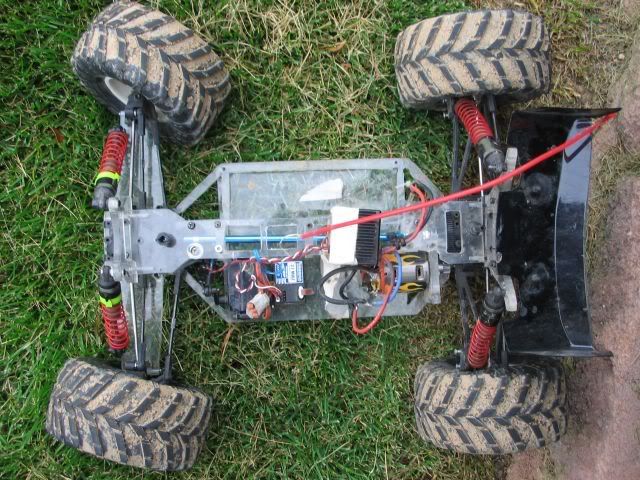
I am curious to see what custom work people are doing. I was driving my brushless recoil for the first time today and I hit a sewage acess (aka manhole) and the car did a frontflip and landed upside down. The rear shock tower broke. This isnt too hard, but here are some pics of my handywork.
I made it out of a spare piece of aluminum. There ya go! free aluminum parts... The pictures show step by step progress.
I made it out of a spare piece of aluminum. There ya go! free aluminum parts... The pictures show step by step progress.
 06-02-2008, 01:01 AM
#2
Senior Member
Join Date: Apr 2007
Location: Thousand Oaks,
CA
Posts: 8,958
Likes: 0
Received 0 Likes
on
0 Posts
now THAT is what i call ingenuity, making somethin out of junk, heck, saves on money... if only i broke stuffi could fix like that on my 18T[>:][8D]
 06-02-2008, 09:41 AM
#4
Senior Member
Thread Starter
Join Date: Jun 2007
Location: Brandon, SD
Posts: 1,684
Likes: 0
Received 0 Likes
on
0 Posts
It saves money, time, and is stronger than stock. You dont need to drive all the way to the hobbyshop to get parts. Whenever I can do this, I do.
Note: those bald tires are the result of my Neu 1105/2y which happens to be for sale. If anyone wants it, pm me.
Note: those bald tires are the result of my Neu 1105/2y which happens to be for sale. If anyone wants it, pm me.
06-02-2008, 04:49 PM
#5
Senior Member

Join Date: Oct 2005
Location: SAN DIEGO, CA CA
Posts: 1,063
Likes: 0
Received 0 Likes
on
0 Posts
Good effort!
Now with the money you saved. Invest on tools, a cheap jigsaw with a metal cutting blade will let you cut straight and curve lines on a flat aluminum stock. A set of files will also smooth out rough cuts. Sometimes they mail me coupons to use. I got these with a 20% coupon at the same time the drill press was on sale for 49.99.
Then I go to the local industrial metal shop and buy scraps per pound. They are really not scraps, they are nicely cut squares and rectangular shaped. Mostly people buy the dimensions they need and any excess is scrapped.
Made my own chassis, shock towers, etc.
http://www.harborfreight.com/cpi/cta...emnumber=46055
http://www.harborfreight.com/cpi/cta...temnumber=7520
http://www.harborfreight.com/cpi/cta...emnumber=38119
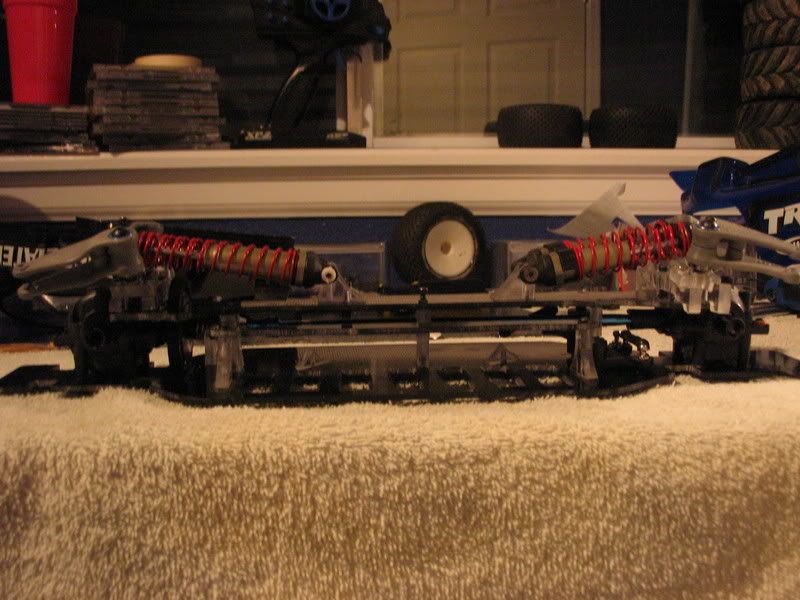
Here is my current project, I covered the metal with clear packaging tape to protect it from scratches while handling it. I will polish it when all the cutting and drilling is done.
Now with the money you saved. Invest on tools, a cheap jigsaw with a metal cutting blade will let you cut straight and curve lines on a flat aluminum stock. A set of files will also smooth out rough cuts. Sometimes they mail me coupons to use. I got these with a 20% coupon at the same time the drill press was on sale for 49.99.
Then I go to the local industrial metal shop and buy scraps per pound. They are really not scraps, they are nicely cut squares and rectangular shaped. Mostly people buy the dimensions they need and any excess is scrapped.
Made my own chassis, shock towers, etc.
http://www.harborfreight.com/cpi/cta...emnumber=46055
http://www.harborfreight.com/cpi/cta...temnumber=7520
http://www.harborfreight.com/cpi/cta...emnumber=38119
Here is my current project, I covered the metal with clear packaging tape to protect it from scratches while handling it. I will polish it when all the cutting and drilling is done.
06-02-2008, 09:26 PM
#6
Senior Member
Thread Starter
Join Date: Jun 2007
Location: Brandon, SD
Posts: 1,684
Likes: 0
Received 0 Likes
on
0 Posts
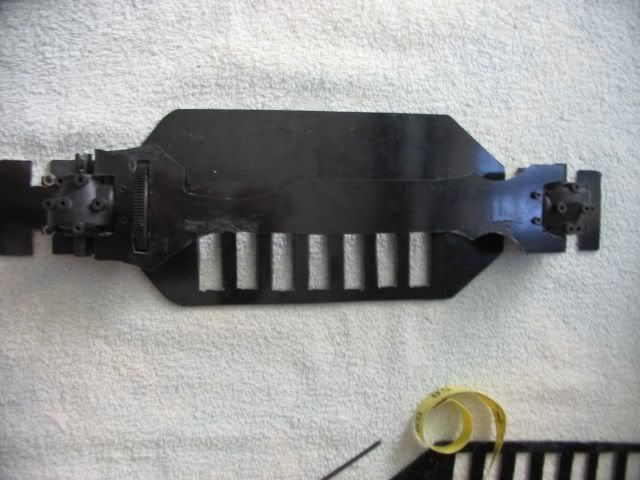
I have all those except the drill press. I didn't take as much time as I could of on the filing, but I did do a lot of it. Look at the second picture compared to the fourth picture. That is all filing.
I didn't take the time to get out and set up my jigsaw, I took a hacksaw off the pegboard and started cutting. I don't think the jigsaw is necessary for this. Anyway, if I go to power tools for cutting metal, I usually get carried away and go straight to the sawzall.
If I wanted, I could go all out and file some more and polish and maybe even anodize this bad boy, but I really wanted to just replace the part and get out and drive it.
Just to let you know, I made the mistake of running without the body to see how cool the electronics stayed. That is the first time and the last time I will run my recoil without the body.
06-03-2008, 02:14 PM
#7
Senior Member
Join Date: Oct 2005
Location: SAN DIEGO, CA CA
Posts: 1,063
Likes: 0
Received 0 Likes
on
0 Posts
I see.
I know what you mean. I get carried away too, and learned that if I take my time and use the right tools, I can make nice aluminum parts.
Here are some more of my handy work.
I know what you mean. I get carried away too, and learned that if I take my time and use the right tools, I can make nice aluminum parts.
Here are some more of my handy work.
06-03-2008, 03:57 PM
#8
Senior Member
Thread Starter
Join Date: Jun 2007
Location: Brandon, SD
Posts: 1,684
Likes: 0
Received 0 Likes
on
0 Posts
That's some really nice work. Keep it up. Glad to see I'm not the only one... hehe
hehe
I would like to see/know how you do the motor mount holes where you can adjust the motor left to right. They look like stretched out regular holes. Why dont I just take a picture?
How do you make those?
heheI would like to see/know how you do the motor mount holes where you can adjust the motor left to right. They look like stretched out regular holes. Why dont I just take a picture?
How do you make those?
06-03-2008, 04:38 PM
#9


Join Date: Nov 2005
Location: Lakeside,
ON, CANADA
Posts: 6,936
Likes: 0
Received 0 Likes
on
0 Posts
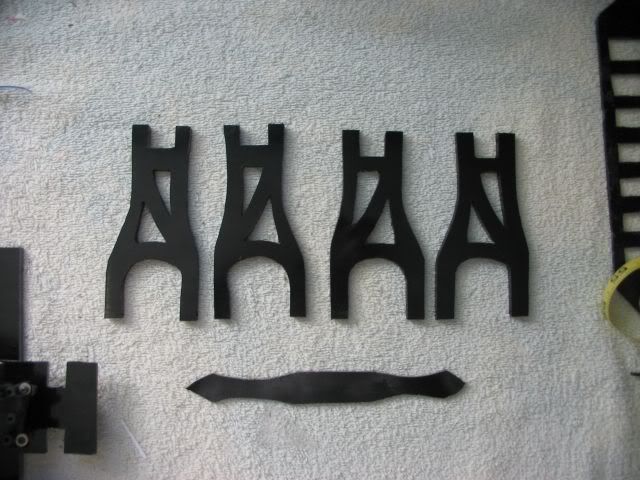
They are called slots.
I'm going to assume you have a set of drill bits, a drill press, and files. Find a drill bit that has the diameter of the width of your intended slot. Drill holes at the very ends of where you want your slot to be. Depending on how long your slot is you might drill some additional holes between the end holes. Then file away until it looks like a slot. The cheap way to do it is to try to cut sideways with your drill bit but its not recomended. Drill press bearings are not meant to take a side load and neither are jobber drill bits. It might be ok with really thin aluminum or plastic but its not good practice.
With a mill you would simply clamp your workpice on a set of parallels, the intended slot being parallel to the X or Y axis. Then you would plunge down with your slot or end mill, move the table to your desired slot length, and be finished.
06-03-2008, 05:05 PM
#10
Senior Member
Join Date: Jul 2006
Location: Roscoe,
IL
Posts: 264
Likes: 0
Received 0 Likes
on
0 Posts
here is some things i made for my rustler. first i made a skid plate for the rear out of a traxxas titan motor can, doesnt look the greatest but it works. then i made a front bumper out of a nozzle for a for a old fuel bottle. it was blue but i sanded it down.
06-03-2008, 05:22 PM
#11
Senior Member
Join Date: Jun 2007
Location: Neiden, NORWAY
Posts: 162
Likes: 0
Received 0 Likes
on
0 Posts
made a front brace for my rush evo once... worked great
if you have some tools and a piece of aluminum or steel you can make alot of parts yourself
if you have some tools and a piece of aluminum or steel you can make alot of parts yourself
 06-06-2008, 11:31 PM
#14
Senior Member

Join Date: Oct 2006
Location: littleton, CO
Posts: 218
Likes: 0
Received 0 Likes
on
0 Posts
Its actually Lexan which is much different than Plexiglass. Plexiglass is terrible to make parts out of but lexan is very strong and just awesome to work with.
06-07-2008, 08:25 PM
#16
Senior Member
My Feedback: (4)
Join Date: Dec 2008
Location: North Smithfield,
RI
Posts: 122
Likes: 0
Received 0 Likes
on
0 Posts
ORIGINAL: omg no name
here is some things i made for my rustler. first i made a skid plate for the rear out of a traxxas titan motor can, doesnt look the greatest but it works. then i made a front bumper out of a nozzle for a for a old fuel bottle. it was blue but i sanded it down.
here is some things i made for my rustler. first i made a skid plate for the rear out of a traxxas titan motor can, doesnt look the greatest but it works. then i made a front bumper out of a nozzle for a for a old fuel bottle. it was blue but i sanded it down.
but not made out of the titan's casing lol
